Repository: easzlab/kubeasz
Branch: master
Commit: c05e479e669a
Files: 601
Total size: 11.8 MB
Directory structure:
gitextract_nkhh78bu/
├── .github/
│ ├── ISSUE_TEMPLATE/
│ │ ├── bug-report.yaml
│ │ └── enhancement.yaml
│ ├── PULL_REQUEST_TEMPLATE.md
│ └── workflows/
│ ├── mirror.yml
│ └── stale.yml
├── .gitignore
├── README.md
├── ansible.cfg
├── docs/
│ ├── blog/
│ │ └── seperated_containerd_services_for_docker_and_k8s.md
│ ├── deprecated/
│ │ ├── efk.md
│ │ ├── gitlab/
│ │ │ ├── app.yaml.md
│ │ │ ├── config.sh.md
│ │ │ ├── gitlab-ci.yml.md
│ │ │ ├── gitlab-install.md
│ │ │ ├── gitlab-runner.md
│ │ │ └── readme.md
│ │ ├── jenkins.md
│ │ ├── kuboard.md
│ │ └── practice/
│ │ ├── dockerize_system_service.md
│ │ ├── es_cluster.md
│ │ ├── go_web_app/
│ │ │ ├── Dockerfile
│ │ │ ├── Dockerfile-more
│ │ │ ├── hellogo.go
│ │ │ ├── hellogo.yaml
│ │ │ └── readme.md
│ │ ├── java_war_app.md
│ │ └── mariadb_cluster.md
│ ├── guide/
│ │ ├── argocd.md
│ │ ├── chrony.md
│ │ ├── dashboard.1.6.3.md
│ │ ├── dashboard.2.x.md
│ │ ├── dashboard.md
│ │ ├── harbor.md
│ │ ├── helm.md
│ │ ├── hpa.md
│ │ ├── index.md
│ │ ├── ingress-tls.md
│ │ ├── ingress.md
│ │ ├── ipvs.md
│ │ ├── istio.md
│ │ ├── kernel_upgrade.md
│ │ ├── kubedns.md
│ │ ├── kubesphere.md
│ │ ├── log-pilot.md
│ │ ├── lvm.md
│ │ ├── metallb.md
│ │ ├── metrics-server.md
│ │ ├── networkpolicy.md
│ │ ├── nfs-server.md
│ │ ├── prometheus.md
│ │ └── rollingupdateWithZeroDowntime.md
│ ├── mixes/
│ │ ├── DoneList.md
│ │ ├── HowToContribute.md
│ │ ├── LICENSE
│ │ ├── conformance.md
│ │ └── donate.md
│ ├── op/
│ │ ├── ch_apiserver_cert.md
│ │ ├── cluster_restore.md
│ │ ├── force_ch_certs.md
│ │ ├── kcfg-adm.md
│ │ ├── loadballance_ingress_nodeport.md
│ │ ├── op-etcd.md
│ │ ├── op-index.md
│ │ ├── op-master.md
│ │ ├── op-node.md
│ │ └── upgrade.md
│ ├── release-notes/
│ │ ├── kubeasz-3.6.0.md
│ │ ├── kubeasz-3.6.1.md
│ │ ├── kubeasz-3.6.2.md
│ │ ├── kubeasz-3.6.3.md
│ │ ├── kubeasz-3.6.4.md
│ │ ├── kubeasz-3.6.5.md
│ │ ├── kubeasz-3.6.6.md
│ │ ├── kubeasz-3.6.7.md
│ │ └── kubeasz-3.6.8.md
│ └── setup/
│ ├── 00-planning_and_overall_intro.md
│ ├── 01-CA_and_prerequisite.md
│ ├── 02-install_etcd.md
│ ├── 03-container_runtime.md
│ ├── 04-install_kube_master.md
│ ├── 05-install_kube_node.md
│ ├── 06-install_network_plugin.md
│ ├── 07-install_cluster_addon.md
│ ├── 08-cluster-storage.md
│ ├── config_guide.md
│ ├── ex-lb.md
│ ├── ezctl.md
│ ├── kubeasz_on_public_cloud.md
│ ├── mix_arch.md
│ ├── multi_os.md
│ ├── multi_platform.md
│ ├── network-plugin/
│ │ ├── calico-bgp-rr.md
│ │ ├── calico.md
│ │ ├── cilium-example.md
│ │ ├── cilium.md
│ │ ├── flannel.md
│ │ ├── kube-ovn.md
│ │ ├── kube-router.md
│ │ └── network-check.md
│ ├── offline_install.md
│ └── quickStart.md
├── example/
│ ├── config.yml
│ ├── hosts.allinone
│ └── hosts.multi-node
├── ezctl
├── ezdown
├── manifests/
│ └── deprecated/
│ ├── efk/
│ │ ├── es-dynamic-pv/
│ │ │ └── es-statefulset.yaml
│ │ ├── es-index-rotator/
│ │ │ └── rotator.yaml
│ │ ├── es-service.yaml
│ │ ├── es-static-pv/
│ │ │ ├── es-pv0.yaml
│ │ │ ├── es-pv1.yaml
│ │ │ ├── es-pv2.yaml
│ │ │ └── es-statefulset.yaml
│ │ ├── es-without-pv/
│ │ │ └── es-statefulset.yaml
│ │ ├── fluentd-es-configmap.yaml
│ │ ├── fluentd-es-ds.yaml
│ │ ├── kibana-deployment.yaml
│ │ ├── kibana-service.yaml
│ │ └── log-pilot/
│ │ └── log-pilot-filebeat.yaml
│ ├── es-cluster/
│ │ ├── elasticsearch/
│ │ │ ├── .helmignore
│ │ │ ├── Chart.yaml
│ │ │ ├── OWNERS
│ │ │ ├── README.md
│ │ │ ├── templates/
│ │ │ │ ├── NOTES.txt
│ │ │ │ ├── _helpers.tpl
│ │ │ │ ├── client-deployment.yaml
│ │ │ │ ├── client-pdb.yaml
│ │ │ │ ├── client-svc.yaml
│ │ │ │ ├── configmap.yaml
│ │ │ │ ├── data-pdb.yaml
│ │ │ │ ├── data-statefulset.yaml
│ │ │ │ ├── master-pdb.yaml
│ │ │ │ ├── master-statefulset.yaml
│ │ │ │ └── master-svc.yaml
│ │ │ └── values.yaml
│ │ └── es-values.yaml
│ ├── ingress/
│ │ ├── nginx-ingress/
│ │ │ ├── nginx-ingress-svc.yaml
│ │ │ ├── nginx-ingress.yaml
│ │ │ ├── tcp-services-configmap.yaml
│ │ │ └── udp-services-configmap.yaml
│ │ ├── test-hello.ing.yaml
│ │ ├── traefik/
│ │ │ ├── tls/
│ │ │ │ ├── hello-tls.ing.yaml
│ │ │ │ ├── k8s-dashboard.ing.yaml
│ │ │ │ └── traefik-controller.yaml
│ │ │ ├── traefik-ingress.yaml
│ │ │ └── traefik-ui.ing.yaml
│ │ ├── whoami.ing.yaml
│ │ └── whoami.yaml
│ ├── jenkins/
│ │ ├── .helmignore
│ │ ├── Chart.yaml
│ │ ├── OWNERS
│ │ ├── README.md
│ │ ├── templates/
│ │ │ ├── NOTES.txt
│ │ │ ├── _helpers.tpl
│ │ │ ├── config.yaml
│ │ │ ├── home-pvc.yaml
│ │ │ ├── jenkins-agent-svc.yaml
│ │ │ ├── jenkins-master-deployment.yaml
│ │ │ ├── jenkins-master-ingress.yaml
│ │ │ ├── jenkins-master-networkpolicy.yaml
│ │ │ ├── jenkins-master-svc.yaml
│ │ │ ├── jenkins-test.yaml
│ │ │ ├── jobs.yaml
│ │ │ ├── rbac.yaml
│ │ │ ├── secret.yaml
│ │ │ ├── service-account.yaml
│ │ │ └── test-config.yaml
│ │ └── values.yaml
│ ├── mariadb-cluster/
│ │ ├── mariadb/
│ │ │ ├── .helmignore
│ │ │ ├── Chart.yaml
│ │ │ ├── OWNERS
│ │ │ ├── README.md
│ │ │ ├── files/
│ │ │ │ └── docker-entrypoint-initdb.d/
│ │ │ │ └── README.md
│ │ │ ├── templates/
│ │ │ │ ├── NOTES.txt
│ │ │ │ ├── _helpers.tpl
│ │ │ │ ├── initialization-configmap.yaml
│ │ │ │ ├── master-configmap.yaml
│ │ │ │ ├── master-statefulset.yaml
│ │ │ │ ├── master-svc.yaml
│ │ │ │ ├── secrets.yaml
│ │ │ │ ├── slave-configmap.yaml
│ │ │ │ ├── slave-statefulset.yaml
│ │ │ │ ├── slave-svc.yaml
│ │ │ │ ├── test-runner.yaml
│ │ │ │ └── tests.yaml
│ │ │ ├── values-production.yaml
│ │ │ └── values.yaml
│ │ └── my-values.yaml
│ ├── mysql-cluster/
│ │ ├── mysql-configmap.yaml
│ │ ├── mysql-services.yaml
│ │ ├── mysql-statefulset.yaml
│ │ └── mysql-test-client.yaml
│ ├── redis-cluster/
│ │ ├── redis-ha/
│ │ │ ├── Chart.yaml
│ │ │ ├── OWNERS
│ │ │ ├── README.md
│ │ │ ├── ci/
│ │ │ │ └── haproxy-enabled-values.yaml
│ │ │ ├── templates/
│ │ │ │ ├── NOTES.txt
│ │ │ │ ├── _configs.tpl
│ │ │ │ ├── _helpers.tpl
│ │ │ │ ├── redis-auth-secret.yaml
│ │ │ │ ├── redis-ha-announce-service.yaml
│ │ │ │ ├── redis-ha-configmap.yaml
│ │ │ │ ├── redis-ha-exporter-script-configmap.yaml
│ │ │ │ ├── redis-ha-pdb.yaml
│ │ │ │ ├── redis-ha-role.yaml
│ │ │ │ ├── redis-ha-rolebinding.yaml
│ │ │ │ ├── redis-ha-service.yaml
│ │ │ │ ├── redis-ha-serviceaccount.yaml
│ │ │ │ ├── redis-ha-servicemonitor.yaml
│ │ │ │ ├── redis-ha-statefulset.yaml
│ │ │ │ ├── redis-haproxy-deployment.yaml
│ │ │ │ ├── redis-haproxy-service.yaml
│ │ │ │ ├── redis-haproxy-serviceaccount.yaml
│ │ │ │ ├── redis-haproxy-servicemonitor.yaml
│ │ │ │ └── tests/
│ │ │ │ ├── test-redis-ha-configmap.yaml
│ │ │ │ └── test-redis-ha-pod.yaml
│ │ │ └── values.yaml
│ │ ├── start.sh
│ │ └── values.yaml
│ └── storage/
│ ├── local-storage/
│ │ ├── example-sts.yml
│ │ ├── local-pv1.yml
│ │ ├── local-pv2.yml
│ │ └── local-storage-class.yml
│ └── test.yaml
├── playbooks/
│ ├── 01.prepare.yml
│ ├── 02.etcd.yml
│ ├── 03.runtime.yml
│ ├── 04.kube-master.yml
│ ├── 05.kube-node.yml
│ ├── 06.network.yml
│ ├── 07.cluster-addon.yml
│ ├── 10.ex-lb.yml
│ ├── 11.harbor.yml
│ ├── 21.addetcd.yml
│ ├── 22.addnode.yml
│ ├── 23.addmaster.yml
│ ├── 31.deletcd.yml
│ ├── 32.delnode.yml
│ ├── 33.delmaster.yml
│ ├── 90.setup.yml
│ ├── 91.start.yml
│ ├── 92.stop.yml
│ ├── 93.upgrade.yml
│ ├── 94.backup.yml
│ ├── 95.restore.yml
│ ├── 96.update-certs.yml
│ └── 99.clean.yml
├── roles/
│ ├── calico/
│ │ ├── tasks/
│ │ │ ├── calico-rr.yml
│ │ │ └── main.yml
│ │ ├── templates/
│ │ │ ├── bgp-default.yaml.j2
│ │ │ ├── bgp-rr.yaml.j2
│ │ │ ├── calico-csr.json.j2
│ │ │ ├── calico-v3.24.yaml.j2
│ │ │ ├── calico-v3.26.yaml.j2
│ │ │ ├── calico-v3.28.yaml.j2
│ │ │ └── calicoctl.cfg.j2
│ │ └── vars/
│ │ └── main.yml
│ ├── chrony/
│ │ ├── chrony.yml
│ │ ├── defaults/
│ │ │ └── main.yml
│ │ ├── tasks/
│ │ │ └── main.yml
│ │ └── templates/
│ │ ├── chronyd.service.j2
│ │ ├── client.conf.j2
│ │ └── server.conf.j2
│ ├── cilium/
│ │ ├── cilium.yml
│ │ ├── files/
│ │ │ ├── cilium-1.17.4.tgz
│ │ │ └── star_war_example/
│ │ │ ├── http-sw-app.yaml
│ │ │ ├── sw_l3_l4_l7_policy.yaml
│ │ │ └── sw_l3_l4_policy.yaml
│ │ ├── tasks/
│ │ │ └── main.yml
│ │ └── templates/
│ │ └── values.yaml.j2
│ ├── clean/
│ │ ├── clean_node.yml
│ │ ├── defaults/
│ │ │ └── main.yml
│ │ └── tasks/
│ │ ├── clean_chrony.yml
│ │ ├── clean_etcd.yml
│ │ ├── clean_lb.yml
│ │ ├── clean_master.yml
│ │ ├── clean_node.yml
│ │ └── main.yml
│ ├── cluster-addon/
│ │ ├── files/
│ │ │ ├── argo-cd-9.3.4.tgz
│ │ │ ├── clickhouse-1.0.0.tgz
│ │ │ ├── elasticsearch-1.0.2.tgz
│ │ │ ├── ingress-nginx-4.13.0.tgz
│ │ │ ├── kube-prometheus-stack-75.7.0.tgz
│ │ │ ├── kubeblocks-1.0.1.tgz
│ │ │ ├── kubeblocks_crds.yaml
│ │ │ ├── kubernetes-dashboard-7.14.0.tgz
│ │ │ ├── minio-1.0.1.tgz
│ │ │ ├── openebs-4.3.2.tgz
│ │ │ ├── operator-7.1.1.tgz
│ │ │ ├── rocketmq-operator-0.1.0.tgz
│ │ │ ├── snapshot-controller-4.1.0.tgz
│ │ │ ├── snapshot.storage.k8s.io_volumesnapshotclasses.yaml
│ │ │ ├── snapshot.storage.k8s.io_volumesnapshotcontents.yaml
│ │ │ ├── snapshot.storage.k8s.io_volumesnapshots.yaml
│ │ │ └── tenant-7.1.1.tgz
│ │ ├── tasks/
│ │ │ ├── argocd.yml
│ │ │ ├── cilium_connectivity_check.yml
│ │ │ ├── coredns.yml
│ │ │ ├── dashboard.yml
│ │ │ ├── ingress-nginx.yml
│ │ │ ├── kubeblocks.yml
│ │ │ ├── local-storage.yml
│ │ │ ├── main.yml
│ │ │ ├── metrics-server.yml
│ │ │ ├── minio.yml
│ │ │ ├── nacos.yml
│ │ │ ├── network_check.yml
│ │ │ ├── nfs-provisioner.yml
│ │ │ ├── nodelocaldns.yml
│ │ │ ├── openebs.yml
│ │ │ ├── prometheus.yml
│ │ │ └── rocketmq.yml
│ │ ├── templates/
│ │ │ ├── argocd/
│ │ │ │ ├── argocd-app-example.yaml
│ │ │ │ ├── cluster/
│ │ │ │ │ └── cluster-mypro1.yaml
│ │ │ │ ├── project/
│ │ │ │ │ └── project-mypro1.yaml
│ │ │ │ ├── repository/
│ │ │ │ │ ├── argocd-ssh-known-hosts-cm.yaml
│ │ │ │ │ ├── git-sync.sh
│ │ │ │ │ ├── repo-charts-git.yaml
│ │ │ │ │ └── repo-values-git.yaml
│ │ │ │ └── values.yaml.j2
│ │ │ ├── cilium-check/
│ │ │ │ ├── check-part1.yaml.j2
│ │ │ │ ├── connectivity-check.yaml.j2
│ │ │ │ └── namespace.yaml.j2
│ │ │ ├── dashboard/
│ │ │ │ ├── admin-user-sa-rbac.yaml.j2
│ │ │ │ ├── dashboard-values.yaml.j2
│ │ │ │ └── read-user-sa-rbac.yaml.j2
│ │ │ ├── dns/
│ │ │ │ ├── coredns.yaml.j2
│ │ │ │ ├── kubedns.yaml.j2
│ │ │ │ ├── nodelocaldns-iptables.yaml.j2
│ │ │ │ └── nodelocaldns-ipvs.yaml.j2
│ │ │ ├── ingress-nginx/
│ │ │ │ ├── nginx.json
│ │ │ │ └── values.yaml.j2
│ │ │ ├── kubeblocks/
│ │ │ │ ├── clickhouse/
│ │ │ │ │ ├── 001.standalone.yaml
│ │ │ │ │ ├── 002.cluster.yaml
│ │ │ │ │ ├── 108.reconf.yaml
│ │ │ │ │ ├── 131.pod-monitor.yaml
│ │ │ │ │ ├── clickhouse-conn.py
│ │ │ │ │ ├── clickhouse.json
│ │ │ │ │ └── readme.md
│ │ │ │ ├── elasticsearch/
│ │ │ │ │ ├── 001.standalone.yaml
│ │ │ │ │ ├── 002.es-multinode.yaml
│ │ │ │ │ ├── 101.stop.yaml
│ │ │ │ │ ├── 102.start.yaml
│ │ │ │ │ ├── 103.restart.yaml
│ │ │ │ │ ├── 104.vscale.yaml
│ │ │ │ │ ├── 105.hscale.yaml
│ │ │ │ │ ├── 106.api-expose.yaml
│ │ │ │ │ ├── 106.expose.yaml
│ │ │ │ │ ├── 107.decommission.yaml
│ │ │ │ │ ├── 131.pod-monitor.yaml
│ │ │ │ │ ├── elasticsearch.json
│ │ │ │ │ └── readme.md
│ │ │ │ ├── kb-values.yaml.j2
│ │ │ │ ├── minio/
│ │ │ │ │ ├── minio-cluster-custom.yaml
│ │ │ │ │ ├── minio-cluster.yaml
│ │ │ │ │ ├── minio.json
│ │ │ │ │ ├── restart.yaml
│ │ │ │ │ ├── scale-out.yaml
│ │ │ │ │ ├── start.yaml
│ │ │ │ │ ├── stop.yaml
│ │ │ │ │ └── verticalscale.yaml
│ │ │ │ ├── mysql/
│ │ │ │ │ ├── 001.semisync-cluster.yaml
│ │ │ │ │ ├── 002.semisync-proxy-cluster.yaml
│ │ │ │ │ ├── 003.semisync-cluster-custom-instance.yaml
│ │ │ │ │ ├── 101.stop.yaml
│ │ │ │ │ ├── 102.start.yaml
│ │ │ │ │ ├── 103.restart.yaml
│ │ │ │ │ ├── 104.vscale.yaml
│ │ │ │ │ ├── 105.hscale.yaml
│ │ │ │ │ ├── 106.api-expose.yaml
│ │ │ │ │ ├── 106.expose.yaml
│ │ │ │ │ ├── 107.reconf-dynamic.yaml
│ │ │ │ │ ├── 108.reconf-static.yaml
│ │ │ │ │ ├── 109.switchover.yaml
│ │ │ │ │ ├── 110.repair.yaml
│ │ │ │ │ ├── 121.backup-repo.yaml
│ │ │ │ │ ├── 122.full-backup.yaml
│ │ │ │ │ ├── 123.scheduled-backup.yaml
│ │ │ │ │ ├── 124.scheduled-continuous-backup.yaml
│ │ │ │ │ ├── 125.restore.yaml
│ │ │ │ │ ├── 126.restore-pitr.yaml
│ │ │ │ │ ├── 131.pod-monitor.yaml
│ │ │ │ │ ├── 132.alert-rules.yaml
│ │ │ │ │ ├── benchmark.py
│ │ │ │ │ ├── mysql.json
│ │ │ │ │ └── readme.md
│ │ │ │ ├── postgresql/
│ │ │ │ │ ├── 001.cluster.yaml
│ │ │ │ │ ├── 002.cluster-custom-instance.yaml
│ │ │ │ │ ├── 101.stop.yaml
│ │ │ │ │ ├── 102.start.yaml
│ │ │ │ │ ├── 103.restart.yaml
│ │ │ │ │ ├── 104.vscale.yaml
│ │ │ │ │ ├── 105.hscale.yaml
│ │ │ │ │ ├── 106.api-expose.yaml
│ │ │ │ │ ├── 106.expose.yaml
│ │ │ │ │ ├── 107.reconf-dynamic.yaml
│ │ │ │ │ ├── 108.reconf-static.yaml
│ │ │ │ │ ├── 109.switchover.yaml
│ │ │ │ │ ├── 110.repair.yaml
│ │ │ │ │ ├── 111.custom-pwd.yaml
│ │ │ │ │ ├── 121.backup-repo.yaml
│ │ │ │ │ ├── 122.full-backup-2.yaml
│ │ │ │ │ ├── 122.full-backup.yaml
│ │ │ │ │ ├── 123.scheduled-backup.yaml
│ │ │ │ │ ├── 124.scheduled-continuous-backup.yaml
│ │ │ │ │ ├── 125.restore.yaml
│ │ │ │ │ ├── 126.restore-pitr.yaml
│ │ │ │ │ ├── 131.pod-monitor.yaml
│ │ │ │ │ ├── 132.alert-rules.yaml
│ │ │ │ │ ├── benchmark.py
│ │ │ │ │ └── postgresql.json
│ │ │ │ └── redis/
│ │ │ │ ├── 001.standalone.yaml
│ │ │ │ ├── 002.redis-replication.yaml
│ │ │ │ ├── 003.redis-sharding.yaml
│ │ │ │ ├── 101.stop.yaml
│ │ │ │ ├── 102.start.yaml
│ │ │ │ ├── 103.restart.yaml
│ │ │ │ ├── 104.vscale.yaml
│ │ │ │ ├── 105.hscale.yaml
│ │ │ │ ├── 106.api-expose.yaml
│ │ │ │ ├── 106.expose.yaml
│ │ │ │ ├── 107.reconf-dynamic.yaml
│ │ │ │ ├── 108.reconf-static.yaml
│ │ │ │ ├── 109.switchover.yaml
│ │ │ │ ├── 121.backup-repo.yaml
│ │ │ │ ├── 122.full-backup.yaml
│ │ │ │ ├── 123.scheduled-backup.yaml
│ │ │ │ ├── 124.scheduled-continuous-backup.yaml
│ │ │ │ ├── 125.api-restore.yaml
│ │ │ │ ├── 125.restore.yaml
│ │ │ │ ├── 126.restore-pitr.yaml
│ │ │ │ ├── 131.pod-monitor.yaml
│ │ │ │ ├── 132.alert-rules.yaml
│ │ │ │ ├── benchmark.py
│ │ │ │ └── redis.json
│ │ │ ├── local-storage/
│ │ │ │ ├── local-path-storage.yaml.j2
│ │ │ │ └── test-pod.yaml.j2
│ │ │ ├── metrics-server/
│ │ │ │ └── components.yaml.j2
│ │ │ ├── minio/
│ │ │ │ ├── minio.default.j2
│ │ │ │ ├── minio.service.j2
│ │ │ │ ├── operator-values.yaml.j2
│ │ │ │ └── tenant-values.yaml.j2
│ │ │ ├── nacos/
│ │ │ │ ├── mysql-schema.sql
│ │ │ │ ├── nacos-sts.yaml.j2
│ │ │ │ └── readme.md
│ │ │ ├── network-check/
│ │ │ │ ├── namespace.yaml.j2
│ │ │ │ └── network-check.yaml.j2
│ │ │ ├── nfs-provisioner/
│ │ │ │ ├── nfs-provisioner.yaml.j2
│ │ │ │ └── test-pod.yaml.j2
│ │ │ ├── openebs/
│ │ │ │ ├── readme.md
│ │ │ │ ├── sc.yaml.j2
│ │ │ │ └── values.yaml.j2
│ │ │ ├── prometheus/
│ │ │ │ ├── dingtalk-webhook.yaml
│ │ │ │ ├── etcd-client-csr.json.j2
│ │ │ │ ├── example-config-alertsmanager.yaml
│ │ │ │ └── values.yaml.j2
│ │ │ └── rocketmq/
│ │ │ └── rocketmq_cluster.yaml.j2
│ │ └── vars/
│ │ └── main.yml
│ ├── cluster-restore/
│ │ ├── defaults/
│ │ │ └── main.yml
│ │ └── tasks/
│ │ └── main.yml
│ ├── containerd/
│ │ ├── tasks/
│ │ │ └── main.yml
│ │ └── templates/
│ │ ├── HARBOR_REGISTRY/
│ │ │ └── hosts.toml.j2
│ │ ├── config.toml.j2
│ │ ├── containerd.service.j2
│ │ ├── crictl.yaml.j2
│ │ ├── docker.io/
│ │ │ └── hosts.toml.j2
│ │ ├── easzlab.io.local:5000/
│ │ │ └── hosts.toml.j2
│ │ └── hosts.toml.j2
│ ├── deploy/
│ │ ├── deploy.yml
│ │ ├── tasks/
│ │ │ ├── add-custom-kubectl-kubeconfig.yml
│ │ │ ├── create-kube-controller-manager-kubeconfig.yml
│ │ │ ├── create-kube-proxy-kubeconfig.yml
│ │ │ ├── create-kube-scheduler-kubeconfig.yml
│ │ │ ├── create-kubectl-kubeconfig.yml
│ │ │ └── main.yml
│ │ ├── templates/
│ │ │ ├── admin-csr.json.j2
│ │ │ ├── ca-config.json.j2
│ │ │ ├── ca-csr.json.j2
│ │ │ ├── crb.yaml.j2
│ │ │ ├── kube-controller-manager-csr.json.j2
│ │ │ ├── kube-proxy-csr.json.j2
│ │ │ ├── kube-scheduler-csr.json.j2
│ │ │ └── user-csr.json.j2
│ │ └── vars/
│ │ └── main.yml
│ ├── docker/
│ │ ├── tasks/
│ │ │ └── main.yml
│ │ ├── templates/
│ │ │ ├── daemon.json.j2
│ │ │ └── docker.service.j2
│ │ └── vars/
│ │ └── main.yml
│ ├── etcd/
│ │ ├── clean-etcd.yml
│ │ ├── defaults/
│ │ │ └── main.yml
│ │ ├── tasks/
│ │ │ └── main.yml
│ │ └── templates/
│ │ ├── etcd-csr.json.j2
│ │ └── etcd.service.j2
│ ├── ex-lb/
│ │ ├── clean-ex-lb.yml
│ │ ├── defaults/
│ │ │ └── main.yml
│ │ ├── ex-lb.yml
│ │ ├── tasks/
│ │ │ └── main.yml
│ │ └── templates/
│ │ ├── keepalived-backup.conf.j2
│ │ ├── keepalived-master.conf.j2
│ │ ├── keepalived.service.j2
│ │ ├── l4lb.conf.j2
│ │ └── l4lb.service.j2
│ ├── flannel/
│ │ ├── tasks/
│ │ │ └── main.yml
│ │ └── templates/
│ │ └── kube-flannel.yaml.j2
│ ├── harbor/
│ │ ├── tasks/
│ │ │ └── main.yml
│ │ ├── templates/
│ │ │ ├── harbor-csr.json.j2
│ │ │ ├── harbor-v1.10.yml.j2
│ │ │ ├── harbor-v2.10.yml.j2
│ │ │ ├── harbor-v2.11.yml.j2
│ │ │ ├── harbor-v2.12.yml.j2
│ │ │ └── harbor.service.j2
│ │ └── vars/
│ │ └── main.yml
│ ├── kube-lb/
│ │ ├── clean-kube-lb.yml
│ │ ├── tasks/
│ │ │ └── main.yml
│ │ └── templates/
│ │ ├── kube-lb.conf.j2
│ │ └── kube-lb.service.j2
│ ├── kube-master/
│ │ ├── tasks/
│ │ │ └── main.yml
│ │ ├── templates/
│ │ │ ├── aggregator-proxy-csr.json.j2
│ │ │ ├── audit-policy.yaml.j2
│ │ │ ├── kube-apiserver.service.j2
│ │ │ ├── kube-controller-manager.service.j2
│ │ │ ├── kube-scheduler.service.j2
│ │ │ └── kubernetes-csr.json.j2
│ │ └── vars/
│ │ └── main.yml
│ ├── kube-node/
│ │ ├── tasks/
│ │ │ ├── create-kubelet-kubeconfig.yml
│ │ │ └── main.yml
│ │ ├── templates/
│ │ │ ├── cni-default.conf.j2
│ │ │ ├── kube-proxy-config.yaml.j2
│ │ │ ├── kube-proxy.service.j2
│ │ │ ├── kubelet-config.yaml.j2
│ │ │ ├── kubelet-csr.json.j2
│ │ │ └── kubelet.service.j2
│ │ └── vars/
│ │ └── main.yml
│ ├── kube-ovn/
│ │ ├── tasks/
│ │ │ └── main.yml
│ │ ├── templates/
│ │ │ ├── coredns.yaml.j2
│ │ │ ├── install.sh.j2
│ │ │ ├── nodelocaldns-iptables.yaml.j2
│ │ │ └── nodelocaldns-ipvs.yaml.j2
│ │ └── vars/
│ │ └── main.yml
│ ├── kube-router/
│ │ ├── kube-router.yml
│ │ ├── tasks/
│ │ │ └── main.yml
│ │ └── templates/
│ │ └── kuberouter.yaml.j2
│ ├── os-harden/
│ │ ├── CHANGELOG.md
│ │ ├── README.md
│ │ ├── defaults/
│ │ │ └── main.yml
│ │ ├── handlers/
│ │ │ └── main.yml
│ │ ├── meta/
│ │ │ └── main.yml
│ │ ├── tasks/
│ │ │ ├── apt.yml
│ │ │ ├── auditd.yml
│ │ │ ├── hardening.yml
│ │ │ ├── limits.yml
│ │ │ ├── login_defs.yml
│ │ │ ├── main.yml
│ │ │ ├── minimize_access.yml
│ │ │ ├── modprobe.yml
│ │ │ ├── pam.yml
│ │ │ ├── profile.yml
│ │ │ ├── rhosts.yml
│ │ │ ├── securetty.yml
│ │ │ ├── selinux.yml
│ │ │ ├── suid_sgid.yml
│ │ │ ├── sysctl.yml
│ │ │ ├── user_accounts.yml
│ │ │ └── yum.yml
│ │ ├── templates/
│ │ │ ├── etc/
│ │ │ │ ├── audit/
│ │ │ │ │ └── auditd.conf.j2
│ │ │ │ ├── default/
│ │ │ │ │ └── ufw.j2
│ │ │ │ ├── initramfs-tools/
│ │ │ │ │ └── modules.j2
│ │ │ │ ├── libuser.conf.j2
│ │ │ │ ├── login.defs.j2
│ │ │ │ ├── modprobe.d/
│ │ │ │ │ └── modprobe.j2
│ │ │ │ ├── pam.d/
│ │ │ │ │ └── rhel_system_auth.j2
│ │ │ │ ├── profile.d/
│ │ │ │ │ └── profile.conf.j2
│ │ │ │ ├── securetty.j2
│ │ │ │ └── sysconfig/
│ │ │ │ └── rhel_sysconfig_init.j2
│ │ │ └── usr/
│ │ │ └── share/
│ │ │ └── pam-configs/
│ │ │ ├── pam_passwdqd.j2
│ │ │ └── pam_tally2.j2
│ │ └── vars/
│ │ ├── Amazon.yml
│ │ ├── Archlinux.yml
│ │ ├── Debian.yml
│ │ ├── Fedora.yml
│ │ ├── Oracle Linux.yml
│ │ ├── RedHat-6.yml
│ │ ├── RedHat.yml
│ │ ├── Suse.yml
│ │ └── main.yml
│ └── prepare/
│ ├── files/
│ │ └── sctp.conf
│ ├── tasks/
│ │ ├── common.yml
│ │ ├── debian.yml
│ │ ├── main.yml
│ │ ├── offline.yml
│ │ ├── redhat.yml
│ │ └── suse.yml
│ ├── templates/
│ │ ├── 10-k8s-modules.conf.j2
│ │ ├── 30-k8s-ulimits.conf.j2
│ │ ├── 95-k8s-journald.conf.j2
│ │ └── 95-k8s-sysctl.conf.j2
│ └── vars/
│ └── main.yml
└── tools/
├── imgutil.sh
├── kubectl-node_shell
├── kubetail
└── yc-ssh-key-copy.sh
================================================
FILE CONTENTS
================================================
================================================
FILE: .github/ISSUE_TEMPLATE/bug-report.yaml
================================================
name: Bug Report 问题提交
description: Report a bug encountered while using kubeasz 项目使用问题提交
labels: kind/bug
body:
- type: textarea
id: problem
attributes:
label: What happened? 发生了什么问题?
description: |
Please provide as much info as possible. Not doing so may result in your bug not being addressed in a timely manner.
操作命令,输出日志等,请尽可能提供详细信息,否则可能导致您的问题无法及时得到跟踪和解决。
validations:
required: true
- type: textarea
id: expected
attributes:
label: What did you expect to happen? 期望的结果是什么?
validations:
required: true
- type: textarea
id: repro
attributes:
label: How can we reproduce it (as minimally and precisely as possible)? 尽可能最小化、精确地描述如何复现问题
validations:
required: true
- type: textarea
id: additional
attributes:
label: Anything else we need to know? 其他需要说明的情况
- type: textarea
id: kubeVersion
attributes:
label: Kubernetes version k8s 版本
value: |
validations:
required: true
- type: textarea
id: kubeaszVersion
attributes:
label: Kubeasz version
value: |
validations:
required: true
- type: textarea
id: osVersion
attributes:
label: OS version 操作系统版本
value: |
```console
# On Linux:
$ cat /etc/os-release
# paste output here
$ uname -a
# paste output here
```
validations:
required: true
- type: textarea
id: plugins
attributes:
label: Related plugins (CNI, CSI, ...) and versions (if applicable) 其他网络插件等需要说明的情况
value: |
================================================
FILE: .github/ISSUE_TEMPLATE/enhancement.yaml
================================================
name: Enhancement Tracking Issue
description: Provide supporting details for a feature in development
labels: kind/feature
body:
- type: textarea
id: feature
attributes:
label: What would you like to be added?
description: |
Feature requests are unlikely to make progress as issues.
A proposal that works through the design along with the implications of the change can be opened as a KEP.
validations:
required: true
- type: textarea
id: rationale
attributes:
label: Why is this needed?
validations:
required: true
================================================
FILE: .github/PULL_REQUEST_TEMPLATE.md
================================================
#### What type of PR is this?
#### What this PR does / why we need it:
#### Which issue(s) this PR fixes:
Fixes #
#### Special notes for your reviewer:
#### Does this PR introduce a user-facing change?
```release-note
```
#### Additional documentation e.g., KEPs (Kubernetes Enhancement Proposals), usage docs, etc.:
```docs
```
================================================
FILE: .github/workflows/mirror.yml
================================================
name: Mirroring
on:
push:
#branches:
# - 'master'
tags:
- '*.*.*'
jobs:
to_gitee:
runs-on: ubuntu-latest
steps: # <-- must use actions/checkout before mirroring!
- uses: actions/checkout@v2
with:
fetch-depth: 0
- uses: pixta-dev/repository-mirroring-action@v1
with:
target_repo_url:
git@gitee.com:easzlab/kubeasz.git
ssh_private_key:
${{ secrets.SYNCGITEE }} # 密钥 (secret)
================================================
FILE: .github/workflows/stale.yml
================================================
name: Close inactive issues
on:
schedule:
- cron: "1 21 * * *"
jobs:
close-issues:
runs-on: ubuntu-latest
permissions:
issues: write
pull-requests: write
steps:
- uses: actions/stale@v5
with:
operations-per-run: 50
days-before-issue-stale: 30
days-before-issue-close: 7
stale-issue-label: "stale"
stale-issue-message: "This issue is stale because it has been open for 30 days with no activity."
close-issue-message: "This issue was closed because it has been inactive for 14 days since being marked as stale."
days-before-pr-stale: -1
days-before-pr-close: -1
repo-token: ${{ secrets.GITHUB_TOKEN }}
================================================
FILE: .gitignore
================================================
# download directory
down/*
# binaries directory
bin/*
# k8s storage manifests
manifests/storage/*
!manifests/storage/test.yaml
!manifests/storage/local-storage/
# role based variable settings, exclude roles/os-harden/vars/
#/roles/*/vars/*
#!/roles/os-harden/vars/
# cluster instances
clusters/
#
*.crt
*.key
*.pem
================================================
FILE: README.md
================================================

 **kubeasz** 致力于提供快速部署高可用`k8s`集群的工具, 同时也努力成为`k8s`实践、使用的参考书;基于二进制方式部署和利用`ansible-playbook`实现自动化;既提供一键安装脚本, 也可以根据`安装指南`分步执行安装各个组件。
**kubeasz** 从每一个单独部件组装到完整的集群,提供最灵活的配置能力,几乎可以设置任何组件的任何参数;同时又为集群创建预置一套运行良好的默认配置,甚至自动化创建适合大规模集群的[BGP Route Reflector网络模式](docs/setup/network-plugin/calico-bgp-rr.md)。
- **集群特性** [Master高可用](docs/setup/00-planning_and_overall_intro.md#ha-architecture)、[离线安装](docs/setup/offline_install.md)、[多架构支持(amd64/arm64)](docs/setup/multi_platform.md)
- **集群版本** kubernetes v1.24, v1.25, v1.26, v1.27, v1.28, v1.29, v1.30, v1.31, v1.32, v.1.33, v1.34
- **运行时** [containerd](docs/setup/03-container_runtime.md) v1.7.x, v2.0.x, v2.1.x
- **网络** [calico](docs/setup/network-plugin/calico.md), [cilium](docs/setup/network-plugin/cilium.md), [flannel](docs/setup/network-plugin/flannel.md), [kube-ovn](docs/setup/network-plugin/kube-ovn.md), [kube-router](docs/setup/network-plugin/kube-router.md)
**[news]** kubeasz 通过cncf一致性测试 [详情](docs/mixes/conformance.md)
推荐版本对照
**kubeasz** 致力于提供快速部署高可用`k8s`集群的工具, 同时也努力成为`k8s`实践、使用的参考书;基于二进制方式部署和利用`ansible-playbook`实现自动化;既提供一键安装脚本, 也可以根据`安装指南`分步执行安装各个组件。
**kubeasz** 从每一个单独部件组装到完整的集群,提供最灵活的配置能力,几乎可以设置任何组件的任何参数;同时又为集群创建预置一套运行良好的默认配置,甚至自动化创建适合大规模集群的[BGP Route Reflector网络模式](docs/setup/network-plugin/calico-bgp-rr.md)。
- **集群特性** [Master高可用](docs/setup/00-planning_and_overall_intro.md#ha-architecture)、[离线安装](docs/setup/offline_install.md)、[多架构支持(amd64/arm64)](docs/setup/multi_platform.md)
- **集群版本** kubernetes v1.24, v1.25, v1.26, v1.27, v1.28, v1.29, v1.30, v1.31, v1.32, v.1.33, v1.34
- **运行时** [containerd](docs/setup/03-container_runtime.md) v1.7.x, v2.0.x, v2.1.x
- **网络** [calico](docs/setup/network-plugin/calico.md), [cilium](docs/setup/network-plugin/cilium.md), [flannel](docs/setup/network-plugin/flannel.md), [kube-ovn](docs/setup/network-plugin/kube-ovn.md), [kube-router](docs/setup/network-plugin/kube-router.md)
**[news]** kubeasz 通过cncf一致性测试 [详情](docs/mixes/conformance.md)
推荐版本对照
| Kubernetes |
1.23 |
1.24-1.28 |
1.29 |
1.30 |
1.31 |
1.32 |
1.33 |
1.34 |
| kubeasz |
3.2.0 |
3.6.2 |
3.6.3 |
3.6.4 |
3.6.5 |
3.6.6 |
3.6.7 |
3.6.8 |
## 支持系统
- **Alibaba Linux** 2.1903, 3.2104
- **Alma Linux** 8, 9
- **Anolis OS** 8.x RHCK, 8.x ANCK
- **CentOS/RHEL** 7, 8, 9
- **Debian** 10, 11([notes](docs/setup/multi_os.md#Debian))
- **Fedora** 34, 35, 36, 37
- **Kylin Linux Advanced Server V10** 麒麟V10 Tercel, Lance, Halberd
- **openEuler** 22.03 LTS, 24.03 LTS([notes](docs/setup/multi_os.md#openEuler))
- **openSUSE** Leap 15.x([notes](docs/setup/multi_os.md#openSUSE))
- **Rocky Linux** 8, 9
- **Ubuntu** 16.04, 18.04, 20.04, 22.04, 24.04
能够支持大部分使用systemd的linux发行版,如果安装有问题先请查看[文档](docs/setup/multi_os.md);如果某个能够支持安装的系统没有在列表中,欢迎提PR 告知。
## 快速指南
单机快速体验k8s集群的测试环境--[AllinOne部署](docs/setup/quickStart.md)
## 安装指南
## 使用指南
## 沟通交流
- 微信:k8s&kubeasz实践, 搜索微信号`badtobone`, 请按格式备注(${城市}-${github用户名}), 验证后加入群聊。
- 推荐阅读
- [kubernetes架构师课程](https://www.toutiao.com/c/user/token/MS4wLjABAAAA0YFomuMNm87NNysXeUsQdI0Tt3gOgz8WG_0B3MzxsmI/?tab=article)
- [kubernetes-the-hard-way](https://github.com/kelseyhightower/kubernetes-the-hard-way)
- [feisky-Kubernetes 指南](https://github.com/feiskyer/kubernetes-handbook/blob/master/SUMMARY.md)
- [opsnull 安装教程](https://github.com/opsnull/follow-me-install-kubernetes-cluster)
## 贡献&致谢
欢迎提[Issues](https://github.com/easzlab/kubeasz/issues)和[PRs](docs/mixes/HowToContribute.md)参与维护项目!感谢您的关注与支持!
- [如何 PR](docs/mixes/HowToContribute.md)
- [如何捐赠](docs/mixes/donate.md)
Copyright 2017 gjmzj (jmgaozz@163.com) Apache License 2.0, 详情见 [LICENSE](docs/mixes/LICENSE) 文件。
================================================
FILE: ansible.cfg
================================================
# Example config file for ansible -- https://ansible.com/
# =======================================================
# Nearly all parameters can be overridden in ansible-playbook
# or with command line flags. Ansible will read ANSIBLE_CONFIG,
# ansible.cfg in the current working directory, .ansible.cfg in
# the home directory, or /etc/ansible/ansible.cfg, whichever it
# finds first
# For a full list of available options, run ansible-config list or see the
# documentation: https://docs.ansible.com/ansible/latest/reference_appendices/config.html.
[defaults]
#inventory = /etc/ansible/hosts
#library = ~/.ansible/plugins/modules:/usr/share/ansible/plugins/modules
#module_utils = ~/.ansible/plugins/module_utils:/usr/share/ansible/plugins/module_utils
#remote_tmp = ~/.ansible/tmp
#local_tmp = ~/.ansible/tmp
#forks = 5
#poll_interval = 0.001
#ask_pass = False
#transport = smart
# Plays will gather facts by default, which contain information about
# the remote system.
#
# smart - gather by default, but don't regather if already gathered
# implicit - gather by default, turn off with gather_facts: False
# explicit - do not gather by default, must say gather_facts: True
gathering = smart
# This only affects the gathering done by a play's gather_facts directive,
# by default gathering retrieves all facts subsets
# all - gather all subsets
# network - gather min and network facts
# hardware - gather hardware facts (longest facts to retrieve)
# virtual - gather min and virtual facts
# facter - import facts from facter
# ohai - import facts from ohai
# You can combine them using comma (ex: network,virtual)
# You can negate them using ! (ex: !hardware,!facter,!ohai)
# A minimal set of facts is always gathered.
#
#gather_subset = all
# some hardware related facts are collected
# with a maximum timeout of 10 seconds. This
# option lets you increase or decrease that
# timeout to something more suitable for the
# environment.
#
gather_timeout = 7
# Ansible facts are available inside the ansible_facts.* dictionary
# namespace. This setting maintains the behaviour which was the default prior
# to 2.5, duplicating these variables into the main namespace, each with a
# prefix of 'ansible_'.
# This variable is set to True by default for backwards compatibility. It
# will be changed to a default of 'False' in a future release.
#
#inject_facts_as_vars = True
# Paths to search for collections, colon separated
# collections_paths = ~/.ansible/collections:/usr/share/ansible/collections
# Paths to search for roles, colon separated
roles_path = /etc/kubeasz/roles
# Host key checking is enabled by default
host_key_checking = False
# You can only have one 'stdout' callback type enabled at a time. The default
# is 'default'. The 'yaml' or 'debug' stdout callback plugins are easier to read.
#
#stdout_callback = default
#stdout_callback = yaml
#stdout_callback = debug
# Ansible ships with some plugins that require whitelisting,
# this is done to avoid running all of a type by default.
# These setting lists those that you want enabled for your system.
# Custom plugins should not need this unless plugin author disables them
# by default.
#
# Enable callback plugins, they can output to stdout but cannot be 'stdout' type.
#callback_whitelist = timer, mail
# Determine whether includes in tasks and handlers are "static" by
# default. As of 2.0, includes are dynamic by default. Setting these
# values to True will make includes behave more like they did in the
# 1.x versions.
#
#task_includes_static = False
#handler_includes_static = False
# Controls if a missing handler for a notification event is an error or a warning
#error_on_missing_handler = True
# Default timeout for connection plugins
#timeout = 10
# Default user to use for playbooks if user is not specified
# Uses the connection plugin's default, normally the user currently executing Ansible,
# unless a different user is specified here.
#
#remote_user = root
# Logging is off by default unless this path is defined.
#log_path = /var/log/ansible.log
# Default module to use when running ad-hoc commands
#module_name = command
# Use this shell for commands executed under sudo.
# you may need to change this to /bin/bash in rare instances
# if sudo is constrained.
#
#executable = /bin/sh
# By default, variables from roles will be visible in the global variable
# scope. To prevent this, set the following option to True, and only
# tasks and handlers within the role will see the variables there
#
private_role_vars = True
# List any Jinja2 extensions to enable here.
#jinja2_extensions = jinja2.ext.do,jinja2.ext.i18n
# If set, always use this private key file for authentication, same as
# if passing --private-key to ansible or ansible-playbook
#
#private_key_file = /path/to/file
# If set, configures the path to the Vault password file as an alternative to
# specifying --vault-password-file on the command line. This can also be
# an executable script that returns the vault password to stdout.
#
#vault_password_file = /path/to/vault_password_file
# Format of string {{ ansible_managed }} available within Jinja2
# templates indicates to users editing templates files will be replaced.
# replacing {file}, {host} and {uid} and strftime codes with proper values.
#
#ansible_managed = Ansible managed: {file} modified on %Y-%m-%d %H:%M:%S by {uid} on {host}
# {file}, {host}, {uid}, and the timestamp can all interfere with idempotence
# in some situations so the default is a static string:
#
#ansible_managed = Ansible managed
# By default, ansible-playbook will display "Skipping [host]" if it determines a task
# should not be run on a host. Set this to "False" if you don't want to see these "Skipping"
# messages. NOTE: the task header will still be shown regardless of whether or not the
# task is skipped.
#
display_skipped_hosts = False
# By default, if a task in a playbook does not include a name: field then
# ansible-playbook will construct a header that includes the task's action but
# not the task's args. This is a security feature because ansible cannot know
# if the *module* considers an argument to be no_log at the time that the
# header is printed. If your environment doesn't have a problem securing
# stdout from ansible-playbook (or you have manually specified no_log in your
# playbook on all of the tasks where you have secret information) then you can
# safely set this to True to get more informative messages.
#
display_args_to_stdout = False
# Ansible will raise errors when attempting to dereference
# Jinja2 variables that are not set in templates or action lines. Uncomment this line
# to change this behavior.
#
error_on_undefined_vars = True
# Ansible may display warnings based on the configuration of the
# system running ansible itself. This may include warnings about 3rd party packages or
# other conditions that should be resolved if possible.
# To disable these warnings, set the following value to False:
#
system_warnings = False
# Ansible may display deprecation warnings for language
# features that should no longer be used and will be removed in future versions.
# To disable these warnings, set the following value to False:
#
deprecation_warnings = False
# Ansible can optionally warn when usage of the shell and
# command module appear to be simplified by using a default Ansible module
# instead. These warnings can be silenced by adjusting the following
# setting or adding warn=yes or warn=no to the end of the command line
# parameter string. This will for example suggest using the git module
# instead of shelling out to the git command.
#
#command_warnings = False
# set plugin path directories here, separate with colons
#action_plugins = /usr/share/ansible/plugins/action
#become_plugins = /usr/share/ansible/plugins/become
#cache_plugins = /usr/share/ansible/plugins/cache
#callback_plugins = /usr/share/ansible/plugins/callback
#connection_plugins = /usr/share/ansible/plugins/connection
#lookup_plugins = /usr/share/ansible/plugins/lookup
#inventory_plugins = /usr/share/ansible/plugins/inventory
#vars_plugins = /usr/share/ansible/plugins/vars
#filter_plugins = /usr/share/ansible/plugins/filter
#test_plugins = /usr/share/ansible/plugins/test
#terminal_plugins = /usr/share/ansible/plugins/terminal
#strategy_plugins = /usr/share/ansible/plugins/strategy
# Ansible will use the 'linear' strategy but you may want to try another one.
#strategy = linear
# By default, callbacks are not loaded for /bin/ansible. Enable this if you
# want, for example, a notification or logging callback to also apply to
# /bin/ansible runs
#
#bin_ansible_callbacks = False
# Don't like cows? that's unfortunate.
# set to 1 if you don't want cowsay support or export ANSIBLE_NOCOWS=1
#nocows = 1
# Set which cowsay stencil you'd like to use by default. When set to 'random',
# a random stencil will be selected for each task. The selection will be filtered
# against the `cow_whitelist` option below.
#
#cow_selection = default
#cow_selection = random
# When using the 'random' option for cowsay, stencils will be restricted to this list.
# it should be formatted as a comma-separated list with no spaces between names.
# NOTE: line continuations here are for formatting purposes only, as the INI parser
# in python does not support them.
#
#cow_whitelist=bud-frogs,bunny,cheese,daemon,default,dragon,elephant-in-snake,elephant,eyes,\
# hellokitty,kitty,luke-koala,meow,milk,moofasa,moose,ren,sheep,small,stegosaurus,\
# stimpy,supermilker,three-eyes,turkey,turtle,tux,udder,vader-koala,vader,www
# Don't like colors either?
# set to 1 if you don't want colors, or export ANSIBLE_NOCOLOR=1
#
#nocolor = 1
# If set to a persistent type (not 'memory', for example 'redis') fact values
# from previous runs in Ansible will be stored. This may be useful when
# wanting to use, for example, IP information from one group of servers
# without having to talk to them in the same playbook run to get their
# current IP information.
#
#fact_caching = memory
# This option tells Ansible where to cache facts. The value is plugin dependent.
# For the jsonfile plugin, it should be a path to a local directory.
# For the redis plugin, the value is a host:port:database triplet: fact_caching_connection = localhost:6379:0
#
#fact_caching_connection=/tmp
# retry files
# When a playbook fails a .retry file can be created that will be placed in ~/
# You can enable this feature by setting retry_files_enabled to True
# and you can change the location of the files by setting retry_files_save_path
#
retry_files_enabled = False
#retry_files_save_path = ~/.ansible-retry
# prevents logging of task data, off by default
#no_log = False
# prevents logging of tasks, but only on the targets, data is still logged on the master/controller
#no_target_syslog = False
# Controls whether Ansible will raise an error or warning if a task has no
# choice but to create world readable temporary files to execute a module on
# the remote machine. This option is False by default for security. Users may
# turn this on to have behaviour more like Ansible prior to 2.1.x. See
# https://docs.ansible.com/ansible/latest/user_guide/become.html#becoming-an-unprivileged-user
# for more secure ways to fix this than enabling this option.
#
#allow_world_readable_tmpfiles = False
# Controls what compression method is used for new-style ansible modules when
# they are sent to the remote system. The compression types depend on having
# support compiled into both the controller's python and the client's python.
# The names should match with the python Zipfile compression types:
# * ZIP_STORED (no compression. available everywhere)
# * ZIP_DEFLATED (uses zlib, the default)
# These values may be set per host via the ansible_module_compression inventory variable.
#
#module_compression = 'ZIP_DEFLATED'
# This controls the cutoff point (in bytes) on --diff for files
# set to 0 for unlimited (RAM may suffer!).
#
#max_diff_size = 104448
# Controls showing custom stats at the end, off by default
#show_custom_stats = False
# Controls which files to ignore when using a directory as inventory with
# possibly multiple sources (both static and dynamic)
#
#inventory_ignore_extensions = ~, .orig, .bak, .ini, .cfg, .retry, .pyc, .pyo
# This family of modules use an alternative execution path optimized for network appliances
# only update this setting if you know how this works, otherwise it can break module execution
#
#network_group_modules=eos, nxos, ios, iosxr, junos, vyos
# When enabled, this option allows lookups (via variables like {{lookup('foo')}} or when used as
# a loop with `with_foo`) to return data that is not marked "unsafe". This means the data may contain
# jinja2 templating language which will be run through the templating engine.
# ENABLING THIS COULD BE A SECURITY RISK
#
#allow_unsafe_lookups = False
# set default errors for all plays
#any_errors_fatal = False
[inventory]
# List of enabled inventory plugins and the order in which they are used.
#enable_plugins = host_list, script, auto, yaml, ini, toml
# Ignore these extensions when parsing a directory as inventory source
#ignore_extensions = .pyc, .pyo, .swp, .bak, ~, .rpm, .md, .txt, ~, .orig, .ini, .cfg, .retry
# ignore files matching these patterns when parsing a directory as inventory source
#ignore_patterns=
# If 'True' unparsed inventory sources become fatal errors, otherwise they are warnings.
#unparsed_is_failed = False
[privilege_escalation]
#become = False
#become_method = sudo
#become_ask_pass = False
## Connection Plugins ##
# Settings for each connection plugin go under a section titled '[[plugin_name]_connection]'
# To view available connection plugins, run ansible-doc -t connection -l
# To view available options for a connection plugin, run ansible-doc -t connection [plugin_name]
# https://docs.ansible.com/ansible/latest/plugins/connection.html
[paramiko_connection]
# uncomment this line to cause the paramiko connection plugin to not record new host
# keys encountered. Increases performance on new host additions. Setting works independently of the
# host key checking setting above.
#record_host_keys=False
# by default, Ansible requests a pseudo-terminal for commands executed under sudo. Uncomment this
# line to disable this behaviour.
#pty = False
# paramiko will default to looking for SSH keys initially when trying to
# authenticate to remote devices. This is a problem for some network devices
# that close the connection after a key failure. Uncomment this line to
# disable the Paramiko look for keys function
#look_for_keys = False
# When using persistent connections with Paramiko, the connection runs in a
# background process. If the host doesn't already have a valid SSH key, by
# default Ansible will prompt to add the host key. This will cause connections
# running in background processes to fail. Uncomment this line to have
# Paramiko automatically add host keys.
#host_key_auto_add = True
[ssh_connection]
# ssh arguments to use
# Leaving off ControlPersist will result in poor performance, so use
# paramiko on older platforms rather than removing it, -C controls compression use
#ssh_args = -C -o ControlMaster=auto -o ControlPersist=60s
# The base directory for the ControlPath sockets.
# This is the "%(directory)s" in the control_path option
#
# Example:
# control_path_dir = /tmp/.ansible/cp
control_path_dir = /tmp
# The path to use for the ControlPath sockets. This defaults to a hashed string of the hostname,
# port and username (empty string in the config). The hash mitigates a common problem users
# found with long hostnames and the conventional %(directory)s/ansible-ssh-%%h-%%p-%%r format.
# In those cases, a "too long for Unix domain socket" ssh error would occur.
#
# Example:
# control_path = %(directory)s/%%C
control_path = /tmp/ansible-ssh-%%h-%%p-%%r
# Enabling pipelining reduces the number of SSH operations required to
# execute a module on the remote server. This can result in a significant
# performance improvement when enabled, however when using "sudo:" you must
# first disable 'requiretty' in /etc/sudoers
#
# By default, this option is disabled to preserve compatibility with
# sudoers configurations that have requiretty (the default on many distros).
#
pipelining = True
# Control the mechanism for transferring files (old)
# * smart = try sftp and then try scp [default]
# * True = use scp only
# * False = use sftp only
#scp_if_ssh = smart
# Control the mechanism for transferring files (new)
# If set, this will override the scp_if_ssh option
# * sftp = use sftp to transfer files
# * scp = use scp to transfer files
# * piped = use 'dd' over SSH to transfer files
# * smart = try sftp, scp, and piped, in that order [default]
#transfer_method = smart
# If False, sftp will not use batch mode to transfer files. This may cause some
# types of file transfer failures impossible to catch however, and should
# only be disabled if your sftp version has problems with batch mode
sftp_batch_mode = True
# The -tt argument is passed to ssh when pipelining is not enabled because sudo
# requires a tty by default.
#usetty = True
# Number of times to retry an SSH connection to a host, in case of UNREACHABLE.
# For each retry attempt, there is an exponential backoff,
# so after the first attempt there is 1s wait, then 2s, 4s etc. up to 30s (max).
#retries = 3
[persistent_connection]
# Configures the persistent connection timeout value in seconds. This value is
# how long the persistent connection will remain idle before it is destroyed.
# If the connection doesn't receive a request before the timeout value
# expires, the connection is shutdown. The default value is 30 seconds.
#connect_timeout = 30
# The command timeout value defines the amount of time to wait for a command
# or RPC call before timing out. The value for the command timeout must
# be less than the value of the persistent connection idle timeout (connect_timeout)
# The default value is 30 second.
#command_timeout = 30
## Become Plugins ##
# Settings for become plugins go under a section named '[[plugin_name]_become_plugin]'
# To view available become plugins, run ansible-doc -t become -l
# To view available options for a specific plugin, run ansible-doc -t become [plugin_name]
# https://docs.ansible.com/ansible/latest/plugins/become.html
[sudo_become_plugin]
#flags = -H -S -n
#user = root
[selinux]
# file systems that require special treatment when dealing with security context
# the default behaviour that copies the existing context or uses the user default
# needs to be changed to use the file system dependent context.
#special_context_filesystems=fuse,nfs,vboxsf,ramfs,9p,vfat
# Set this to True to allow libvirt_lxc connections to work without SELinux.
#libvirt_lxc_noseclabel = False
[colors]
#highlight = white
#verbose = blue
#warn = bright purple
#error = red
#debug = dark gray
#deprecate = purple
#skip = cyan
#unreachable = red
#ok = green
#changed = yellow
#diff_add = green
#diff_remove = red
#diff_lines = cyan
[diff]
# Always print diff when running ( same as always running with -D/--diff )
#always = False
# Set how many context lines to show in diff
#context = 3
[galaxy]
# Controls whether the display wheel is shown or not
#display_progress=
# Validate TLS certificates for Galaxy server
#ignore_certs = False
# Role or collection skeleton directory to use as a template for
# the init action in ansible-galaxy command
#role_skeleton=
# Patterns of files to ignore inside a Galaxy role or collection
# skeleton directory
#role_skeleton_ignore="^.git$", "^.*/.git_keep$"
# Galaxy Server URL
#server=https://galaxy.ansible.com
# A list of Galaxy servers to use when installing a collection.
#server_list=automation_hub, release_galaxy
# Server specific details which are mentioned in server_list
#[galaxy_server.automation_hub]
#url=https://cloud.redhat.com/api/automation-hub/
#auth_url=https://sso.redhat.com/auth/realms/redhat-external/protocol/openid-connect/token
#token=my_ah_token
#
#[galaxy_server.release_galaxy]
#url=https://galaxy.ansible.com/
#token=my_token
================================================
FILE: docs/blog/seperated_containerd_services_for_docker_and_k8s.md
================================================
# 为docker和k8s创建独立的containerd进程
## 背景
公司有一台带GPU显卡的服务器,为了通过vllm推理镜像运行像“qwen3-32b”这样的大语言模型,已经配置了带`nvidia-container-runtime`运行时的docker服务;现在需要该服务器加入到k8s集群;因为docker和k8s都需要containerd服务;为了避免冲突,需要两个完全独立的 containerd 实例。
## 方案
必须隔离的 6 个关键点
| 项 | Docker containerd | K8s containerd |
| :--- | :--- | :--- |
| binary | Docker 自带 | 系统安装|
| systemd unit | docker.service | containerd-k8s.service |
| socket | /var/run/docker/containerd.sock | /run/containerd-k8s/containerd.sock |
| root | /var/lib/docker/containerd | /var/lib/containerd-k8s |
| state | /run/docker/containerd | /run/containerd-k8s |
| config | Docker 管理 | /etc/containerd-k8s/config.toml |
## 基于kubeasz 安装步骤
`kubeasz` 3.6.9 版本以上支持快速配置自定义的`containerd`服务; 在正常安装之前,首先修改 example/config.yml 配置文件参考如下:
```
# [containerd] root 存储目录,默认:/var/lib/containerd
CONTAINERD_ROOT_DIR: "/var/lib/k8scontainerd"
# [containerd] state 存储目录,默认:/run/containerd
CONTAINERD_STATE_DIR: "/run/k8scontainerd"
# [containerd] config 目录,默认:/etc/containerd
CONTAINERD_CONFIG_DIR: "/etc/k8scontainerd"
# [containerd] systemd service 名称,默认:containerd.service
CONTAINERD_SERVICE_NAME: "k8scontainerd.service"
```
然后按照正常的安装流程即可。
## 验证
```
ps -ef | grep containerd
# 可以看到两个不同的进程
/opt/kube/bin/containerd-bin/containerd --log-level warn --config /etc/k8scontainerd/config.toml
/usr/bin/containerd --config /var/run/docker/containerd/containerd.toml
```
That's it. Have Fun!
================================================
FILE: docs/deprecated/efk.md
================================================
### 第一部分:EFK
本文档已过期(deprecated)
`EFK` 插件是`k8s`项目的一个日志解决方案,它包括三个组件:[Elasticsearch](), [Fluentd](), [Kibana]();Elasticsearch 是日志存储和日志搜索引擎,Fluentd 负责把`k8s`集群的日志发送给 Elasticsearch, Kibana 则是可视化界面查看和检索存储在 ES 中的数据。
- 建议在熟悉本文档内容后使用[Log-Pilot + ES + Kibana 日志方案](log-pilot.md)
### 准备
参考官方[部署文档](https://github.com/kubernetes/kubernetes/tree/master/cluster/addons/fluentd-elasticsearch)的基础上使用本项目`manifests/efk/`部署,以下为几点主要的修改:
+ 修改 fluentd-es-configmap.yaml 中的部分 journald 日志源(增加集群组件服务日志搜集)
+ 修改官方docker镜像,方便国内下载加速
+ 修改 es-statefulset.yaml 支持日志存储持久化等
+ 增加自动清理日志,见后文`第四部分`
### 安装
``` bash
$ kubectl apply -f /etc/kubeasz/manifests/efk/
$ kubectl apply -f /etc/kubeasz/manifests/efk/es-without-pv/
```
### 验证
``` bash
kubectl get pods -n kube-system|grep -E 'elasticsearch|fluentd|kibana'
elasticsearch-logging-0 1/1 Running 0 19h
elasticsearch-logging-1 1/1 Running 0 19h
fluentd-es-v2.0.2-6c95c 1/1 Running 0 17h
fluentd-es-v2.0.2-f2xh8 1/1 Running 0 8h
fluentd-es-v2.0.2-pv5q5 1/1 Running 0 8h
kibana-logging-d5cffd7c6-9lz2p 1/1 Running 0 1m
```
kibana Pod 第一次启动时会用较长时间(10-20分钟)来优化和 Cache 状态页面,可以查看 Pod 的日志观察进度,如下等待 `Ready` 状态
``` bash
$ kubectl logs -n kube-system kibana-logging-d5cffd7c6-9lz2p -f
...
{"type":"log","@timestamp":"2018-03-13T07:33:00Z","tags":["listening","info"],"pid":1,"message":"Server running at http://0:5601"}
{"type":"log","@timestamp":"2018-03-13T07:33:00Z","tags":["status","ui settings","info"],"pid":1,"state":"green","message":"Status changed from uninitialized to green - Ready","prevState":"uninitialized","prevMsg":"uninitialized"}
```
### 访问 Kibana
推荐使用`kube-apiserver`方式访问(可以使用证书和rbac等方式进行认证授权),获取访问 URL
- 使用证书登录(生成kubecfg.p12,并将证书下载到本地安装):
```bash
grep 'client-certificate-data' ~/.kube/config | head -n 1 | awk '{print $2}' | base64 -d > kubecfg.crt
grep 'client-key-data' ~/.kube/config | head -n 1 | awk '{print $2}' | base64 -d > kubecfg.key
openssl pkcs12 -export -clcerts -inkey kubecfg.key -in kubecfg.crt -out kubecfg.p12 -name "kubernetes-client"
```
``` bash
$ kubectl cluster-info | grep Kibana
Kibana is running at https://192.168.1.10:8443/api/v1/namespaces/kube-system/services/kibana-logging/proxy
```
浏览器访问 URL:`https://192.168.1.10:8443/api/v1/namespaces/kube-system/services/kibana-logging/proxy`,然后使用`basic-auth`或者`证书` 的方式认证后即可,关于认证可以参考[dashboard文档](dashboard.md)
首次登录需要在`Management` - `Index Patterns` 创建 `index pattern`,可以使用默认的 logstash-* pattern,点击下一步;在 Time Filter field name 下拉框选择 @timestamp; 点击创建Index Pattern后,稍等几分钟就可以在 Discover 菜单看到 ElasticSearch logging 中汇聚的日志;
### 第二部分:日志持久化之静态PV
日志数据是存放于 `Elasticsearch POD`中,但是默认情况下它使用的是`emptyDir`存储类型,所以当 `POD`被删除或重新调度时,日志数据也就丢失了。以下讲解使用`NFS` 服务器手动(静态)创建`PV` 持久化保存日志数据的例子。
#### 配置 NFS
+ 准备一个nfs服务器,如果没有可以参考[nfs-server](nfs-server.md)创建。
+ 配置nfs服务器的共享目录,即修改`/etc/exports`(根据实际网段替换`192.168.1.*`),修改后重启`systemctl restart nfs-server`。
``` bash
/share 192.168.1.*(rw,sync,insecure,no_subtree_check,no_root_squash)
/share/es0 192.168.1.*(rw,sync,insecure,no_subtree_check,no_root_squash)
/share/es1 192.168.1.*(rw,sync,insecure,no_subtree_check,no_root_squash)
/share/es2 192.168.1.*(rw,sync,insecure,no_subtree_check,no_root_squash)
```
#### 使用静态 PV安装 EFK
- 请按实际日志容量需求修改 `es-static-pv/es-statefulset.yaml` 文件中 volumeClaimTemplates 设置的 storage: 4Gi 大小
- 请根据实际nfs服务器地址、共享目录、容量大小修改 `es-static-pv/es-pv*.yaml` 文件中对应的设置
``` bash
# 如果之前已经安装了默认的EFK,请用以下两个命令先删除它
$ kubectl delete -f /etc/kubeasz/manifests/efk/
$ kubectl delete -f /etc/kubeasz/manifests/efk/es-without-pv/
# 安装静态PV 的 EFK
$ kubectl apply -f /etc/kubeasz/manifests/efk/
$ kubectl apply -f /etc/kubeasz/manifests/efk/es-static-pv/
```
+ 目录`es-static-pv` 下首先是利用 NFS服务预定义了三个 PV资源,然后在 `es-statefulset.yaml`定义中使用 `volumeClaimTemplates` 去匹配使用预定义的 PV资源;注意 PV参数:`accessModes` `storageClassName` `storage`容量大小必须两边匹配。
#### 验证安装
+ 1.集群中查看 `pod` `pv` `pvc` 等资源
``` bash
$ kubectl get pods -n kube-system|grep -E 'elasticsearch|fluentd|kibana'
elasticsearch-logging-0 1/1 Running 0 10m
elasticsearch-logging-1 1/1 Running 0 10m
fluentd-es-v2.0.2-6c95c 1/1 Running 0 10m
fluentd-es-v2.0.2-f2xh8 1/1 Running 0 10m
fluentd-es-v2.0.2-pv5q5 1/1 Running 0 10m
kibana-logging-d5cffd7c6-9lz2p 1/1 Running 0 10m
$ kubectl get pv
NAME CAPACITY ACCESS MODES RECLAIM POLICY STATUS CLAIM STORAGECLASS REASON AGE
pv-es-0 4Gi RWX Recycle Bound kube-system/elasticsearch-logging-elasticsearch-logging-0 es-storage-class 1m
pv-es-1 4Gi RWX Recycle Bound kube-system/elasticsearch-logging-elasticsearch-logging-1 es-storage-class 1m
pv-es-2 4Gi RWX Recycle Available es-storage-class 1m
$ kubectl get pvc --all-namespaces
NAMESPACE NAME STATUS VOLUME CAPACITY ACCESS MODES STORAGECLASS AGE
kube-system elasticsearch-logging-elasticsearch-logging-0 Bound pv-es-0 4Gi RWX es-storage-class 2m
kube-system elasticsearch-logging-elasticsearch-logging-1 Bound pv-es-1 4Gi RWX es-storage-class 1m
```
+ 2.网页访问 `kibana`查看具体的日志,如上须等待(约15分钟) `kibana Pod`优化和 Cache 状态页面,达到 `Ready` 状态。
+ 3.登录 NFS Server 查看对应目录和内部数据
``` bash
$ ls /share
es0 es1 es2
```
### 第三部分:日志持久化之动态PV
`PV` 作为集群的存储资源,`StatefulSet` 依靠它实现 POD的状态数据持久化,但是当 `StatefulSet`动态伸缩时,它的 `PVC`请求也会变化,如果每次都需要管理员手动去创建对应的 `PV`资源,那就很不方便;因此 K8S还提供了 `provisioner`来动态创建 `PV`,不仅节省了管理员的时间,还可以根据不同的 `StorageClasses`封装不同类型的存储供 PVC 选用。
+ 此功能需要 `API-SERVER` 参数 `--admission-control`字符串设置中包含 `DefaultStorageClass`,本项目中已经开启。
+ `provisioner`指定 Volume 插件的类型,包括内置插件(如 kubernetes.io/glusterfs)和外部插件(如 external-storage 提供的 ceph.com/cephfs,nfs-client等),以下讲解使用 `nfs-client-provisioner`来动态创建 `PV`来持久化保存 `EFK`的日志数据。
#### 配置 NFS(同上)
确保 `/etc/exports` 配置如下共享目录,并确保 `/share`目录可读可写权限,否则可能因为权限问题无法动态生成 PV的对应目录。(根据实际情况替换IP段`192.168.1.*`)
``` bash
/share 192.168.1.*(rw,sync,insecure,no_subtree_check,no_root_squash)
```
#### 使用动态 PV安装 EFK
- 首先根据[集群存储](../setup/08-cluster-storage.md)创建nfs-client-provisioner
- 然后按实际需求修改 `es-dynamic-pv/es-statefulset.yaml` 文件中 volumeClaimTemplates 设置的 storage: 4Gi 大小
``` bash
# 如果之前已经安装了默认的EFK或者静态PV EFK,请用以下命令先删除它
$ kubectl delete -f /etc/kubeasz/manifests/efk/
$ kubectl delete -f /etc/kubeasz/manifests/efk/es-without-pv/
$ kubectl delete -f /etc/kubeasz/manifests/efk/es-static-pv/
# 安装动态PV 的 EFK
$ kubectl apply -f /etc/kubeasz/manifests/efk/
$ kubectl apply -f /etc/kubeasz/manifests/efk/es-dynamic-pv/
```
+ 首先 `nfs-client-provisioner.yaml` 创建一个工作 POD,它监听集群的 PVC请求,并当 PVC请求来到时调用 `nfs-client` 去请求 `nfs-server`的存储资源,成功后即动态生成对应的 PV资源。
+ `nfs-dynamic-storageclass.yaml` 定义 NFS存储类型的类型名 `nfs-dynamic-class`,然后在 `es-statefulset.yaml`中必须使用这个类型名才能动态请求到资源。
#### 验证安装
+ 1.集群中查看 `pod` `pv` `pvc` 等资源
``` bash
$ kubectl get pods -n kube-system|grep -E 'elasticsearch|fluentd|kibana'
elasticsearch-logging-0 1/1 Running 0 10m
elasticsearch-logging-1 1/1 Running 0 10m
fluentd-es-v2.0.2-6c95c 1/1 Running 0 10m
fluentd-es-v2.0.2-f2xh8 1/1 Running 0 10m
fluentd-es-v2.0.2-pv5q5 1/1 Running 0 10m
kibana-logging-d5cffd7c6-9lz2p 1/1 Running 0 10m
$ kubectl get pv
NAME CAPACITY ACCESS MODES RECLAIM POLICY STATUS CLAIM STORAGECLASS REASON AGE
pvc-50644f36-358b-11e8-9edd-525400cecc16 4Gi RWX Delete Bound kube-system/elasticsearch-logging-elasticsearch-logging-0 nfs-dynamic-class 10m
pvc-5b105ee6-358b-11e8-9edd-525400cecc16 4Gi RWX Delete Bound kube-system/elasticsearch-logging-elasticsearch-logging-1 nfs-dynamic-class 10m
$ kubectl get pvc --all-namespaces
NAMESPACE NAME STATUS VOLUME CAPACITY ACCESS MODES STORAGECLASS AGE
kube-system elasticsearch-logging-elasticsearch-logging-0 Bound pvc-50644f36-358b-11e8-9edd-525400cecc16 4Gi RWX nfs-dynamic-class 10m
kube-system elasticsearch-logging-elasticsearch-logging-1 Bound pvc-5b105ee6-358b-11e8-9edd-525400cecc16 4Gi RWX nfs-dynamic-class 10m
```
+ 2.网页访问 `kibana`查看具体的日志,如上须等待(约15分钟) `kibana Pod`优化和 Cache 状态页面,达到 `Ready` 状态。
+ 3.登录 NFS Server 查看对应目录和内部数据
``` bash
$ ls /share # 可以看到类似如下的目录生成
kube-system-elasticsearch-logging-elasticsearch-logging-0-pvc-50644f36-358b-11e8-9edd-525400cecc16
kube-system-elasticsearch-logging-elasticsearch-logging-1-pvc-5b105ee6-358b-11e8-9edd-525400cecc16
```
### 第四部分:日志自动清理
我们知道日志都存储在elastic集群中,且日志每天被分割成一个index,例如:
```
/ # curl elasticsearch-logging:9200/_cat/indices?v
health status index uuid pri rep docs.count docs.deleted store.size pri.store.size
green open logstash-2019.04.29 ejMBlRcJQvqK76xIerenYg 5 1 69864 0 65.9mb 32.9mb
green open logstash-2019.04.28 hacNCuQVTQCUL62Sl8avOA 5 1 17558 0 21.3mb 10.6mb
green open .kibana_1 MVjF8lQeRDeKfoZcDhA93A 1 1 2 0 30.1kb 15kb
green open logstash-2019.05.05 m2aD8X9RQ3u48DvVq18x_Q 5 1 31218 0 34.4mb 17.2mb
green open logstash-2019.05.01 66OjwM5wT--DZaVfzUdXYQ 5 1 50610 0 54.6mb 27.1mb
green open logstash-2019.04.30 L3AH165jT6izjHHa5L5g0w 5 1 56401 0 55.5mb 27.8mb
...
```
因此 EFK 中的日志自动清理,只要定时去删除 es 中的 index 即可,如下命令
```
$ curl -X DELETE elasticsearch-logging:9200/logstash-xxxx.xx.xx
```
基于 alpine:3.8 创建镜像`es-index-rotator` [查看Dockerfile](../../dockerfiles/es-index-rotator/Dockerfile),然后创建一个cronjob去完成清理任务
```
$ kubectl apply -f /etc/kubeasz/manifests/efk/es-index-rotator/
```
#### 验证日志清理
- 查看 cronjob
```
$ kubectl get cronjob -n kube-system
NAME SCHEDULE SUSPEND ACTIVE LAST SCHEDULE AGE
es-index-rotator 3 1 */1 * * False 0 19h 20h
```
- 查看日志清理情况
```
$ kubectl get pod -n kube-system |grep es-index-rotator
es-index-rotator-1557507780-7xb89 0/1 Completed 0 19h
# 查看日志,可以了解日志清理情况
$ kubectl logs -n kube-system es-index-rotator-1557507780-7xb89 es-index-rotator
```
HAVE FUN!
### 参考
1. [EFK 配置](https://github.com/kubernetes/kubernetes/tree/master/cluster/addons/fluentd-elasticsearch)
1. [nfs-client-provisioner](https://github.com/kubernetes-incubator/external-storage/tree/master/nfs-client)
1. [persistent-volume](https://kubernetes.io/docs/concepts/storage/persistent-volumes/#persistentvolumeclaims)
1. [storage-classes](https://kubernetes.io/docs/concepts/storage/storage-classes/)
================================================
FILE: docs/deprecated/gitlab/app.yaml.md
================================================
## 3.3 K8S 应用部署模板 app.yaml
以下示例配置仅做参考,描述一个简单 java spring boot项目的 k8s 部署文件模板;在实际部署前,CI/CD流程中会对变量做替换。详见 [gitlab-ci.yml文件](gitlab-ci.yml.md)。
``` bash
cat > .ci/app.yaml << EOF
---
apiVersion: v1
kind: Namespace
metadata:
name: PROJECT_NS
---
apiVersion: v1
kind: Secret
metadata:
name: harborkey1
namespace: PROJECT_NS
data:
#待替换的变量DOCKER_KEY,参考 docs/guide/harbor.md#k8s%E4%B8%AD%E4%BD%BF%E7%94%A8harbor
.dockerconfigjson: DOCKER_KEY
type: kubernetes.io/dockerconfigjson
---
apiVersion: apps/v1
kind: Deployment
metadata:
name: APP_NAME
namespace: PROJECT_NS
spec:
replicas: APP_REP
template:
metadata:
labels:
run: APP_NAME
spec:
containers:
- name: APP_NAME
image: ProjectImage
env:
# 设置java的时区
- name: TZ
value: "Asia/Shanghai"
resources:
limits:
cpu: 500m
memory: 1600Mi
requests:
cpu: 200m
memory: 800Mi
ports:
- containerPort: 8080
imagePullSecrets:
- name: harborkey1
---
apiVersion: v1
kind: Service
metadata:
labels:
run: APP_NAME
name: APP_NAME
namespace: PROJECT_NS
spec:
ports:
- port: 80
protocol: TCP
targetPort: 8080
selector:
run: APP_NAME
sessionAffinity: None
---
apiVersion: networking.k8s.io/v1beta1
kind: Ingress
metadata:
name: APP_NAME-ingress
namespace: PROJECT_NS
spec:
rules:
- host: AppDomain
http:
paths:
- path: /AppPath
backend:
serviceName: APP_NAME
servicePort: 80
EOF
```
================================================
FILE: docs/deprecated/gitlab/config.sh.md
================================================
## 3.2 环境配置替换 config.sh
首先应用开发人员需要整理在不同环境(测试环境/生产环境)的配置参数,并在源代码中约定好替换的名称(如db_host, db_usr);然后用户必须在项目gitlab web界面(“Settings”>"CI/CD">"Variables")配置变量;最后根据gitlab-ci.yml文件定义CI/CD执行的需要,编写如下简单变量替换shell脚本;该shell脚本分别在测试环境打包阶段(beta-build)和生产环境打包阶段(prod-build)阶段运行。
以下脚本仅作示例,实际应根据项目需要增加/修改需替换变量名称与对应源代码中的配置文件
``` bash
cat > .ci/config.sh << EOF
#!/bin/bash
#set -o verbose
#set -o xtrace
beta_config() {
sed -i \
-e "s/db_host/$BETA_DB_HOST/g" \
-e "s/db_usr/$BETA_DB_USR/g" \
-e "s/db_pwd/$BETA_DB_PWD/g" \
example-web/src/main/resources/config/datasource.properties # 项目源码的配置文件
sed -i \
-e "s/redis_host/$BETA_REDIS_HOST/g" \
-e "s/redis_port/$BETA_REDIS_PORT/g" \
-e "s/redis_pwd/$BETA_REDIS_PWD/g" \
example-web/src/main/resources/config/redis.properties # 项目源码的配置文件
}
prod_config() {
sed -i \
-e "s/db_host/$PROD_DB_HOST/g" \
-e "s/db_usr/$PROD_DB_USR/g" \
-e "s/db_pwd/$PROD_DB_PWD/g" \
example-web/src/main/resources/config/datasource.properties
sed -i \
-e "s/redis_host/$PROD_REDIS_HOST/g" \
-e "s/redis_port/$PROD_REDIS_PORT/g" \
-e "s/redis_pwd/$PROD_REDIS_PWD/g" \
example-web/src/main/resources/config/redis.properties
}
if [[ "$CI_JOB_STAGE" == "beta-build" ]];then
beta_config
elif [[ "$CI_JOB_STAGE" == "prod-build" ]];then
prod_config
else
echo "error: undefined CI_JOB_STAGE!"
fi
EOF
```
================================================
FILE: docs/deprecated/gitlab/gitlab-ci.yml.md
================================================
## 3.1 配置 gitlab-ci.yml
示例应用搭建 CI/CD 流水线的背景需求
- 应用测试环境部署在本地k8s平台,生产环境部署在阿里云上k8s平台
- 应用的多个feature分支可以并行测试
- 对于即将发布的release分支,本地提供封版测试环境,阿里云上提供UAT测试环境
以下示例配置为个人经验总结,仅供参考,可以根据自己的理解和项目需要不断优化完善;总体来说 gitlab-ci.yml 配置很丰富,基本上能够满足各种个性化的CI/CD流程需要。
``` bash
$ cat > .ci/gitlab-ci.yml << EOF
variables: ### 定义全局变量 http://gitlab.test.com/help/ci/variables/README.md
PROJECT_NS: '$CI_PROJECT_NAMESPACE-$CI_JOB_STAGE' # 定义项目命名空间,对应k8s的namespace
APP_NAME: '$CI_PROJECT_NAME-$CI_COMMIT_REF_SLUG' # 使用项目名和git提交信息作为应用名
IMAGE_NAME: '$CI_PROJECT_NAMESPACE-$CI_PROJECT_NAME:$CI_PIPELINE_ID' # 定义镜像名称
stages: ### 定义ci各阶段
- beta-build # beta环境编译打包
- beta-deploy # beta环境部署
- beta-feature-delete # beta环境feature分支手动删除
- prod-build # prod环境编译打包
- prod-uat-deploy # prod-uat环境部署
- prod-deploy # prod环境部署
- prod-rollback # prod回滚
job_beta_build:
stage: beta-build # beta环境编译打包
tags:
- build-shell # 定义带`build-shell`标签的runner可以运行该job
only: # 定义只在如下分支或者tag运行该job
- master
- develop
- /^feature.*$/
- release
#when: manual # 调试阶段可以先手动,后续可以注释掉以自动运行
script: ### runner上运行的脚本
- bash .ci/config.sh # 不同环境配置替换,后文详解 config.sh
- mvn clean install -Dmaven.test.skip=true -U # mvn 编译,可以去runner 虚机上手动执行编译测试
- mv example-web/target/*.jar dockerfiles/ # 把mvn生成的xxx.jar移动到dockerfiles目录下
- export IMAGE=`echo $IMAGE_NAME | sed 's/\//-/g'` # 转换镜像名,例:mygroup/java/example:172 >> mygroup-java-example:172
- cd dockerfiles && docker build -t $BETA_HARBOR/example/$IMAGE . # 创建 docker 镜像
- docker login -u $BETA_HARBOR_USR -p $BETA_HARBOR_PWD $BETA_HARBOR # 登录到内部镜像仓库 harbor,并推送
- docker push $BETA_HARBOR/example/$IMAGE
- docker logout $BETA_HARBOR
job_push_beta: ### 推送到beta环境,可以推送不同分支 develop, feature-1, ...>
stage: beta-deploy # 可以做到多分支同时测试,甚至最后的release分支也要在beta封版测试
tags:
- beta-shell # 定义带`beta-shell`标签的runner可以运行该job
only:
- master
- develop
- /^feature.*$/
- release
when: manual # 调试阶段可以先手动,后续可以注释掉以自动运行
variables:
BETA_EXP_Domain: '$CI_COMMIT_REF_SLUG.example.test.com' # job内部变量,指定该应用在beta环境的 ingress 域名
script:
- export IMAGE=`echo $IMAGE_NAME | sed 's/\//-/g'` # 转换 $IMAGE_NAME 中可能的 / 字符
- export PROJECT_NS=`echo $PROJECT_NS | sed 's/\//-/g'` # 转换命名空间中可能有的 / 字符
# 替换beta环境的参数配置
- sed -i "s/PROJECT_NS/$PROJECT_NS/g" .ci/app.yaml ### app.yaml 即k8s的部署模板文件,详见后面 app.yaml.md 文档,注意这里的变量有的来自>
- sed -i "s/APP_NAME/$APP_NAME/g" .ci/app.yaml # gitlab 系统变量, 有的是在项目 CI/CD 设置里面用户定义的变量
- sed -i "s/APP_REP/$BETA_APP_REP/g" .ci/app.yaml
- sed -i "s/AppDomain/$BETA_EXP_Domain/g" .ci/app.yaml
- sed -i "s/ProjectImage/$BETA_HARBOR\/example\/$IMAGE/g" .ci/app.yaml
- sed -i "s/DOCKER_KEY/$BETA_KEY/g" .ci/app.yaml # DOCKER_KEY 为k8s平台能从镜像仓库pull所需的认证信息,详见harbor文档
#
- mkdir -p /opt/kube/$PROJECT_NS/$APP_NAME # 在runner:beta-shell虚机本地创建应用配置目录,调试检查用
- cp -f .ci/app.yaml /opt/kube/$PROJECT_NS/$APP_NAME
- kubectl --kubeconfig=/etc/.beta/config apply -f .ci/app.yaml # 部署应用(runner虚机上预先配置了kubectl权限执行测试k8s平台)
job_delete_beta: ### 多测试环境并行部署在beta k8s平台,feature分支测试完毕后删除代码分支,
stage: beta-feature-delete # 同时需要删除该分支在k8s平台上的部署,可以由开发人员自行执行该job删除
tags:
- beta-shell
only:
- /^feature.*$/
when: manual
script:
- export PROJECT_NS=`echo $PROJECT_NS | sed 's/\//-/g'`
- kubectl --kubeconfig=/etc/.beta/config delete deploy,svc,ing $APP_NAME -n $PROJECT_NS
job_prod_build: ### prod环境编译打包,这里prod环境我们使用阿里云上的K8S
stage: prod-build # 阿里云k8s平台上运行的uat环境和正式环境都使用本次打包镜像
tags:
- build-shell
only: # 仅master和release分支可以执行该job
- master
- release
#when: manual
script:
- bash .ci/config.sh # config.sh 会执行替换生产环境的变量
- mvn clean install -Dmaven.test.skip=true -U # mvn 编译,可以去runner 虚机上手动执行编译测试
- mv example-web/target/*.jar dockerfiles/ # 把mvn生成的xxx.jar移动到dockerfiles目录下
- export IMAGE=`echo $IMAGE_NAME | sed 's/\//-/g'`
- cd dockerfiles && docker build -t $PROD_HARBOR/example/$IMAGE .
- docker login -u $PROD_HARBOR_USR -p $PROD_HARBOR_PWD $PROD_HARBOR
- docker push $PROD_HARBOR/example/$IMAGE
- docker logout $PROD_HARBOR
job_push_prod_uat: ### 部署至阿里云uat环境
stage: prod-uat-deploy
tags:
- prod-shell
when: manual
only: # 仅master和release分支可以执行该job
- master
- release
variables:
PROD_EXP_Domain: 'example-uat.xxxx.com' # job内部变量,指定该应用在uat环境的 ingress 域名
script:
- export IMAGE=`echo $IMAGE_NAME | sed 's/\//-/g'`
- export PROJECT_NS=`echo $PROJECT_NS | sed 's/\//-/g'`
# 替换prod环境的参数配置
- sed -i "s/PROJECT_NS/$PROJECT_NS/g" .ci/app.yaml
- sed -i "s/APP_NAME/$CI_PROJECT_NAME/g" .ci/app.yaml
- sed -i "s/APP_REP/1/g" .ci/app.yaml
- sed -i "s/AppDomain/$PROD_EXP_Domain/g" .ci/app.yaml
- sed -i "s/ProjectImage/$PROD_HARBOR\/example\/$IMAGE/g" .ci/app.yaml
- sed -i "s/DOCKER_KEY/$PROD_KEY/g" .ci/app.yaml
#
- mkdir -p /opt/kube/$PROJECT_NS/$APP_NAME
- cp -f .ci/app.yaml /opt/kube/$PROJECT_NS/$APP_NAME
- kubectl --kubeconfig=/etc/.aliyun/config apply -f .ci/app.yaml
job_push_prod_release: ### 部署至阿里云正式环境
stage: prod-deploy
tags:
- prod-shell
when: manual
only: # 仅master和release分支可以执行该job
- master
- release
variables:
PROD_EXP_Domain: 'example.xxxx.com' # 指定该应用在阿里云正式环境的 ingress 域名
script:
- export IMAGE=`echo $IMAGE_NAME | sed 's/\//-/g'`
- export PROJECT_NS=`echo $PROJECT_NS | sed 's/\//-/g'`
# 替换prod环境的参数配置
- sed -i "s/PROJECT_NS/$PROJECT_NS/g" .ci/app.yaml
- sed -i "s/APP_NAME/$CI_PROJECT_NAME/g" .ci/app.yaml
- sed -i "s/APP_REP/$PROD_APP_REP/g" .ci/app.yaml
- sed -i "s/AppDomain/$PROD_EXP_HOST/g" .ci/app.yaml
- sed -i "s/ProjectImage/$PROD_HARBOR\/example\/$IMAGE/g" .ci/app.yaml
- sed -i "s/DOCKER_KEY/$PROD_KEY/g" .ci/app.yaml
#
- mkdir -p /opt/kube/$PROJECT_NS/$APP_NAME
- cp -f .ci/app.yaml /opt/kube/$PROJECT_NS/$APP_NAME
- kubectl --kubeconfig=/etc/.aliyun/config apply -f .ci/app.yaml
1/3 rollback: ### 定义生产环境回退job
stage: prod-rollback
tags:
- prod-shell
when: manual
only:
- master
- /^release.*$/
variables:
PROJECT_NS: '$CI_PROJECT_NAMESPACE-prod-deploy' # 定义job内变量覆盖全局变量设置
script:
- kubectl --kubeconfig=/etc/.aliyun/config -n $PROJECT_NS rollout undo deployment $CI_PROJECT_NAME --to-revision=1
2/3 rollback:
stage: prod-rollback
tags:
- prod-shell
when: manual
only:
- master
- /^release.*$/
variables:
PROJECT_NS: '$CI_PROJECT_NAMESPACE-prod-deploy' # 定义job内变量覆盖全局变量设置
script:
- kubectl --kubeconfig=/etc/.aliyun/config -n $PROJECT_NS rollout undo deployment $CI_PROJECT_NAME --to-revision=2
3/3 rollback:
stage: prod-rollback
tags:
- prod-shell
when: manual
only:
- master
- /^release.*$/
variables:
PROJECT_NS: '$CI_PROJECT_NAMESPACE-prod-deploy' # 定义job内变量覆盖全局变量设置
script:
- kubectl --kubeconfig=/etc/.aliyun/config -n $PROJECT_NS rollout undo deployment $CI_PROJECT_NAME --to-revision=3
EOF
```
恭喜终于看完 gitlab-ci.yml 文件,怎么样,是不是一千个人可以写出一万个 CI/CD 流程 :)
================================================
FILE: docs/deprecated/gitlab/gitlab-install.md
================================================
# 安装 gitlab [Deprecated]
gitlab 是深受企业用户喜爱的基于 git 的代码管理系统。安装 gitlab 最理想的方式是利用 gitlab charts 部署到 k8s 集群上,但此方式还未成熟,期待后续推出更成熟稳定版本;本文使用 Docker 方式安装 gitlab:
- 环境:Ubuntu 16.04,虚机内存/CPU/存储请根据实际使用情况配置,一般`4C/8G/200G`足够
- 安装 docker: 18.06.1-ce
## 准备启动脚本
``` bash
$ cat > gitlab-setup.sh << EOF
#!/bin/bash
# 注意:设置 gitlab_shell_ssh_port 是为了后续可以使用 SSH 方式访问你的项目
docker run --detach \\
--hostname gitlab.test.com \\
--env GITLAB_OMNIBUS_CONFIG="external_url 'http://gitlab.test.com/'; gitlab_rails['gitlab_shell_ssh_port'] = 6022;" \\
--publish 443:443 --publish 80:80 --publish 6022:22 \\
--name gitlab \\
--restart always \\
--volume /srv/gitlab/config:/etc/gitlab \\
--volume /srv/gitlab/logs:/var/log/gitlab \\
--volume /srv/gitlab/data:/var/opt/gitlab \\
docker.mirrors.ustc.edu.cn/gitlab/gitlab-ce:11.2.2-ce.0
EOF
```
执行启动脚本:`sh gitlab-setup.sh` 执行成功后,等待数分钟可以看到
```
$ docker ps -a
CONTAINER ID IMAGE COMMAND CREATED STATUS PORTS NAMES
4f9d5f97f494 docker.mirrors.ustc.edu.cn/gitlab/gitlab-ce:11.2.2-ce.0 "/assets/wrapper" 9 minutes ago Up 9 minutes (healthy) 0.0.0.0:80->80/tcp, 0.0.0.0:443->443/tcp, 0.0.0.0:6022->22/tcp gitlab
```
## 配置 gitlab
```
$ docker exec -it gitlab vi /etc/gitlab/gitlab.rb
```
请阅读后修改(因为前面docker run 已经指定了必要参数,可以不修改,后续有需要再修改),修改保存以后需要重启容器
```
$ docker restart gitlab
```
## 首次访问 gitlab
使用域名`gitlab.test.com`或者该主机 IP 首次登录时会要求设置 root 用户的密码,完成后就可以用 root 和新设密码登录;然后按需创建 Group, User, Projects等,还有相关配置。
## 备份数据
无论是企业、组织、个人都十分重视代码资产,之前我们的 gitlab 安装是单机版的,虽然可以有硬盘 raid 等保护,还有是丢失 gitlab 数据和配置的风险,因此我们有必要再做一些备份操作。这里利用 crontab 定期执行 rsync 命令备份到其他服务器。
``` bash
# 创建备份脚本
cat > /root/gitlab-backup.sh << EOF
#!/bin/bash
# 请事先配置 gitlab 服务器到备份服务器的免密码 ssh 登录
rsync -av --delete /srv/gitlab/config '-e ssh -l root' 192.168.1.xx:/backup_gitlab/config
rsync -av --delete /srv/gitlab/data '-e ssh -l root' 192.168.1.xx:/backup_gitlab/data
EOF
# 创建并应用 crontab
cat > /etc/cron.d/gitlab-backup << EOF
## 每3个小时同步备份一次,具体根据需要修改
11 */3 * * * root bash /root/gitlab-backup.sh > /root/gitlab/sync.log 2>&1
EOF
```
如果 gitlab 服务器真的出现不可恢复的故障,丢失数据,那么至少保留有3小时前的备份,利用备份的文件,同样再用 docker 挂载 volume的方式运行,这样就可以恢复原 gitlab 服务运行。
## 升级 gitlab
因为前面使用了 docker 方式安装,因此 gitlab 升级很方便。
- 升级前停止/删除容器:`$ docker stop gitlab && docker rm gitlab`
- 如上节执行备份数据
- 修改 gitlab-setup.sh 指定新的版本,执行该脚本
## 参考
- 1.[Install GitLab with Docker](https://docs.gitlab.com/omnibus/docker/)
================================================
FILE: docs/deprecated/gitlab/gitlab-runner.md
================================================
## 安装 Gitlab Runner
Gitlab Runner 安装方式有很多,可以参考官网文档 https://docs.gitlab.com/runner/install/; 这里为了方便直接在 Ubuntu1604 上 apt方式安装了。
``` bash
$ curl -L https://packages.gitlab.com/install/repositories/runner/gitlab-runner/script.deb.sh | sudo bash
$ apt-get install gitlab-runner
```
安装完成后就可以看到服务运行状态:`systemctl status gitlab-runner`,因为示例的java spring boot 项目需要,该虚机上要同时安装和配置 mvn 和 docker 环境。
注意:需要通过 gitlab-runner shell 执行docker镜像打包等命令,因此要修改下 gitlab-runner 服务运行用户:"--user" "gitlab-runner" 改成 "--user" "root"
``` bash
vi /etc/systemd/system/gitlab-runner.service
[Unit]
Description=GitLab Runner
After=syslog.target network.target
ConditionFileIsExecutable=/usr/lib/gitlab-runner/gitlab-runner
[Service]
StartLimitInterval=5
StartLimitBurst=10
ExecStart=/usr/lib/gitlab-runner/gitlab-runner "run" "--working-directory" "/home/gitlab-runner" "--config" "/etc/gitlab-runner/config.toml" "--service" "gitlab-runner" "--syslog" "--user" "gitlab-runner"
Restart=always
RestartSec=120
[Install]
WantedBy=multi-user.target
```
以上配置改完保存后执行服务重启:
``` bash
$ systemctl daemon-reload
$ systemctl restart gitlab-runner
```
### 注册 Runner
运行命令`gitlab-runner register`后进入交互式界面,按照提示注册,关注下面注释内容。
``` bash
$ gitlab-runner register
Runtime platform arch=amd64 os=linux pid=3269 revision=8bb608ff version=11.7.0
Running in system-mode.
Please enter the gitlab-ci coordinator URL (e.g. https://gitlab.com/):
http://gitlab.test.com/ ### 这里输入gitlab URL
Please enter the gitlab-ci token for this runner:
tzfBWCX-tQxxo1TCcoeJ ### 这里输入项目的token
Please enter the gitlab-ci description for this runner:
[k8s403]: build-shell ### 命名此runner
Please enter the gitlab-ci tags for this runner (comma separated):
build-shell ### 重要:指定runner tag,在gitlab-ci.yml文件中定义该tag才能执行 mvn编译/docker打包的任务
Registering runner... succeeded runner=tzfBWCX-
Please enter the executor: docker-ssh, parallels, shell, ssh, virtualbox, kubernetes, docker, docker+machine, docker-ssh+machine:
shell ### 作为入门,在虚机上运行shell命令方式,方便调试
Runner registered successfully. Feel free to start it, but if it's running already the config should be automatically reloaded!
```
另外根据示例项目的ci/cd流程,还需要注册标签 tag 为 `beta-shell` 和 `prod-shell` 的两个 Runner; 注意这两个runner所在虚机需要分别配置测试k8s和生产k8s的 kubeconfig 配置,这样 Runner 才能通过 shell 脚本执行 kubectl apply 命令部署应用。三个 Runner 注册成功后可以看到如图:

================================================
FILE: docs/deprecated/gitlab/readme.md
================================================
# Gitlab CI/CD 基础
Gitlab-ci 兼容 travis ci 格式,也是最流行的 CI 工具之一;本文讲解利用 gitlab, gitlab-runner, docker, harbor, kubernetes 等流行开源工具搭建一个自动化CI/CD流水线;示例配置以简单实用为原则,暂时没有选用 dind(docker in dockers)打包、gitlab Auto DevOps 等方式。一个最简单的流水线如下:
- 代码提交 --> 镜像构建 --> 部署测试 --> 部署生产
## 0.前提条件
- 正常运行的 gitlab,[安装 gitlab 文档](gitlab-install.md)
- 正常运行的容器仓库,[安装 Harbor 文档](../harbor.md)
- 正常运行的 k8s,可以本地自建 k8s 集群,也可以使用公有云 k8s 集群
- 若干虚机运行 gitlab-runner: 运行自动化流水线任务 pipeline job
- 了解代码管理流程 gitflow 等
## 1.准备测试项目代码
假设你要开发一个 spring boot 项目;先登录你的 gitlab 账号,创建项目,上传你的代码;项目根目录看起来如下:
```
-rw-r--r-- 1 root root 44 Jan 2 16:38 eclipse.bat
drwxr-xr-x 8 root root 4096 Jan 7 15:29 .git/
-rw-r--r-- 1 root root 276 Jan 7 08:44 .gitignore
drwxr-xr-x 3 root root 4096 Jan 7 08:44 example-api/
drwxr-xr-x 3 root root 4096 Jan 7 08:44 example-biz/
drwxr-xr-x 3 root root 4096 Jan 2 16:38 example-dal/
drwxr-xr-x 3 root root 4096 Jan 2 16:38 example-web/
-rw-r--r-- 1 root root 54 Jan 2 16:38 install.bat
-rw-r--r-- 1 root root 10419 Jan 2 16:38 pom.xml
```
传统做法是在本地配置好相关环境后使用 mvn 编译生成jar包,然后测试运行jar;这里我们要把应用打包成 docker 镜像,并创建 CI/CD 流水线:如下示例,在项目根目录新增创建2个文件夹及相关文件
``` bash
dockerfiles ### 新增文件夹用来 docker 镜像打包
└── Dockerfile # 定义 docker 镜像
.ci ### 新增文件夹用来存放 CI/CD 相关内容
├── app.yaml # k8s 平台的应用部署文件
├── config.sh # 配置替换脚本
└── gitlab-ci.yml # gitlab-ci 的主配置文件
```
## 2.准备 docker 镜像描述文件 Dockerfile
我们把 Dockerfile 放在独立目录下,java spring boot 应用可以这样写:
``` bash
cat > dockerfiles/Dockerfile << EOF
FROM openjdk:8-jdk-alpine
VOLUME /tmp
COPY *.jar app.jar # 这里 *.jar 包就是后续在cicd pipeline 过程中 mvn 生成的jar包移动到此目录
ENTRYPOINT ["java","-Djava.security.egd=file:/dev/./urandom","-jar","/app.jar"]
EOF
```
## 3.准备 CI/CD 相关脚本和文件
装完 gitlab 后使用浏览器登录gitlab,很容易找到帮助文档,里面有介绍gitlab-ci的内容(文档权威、详细!请多多阅读~ 随着CI/CD流程的深入,部分内容也可以回来查阅),先看如下文档(假设你本地gitlab使用域名`gitlab.test.com`)
- 文档首页 http://gitlab.test.com/help
- gitlab-ci 基本概念 http://gitlab.test.com/help/ci/README.md
- variables 变量 http://gitlab.test.com/help/ci/variables/README.md
目录`.ci`下面的三个文件`app.yaml`, `config.sh`, `gitlab-ci.yml`是互相关联的;gitlab-ci.yml 文件中会调用到另外两个文件;文件之间又通过一些变量定义联系,流程中用到的变量大致可以分为三种:
- 第一种是gitlab自身预定义变量(比如项目名: CI_PROJECT_NAME,流水线ID: CI_PIPELINE_ID);无需更改;
- 第二种是在gitlab-ci.yml文件中定义的变量,一般是少量的自定义变量;按需少量改动;
- 第三种是用户可以在项目web界面配置的变量:“Settings”>"CI/CD">"Variables",本示例项目用到该类型变量举例:
|变量|值|注解|
|:-|:-|:-|
|BETA_APP_REP|1|beta环境应用副本数|
|BETA_DB_HOST|1.1.1.1:3306|beta环境应用连接数据库主机|
|BETA_DB_PWD|xxxx|beta环境数据库连接密码|
|BETA_DB_USR|xxxx|beta环境数据库连接用户|
|BETA_REDIS_HOST|1.1.1.2|beta环境redis主机|
|BETA_REDIS_PORT|6379|beta环境redis端口|
|BETA_REDIS_PWD|xxxx|beta环境redis密码|
|BETA_HARBOR|1.1.1.3|beta环境镜像仓库地址|
|BETA_HARBOR_PWD|xxxx|beta环境镜像仓库密码|
|BETA_HARBOR_USR|xxxx|beta环境镜像仓库用户|
|PROD_APP_REP|2|prod环境应用副本数|
|PROD_DB_HOST|2.2.2.1:3306|prod环境应用连接数据库主机|
|PROD_DB_PWD|xxxx|prod环境数据库连接密码|
|PROD_DB_USR|xxxx|prod环境数据库连接用户|
|PROD_REDIS_HOST|2.2.2.2|prod环境redis主机|
|PROD_REDIS_PORT|6379|prod环境redis端口|
|PROD_REDIS_PWD|xxxx|prod环境redis密码|
|PROD_HARBOR|2.2.2.3|prod环境镜像仓库地址|
|PROD_HARBOR_PWD|xxxx|prod环境镜像仓库密码|
|PROD_HARBOR_USR|xxxx|prod环境镜像仓库用户|
|...|...|根据项目需要自行添加设置|
掌握了以上基础知识,可以开始以下三个任务:
- 3.1[配置 gitlab-ci.yml](gitlab-ci.yml.md), 整个CI/CD的主配置文件,定义所有的CI/CD阶段和每个阶段的任务
- 3.2[配置 config.sh](config.sh.md),根据不同分支/环境替换不同的应用程序变量(对应上述第三种变量)
- 3.3[配置 app.yaml](app.yaml.md),K8S应用部署简单模板,替换完成后可以部署到测试/生产的K8S平台上
## 4.为项目配置 CI/CD 及创建 RUNNER
使用浏览器访问gitlab,登录后,在项目页面进行配置,如图:

- 在 General pipelines 中配置 Custom CI config path 为 .ci/gitlab-ci.yml
- 在 Variables 中配置需要用到的变量
- 在 Runners 中配置注册 gitlab-runner 实例(runner 就是用来自动执行ci job的),点进去后如图:

- 作为入门,先来手动创建 specific Runner,后续同样可以创建 Group Runners/Shared Runners,使用起来更方便;本文档暂不涉及在 kubernetes 自动创建 Runner
- 按照官网文档安装 Gitlab Runner,参考[文档](gitlab-runner.md)
- 记下 gitlab URL, 项目 token,注册 Runner 时要用到
- 在 Gitlab Runner 注册本项目
## 5.提交代码测试 CI/CD Pipelines
终于经过 1~4 步骤把示例项目的CI/CD 流水线创建出来了,是时候试试提交代码测试下成果了;别担心,初次 CI/CD job执行一般都会失败的:) 好在现在你已经基本了解了所有CI/CD流程与配置,失败了就查看错误日志一一排除。另外因为采用虚机安装 Runner 执行 shell 脚本的方式执行 ci job,我们始终可以登录虚机以手动执行 shell 脚本的方式调试,这对于初学来说很有帮助。查看 CI/CD 执行情况如图:

## 6.gitlab-ci 安全实践
现在为止 CICD Pipelines 已经可以跑通了,甚至稍微修改下 gitlab-ci.yml 配置,项目代码每一次提交后可以自动执行`编译`、`打包`、`部署测试`、`部署生产`等等工作;也许你还没来得及慢慢体会这顺畅的感觉,赶紧先踩个刹车,控制下车速;因为现在你需要考虑 gitlab-ci 的安全配置了,这很重要!
首先 gitlab 项目的基本安全就是项目成员控制,访问项目的权限分为:所有者(Owner),维护者(Maintainer),开发者(Developer),报告者(Reporter),访客(Guest);详细的权限介绍请查阅官方文档,这里简单地介绍两类权限:所有者和维护者属于`特权用户`,开发者属于`普通用户`,他们应该具有如下权限区分:
- 特权用户对整个项目负责,包括项目代码开发、配置管理、CI流程、测试环境、生产环境等
- 特权用户可以提交代码到所有分支包括 master/release 分支,执行所有 ci job
- 普通用户只负责对应项目模块代码开发、不接触程序配置、只能访问测试环境
- 普通用户只能提交代码到 develop/feature 分支,只能执行这两个分支的 ci job
以下的安全实践配置作为个人经验分享,仅作参考;如果你的项目需要更高的安全性,请阅读 gitlab-ci 官方相关文档,尝试找到属于自己的最佳实践。
- 正确设置项目成员(Settings > Members),严格限制项目维护者(Maintainer)人数,大部分应该作为开发者(Developer)提交代码
- 配置项目受保护分支/受保护标签,一般把master/release分支设置成受保护分支,限制只有维护者才能在保护分支commit和merge,从而限制只有维护者才能执行部署生产的 ci job,http://gitlab.test.com/help/user/project/protected_branches.md
- 配置受保护的变量,受保护的变量只在受保护分支和受保护tag的pipeline中可见,防止生产环境配置参数泄露,http://gitlab.test.com/help/ci/variables/README#protected-variables
- 配置受保护的Runner,只能执行受保护分支上的 ci jobs
- CICD Pipelines 中发布生产的任务请设置手动执行,同样生产的回退任务设置手动执行
================================================
FILE: docs/deprecated/jenkins.md
================================================
# Jenkins CI/CD
**此文档已过期,仅留档**
## 前言
本文档介绍如何快速通过K8s集群实现Jenkins 动态Slave CI/CD流程。
## 开始之前
在开始之前需要准备以下环境:
- k8s dns组件
参考文档:[kubedns](kubedns.md)
- helm
为了简化部署,通过helm来安装Jenkins,可参考文档:[helm](helm.md)
- 持久化存储
这里使用**NFS**演示,参考文档:[cluster-storage](../setup/08-cluster-storage.md)。
如果k8s集群是部署在公有云,也可使用厂商的NAS等存储方案,项目中已集成支持阿里云NAS,其他的方案参考相关厂商文档
- Ingress Controller(nginx-ingress/traefik)
默认是通过Ingress访问Jenkins,因此需要安装一种`Ingress Controller`。参考文档:[ingress](ingress.md)
- Gitlab 代码管理仓库
用于提交代码后自动触发CI, 目前项目中还没有相关内容,可[参考官网](https://about.gitlab.com/installation/)进行安装。
## 安装Jenkins
执行以下命令快速安装:
```
helm install manifests/jenkins/ --name jenkins
```
如果通过/etc/kubeasz/roles/helm/helm.yml安装的helm,安装过程会出现如下错误
``` bash
E0703 08:40:22.376225 19888 portforward.go:331] an error occurred forwarding 41655 -> 44134: error forwarding port 44134 to pod 5098414beaaa07140a4ba3240690b1ce989ece01e5db33db65eec83bd64bdedf, uid : exit status 1: 2018/07/03 08:40:22 socat[19991] E write(5, 0x1aec120, 3424): Connection reset by peer
Error: transport is closing
```
请执行以下命令快速安装进行修复:
```
helm install --tls manifests/jenkins/ --name jenkins
```
由于初始化过程中,默认安装指定的插件,所以启动较慢,大概5-10分钟左右就可以启动完成了。
部分默认配置说明:
**注**:以下配置都定义在`manifests/jenkins/values.yaml`文件中。
| 字段 |
说明 |
默认值 |
| InstallPlugins |
初始化安装的插件 |
- kubernetes:1.6.3
- workflow-aggregator:2.5
- workflow-job:2.21
- credentials-binding:1.16
- git:3.9.0
- gitlab:1.5.6
|
| HostName |
Ingress访问入口 |
jenkins.local.com |
| AdminPassword |
admin登录密码 |
admin |
| UpdateCenter |
插件下载镜像地址 |
https://mirrors.tuna.tsinghua.edu.cn/jenkins |
| StorageClass |
持久化存储SC |
nfs-dynamic-class |
## 配置Kubernetes plugin
登录Jenkins,点击左边导航`系统管理`——>`系统设置`,拖动到最下面可以看到`云——>Kubernetes`配置,默认配置有以下字段:
- Name:配置名称,后面运行测试的时候会用到,用于区别多个Kubernetes配置,默认为:kubernetes
- Kubernetes URL:集群访问url,可通过`kubectl cluster-info`查看,如果集群有部署**DNS**插件, 也可以直接填服务名称(自动解析),默认使用服务名称:https://kubernetes
- Jenkins URL:Jenkins访问地址,默认使用服务名称+端口号
在Jenkins初始化时,默认都已经配置好了,可以直接新建项目测试了。
## 简单测试
点击左边:新建任务——>流水线(Pipeline)
任务名称可以随便起,这里为:k8s-test
配置——>流水线,选择`Pipeline script`
以下为测试脚本内容:
```
podTemplate(label: 'jenkins-slave', cloud: 'kubernetes')
{
node ('jenkins-slave') {
stage('test') {
echo "hello, world"
sleep 60
}
}
}
```
- cloud:插件配置中的Name
- label:插件配置中的Images——>Kubernetes Pod Tempalte——>Labels
- node:与label一致即可
保存配置,点击立即构建,查看控制台输出,出现以下内容就表示运行成功了:
```
Agent default-lsths is provisioned from template Kubernetes Pod Template
Agent specification [Kubernetes Pod Template] (jenkins-slave):
* [jnlp] jenkins/jnlp-slave:alpine(resourceRequestCpu: 200m, resourceRequestMemory: 256Mi, resourceLimitCpu: 200m, resourceLimitMemory: 256Mi)
Running on default-lsths in /home/jenkins/workspace/k8s-test
[Pipeline] {
[Pipeline] stage
[Pipeline] { (test)
[Pipeline] echo
hello, world
[Pipeline] sleep
Sleeping for 1 min 0 sec
[Pipeline] }
[Pipeline] // stage
[Pipeline] }
[Pipeline] // node
[Pipeline] }
[Pipeline] // podTemplate
[Pipeline] End of Pipeline
Finished: SUCCESS
```
## 配置自动触发CI
- 配置Gitlab项目
在`Gitlab`中创建一个测试项目,将上面测试的脚本内容写入到一个`Jenkinsfile`文件中,然后上传到该测试项目根路径下。
- 配置Jenkins项目
点击项目`配置`——>`构建触发器`——>勾选`Build when a change is pushed to GitLab. GitLab webhook URL:http://jenkins.local.com/project/k8s-test`——>保存配置
- 配置Webhook
进入Gitlab测试项目的`Settings——>Integrations`,一般只需要填写`URL`即可,其他的可根据需求环境配置
默认Jenkins配置不允许匿名用户触发构建,因此还需要添加用户和token。
URL的格式为:
`http://[UserID]:[API Token]@jenkins.local.com/project/[ProjectName]`
Jenkins 用户ID Token查看:
点击右上角的`用户名——>设置——>API Token(点击Show API Token...)`
最终Webhook中的URL类似:
http://admin:a910b1492e39e9dd1ea48ea7f7638aaf@jenkins.local.com/project/k8s-test
后面只需要我们一提交代码到Git仓库,就会自动触发Jenkins进行构建了。
## 项目应用
这里我们以一个简单的Java项目为例,实战演示如何进行CI/CD。
基本环境配置上面已经说过了,这里就不多介绍。
示例项目:https://github.com/lusyoe/springboot-k8s-example
结构说明:
- 镜像构建文件:`Dockerfile`
- k8s应用配置:`k8s-example.yaml`
- 项目源码:`src`
- Jenkins构建文件:`jenkins/Jenkinsfile`
构建流程说明:
- 通过Jenkins kubernetes插件,定义构建过程中所需的3个docker容器:maven、docker、kubectl (这3个容器都在一个pod中)
- 挂载docker.sock和kubeconfig文件
- 首先使用`maven`容器,检出代码,执行项目构建
- 使用`docker`容器,构建镜像,推送到镜像参考
- 使用`kubectl`容器,部署`k8s-example`应用(这里后面也可以使用helm)
访问:
项目通过Ingress访问`k8s-example.com`,出现`hello, world`,就表示服务部署成功了。
================================================
FILE: docs/deprecated/kuboard.md
================================================
# 安装 Kuboard
## Kuboard 介绍
Kuboard 是一款免费的 Kubernetes 管理工具,提供了丰富的功能:
* Kubernetes 多集群管理
* Kubernetes 基本管理功能
* 节点管理
* 名称空间管理
* 存储类/存储卷管理
* 控制器(Deployment/StatefulSet/DaemonSet/CronJob/Job/ReplicaSet)管理
* Service/Ingress 管理
* ConfigMap/Secret 管理
* CustomerResourceDefinition 管理
* Kubernetes 问题诊断
* Top Nodes / Top Pods
* 事件列表及通知
* 容器日志及终端
* KuboardProxy (kubectl proxy 的在线版本)
* PortForward (kubectl port-forward 的快捷版本)
* 复制文件 (kubectl cp 的在线版本)
* 认证与授权
* Github/GitLab 单点登录
* KeyCloak 认证
* LDAP 认证
* 完整的 RBAC 权限管理
* Kuboard 特色功能
* Kuboard 官方套件
* Grafana+Prometheus 资源监控
* Grafana+Loki+Promtail 日志聚合
* Kuboard 自定义名称空间布局
* Kuboard 中英文语言包

 点击这里可以查看 [Kuboard 的安装文档](https://kuboard.cn/install/v3/install.html)
## 在线演示
点击这里可以查看 [Kuboard 的安装文档](https://kuboard.cn/install/v3/install.html)
## 在线演示
在线演示环境中,您具备 只读 权限,只能体验 Kuboard 的一部分功能。
## 特点介绍
相较于 Kubernetes Dashboard 等其他 Kubernetes 管理界面,Kuboard 的主要特点有:
* 多种认证方式
Kuboard 可以使用内建用户库、gitlab / github 单点登录或者 LDAP 用户库进行认证,避免管理员将 ServiceAccount 的 Token 分发给普通用户而造成的麻烦。使用内建用户库时,管理员可以配置用户的密码策略、密码过期时间等安全设置。
* 多集群管理
管理员可以将多个 Kubernetes 集群导入到 Kuboard 中,并且通过权限控制,将不同集群/名称空间的权限分配给指定的用户或用户组。
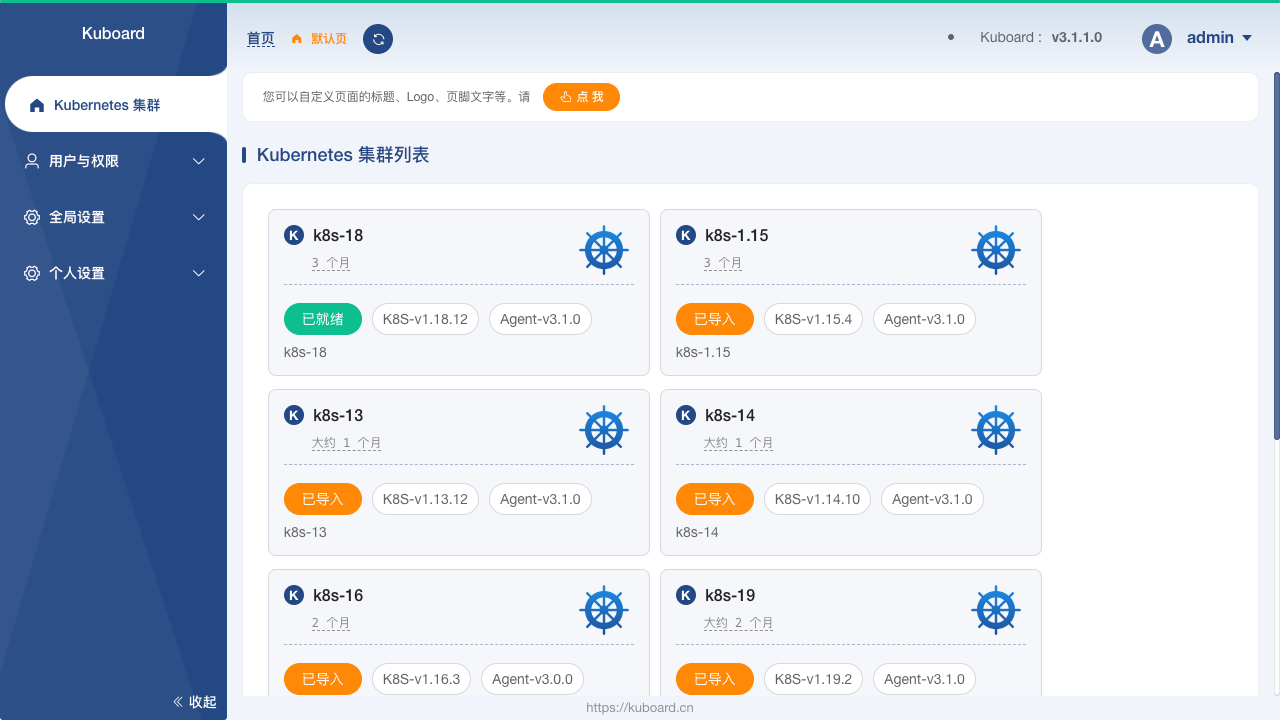
* 微服务分层展示
在 Kuboard 的名称空间概要页中,以经典的微服务分层方式将工作负载划分到不同的分层,更加直观地展示微服务架构的结构,并且可以为每一个名称空间自定义名称空间布局。
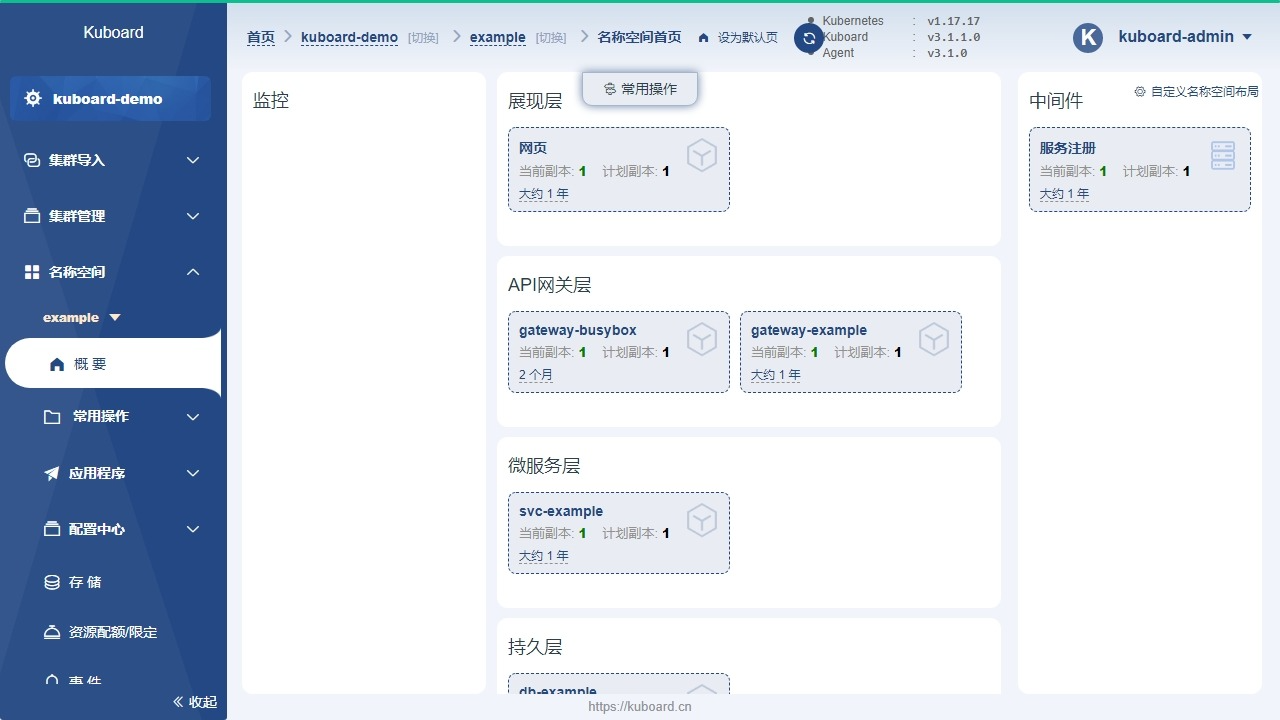
* 工作负载的直观展示
Kuboard 中将 Deployment 的历史版本、所属的 Pod 列表、Pod 的关联事件、容器信息合理地组织在同一个页面中,可以帮助用户最快速的诊断问题和执行各种相关操作。
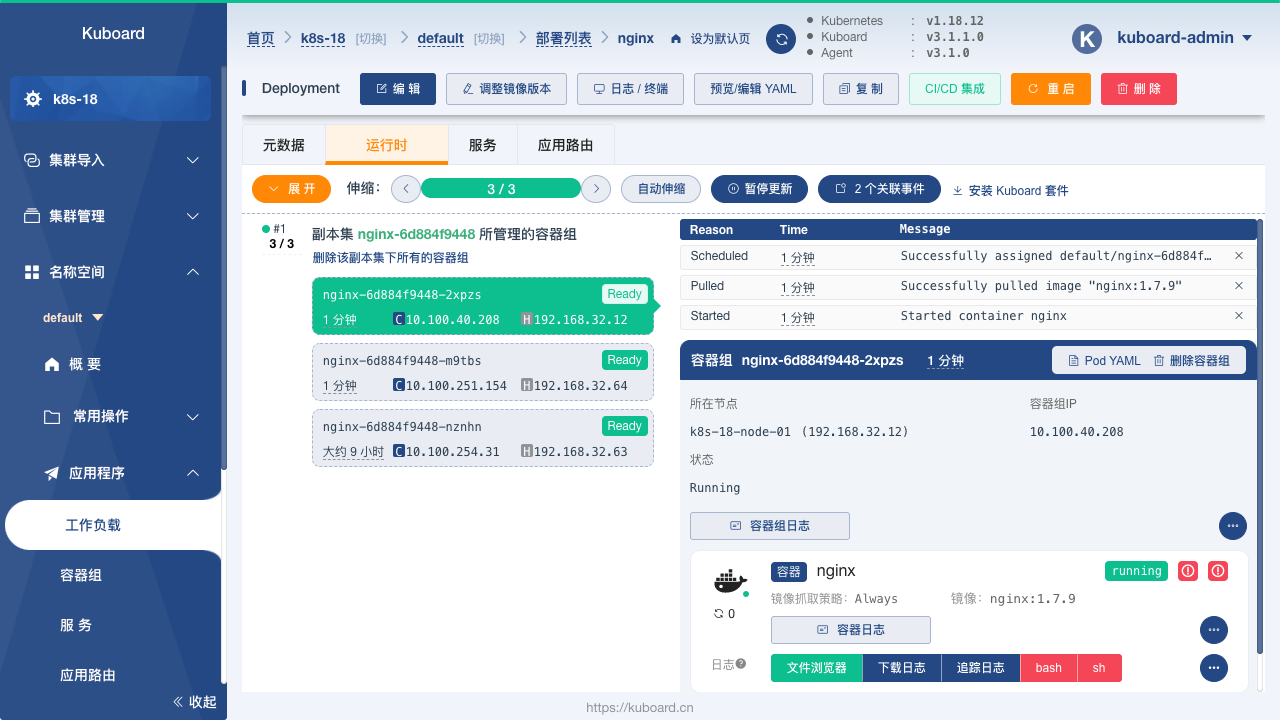
* 工作负载编辑
Kuboard 提供了图形化的工作负载编辑界面,用户无需陷入繁琐的 YAML 文件细节中,即可轻松完成对容器的编排任务。支持的 Kubernetes 对象类型包括:Node、Namespace、Deployment、StatefulSet、DaemonSet、Secret、ConfigMap、Service、Ingress、StorageClass、PersistentVolumeClaim、LimitRange、ResourceQuota、ServiceAccount、Role、RoleBinding、ClusterRole、ClusterRoleBinding、CustomResourceDefinition、CustomResource 等各类常用 Kubernetes 对象,
* 存储类型支持
在 Kuboard 中,可以方便地对接 NFS、CephFS 等常用存储类型,并且支持对 CephFS 类型的存储卷声明执行扩容和快照操作。
* 丰富的互操作性
可以提供许多通常只在 `kubectl` 命令行界面中才提供的互操作手段,例如:
* Top Nodes / Top Pods
* 容器的日志、终端
* 容器的文件浏览器(支持从容器中下载文件、上传文件到容器)
* KuboardProxy(在浏览器中就可以提供 `kubectl proxy` 的功能)
* 套件扩展
Kuboard 提供了必要的套件库,使得用户可以根据自己的需要扩展集群的管理能力。当前提供的套件有:
* 资源层监控套件,基于 Prometheus / Grafana 提供 K8S 集群的监控能力,可以监控集群、节点、工作负载、容器组等各个级别对象的 CPU、内存、网络、磁盘等资源的使用情况;
* 日志聚合套件,基于 Grafana / Loki / Promtail 实现日志聚合;
* 存储卷浏览器,查看和操作存储卷中的内容;

访问 Kuboard 网站 https://kuboard.cn 可以加入 Kuboard 社群,并获得帮助。
================================================
FILE: docs/deprecated/practice/dockerize_system_service.md
================================================
# 容器化系统服务
## 容器化 haproxy
本例使用 [docker hub 官方](https://github.com/docker-library/haproxy) 维护的 haproxy 镜像;haproxy 配置举例如下
```
global
log stdout format raw local1 notice
nbproc 1
defaults
log global
timeout connect 5s
timeout client 10m
timeout server 10m
listen apiservers
bind 0.0.0.0:6443
mode tcp
option tcplog
option dontlognull
option dontlog-normal
balance roundrobin
server 192.168.1.1 192.168.1.1:6443 check inter 10s fall 2 rise 2 weight 1
server 192.168.1.2 192.168.1.2:6443 check inter 10s fall 2 rise 2 weight 1
```
在 systemd 系统上编写服务文件如下 /etc/systemd/system/haproxy.service
```
[Unit]
Description=haproxy
Documentation=https://github.com/docker-library/haproxy
After=docker.service
Requires=docker.service
[Service]
User=root
ExecStart=/bin/docker run \
--name haproxy \
--publish 6443:6443 \
--volume /etc/haproxy/haproxy.cfg:/usr/local/etc/haproxy/haproxy.cfg \
docker.io/library/haproxy:1.9.8-alpine
ExecStop=/bin/docker rm -f haproxy
ExecReload=/bin/docker kill -s HUP haproxy
Restart=always
RestartSec=10
Delegate=yes
LimitNOFILE=50000
LimitNPROC=50000
[Install]
WantedBy=multi-user.target
```
## 容器化 chrony
- chrony 服务器端配置(假设chrony服务器端192.168.1.1)
```
$ cat /etc/chrony.conf
# Use public servers from the pool.ntp.org project.
server ntp1.aliyun.com iburst
server ntp2.aliyun.com iburst
pool pool.ntp.org iburst
# Ignor source level
stratumweight 0
# Record the rate at which the system clock gains/losses time.
driftfile /var/lib/chrony/drift
# Allow the system clock to be stepped in the first five updates
# if its offset is larger than 1 second.
makestep 1 5
# Enable kernel synchronization of the real-time clock (RTC).
rtcsync
# Allow NTP client access from local network.
allow 0.0.0.0/0
# Serve time even if not synchronized to a time source.
local stratum 10
# Select which information is logged.
#log measurements statistics tracking
#
noclientlog
```
- chrony 客户端配置
```
$ cat /etc/chrony.conf
# Use local chrony server.
server 192.168.1.1 iburst
# Record the rate at which the system clock gains/losses time.
driftfile /var/lib/chrony/drift
# Allow the system clock to be stepped in the first five updates
# if its offset is larger than 1 second.
makestep 1 5
# Enable kernel synchronization of the real-time clock (RTC).
rtcsync
# Select which information is logged.
#log measurements statistics tracking
```
- 在 systemd 系统上编写服务文件如下 /etc/systemd/system/chrony.service
```
[Unit]
Description=chrony
Documentation=https://github.com/kubeasz/dockerfiles/chrony
After=docker.service
Requires=docker.service
[Service]
User=root
ExecStart=/opt/kube/bin/docker run \
--cap-add SYS_TIME \
--name chrony \
--network host \
--volume /etc/chrony.conf:/etc/chrony/chrony.conf \
--volume /var/lib/chrony:/var/lib/chrony \
easzlab/chrony:0.1.0
ExecStartPost=/sbin/iptables -t raw -A PREROUTING -p udp -m udp --dport 123 -j NOTRACK
ExecStartPost=/sbin/iptables -t raw -A OUTPUT -p udp -m udp --sport 123 -j NOTRACK
ExecStop=/opt/kube/bin/docker rm -f chrony
Restart=always
RestartSec=10
Delegate=yes
[Install]
WantedBy=multi-user.target
```
================================================
FILE: docs/deprecated/practice/es_cluster.md
================================================
# Elasticsearch 部署实践
`Elasticsearch`是目前全文搜索引擎的首选,它可以快速地储存、搜索和分析海量数据;也可以看成是真正分布式的高效数据库集群;`Elastic`的底层是开源库`Lucene`;封装并提供了`REST API`的操作接口。
## 单节点 docker 测试安装
``` bash
cat > es-start.sh << EOF
#!/bin/bash
sysctl -w vm.max_map_count=262144
docker run --detach \
--name es01 \
-p 9200:9200 -p 9300:9300 \
-e "discovery.type=single-node" \
-e "bootstrap.memory_lock=true" --ulimit memlock=-1:-1 \
--ulimit nofile=65536:65536 \
--volume /srv/elasticsearch/data:/usr/share/elasticsearch/data \
--volume /srv/elasticsearch/elasticsearch.yml:/usr/share/elasticsearch/config/elasticsearch.yml \
jmgao1983/elasticsearch:6.4.0
EOF
```
执行`sh es-start.sh`后,就在本地运行了。
- 验证 docker 镜像运行情况
``` bash
root@docker-ts:~# docker ps -a
CONTAINER ID IMAGE COMMAND CREATED STATUS PORTS NAMES
171f3fecb596 jmgao1983/elasticsearch:6.4.0 "/usr/local/bin/do..." 2 hours ago Up 2 hours 0.0.0.0:9200->9200/tcp, 0.0.0.0:9300->9300/tcp es01
```
- 验证 es 健康检查
``` bash
root@docker-ts:~# curl http://127.0.0.1:9200/_cat/health
epoch timestamp cluster status node.total node.data shards pri relo init unassign pending_tasks max_task_wait_time active_shards_percent
1535523956 06:25:56 docker-es green 1 1 0 0 0 0 0 0 - 100.0%
```
## 在 k8s 上部署 Elasticsearch 集群
在生产环境下,Elasticsearch 集群由不同的角色节点组成:
- master 节点:参与主节点选举,不存储数据;建议3个以上,维护整个集群的稳定可靠状态
- data 节点:不参与选主,负责存储数据;主要消耗磁盘,内存
- client 节点:不参与选主,不存储数据;负责处理用户请求,实现请求转发,负载均衡等功能
这里使用`helm chart`来部署 (https://github.com/helm/charts/tree/master/incubator/elasticsearch)
- 1.安装 helm: 以本项目[安全安装helm](../guide/helm.md)为例
- 2.准备 PV: 以本项目[K8S 集群存储](../setup/08-cluster-storage.md)创建`nfs`动态 PV 为例
- 3.安装 elasticsearch chart
``` bash
$ cd /etc/kubeasz/manifests/es-cluster
# 如果你的helm安装没有启用tls证书,请忽略以下--tls参数
$ helm install --tls --name es-cluster --namespace elastic -f es-values.yaml elasticsearch
```
- 4.验证 es 集群
``` bash
# 验证k8s上 es集群状态
$ kubectl get pod,svc -n elastic
NAME READY STATUS RESTARTS AGE
pod/es-cluster-elasticsearch-client-778df74c8f-7fj4k 1/1 Running 0 2m17s
pod/es-cluster-elasticsearch-client-778df74c8f-skh8l 1/1 Running 0 2m3s
pod/es-cluster-elasticsearch-data-0 1/1 Running 0 25m
pod/es-cluster-elasticsearch-data-1 1/1 Running 0 11m
pod/es-cluster-elasticsearch-master-0 1/1 Running 0 25m
pod/es-cluster-elasticsearch-master-1 1/1 Running 0 12m
pod/es-cluster-elasticsearch-master-2 1/1 Running 0 10m
NAME TYPE CLUSTER-IP EXTERNAL-IP PORT(S) AGE
service/es-cluster-elasticsearch-client NodePort 10.68.157.105 9200:29200/TCP,9300:29300/TCP 25m
service/es-cluster-elasticsearch-discovery ClusterIP None 9300/TCP 25m
# 验证 es集群本身状态
$ curl $NODE_IP:29200/_cat/health
1539335131 09:05:31 es-on-k8s green 7 2 0 0 0 0 0 0 - 100.0%
$ curl $NODE_IP:29200/_cat/indices?v
health status index uuid pri rep docs.count docs.deleted store.size pri.store.size
root@k8s401:/etc/kubeasz# curl 10.100.97.41:29200/_cat/nodes?
172.31.2.4 27 80 5 0.09 0.11 0.21 mi - es-cluster-elasticsearch-master-0
172.31.1.7 30 97 3 0.39 0.29 0.27 i - es-cluster-elasticsearch-client-778df74c8f-skh8l
172.31.3.7 20 97 3 0.11 0.17 0.18 i - es-cluster-elasticsearch-client-778df74c8f-7fj4k
172.31.1.5 8 97 5 0.39 0.29 0.27 di - es-cluster-elasticsearch-data-0
172.31.2.5 8 80 3 0.09 0.11 0.21 di - es-cluster-elasticsearch-data-1
172.31.1.6 18 97 4 0.39 0.29 0.27 mi - es-cluster-elasticsearch-master-2
172.31.3.6 20 97 4 0.11 0.17 0.18 mi * es-cluster-elasticsearch-master-1
```
### es 性能压测
如上已使用 chart 在 k8s上部署了 **7** 节点的 elasticsearch 集群;各位应该十分好奇性能怎么样;官方提供了压测工具[esrally](https://github.com/elastic/rally)可以方便的进行性能压测,这里省略安装和测试过程;压测机上执行:
`esrally --track=http_logs --target-hosts="$NODE_IP:29200" --pipeline=benchmark-only --report-file=report.md`
压测过程需要1-2个小时,部分压测结果如下:
``` bash
------------------------------------------------------
_______ __ _____
/ ____(_)___ ____ _/ / / ___/_________ ________
/ /_ / / __ \/ __ `/ / \__ \/ ___/ __ \/ ___/ _ \
/ __/ / / / / / /_/ / / ___/ / /__/ /_/ / / / __/
/_/ /_/_/ /_/\__,_/_/ /____/\___/\____/_/ \___/
------------------------------------------------------
| Lap | Metric | Task | Value | Unit |
|------:|-------------------------------------:|-------------:|------------:|--------:|
...
| All | Min Throughput | index-append | 16903.2 | docs/s |
| All | Median Throughput | index-append | 17624.4 | docs/s |
| All | Max Throughput | index-append | 19382.8 | docs/s |
| All | 50th percentile latency | index-append | 1865.74 | ms |
| All | 90th percentile latency | index-append | 3708.04 | ms |
| All | 99th percentile latency | index-append | 6379.49 | ms |
| All | 99.9th percentile latency | index-append | 8389.74 | ms |
| All | 99.99th percentile latency | index-append | 9612.84 | ms |
| All | 100th percentile latency | index-append | 9861.02 | ms |
| All | 50th percentile service time | index-append | 1865.74 | ms |
| All | 90th percentile service time | index-append | 3708.04 | ms |
| All | 99th percentile service time | index-append | 6379.49 | ms |
| All | 99.9th percentile service time | index-append | 8389.74 | ms |
| All | 99.99th percentile service time | index-append | 9612.84 | ms |
| All | 100th percentile service time | index-append | 9861.02 | ms |
| All | error rate | index-append | 0 | % |
| All | Min Throughput | default | 0.66 | ops/s |
| All | Median Throughput | default | 0.66 | ops/s |
| All | Max Throughput | default | 0.66 | ops/s |
| All | 50th percentile latency | default | 770131 | ms |
| All | 90th percentile latency | default | 825511 | ms |
| All | 99th percentile latency | default | 838030 | ms |
| All | 100th percentile latency | default | 839382 | ms |
| All | 50th percentile service time | default | 1539.4 | ms |
| All | 90th percentile service time | default | 1635.39 | ms |
| All | 99th percentile service time | default | 1728.02 | ms |
| All | 100th percentile service time | default | 1736.2 | ms |
| All | error rate | default | 0 | % |
...
```
从测试结果看:集群的吞吐可以(k8s es-client pod还可以扩展);延迟略高一些(因为使用了nfs共享存储);整体效果不错。
### 中文分词安装
安装 ik 插件即可,可以自定义已安装ik插件的es docker镜像:创建如下 Dockerfile
``` bash
FROM jmgao1983/elasticsearch:6.4.0
RUN /usr/share/elasticsearch/bin/elasticsearch-plugin install \
--batch https://github.com/medcl/elasticsearch-analysis-ik/releases/download/v6.4.0/elasticsearch-analysis-ik-6.4.0.zip \
&& cp /usr/share/zoneinfo/Asia/Shanghai /etc/localtime
```
### 参考阅读
1. [Elasticsearch 入门教程](http://www.ruanyifeng.com/blog/2017/08/elasticsearch.html)
2. [Elasticsearch 压测方案之 esrally 简介](https://segmentfault.com/a/1190000011174694)
================================================
FILE: docs/deprecated/practice/go_web_app/Dockerfile
================================================
# a demon for containerize golang web apps
#
# @author:
# @repo:
# @ref:
# stage 1: build src code to binary
FROM golang:1.13-alpine3.10 as builder
COPY *.go /app/
RUN cd /app && go build -o hellogo .
# stage 2: use alpine as base image
FROM alpine:3.10
RUN apk update && \
apk --no-cache add tzdata ca-certificates && \
cp -f /usr/share/zoneinfo/Asia/Shanghai /etc/localtime && \
apk del tzdata && \
rm -rf /var/cache/apk/*
COPY --from=builder /app/hellogo /hellogo
CMD ["/hellogo"]
================================================
FILE: docs/deprecated/practice/go_web_app/Dockerfile-more
================================================
# build stage
FROM golang:1.13 as builder
# ENV GOPROXY=https://goproxy.cn
# 设置 GOPROXY 是为编译时能够通过代理下载Qiang外的包
# 设置 GOPRIVATE 是为编译时下载本地gitlab上的包时候不使用代理
ENV GOPROXY=https://goproxy.io
ENV GOPRIVATE=gitlab.yourdomain.com/*
WORKDIR /root
COPY ./ .
# 本地 gitlab 上的项目非公开,编译时需要用 ssh key 的方式下载本地 gitlab 包
# 提前把 ssh key 中的公钥上传到gitlab 个人profile中的 SSH KEY 中
# 在 docker build 时通过命令行参数用--build-arg 'SSH_PKEY=${KEY_TXT}' 传入
# 在 CICD 流水线中,${KEY_TXT} 可以是jenkins中的secret-text参数,也可以是gitlab-ci中的secret variables
ARG SSH_PKEY
# 设置 git config 是为了拉区项目时使用ssh方式 git@gitlab.yourdomain.com:xxx/yyy.git
#
RUN git config --global url."git@gitlab.yourdomain.com:".insteadof "https://gitlab.yourdomain.com/" && \
mkdir -p /root/.ssh && \
echo "-----BEGIN RSA PRIVATE KEY-----" > /root/.ssh/id_rsa && \
echo "${SSH_PKEY}" >> /root/.ssh/id_rsa && \
echo "-----END RSA PRIVATE KEY-----" >> /root/.ssh/id_rsa && \
sed -i "2s/ /\\n/g" /root/.ssh/id_rsa && \
echo "StrictHostKeyChecking no" > /root/.ssh/config && \
chmod 600 /root/.ssh/id_rsa
RUN go mod tidy && \
go mod download
RUN CGO_ENABLED=0 GOOS=linux go build -installsuffix cgo -o main cmd/main.go
# final stage
FROM alpine:3.10
WORKDIR /home/admin/bin
COPY --from=builder /root/main .
CMD ["./main"]
================================================
FILE: docs/deprecated/practice/go_web_app/hellogo.go
================================================
package main
import (
"fmt"
"log"
"math/rand"
"net/http"
"time"
)
var appVersion = "1.2" //Default/fallback version
var instanceNum int
func getFrontpage(w http.ResponseWriter, r *http.Request) {
t := time.Now()
fmt.Fprintf(w, "Hello, Go! I'm instance %d running version %s at %s\n", instanceNum, appVersion, t.Format("2019-01-02 15:04:05"))
}
func health(w http.ResponseWriter, r *http.Request) {
w.WriteHeader(http.StatusOK)
}
func getVersion(w http.ResponseWriter, r *http.Request) {
fmt.Fprintf(w, "%s\n", appVersion)
}
func main() {
rand.Seed(time.Now().UTC().UnixNano())
instanceNum = rand.Intn(1000)
http.HandleFunc("/", getFrontpage)
http.HandleFunc("/health", health)
http.HandleFunc("/version", getVersion)
log.Fatal(http.ListenAndServe(":3000", nil))
}
================================================
FILE: docs/deprecated/practice/go_web_app/hellogo.yaml
================================================
---
apiVersion: apps/v1
kind: Deployment
metadata:
name: hellogo-deploy
spec:
replicas: 3
minReadySeconds: 5 # Wait 5 seconds after each new pod comes up before marked as "ready"
strategy:
type: RollingUpdate # describe how we do rolling updates
rollingUpdate:
maxUnavailable: 1 # When updating take one pod down at a time
maxSurge: 1
selector:
matchLabels:
name: hellogo-app
template:
metadata:
labels:
name: hellogo-app
spec:
containers:
- name: hellogo
image: hellogo:v1.0
imagePullPolicy: IfNotPresent
resources:
requests:
memory: "32Mi"
cpu: "50m"
limits:
memory: "64Mi"
cpu: "100m"
ports:
- containerPort: 3000
---
apiVersion: v1
kind: Service
metadata:
name: hellogo-svc
spec:
type: NodePort
ports:
- name: http
port: 80
targetPort: 3000
nodePort: 30000
selector:
name: hellogo-app
================================================
FILE: docs/deprecated/practice/go_web_app/readme.md
================================================
# 容器化 GO 应用
Golang 作为服务器端新兴热门语言同时也是容器技术的主要编写语言备受关注;它简洁、有趣、并行、安全等特点让 GO 应用容器化相对省心;一般来说做下时间本地化、安装信任根证书,然后把编译生成的二进制拷贝进去即可。
## 一个演示 GO WEB 应用
[hellogo 代码](hellogo.go)
## Dockerfile
作为演示项目的Dockerfile比较简单,请看 [Dockerfile 文件](Dockerfile)
- 采用 docker 多阶段编译,使生成的目标镜像最小
- 使用 alpine 基础镜像
- 安装 tzdata 做时间本地化
- 安装信任根证书
一个真实复杂go项目的Dockerfile可能如这个例子:[复杂 Dockerfile](Dockerfile-more)
## 制作镜像
在 Dockerfile 文件所在目录,执行
```
docker build -t hellogo:v1.0 .
```
## 本地测试应用
- 1.单机运行 hellogo 容器应用
```
docker run -d --name hello -p3000:3000 hellogo:v1.0
```
- 2.验证测试
``` bash
# 查看本地监听端口
$ ss -ntl|grep 3000
LISTEN 0 128 *:3000 *:*
# 查看应用状态
$ curl localhost:3000
Hello, Go! I'm instance 987 running version 1.2 at 13109-10-13 08:39:11
$ curl localhost:3000/health -i
HTTP/1.1 200 OK
Date: Sun, 13 Oct 2019 00:39:15 GMT
Content-Length: 0
$ curl localhost:3000/version
1.2
```
## 在 k8s 上运行演示应用
- 可以参考项目`github.com/easzlab/kubeasz` 快速搭建一个本地 k8s 测试环境
- 1.编写基于k8s的应用编排文件 [hellogo.yaml](hellogo.yaml)
- 设置应用副本数`replicas: 3`
- 预设新副本启动延迟5秒`minReadySeconds: 5`
- 设置滚动更新策略
- 设置资源使用限制,安装实际情况修改
- 设置服务对外暴露方式 NodePort,根据实际情况修改端口,或者使用 ingress 方式
- 2.在 k8s 上运行应用
``` bash
# 运行
$ kubectl apply -f hellogo.yaml
# 验证
$ kubectl get pod
NAME READY STATUS RESTARTS AGE
hellogo-deploy-854dcd85c-2zm9l 1/1 Running 0 12m
hellogo-deploy-854dcd85c-7nfk5 1/1 Running 0 12m
hellogo-deploy-854dcd85c-ns7fp 1/1 Running 0 12m
$kubectl get deploy
NAME READY UP-TO-DATE AVAILABLE AGE
hellogo-deploy 3/3 3 3 13m
$kubectl get svc
NAME TYPE CLUSTER-IP EXTERNAL-IP PORT(S) AGE
hellogo-svc NodePort 10.68.194.109 80:30000/TCP 13m
# 使用curl测试应用三副本状态(用curl多次访问看到三个不同`instance id`)
$ curl http://192.168.111.3:30000
Hello, Go! I'm instance 629 running version 1.2 at 13109-10-13 09:06:25
$ curl http://192.168.111.3:30000
Hello, Go! I'm instance 722 running version 1.2 at 13109-10-13 09:06:27
$curl http://192.168.111.3:30000
Hello, Go! I'm instance 799 running version 1.2 at 13109-10-13 09:06:28
```
================================================
FILE: docs/deprecated/practice/java_war_app.md
================================================
# JAVA WAR 应用迁移 K8S 实践
初步思路是这样:应用代码与应用配置分离,应用代码打包成 docker 镜像存于内部 harbor 仓库,应用配置使用 configmap 挂载,这样不同的环境只需要修改 configmap 即可部署。
- 使用 maven 把 java 应用代码打包成 xxx.war
- 基于 tomcat 镜像和 xxx.war 做成应用 docker 镜像
- 编写 k8s deployment 文件,在 pod 指定上述应用镜像,同时把应用配置做成 configmap 挂载到 pod 里
经过多次尝试部署发现问题:configmap配置是可以挂载上去,但是会把目录下其他的文件删掉,而且tomcat 目录 webapps/xxxxx/下其他目录也消失了。原来是因为 tomcat 容器完全启动完成后才会解压 war包,而 configmap 配置文件是一开始就挂载上去了,导致失败。
- 调整应用镜像打包过程:xxx.war 先解压后再进行应用镜像打包
## 应用 gitlab CI/CD 集成
- 在内部gitlab创建项目,上传应用java代码,同时在项目根目录下新加如下目录和文件,配置相应的 gitlab-runner 和 环境变量参数
``` bash
├── .app.yaml # k8s deployment 部署模板文件
├── config.yaml # k8s configmap 配置模板文件
├── dockerfiles
│ └── Dockerfile # Dockerfile 文件
├── .gitlab-ci.yml # gitlab ci 配置文件
└── .ns.yaml # k8s namespace 和 imagePullSecrets的配置文件
```
### gitlab-ci 文件摘要
``` bash
variables:
PROJECT_NS: '$CI_PROJECT_NAMESPACE-$CI_JOB_STAGE'
APP_NAME: '$CI_PROJECT_NAME-$CI_COMMIT_REF_SLUG'
stages:
- package
- beta
job_package:
stage: package
tags:
- package-shell
only:
- master
- /^feature-.*$/
script:
- mvn clean install -Dmaven.test.skip=true
- unzip target/xxxx.war -d dockerfiles/project
- cd dockerfiles && docker build -t harbor.test.lo/project/$CI_PROJECT_NAME:$CI_PIPELINE_ID .
- docker login -u $HARBOR_USR -p $HARBOR_PWD harbor.test.lo
- docker push harbor.test.lo/project/$CI_PROJECT_NAME:$CI_PIPELINE_ID
- docker logout harbor.test.lo
job_push_beta:
stage: beta
tags:
- beta-shell
only:
- master
- /^feature-.*$/
when: manual
script:
# 替换beta环境的参数配置
- sed -i "s/PROJECT_NS/$PROJECT_NS/g" config.yaml .app.yaml .ns.yaml
- sed -i "s/TemplateProject/$APP_NAME/g" config.yaml .app.yaml
- sed -i "s/DB_HOST/$BETA_DB_HOST/g" config.yaml
- sed -i "s/DB_PWD/$BETA_DB_PWD/g" config.yaml
- sed -i "s/APP_REP/$BETA_APP_REP/g" .app.yaml
- sed -i "s/ProjectImage/$CI_PROJECT_NAME:$CI_PIPELINE_ID/g" .app.yaml
#
- mkdir -p /opt/kube/$PROJECT_NS/$APP_NAME
- cp -f .ns.yaml config.yaml .app.yaml /opt/kube/$PROJECT_NS/$APP_NAME
- kubectl --kubeconfig=/etc/.beta/config apply -f .ns.yaml
- kubectl --kubeconfig=/etc/.beta/config apply -f config.yaml
- kubectl --kubeconfig=/etc/.beta/config apply -f .app.yaml
# 生产部署与beta环境类同,这里省略
```
### Dockerfile 编写
```
FROM tomcat:8.5.33-jre8-alpine
COPY . /usr/local/tomcat/webapps/
# 设置tomcat日志使用的时区
RUN sed -i 's/^JAVA_OPTS=.*webresources\"$/JAVA_OPTS=\"$JAVA_OPTS -Djava.protocol.handler.pkgs=org.apache.catalina.webresources -Duser.timezone=GMT+08\"/g' /usr/local/tomcat/bin/catalina.sh
```
### k8s deployment 配置举例
```
---
apiVersion: apps/v1
kind: Deployment
metadata:
name: TemplateProject
namespace: PROJECT_NS
spec:
replicas: APP_REP
template:
metadata:
labels:
run: TemplateProject
spec:
containers:
- name: TemplateProject
image: harbor.test.lo/project/ProjectImage
imagePullPolicy: IfNotPresent
ports:
- containerPort: 8080
volumeMounts:
- name: db-config
mountPath: "/usr/local/tomcat/webapps/project/xxxx/yyyy/config/datasource.properties"
subPath: datasource.properties
imagePullSecrets:
- name: projectkey1
volumes:
- name: db-config
configMap:
name: TemplateProject-config
defaultMode: 0640
items:
- path: datasource.properties
key: datasource.properties
---
apiVersion: v1
kind: Service
metadata:
labels:
run: TemplateProject
name: TemplateProject
namespace: PROJECT_NS
spec:
ports:
- port: 80
protocol: TCP
targetPort: 8080
selector:
run: TemplateProject
sessionAffinity: None
```
### k8s configmap 配置举例
```
apiVersion: v1
kind: ConfigMap
metadata:
name: TemplateProject-config
namespace: PROJECT_NS
data:
datasource.properties: |
dataSource.maxIdle = 5
dataSource.maxActive = 41
dataSource.driverClassName = com.mysql.jdbc.Driver
dataSource.url = jdbc:mysql://DB_HOST:8066/project?useUnicode=true&characterEncoding=utf-8
dataSource.username = username
dataSource.password = DB_PWD
```
================================================
FILE: docs/deprecated/practice/mariadb_cluster.md
================================================
# Mariadb 数据库集群
Mariadb 是从 MySQL 衍生出来的开源关系型数据库,目前兼容 mysql 5.7 版本;它也非常流行,拥有 Google Facebook 等重要企业用户。本文档介绍使用 helm charts 方式安装 mariadb cluster,仅供实践交流使用。
## 前提条件
- 已部署 k8s 集群,参考[这里](../setup/quickStart.md)
- 已部署 helm,参考[这里](../guide/helm.md)
- 集群提供持久性存储,参考[这里](../setup/08-cluster-storage.md)
## mariadb charts 配置修改
按照惯例,直接把 chart 下载到本地,然后把配置复制 values.yaml 出来进行修改,这样方便以后整体更新 chart,安装实际使用需要修改配置文件
``` bash
$ cd /etc/kubeasz/manifests/mariadb-cluster
# 编辑 my-values.yaml 修改以下部分
service:
type: NodePort # 方便集群外部访问
port: 3306
nodePort:
master: 33306 # 设置主库的nodePort
slave: 33307 # 设置从库的nodePort
rootUser: # 设置 root 密码
password: test.c0m
forcePassword: true
db: # 设置初始测试数据库
user: hello
password: hello
name: hello
forcePassword: true
replication: # 设置主从复制
enabled: true
user: replicator
password: R4%forep11CAT0r
forcePassword: true
master:
affinity: {}
antiAffinity: soft
tolerations: []
persistence:
enabled: true # 启用持久化存储
mountPath: /bitnami/mariadb
storageClass: "nfs-db" # 设置使用 nfs-db 存储类
annotations: {}
accessModes:
- ReadWriteOnce
size: 5Gi # 设置存储容量
slave:
replicas: 1
affinity: {}
antiAffinity: soft
tolerations: []
persistence:
enabled: false # 从库这里没有启用持久性存储
```
## 安装
使用 helm 安装
``` bash
$ cd /etc/kubeasz/manifests/mariadb-cluster
$ helm install --name mariadb --namespace default -f my-values.yaml ./mariadb
```
## 验证
``` bash
$ kubectl get pod,svc | grep mariadb
pod/mariadb-mariadb-master-0 1/1 Running 0 27m
pod/mariadb-mariadb-slave-0 1/1 Running 0 29m
service/mariadb NodePort 10.68.170.168 3306:33306/TCP 29m
service/mariadb-mariadb-slave NodePort 10.68.151.95 3306:33307/TCP 29m
```
================================================
FILE: docs/guide/argocd.md
================================================
# argocd 安装
用 GitOps 方式把 Kubernetes 声明式配置“自动、可观测、可回滚”地同步到集群的控制器;它是 Kubernetes 世界里 GitOps 的事实标准。
## 初始安装
- 建议使用helm chart 方式基础安装;后续用声明式方式配置cluster、project、repository等
## 服务暴露
- 建议使用ingress方式
- 备用:kubectl patch svc argocd-server -n argocd -p '{"spec": {"type": "NodePort"}}'
## 密码登录
- 获取初始化密码 `argocd admin initial-password -n argocd`
- 登录 `argocd login {nodeIP}:{nodePort}`
- 更新密码 `argocd account update-password`
- 重置遗忘密码
```
kubectl -n argocd patch secret argocd-secret -p '{"data": {"admin.password": null, "admin.passwordMtime": null}}'
kubectl -n argocd delete pods -l app.kubernetes.io/name=argocd-server
```
## SSO 登录
- 参考文档:https://help.aliyun.com/zh/ram/obtain-user-information-through-oidc
- 阿里云控制台-RAM访问控制-集成管理-OAuth应用:创建应用 https://ram.console.aliyun.com/applications/create
- OAuth 协议版本:2.0
- 应用类型:Web应用
- 回调地址:填写 https://${argocd-server-domain}/api/dex/callback
- OAuth 范围:openid(必选), aliuid(可选), profile(可选)
- OAuth应用创建后,准备以下参数
- "应用 ID" --> dex.config: connectors oidc.config.clientID
- 创建应用密码 --> dex.config: connectors oidc.config.clientSecret
- 配置argocd-cm
```
dex.config: |
connectors:
- type: oidc
id: aliyun
name: aliyun
config:
issuer: https://oauth.aliyun.com
clientID: "406************"
clientSecret: E8G***************************************************b6
scopes:
- profile
- openid
- aliuid
getUserInfo: true
userIDKey: uid
userNameKey: uid
claimMapping:
preferred_username: name
email: uid
```
- 配置argocd-rbac-cm
```
data:
policy.csv: |
# 设置普通用户app-dev 只读权限
p, role:app-dev, projects, get, *, allow
p, role:app-dev, applications, get, *, allow
p, role:app-dev, logs, get, *, allow
p, role:app-dev, exec, create, */*, allow
# 设置测试项目,所有权限
p, role:app-dev, applications, *, test-project/*, allow
# 阿里云子账号 ID:2***********84
g, "2***********84", role:admin
g, "2***********27", role:app-dev
policy.default: role:''
scopes: '[name]'
```
## 支持 application in any namespace
- 配置 argocd-cm
```
data:
# 设置argocd 资源标记方式,使用annotation,禁用labelKey
# application.instanceLabelKey: argocd.argoproj.io/instance
application.resourceTrackingMethod: annotation
```
- 配置 argocd-cmd-params-cm
```
data:
#application.namespaces: app-team-one, app-team-two
application.namespaces: '*'
applicationsetcontroller.allowed.scm.providers: '*'
applicationsetcontroller.namespaces: '*'
```
然后重启 argocd-server 和 argocd-application-controller
## 其他设置
- argocd 部署应用 ingress 资源一直Progressing,参考:https://github.com/argoproj/argo-cd/issues/14607
```
# 修改argocd-cm configmap,重启argocd-application-controller
data:
resource.customizations: |
networking.k8s.io/Ingress:
health.lua: |
hs = {}
hs.status = "Healthy"
hs.message = "Skip health check for Ingress"
return hs
```
================================================
FILE: docs/guide/chrony.md
================================================
# chrony 时间同步
在安装k8s集群前需确保各节点时间同步;`chrony` 是一个优秀的 `NTP` 实现,性能比ntp好,且配置管理方便;它既可作时间服务器服务端,也可作客户端。
- `OpenStack` 社区也推荐使用 `chrony`实现各节点之间的时间同步
## 安装配置介绍
项目中选定一个节点(`groups.chrony[0]`)作为集群内部其他节点的时间同步源,而这个节点本身从公网源同步;当然如果整个集群都无法访问公网,那么请手动校准这个节点的时间后,仍旧可以作为内部集群的时间源服务器。
- 配置 chrony server,详见roles/chrony/templates/server.conf.j2
- 配置 chrony client,详见roles/chrony/templates/client.conf.j2
## `kubeasz` 集成安装
- 修改 clusters/${cluster_name}/hosts 文件,在 `chrony`组中加入选中的节点ip
- [可选] 修改 clusters/${cluster_name}/config.yml 中的相关配置
-执行命令安装 `ezctl setup ${cluster_name} 01`
## 验证安装
- 检查chronyd服务状态 `systemctl status chronyd`
- 检查chronyd时间同步日志 `/var/log/chrony`
## 验证时间同步状态完成
chrony 服务启动后,chrony server 会与配置的公网参考时间服务器进行同步;server 同步完成后,chrony client 会与 server 进行时间同步;一般来说整个集群达到时间同步需要几十分钟。可以用如下命令检查,初始时 **NTP synchronized: no**,同步完成后 **NTP synchronized: yes**
``` bash
$ ansible -i clusters/${cluster_name}/hosts all -m shell -a 'timedatectl'
192.168.1.1 | SUCCESS | rc=0 >>
Local time: Sat 2019-01-26 11:51:51 HKT
Universal time: Sat 2019-01-26 03:51:51 UTC
RTC time: Sat 2019-01-26 03:51:52
Time zone: Asia/Hong_Kong (HKT, +0800)
Network time on: yes
NTP synchronized: yes
RTC in local TZ: no
192.168.1.4 | SUCCESS | rc=0 >>
Local time: Sat 2019-01-26 11:51:51 HKT
Universal time: Sat 2019-01-26 03:51:51 UTC
RTC time: Sat 2019-01-26 03:51:52
Time zone: Asia/Hong_Kong (HKT, +0800)
Network time on: yes
NTP synchronized: yes
RTC in local TZ: no
192.168.1.2 | SUCCESS | rc=0 >>
Local time: Sat 2019-01-26 11:51:51 HKT
Universal time: Sat 2019-01-26 03:51:51 UTC
RTC time: Sat 2019-01-26 03:51:52
Time zone: Asia/Hong_Kong (HKT, +0800)
Network time on: yes
NTP synchronized: yes
RTC in local TZ: no
192.168.1.3 | SUCCESS | rc=0 >>
Local time: Sat 2019-01-26 11:51:51 HKT
Universal time: Sat 2019-01-26 03:51:51 UTC
RTC time: Sat 2019-01-26 03:51:52
Time zone: Asia/Hong_Kong (HKT, +0800)
Network time on: yes
NTP synchronized: yes
RTC in local TZ: no
```
================================================
FILE: docs/guide/dashboard.1.6.3.md
================================================
## dashboard
本文档基于 dashboard 1.6.3版本,从 1.7.x 版本以后,dashboard 默认开启自带的登录验证界面,登录流程差异详见[新版本](dashboard.md)。
+ 注意:实际测试k8s版本<=1.9.1支持dashboard 1.6.3, 建议k8s 1.9 以后使用 dashboard 新版本。
### 部署
``` bash
# 部署dashboard 主yaml配置文件
$ kubectl create -f /etc/kubeasz/manifests/dashboard/1.6.3/kubernetes-dashboard.yaml
# 部署基本密码认证配置[可选],密码文件位于 /etc/kubernetes/ssl/basic-auth.csv
$ kubectl create -f /etc/kubeasz/manifests/dashboard/1.6.3/ui-admin-rbac.yaml
$ kubectl create -f /etc/kubeasz/manifests/dashboard/1.6.3/ui-read-rbac.yaml
```
请在另外窗口打开 [kubernetes-dashboard.yaml](../../manifests/dashboard/1.6.3/kubernetes-dashboard.yaml)
+ 由于 kube-apiserver 启用了 RBAC授权,dashboard使用的 ServiceAccount `kubernetes-dashboard` 必须有相应的权限去访问apiserver(在新版本1.8.0中,该访问权限已按最小化方式授权),在1.6.3 版本,先粗放一点,把`kubernetes-dashboard` 与 集群角色 `cluster-admin` 绑定,这样dashboard就拥有了所有访问apiserver的权限。
+ 开发测试环境为了方便配置dashboard-service时候,指定 `NodePort`方式暴露服务,这样集群外部可以使用 `http://NodeIP:NodePort` 方式直接访问 dashboard,生产环境建议关闭该访问途径。
### 验证
``` bash
# 查看pod 运行状态
kubectl get pod -n kube-system | grep dashboard
kubernetes-dashboard-86bd8778bf-w4974 1/1 Running 0 12h
# 查看dashboard service
kubectl get svc -n kube-system|grep dashboard
kubernetes-dashboard NodePort 10.68.7.67 80:5452/TCP 12h
# 查看集群服务
kubectl cluster-info|grep dashboard
kubernetes-dashboard is running at https://192.168.1.10:6443/api/v1/namespaces/kube-system/services/kubernetes-dashboard/proxy
# 查看pod 运行日志,关注有没有错误
kubectl logs kubernetes-dashboard-86bd8778bf-w4974 -n kube-system
```
### 访问
因为dashboard 作为k8s 原生UI,能够展示各种资源信息,甚至可以有修改、增加、删除权限,所以有必要对访问进行认证和控制,本项目预置部署的集群有以下安全设置:详见 [apiserver配置模板](../../roles/kube-master/templates/kube-apiserver.service.j2)
+ 启用 `TLS认证` `RBAC授权`等安全特性
+ 关闭 apiserver非安全端口8080的外部访问`--insecure-bind-address=127.0.0.1`
+ 关闭匿名认证`--anonymous-auth=false`
+ 补充启用基本密码认证 `--token-auth-file=/etc/kubernetes/ssl/basic-auth.csv`,[密码文件模板](../../roles/kube-master/templates/basic-auth.csv.j2)中按照每行(密码,用户名,序号)的格式,可以定义多个用户
#### 1. 临时访问:使用 `http://NodeIP:NodePort` 方式直接访问 dashboard,生产环境建议关闭该途径
#### 2. 用户+密码访问:安全性比证书方式差点,务必保管好密码文件`basic-auth.csv`
- 这里演示两种权限,使用admin 登录dashboard拥有所有权限,使用readonly 登录后仅查看权限,首先在 master节点文件 `/etc/kubernetes/ssl/basic-auth.csv` 确认用户名和密码,如果要增加或者修改用户,修改保存该文件后记得逐个重启你的master 节点
- 为了演示用户密码访问,如果你已经完成证书访问方式,你可以在浏览器删除证书,或者访问时候浏览器询问你证书时不选证书
- 2.1 设置用户admin 的RBAC 权限,如下运行配置文件 `kubectl create -f ui-admin-rbac.yaml`
``` bash
kind: ClusterRole
apiVersion: rbac.authorization.k8s.io/v1
metadata:
name: ui-admin
rules:
- apiGroups:
- ""
resources:
- services
- services/proxy
verbs:
- '*'
---
apiVersion: rbac.authorization.k8s.io/v1
kind: RoleBinding
metadata:
name: ui-admin-binding
namespace: kube-system
roleRef:
apiGroup: rbac.authorization.k8s.io
kind: ClusterRole
name: ui-admin
subjects:
- apiGroup: rbac.authorization.k8s.io
kind: User
name: admin
```
- 2.2 设置用户readonly 的RBAC 权限,如下运行配置文件 `kubectl create -f ui-read-rbac.yaml`
``` bash
kind: ClusterRole
apiVersion: rbac.authorization.k8s.io/v1
metadata:
name: ui-read
rules:
- apiGroups:
- ""
resources:
- services
- services/proxy
verbs:
- get
- list
- watch
---
apiVersion: rbac.authorization.k8s.io/v1
kind: RoleBinding
metadata:
name: ui-read-binding
namespace: kube-system
roleRef:
apiGroup: rbac.authorization.k8s.io
kind: ClusterRole
name: ui-read
subjects:
- apiGroup: rbac.authorization.k8s.io
kind: User
name: readonly
```
- 2.3 访问 `https://x.x.x.x:6443/api/v1/namespaces/kube-system/services/kubernetes-dashboard/proxy` 使用 admin登录拥有所有权限,比如删除某个部署;使用 readonly登录只有查看权限,尝试删除某个部署会提示错误 `forbidden: User \"readonly\" cannot delete services/proxy in the namespace \"kube-system\"`
#### 3. 证书访问:最安全的方式,配置较复杂
- 使用集群CA 生成客户端证书,可以根据需要生成权限不同的证书,这里为了演示直接使用 kubectl使用的证书和key(在03.kubectl.yml阶段生成),该证书拥有所有权限
- 指定格式导出该证书,进入`/etc/kubernetes/ssl`目录,使用命令`openssl pkcs12 -export -in admin.pem -inkey admin-key.pem -out kube-admin.p12` 提示输入证书密码和确认密码,可以用密码再增加一层保护,也可以直接回车跳过,完成后目录下多了 `kube-admin.p12`文件,将它分发给授权的用户
- 用户将 `kube-admin.p12` 双击导入证书即可,`IE` 和`Chrome` 中输入`https://x.x.x.x:6443/api/v1/namespaces/kube-system/services/kubernetes-dashboard/proxy` 或者 `https://x.x.x.x:6443/ui` 即可访问。补充:最新firefox需要在浏览器中单独导入 [选项] - [隐私与安全] - [证书/查看证书] - [您的证书] 页面点击 [导入] 该证书
### 小结
+ dashboard 版本 1.6.3 访问控制实现较复杂,文档中给出的例子也有助于你理解 RBAC的灵活控制能力,当然最好去[官方文档](https://kubernetes.io/docs/admin/authorization/rbac/)学习一下,这块篇幅不长
+ 由于还未部署 Heapster 插件,当前 dashboard 不能展示 Pod、Nodes 的 CPU、内存等 metric 图形,后续部署 heapster后自然能够看到
+ 本文中的权限设置仅供演示用,生产环境请在此基础上修改成适合你安全需求的方式
================================================
FILE: docs/guide/dashboard.2.x.md
================================================
## dashboard
本文档基于 dashboard 2.2 版本,k8s 1.22 版本,因 dashboard 1.7 以后默认开启了自带的登录验证机制,因此不同版本登录有差异:
- 旧版(<= 1.6)建议通过apiserver访问,直接通过apiserver 认证授权机制去控制 dashboard权限,详见[旧版文档](dashboard.1.6.3.md)
- 新版(>= 1.7)可以使用自带的登录界面,使用不同Service Account Tokens 去控制访问 dashboard的权限
### 部署
参考 https://github.com/kubernetes/dashboard
+ 增加了通过`api-server`方式访问dashboard
+ 增加了`NodePort`方式暴露服务,这样集群外部可以使用 `https://NodeIP:NodePort` (注意是https不是http,区别于1.6.3版本) 直接访问 dashboard。
安装部署
``` bash
# ezctl 集成部署组件,xxxx 代表集群部署名
# dashboard 部署文件位于 /etc/kubeasz/clusters/xxxx/yml/dashboard/ 目录
./ezctl setup xxxx 07
```
### 验证部署
``` bash
# 查看pod 运行状态
kubectl get pod -n kube-system | grep dashboard
dashboard-metrics-scraper-856586f554-l6bf4 1/1 Running 0 35m
kubernetes-dashboard-698d4c759b-67gzg 1/1 Running 0 35m
# 查看dashboard service
kubectl get svc -n kube-system|grep dashboard
kubernetes-dashboard NodePort 10.68.219.38 443:24108/TCP 53s
# 查看pod 运行日志
kubectl logs -n kube-system kubernetes-dashboard-698d4c759b-67gzg
```
### 登陆
因为dashboard 作为k8s 原生UI,能够展示各种资源信息,甚至可以有修改、增加、删除权限,所以有必要对访问进行认证和控制,为演示方便这里使用 `https://NodeIP:NodePort` 方式访问 dashboard,支持两种登录方式:Kubeconfig、令牌(Token)
**注意:** 使用chrome浏览器访问 `https://NodeIP:NodePort` 可能提示安全风险无法访问,可以换firefox浏览器设置安全例外,继续访问。
- Token令牌方式登录(admin)
选择 Token 方式登录,复制下面输出的admin token 字段到输入框
``` bash
# 获取 Bearer Token,找到输出中 ‘token:’ 开头的后面部分
$ kubectl describe -n kube-system secrets admin-user
```
- Token令牌方式登录(只读)
选择 Token 方式登录,复制下面输出的read token 字段到输入框
``` bash
# 获取 Bearer Token,找到输出中 ‘token:’ 开头的后面部分
$ kubectl describe -n kube-system secrets dashboard-read-user
```
- Kubeconfig登录(admin)
Admin kubeconfig文件默认位置:`/root/.kube/config`,该文件中默认没有token字段,使用Kubeconfig方式登录,还需要将token追加到该文件中,完整的文件格式如下:
```
apiVersion: v1
clusters:
- cluster:
certificate-authority-data: LS0tLS1CRUdxxxxxxxxxxxxxx
server: https://192.168.1.2:6443
name: kubernetes
contexts:
- context:
cluster: kubernetes
user: admin
name: kubernetes
current-context: kubernetes
kind: Config
preferences: {}
users:
- name: admin
user:
client-certificate-data: LS0tLS1CRUdJTiBDRxxxxxxxxxxx
client-key-data: LS0tLS1CRUdJTxxxxxxxxxxxxxx
token: eyJhbGcixxxxxxxxxxxxxxxx
```
- Kubeconfig登录(只读)
首先[创建只读权限 kubeconfig文件](../op/kcfg-adm.md),然后类似追加只读token到该文件,略。
### 参考
- 1.[Dashboard docs](https://github.com/kubernetes/dashboard/blob/master/docs/README.md)
- 2.[a-read-only-kubernetes-dashboard](https://blog.cowger.us/2018/07/03/a-read-only-kubernetes-dashboard.html)
================================================
FILE: docs/guide/dashboard.md
================================================
## dashboard
本文档基于 dashboard 7.12.0 版本,k8s 1.32 版本,dashboard 7.0.0 以后引入大量不兼容变化。
### 部署
假设已经使用kubeasz 部署k8s集群完成;新版dashboard 部署如下:(以单机集群为例,其他情况请修改集群名称'default'为实际的名称)
``` bash
# 1. 修改 clusters/default/config.yml 文件,设置 dashboard_install: "yes"
# 2. 下载dashboard 需要的镜像
./ezdown -X dashboard
# 3. 执行安装,配置文件位于 clusters/default/yml/dashboard/ 目录
dk ezctl setup default 07
```
+ 增加`NodePort`方式暴露服务,这样集群外部可以使用 `https://NodeIP:NodePort` (注意是https不是http) 直接访问 dashboard。
### 验证
``` bash
# 查看pod 运行状态
kubectl get pod -n kube-system |grep kubernetes-dashboard
kubernetes-dashboard-api-6d77cb7964-4tklq 1/1 Running 0 17h
kubernetes-dashboard-auth-5fbd64f659-f9dst 1/1 Running 0 17h
kubernetes-dashboard-kong-6dcdbf5dfd-829h4 1/1 Running 0 17h
kubernetes-dashboard-metrics-scraper-7757c48476-4lcrq 1/1 Running 0 17h
kubernetes-dashboard-web-5f9f47979-7khrk 1/1 Running 0 17h
# 查看service
kubectl get svc -n kube-system |grep kong
kubernetes-dashboard-kong-proxy NodePort 10.68.148.170 443:31544/TCP 17h
```
### 登陆
因为dashboard 作为k8s 原生UI,能够展示各种资源信息,甚至可以有修改、增加、删除权限,所以有必要对访问进行认证和控制,为演示方便这里使用 `https://NodeIP:NodePort` 方式访问 dashboard,目前支持登录方式:令牌(Token)
**注意:** 使用chrome浏览器访问 `https://NodeIP:NodePort` 可能提示安全风险无法访问,可以换firefox浏览器设置安全例外,继续访问。
- Token令牌方式登录(admin)
选择 Token 方式登录,复制下面输出的admin token 字段到输入框
``` bash
# 获取 Bearer Token,找到输出中 ‘token:’ 开头的后面部分
$ kubectl describe -n kube-system secrets admin-user
```
- Token令牌方式登录(只读)
选择 Token 方式登录,复制下面输出的read token 字段到输入框
``` bash
# 获取 Bearer Token,找到输出中 ‘token:’ 开头的后面部分
$ kubectl describe -n kube-system secrets dashboard-read-user
```
### 参考
- [旧版文档 dashboard 1.6.3](dashboard.1.6.3.md)
- [旧版文档 dashboard 2.x](dashboard.2.x.md)
- https://github.com/kubernetes/dashboard
================================================
FILE: docs/guide/harbor.md
================================================
# harbor 镜像仓库
Habor是由VMWare中国团队开源的企业级容器镜像仓库。特性包括:友好的用户界面,基于角色的访问控制,水平扩展,同步复制,AD/LDAP集成以及审计日志等。本文档仅说明单机安装harbor 服务。
- 目录
- 安装步骤
- 安装讲解
- 配置docker/containerd信任harbor证书
- 在k8s集群使用harbor
- 管理维护
### 安装步骤
1. 下载离线安装包,成功后在/etc/kubeasz/down/目录下有离线包harbor-offline-installer-$HARBOR_VER.tgz
```
ezdown -D
ezdown -R
```
2. 利用ezctl [文档](../setup/ezctl.md) 创建一个新的集群,已有集群修改同样的文件
```
#clusters/xxx/hosts 中修改如下,配置harbor组下机器,设置NEW_INSTALL=true
...
# 'NEW_INSTALL': 'true' to install a harbor server; 'false' to integrate with existed one
[harbor]
192.168.1.8 NEW_INSTALL=true
...
#clusters/xxx/config.yml 中修改如下,按需修改HARBOR_DOMAIN/HARBOR_TLS_PORT 等配置项,举例如下
############################
# role:harbor
############################
# harbor version,完整版本号
HARBOR_VER: "v2.10.2"
HARBOR_DOMAIN: "harbor.yourdomain.com"
HARBOR_PATH: /var/data
HARBOR_TLS_PORT: 8443
HARBOR_REGISTRY: "{{ HARBOR_DOMAIN }}:{{ HARBOR_TLS_PORT }}"
# if set 'false', you need to put certs named harbor.pem and harbor-key.pem in directory 'down'
HARBOR_SELF_SIGNED_CERT: true
# install component
HARBOR_WITH_TRIVY: false
```
3. 配置完成后,执行 `./ezctl setup xxx harbor`,完成harbor安装和docker 客户端配置
- 安装验证
1. 在harbor节点使用`docker ps -a` 查看harbor容器组件运行情况
2. 浏览器访问地址(忽略证书报错) `https://${HARBOR_DOMAIN}:${HARBOR_TLS_PORT}`,管理员账号是 admin ,密码见harbor.yml文件 harbor_admin_password 对应值(默认密码 Harbor12345 已被随机生成的16位随机密码替换,不然存在安全隐患)
### 安装讲解
根据`playbooks/11.harbor.yml`文件,harbor节点需要以下步骤:
- role `os-harden` 系统安全加固(可选)
- role `chrony` 时间同步服务(可选)
- role `prepare` 基础系统环境准备
- role `docker` 安装docker
- role `harbor` 安装harbor
- 注意:`kube_node`节点在harbor部署完之后,需要配置harbor的证书(详见下节配置docker/containerd信任harbor证书),并可以在hosts里面添加harbor的域名解析,如果你的环境中有dns服务器,可以跳过hosts文件设置
1. 下载docker-compose可执行文件到$PATH目录
1. 自注册变量result判断是否已经安装harbor,避免重复安装问题
1. 解压harbor离线安装包到指定目录
1. 导入harbor所需 docker images
1. 创建harbor证书和私钥(复用集群的CA证书)
1. 修改harbor.yml配置文件
1. 启动harbor安装脚本
### 在k8s集群使用harbor
admin用户web登录后可以方便的创建项目,并指定项目属性(公开或者私有);然后创建用户,并在项目`成员`选项中选择用户和权限;
#### 镜像上传
使用docker客户端登录`{{ HARBOR_REGISTRY }}`,然后把镜像tag成 `{{ HARBOR_REGISTRY }}/$项目名/$镜像名:$TAG` 之后,即可使用docker push 上传
``` bash
docker login harbor.test.com
Username:
Password:
Login Succeeded
docker tag busybox:latest harbor.test.com/library/busybox:latest
docker push harbor.test.com/library/busybox:latest
The push refers to a repository [harbor.test.com/library/busybox]
0271b8eebde3: Pushed
latest: digest: sha256:91ef6c1c52b166be02645b8efee30d1ee65362024f7da41c404681561734c465 size: 527
```
#### k8s中使用harbor
1. 如果镜像保存在harbor中的公开项目中,那么只需要在yaml文件中简单指定harbor私有镜像即可,例如
``` bash
apiVersion: v1
kind: Pod
metadata:
name: test-busybox
spec:
containers:
- name: test-busybox
image: harbor.test.com/xxx/busybox:latest
imagePullPolicy: Always
```
2. 如果镜像保存在harbor中的私有项目中,那么yaml文件中使用该私有项目的镜像需要指定`imagePullSecrets`,例如
``` bash
apiVersion: v1
kind: Pod
metadata:
name: test-busybox
spec:
containers:
- name: test-busybox
image: harbor.test.com/xxx/busybox:latest
imagePullPolicy: Always
imagePullSecrets:
- name: harborkey1
```
其中 `harborKey1`可以用以下两种方式生成:
+ 1.使用 `kubectl create secret docker-registry harborkey1 --docker-server=harbor.test.com --docker-username=admin --docker-password=Harbor12345 --docker-email=team@test.com`
+ 2.使用yaml配置文件生成
``` bash
//harborkey1.yaml
apiVersion: v1
kind: Secret
metadata:
name: harborkey1
namespace: default
data:
.dockerconfigjson: {base64 -w 0 ~/.docker/config.json}
type: kubernetes.io/dockerconfigjson
```
前面docker login会在~/.docker下面创建一个config.json文件保存鉴权串,这里secret yaml的.dockerconfigjson后面的数据就是那个json文件的base64编码输出(-w 0让base64输出在单行上,避免折行)
### 管理维护
+ 日志目录 `/var/log/harbor`
+ 数据目录 `/var/data` ,其中最主要是 `/var/data/database` 和 `/var/data/registry` 目录,如果你要彻底重新安装harbor,删除这两个目录即可
先进入harbor安装目录 `cd /var/data/harbor`,常规操作如下:
1. 暂停harbor `docker-compose stop` : docker容器stop,并不删除容器
2. 恢复harbor `docker-compose start` : 恢复docker容器运行
3. 停止harbor `docker-compose down -v` : 停止并删除docker容器
4. 启动harbor `docker-compose up -d` : 启动所有docker容器
修改harbor的运行配置,需要如下步骤:
``` bash
# 停止 harbor
docker-compose down -v
# 修改配置
vim harbor.yml
# 执行./prepare已更新配置到docker-compose.yml文件
./prepare
# 启动 harbor
docker-compose up -d
```
================================================
FILE: docs/guide/helm.md
================================================
# Helm
`Helm`致力于成为k8s集群的应用包管理工具,希望像linux 系统的`RPM` `DPKG`那样成功;确实在k8s上部署复杂一点的应用很麻烦,需要管理很多yaml文件(configmap,controller,service,rbac,pv,pvc等等),而helm能够整齐管理这些文档:版本控制,参数化安装,方便的打包与分享等。
- 建议积累一定k8s经验以后再去使用helm;对于初学者来说手工去配置那些yaml文件对于快速学习k8s的设计理念和运行原理非常有帮助,而不是直接去使用helm,面对又一层封装与复杂度。
- 本文基于helm 3(建议版本),helm 2 文档[请看这里](helm2.md)
## 安装 helm
在官方repo下载[release版本](https://github.com/helm/helm/releases)中自带的二进制文件即可(以Linux amd64为例)
```
wget https://get.helm.sh/helm-v3.2.1-linux-amd64.tar.gz
mv ./linux-amd64/helm /usr/bin
```
- 启用官方 charts 仓库
```
helm repo add stable https://kubernetes-charts.storage.googleapis.com/
```
国内镜像
```
helm repo add stable http://mirror.azure.cn/kubernetes/charts
```
## 使用 helm 安装应用
helm3 安装命令与 helm2 稍有变化,个人习惯先下载对应charts到本地然后按照固定目录格式安装,以创建一个redis集群举例:
- 创建 redis-cluster 目录
``` bash
mkdir -p /opt/charts/redis-cluster
cd /opt/charts/redis-cluster
```
- 下载最新stalbe/redis-ha
```
helm repo update
helm pull stable/redis-ha
```
- 解压 charts,复制 values.yaml设置
```
tar zxvf redis-ha-*.tgz
cp redis-ha/values.yaml .
```
- 创建 start.sh 脚本记录启动命令
```
cat > start.sh << EOF
#!/bin/sh
set -x
ROOT=$(cd `dirname $0`; pwd)
cd $ROOT
helm install redis \
--create-namespace \
--namespace dependency \
-f ./values.yaml \
./redis-ha
EOF
```
- 查看当前目录结构如下
```
tree .
.
├── redis-ha # redis-ha 原始charts目录
├── start.sh # 启动命名脚本
└── values.yaml # 个性化参数配置
```
- 修改当前目录的 values.yaml 为你的个性化配置
``` bash
#举例values.yaml 配置如下,没有启用PV
#cat values.yaml
image:
repository: redis
tag: 5.0.6-alpine
replicas: 2
## Redis specific configuration options
redis:
port: 6379
masterGroupName: "mymaster" # must match ^[\\w-\\.]+$) and can be templated
config:
## For all available options see http://download.redis.io/redis-stable/redis.conf
min-replicas-to-write: 1
min-replicas-max-lag: 5 # Value in seconds
maxmemory: "4g" # Max memory to use for each redis instance. Default is unlimited.
maxmemory-policy: "allkeys-lru" # Max memory policy to use for each redis instance. Default is volatile-lru.
repl-diskless-sync: "yes"
rdbcompression: "yes"
rdbchecksum: "yes"
resources:
requests:
memory: 200Mi
cpu: 100m
limits:
memory: 4000Mi
## Sentinel specific configuration options
sentinel:
port: 26379
quorum: 1
resources:
requests:
memory: 200Mi
cpu: 100m
limits:
memory: 200Mi
hardAntiAffinity: true
## Configures redis with AUTH (requirepass & masterauth conf params)
auth: false
persistentVolume:
enabled: false
hostPath:
path: "/data/mcs-redis/{{ .Release.Name }}"
```
- 执行安装
```
bash ./start.sh
```
- 查看安装
```
helm ls -A
NAME NAMESPACE REVISION UPDATED STATUS CHART APP VERSION
redis dependency 1 2020-05-28 20:57:31.166002853 +0800 CST deployed redis-ha-4.4.4 5.0.6
# 查看k8s上资源
kubectl get pod,svc -n dependency
NAME READY STATUS RESTARTS AGE
pod/redis-redis-ha-server-0 2/2 Running 0 119s
pod/redis-redis-ha-server-1 2/2 Running 0 104s
NAME TYPE CLUSTER-IP EXTERNAL-IP PORT(S) AGE
service/redis-redis-ha ClusterIP None 6379/TCP,26379/TCP 119s
service/redis-redis-ha-announce-0 ClusterIP 10.68.41.65 6379/TCP,26379/TCP 119s
service/redis-redis-ha-announce-1 ClusterIP 10.68.64.49 6379/TCP,26379/TCP 119s
```
================================================
FILE: docs/guide/hpa.md
================================================
## Horizontal Pod Autoscaling
自动水平伸缩,是指运行在k8s上的应用负载(POD),可以根据资源使用率进行自动扩容、缩容;我们知道应用的资源使用率通常都有高峰和低谷,所以k8s的`HPA`特性应运而生;它也是最能体现区别于传统运维的优势之一,不仅能够弹性伸缩,而且完全自动化!
根据 CPU 使用率或自定义 metrics 自动扩展 Pod 数量(支持 replication controller、deployment);k8s1.6版本之前是通过kubelet来获取监控指标,1.6版本之后是通过api server、heapster或者kube-aggregator来获取监控指标。
### Metrics支持
根据不同版本的API中,HPA autoscale时靠以下指标来判断资源使用率:
- autoscaling/v1: CPU
- autoscaling/v2alpha1
- 内存
- 自定义metrics
- 多metrics组合: 根据每个metric的值计算出scale的值,并将最大的那个值作为扩容的最终结果
### 基础示例
本实验环境基于k8s 1.8 和 1.9,仅使用`autoscaling/v1` 版本API,**注意确保**`k8s` 集群插件`kubedns` 和 `heapster` 工作正常。
``` bash
# 创建deploy和service
$ kubectl run php-apache --image=pilchard/hpa-example --requests=cpu=200m --expose --port=80
# 创建autoscaler
$ kubectl autoscale deploy php-apache --cpu-percent=50 --min=1 --max=10
# 等待3~5分钟查看hpa状态
$ kubectl get hpa php-apache
NAME REFERENCE TARGETS MINPODS MAXPODS REPLICAS AGE
php-apache Deployment/php-apache 0% / 50% 1 10 1 3m
# 增加负载
$ kubectl run --rm -it load-generator --image=busybox /bin/sh
Hit enter for command prompt
$ while true; do wget -q -O- http://php-apache; done;
# 等待约5分钟查看hpa显示负载增加,且副本数目增加为4
$ kubectl get hpa php-apache
NAME REFERENCE TARGETS MINPODS MAXPODS REPLICAS AGE
php-apache Deployment/php-apache 430% / 50% 1 10 4 4m
# 注意k8s为了避免频繁增删pod,对副本的增加速度有限制
# 实验过程可以看到副本数目从1到4到8到10,大概都需要4~5分钟的缓冲期
$ kubectl get hpa php-apache
NAME REFERENCE TARGETS MINPODS MAXPODS REPLICAS AGE
php-apache Deployment/php-apache 86% / 50% 1 10 8 9m
$ kubectl get hpa php-apache
NAME REFERENCE TARGETS MINPODS MAXPODS REPLICAS AGE
php-apache Deployment/php-apache 52% / 50% 1 10 10 12m
# 清除负载,CTRL+C 结束上述循环程序,稍后副本数目变回1
$ kubectl get hpa php-apache
NAME REFERENCE TARGETS MINPODS MAXPODS REPLICAS AGE
php-apache Deployment/php-apache 0% / 50% 1 10 1 17m
```
================================================
FILE: docs/guide/index.md
================================================
## 使用指南
### 附加组件安装
- 安装 [kubedns](kubedns.md)
- 安装 [dashboard](dashboard.md)
- 安装 [metrics-server](metrics-server.md)
- 安装 [prometheus](prometheus.md)
- 安装 [kubeapps](kubeapps.md)
- 安装 [ingress](ingress.md)
- 安装 [helm](helm.md)
- 安装 [efk](efk.md)
- 安装 [harbor](harbor.md)
- 安装 [metallb](metallb.md)
### 基础特性演示
- 自动水平伸缩 [Horizontal Pod Autoscaling](hpa.md)
- 网络安全策略 [Network Policy](networkpolicy.md)
- 滚动更新 [rollingupdate](rollingupdateWithZeroDowntime.md)
================================================
FILE: docs/guide/ingress-tls.md
================================================
# 使用 traefik 配置 https ingress
本文档已过期,安装最新版本,请参考相关官方文档。
本文档基于 traefik 配置 https ingress 规则,请先阅读[配置基本 ingress](ingress.md)。与基本 ingress-controller 相比,需要额外配置 https tls 证书,主要步骤如下:
## 1.准备 tls 证书
可以使用Let's Encrypt签发的免费证书,这里为了测试方便使用自签证书 (tls.key/tls.crt),注意CN 配置为 ingress 的域名:
``` bash
$ openssl req -x509 -nodes -days 365 -newkey rsa:2048 -keyout tls.key -out tls.crt -subj "/CN=hello.test.com"
```
## 2.在 kube-system 命名空间创建 secret: traefik-cert,以便后面 traefik-controller 挂载该证书
``` bash
$ kubectl -n kube-system create secret tls traefik-cert --key=tls.key --cert=tls.crt
```
## 3.创建 traefik-controller,增加 traefik.toml 配置文件及https 端口暴露等,详见该 yaml 文件
``` bash
$ kubectl apply -f /etc/kubeasz/manifests/ingress/traefik/tls/traefik-controller.yaml
```
## 4.创建 https ingress 例子
``` bash
# 创建示例应用
$ kubectl run test-hello --image=nginx:alpine --port=80 --expose
# hello-tls-ingress 示例
apiVersion: networking.k8s.io/v1beta1
kind: Ingress
metadata:
name: hello-tls-ingress
annotations:
kubernetes.io/ingress.class: traefik
spec:
rules:
- host: hello.test.com
http:
paths:
- backend:
serviceName: test-hello
servicePort: 80
tls:
- secretName: traefik-cert
# 创建https ingress
$ kubectl apply -f /etc/kubeasz/manifests/ingress/traefik/tls/hello-tls.ing.yaml
# 注意根据hello示例,需要在default命名空间创建对应的secret: traefik-cert
$ kubectl create secret tls traefik-cert --key=tls.key --cert=tls.crt
```
## 5.验证 https 访问
验证 traefik-ingress svc
``` bash
$ kubectl get svc -n kube-system traefik-ingress-service
NAME TYPE CLUSTER-IP EXTERNAL-IP PORT(S) AGE
traefik-ingress-service NodePort 10.68.250.253 80:23456/TCP,443:23457/TCP,8080:35941/TCP 66m
```
可以看到项目默认使用nodePort 23456暴露traefik 80端口,nodePort 23457暴露 traefik 443端口,因此在客户端 hosts 增加记录 `$Node_IP hello.test.com`之后,可以在浏览器验证访问如下:
``` bash
https://hello.test.com:23457
```
如果你已经配置了[转发 ingress nodePort](../op/loadballance_ingress_nodeport.md),那么增加对应 hosts记录后,可以验证访问 `https://hello.test.com`
## 配置 dashboard ingress
前提1:k8s 集群的dashboard 已安装
```
$ kubectl get svc -n kube-system | grep dashboard
kubernetes-dashboard NodePort 10.68.211.168 443:39308/TCP 3d11h
```
前提2:`/etc/kubeasz/manifests/ingress/traefik/tls/traefik-controller.yaml`的配置文件`traefik.toml`开启了`insecureSkipVerify = true`
配置 dashboard ingress:`kubectl apply -f /etc/kubeasz/manifests/ingress/traefik/tls/k8s-dashboard.ing.yaml` 内容如下:
```
apiVersion: networking.k8s.io/v1beta1
kind: Ingress
metadata:
name: kubernetes-dashboard
namespace: kube-system
annotations:
traefik.ingress.kubernetes.io/redirect-entry-point: https
spec:
rules:
- host: dashboard.test.com
http:
paths:
- path: /
backend:
serviceName: kubernetes-dashboard
servicePort: 443
```
- 注意annotations 配置了 http 跳转 https 功能
- 注意后端服务是443端口
## 参考
- [Add a TLS Certificate to the Ingress](https://docs.traefik.io/user-guide/kubernetes/#add-a-tls-certificate-to-the-ingress)
================================================
FILE: docs/guide/ingress.md
================================================
## Ingress简介
本文档已过期,安装最新版本,请参考相关官方文档。
ingress就是从外部访问k8s集群的入口,将用户的URL请求转发到不同的service上。ingress相当于nginx反向代理服务器,它包括的规则定义就是URL的路由信息;它的实现需要部署`Ingress controller`(比如 [traefik](https://github.com/containous/traefik) [ingress-nginx](https://github.com/kubernetes/ingress-nginx) 等),`Ingress controller`通过apiserver监听ingress和service的变化,并根据规则配置负载均衡并提供访问入口,达到服务发现的作用。
- 未配置ingress:
集群外部 -> NodePort -> K8S Service
- 配置ingress:
集群外部 -> Ingress -> K8S Service
- **注意:ingress 本身也需要部署`Ingress controller`时使用以下几种方式让外部访问**
- 使用`NodePort`方式
- 使用`hostPort`方式
- 使用LoadBalancer地址方式
- 以下讲解基于`Traefik`,如果想要了解`ingress-nginx`的原理与实践,推荐阅读博客[烂泥行天下](https://www.ilanni.com/?p=14501)的相关文章
### 部署 Traefik
Traefik 提供了一个简单好用 `Ingress controller`,下文侧重讲解 ingress部署和测试例子。请查看yaml配置 [traefik-ingress.yaml](../../manifests/ingress/traefik/traefik-ingress.yaml),参考[traefik 官方k8s例子](https://github.com/containous/traefik/tree/master/examples/k8s)
#### 安装 traefik ingress-controller
``` bash
kubectl create -f /etc/kubeasz/manifests/ingress/traefik/traefik-ingress.yaml
```
+ 注意需要配置 `RBAC`授权
+ 注意`trafik pod`中 `80`端口为 traefik ingress-controller的服务端口,`8080`端口为 traefik 的管理WEB界面;为后续配置方便指定`80` 端口暴露`NodePort`端口为 `23456`(对应于在hosts配置中`NODE_PORT_RANGE`范围内可用端口)
#### 验证 traefik ingress-controller
``` bash
# kubectl get deploy -n kube-system traefik-ingress-controller
NAME DESIRED CURRENT UP-TO-DATE AVAILABLE AGE
traefik-ingress-controller 1 1 1 1 4m
# kubectl get svc -n kube-system traefik-ingress-service
NAME TYPE CLUSTER-IP EXTERNAL-IP PORT(S) AGE
traefik-ingress-service NodePort 10.68.69.170 80:23456/TCP,8080:34815/TCP 4m
```
+ 可以看到`traefik-ingress-service` 服务端口`80`暴露的nodePort确实为`23456`
#### 测试 ingress
+ 首先创建测试用K8S应用,并且该应用服务不用nodePort暴露,而是用ingress方式让外部访问
``` bash
kubectl run test-hello --image=nginx:alpine --expose --port=80
##
# kubectl get deploy test-hello
NAME DESIRED CURRENT UP-TO-DATE AVAILABLE AGE
test-hello 1 1 1 1 56s
# kubectl get svc test-hello
NAME TYPE CLUSTER-IP EXTERNAL-IP PORT(S) AGE
test-hello ClusterIP 10.68.124.115 80/TCP 1m
```
+ 然后为这个应用创建 ingress,`kubectl create -f /etc/kubeasz/manifests/ingress/test-hello.ing.yaml`
``` bash
# test-hello.ing.yaml内容
apiVersion: networking.k8s.io/v1beta1
kind: Ingress
metadata:
name: test-hello
spec:
rules:
- host: hello.test.com
http:
paths:
- path: /
backend:
serviceName: test-hello
servicePort: 80
```
+ 集群内部尝试访问: `curl -H Host:hello.test.com 10.68.69.170(traefik-ingress-service的服务地址)` 能够看到欢迎页面 `Welcome to nginx!`;
+ 在集群外部尝试访问(假定集群一个NodeIP为 192.168.1.1): `curl -H Host:hello.test.com 192.168.1.1:23456`,也能够看到欢迎页面 `Welcome to nginx!`,说明ingress测试成功
#### 为 traefik WEB 管理页面创建 ingress 规则
`kubectl create -f /etc/kubeasz/manifests/ingress/traefik/traefik-ui.ing.yaml`
``` bash
# traefik-ui.ing.yaml内容
---
apiVersion: networking.k8s.io/v1beta1
kind: Ingress
metadata:
name: traefik-web-ui
namespace: kube-system
spec:
rules:
- host: traefik-ui.test.com
http:
paths:
- path: /
backend:
serviceName: traefik-ingress-service
servicePort: 8080
```
+ 在集群外部可以使用 `curl -H Host:traefik-ui.test.com 192.168.1.1:23456` 尝试访问WEB管理页面,返回 `Found.`说明 traefik-ui的ingress配置生效了。
+ 在客户端主机也可以通过修改本机 `hosts` 文件,如上例子,增加两条记录:
``` text
192.168.1.1 hello.test.com
192.168.1.1 traefik-ui.test.com
```
打开浏览器输入域名 `http://hello.test.com:23456` 和 `http://traefik-ui.test.com:23456` 就可以访问k8s的应用服务了。
### 可选1: 使用`LoadBalancer`服务类型来暴露ingress,自有环境(非公有云)可以参考[metallb文档](metallb.md)
``` bash
# 修改traefik-ingress 使用 LoadBalancer服务
$ sed -i 's/NodePort$/LoadBalancer/g' /etc/kubeasz/manifests/ingress/traefik/traefik-ingress.yaml
# 创建traefik-ingress
$ kubectl apply -f /etc/kubeasz/manifests/ingress/traefik/traefik-ingress.yaml
# 验证
$ kubectl get svc --all-namespaces |grep traefik
kube-system traefik-ingress-service LoadBalancer 10.68.163.243 192.168.1.241 80:23456/TCP,8080:37088/TCP 1m
```
这时可以修改客户端本机 `hosts`文件:(如上例192.168.1.241)
``` text
192.168.1.241 hello.test.com
192.168.1.241 traefik-ui.test.com
```
打开浏览器输入域名 `http://hello.test.com` 和 `http://traefik-ui.test.com`可以正常访问。
### 可选2: 部署`ingress-service`的负载均衡
- 利用 nginx/haproxy 等集群,可以做代理转发以去掉 `23456`这个端口。如果你的集群根据本项目部署了高可用方案,那么可以利用`LB` 节点haproxy 来做,当然如果生产环境K8S应用已经部署非常多,建议还是使用独立的 `nginx/haproxy`集群。
具体参考[配置转发 ingress nodePort](../op/loadballance_ingress_nodeport.md),如上配置访问集群`MASTER_IP`的`80`端口时,由haproxy代理转发到实际的node节点暴露的nodePort端口上了。这时可以修改客户端本机 `hosts`文件如下:(假定 MASTER_IP=192.168.1.10)
``` text
192.168.1.10 hello.test.com
192.168.1.10 traefik-ui.test.com
```
打开浏览器输入域名 `http://hello.test.com` 和 `http://traefik-ui.test.com`可以正常访问。
## 下一步[配置https ingress](ingress-tls.md)
================================================
FILE: docs/guide/ipvs.md
================================================
# IPVS 服务负载均衡
kube-proxy 组件监听 API server 中 service 和 endpoint 的变化情况,从而为 k8s 集群内部的 service 提供动态负载均衡。在v1.10之前主要通过 iptables来实现,是稳定、推荐的方式,但是当服务多的时候会产生太多的 iptables 规则,大规模情况下有明显的性能问题;在v1.11 GA的 ipvs高性能负载模式,采用增量式更新,并可以保证 service 更新期间连接的保持。
- NOTE: k8s v1.11.0 CentOS7下使用ipvs模式会有问题(见 kubernetes/kubernetes#65461),测试 k8s v1.10.2 CentOS7 可以。
## 启用 ipvs
建议 k8s 版本1.13 及以后启用 ipvs,只要在 kube-proxy 启动参数(或者配置文件中)中增加 `--proxy-mode=ipvs`:
``` bash
[Unit]
Description=Kubernetes Kube-Proxy Server
After=network.target
[Service]
WorkingDirectory=/var/lib/kube-proxy
ExecStart={{ bin_dir }}/kube-proxy \
--bind-address={{ NODE_IP }} \
--hostname-override={{ NODE_IP }} \
--kubeconfig=/etc/kubernetes/kube-proxy.kubeconfig \
--logtostderr=true \
--proxy-mode=ipvs
Restart=on-failure
RestartSec=5
LimitNOFILE=65536
[Install]
WantedBy=multi-user.target
```
================================================
FILE: docs/guide/istio.md
================================================
---
title: "Istio 1.1.7 安装 "
date: 2019-05-19T19:44:00+08:00
---
#### Service Mesh(服务网格)
---
Kubernetes 已经给我们带来了诸多的好处。但是仍有些需求比如 A/B 测试、金丝雀发布、限流、访问控制,端到端认证等需要运维人员进一步去解决。
Istio 是完全开源的服务网格,提供了一套完整的解决方案,可以透明地分层到现有的分布式应用程序上。对开发人员几乎无感的同时获得超能力。
如果想要现有的服务支持 Istio,只需要在当前的环境中部署一个特殊的 sidecar 代理,即可。
##### 前提
----
- 安装 Kubernetes 集群 1.9+
- [安装 Helm](./helm.md)
##### 准备
----
进入 [Istio release](https://github.com/istio/istio/releases) 页面下载最新版安装包并解压到当前目录,
```sh
curl -L https://git.io/getLatestIstio | sh -
ll istio-1.1.7/
total 40
drwxr-xr-x 2 root root 4096 May 15 08:59 bin
drwxr-xr-x 6 root root 4096 May 15 08:59 install
-rw-r--r-- 1 root root 602 May 15 08:59 istio.VERSION
-rw-r--r-- 1 root root 11343 May 15 08:59 LICENSE
-rw-r--r-- 1 root root 5921 May 15 08:59 README.md
drwxr-xr-x 15 root root 4096 May 15 08:59 samples
drwxr-xr-x 7 root root 4096 May 15 08:59 tools
```
- install Kubernetes 安装所需的 .yaml 文件
- samples Task中的示例应用
- bin/istioctl 客户端工具
- istio.VERSION 配置文件
#### 安装
----
注意事项
- Node 节点内存不能低于 4G,否则相关容器可能启动失败
- Istio 默认使用‘负载均衡器’服务对象类型。对于裸机安装没有负载均衡器的情况下,安装需指定‘NodePort’类型。
##### 方案1:使用 Helm template 进行安装
```bash
cd /usr/local/src/istio-1.1.7
kubectl create namespace istio-system
# 安装 istio-init chart,来启动 Istio CRD 的安装过程
helm template install/kubernetes/helm/istio-init --name istio-init --namespace istio-system --set gateways.istio-ingressgateway.type=NodePort --set gateways.istio-egressgateway.type=NodePort | kubectl apply -f -
# 稍等一会儿执行
# 输出 23 或者 28 (若开启了 cert-manager)
kubectl get crds | grep 'istio.io\|certmanager.k8s.io' | wc -l
# 部署与你选择的配置文件相对应的 Istio 的核心组件
# 不同配置说明 https://istio.io/zh/docs/setup/kubernetes/additional-setup/config-profiles/
# 选择 default 配置
helm template install/kubernetes/helm/istio --name istio --namespace istio-system \
--set gateways.istio-ingressgateway.type=NodePort \
--set gateways.istio-egressgateway.type=NodePort | kubectl apply -f -
# 或选择 demo 配置
helm template install/kubernetes/helm/istio --name istio --namespace istio-system \
--set gateways.istio-ingressgateway.type=NodePort \
--set gateways.istio-egressgateway.type=NodePort \
--values install/kubernetes/helm/istio/values-istio-demo.yaml | kubectl apply -f -
```
##### 方案2:在 Helm 和 Tiller 的环境中使用 helm install 命令进行安装
见[官方文档](https://istio.io/zh/docs/setup/kubernetes/install/helm/#%E6%96%B9%E6%A1%88-2-%E5%9C%A8-helm-%E5%92%8C-tiller-%E7%9A%84%E7%8E%AF%E5%A2%83%E4%B8%AD%E4%BD%BF%E7%94%A8-helm-install-%E5%91%BD%E4%BB%A4%E8%BF%9B%E8%A1%8C%E5%AE%89%E8%A3%85)
##### 验证
```bash
kubectl get pod -n istio-system
# default 配置时
NAME READY STATUS RESTARTS AGE
istio-citadel-899dfb67c-5hlsc 1/1 Running 0 49s
istio-cleanup-secrets-1.1.7-nkdxt 0/1 Completed 0 50s
istio-galley-555dd7c7d7-rpfln 1/1 Running 0 49s
istio-ingressgateway-5b547dfb7b-ctm5l 1/1 Running 0 49s
istio-init-crd-10-l9xcj 0/1 Completed 0 66s
istio-init-crd-11-nqvml 0/1 Completed 0 66s
istio-pilot-9f5c75ddf-n5s6p 2/2 Running 0 49s
istio-policy-bd45d757d-6qcdg 2/2 Running 1 49s
istio-security-post-install-1.1.7-nbwwv 0/1 Completed 0 50s
istio-sidecar-injector-998dd6cbb-n2hdm 1/1 Running 0 49s
istio-telemetry-656df5b64-k8vkf 2/2 Running 1 49s
prometheus-7f87866f5f-t97wc 1/1 Running 0 49s
# demo 配置时
grafana-749c78bcc5-fbzmn 1/1 Running 0 101s
istio-citadel-899dfb67c-8shx2 1/1 Running 0 100s
istio-cleanup-secrets-1.1.7-jbhsl 0/1 Completed 0 102s
istio-egressgateway-748d5fd794-x5bjt 1/1 Running 0 101s
istio-galley-555dd7c7d7-86r2b 1/1 Running 0 101s
istio-grafana-post-install-1.1.7-kq7b4 0/1 Completed 0 103s
istio-ingressgateway-55dd86767f-jd9m4 1/1 Running 0 101s
istio-init-crd-10-l9xcj 0/1 Completed 0 16m
istio-init-crd-11-nqvml 0/1 Completed 0 16m
istio-pilot-6964dd4957-7bzdq 2/2 Running 0 101s
istio-policy-689687bd77-ncw2n 2/2 Running 1 101s
istio-security-post-install-1.1.7-t2kwh 0/1 Completed 0 102s
istio-sidecar-injector-998dd6cbb-7mwkh 1/1 Running 0 100s
istio-telemetry-8564679887-59c8z 2/2 Running 1 101s
istio-tracing-595796cf54-jn49s 1/1 Running 0 100s
kiali-5df77dc9b6-psjs4 1/1 Running 0 101s
prometheus-7f87866f5f-hrbgt 1/1 Running 0 100s
```
```bash
kubectl get svc -n istio-system
# default 配置时
NAME TYPE CLUSTER-IP EXTERNAL-IP PORT(S) AGE
istio-citadel ClusterIP 10.68.236.249 8060/TCP,15014/TCP 75s
istio-galley ClusterIP 10.68.105.102 443/TCP,15014/TCP,9901/TCP 75s
istio-ingressgateway NodePort 10.68.181.46 15020:32761/TCP,80:31380/TCP,443:31390/TCP,31400:31400/TCP,15029:33185/TCP,15030:20745/TCP,15031:36208/TCP,15032:34095/TCP,15443:36244/TCP 75s
istio-pilot ClusterIP 10.68.252.143 15010/TCP,15011/TCP,8080/TCP,15014/TCP 75s
istio-policy ClusterIP 10.68.40.51 9091/TCP,15004/TCP,15014/TCP 75s
istio-sidecar-injector ClusterIP 10.68.55.134 443/TCP 74s
istio-telemetry ClusterIP 10.68.16.11 9091/TCP,15004/TCP,15014/TCP,42422/TCP 75s
prometheus ClusterIP 10.68.65.238 9090/TCP 75s
# demo 配置时
NAME TYPE CLUSTER-IP EXTERNAL-IP PORT(S) AGE
grafana ClusterIP 10.68.65.248 3000/TCP 2m27s
istio-citadel ClusterIP 10.68.72.100 8060/TCP,15014/TCP 2m26s
istio-egressgateway NodePort 10.68.21.24 80:26775/TCP,443:28249/TCP,15443:38494/TCP 2m27s
istio-galley ClusterIP 10.68.73.9 443/TCP,15014/TCP,9901/TCP 2m27s
istio-ingressgateway NodePort 10.68.122.190 15020:39248/TCP,80:31380/TCP,443:31390/TCP,31400:31400/TCP,15029:33522/TCP,15030:26010/TCP,15031:27064/TCP,15032:32158/TCP,15443:30848/TCP 2m27s
istio-pilot ClusterIP 10.68.116.5 15010/TCP,15011/TCP,8080/TCP,15014/TCP 2m26s
istio-policy ClusterIP 10.68.239.246 9091/TCP,15004/TCP,15014/TCP 2m27s
istio-sidecar-injector ClusterIP 10.68.93.151 443/TCP 2m26s
istio-telemetry ClusterIP 10.68.117.254 9091/TCP,15004/TCP,15014/TCP,42422/TCP 2m26s
jaeger-agent ClusterIP None 5775/UDP,6831/UDP,6832/UDP 2m25s
jaeger-collector ClusterIP 10.68.103.8 14267/TCP,14268/TCP 2m26s
jaeger-query ClusterIP 10.68.73.252 16686/TCP 2m26s
kiali ClusterIP 10.68.214.228 20001/TCP 2m27s
prometheus ClusterIP 10.68.203.209 9090/TCP 2m26s
tracing ClusterIP 10.68.113.236 80/TCP 2m25s
zipkin ClusterIP 10.68.96.189 9411/TCP 2m25s
```
##### Sidecar 的自动注入
注意事项
需要在kube-apiserver 启动 admission-control 参数中加入 MutatingAdmissionWebhook 和 ValidatingAdmissionWebhook并确保正确的顺序,如果是多master安装,确保每个kube-apiserver都要进行修改。
##### 部署应用验证
istio 的samples目录中有很多示例。我们现在使用samples/sleep/sleep.yaml 来验证刚刚开启的Sidecar自动注入功能。
进入目录 istio-1.1.7/ 部署一个新的应用
```bash
cd istio-1.1.7/
kubectl apply -f samples/sleep/sleep.yaml
kubectl get pod
NAME READY STATUS RESTARTS AGE
sleep-7549f66447-wv8cl 1/1 Running 0 1m
```
一切都是熟悉的味道。下面给 default 命名空间设置标签:istio-injection=enabled,这样就会在pod 创建时触发 Sidecar 的注入过程。从此default 名称空间拥有了超能力.
```bash
kubectl label namespace default istio-injection=enabled
kubectl get namespace -L istio-injection
NAME STATUS AGE ISTIO-INJECTION
default Active 1h enabled
istio-system Active 3d22h
kube-public Active 4d2h
kube-system Active 4d2h
```
接下来删除上面创建的pod,观察下有什么变化。
```bash
kubectl delete pod sleep-7549f66447-wv8cl
pod "sleep-7549f66447-wv8cl" deleted
kubectl get pod
NAME READY STATUS RESTARTS AGE
sleep-7549f66447-x4td6 2/2 Running 0 37s
```
刚刚的pod里面现在已经拥有两个容器,进入pod一探究竟。
```bash
kubectl describe pod sleep-7549f66447-x4td6
....
Containers:
sleep:
Container ID: docker://
Image: pstauffer/curl
....
istio-proxy:
Container ID: docker://
Image: docker.io/istio/proxyv2:1.1.7
....
```
多出了一个 `istio-proxy` 容器及其对应的存储卷
#### 卸载istio
---
```bash
# 采用 default 配置安装
helm template install/kubernetes/helm/istio --name istio --namespace istio-system | kubectl delete -f -
# 采用 demo 配置安装
helm template install/kubernetes/helm/istio --name istio --namespace istio-system \
--values install/kubernetes/helm/istio/values-istio-demo.yaml | kubectl delete -f -
kubectl delete namespace istio-system
```
#### 资源
- [官方安装文档](https://istio.io/zh/docs/setup/kubernetes/install/helm/)
================================================
FILE: docs/guide/kernel_upgrade.md
================================================
# Linux Kernel 升级
k8s,docker,cilium等很多功能、特性需要较新的linux内核支持,所以有必要在集群部署前对内核进行升级;CentOS7 和 Ubuntu16.04可以很方便的完成内核升级。
## CentOS7
红帽企业版 Linux 仓库网站 https://www.elrepo.org,主要提供各种硬件驱动(显卡、网卡、声卡等)和内核升级相关资源;兼容 CentOS7 内核升级。如下按照网站提示载入elrepo公钥及最新elrepo版本,然后按步骤升级内核(以安装长期支持版本 kernel-lt 为例)
``` bash
#安装所需软件包
yum install -y perl wget
#下载所需内核版本的 RPM 包,更多版本可以从中寻找(http://mirrors.coreix.net/elrepo-archive-archive/kernel/el7/x86_64/RPMS/)
wget http://mirrors.coreix.net/elrepo-archive-archive/kernel/el7/x86_64/RPMS/kernel-lt-5.4.278-1.el7.elrepo.x86_64.rpm
wget http://mirrors.coreix.net/elrepo-archive-archive/kernel/el7/x86_64/RPMS/kernel-lt-devel-5.4.278-1.el7.elrepo.x86_64.rpm
wget http://mirrors.coreix.net/elrepo-archive-archive/kernel/el7/x86_64/RPMS/kernel-lt-headers-5.4.278-1.el7.elrepo.x86_64.rpm
wget http://mirrors.coreix.net/elrepo-archive-archive/kernel/el7/x86_64/RPMS/kernel-lt-tools-5.4.278-1.el7.elrepo.x86_64.rpm
wget http://mirrors.coreix.net/elrepo-archive-archive/kernel/el7/x86_64/RPMS/kernel-lt-tools-libs-5.4.278-1.el7.elrepo.x86_64.rpm
# 卸载旧版工具(安装kernel-lt-tools会和旧版本的kernel-tools导致冲突,需要卸载旧版本的)
yum remove kernel-tools kernel-tools-libs -y
#安装下载的 RPM 包
rpm -ivh kernel-lt-tools-libs-5.4.278-1.el7.elrepo.x86_64.rpm
rpm -ivh kernel-lt-tools-5.4.278-1.el7.elrepo.x86_64.rpm
rpm -ivh kernel-lt-5.4.278-1.el7.elrepo.x86_64.rpm
rpm -ivh kernel-lt-devel-5.4.278-1.el7.elrepo.x86_64.rpm
#验证安装,可以看到新版本的和旧版本的
rpm -qa | grep kernel
kernel-lt-5.4.278-1.el7.elrepo.x86_64
kernel-lt-tools-libs-5.4.278-1.el7.elrepo.x86_64
kernel-3.10.0-1160.71.1.el7.x86_64
kernel-lt-devel-5.4.278-1.el7.elrepo.x86_64
kernel-lt-tools-5.4.278-1.el7.elrepo.x86_64
#查看默认启动顺序
awk -F\' '$1=="menuentry " {print i++ " : " $2}' /etc/grub2.cfg
0 : CentOS Linux (5.4.278-1.el7.elrepo.x86_64) 7 (Core)
1 : CentOS Linux (3.10.0-1160.71.1.el7.x86_64) 7 (Core)
2 : CentOS Linux (0-rescue-0b208d4cc51848998d32430e022d3040) 7 (Core)
#设置默认启动内核顺序
grub2-set-default 0
#重启
reboot
#重启后进行检查是否成功切换到新内核
uname -r
5.4.278-1.el7.elrepo.x86_64
```
## Ubuntu16.04
``` bash
打开 http://kernel.ubuntu.com/~kernel-ppa/mainline/ 并选择列表中选择你需要的版本(以4.16.3为例)。
接下来,根据你的系统架构下载 如下.deb 文件:
Build for amd64 succeeded (see BUILD.LOG.amd64):
linux-headers-4.16.3-041603_4.16.3-041603.201804190730_all.deb
linux-headers-4.16.3-041603-generic_4.16.3-041603.201804190730_amd64.deb
linux-image-4.16.3-041603-generic_4.16.3-041603.201804190730_amd64.deb
#安装后重启即可
$ sudo dpkg -i *.deb
```
================================================
FILE: docs/guide/kubedns.md
================================================
# 集群 DNS
DNS 是 k8s 集群首要部署的组件,它为集群中的其他 pods 提供域名解析服务;主要可以解析 `集群服务名 SVC` 和 `Pod hostname`;目前建议部署 `coredns`。
NodeLocal DNSCache在集群的上运行一个dnsCache daemonset来提高clusterDNS性能和可靠性。在K8S集群上的一些测试表明:相比于纯coredns方案,nodelocaldns + coredns方案能够大幅降低DNS查询timeout的频次,提升服务稳定性。参考官方文档:https://kubernetes.io/docs/tasks/administer-cluster/nodelocaldns/
### 部署 dns
配置文件参考 `https://github.com/kubernetes/kubernetes` 项目目录 `kubernetes/cluster/addons/dns`
+ 安装
目前 kubeasz 已经自动集成安装 coredns 和 nodelocaldns 组件,配置模板位于`roles/cluster-addon/templates/`目录。
``` bash
# 默认已经集成安装,假设集群名为xxxx
ezctl setup xxxx all
# 如果需要分步安装
ezctl setup xxxx 07
# 如果需要手动安装
kubectl apply -f /etc/kubeasz/clusters/xxxx/yml/coredns.yaml
kubectl apply -f /etc/kubeasz/clusters/xxxx/yml/nodelocaldns.yaml
```
### 验证 dns服务
新建一个测试nginx服务
`kubectl run nginx --image=nginx --expose --port=80`
确认nginx服务
``` bash
kubectl get pod|grep nginx
nginx-7cbc4b4d9c-fl46v 1/1 Running 0 1m
kubectl get svc|grep nginx
nginx ClusterIP 10.68.33.167 80/TCP 1m
```
测试pod alpine
``` bash
kubectl run test --rm -it --image=alpine /bin/sh
If you don't see a command prompt, try pressing enter.
/ # cat /etc/resolv.conf
nameserver 10.68.0.2
search default.svc.cluster.local. svc.cluster.local. cluster.local.
options ndots:5
# 测试集群内部服务解析
/ # nslookup nginx.default.svc.cluster.local
Server: 10.68.0.2
Address 1: 10.68.0.2 kube-dns.kube-system.svc.cluster.local
Name: nginx
Address 1: 10.68.33.167 nginx.default.svc.cluster.local
/ # nslookup kubernetes.default.svc.cluster.local
Server: 10.68.0.2
Address 1: 10.68.0.2 kube-dns.kube-system.svc.cluster.local
Name: kubernetes
Address 1: 10.68.0.1 kubernetes.default.svc.cluster.local
# 测试外部域名的解析,默认集成node的dns解析
/ # nslookup www.baidu.com
Server: 10.68.0.2
Address 1: 10.68.0.2 kube-dns.kube-system.svc.cluster.local
Name: www.baidu.com
Address 1: 180.97.33.108
Address 2: 180.97.33.107
/ #
```
- Note1: 如果你使用`calico`网络组件,安装完集群后,直接安装dns组件,可能会出现如下BUG,分析是因为calico分配pod地址时候会从网段的第一个地址(网络地址)开始,详见提交的 [ISSUE #1710](https://github.com/projectcalico/calico/issues/1710),临时解决办法为手动删除POD,重新创建后获取后面的IP地址
```
# BUG出现现象
$ kubectl get pod --all-namespaces -o wide
NAMESPACE NAME READY STATUS RESTARTS AGE IP NODE
default busy-5cc98488d4-s894w 1/1 Running 0 28m 172.20.24.193 192.168.97.24
kube-system calico-kube-controllers-6597d9c664-nq9hn 1/1 Running 0 1h 192.168.97.24 192.168.97.24
kube-system calico-node-f8gnf 2/2 Running 0 1h 192.168.97.24 192.168.97.24
kube-system kube-dns-69bf9d5cc9-c68mw 0/3 CrashLoopBackOff 27 31m 172.20.24.192 192.168.97.24
# 解决办法,删除pod,自动重建
$ kubectl delete pod -n kube-system kube-dns-69bf9d5cc9-c68mw
```
- Note2: 使用``` kubectl run test -it --rm --image=busybox /bin/sh``` 进行解析测试可能会失败, busybox内的nslookup程序有bug, 详见 https://github.com/kubernetes/dns/issues/109
================================================
FILE: docs/guide/kubesphere.md
================================================
# 在 Kubernetes 安装 KubeSphere 容器平台
## 什么是 KubeSphere
[KubeSphere](https://github.com/kubesphere/kubesphere) 是在 [Kubernetes](https://kubernetes.io) 之上构建的面向云原生应用的**开源容器平台**,支持多云与多集群管理,提供全栈的 IT 自动化运维能力,简化企业的 DevOps 工作流。它的架构可以非常方便地使第三方应用与云原生生态组件进行即插即用 (plug-and-play) 的集成。
KubeSphere 作为一个**全栈的多租户容器平台**,不仅支持**安装和纳管原生 Kubernetes**,还设计了一套完整的管理界面,方便开发者与运维人员在一个**统一的平台**中安装与管理最常用的云原生工具,**从业务视角提供一致的用户体验来降低复杂性**。目前最新的 3.0 版本提供以下功能:
|功能 |介绍 |
| --- | ---|
| Kubernetes 集群搭建与运维 | 支持在线 & 离线安装、升级与扩容 Kubernetes 集群,支持安装 “云原生全家桶” |
| Kubernetes 资源可视化管理 | 比 Kubernetes 原生 Dashboard 功能更丰富的控制面板,支持向导式创建与管理 Kubernetes 资源 |
| 基于 Jenkins 的 DevOps 系统 | 支持图形化与脚本两种方式构建 CI/CD 流水线,内置 Source/Binary to Image 等 CD 工具 |
| 应用商店与应用生命周期管理 | 内置 Redis、MySQL 等十五个常用应用,基于 Helm 提供应用上传、审核、发布、部署、下架等操作 |
| 基于 Istio 的微服务治理 (Service Mesh) | 提供可视化无代码侵入的**灰度发布、熔断机制、流量治理与流量拓扑、分布式链路追踪** |
| 多租户管理 | 提供基于角色的细粒度多租户统一认证,支持**对接企业 LDAP/AD**,提供多层级的权限管理 |
| 丰富的可观察性功能 | UI 提供集群/工作负载/Pod/容器等多维度的监控、事件/日志查询、告警与通知管理 |
| 存储管理 | 支持对接 Ceph、GlusterFS、NFS,支持可视化管理 PVC、PV、StorageClass |
| 网络管理 | 支持 Calico、Flannel,提供 Porter LB 帮助暴露物理环境 Kubernetes 集群的 LoadBalancer 服务 |
| GPU support | 集群支持添加 GPU 与 vGPU,可运行 TensorFlow 等 ML 框架 |
## 在 Kubernetes 与 Kubeasz 之上安装 KubeSphere
作为一个轻量化容器平台,KubeSphere 可以安装在任何私有或托管的 Kubernetes、虚拟机、裸机、本地环境、公有云、混合云之上,并且所有功能组件都是可插拔的。当使用 Kubeasz 完成 Kubernetes 集群的安装后,可参考以下步骤在 Kubernetes 上安装 KubeSphere。
**前提条件**
> - Kubernetes 版本必须是:1.15.x、1.16.x、1.17.x 或 1.18.x;
> - 您的机器满足最低硬件要求:CPU > 1 Core,可用内存 > 2 G;
> - 安装之前,Kubernetes 集群已配置**默认**存储类型 (StorageClass);
> - 当使用 `--cluster-signing-cert-file` 和 `--cluster-signing-key-file` 参数启动时,在 `kube-apiserver` 中会激活 CSR 签名功能。请参见 [RKE 安装问题](https://github.com/kubesphere/kubesphere/issues/1925#issuecomment-591698309);
> - 有关在 Kubernetes 上安装 KubeSphere 的准备工作,请参见[准备工作](https://kubesphere.io/zh/docs/installing-on-kubernetes/introduction/prerequisites/)。
>
1. 若待安装的环境满足以上条件,则可以执行以下命令部署 KubeSphere:
```yaml
kubectl apply -f https://github.com/kubesphere/ks-installer/releases/download/v3.0.0/kubesphere-installer.yaml
kubectl apply -f https://github.com/kubesphere/ks-installer/releases/download/v3.0.0/cluster-configuration.yaml
```
2. 等待安装成功(取决于您的网络状况,约十几至二十几分钟不等),运行以下命令查看安装日志:
```bash
kubectl logs -n kubesphere-system $(kubectl get pod -n kubesphere-system -l app=ks-install -o jsonpath='{.items[0].metadata.name}') -f
```
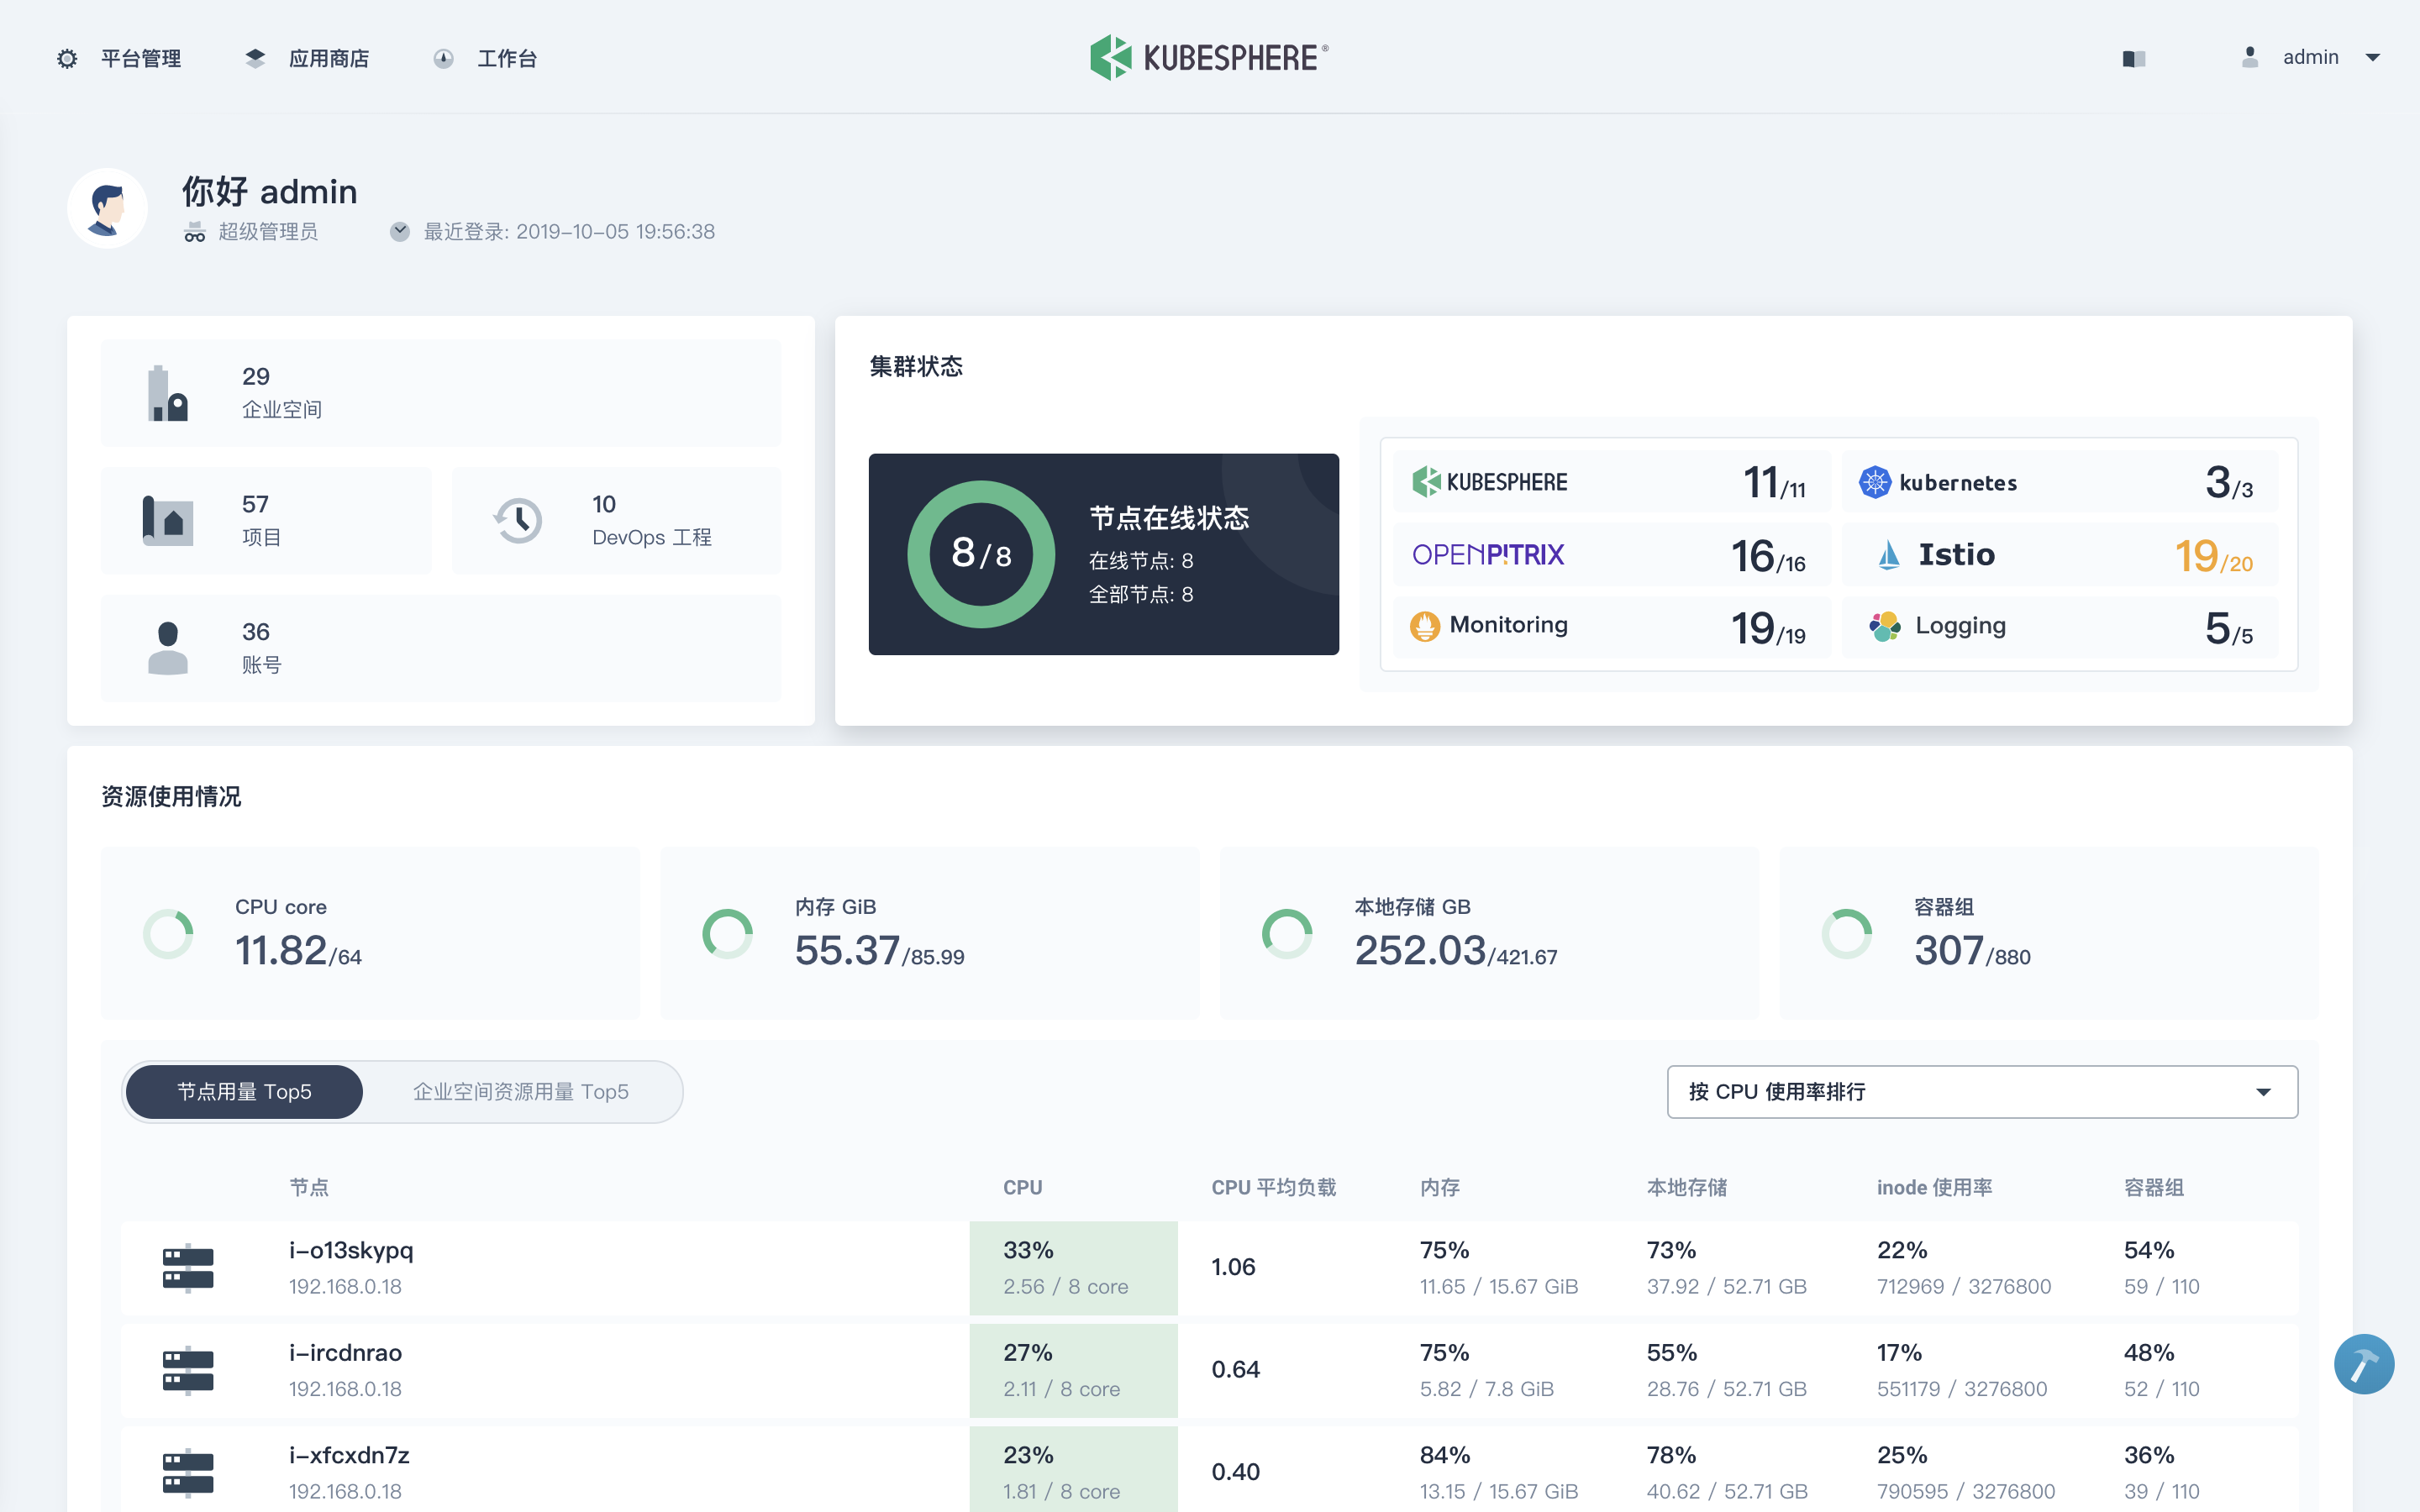
3. 使用 `kubectl get pod --all-namespaces` 查看所有 Pod 是否在 KubeSphere 的相关命名空间中正常运行。如果是,请通过以下命令检查控制台的端口(默认为 `30880`):
```bash
kubectl get svc/ks-console -n kubesphere-system
```
4. 请确保在安全组中打开了端口 `30880`,并通过 NodePort `(IP:30880)` 使用默认帐户和密码 `(admin/P@88w0rd)` 访问 Web 控制台。
5. 登录控制台后,您可以在**服务组件**中查看不同组件的状态。如果要使用相关服务,可能需要等待某些组件启动并运行。
**Tips**:若要在 KubeSphere 中启用其他组件,请参见[启用可插拔组件](https://kubesphere.io/zh/docs/pluggable-components/)。开启安装前确认您的机器资源已符合[资源最低要求](https://kubesphere.io/zh/docs/pluggable-components/overview/)。
## 延伸阅读
- [安装 Kubeasz 与 KubeSphere](https://kubesphere.com.cn/forum/d/716-play-with-kubesphere-and-kubeasz)
- [在 Linux 完整安装 KubeSphere 与 Kubernetes](https://kubesphere.io/zh/docs/installing-on-linux/introduction/intro/)
- [KubeSphere 官网](https://kubesphere.io/zh/)
- [常见问题](https://kubesphere.io/zh/docs/faq/)
================================================
FILE: docs/guide/log-pilot.md
================================================
# Log-Pilot Elasticsearch Kibana 日志解决方案
该方案是社区方案`EFK`的升级版,它支持两种搜集形式,对应容器标准输出日志和容器内的日志文件;个人使用了一把,在原有`EFK`经验的基础上非常简单、方便,值得推荐;更多的关于`log-pilot`的介绍详见链接:
- github 项目地址: https://github.com/AliyunContainerService/log-pilot
- 阿里云介绍文档: https://help.aliyun.com/document_detail/86552.html
- 介绍文档2: https://yq.aliyun.com/articles/674327
## 安装步骤
- 1.安装 ES 集群,同[EFK](efk.md)文档
- 2.安装 Kibana,同[EFK](efk.md)文档
- 3.安装 Log-Pilot
``` bash
kubectl apply -f /etc/kubeasz/manifests/efk/log-pilot/log-pilot-filebeat.yaml
```
- 4.创建示例应用,采集日志
``` bash
$ cat > tomcat.yaml << EOF
apiVersion: v1
kind: Pod
metadata:
name: tomcat
spec:
containers:
- name: tomcat
image: "tomcat:7.0"
env:
# 1、stdout为约定关键字,表示采集标准输出日志
# 2、配置标准输出日志采集到ES的catalina索引下
- name: aliyun_logs_catalina
value: "stdout"
# 1、配置采集容器内文件日志,支持通配符
# 2、配置该日志采集到ES的access索引下
- name: aliyun_logs_access
value: "/usr/local/tomcat/logs/catalina.*.log"
volumeMounts:
- name: tomcat-log
mountPath: /usr/local/tomcat/logs
volumes:
# 容器内文件日志路径需要配置emptyDir
- name: tomcat-log
emptyDir: {}
EOF
$ kubectl apply -f tomcat.yaml
```
- 5.在 kibana 创建 Index Pattern,验证日志已搜集,如上示例应用,应创建如下 index pattern
- catalina-*
- access-*
================================================
FILE: docs/guide/lvm.md
================================================
# LVM 操作
以下是使用 parted 对 /dev/sdb 进行分区并配置 LVM 的完整操作流程,包含详细解释和注意事项。
## 1. 磁盘分区 (使用 parted)
``` bash
sudo parted /dev/sdb
# 在交互界面执行:
(parted) mklabel gpt # 创建 GPT 分区表(兼容大容量磁盘)
(parted) mkpart lvm 0% 100% # 创建占用整个磁盘的 LVM 分区
(parted) set 1 lvm on # 设置分区类型为 LVM
(parted) print # 验证分区信息
(parted) quit # 退出
# 验证分区结果:应看到 sdb1 分区
lsblk /dev/sdb
```
## 2. 创建物理卷 (PV)
``` bash
sudo pvcreate /dev/sdb1 # 将分区初始化为物理卷
sudo pvs # 查看已创建的物理卷
# 输出示例:
PV VG Fmt Attr PSize PFree
/dev/sdb1 lvm2 --- 100.00g 100.00g
```
## 3. 创建卷组 (VG)
``` bash
sudo vgcreate vg_data /dev/sdb1 # 创建名为 vg_data 的卷组
sudo vgs # 查看卷组信息
# 参数说明:
● vg_data:自定义卷组名称
● -s 4M:可指定 PE 大小(默认 4MB)
```
## 4. 创建逻辑卷 (LV)
```
sudo lvcreate -n lv_app -L 50G vg_data # 创建 50G 的逻辑卷
sudo lvs # 查看逻辑卷
可选参数:
● -l 100%FREE:使用全部剩余空间
● -i 3 -I 4:创建条带化卷(需多磁盘)
```
## 5. 创建文件系统
```
sudo mkfs.xfs /dev/vg_data/lv_app # 创建 XFS 文件系统
# 或使用 ext4:
# sudo mkfs.ext4 /dev/vg_data/lv_app
格式选择建议:
● XFS:适合大文件/高并发
● ext4:兼容性好
```
## 6. 挂载文件系统
```
sudo mkdir /data # 创建挂载点
sudo mount /dev/vg_data/lv_app /data # 临时挂载
df -hT /data # 验证挂载
# 持久化挂载:
echo '/dev/mapper/vg_data-lv_app /data xfs defaults 0 0' | sudo tee -a /etc/fstab
sudo mount -a # 测试 fstab 配置
```
- 建议使用uuid方式挂载
```
# 查看uuid
sudo blkid /dev/mapper/vg_data-lv_app
/dev/mapper/vg_data-lv_app: UUID="b8520e35-3a01-4ec7-b31a-3371f31c4de7" BLOCK_SIZE="4096" TYPE="xfs"
#
echo 'UUID="b8520e35-3a01-4ec7-b31a-3371f31c4de7" /data xfs defaults 0 0' | sudo tee -a /etc/fstab
```
## 完整操作流程图
graph TD A[磁盘/dev/sdb] --> B[parted创建GPT分区] B --> C[pvcreate创建物理卷] C --> D[vgcreate创建卷组] D --> E[lvcreate创建逻辑卷] E --> F[mkfs创建文件系统] F --> G[mount挂载使用]
mermaidgraph TD
A[磁盘/dev/sdb] --> B[parted创建GPT分区]
B --> C[pvcreate创建物理卷]
C --> D[vgcreate创建卷组]
D --> E[lvcreate创建逻辑卷]
E --> F[mkfs创建文件系统]
F --> G[mount挂载使用]
关键命令速查表
| 操作 | 命令 |
|:---|:---|
|查看块设备|lsblk|
|验证分区表|parted /dev/sdb print|
|扩展逻辑卷|lvextend -L +10G /dev/vg_data/lv_app|
|扩展文件系统 (XFS)|xfs_growfs /data|
|扩展文件系统 (ext4)|resize2fs /dev/vg_data/lv_app|
|删除卷组|vgremove vg_data|
注意事项
● 数据备份:操作前确认磁盘无重要数据
● 容量对齐:生产环境建议保持 1MB 对齐(parted 使用 % 单位自动对齐)
● 在线扩展:XFS 支持在线扩容,但不支持缩小
● RAID 整合:可在 LVM 层整合多个 PV 实现软 RAID
● 快照功能:使用 lvcreate -s 创建快照卷实现备份
通过以上步骤,您已成功将原始磁盘配置为可弹性管理的存储空间。后续可通过 LVM 的动态调整特性,实现无需卸载的存储扩容。
================================================
FILE: docs/guide/metallb.md
================================================
# metallb 网络负载均衡
本文档已过期,以下内容仅做介绍,安装请参考最新官方文档
`Metallb`是在自有硬件上(非公有云)实现 `Kubernetes Load-balancer`的工具,由`google`团队开源,值得推荐!项目[github主页](https://github.com/google/metallb)。
## metallb 简介
这里简单介绍下它的实现原理,具体可以参考[metallb官网](https://metallb.universe.tf/),文档非常简洁、清晰。目前有如下的使用限制:
- `Kubernetes v1.9.0`版本以上,暂不支持`ipvs`模式
- 支持网络组件 (flannel/weave/romana), calico 部分支持
- `layer2`和`bgp`两种模式,其中`bgp`模式需要外部网络设备支持`bgp`协议
`metallb`主要实现了两个功能:地址分配和对外宣告
- 地址分配:需要向网络管理员申请一段ip地址,如果是layer2模式需要这段地址与node节点地址同个网段(同一个二层);如果是bgp模式没有这个限制。
- 对外宣告:layer2模式使用arp协议,利用节点的mac额外宣告一个loadbalancer的ip(同mac多ip);bgp模式下节点利用bgp协议与外部网络设备建立邻居,宣告loadbalancer的地址段给外部网络。
================================================
FILE: docs/guide/metrics-server.md
================================================
# Metrics Server
从 v1.8 开始,资源使用情况的度量(如容器的 CPU 和内存使用)可以通过 Metrics API 获取;前提是集群中要部署 Metrics Server,它从Kubelet 公开的Summary API采集指标信息,关于更多的背景介绍请参考如下文档:
- Metrics Server[设计提案](https://github.com/kubernetes/community/blob/master/contributors/design-proposals/instrumentation/metrics-server.md)
大致是说它符合k8s的监控架构设计,受heapster项目启发,并且比heapster优势在于:访问不需要apiserver的代理机制,提供认证和授权等;很多集群内组件依赖它(HPA,scheduler,kubectl top),因此它应该在集群中默认运行;部分k8s集群的安装工具已经默认集成了Metrics Server的安装,以下概述下它的安装:
- 1.metric-server是扩展的apiserver,依赖于[kube-aggregator](https://github.com/kubernetes/kube-aggregator),因此需要在apiserver中开启相关参数。
- 2.需要在集群中运行deployment处理请求
从kubeasz 0.1.0 开始,metrics-server已经默认集成安装,请查看`/etc/kubeasz/clusters/xxxx/config.yml`中的设置
- 参考:https://github.com/kubernetes-sigs/metrics-server
## 前提
- 1.设置apiserver相关[参数](../../roles/kube-master/templates/kube-apiserver.service.j2)
``` bash
... # 省略
--requestheader-client-ca-file={{ ca_dir }}/ca.pem \
--requestheader-allowed-names=aggregator \
--requestheader-extra-headers-prefix=X-Remote-Extra- \
--requestheader-group-headers=X-Remote-Group \
--requestheader-username-headers=X-Remote-User \
--proxy-client-cert-file={{ ca_dir }}/aggregator-proxy.pem \
--proxy-client-key-file={{ ca_dir }}/aggregator-proxy-key.pem \
--enable-aggregator-routing=true \
```
- 2.生成[aggregator proxy相关证书](../../roles/kube-master/tasks/main.yml)
参考1:https://kubernetes.io/docs/tasks/access-kubernetes-api/configure-aggregation-layer/
参考2:https://kubernetes.io/docs/tasks/access-kubernetes-api/setup-extension-api-server/
## 安装
``` bash
# 默认已经集成安装,假设集群名为xxxx
ezctl setup xxxx all
# 如果需要分步安装
ezctl setup xxxx 07
# 如果需要手动安装
kubectl apply -f /etc/kubeasz/clusters/xxxx/yml/metrics-server.yaml
```
## 验证
- 查看生成的新api:v1beta1.metrics.k8s.io
``` bash
$ kubectl get apiservice|grep metrics
v1beta1.metrics.k8s.io 1d
```
- 查看kubectl top命令(无需额外安装heapster)
``` bash
$ kubectl top node
NAME CPU(cores) CPU% MEMORY(bytes) MEMORY%
192.168.1.1 116m 2% 2342Mi 60%
192.168.1.2 79m 1% 1824Mi 47%
192.168.1.3 82m 2% 1897Mi 49%
$ kubectl top pod --all-namespaces # 输出略
```
- 验证基于metrics-server实现的基础hpa自动缩放,请参考[hpa.md](hpa.md)
================================================
FILE: docs/guide/networkpolicy.md
================================================
## Network Policy
`Network Policy`提供了基于策略的网络控制,用于隔离应用并减少攻击面。它使用标签选择器模拟传统的分段网络,并通过策略控制它们之间的流量以及来自外部的流量;目前基于`linux iptables`实现,使用类似`nf_conntrack`检查记录网络流量`session`从而决定流量是否阻断;因此它是`状态检测防火墙`。
- 网络插件要支持 Network Policy,如 Calico、Romana、Weave Net
### 简单示例
实验环境:k8s v1.9, calico 2.6.5
首先部署测试用nginx服务
``` bash
$ kubectl run nginx --image=nginx --replicas=3 --port=80 --expose
# 验证测试nginx服务
$ kubectl get pod -o wide
NAME READY STATUS RESTARTS AGE IP NODE
nginx-7587c6fdb6-p2fpz 1/1 Running 0 55m 172.20.125.2 10.0.96.7
nginx-7587c6fdb6-pbw7c 1/1 Running 0 55m 172.20.124.2 10.0.96.6
nginx-7587c6fdb6-v48db 1/1 Running 0 55m 172.20.121.195 10.0.96.4
$ kubectl get svc nginx
NAME TYPE CLUSTER-IP EXTERNAL-IP PORT(S) AGE
nginx ClusterIP 10.68.7.183 80/TCP 1h
```
默认情况下,其他pod可以访问nginx服务
``` bash
$ kubectl run busy1 --rm -it --image=busybox /bin/sh
If you don't see a command prompt, try pressing enter.
/ # wget --spider --timeout=1 nginx
Connecting to nginx (10.68.7.183:80)
```
创建`DefaultDeny Network Policy`后,其他Pod(包括namespace外部)不能访问nginx
``` bash
$ cat > default-deny.yaml << EOF
apiVersion: networking.k8s.io/v1
kind: NetworkPolicy
metadata:
name: default-deny
spec:
podSelector: {}
policyTypes:
- Ingress
EOF
$ kubectl create -f default-deny.yaml
networkpolicy "default-deny" created
$ kubectl run busy1 --rm -it --image=busybox /bin/sh
If you don't see a command prompt, try pressing enter.
/ # wget --spider --timeout=1 nginx
Connecting to nginx (10.68.7.183:80)
wget: download timed out
```
创建一个允许带有access=true的Pod访问nginx的网络策略
``` bash
$ cat > nginx-policy.yaml << EOF
kind: NetworkPolicy
apiVersion: networking.k8s.io/v1
metadata:
name: access-nginx
spec:
podSelector:
matchLabels:
run: nginx
ingress:
- from:
- podSelector:
matchLabels:
access: "true"
EOF
$ kubectl create -f nginx-policy.yaml
networkpolicy "access-nginx" created
# 不带access=true标签的Pod还是无法访问nginx服务
$ kubectl run busy1 --rm -it --image=busybox /bin/sh
If you don't see a command prompt, try pressing enter.
/ # wget --spider --timeout=1 nginx
Connecting to nginx (10.68.7.183:80)
wget: download timed out
# 而带有access=true标签的Pod可以访问nginx服务
$ kubectl run busy2 --rm -it --labels="access=true" --image=busybox /bin/sh
If you don't see a command prompt, try pressing enter.
/ # wget --spider --timeout=1 nginx
Connecting to nginx (10.68.7.183:80)
```
### 示例策略解读
``` bash
apiVersion: networking.k8s.io/v1
kind: NetworkPolicy
metadata:
name: test-network-policy
namespace: default
spec:
podSelector:
matchLabels:
role: db
policyTypes:
- Ingress
- Egress
ingress:
- from:
- ipBlock:
cidr: 172.17.0.0/16
except:
- 172.17.1.0/24
- namespaceSelector:
matchLabels:
project: myproject
- podSelector:
matchLabels:
role: frontend
ports:
- protocol: TCP
port: 6379
egress:
- to:
- ipBlock:
cidr: 10.0.0.0/24
ports:
- protocol: TCP
port: 5978
```
- 策略作用的对象Pods:default命名空间下带有`role=db`标签的Pod
- 内向流量策略
- 允许属于`172.17.0.0/16`网段但不属于`172.17.1.0/24`的源地址访问该对象Pods的TCP 6379端口
- 允许带有project=myprojects标签的namespace中所有Pod访问该对象Pods的TCP 6379端口
- 允许default命名空间下带有role=frontend标签的Pod访问该对象Pods的TCP 6379端口
- 拒绝其他所有主动访问该对象Pods的网络流量
- 外向流量策略
- 允许该对象Pods主动访问目的地址属于`10.0.0.0/24`网段且目的端口为TCP 5978的流量
- 拒绝该对象Pods其他所有主动外向网络流量
### 使用场景
参考阅读[ahmetb/kubernetes-network-policy-recipes](https://github.com/ahmetb/kubernetes-network-policy-recipes) 该项目举例一些使用NetworkPolicy的场景,并有形象的配图
#### 拒绝其他namespaces访问服务

+ 场景1:你的k8s集群应用按照namespaces区分生产、测试环境,你要确保生产环境不会受到测试环境错误访问影响
+ 场景2:你的k8s集群有多租户应用采用namespaces区分的,你要确保多租户之间的应用隔离
在你需要隔离的命名空间创建如下策略:
``` bash
kind: NetworkPolicy
apiVersion: networking.k8s.io/v1
metadata:
namespace: your-ns
name: deny-other-namespaces
spec:
podSelector:
matchLabels:
ingress:
- from:
- podSelector: {}
```
#### 允许外部访问服务
+ 场景:暴露特定Pod的特定端口给外部访问

``` bash
# 创建示例应用待暴露服务
$ kubectl run web --image=nginx --labels=app=web --port 80 --expose
# 创建网络策略
kind: NetworkPolicy
apiVersion: networking.k8s.io/v1
metadata:
name: web-allow-external
spec:
podSelector:
matchLabels:
app: web
ingress:
- from: []
ports:
- protocol: TCP
port: 80
```
================================================
FILE: docs/guide/nfs-server.md
================================================
## 创建 NFS 服务器
NFS 允许系统将其目录和文件共享给网络上的其他系统。通过 NFS,用户和应用程序可以访问远程系统上的文件,就象它们是本地文件一样。
### 安装
Ubuntu 16.04 键入以下命令安装 NFS 服务器:
``` bash
apt install nfs-kernel-server
```
### 配置
编辑`/etc/exports`文件添加需要共享目录,每个目录的设置独占一行,编写格式如下:
`NFS共享目录路径 客户机IP或者名称(参数1,参数2,...,参数n)`
例如:
``` bash
/home *(ro,sync,insecure,no_root_squash)
/share 192.168.1.0/24(rw,sync,insecure,no_subtree_check,no_root_squash)
```
| 参数 | 说明 |
| :- | :- |
| ro | 只读访问 |
| rw | 读写访问 |
| sync | 所有数据在请求时写入共享 |
| async | nfs在写入数据前可以响应请求 |
| secure | nfs通过1024以下的安全TCP/IP端口发送 |
| insecure | nfs通过1024以上的端口发送 |
| wdelay | 如果多个用户要写入nfs目录,则归组写入(默认) |
| no_wdelay | 如果多个用户要写入nfs目录,则立即写入,当使用async时,无需此设置 |
| hide | 在nfs共享目录中不共享其子目录 |
| no_hide | 共享nfs目录的子目录 |
| subtree_check | 如果共享/usr/bin之类的子目录时,强制nfs检查父目录的权限(默认) |
| no_subtree_check | 不检查父目录权限 |
| all_squash | 共享文件的UID和GID映射匿名用户anonymous,适合公用目录 |
| no_all_squash | 保留共享文件的UID和GID(默认) |
| root_squash | root用户的所有请求映射成如anonymous用户一样的权限(默认) |
| no_root_squash | root用户具有根目录的完全管理访问权限 |
| anonuid=xxx | 指定nfs服务器/etc/passwd文件中匿名用户的UID |
| anongid=xxx | 指定nfs服务器/etc/passwd文件中匿名用户的GID |
+ 注1:尽量指定主机名或IP或IP段最小化授权可以访问NFS 挂载的资源的客户端;注意如果在k8s集群中配合nfs-client-provisioner使用的话,这里需要指定pod的IP段,否则nfs-client-provisioner pod无法启动,报错 mount.nfs: access denied by server while mounting
+ 注2:经测试参数insecure必须要加,否则客户端挂载出错mount.nfs: access denied by server while mounting
### 启动
配置完成后,您可以在终端提示符后运行以下命令来启动 NFS 服务器:
``` bash
systemctl start nfs-kernel-server.service
```
### 客户端挂载
Ubuntu 16.04,首先需要安装 `nfs-common` 包
``` bash
apt install nfs-common
```
CentOS 7, 需要安装 `nfs-utils` 包
``` bash
yum install nfs-utils
```
使用 mount 命令来挂载其他机器共享的 NFS 目录。可以在终端提示符后输入以下类似的命令:
``` bash
mount example.hostname.com:/ubuntu /local/ubuntu
```
挂载点 /local/ubuntu 目录必须已经存在。而且在 /local/ubuntu 目录中没有文件或子目录。
另一个挂载NFS 共享的方式就是在 /etc/fstab 文件中添加一行。该行必须指明 NFS 服务器的主机名、服务器输出的目录名以及挂载 NFS 共享的本机目录。
以下是在 /etc/fstab 中的常用语法:
``` bash
example.hostname.com:/ubuntu /local/ubuntu nfs rsize=8192,wsize=8192,timeo=14,intr
```
================================================
FILE: docs/guide/prometheus.md
================================================
# Prometheus
`prometheus`已经成为k8s集群上默认的监控解决方案,它的监控理念、数据结构设计其实相当精简,包括其非常灵活的查询语言;但是对于初学者来说,想要在k8s集群中实践搭建一套相对可用的部署却比较麻烦。本项目3.x采用的helm chart方式部署,使用的charts地址: https://github.com/prometheus-community/helm-charts/tree/main/charts/kube-prometheus-stack
## 安装
kubeasz 集成安装
- 1.修改 /etc/kubeasz/clusters/xxxx/config.yml 中配置项 prom_install: "yes"
- 2.下载镜像 /etc/kubeasz/ezdown -X prometheus
- 3.安装 /etc/kubeasz/ezctl setup xxxx 07
生成的charts自定义配置在/etc/kubeasz/clusters/xxxx/yml/prom-values.yaml
注1:如果需要修改配置,修改roles/cluster-addon/templates/prometheus/values.yaml.j2 后重新执行安装命令
注2:如果集群节点有增减,重新执行安装命令
注3:涉及到很多相关镜像下载比较慢,另外部分k8s.gcr.io的镜像已经替换成easzlab的mirror镜像地址
## 验证安装
``` bash
# 查看相关pod和svc
$ kubectl get pod,svc -n monitor
NAME READY STATUS RESTARTS AGE
pod/alertmanager-prometheus-kube-prometheus-alertmanager-0 2/2 Running 0 160m
pod/prometheus-grafana-69f88948bc-7hnbp 3/3 Running 0 160m
pod/prometheus-kube-prometheus-operator-f8f4758cb-bm6gs 1/1 Running 0 160m
pod/prometheus-kube-state-metrics-74b8f49c6c-f9wgg 1/1 Running 0 160m
pod/prometheus-prometheus-kube-prometheus-prometheus-0 2/2 Running 0 160m
pod/prometheus-prometheus-node-exporter-6nfb4 1/1 Running 0 160m
pod/prometheus-prometheus-node-exporter-q4qq2 1/1 Running 0 160m
NAME TYPE CLUSTER-IP EXTERNAL-IP PORT(S) AGE
service/alertmanager-operated ClusterIP None 9093/TCP,9094/TCP,9094/UDP 160m
service/prometheus-grafana NodePort 10.68.253.23 80:30903/TCP 160m
service/prometheus-kube-prometheus-alertmanager NodePort 10.68.125.191 9093:30902/TCP 160m
service/prometheus-kube-prometheus-operator NodePort 10.68.161.218 443:30900/TCP 160m
service/prometheus-kube-prometheus-prometheus NodePort 10.68.64.217 9090:30901/TCP 160m
service/prometheus-kube-state-metrics ClusterIP 10.68.111.106 8080/TCP 160m
service/prometheus-operated ClusterIP None 9090/TCP 160m
service/prometheus-prometheus-node-exporter ClusterIP 10.68.252.83 9100/TCP 160m
```
- 访问prometheus的web界面:`http://$NodeIP:30901`
- 访问alertmanager的web界面:`http://$NodeIP:30902`
- 访问grafana的web界面:`http://$NodeIP:30903` (默认用户密码 admin:Admin1234!)
## 其他操作
-- 以下内容没有更新测试
### [可选] 配置钉钉告警
- 创建钉钉群,获取群机器人 webhook 地址
使用钉钉创建群聊以后可以方便设置群机器人,【群设置】-【群机器人】-【添加】-【自定义】-【添加】,然后按提示操作即可,参考 https://open.dingtalk.com/document/group/custom-robot-access
上述配置好群机器人,获得这个机器人对应的Webhook地址,记录下来,后续配置钉钉告警插件要用,格式如下
```
https://oapi.dingtalk.com/robot/send?access_token=xxxxxxxx
```
- 创建钉钉告警插件,参考:
- https://github.com/timonwong/prometheus-webhook-dingtalk
- http://theo.im/blog/2017/10/16/release-prometheus-alertmanager-webhook-for-dingtalk/
``` bash
# 编辑修改文件中 access_token=xxxxxx 为上一步你获得的机器人认证 token
$ vi /etc/kubeasz/roles/cluster-addon/templates/prometheus/dingtalk-webhook.yaml
# 运行插件
$ kubectl apply -f /etc/kubeasz/roles/cluster-addon/templates/prometheus/dingtalk-webhook.yaml
```
- 修改 alertsmanager 告警配置,重新运行安装命令/etc/kubeasz/ezctl setup xxxx 07,成功后如上节测试告警发送
``` bash
# 修改 alertsmanager 告警配置
$ vi /etc/kubeasz/roles/cluster-addon/templates/prometheus/values.yaml.j2
# 增加 receiver dingtalk,然后在 route 配置使用 receiver: dingtalk
receivers:
- name: dingtalk
webhook_configs:
- send_resolved: false
url: http://webhook-dingtalk.monitor.svc.cluster.local:8060/dingtalk/webhook1/send
# ...
```
================================================
FILE: docs/guide/rollingupdateWithZeroDowntime.md
================================================
## 1、前言
在当下微服务架构盛行的时代,用户希望应用程序时时刻刻都是可用,为了满足不断变化的新业务,需要不断升级更新应用程序,有时可能需要频繁的发布版本。实现"零停机"、“零感知”的持续集成(Continuous Integration)和持续交付/部署(Continuous Delivery)应用程序,一直都是软件升级换代不得不面对的一个难题和痛点,也是一种追求的理想方式,也是DevOps诞生的目的。
## 2、滚动发布
把一次完整的发布过程,合理地分成多个批次,每次发布一个批次,**成功后**,再发布下一个批次,最终完成所有批次的发布。在整个滚动过程期间,保证始终有可用的副本在运行,从而平滑的发布新版本,实现**零停机(without an outage)**、用户**零感知**,是一种非常主流的发布方式。由于其自动化程度比较高,通常需要复杂的发布工具支撑,而k8s可以完美的胜任这个任务。
## 3、k8s滚动更新机制
**k8s创建副本应用程序的最佳方法就是部署(Deployment),部署自动创建副本集(ReplicaSet),副本集可以精确地控制每次替换的Pod数量,从而可以很好的实现滚动更新**。具体来说,k8s每次使用一个新的副本控制器(replication controller)来替换已存在的副本控制器,从而始终使用一个新的Pod模板来替换旧的pod模板。
>大致步骤如下:
>1. 创建一个新的replication controller。
>2. 增加或减少pod副本数量,直到满足当前批次期望的数量。
>3. 删除旧的replication controller。
## 4、演示
>使用kubectl更新一个已部署的应用程序,并模拟回滚。为了方便分析,将应用程序的pod副本数量设置为10。
``` bash
$ kubectl run busy --image=busybox:1.28.4 sleep 36000000 --replicas=10
```
### 4.1. 发布微服务
- 当前服务状态查看
``` bash
# 查看部署列表
root@kube-aio:~# kubectl get deploy busy
NAME DESIRED CURRENT UP-TO-DATE AVAILABLE AGE
busy 10 10 10 10 5m
# 查看正在运行的pod
root@kube-aio:~# kubectl get pod | grep busy
busy-794c95f5d7-56b6w 1/1 Running 0 5m
busy-794c95f5d7-8ddjr 1/1 Running 0 5m
busy-794c95f5d7-8zm8r 1/1 Running 0 5m
busy-794c95f5d7-9hjhp 1/1 Running 0 5m
busy-794c95f5d7-df2r2 1/1 Running 0 5m
busy-794c95f5d7-fsn94 1/1 Running 0 5m
busy-794c95f5d7-k4w8r 1/1 Running 0 5m
busy-794c95f5d7-lsmgb 1/1 Running 0 5m
busy-794c95f5d7-rg8kw 1/1 Running 0 5m
busy-794c95f5d7-xpxxt 1/1 Running 0 5m
# 通过pod描述,查看应用程序的当前映像版本
root@kube-aio:~# kubectl describe pod busy-794c95f5d7-56b6w |grep Image
Image: busybox:1.28.4
Image ID: docker-pullable://busybox@sha256:141c253bc4c3fd0a201d32dc1f493bcf3fff003b6df416dea4f41046e0f37d47
```
- 升级镜像版本到1.29
- 为了更清晰看到更新过程,可另开一个窗口使用`$ watch kubectl get deployment busy`实时查看变化
``` bash
$ kubectl set image deployments/busy busy=busybox:1.29
```
### 4.2. 验证发布
``` bash
# 检查rollout状态
root@kube-aio:~# kubectl rollout status deployments/busy
deployment "busy" successfully rolled out
# 检查pod详情
root@kube-aio:~# kubectl describe pod busy-665cdb7b-44jnt |grep Image
Image: busybox:1.29
Image ID: docker-pullable://busybox@sha256:cb63aa0641a885f54de20f61d152187419e8f6b159ed11a251a09d115fdff9bd
```
从上面可以看到,镜像已经升级到1.29版本
### 4.3. 回滚发布
``` bash
# 回滚发布
root@kube-aio:~# kubectl rollout undo deployments/busy
deployment.apps "busy"
# 回滚完成
root@kube-aio:~# kubectl rollout status deployments/busy
deployment "busy" successfully rolled out
# 镜像又回退到1.28.4 版本
root@kube-aio:~# kubectl describe pod busy-794c95f5d7-4x9bn |grep Image
Image: busybox:1.28.4
Image ID: docker-pullable://busybox@sha256:141c253bc4c3fd0a201d32dc1f493bcf3fff003b6df416dea4f41046e0f37d47
```
到目前为止,整个滚动发布工作就圆满完成了!!!
**那么如果我们想回滚到指定版本呢?答案是k8s完美支持,并且还可以通过资源文件进行配置保留的历史版次量**。由于篇幅有限,感兴趣的朋友,可以自己下去实战,回滚命令如下:
```javascript
kubectl rollout undo deployment/busy --to-revision=<版次>
```
## 5、原理
k8s精确地控制着整个发布过程,分批次有序地进行着滚动更新,直到把所有旧的副本全部更新到新版本。实际上,k8s是通过两个参数来精确地控制着每次滚动的pod数量:
>* **`maxSurge` 滚动更新过程中运行操作期望副本数的最大pod数,可以为绝对数值(eg:5),但不能为0;也可以为百分数(eg:10%)。**
>* **`maxUnavailable` 滚动更新过程中不可用的最大pod数,可以为绝对数值(eg:5),但不能为0;也可以为百分数(eg:10%)。**
如果未指定这两个可选参数,则k8s会使用默认配置:
``` bash
root@kube-aio:~# kubectl get deploy busy -o yaml
apiVersion: apps/v1
kind: Deployment
metadata:
annotations:
deployment.kubernetes.io/revision: "3"
creationTimestamp: 2018-08-19T02:42:56Z
generation: 3
labels:
run: busy
name: busy
namespace: default
resourceVersion: "199461"
uid: 93fde307-a359-11e8-a93b-525400c61543
spec:
progressDeadlineSeconds: 600
replicas: 10
revisionHistoryLimit: 10
selector:
matchLabels:
run: busy
strategy:
rollingUpdate:
maxSurge: 1 # 滚动更新中最多超过预期值的 pod数
maxUnavailable: 1 # 滚动更新中最多不可用的 pod数
type: RollingUpdate
...
```
### 5.1. 浅析部署概况
``` bash
# 初始状态
root@kube-aio:~# kubectl get deploy busy
NAME DESIRED CURRENT UP-TO-DATE AVAILABLE AGE
busy 10 10 10 10 1h
# 再做一遍回退
root@kube-aio:~# kubectl rollout undo deploy busy
deployment.apps "busy"
# 更新过程1
root@kube-aio:~# kubectl get deploy busy
NAME DESIRED CURRENT UP-TO-DATE AVAILABLE AGE
busy 10 11 2 9 1h
# 更新过程2
root@kube-aio:~# kubectl get deploy busy
NAME DESIRED CURRENT UP-TO-DATE AVAILABLE AGE
busy 10 11 4 9 1h
# 更新过程3
root@kube-aio:~# kubectl get deploy busy
NAME DESIRED CURRENT UP-TO-DATE AVAILABLE AGE
busy 10 11 6 9 1h
# 更新结束
root@kube-aio:~# kubectl get deploy busy
NAME DESIRED CURRENT UP-TO-DATE AVAILABLE AGE
busy 10 10 10 10 1h
```
>* `DESIRED` 最终期望处于READY状态的副本数
>* `CURRENT` 当前的副本总数
>* `UP-TO-DATE` 当前完成更新的副本数
>* `AVAILABLE` 当前可用的副本数
当前的副本总数:10(DESIRED) + 1(maxSurge) = 11,所以CURRENT为11。
当前可用的副本数:10(DESIRED) - 1(maxUnavailable) = 9,所以AVAILABLE为9。
### 5.2. 浅析部署详情
``` bash
root@kube-aio:~# kubectl describe deploy busy
Name: busy
Namespace: default
CreationTimestamp: Sun, 19 Aug 2018 12:27:19 +0800
Labels: run=busy
Annotations: deployment.kubernetes.io/revision=2
Selector: run=busy
Replicas: 10 desired | 10 updated | 10 total | 10 available | 0 unavailable
StrategyType: RollingUpdate
MinReadySeconds: 0
RollingUpdateStrategy: 1 max unavailable, 1 max surge
Pod Template:
Labels: run=busy
Containers:
busy:
Image: busybox:1.29
Port:
Host Port:
Args:
sleep
3600000
Environment:
Mounts:
Volumes:
Conditions:
Type Status Reason
---- ------ ------
Available True MinimumReplicasAvailable
Progressing True NewReplicaSetAvailable
OldReplicaSets:
NewReplicaSet: busy-84cb46955d (10/10 replicas created)
Events:
Type Reason Age From Message
---- ------ ---- ---- -------
Normal ScalingReplicaSet 1m deployment-controller Scaled up replica set busy-9669c8599 to 10
Normal ScalingReplicaSet 46s deployment-controller Scaled up replica set busy-84cb46955d to 1
Normal ScalingReplicaSet 46s deployment-controller Scaled down replica set busy-9669c8599 to 9
Normal ScalingReplicaSet 46s deployment-controller Scaled up replica set busy-84cb46955d to 2
Normal ScalingReplicaSet 43s deployment-controller Scaled down replica set busy-9669c8599 to 8
Normal ScalingReplicaSet 43s deployment-controller Scaled up replica set busy-84cb46955d to 3
Normal ScalingReplicaSet 43s deployment-controller Scaled down replica set busy-9669c8599 to 7
Normal ScalingReplicaSet 43s deployment-controller Scaled up replica set busy-84cb46955d to 4
Normal ScalingReplicaSet 40s deployment-controller Scaled down replica set busy-9669c8599 to 6
Normal ScalingReplicaSet 28s (x12 over 40s) deployment-controller (combined from similar events): Scaled down replica set busy-9669c8599 to 0
```
整个滚动过程是通过控制两个副本集来完成的,新的副本集:busy-84cb46955d;旧的副本集:busy-9669c8599 。
理想状态下的滚动过程:
>1. 创建新副本集,并为其分配1个新版本的pod。
>2. 通知旧副本集,销毁1个旧版本的pod。
>3. 当旧副本销毁成功后,通知新副本集,再新增1个新版本的pod;当新副本创建成功后,通知旧副本再减少1个pod。
>只要销毁成功,新副本集就会创造新的pod,一直循环,直到旧的副本集pod数量为0。
### 5.4 总结
**`无论理想还是不理想,k8s最终都会使应用程序全部更新到期望状态,都会始终保持最大的副本总数和可用副本总数的不变性!!!`**
[阅读原文](http://www.cnblogs.com/justmine/p/8688828.html)
================================================
FILE: docs/mixes/DoneList.md
================================================
## 前言
`kubeasz`项目开始于`2017.11`,半年多时间以来,从最开始单一的ansible部署脚本朝着提供部署高可用 K8S集群的完整解决方案的目标不断前进,接下去项目的发展需要各位的共同参与和贡献,希望越做越好,为国内k8s学习、实践者提供更多帮助。
### 项目已完成部分
| 类型 |
描述 |
备注 |
| 集群部署 |
服务器基础安全加固与参数优化 |
已完成 |
| 基础服务 |
集群监控告警-prometheus |
已完成基础,待优化 |
| 应用服务 |
jenkins集成 |
已完成 |
| 集群部署 |
kube-router网络插件 |
已完成 |
| 基础服务 |
metrics server |
已完成 |
| 集群部署 |
ipvs代理模式跟进 |
已完成 |
| 集群部署 |
cilium网络插件 |
已完成 |
| 集群部署 |
集群内时间同步-Chrony |
已完成 |
================================================
FILE: docs/mixes/HowToContribute.md
================================================
# 为项目`kubeasz`提交`pull request`
首先请核对下本地git config配置的用户名和邮箱与你github上的注册用户和邮箱一致,否则即使`pull request`被接受,贡献者列表中也看不到自己的名字,设置命令:
``` bash
$ git config --global user.email "you@example.com"
$ git config --global user.name "Your Name"
```
- 1.登录github,在本项目页面点击`fork`到自己仓库
- 2.clone 自己的仓库到本地:`git clone https://github.com/xxx/kubeasz.git`
- 3.在 master 分支添加原始仓库为上游分支:`git remote add upstream https://github.com/easzlab/kubeasz.git`
- 4.在本地新建开发分支:`git checkout -b dev`
- 5.在开发分支修改代码并提交:`git add .`, `git commit -am 'xx变更说明'`
- 6.切换至 master 分支,同步原始仓库:`git checkout master`, `git pull upstream master`
- 7.切换至 dev 分支,合并本地 master 分支(已经和原始仓库同步),可能需要解冲突:`git checkout dev`, `git merge master`
- 8.提交本地 dev 分支到自己的远程 dev 仓库:`git push origin dev`
- 9.在github自己仓库页面,点击`Compare & pull request`给原始仓库发 pull request 请求
- a.等待原作者回复(接受/拒绝)
================================================
FILE: docs/mixes/LICENSE
================================================
Apache License
Version 2.0, January 2004
http://www.apache.org/licenses/
TERMS AND CONDITIONS FOR USE, REPRODUCTION, AND DISTRIBUTION
1. Definitions.
"License" shall mean the terms and conditions for use, reproduction, and
distribution as defined by Sections 1 through 9 of this document.
"Licensor" shall mean the copyright owner or entity authorized by the copyright
owner that is granting the License.
"Legal Entity" shall mean the union of the acting entity and all other entities
that control, are controlled by, or are under common control with that entity.
For the purposes of this definition, "control" means (i) the power, direct or
indirect, to cause the direction or management of such entity, whether by
contract or otherwise, or (ii) ownership of fifty percent (50%) or more of the
outstanding shares, or (iii) beneficial ownership of such entity.
"You" (or "Your") shall mean an individual or Legal Entity exercising
permissions granted by this License.
"Source" form shall mean the preferred form for making modifications, including
but not limited to software source code, documentation source, and configuration
files.
"Object" form shall mean any form resulting from mechanical transformation or
translation of a Source form, including but not limited to compiled object code,
generated documentation, and conversions to other media types.
"Work" shall mean the work of authorship, whether in Source or Object form, made
available under the License, as indicated by a copyright notice that is included
in or attached to the work (an example is provided in the Appendix below).
"Derivative Works" shall mean any work, whether in Source or Object form, that
is based on (or derived from) the Work and for which the editorial revisions,
annotations, elaborations, or other modifications represent, as a whole, an
original work of authorship. For the purposes of this License, Derivative Works
shall not include works that remain separable from, or merely link (or bind by
name) to the interfaces of, the Work and Derivative Works thereof.
"Contribution" shall mean any work of authorship, including the original version
of the Work and any modifications or additions to that Work or Derivative Works
thereof, that is intentionally submitted to Licensor for inclusion in the Work
by the copyright owner or by an individual or Legal Entity authorized to submit
on behalf of the copyright owner. For the purposes of this definition,
"submitted" means any form of electronic, verbal, or written communication sent
to the Licensor or its representatives, including but not limited to
communication on electronic mailing lists, source code control systems, and
issue tracking systems that are managed by, or on behalf of, the Licensor for
the purpose of discussing and improving the Work, but excluding communication
that is conspicuously marked or otherwise designated in writing by the copyright
owner as "Not a Contribution."
"Contributor" shall mean Licensor and any individual or Legal Entity on behalf
of whom a Contribution has been received by Licensor and subsequently
incorporated within the Work.
2. Grant of Copyright License.
Subject to the terms and conditions of this License, each Contributor hereby
grants to You a perpetual, worldwide, non-exclusive, no-charge, royalty-free,
irrevocable copyright license to reproduce, prepare Derivative Works of,
publicly display, publicly perform, sublicense, and distribute the Work and such
Derivative Works in Source or Object form.
3. Grant of Patent License.
Subject to the terms and conditions of this License, each Contributor hereby
grants to You a perpetual, worldwide, non-exclusive, no-charge, royalty-free,
irrevocable (except as stated in this section) patent license to make, have
made, use, offer to sell, sell, import, and otherwise transfer the Work, where
such license applies only to those patent claims licensable by such Contributor
that are necessarily infringed by their Contribution(s) alone or by combination
of their Contribution(s) with the Work to which such Contribution(s) was
submitted. If You institute patent litigation against any entity (including a
cross-claim or counterclaim in a lawsuit) alleging that the Work or a
Contribution incorporated within the Work constitutes direct or contributory
patent infringement, then any patent licenses granted to You under this License
for that Work shall terminate as of the date such litigation is filed.
4. Redistribution.
You may reproduce and distribute copies of the Work or Derivative Works thereof
in any medium, with or without modifications, and in Source or Object form,
provided that You meet the following conditions:
You must give any other recipients of the Work or Derivative Works a copy of
this License; and
You must cause any modified files to carry prominent notices stating that You
changed the files; and
You must retain, in the Source form of any Derivative Works that You distribute,
all copyright, patent, trademark, and attribution notices from the Source form
of the Work, excluding those notices that do not pertain to any part of the
Derivative Works; and
If the Work includes a "NOTICE" text file as part of its distribution, then any
Derivative Works that You distribute must include a readable copy of the
attribution notices contained within such NOTICE file, excluding those notices
that do not pertain to any part of the Derivative Works, in at least one of the
following places: within a NOTICE text file distributed as part of the
Derivative Works; within the Source form or documentation, if provided along
with the Derivative Works; or, within a display generated by the Derivative
Works, if and wherever such third-party notices normally appear. The contents of
the NOTICE file are for informational purposes only and do not modify the
License. You may add Your own attribution notices within Derivative Works that
You distribute, alongside or as an addendum to the NOTICE text from the Work,
provided that such additional attribution notices cannot be construed as
modifying the License.
You may add Your own copyright statement to Your modifications and may provide
additional or different license terms and conditions for use, reproduction, or
distribution of Your modifications, or for any such Derivative Works as a whole,
provided Your use, reproduction, and distribution of the Work otherwise complies
with the conditions stated in this License.
5. Submission of Contributions.
Unless You explicitly state otherwise, any Contribution intentionally submitted
for inclusion in the Work by You to the Licensor shall be under the terms and
conditions of this License, without any additional terms or conditions.
Notwithstanding the above, nothing herein shall supersede or modify the terms of
any separate license agreement you may have executed with Licensor regarding
such Contributions.
6. Trademarks.
This License does not grant permission to use the trade names, trademarks,
service marks, or product names of the Licensor, except as required for
reasonable and customary use in describing the origin of the Work and
reproducing the content of the NOTICE file.
7. Disclaimer of Warranty.
Unless required by applicable law or agreed to in writing, Licensor provides the
Work (and each Contributor provides its Contributions) on an "AS IS" BASIS,
WITHOUT WARRANTIES OR CONDITIONS OF ANY KIND, either express or implied,
including, without limitation, any warranties or conditions of TITLE,
NON-INFRINGEMENT, MERCHANTABILITY, or FITNESS FOR A PARTICULAR PURPOSE. You are
solely responsible for determining the appropriateness of using or
redistributing the Work and assume any risks associated with Your exercise of
permissions under this License.
8. Limitation of Liability.
In no event and under no legal theory, whether in tort (including negligence),
contract, or otherwise, unless required by applicable law (such as deliberate
and grossly negligent acts) or agreed to in writing, shall any Contributor be
liable to You for damages, including any direct, indirect, special, incidental,
or consequential damages of any character arising as a result of this License or
out of the use or inability to use the Work (including but not limited to
damages for loss of goodwill, work stoppage, computer failure or malfunction, or
any and all other commercial damages or losses), even if such Contributor has
been advised of the possibility of such damages.
9. Accepting Warranty or Additional Liability.
While redistributing the Work or Derivative Works thereof, You may choose to
offer, and charge a fee for, acceptance of support, warranty, indemnity, or
other liability obligations and/or rights consistent with this License. However,
in accepting such obligations, You may act only on Your own behalf and on Your
sole responsibility, not on behalf of any other Contributor, and only if You
agree to indemnify, defend, and hold each Contributor harmless for any liability
incurred by, or claims asserted against, such Contributor by reason of your
accepting any such warranty or additional liability.
END OF TERMS AND CONDITIONS
APPENDIX: How to apply the Apache License to your work
To apply the Apache License to your work, attach the following boilerplate
notice, with the fields enclosed by brackets "{}" replaced with your own
identifying information. (Don't include the brackets!) The text should be
enclosed in the appropriate comment syntax for the file format. We also
recommend that a file or class name and description of purpose be included on
the same "printed page" as the copyright notice for easier identification within
third-party archives.
Copyright 2017 jmgao
Licensed under the Apache License, Version 2.0 (the "License");
you may not use this file except in compliance with the License.
You may obtain a copy of the License at
http://www.apache.org/licenses/LICENSE-2.0
Unless required by applicable law or agreed to in writing, software
distributed under the License is distributed on an "AS IS" BASIS,
WITHOUT WARRANTIES OR CONDITIONS OF ANY KIND, either express or implied.
See the License for the specific language governing permissions and
limitations under the License.
================================================
FILE: docs/mixes/conformance.md
================================================
# 关于K8S集群一致性认证
CNCF 一致性认证项目(https://github.com/cncf/k8s-conformance) 可以很方便帮助k8s搭建者和用户确认集群各项功能符合预期,既符合k8s设计标准。
# kubeasz 通过一致性测试
自kubeasz 3.0.0 版本,k8s v1.20.2开始,正式通过cncf一致性认证,成为cncf 官方认证安装工具;后续k8s主要版本发布或者kubeasz有大版本更新,会优先确保通过集群一致性认证。
- v1.34 [进行中]()
- v1.33 [已认证](https://github.com/cncf/k8s-conformance/tree/master/v1.33/kubeasz)
- v1.32 [已认证](https://github.com/cncf/k8s-conformance/tree/master/v1.32/kubeasz)
- v1.31 [已认证](https://github.com/cncf/k8s-conformance/tree/master/v1.31/kubeasz)
- v1.30 [已认证](https://github.com/cncf/k8s-conformance/tree/master/v1.30/kubeasz)
- v1.29 [已认证](https://github.com/cncf/k8s-conformance/tree/master/v1.29/kubeasz)
- v1.28 [已认证](https://github.com/cncf/k8s-conformance/tree/master/v1.28/kubeasz)
- v1.27 [已认证](https://github.com/cncf/k8s-conformance/tree/master/v1.27/kubeasz)
- v1.26 [已认证](https://github.com/cncf/k8s-conformance/tree/master/v1.26/kubeasz)
- v1.25 [已认证](https://github.com/cncf/k8s-conformance/tree/master/v1.25/kubeasz)
- v1.24 [已认证](https://github.com/cncf/k8s-conformance/tree/master/v1.24/kubeasz)
- v1.23 [已认证](https://github.com/cncf/k8s-conformance/tree/master/v1.23/kubeasz)
- v1.22 [已认证](https://github.com/cncf/k8s-conformance/tree/master/v1.22/kubeasz)
- v1.21 [已认证](https://github.com/cncf/k8s-conformance/tree/master/v1.21/kubeasz)
- v1.20 [已认证](https://github.com/cncf/k8s-conformance/tree/master/v1.20/kubeasz)
## Conformance Test
按照测试文档,注意以下几点:
1.解决qiang的问题,可以临时去国外公有云创建集群,然后运行测试项目。
2.集群要保障资源,建议3个节点
3.网络组件选择calico,其他组件可能有bug导致特定测试项失败
# 附:测试流程
## Node Provisioning
Provision 3 nodes for your cluster (OS: Ubuntu 20.04)
1 master node (4c16g)
2 worker node (4c16g)
for a High-Availability Kubernetes Cluster, read [more](https://github.com/easzlab/kubeasz/blob/master/docs/setup/00-planning_and_overall_intro.md)
## Install the cluster
(1) Download 'kubeasz' code, the binaries and offline images
```
export release=3.2.0
curl -C- -fLO --retry 3 https://github.com/easzlab/kubeasz/releases/download/${release}/ezdown
chmod +x ./ezdown
./ezdown -D -m standard
```
(2) install an all-in-one cluster
```
./ezdown -S
source ~/.bashrc
dk ezctl start-aio
```
(3) Add two worker nodes
```
ssh-copy-id ${worker1_ip}
dk ezctl add-node default ${worker1_ip}
ssh-copy-id ${worker2_ip}
dk ezctl add-node default ${worker2_ip}
```
## Run Conformance Test
The standard tool for running these tests is
[Sonobuoy](https://github.com/heptio/sonobuoy). Sonobuoy is
regularly built and kept up to date to execute against all
currently supported versions of kubernetes.
Download a [binary release](https://github.com/heptio/sonobuoy/releases) of the CLI
Deploy a Sonobuoy pod to your cluster with:
```
$ sonobuoy run --plugin-env=e2e.E2E_EXTRA_ARGS="--ginkgo.v" --mode=certified-conformance
```
**NOTE:** You can run the command synchronously by adding the flag `--wait` but be aware that running the Conformance tests can take an hour or more.
View actively running pods:
```
$ sonobuoy status
```
To inspect the logs:
```
$ sonobuoy logs
```
Once `sonobuoy status` shows the run as `completed`, copy the output directory from the main Sonobuoy pod to a local directory:
```
$ outfile=$(sonobuoy retrieve)
```
This copies a single `.tar.gz` snapshot from the Sonobuoy pod into your local
`.` directory. Extract the contents into `./results` with:
```
mkdir ./results; tar xzf $outfile -C ./results
```
**NOTE:** The two files required for submission are located in the tarball under **plugins/e2e/results/{e2e.log,junit.xml}**.
To clean up Kubernetes objects created by Sonobuoy, run:
```
sonobuoy delete
```
================================================
FILE: docs/mixes/donate.md
================================================
# 捐赠
如果觉得本项目对您有帮助,请小小鼓励下项目作者,谢谢!
支付宝码(左)和微信钱包码(右)
 
================================================
FILE: docs/op/ch_apiserver_cert.md
================================================
# 修改 APISERVER(MASTER)证书
`kubeasz` 创建集群后,APISERVER(MASTER)证书默认 CN 包含如下`域名`和`IP`:参见`roles/kube-master/templates/kubernetes-csr.json.j2`
```
"hosts": [
"127.0.0.1",
{% if groups['ex_lb']|length > 0 %}
"{{ hostvars[groups['ex_lb'][0]]['EX_APISERVER_VIP'] }}",
{% endif %}
{% for host in groups['kube_master'] %}
"{{ host }}",
{% endfor %}
"{{ CLUSTER_KUBERNETES_SVC_IP }}",
{% for host in MASTER_CERT_HOSTS %}
"{{ host }}",
{% endfor %}
"kubernetes",
"kubernetes.default",
"kubernetes.default.svc",
"kubernetes.default.svc.cluster",
"kubernetes.default.svc.cluster.local"
],
```
有的时候(比如apiserver地址通过边界防火墙的NAT转换成公网IP访问,或者需要添加公网域名访问)我们需要在 APISERVER(MASTER)证书中添加一些`域名`或者`IP`,可以方便操作如下:
## 1.修改配置文件`/etc/kubeasz/clusters/${集群名}/config.yaml`
``` bash
# k8s 集群 master 节点证书配置,可以添加多个ip和域名(比如增加公网ip和域名)
MASTER_CERT_HOSTS:
- "10.1.1.1"
- "k8s.test.io"
#- "www.test.com"
```
## 2.执行新证书生成并重启apiserver
``` bash
$ ezctl setup ${集群名} 04 -t change_cert,restart_master
```
================================================
FILE: docs/op/cluster_restore.md
================================================
# K8S 集群备份与恢复
虽然 K8S 集群可以配置成多主多节点的高可用的部署,还是有必要了解下集群的备份和容灾恢复能力;在高可用k8s集群中 etcd集群保存了整个集群的状态,因此这里的备份与恢复重点就是:
- 从运行的etcd集群备份数据到磁盘文件
- 从etcd备份文件恢复数据,从而使集群恢复到备份时状态
## 备份与恢复操作说明
- 1.首先搭建一个测试集群,部署几个测试deployment,验证集群各项正常后,进行一次备份(假设集群名为k8s-01):
``` bash
$ ezctl backup k8s-01
# 或者如下手动执行ansible命令
# ansible-playbook -i clusters/k8s-01/hosts -e @clusters/k8s-01/config.yml playbooks/94.backup.yml
```
执行完毕可以在部署主机的备份目录下检查备份情况,示例如下:
```
/etc/kubeasz/clusters/k8s-01/backup/
├── snapshot_202106201205.db
├── snapshot_202106211406.db
└── snapshot.db
```
其中,snapshot.db始终为最近一次备份文件
- 2.模拟误删除操作(略)
- 3.恢复集群及验证
可以在 `roles/cluster-restore/defaults/main.yml` 文件中配置需要恢复的 etcd备份版本(从上述备份目录中选取),默认使用最近一次备份;执行恢复后,需要一定时间等待 pod/svc 等资源恢复重建。
``` bash
$ ezctl restore k8s-01
# 或者如下手动执行ansible命令
# ansible-playbook -i clusters/k8s-01/hosts -e @clusters/k8s-01/config.yml playbooks/95.restore.yml
```
如果集群主要组件(master/etcd/node)等出现不可恢复问题,可以尝试使用如下步骤 [清理]() --> [创建]() --> [恢复]()
``` bash
$ ezctl clean k8s-01
# 或者如下手动执行ansible命令
# ansible-playbook -i clusters/k8s-01/hosts -e @clusters/k8s-01/config.yml playbooks/99.clean.yml
$ ezctl setup k8s-01 01
$ ezctl setup k8s-01 02
$ ezctl setup k8s-01 03
$ ezctl setup k8s-01 04
$ ezctl setup k8s-01 05
...
$ ezctl restore k8s-01
# ansible-playbook -i clusters/k8s-01/hosts -e @clusters/k8s-01/config.yml playbooks/95.restore.yml
```
## 参考
- https://etcd.io/docs/v3.4/op-guide/recovery/
================================================
FILE: docs/op/force_ch_certs.md
================================================
# 强制更新CA和所有证书
- WARNNING: 此命令使用需要小心谨慎,确保了解功能背景和可能的结果;执行后,它会重新创建集群CA证书以及由它颁发的所有其他证书;一般适合于集群admin.conf不小心泄露,为了避免集群被非法访问,重新创建CA,从而使已泄漏的admin.conf失效。
- 如果需要分发受限的kubeconfig,强烈建议使用[自定义权限和期限的kubeconfig](kcfg-adm.md)
## 使用帮助
确认需要强制更新后,在ansible 控制节点使用如下命令:(xxx 表示需要操作的集群名)
``` bash
docker exec -it kubeasz ezctl kca-renew xxx
# 或者使用 dk ezctl kca-renew xxx
```
上述命令执行后,按序进行以下的操作:详见`playbooks/96.update-certs.yml`
- 重新生成CA证书,以及各种kubeconfig
- 签发新etcd证书,并使用新证书重启etcd服务
- 签发新kube-apiserver 证书,并重启kube-apiserver/kube-controller-manager/kube-scheduler 服务
- 签发新kubelet 证书,并重启kubelet/kube-proxy 服务
- 重启网络组件pod
- 重启其他集群组件pod
- **特别注意:** 如果集群中运行的业务负载pod需要访问apiserver,需要重启这些pod
## 检查验证
更新完毕,注意检查集群组件日志和容器pod日志,确认集群处于正常状态
- 集群组件日志:使用journalctl -u xxxx.service -f 依次检查 etcd.service/kube-apiserver.service/kube-controller-manager.service/kube-scheduler.service/kubelet.service/kube-proxy.service
- 容器pod日志:使用 kubectl logs 方式检查容器日志
================================================
FILE: docs/op/kcfg-adm.md
================================================
# 管理客户端kubeconfig
默认 k8s集群安装成功后生成客户端kubeconfig,它拥有集群管理的所有权限(不要将这个admin权限、50年期限的kubeconfig流露出去);而我们经常需要将限定权限、限定期限的kubeconfig 分发给普通用户;利用cfssl签发自定义用户证书和k8s灵活的rbac权限绑定机制,ezctl 工具封装了这个功能。
## 使用帮助
```
ezctl help kcfg-adm
Usage: ezctl kcfg-adm
available :
-A to add a client kubeconfig with a newly created user
-D to delete a client kubeconfig with the existed user
-L to list all of the users
-e to set expiry of the user certs in hours (ex. 24h, 8h, 240h)
-t to set a user-type (admin or view)
-u to set a user-name prefix
examples: ./ezctl kcfg-adm test-k8s -L
./ezctl kcfg-adm default -A -e 240h -t admin -u jack
./ezctl kcfg-adm default -D -u jim-202101162141
```
- 可以设置过期时间
- 可以设置权限:管理员权限(admin)和只读权限(view)
## 使用举例
- 1.查看集群k8s-01当前自定义kubeconfig
```
ezctl kcfg-adm k8s-01 -L
2021-01-24 16:32:43 INFO list-kcfg k8s-01
2021-01-24 16:32:43 INFO list-kcfg in cluster:k8s-01
USER TYPE EXPIRY(+8h if in Asia/Shanghai)
---------------------------------------------------------------------------------
2021-01-24 16:32:43 INFO list-kcfg k8s-01 success
```
初始情况下列表为空
- 2.增加集群k8s-01一个自定义用户kubeconfig,用户名user01,期限24h,只读权限
```
ezctl kcfg-adm k8s-01 -A -u user01 -e 24h -t view
2021-01-24 17:32:33 INFO add-kcfg k8s-01
2021-01-24 17:32:33 INFO add-kcfg in cluster:k8s-01 with user:user01-202101241732
PLAY [localhost] *****************************************************************************************************
...(此处省略输出)
TASK [deploy : debug] ************************************************************************************************
ok: [localhost] => {
"msg": "查看user01-202101241732自定义kubeconfig:/etc/kubeasz/clusters/k8s-01/ssl/users/user01-202101241732.kubeconfig"
}
PLAY RECAP ***********************************************************************************************************
localhost : ok=12 changed=10 unreachable=0 failed=0 skipped=0 rescued=0 ignored=0
2021-01-24 17:32:41 INFO add-kcfg k8s-01 success
```
生成的kubeconfig位于 /etc/kubeasz/clusters/k8s-01/ssl/users/user01-202101241732.kubeconfig
- 3.再增加一个用户user02,期限240h,admin权限
```
ezctl kcfg-adm k8s-01 -A -u user02 -e 240h -t admin
2021-01-24 18:38:47 INFO add-kcfg k8s-01
2021-01-24 18:38:47 INFO add-kcfg in cluster:k8s-01 with user:user02-202101241838
PLAY [localhost] *****************************************************************************************************
...(此处省略输出)
TASK [deploy : debug] ************************************************************************************************
ok: [localhost] => {
"msg": "查看user02-202101241838自定义kubeconfig:/etc/kubeasz/clusters/k8s-01/ssl/users/user02-202101241838.kubeconfig"
}
PLAY RECAP ***********************************************************************************************************
localhost : ok=12 changed=9 unreachable=0 failed=0 skipped=0 rescued=0 ignored=0
2021-01-24 18:38:55 INFO add-kcfg k8s-01 success
```
- 4.再次查看集群k8s-01当前自定义kubeconfig
```
ezctl kcfg-adm k8s-01 -L
2021-01-24 18:40:30 INFO list-kcfg k8s-01
2021-01-24 18:40:30 INFO list-kcfg in cluster:k8s-01
USER TYPE EXPIRY(+8h if in Asia/Shanghai)
---------------------------------------------------------------------------------
user02-202101241838 cluster-admin 2021-02-03T10:34:00Z
user01-202101241732 view 2021-01-25T09:28:00Z
2021-01-24 18:40:31 INFO list-kcfg k8s-01 success
```
- 5.删除user01-202101241732 权限
``` bash
ezctl kcfg-adm k8s-01 -D -u user01-202101241732
2021-01-24 21:41:50 INFO del-kcfg k8s-01
2021-01-24 21:41:50 INFO del-kcfg in cluster:k8s-01 with user:user01-202101241732
clusterrolebinding.rbac.authorization.k8s.io "crb-user01-202101241732" deleted
2021-01-24 21:41:50 INFO del-kcfg k8s-01 success
ezctl kcfg-adm k8s-01 -L
2021-01-24 21:42:02 INFO list-kcfg k8s-01
2021-01-24 21:42:02 INFO list-kcfg in cluster:k8s-01
USER TYPE EXPIRY(+8h if in Asia/Shanghai)
---------------------------------------------------------------------------------
user02-202101241838 cluster-admin 2021-02-03T10:34:00Z
2021-01-24 21:42:02 INFO list-kcfg k8s-01 success
```
================================================
FILE: docs/op/loadballance_ingress_nodeport.md
================================================
# 配置负载转发 ingress nodeport
向集群外暴露 ingress-controller 本身的服务端口(80/443/8080)一般有以下三种方法:
- 1.部署ingress-controller时使用`hostNetwork: true`,这样就可以直接使用上述端口,可能与host已listen端口冲突
- 2.部署ingress-controller时使用`LoadBalancer`类型服务,需要集群支持`LoadBalancer`
- 3.部署ingress-controller时使用`nodePort`类型服务,然后在集群外使用 haproxy/f5 等配置 virtual server 集群
本文档讲解使用 haproxy 配置 ingress的 VS 集群,前提是配置了自建`ex_lb`节点
## 1.配置 ex_lb 参数开启转发 ingress nodeport
``` bash
# 编辑 roles/ex-lb/defaults/main.yml,配置如下变量
INGRESS_NODEPORT_LB: "yes"
INGRESS_TLS_NODEPORT_LB: "yes"
```
## 2.重新配置启动LB节点服务
``` bash
$ ezctl setup ${集群名} ex-lb
```
## 3.验证 ex_lb 节点的 haproxy 服务配置 `/etc/haproxy/haproxy.cfg` 包含如下配置
``` bash
... 前文省略
listen kube_master
bind 0.0.0.0:8443
mode tcp
option tcplog
balance roundrobin
server 192.168.1.1 192.168.1.1:6443 check inter 2000 fall 2 rise 2 weight 1
server 192.168.1.2 192.168.1.2:6443 check inter 2000 fall 2 rise 2 weight 1
listen ingress-node
bind 0.0.0.0:80
mode tcp
option tcplog
balance roundrobin
server 192.168.1.3 192.168.1.3:23456 check inter 2000 fall 2 rise 2 weight 1
server 192.168.1.4 192.168.1.4:23456 check inter 2000 fall 2 rise 2 weight 1
listen ingress-node-tls
bind 0.0.0.0:443
mode tcp
option tcplog
balance roundrobin
server 192.168.1.3 192.168.1.3:23457 check inter 2000 fall 2 rise 2 weight 1
server 192.168.1.4 192.168.1.4:23457 check inter 2000 fall 2 rise 2 weight 1
```
验证成功后,我们可以方便的去做[配置ingress](../guide/ingress.md)和[配置https ingress](../guide/ingress-tls.md)实验了。
================================================
FILE: docs/op/op-etcd.md
================================================
# 管理 etcd 集群
Etcd 集群支持在线改变集群成员节点,可以增加、修改、删除成员节点;不过改变成员数量仍旧需要满足集群成员多数同意原则(quorum),另外请记住集群成员数量变化的影响:
- 注意:如果etcd 集群有故障节点,务必先删除故障节点,然后添加新节点,[参考FAQ](https://etcd.io/docs/v3.4.0/faq/)
- 增加 etcd 集群节点, 提高集群稳定性
- 增加 etcd 集群节点, 提高集群读性能(所有节点数据一致,客户端可以从任意节点读取数据)
- 增加 etcd 集群节点, 降低集群写性能(所有节点数据一致,每一次写入会需要所有节点数据同步)
## 备份 etcd 数据
1. 手动在任意正常 etcd 节点上执行备份:
``` bash
# snapshot备份
$ ETCDCTL_API=3 etcdctl snapshot save backup.db
# 查看备份
$ ETCDCTL_API=3 etcdctl --write-out=table snapshot status backup.db
```
2. 使用 kubeasz 备份
_cluster_name_ 为 k8s-01
``` bash
ezctl backup k8s-01
```
使用 crontab 定时备份示例(使用 容器化的 kubeasz,每日01:01 备份)
```
1 1 * * * /usr/bin/docker exec -i kubeasz ezctl backup k8s-01
```
备份文件在
```
{{ base_dir }}/clusters/k8s-01/backup
```
## etcd 集群节点操作
执行如下 (假设待操作节点为 192.168.1.11,集群名称test-k8s):
- 增加 etcd 节点:
``` bash
# ssh 免密码登录
$ ssh-copy-id 192.168.1.11
# 新增节点
$ ezctl add-etcd test-k8s 192.168.1.11
```
- 删除 etcd 节点:`$ ezctl del-etcd test-k8s 192.168.1.11`
具体操作流程参考 ezctl中 add-etcd/del-etcd 相关函数和playbooks/ 目录的操作剧本
### 验证 etcd 集群
``` bash
# 登录任意etcd节点验证etcd集群状态
$ export ETCDCTL_API=3
$ etcdctl member list
# 验证所有etcd节点服务状态和日志
$ systemctl status etcd
$ journalctl -u etcd -f
```
## 参考
- 官方文档 https://etcd.io/docs/v3.5/op-guide/runtime-configuration/
================================================
FILE: docs/op/op-index.md
================================================
# 集群运维管理指南 operation guide
- [管理 NODE 节点](op-node.md)
- [管理 MASTER 节点](op-master.md)
- [管理 ETCD 节点](op-etcd.md)
- [升级 K8S 版本](upgrade.md)
- [集群备份与恢复](cluster_restore.md)
- [管理分发用户 kubeconfig](kcfg-adm.md)
- [修改 APISERVER 证书](ch_apiserver_cert.md)
- [强制更新CA和所有证书](force_ch_certs.md)
- [配置负载转发 ingress nodeport](loadballance_ingress_nodeport.md)
================================================
FILE: docs/op/op-master.md
================================================
# 管理 kube_master 节点
## 1.增加 kube_master 节点
新增`kube_master`节点大致流程为:(参考ezctl 中add-master函数和playbooks/23.addmaster.yml)
- [可选]新节点安装 chrony 时间同步
- 新节点预处理 prepare
- 新节点安装 container runtime
- 新节点安装 kube_master 服务
- 新节点安装 kube_node 服务
- 新节点安装网络插件相关
- 禁止业务 pod调度到新master节点
- 更新 node 节点 haproxy 负载均衡并重启
### 操作步骤
执行如下 (假设待增加节点为 192.168.1.11, 集群名称test-k8s):
``` bash
# ssh 免密码登录
$ ssh-copy-id 192.168.1.11
# 新增节点
$ ezctl add-master test-k8s 192.168.1.11
# 同理,重复上面步骤再新增节点并自定义nodename
$ ezctl add-master test-k8s 192.168.1.12 k8s_nodename=master-03
```
### 验证
``` bash
# 在新节点master 服务状态
$ systemctl status kube-apiserver
$ systemctl status kube-controller-manager
$ systemctl status kube-scheduler
# 查看新master的服务日志
$ journalctl -u kube-apiserver -f
# 查看集群节点,可以看到新 master节点 Ready, 并且禁止了POD 调度功能
$ kubectl get node
NAME STATUS ROLES AGE VERSION
192.168.1.1 Ready,SchedulingDisabled 3h v1.9.3
192.168.1.2 Ready,SchedulingDisabled 3h v1.9.3
192.168.1.3 Ready 3h v1.9.3
192.168.1.4 Ready 3h v1.9.3
192.168.1.11 Ready,SchedulingDisabled 2h v1.9.3 # 新增 master节点
```
## 2.删除 kube_master 节点
删除`kube_master`节点大致流程为:(参考ezctl 中del-master函数和playbooks/33.delmaster.yml)
- 检测是否可以删除
- 迁移节点 pod
- 删除 master 相关服务及文件
- 删除 node 相关服务及文件
- 从集群删除 node 节点
- 从 ansible hosts 移除节点
- 在 ansible 控制端更新 kubeconfig
- 更新 node 节点 haproxy 配置
### 操作步骤
``` bash
$ ezctl del-master test-k8s 192.168.1.11 # 假设待删除节点 192.168.1.11
```
### 验证
略
================================================
FILE: docs/op/op-node.md
================================================
# 管理 node 节点
目录
- 1.增加 kube_node 节点
- 2.增加非标准ssh端口节点
- 3.删除 kube_node 节点
## 1.增加 kube_node 节点
新增`kube_node`节点大致流程为:(参考ezctl 里面add-node函数 和 playbooks/22.addnode.yml)
- [可选]新节点安装 chrony 时间同步
- 新节点预处理 prepare
- 新节点安装 container runtime
- 新节点安装 kube_node 服务
- 新节点安装网络插件相关
### 操作步骤
执行如下 (假设待增加节点为 192.168.1.11,k8s集群名为 test-k8s):
``` bash
# ssh 免密码登录
$ ssh-copy-id 192.168.1.11
# 新增节点
$ ezctl add-node test-k8s 192.168.1.11
# 同理,重复上面步骤再新增节点并自定义nodename
$ ezctl add-node test-k8s 192.168.1.12 k8s_nodename=worker-03
```
### 验证
``` bash
# 验证新节点状态
$ kubectl get node
# 验证新节点的网络插件calico 或flannel 的Pod 状态
$ kubectl get pod -n kube-system
# 验证新建pod能否调度到新节点,略
```
## 2.增加非标准ssh端口节点
假设待添加节点192.168.2.1,ssh 端口 10022;然后执行
``` bash
$ ssh-copy-id -p 10022 192.168.2.1
$ ezctl add-node test-k8s 192.168.2.1 ansible_ssh_port=10022
```
- 注意:如果在添加节点时需要设置其他个性化变量,可以同理在后面不断添加
## 3.删除 kube_node 节点
删除 node 节点流程:(参考ezctl 里面del-node函数 和 playbooks/32.delnode.yml)
- 检测是否可以删除
- 迁移节点上的 pod
- 删除 node 相关服务及文件
- 从集群删除 node
### 操作步骤
``` bash
$ ezctl del-node test-k8s 192.168.1.11 # 假设待删除节点为 192.168.1.11
```
### 验证
略
================================================
FILE: docs/op/upgrade.md
================================================
## k8s 集群升级
集群升级存在一定风险,请谨慎操作。
- 支持k8s相同大版本基础上升级任意小版本,比如当前安装集群为1.25.0,你可以方便的升级到任何1.25.x版本
- 不建议跨大版本升级,一般大版本更新时k8s api有一些变动
### 备份etcd数据
- 自动备份
`kubeasz`项目也可以如下方便执行备份(假设集群名为k8s-01),详情阅读文档[备份恢复](cluster_restore.md)
```
dk ezctl backup k8s-01
```
- 手动备份 etcd数据,在任意 etcd节点上执行:
``` bash
# snapshot备份
$ ETCDCTL_API=3 etcdctl snapshot save backup.db
# 查看备份
$ ETCDCTL_API=3 etcdctl --write-out=table snapshot status backup.db
```
### k8s 升级小版本
快速升级`k8s`小版本,比较常见如`Bug修复` `特性发布`时使用。
- 首先去官网release下载待升级的k8s版本,例如`https://dl.k8s.io/v1.25.4/kubernetes-server-linux-amd64.tar.gz`
- 解压下载的tar.gz文件,找到如下`kube*`开头的二进制,复制替换kubeasz控制端目录`/etc/kubeasz/bin`对应文件
- kube-apiserver
- kube-controller-manager
- kubectl
- kubelet
- kube-proxy
- kube-scheduler
- 切换当前所在集群为升级集群, 在kubeasz控制端执行`dk ezctl checkout k8s-01`
- 在kubeasz控制端执行`dk ezctl upgrade k8s-01` 即可完成k8s 升级,不会中断业务应用
### 其他升级说明
其他升级是指升级k8s组件包括:`etcd版本` `docker版本`,一般不需要用到,不建议升级,以下仅作说明。
- 1.下载所有组件相关新的二进制解压并替换 `/etc/kubeasz/bin/` 目录下文件
- 2.升级 etcd: `ansible-playbook -i clusters/k8s-01/hosts -e @clusters/k8s-01/config.yml -t upgrade_etcd playbooks/02.etcd.yml`
- 3.升级 docker (建议使用k8s官方支持的docker稳定版本)
- 如果可以接受短暂业务中断,执行 `ansible-playbook -t upgrade_docker 03.docker.yml`
- 如果要求零中断升级,执行 `ansible-playbook -i clusters/k8s-01/hosts -e @clusters/k8s-01/config.yml -t download_docker playbooks/03.runtime.yml`,然后手动执行如下
- 待升级节点,先应用`kubectl cordon`和`kubectl drain`命令迁移业务pod
- 待升级节点执行 `systemctl restart docker`
- 恢复节点可调度 `kubectl uncordon`
================================================
FILE: docs/release-notes/kubeasz-3.6.0.md
================================================
## kubeasz 3.6.0 (Beginning of Summer)
微雨过,小荷翻。榴花开欲然。kubeasz 3.6.0 发布:支持k8s v1.27版本,支持更多操作系统安装,以及组件更新和一些bugfix。
### 版本更新
- k8s: v1.27.1
- cilium: v1.13.2
- flannel: v0.21.4
- harbor: v2.6.4
- metrics-server: v0.6.3
- k8s-dns-node-cache: 1.22.20
- kube-prometheus-stack: 45.23.0
### 调整项目分支更新规则
k8s大版本对应kubeasz特定的大版本号,详见README.md 中版本对照表,当前积极更新的分支如下:
- master:默认保持与最新分支同步,当前与v3.6同步
- v3.6:对应k8s v1.27 版本,持续保持更新
- v3.5:对应k8s v1.26 版本,主要使用cherry-pick方式合并后续版本中的重要commit
- v3.4:对应k8s v1.25 版本,主要使用cherry-pick方式合并后续版本中的重要commit
- v3.3:对应k8s v1.24 版本,主要使用cherry-pick方式合并后续版本中的重要commit
### 支持更多操作系统安装
本次增加测试支持大部分使用systemd的linux发行版,如果安装有问题先请查看(docs/setup/multi_os.md);如果某个能够支持安装的系统没有在列表中,欢迎提PR 告知。
- **Alibaba Linux** 2.1903, 3.2104([notes](docs/setup/multi_os.md#Alibaba))
- **Alma Linux** 8, 9
- **Anolis OS** 8.x RHCK, 8.x ANCK([notes](docs/setup/multi_os.md#Anolis))
- **CentOS/RHEL** 7, 8, 9
- **Debian** 10, 11([notes](docs/setup/multi_os.md#Debian))
- **Fedora** 34, 35, 36, 37
- **openSUSE** Leap 15.x([notes](docs/setup/multi_os.md#openSUSE))
- **Rocky Linux** 8, 9
- **Ubuntu** 16.04, 18.04, 20.04, 22.04
### 重要更新
- 重写`ezdown`脚本支持下载多系统软件包部分
- 重写`role:prepare`支持离线安装多系统软件包部分
- 简化harbor安装后集成使用,目前在containerd容器运行时中额外配置允许insecure仓库方式
- 修复pod挂载 hostpath volume,删除pod会卡住问题 (#1259) by itswl
- 增加设置limits for pids #1265 by AsonZhang
### 其他
- 增加项目`ISSUE`模版
- 修复chronyd 服务可能出现 enable失败问题 (#1254) by Roach57
- 增加ezctl setup脚本执行时打印版本信息
================================================
FILE: docs/release-notes/kubeasz-3.6.1.md
================================================
## kubeasz 3.6.1
kubeasz 3.6.1 发布:支持k8s v1.27版本,组件更新和一些bugfix。
### 版本更新
- k8s: v1.27.2
- calico: v3.24.6
- kube-ovn: v1.11.5
- kube-router: v1.5.4
### 增加应用部署插件 kubeapps
Kubeapps 是一个基于 Web 的应用程序,它可以在 Kubernetes 集群上进行一站式安装,并使用户能够部署、管理和升级应用
程序。https://github.com/easzlab/kubeasz/blob/master/docs/guide/kubeapps.md
### 重要更新
- 重写`ezdown`脚本支持下载额外的应用容器镜像
- 增加`local-path-provisioner`本地文件目录提供者
- 设置允许kubelet并行拉取容器镜像
### 其他
- 增加kubectl-node-shell 脚本
- 修复ansible connect local 是 python 解析器不确定问题
- 修复typo #1273
- 部分文档更新
================================================
FILE: docs/release-notes/kubeasz-3.6.2.md
================================================
## kubeasz 3.6.2
kubeasz 3.6.2 发布:支持k8s v1.28版本,组件更新和一些bugfix。
### 版本更新
- k8s: v1.28.1
- etcd: v3.5.9
- containerd: 1.6.23
- runc: v1.1.9
- cni: v1.3.0
- coredns: 1.11.1
- cilium: 1.13.6
- flannel: v0.22.2
### 修改kubeasz支持k8s版本对应规则
原有模式每个k8s大版本都有推荐对应的kubeasz版本,这样做会导致kubeasz版本碎片化,追踪问题很麻烦,而且也影响普通用户安装体验。从kubeasz 3.6.2版本开始,默认最新版本kubeasz兼容支持安装最新的三个k8s大版本。具体安装说明如下:
(如果/etc/kubeasz/bin 目录下已经有kube* 文件,需要先删除 rm -f /etc/kubeasz/bin/kube*)
- 安装 k8s v1.28: 使用 kubeasz 3.6.2,执行./ezdown -D 默认下载即可
- 安装 k8s v1.27: 使用 kubeasz 3.6.2,执行./ezdown -D -k v1.27.5 下载
- 安装 k8s v1.26: 使用 kubeasz 3.6.2,执行./ezdown -D -k v1.26.8 下载
- 安装 k8s v1.25: 使用 kubeasz 3.6.2,执行./ezdown -D -k v1.25.13 下载
- 安装 k8s v1.24: 使用 kubeasz 3.6.2,执行./ezdown -D -k v1.24.17 下载
### 重要更新
- 增加支持containerd 可配置trusted insecure registries
- 修复calico rr 模式的节点设置 #1308
- 修复自定义节点名称设置 /etc/hosts方案
- fix: kubelet failed when enabling kubeReserved or systemReserved
### 其他
- 修复:disable selinux on deploy host
- helm部署redis-ha添加国内可访问镜像 by heyanyanchina123
- 修复多集群管理时, 若当前ezctl配置不是升级集群,会导致升级失败 by learn0208
- add ipvs配置打开strictARP #1298
- revert for supporting k8s version <= 1.26
- add kubetail, by WeiLai
- update manifests:es-cluster/mysql-cluster
================================================
FILE: docs/release-notes/kubeasz-3.6.3.md
================================================
## kubeasz 3.6.3
kubeasz 3.6.3 发布:支持k8s v1.29版本,组件更新和一些bugfix。
### 版本更新
- k8s: v1.29.0
- etcd: v3.5.10
- containerd: 1.6.26
- runc: v1.1.10
- calico: v3.26.4
- cilium: 1.14.5
### 修改kubeasz支持k8s版本对应规则
原有模式每个k8s大版本都有推荐对应的kubeasz版本,这样做会导致kubeasz版本碎片化,追踪问题很麻烦,而且也影响普通用户安装体验。从kubeasz 3.6.2版本开始,默认最新版本kubeasz兼容支持安装最新的三个k8s大版本。具体安装说明如下:
(如果/etc/kubeasz/bin 目录下已经有kube* 文件,需要先删除 rm -f /etc/kubeasz/bin/kube*)
- 安装 k8s v1.29: 使用 kubeasz 3.6.3,执行./ezdown -D 默认下载即可
- 安装 k8s v1.28: 使用 kubeasz 3.6.2,执行./ezdown -D -k v1.28.5 下载
- 安装 k8s v1.27: 使用 kubeasz 3.6.2,执行./ezdown -D -k v1.27.9 下载
- 安装 k8s v1.26: 使用 kubeasz 3.6.2,执行./ezdown -D -k v1.26.12 下载
### 重要更新
- deprecated role: os-harden,因为扩大支持更多linux发行版,系统加固方式无法在各种系统上充分测试,感谢 #1338 issue 反馈问题
- adjust docker setup scripts
- update harbor v2.8.4 and fix harbor setup
- fix nodelocaldns yaml
### 其他
- docs update: add argocd guide
- docs: fix the quickStart.md url in network-plugin
================================================
FILE: docs/release-notes/kubeasz-3.6.4.md
================================================
## kubeasz 3.6.4
kubeasz 3.6.4 发布:支持k8s v1.30版本,组件更新和一些bugfix。
### 版本更新
- k8s: v1.30.1
- etcd: v3.5.12
- containerd: 1.7.17
- runc: v1.1.12
- calico: v3.26.4
- cilium: 1.15.5
- cni: v1.4.1
- harbor: v2.10.2
- metrics-server: v0.7.1
### 重要更新
- 安全更新:to solve CVE-2024-21626: update containerd, runc
- 安装流程:role 'prepare' 阶段增加设置hostname,这样当网络组件为calico时不会因为主机名相同而出错;同时在example/config.yml 中增加配置开关`ENABLE_SETTING_HOSTNAME`
- 操作系统:增加测试支持 Ubuntu 2404
- 已知在ubuntu 2404上使用网络插件calico v3.26.4不兼容,提示:ipset v7.11: Kernel and userspace incompatible
- 使用cilium 组件没有问题
### 其他
- 21376465de7f44d1ec997bde096afc7404ce45c5 fix: cilium ui images settings
- c40548e0e33cab3c4e5742aacce11101ac0c7366 #1343, 恢复podPidsLimit=-1默认设置
-
================================================
FILE: docs/release-notes/kubeasz-3.6.5.md
================================================
## kubeasz 3.6.5
kubeasz 3.6.5 发布:支持k8s v1.31 版本,组件更新和一些bugfix。
### 版本更新
- k8s: v1.31.2
- etcd: v3.5.16
- containerd: 1.7.23
- runc: v1.1.15
- calico: v3.28.2
- coredns: 1.11.3
- dnsnodecache: 1.23.1
- cilium: 1.16.3
- flannel: v0.26.0
- cni: v1.6.0
- harbor: v2.11.1
- metrics-server: v0.7.2
- pause: 3.10
### 更新
- 修正centos9 下prepare脚本运行的问题 #1397 By GitHubAwan
- style: trim trailing whitespace & add logger source line number #1413 By kelein
- 操作系统:增加测试支持 Ubuntu 2404
- 修复在ubuntu 2404上使用网络插件calico ipSet兼容性问题(calico v3.28.2)
### 其他
- 修复calico hostname 设置
- 更新部分文档
-
================================================
FILE: docs/release-notes/kubeasz-3.6.6.md
================================================
## kubeasz 3.6.6
kubeasz 3.6.6 发布:支持k8s v1.32 版本,组件更新和一些bugfix。
### 版本更新
- k8s: v1.32.3
- etcd: v3.5.20
- containerd: 2.0.4
- runc: v1.2.6
- calico: v3.28.3
- coredns: 1.11.4
- cni: v1.6.2
- harbor: v2.12.2
### 更新
- 更新国内docker镜像仓库加速设置,解决ezdown脚本无法下载镜像问题;同步更新containerd 镜像仓库加速设置
- 主要组件大版本更新:containerd 从 1.7.x 更新大版本 2.0.x,更新主要配置文件;runc 从 1.1.x 更新大版本 1.2.x
- 安装逻辑更新:新增节点不再重复执行网络插件安装,避免部分网络插件自动重启业务pod,by gogeof
- 安装逻辑更新:每次执行脚本 containerd 都会被重新安装,不管原先是否已经运行
- 优化更新 ezctl 脚本从 ezdown 加载变量方式,by RadPaperDinosaur
### 其他
- 修复 CLUSTER_DNS_SVC_IP & CLUSTER_KUBERNETES_SVC_IP 地址生成规则,by yunpiao
- 更新conformance文档
-
================================================
FILE: docs/release-notes/kubeasz-3.6.7.md
================================================
## kubeasz 3.6.7
kubeasz 3.6.7 发布:支持k8s v1.33 版本,组件更新和bugfix。
### 版本更新
- k8s: v1.33.1
- etcd: v3.5.21
- containerd: 2.1.1
- runc: v1.2.6
- calico: v3.28.4
- cilium: 1.17.4
- coredns: 1.12.1
- cni: v1.7.1
- dnsNodeCache: 1.25.0
- harbor: v2.12.4
- local-path-provisioner: v0.0.31
- dashboard 7.12.0
### 更新
- 增加可选组件`kubeblocks`集成,增加多种数据库高可用方案
- 重写脚本ezdown中关于镜像下载保存部分,清理冗余,增加错误错误处理
- 修复添加/删除master节点时/etc/hosts问题 #1464
- 修复使用静态编译的containerd二进制,并设置日志为warn级别,避免当容器使用exec类健康检查时产生过多日志
- 修复./ezdown -D 偶发403报错 #1470
- 修复cilium 组件原cilium_connectivity_check脚本执行条件
### 文档更新
- 更新一致性认证文档 conformance.md
================================================
FILE: docs/release-notes/kubeasz-3.6.8.md
================================================
## kubeasz 3.6.8
kubeasz 3.6.8 发布:支持k8s v1.34 版本,组件更新和bugfix。
### 版本更新
- k8s: v1.34.1
- etcd: v3.6.4
- containerd: 2.1.4
- runc: v1.3.1
- coredns: 1.12.4
- cni: v1.8.0
- dnsNodeCache: 1.26.4
- metrics: v0.8.0
- flannel: v0.27.3
- kubeblocks: 1.0.0
- kube-prometheus-stack: 75.7.0
### 重要更新
- 调整系统内核设置 commit f9bdbeb4e3bd6b98a03a900d3e50ef29da6a590f, #1478
- 新增支持 openEuler 22.03 LTS, 24.03 LTS
- 优化节点只需运行一次 prepare task
- 增加可选开启集群审计功能
- 修复 calico mtu 设置 #1444
- 修复 calico vxlan overlay 设置 #1492
- 更新 containerd 配置容器镜像仓库方式
### 文档更新
- 实验性混合架构部署文档 https://github.com/easzlab/kubeasz/blob/master/docs/setup/mix_arch.md
- updat kernel_upgrade.md for centos7 by Zlanghu #1483
感谢新增贡献者:
vistamin #1444
newfzk #1477
learn0208 #1478
Zlanghu #1483
newfzk #1492
TOT-JIN #1495
================================================
FILE: docs/setup/00-planning_and_overall_intro.md
================================================
## 00-集群规划和基础参数设定
### HA architecture
 - 注意1:确保各节点时区设置一致、时间同步。 如果你的环境没有提供NTP 时间同步,推荐集成安装[chrony](../guide/chrony.md)
- 注意2:确保在干净的系统上开始安装,不要使用曾经装过kubeadm或其他k8s发行版的环境
- 注意3:建议操作系统升级到新的稳定内核,请结合阅读[内核升级文档](../guide/kernel_upgrade.md)
- 注意4:在公有云上创建多主集群,请结合阅读[在公有云上部署 kubeasz](kubeasz_on_public_cloud.md)
## 高可用集群所需节点配置如下
|角色|数量|描述|
|:-|:-|:-|
|部署节点|1|运行ansible/ezctl命令,一般复用第一个master节点|
|etcd节点|3|注意etcd集群需要1,3,5,...奇数个节点,一般复用master节点|
|master节点|2|高可用集群至少2个master节点|
|node节点|n|运行应用负载的节点,可根据需要提升机器配置/增加节点数|
机器配置:
- master节点:4c/8g内存/50g硬盘
- worker节点:建议8c/32g内存/200g硬盘以上
注意:默认配置下容器运行时和kubelet会占用/var的磁盘空间,如果磁盘分区特殊,可以设置config.yml中的容器运行时和kubelet数据目录:`CONTAINERD_STORAGE_DIR` `DOCKER_STORAGE_DIR` `KUBELET_ROOT_DIR`
在 kubeasz 2x 版本,多节点高可用集群安装可以使用2种方式
- 1.按照本文步骤先规划准备,预先配置节点信息后,直接安装多节点高可用集群
- 2.先部署单节点集群 [AllinOne部署](quickStart.md),然后通过 [节点添加](../op/op-index.md) 扩容成高可用集群
## 部署步骤
以下示例创建一个4节点的多主高可用集群,文档中命令默认都需要root权限运行。
### 1.基础系统配置
+ 2c/4g内存/40g硬盘(该配置仅测试用)
+ 最小化安装`Ubuntu 16.04 server`或者`CentOS 7 Minimal`
+ 配置基础网络、更新源、SSH登录等
### 2.在每个节点安装依赖工具
推荐使用ansible in docker 容器化方式运行,无需安装额外依赖。
### 3.准备ssh免密登陆
配置从部署节点能够ssh免密登陆所有节点,并且设置python软连接
``` bash
#$IP为所有节点地址包括自身,按照提示输入yes 和root密码
ssh-copy-id $IP
```
### 4.在部署节点编排k8s安装
- 4.1 下载项目源码、二进制及离线镜像
下载工具脚本ezdown,举例使用kubeasz版本3.5.0
``` bash
export release=3.5.0
wget https://github.com/easzlab/kubeasz/releases/download/${release}/ezdown
chmod +x ./ezdown
```
下载kubeasz代码、二进制、默认容器镜像(更多关于ezdown的参数,运行./ezdown 查看)
``` bash
# 国内环境
./ezdown -D
# 海外环境
#./ezdown -D -m standard
```
【可选】下载额外容器镜像(cilium,flannel,prometheus等)
``` bash
# 按需下载
./ezdown -X flannel
./ezdown -X prometheus
...
```
【可选】下载离线系统包 (适用于无法使用yum/apt仓库情形)
``` bash
./ezdown -P
```
上述脚本运行成功后,所有文件(kubeasz代码、二进制、离线镜像)均已整理好放入目录`/etc/kubeasz`
- 4.2 创建集群配置实例
``` bash
# 容器化运行kubeasz
./ezdown -S
# 创建新集群 k8s-01
docker exec -it kubeasz ezctl new k8s-01
2021-01-19 10:48:23 DEBUG generate custom cluster files in /etc/kubeasz/clusters/k8s-01
2021-01-19 10:48:23 DEBUG set version of common plugins
2021-01-19 10:48:23 DEBUG cluster k8s-01: files successfully created.
2021-01-19 10:48:23 INFO next steps 1: to config '/etc/kubeasz/clusters/k8s-01/hosts'
2021-01-19 10:48:23 INFO next steps 2: to config '/etc/kubeasz/clusters/k8s-01/config.yml'
```
然后根据提示配置'/etc/kubeasz/clusters/k8s-01/hosts' 和 '/etc/kubeasz/clusters/k8s-01/config.yml':根据前面节点规划修改hosts 文件和其他集群层面的主要配置选项;其他集群组件等配置项可以在config.yml 文件中修改。
- 4.3 开始安装
如果你对集群安装流程不熟悉,请阅读项目首页 **安装步骤** 讲解后分步安装,并对 **每步都进行验证**
``` bash
#建议使用alias命令,查看~/.bashrc 文件应该包含:alias dk='docker exec -it kubeasz'
source ~/.bashrc
# 一键安装,等价于执行docker exec -it kubeasz ezctl setup k8s-01 all
dk ezctl setup k8s-01 all
# 或者分步安装,具体使用 dk ezctl help setup 查看分步安装帮助信息
# dk ezctl setup k8s-01 01
# dk ezctl setup k8s-01 02
# dk ezctl setup k8s-01 03
# dk ezctl setup k8s-01 04
...
```
更多ezctl使用帮助,请参考[这里](ezctl.md)
[后一篇](01-CA_and_prerequisite.md)
================================================
FILE: docs/setup/01-CA_and_prerequisite.md
================================================
# 01-创建证书和环境准备
本步骤主要完成:
- (deprecated) role:os-harden,(未更新上游项目,未验证最新k8s集群安装,不建议启用)可选系统加固,符合linux安全基线,详见[upstream](https://github.com/dev-sec/ansible-collection-hardening/tree/master/roles/os_hardening)
- (optional) role:chrony,[可选集群节点时间同步](../guide/chrony.md)
- role:deploy,创建CA证书、集群组件访问apiserver所需的各种kubeconfig
- role:prepare,系统基础环境配置、分发CA证书、kubectl客户端安装
## deploy 角色
主要任务讲解:roles/deploy/tasks/main.yml
### 创建 CA 证书
kubernetes 系统各组件需要使用 TLS 证书对通信进行加密,使用 CloudFlare 的 PKI 工具集生成自签名的 CA 证书,用来签名后续创建的其它 TLS 证书。[参考阅读](https://coreos.com/os/docs/latest/generate-self-signed-certificates.html)
根据认证对象可以将证书分成三类:服务器证书`server cert`,客户端证书`client cert`,对等证书`peer cert`(既是`server cert`又是`client cert`),在kubernetes 集群中需要的证书种类如下:
+ `etcd` 节点需要标识自己服务的`server cert`,也需要`client cert`与`etcd`集群其他节点交互,当然可以分别指定2个证书,为方便这里使用一个对等证书
+ `master` 节点需要标识 apiserver服务的`server cert`,也需要`client cert`连接`etcd`集群,这里也使用一个对等证书
+ `kubectl` `calico` `kube-proxy` 只需要`client cert`,因此证书请求中 `hosts` 字段可以为空
+ `kubelet` 需要标识自己服务的`server cert`,也需要`client cert`请求`apiserver`,也使用一个对等证书
整个集群要使用统一的CA 证书,只需要在ansible控制端创建,然后分发给其他节点;为了保证安装的幂等性,如果已经存在CA 证书,就跳过创建CA 步骤
#### 创建 CA 配置文件 [ca-config.json.j2](../../roles/deploy/templates/ca-config.json.j2)
``` bash
{
"signing": {
"default": {
"expiry": "{{ CERT_EXPIRY }}"
},
"profiles": {
"kubernetes": {
"usages": [
"signing",
"key encipherment",
"server auth",
"client auth"
],
"expiry": "{{ CERT_EXPIRY }}"
},
"kcfg": {
"usages": [
"signing",
"key encipherment",
"client auth"
],
"expiry": "{{ CUSTOM_EXPIRY }}"
}
}
}
}
```
+ `signing`:表示该证书可用于签名其它证书;生成的 ca.pem 证书中 `CA=TRUE`;
+ `server auth`:表示可以用该 CA 对 server 提供的证书进行验证;
+ `client auth`:表示可以用该 CA 对 client 提供的证书进行验证;
+ `profile kubernetes` 包含了`server auth`和`client auth`,所以可以签发三种不同类型证书;expiry 证书有效期,默认50年
+ `profile kcfg` 在后面客户端kubeconfig证书管理中用到
#### 创建 CA 证书签名请求 [ca-csr.json.j2](../../roles/deploy/templates/ca-csr.json.j2)
``` bash
{
"CN": "kubernetes-ca",
"key": {
"algo": "rsa",
"size": 2048
},
"names": [
{
"C": "CN",
"ST": "HangZhou",
"L": "XS",
"O": "k8s",
"OU": "System"
}
],
"ca": {
"expiry": "876000h"
}
}
```
- `ca expiry` 指定ca证书的有效期,默认100年
#### 生成CA 证书和私钥
``` bash
cfssl gencert -initca ca-csr.json | cfssljson -bare ca
```
### 生成 kubeconfig 配置文件
kubectl使用~/.kube/config 配置文件与kube-apiserver进行交互,且拥有管理 K8S集群的完全权限,
准备kubectl使用的admin 证书签名请求 [admin-csr.json.j2](../../roles/deploy/templates/admin-csr.json.j2)
``` bash
{
"CN": "admin",
"hosts": [],
"key": {
"algo": "rsa",
"size": 2048
},
"names": [
{
"C": "CN",
"ST": "HangZhou",
"L": "XS",
"O": "system:masters",
"OU": "System"
}
]
}
```
+ kubectl 使用客户端证书可以不指定hosts 字段
+ 证书请求中 `O` 指定该证书的 Group 为 `system:masters`,而 `RBAC` 预定义的 `ClusterRoleBinding` 将 Group `system:masters` 与 ClusterRole `cluster-admin` 绑定,这就赋予了kubectl**所有集群权限**
``` bash
$ kubectl describe clusterrolebinding cluster-admin
Name: cluster-admin
Labels: kubernetes.io/bootstrapping=rbac-defaults
Annotations: rbac.authorization.kubernetes.io/autoupdate=true
Role:
Kind: ClusterRole
Name: cluster-admin
Subjects:
Kind Name Namespace
---- ---- ---------
Group system:masters
```
#### 生成 admin 用户证书
```
cfssl gencert -ca=ca.pem -ca-key=ca-key.pem -config=ca-config.json -profile=kubernetes admin-csr.json | cfssljson -bare admin
```
#### 生成 ~/.kube/config 配置文件
使用`kubectl config` 生成kubeconfig 自动保存到 ~/.kube/config,生成后 `cat ~/.kube/config`可以验证配置文件包含 kube-apiserver 地址、证书、用户名等信息。
```
kubectl config set-cluster kubernetes --certificate-authority=ca.pem --embed-certs=true --server=127.0.0.1:8443
kubectl config set-credentials admin --client-certificate=admin.pem --embed-certs=true --client-key=admin-key.pem
kubectl config set-context kubernetes --cluster=kubernetes --user=admin
kubectl config use-context kubernetes
```
### 生成 kube-proxy.kubeconfig 配置文件
创建 kube-proxy 证书请求
``` bash
{
"CN": "system:kube-proxy",
"hosts": [],
"key": {
"algo": "rsa",
"size": 2048
},
"names": [
{
"C": "CN",
"ST": "HangZhou",
"L": "XS",
"O": "k8s",
"OU": "System"
}
]
}
```
+ kube-proxy 使用客户端证书可以不指定hosts 字段
+ CN 指定该证书的 User 为 system:kube-proxy,预定义的 ClusterRoleBinding system:node-proxier 将User system:kube-proxy 与 Role system:node-proxier 绑定,授予了调用 kube-apiserver Proxy 相关 API 的权限;
``` bash
$ kubectl describe clusterrolebinding system:node-proxier
Name: system:node-proxier
Labels: kubernetes.io/bootstrapping=rbac-defaults
Annotations: rbac.authorization.kubernetes.io/autoupdate=true
Role:
Kind: ClusterRole
Name: system:node-proxier
Subjects:
Kind Name Namespace
---- ---- ---------
User system:kube-proxy
```
#### 生成 system:kube-proxy 用户证书
```
cfssl gencert -ca=ca.pem -ca-key=ca-key.pem -config=ca-config.json -profile=kubernetes kube-proxy-csr.json | cfssljson -bare kube-proxy
```
#### 生成 kube-proxy.kubeconfig
使用`kubectl config` 生成kubeconfig 自动保存到 kube-proxy.kubeconfig
```
kubectl config set-cluster kubernetes --certificate-authority=ca.pem --embed-certs=true --server=127.0.0.1:8443 --kubeconfig=kube-proxy.kubeconfig
kubectl config set-credentials kube-proxy --client-certificate=kube-proxy.pem --embed-certs=true --client-key=kube-proxy-key.pem --kubeconfig=kube-proxy.kubeconfig
kubectl config set-context default --cluster=kubernetes --user=kube-proxy --kubeconfig=kube-proxy.kubeconfig
kubectl config use-context default --kubeconfig=kube-proxy.kubeconfig
```
### 创建kube-controller-manager 和 kube-scheduler 组件的kubeconfig 文件
过程与创建kube-proxy.kubeconfig 类似,略。
## prepare 角色
请在另外窗口打开[roles/prepare/tasks/main.yml](../../roles/prepare/tasks/main.yml) 文件,比较简单直观
1. 设置基础操作系统软件和系统参数,请阅读脚本中的注释内容
1. 创建一些基础文件目录、环境变量以及添加本地镜像仓库`easzlab.io.local`的域名解析
1. 分发kubeconfig等配置文件
[后一篇](02-install_etcd.md)
================================================
FILE: docs/setup/02-install_etcd.md
================================================
## 02-安装etcd集群
kuberntes 集群使用 etcd 存储所有数据,是最重要的组件之一,注意 etcd集群需要奇数个节点(1,3,5...),本文档使用3个节点做集群。
请在另外窗口打开[roles/etcd/tasks/main.yml](../../roles/etcd/tasks/main.yml) 文件,对照看以下讲解内容。
### 创建etcd证书
注意:证书是在部署节点创建好之后推送到目标etcd节点上去的,以增加ca证书的安全性
创建ectd证书请求 [etcd-csr.json.j2](../../roles/etcd/templates/etcd-csr.json.j2)
``` bash
{
"CN": "etcd",
"hosts": [
{% for host in groups['etcd'] %}
"{{ host }}",
{% endfor %}
"127.0.0.1"
],
"key": {
"algo": "rsa",
"size": 2048
},
"names": [
{
"C": "CN",
"ST": "HangZhou",
"L": "XS",
"O": "k8s",
"OU": "System"
}
]
}
```
+ etcd使用对等证书,hosts 字段必须指定授权使用该证书的 etcd 节点 IP,这里枚举了所有ectd节点的地址
### 创建etcd 服务文件 [etcd.service.j2](../../roles/etcd/templates/etcd.service.j2)
``` bash
[Unit]
Description=Etcd Server
After=network.target
After=network-online.target
Wants=network-online.target
Documentation=https://github.com/coreos
[Service]
Type=notify
WorkingDirectory={{ ETCD_DATA_DIR }}
ExecStart={{ bin_dir }}/etcd \
--name=etcd-{{ inventory_hostname }} \
--cert-file={{ ca_dir }}/etcd.pem \
--key-file={{ ca_dir }}/etcd-key.pem \
--peer-cert-file={{ ca_dir }}/etcd.pem \
--peer-key-file={{ ca_dir }}/etcd-key.pem \
--trusted-ca-file={{ ca_dir }}/ca.pem \
--peer-trusted-ca-file={{ ca_dir }}/ca.pem \
--initial-advertise-peer-urls=https://{{ inventory_hostname }}:2380 \
--listen-peer-urls=https://{{ inventory_hostname }}:2380 \
--listen-client-urls=https://{{ inventory_hostname }}:2379,http://127.0.0.1:2379 \
--advertise-client-urls=https://{{ inventory_hostname }}:2379 \
--initial-cluster-token=etcd-cluster-0 \
--initial-cluster={{ ETCD_NODES }} \
--initial-cluster-state={{ CLUSTER_STATE }} \
--data-dir={{ ETCD_DATA_DIR }} \
--wal-dir={{ ETCD_WAL_DIR }} \
--snapshot-count=50000 \
--auto-compaction-retention=1 \
--auto-compaction-mode=periodic \
--max-request-bytes=10485760 \
--quota-backend-bytes=8589934592
Restart=always
RestartSec=15
LimitNOFILE=65536
OOMScoreAdjust=-999
[Install]
WantedBy=multi-user.target
```
+ 完整参数列表请使用 `etcd --help` 查询
+ 注意etcd 即需要服务器证书也需要客户端证书,为方便使用一个peer 证书代替两个证书
+ `--initial-cluster-state` 值为 `new` 时,`--name` 的参数值必须位于 `--initial-cluster` 列表中
+ `--snapshot-count` `--auto-compaction-retention` 一些性能优化参数,请查阅etcd项目文档
+ 设置`--data-dir` 和`--wal-dir` 使用不同磁盘目录,可以避免磁盘io竞争,提高性能,具体请参考etcd项目文档
### 验证etcd集群状态
+ systemctl status etcd 查看服务状态
+ journalctl -u etcd 查看运行日志
+ 在任一 etcd 集群节点上执行如下命令
``` bash
# 根据hosts中配置设置shell变量 $NODE_IPS
export NODE_IPS="192.168.1.1 192.168.1.2 192.168.1.3"
for ip in ${NODE_IPS}; do
etcdctl \
--endpoints=https://${ip}:2379 \
--cacert=/etc/kubernetes/ssl/ca.pem \
--cert=/etc/kubernetes/ssl/etcd.pem \
--key=/etc/kubernetes/ssl/etcd-key.pem \
endpoint health; done
# 预期结果
https://192.168.1.1:2379 is healthy: successfully committed proposal: took = 2.210885ms
https://192.168.1.2:2379 is healthy: successfully committed proposal: took = 2.784043ms
https://192.168.1.3:2379 is healthy: successfully committed proposal: took = 3.275709ms
for ip in ${NODE_IPS}; do
etcdctl \
--endpoints=https://${ip}:2379 \
--cacert=/etc/kubernetes/ssl/ca.pem \
--cert=/etc/kubernetes/ssl/etcd.pem \
--key=/etc/kubernetes/ssl/etcd-key.pem \
--write-out=table endpoint status; done
# 预期结果
+----------------------------+------------------+---------+-----------------+---------+--------+-----------------------+--------+-----------+------------+-----------+------------+--------------------+--------+--------------------------+-------------------+
| ENDPOINT | ID | VERSION | STORAGE VERSION | DB SIZE | IN USE | PERCENTAGE NOT IN USE | QUOTA | IS LEADER | IS LEARNER | RAFT TERM | RAFT INDEX | RAFT APPLIED INDEX | ERRORS | DOWNGRADE TARGET VERSION | DOWNGRADE ENABLED |
+----------------------------+------------------+---------+-----------------+---------+--------+-----------------------+--------+-----------+------------+-----------+------------+--------------------+--------+--------------------------+-------------------+
| https://192.168.1.1:2379 | 5f64925bd78a482c | 3.6.4 | 3.6.0 | 38 MB | 28 MB | 28% | 8.6 GB | true | false | 269 | 6582307 | 6582307 | | | false |
+----------------------------+------------------+---------+-----------------+---------+--------+-----------------------+--------+-----------+------------+-----------+------------+--------------------+--------+--------------------------+-------------------+
+----------------------------+-----------------+---------+-----------------+---------+--------+-----------------------+--------+-----------+------------+-----------+------------+--------------------+--------+--------------------------+-------------------+
| ENDPOINT | ID | VERSION | STORAGE VERSION | DB SIZE | IN USE | PERCENTAGE NOT IN USE | QUOTA | IS LEADER | IS LEARNER | RAFT TERM | RAFT INDEX | RAFT APPLIED INDEX | ERRORS | DOWNGRADE TARGET VERSION | DOWNGRADE ENABLED |
+----------------------------+-----------------+---------+-----------------+---------+--------+-----------------------+--------+-----------+------------+-----------+------------+--------------------+--------+--------------------------+-------------------+
| https://192.168.1.2:2379 | 18e1b1602639adb | 3.6.4 | 3.6.0 | 37 MB | 28 MB | 25% | 8.6 GB | false | false | 269 | 6582307 | 6582307 | | | false |
+----------------------------+-----------------+---------+-----------------+---------+--------+-----------------------+--------+-----------+------------+-----------+------------+--------------------+--------+--------------------------+-------------------+
+----------------------------+------------------+---------+-----------------+---------+--------+-----------------------+--------+-----------+------------+-----------+------------+--------------------+--------+--------------------------+-------------------+
| ENDPOINT | ID | VERSION | STORAGE VERSION | DB SIZE | IN USE | PERCENTAGE NOT IN USE | QUOTA | IS LEADER | IS LEARNER | RAFT TERM | RAFT INDEX | RAFT APPLIED INDEX | ERRORS | DOWNGRADE TARGET VERSION | DOWNGRADE ENABLED |
+----------------------------+------------------+---------+-----------------+---------+--------+-----------------------+--------+-----------+------------+-----------+------------+--------------------+--------+--------------------------+-------------------+
| https://192.168.1.3:2379 | 3d375f7546465b4e | 3.6.4 | 3.6.0 | 37 MB | 28 MB | 26% | 8.6 GB | false | false | 269 | 6582308 | 6582308 | | | false |
+----------------------------+------------------+---------+-----------------+---------+--------+-----------------------+--------+-----------+------------+-----------+------------+--------------------+--------+--------------------------+-------------------+
```
- 所有节点可达:etcdctl endpoint health 对所有三个节点都返回 healthy。
- 有且仅有一个领导者:etcdctl endpoint status 显示一个节点 is leader: true,另外两个节点 is leader: false。
- Raft 任期一致:所有三个节点的 raft term 值完全相同。
- Raft 索引同步:所有节点的 raft index 值相差不大(跟随者与领导者的差距在可接受范围内)。
- 无活跃告警:etcdctl alarm list 返回空。
- 节点间网络稳定:没有频繁的领导者切换(通过监控 etcd_server_leader_changes_seen_total 指标)。
- 磁盘空间充足:没有 NOSPACE 告警,且磁盘使用率在安全阈值内(例如低于80%)。
### 磁盘性能
快速的磁盘是 etcd 部署性能和稳定性的最关键因素。
磁盘速度慢会增加 etcd 请求延迟,并可能损害集群稳定性。由于 etcd 的共识协议依赖于将元数据持久地存储到日志中,因此大多数 etcd 集群成员必须将每个请求写入磁盘。此外,etcd 还会逐步将其状态检查点写入磁盘,以便截断此日志。如果这些写入耗时过长,心跳可能会超时并触发选举,从而损害集群的稳定性。通常,要判断磁盘速度是否足以满足 etcd 的要求,可以使用fio等基准测试工具。
etcd 对磁盘写入延迟非常敏感。通常需要 50 的顺序 IOPS(例如,7200 RPM 磁盘)。对于负载较重的集群,建议使用 500 的顺序 IOPS(例如,典型的本地 SSD 或高性能虚拟化块设备)。请注意,大多数云提供商发布的是并发 IOPS,而不是顺序 IOPS;发布的并发 IOPS 可能比顺序 IOPS 高出 10 倍。要测量实际的顺序 IOPS,我们建议使用磁盘基准测试工具,例如diskbench或fio。
``` bash
# 测试示例
mkdir test-data
fio --rw=write --ioengine=sync --fdatasync=1 --directory=test-data --size=2200m --bs=2300 --name=mytest
```
[后一篇](03-container_runtime.md)
================================================
FILE: docs/setup/03-container_runtime.md
================================================
# 03-安装容器运行时
项目根据k8s版本提供不同的默认容器运行时:
- k8s 版本 < 1.24 时,支持docker containerd 可选
- k8s 版本 >= 1.24 时,仅支持 containerd
## 安装containerd
作为 CNCF 毕业项目,containerd 致力于提供简洁、可靠、可扩展的容器运行时;它被设计用来集成到 kubernetes 等系统使用,而不是像 docker 那样独立使用。
- 安装指南 https://github.com/containerd/cri/blob/master/docs/installation.md
- 客户端 circtl 使用指南 https://github.com/containerd/cri/blob/master/docs/crictl.md
- man 文档 https://github.com/containerd/containerd/tree/master/docs/man
## kubeasz 集成安装 containerd
- 注意:k8s 1.24以后,项目已经设置默认容器运行时为 containerd,无需手动修改
- 执行安装:分步安装`ezctl setup xxxx 03`,一键安装`ezctl setup xxxx all`
## 命令对比
|命令 |docker |crictl(推荐) |ctr |
|:- |:- |:- |:- |
|查看容器列表 |docker ps |crictl ps |ctr -n k8s.io c ls |
|查看容器详情 |docker inspect |crictl inspect |ctr -n k8s.io c info |
|查看容器日志 |docker logs |crictl logs |无 |
|容器内执行命令 |docker exec |crictl exec |无 |
|挂载容器 |docker attach |crictl attach |无 |
|容器资源使用 |docker stats |crictl stats |无 |
|创建容器 |docker create |crictl create |ctr -n k8s.io c create |
|启动容器 |docker start |crictl start |ctr -n k8s.io run |
|停止容器 |docker stop |crictl stop |无 |
|删除容器 |docker rm |crictl rm |ctr -n k8s.io c del |
|查看镜像列表 |docker images |crictl images |ctr -n k8s.io i ls |
|查看镜像详情 |docker inspect |crictl inspecti|无 |
|拉取镜像 |docker pull |crictl pull |ctr -n k8s.io i pull |
|推送镜像 |docker push |无 |ctr -n k8s.io i push |
|删除镜像 |docker rmi |crictl rmi |ctr -n k8s.io i rm |
|查看Pod列表 |无 |crictl pods |无 |
|查看Pod详情 |无 |crictl inspectp|无 |
|启动Pod |无 |crictl runp |无 |
|停止Pod |无 |crictl stopp |无 |
[后一篇](04-install_kube_master.md)
================================================
FILE: docs/setup/04-install_kube_master.md
================================================
# 04-安装kube_master节点
部署master节点主要包含三个组件`apiserver` `scheduler` `controller-manager`,其中:
- apiserver提供集群管理的REST API接口,包括认证授权、数据校验以及集群状态变更等
- 只有API Server才直接操作etcd
- 其他模块通过API Server查询或修改数据
- 提供其他模块之间的数据交互和通信的枢纽
- scheduler负责分配调度Pod到集群内的node节点
- 监听kube-apiserver,查询还未分配Node的Pod
- 根据调度策略为这些Pod分配节点
- controller-manager由一系列的控制器组成,它通过apiserver监控整个集群的状态,并确保集群处于预期的工作状态
## 高可用机制
- apiserver 无状态服务,可以通过外部负载均衡实现高可用,如项目采用的两种高可用架构:HA-1x (#584)和 HA-2x (#585)
- controller-manager 组件启动时会进行类似选举(leader);当多副本存在时,如果原先leader挂掉,那么会选举出新的leader,从而保证高可用;
- scheduler 类似选举机制
## 安装流程
``` bash
cat playbooks/04.kube-master.yml
- hosts: kube_master
roles:
- kube-lb # 四层负载均衡,监听在127.0.0.1:6443,转发到真实master节点apiserver服务
- kube-master #
- kube-node # 因为网络、监控等daemonset组件,master节点也推荐安装kubelet和kube-proxy服务
...
```
### 创建 kubernetes 证书签名请求
``` bash
{
"CN": "kubernetes",
"hosts": [
"127.0.0.1",
{% if groups['ex_lb']|length > 0 %}
"{{ hostvars[groups['ex_lb'][0]]['EX_APISERVER_VIP'] }}",
{% endif %}
{% for host in groups['kube_master'] %}
"{{ host }}",
{% endfor %}
"{{ CLUSTER_KUBERNETES_SVC_IP }}",
{% for host in MASTER_CERT_HOSTS %}
"{{ host }}",
{% endfor %}
"kubernetes",
"kubernetes.default",
"kubernetes.default.svc",
"kubernetes.default.svc.cluster",
"kubernetes.default.svc.cluster.local"
],
"key": {
"algo": "rsa",
"size": 2048
},
"names": [
{
"C": "CN",
"ST": "HangZhou",
"L": "XS",
"O": "k8s",
"OU": "System"
}
]
}
```
kubernetes apiserver 使用对等证书,创建时hosts字段需要配置:
- 如果配置 ex_lb,需要把 EX_APISERVER_VIP 也配置进去
- 如果需要外部访问 apiserver,可选在config.yml配置 MASTER_CERT_HOSTS
- `kubectl get svc` 将看到集群中由api-server 创建的默认服务 `kubernetes`,因此也要把 `kubernetes` 服务名和各个服务域名也添加进去
### 创建apiserver的服务配置文件
``` bash
[Unit]
Description=Kubernetes API Server
Documentation=https://github.com/GoogleCloudPlatform/kubernetes
After=network.target
[Service]
ExecStart={{ bin_dir }}/kube-apiserver \
--allow-privileged=true \
--anonymous-auth=false \
--api-audiences=api,istio-ca \
--authorization-mode=Node,RBAC \
--bind-address={{ inventory_hostname }} \
--client-ca-file={{ ca_dir }}/ca.pem \
--endpoint-reconciler-type=lease \
--etcd-cafile={{ ca_dir }}/ca.pem \
--etcd-certfile={{ ca_dir }}/kubernetes.pem \
--etcd-keyfile={{ ca_dir }}/kubernetes-key.pem \
--etcd-servers={{ ETCD_ENDPOINTS }} \
--kubelet-certificate-authority={{ ca_dir }}/ca.pem \
--kubelet-client-certificate={{ ca_dir }}/kubernetes.pem \
--kubelet-client-key={{ ca_dir }}/kubernetes-key.pem \
--secure-port={{ SECURE_PORT }} \
--service-account-issuer=https://kubernetes.default.svc \
--service-account-signing-key-file={{ ca_dir }}/ca-key.pem \
--service-account-key-file={{ ca_dir }}/ca.pem \
--service-cluster-ip-range={{ SERVICE_CIDR }} \
--service-node-port-range={{ NODE_PORT_RANGE }} \
--tls-cert-file={{ ca_dir }}/kubernetes.pem \
--tls-private-key-file={{ ca_dir }}/kubernetes-key.pem \
--requestheader-client-ca-file={{ ca_dir }}/ca.pem \
--requestheader-allowed-names= \
--requestheader-extra-headers-prefix=X-Remote-Extra- \
--requestheader-group-headers=X-Remote-Group \
--requestheader-username-headers=X-Remote-User \
--proxy-client-cert-file={{ ca_dir }}/aggregator-proxy.pem \
--proxy-client-key-file={{ ca_dir }}/aggregator-proxy-key.pem \
--enable-aggregator-routing=true \
--v=2
Restart=always
RestartSec=5
Type=notify
LimitNOFILE=65536
[Install]
WantedBy=multi-user.target
```
+ Kubernetes 对 API 访问需要依次经过认证、授权和准入控制(admission controll),认证解决用户是谁的问题,授权解决用户能做什么的问题,Admission Control则是资源管理方面的作用。
+ 关于authorization-mode=Node,RBAC v1.7+支持Node授权,配合NodeRestriction准入控制来限制kubelet仅可访问node、endpoint、pod、service以及secret、configmap、PV和PVC等相关的资源;需要注意的是v1.7中Node 授权是默认开启的,v1.8中需要显式配置开启,否则 Node无法正常工作
+ 详细参数配置请参考`kube-apiserver --help`,关于认证、授权和准入控制请[阅读](https://github.com/feiskyer/kubernetes-handbook/blob/master/components/apiserver.md)
+ 增加了访问kubelet使用的证书配置,防止匿名访问kubelet的安全漏洞,详见[漏洞说明](../mixes/01.fix_kubelet_annoymous_access.md)
### 创建controller-manager 的服务文件
``` bash
[Unit]
Description=Kubernetes Controller Manager
Documentation=https://github.com/GoogleCloudPlatform/kubernetes
[Service]
ExecStart={{ bin_dir }}/kube-controller-manager \
--allocate-node-cidrs=true \
--authentication-kubeconfig=/etc/kubernetes/kube-controller-manager.kubeconfig \
--authorization-kubeconfig=/etc/kubernetes/kube-controller-manager.kubeconfig \
--bind-address=0.0.0.0 \
--cluster-cidr={{ CLUSTER_CIDR }} \
--cluster-name=kubernetes \
--cluster-signing-cert-file={{ ca_dir }}/ca.pem \
--cluster-signing-key-file={{ ca_dir }}/ca-key.pem \
--kubeconfig=/etc/kubernetes/kube-controller-manager.kubeconfig \
--leader-elect=true \
--node-cidr-mask-size={{ NODE_CIDR_LEN }} \
--root-ca-file={{ ca_dir }}/ca.pem \
--service-account-private-key-file={{ ca_dir }}/ca-key.pem \
--service-cluster-ip-range={{ SERVICE_CIDR }} \
--use-service-account-credentials=true \
--v=2
Restart=always
RestartSec=5
[Install]
WantedBy=multi-user.target
```
+ --cluster-cidr 指定 Cluster 中 Pod 的 CIDR 范围,该网段在各 Node 间必须路由可达(flannel/calico 等网络插件实现)
+ --service-cluster-ip-range 参数指定 Cluster 中 Service 的CIDR范围,必须和 kube-apiserver 中的参数一致
+ --cluster-signing-* 指定的证书和私钥文件用来签名为 TLS BootStrap 创建的证书和私钥
+ --root-ca-file 用来对 kube-apiserver 证书进行校验,指定该参数后,才会在Pod 容器的 ServiceAccount 中放置该 CA 证书文件
+ --leader-elect=true 使用多节点选主的方式选择主节点。只有主节点才会启动所有控制器,而其他从节点则仅执行选主算法
### 创建scheduler 的服务文件
``` bash
[Unit]
Description=Kubernetes Scheduler
Documentation=https://github.com/GoogleCloudPlatform/kubernetes
[Service]
ExecStart={{ bin_dir }}/kube-scheduler \
--authentication-kubeconfig=/etc/kubernetes/kube-scheduler.kubeconfig \
--authorization-kubeconfig=/etc/kubernetes/kube-scheduler.kubeconfig \
--bind-address=0.0.0.0 \
--kubeconfig=/etc/kubernetes/kube-scheduler.kubeconfig \
--leader-elect=true \
--v=2
Restart=always
RestartSec=5
[Install]
WantedBy=multi-user.target
```
+ --leader-elect=true 部署多台机器组成的 master 集群时选举产生一个处于工作状态的 kube-controller-manager 进程
### 在master 节点安装 node 服务: kubelet kube-proxy
项目master 分支使用 DaemonSet 方式安装网络插件,如果master 节点不安装 kubelet 服务是无法安装网络插件的,如果 master 节点不安装网络插件,那么通过`apiserver` 方式无法访问 `dashboard` `kibana`等管理界面,[ISSUES #130](https://github.com/easzlab/kubeasz/issues/130)
在master 节点也同时成为 node 节点后,默认业务 POD也会调度到 master节点;可以使用 `kubectl cordon`命令禁止业务 POD调度到 master节点。
### master 集群的验证
运行 `ansible-playbook 04.kube-master.yml` 成功后,验证 master节点的主要组件:
``` bash
# 查看进程状态
systemctl status kube-apiserver
systemctl status kube-controller-manager
systemctl status kube-scheduler
# 查看进程运行日志
journalctl -u kube-apiserver
journalctl -u kube-controller-manager
journalctl -u kube-scheduler
```
执行 `kubectl get componentstatus` 可以看到
``` bash
NAME STATUS MESSAGE ERROR
scheduler Healthy ok
controller-manager Healthy ok
etcd-0 Healthy {"health": "true"}
etcd-2 Healthy {"health": "true"}
etcd-1 Healthy {"health": "true"}
```
[后一篇](05-install_kube_node.md)
================================================
FILE: docs/setup/05-install_kube_node.md
================================================
## 05-安装kube_node节点
`kube_node` 是集群中运行工作负载的节点,前置条件需要先部署好`kube_master`节点,它需要部署如下组件:
``` bash
cat playbooks/05.kube-node.yml
- hosts: kube_node
roles:
- { role: kube-lb, when: "inventory_hostname not in groups['kube_master']" }
- { role: kube-node, when: "inventory_hostname not in groups['kube_master']" }
```
+ kube-lb:由nginx裁剪编译的四层负载均衡,用于将请求转发到主节点的 apiserver服务
+ kubelet:kube_node上最主要的组件
+ kube-proxy: 发布应用服务与负载均衡
### 创建cni 基础网络插件配置文件
因为后续需要用 `DaemonSet Pod`方式运行k8s网络插件,所以kubelet.server服务必须开启cni相关参数,并且提供cni网络配置文件
### 创建 kubelet 的服务文件
+ 根据官方建议独立使用 kubelet 配置文件,详见roles/kube-node/templates/kubelet-config.yaml.j2
+ 必须先创建工作目录 `/var/lib/kubelet`
``` bash
[Unit]
Description=Kubernetes Kubelet
Documentation=https://github.com/GoogleCloudPlatform/kubernetes
[Service]
WorkingDirectory=/var/lib/kubelet
ExecStartPre=/bin/mount -o remount,rw '/sys/fs/cgroup'
{% if KUBE_RESERVED_ENABLED == "yes" or SYS_RESERVED_ENABLED == "yes" %}
ExecStartPre=/bin/mkdir -p /sys/fs/cgroup/cpu/podruntime.slice
ExecStartPre=/bin/mkdir -p /sys/fs/cgroup/cpuacct/podruntime.slice
ExecStartPre=/bin/mkdir -p /sys/fs/cgroup/cpuset/podruntime.slice
ExecStartPre=/bin/mkdir -p /sys/fs/cgroup/memory/podruntime.slice
ExecStartPre=/bin/mkdir -p /sys/fs/cgroup/pids/podruntime.slice
ExecStartPre=/bin/mkdir -p /sys/fs/cgroup/systemd/podruntime.slice
ExecStartPre=/bin/mkdir -p /sys/fs/cgroup/cpu/system.slice
ExecStartPre=/bin/mkdir -p /sys/fs/cgroup/cpuacct/system.slice
ExecStartPre=/bin/mkdir -p /sys/fs/cgroup/cpuset/system.slice
ExecStartPre=/bin/mkdir -p /sys/fs/cgroup/memory/system.slice
ExecStartPre=/bin/mkdir -p /sys/fs/cgroup/pids/system.slice
ExecStartPre=/bin/mkdir -p /sys/fs/cgroup/systemd/system.slice
ExecStartPre=/bin/mkdir -p /sys/fs/cgroup/hugetlb/podruntime.slice
ExecStartPre=/bin/mkdir -p /sys/fs/cgroup/hugetlb/system.slice
{% endif %}
ExecStart={{ bin_dir }}/kubelet \
--config=/var/lib/kubelet/config.yaml \
--container-runtime-endpoint=unix:///run/containerd/containerd.sock \
--hostname-override={{ K8S_NODENAME }} \
--kubeconfig=/etc/kubernetes/kubelet.kubeconfig \
--root-dir={{ KUBELET_ROOT_DIR }} \
--v=2
Restart=always
RestartSec=5
[Install]
WantedBy=multi-user.target
```
+ --ExecStartPre=/bin/mkdir -p xxx 对于某些系统(centos7)cpuset和hugetlb 是默认没有初始化system.slice 的,需要手动创建,否则在启用--kube-reserved-cgroup 时会报错Failed to start ContainerManager Failed to enforce System Reserved Cgroup Limits
+ 关于kubelet资源预留相关配置请参考 https://kubernetes.io/docs/tasks/administer-cluster/reserve-compute-resources/
### 创建 kube-proxy kubeconfig 文件
该步骤已经在 deploy节点完成,[roles/deploy/tasks/main.yml](../../roles/deploy/tasks/main.yml)
+ 生成的kube-proxy.kubeconfig 配置文件需要移动到/etc/kubernetes/目录,后续kube-proxy服务启动参数里面需要指定
### 创建 kube-proxy服务文件
``` bash
[Unit]
Description=Kubernetes Kube-Proxy Server
Documentation=https://github.com/GoogleCloudPlatform/kubernetes
After=network.target
[Service]
WorkingDirectory=/var/lib/kube-proxy
ExecStart={{ bin_dir }}/kube-proxy \
--config=/var/lib/kube-proxy/kube-proxy-config.yaml
Restart=always
RestartSec=5
LimitNOFILE=65536
[Install]
WantedBy=multi-user.target
```
请注意 [kube-proxy-config](../../roles/kube-node/templates/kube-proxy-config.yaml.j2) 文件的注释说明
### 验证 node 状态
``` bash
systemctl status kubelet # 查看状态
systemctl status kube-proxy
journalctl -u kubelet # 查看日志
journalctl -u kube-proxy
```
运行 `kubectl get node` 可以看到类似
``` bash
NAME STATUS ROLES AGE VERSION
192.168.1.42 Ready 2d v1.9.0
192.168.1.43 Ready 2d v1.9.0
192.168.1.44 Ready 2d v1.9.0
```
[后一篇](06-install_network_plugin.md)
================================================
FILE: docs/setup/06-install_network_plugin.md
================================================
## 06-安装网络组件
首先回顾下K8S网络设计原则,在配置集群网络插件或者实践K8S 应用/服务部署请牢记这些原则:
- 1.每个Pod都拥有一个独立IP地址,Pod内所有容器共享一个网络命名空间
- 2.集群内所有Pod都在一个直接连通的扁平网络中,可通过IP直接访问
- 所有容器之间无需NAT就可以直接互相访问
- 所有Node和所有容器之间无需NAT就可以直接互相访问
- 容器自己看到的IP跟其他容器看到的一样
- 3.Service cluster IP只可在集群内部访问,外部请求需要通过NodePort、LoadBalance或者Ingress来访问
`Container Network Interface (CNI)`是目前CNCF主推的网络模型,它由两部分组成:
- CNI Plugin负责给容器配置网络,它包括两个基本的接口
- 配置网络: AddNetwork(net *NetworkConfig, rt *RuntimeConf) (types.Result, error)
- 清理网络: DelNetwork(net *NetworkConfig, rt *RuntimeConf) error
- IPAM Plugin负责给容器分配IP地址
Kubernetes Pod的网络是这样创建的:
- 0. 每个Pod除了创建时指定的容器外,都有一个kubelet启动时指定的`基础容器`,即`pause`容器
- 1. kubelet创建`基础容器`生成network namespace
- 2. kubelet调用网络CNI driver,由它根据配置调用具体的CNI 插件
- 3. CNI 插件给`基础容器`配置网络
- 4. Pod 中其他的容器共享使用`基础容器`的网络
本项目基于CNI driver 调用各种网络插件来配置kubernetes的网络,常用CNI插件有 `flannel` `calico` `cilium`等等,这些插件各有优势,也在互相借鉴学习优点,比如:在所有node节点都在一个二层网络时候,flannel提供hostgw实现,避免vxlan实现的udp封装开销,估计是目前最高效的;calico也针对L3 Fabric,推出了IPinIP的选项,利用了GRE隧道封装;因此这些插件都能适合很多实际应用场景。
项目当前内置支持的网络插件有:`calico` `cilium` `flannel` `kube-ovn` `kube-router`
### 安装讲解
- [安装calico](network-plugin/calico.md)
- [安装cilium](network-plugin/cilium.md)
- [安装flannel](network-plugin/flannel.md)
- [安装kube-ovn](network-plugin/kube-ovn.md) 暂未更新
- [安装kube-router](network-plugin/kube-router.md) 暂未更新
### 参考
- [kubernetes.io networking docs](https://kubernetes.io/docs/concepts/cluster-administration/networking/)
- [feiskyer-kubernetes指南网络章节](https://github.com/feiskyer/kubernetes-handbook/blob/master/zh/network/network.md)
[后一篇](07-install_cluster_addon.md)
================================================
FILE: docs/setup/07-install_cluster_addon.md
================================================
# 07-安装集群主要插件
目前挑选一些常用、必要的插件自动集成到安装脚本之中:
## 集群默认安装
- [coredns](../guide/kubedns.md)
- [nodelocaldns](../guide/kubedns.md)
- [metrics-server](../guide/metrics-server.md)
- [dashboard](../guide/dashboard.md)
kubeasz 默认安装上述基础插件,并支持离线方式安装(./ezdown -D 命令会自动下载组件镜像,并推送到本地镜像仓库easzlab.io.local:5000)
## 集群可选安装
- [prometheus](../guide/prometheus.md)
- [network_check](network-plugin/network-check.md)
- [nfs_provisioner]()
kubeasz 默认不安装上述插件,可以在配置文件(clusters/xxx/config.yml)中开启,支持离线方式安装(./ezdown -X 会额外下载这些组件镜像,并推送到本地镜像仓库easzlab.io.local:5000)
## 安装脚本
详见`roles/cluster-addon/` 目录
- 1.根据hosts文件中配置的`CLUSTER_DNS_SVC_IP` `CLUSTER_DNS_DOMAIN`等参数生成kubedns.yaml和coredns.yaml文件
- 2.注册变量pod_info,pod_info用来判断现有集群是否已经运行各种插件
- 3.根据pod_info和`配置开关`逐个进行/跳过插件安装
## 下一步
- [创建ex_lb节点组](ex-lb.md), 向集群外提供高可用apiserver
- [创建集群持久化存储](08-cluster-storage.md)
================================================
FILE: docs/setup/08-cluster-storage.md
================================================
# K8S 集群存储
## 前言
在kubernetes(k8s)中对于存储的资源抽象了两个概念,分别是PersistentVolume(PV)、PersistentVolumeClaim(PVC)。
- PV是集群中的资源
- PVC是对这些资源的请求。
如上面所说PV和PVC都只是抽象的概念,在k8s中是通过插件的方式提供具体的存储实现。目前包含有NFS、iSCSI和云提供商指定的存储系统,更多的存储实现[参考官方文档](https://kubernetes.io/docs/concepts/storage/persistent-volumes/#access-modes)。
以下介绍两种`provisioner`, 可以提供静态或者动态的PV
- [nfs-provisioner](https://github.com/kubernetes-sigs/nfs-subdir-external-provisioner): NFS存储目录供应者
- [local-path-provisioner](https://github.com/rancher/local-path-provisioner): 本地存储目录供应者
## NFS存储目录供应者
首先我们需要一个NFS服务器,用于提供底层存储。通过文档[nfs-server](../guide/nfs-server.md),我们可以创建一个NFS服务器。
### 静态 PV
- 创建静态 pv,指定容量,访问模式,回收策略,存储类等
``` bash
apiVersion: v1
kind: PersistentVolume
metadata:
name: pv-es-0
spec:
capacity:
storage: 4Gi
accessModes:
- ReadWriteMany
volumeMode: Filesystem
persistentVolumeReclaimPolicy: Recycle
storageClassName: "es-storage-class"
nfs:
# 根据实际共享目录修改
path: /share/es0
# 根据实际 nfs服务器地址修改
server: 192.168.1.208
```
- 创建 pvc即可绑定使用上述 pv了,具体请看后文 test pod例子
### 创建动态PV
在一个工作k8s 集群中,`PVC`请求会很多,如果每次都需要管理员手动去创建对应的 `PV`资源,那就很不方便;因此 K8S还提供了多种 `provisioner`来动态创建 `PV`,不仅节省了管理员的时间,还可以根据`StorageClasses`封装不同类型的存储供 PVC 选用。
项目中以nfs-client-provisioner为例 https://github.com/kubernetes-sigs/nfs-subdir-external-provisioner
- 1.编辑集群配置文件:clusters/${集群名}/config.yml
``` bash
... 省略
# 在role:cluster-addon 中启用nfs-provisioner 安装
nfs_provisioner_install: "yes" # 修改为yes
nfs_provisioner_namespace: "kube-system"
nfs_provisioner_ver: "v4.0.1"
nfs_storage_class: "managed-nfs-storage"
nfs_server: "192.168.31.244" # 修改为实际nfs server地址
nfs_path: "/data/nfs" # 修改为实际的nfs共享目录
```
- 2.创建 nfs provisioner
``` bash
$ dk ezctl setup ${集群名} 07
# 执行成功后验证
$ kubectl get pod --all-namespaces |grep nfs-client
kube-system nfs-client-provisioner-84ff87c669-ksw95 1/1 Running 0 21m
```
- 3.验证使用动态 PV
在目录clusters/${集群名}/yml/nfs-provisioner/ 有个测试例子
``` bash
$ kubectl apply -f /etc/kubeasz/clusters/hello/yml/nfs-provisioner/test-pod.yaml
# 验证测试pod
kubectl get pod
NAME READY STATUS RESTARTS AGE
test-pod 0/1 Completed 0 6h36m
# 验证自动创建的pv 资源,
kubectl get pv
NAME CAPACITY ACCESS MODES RECLAIM POLICY STATUS CLAIM STORAGECLASS REASON AGE
pvc-44d34a50-e00b-4f6c-8005-40f5cc54af18 2Mi RWX Delete Bound default/test-claim managed-nfs-storage 6h36m
# 验证PVC已经绑定成功:STATUS字段为 Bound
kubectl get pvc
NAME STATUS VOLUME CAPACITY ACCESS MODES STORAGECLASS AGE
test-claim Bound pvc-44d34a50-e00b-4f6c-8005-40f5cc54af18 2Mi RWX managed-nfs-storage 6h37m
```
另外,Pod启动完成后,在挂载的目录中创建一个`SUCCESS`文件。我们可以到NFS服务器去看下:
```
.
└── default-test-claim-pvc-44d34a50-e00b-4f6c-8005-40f5cc54af18
└── SUCCESS
```
如上,可以发现挂载的时候,nfs-client根据PVC自动创建了一个目录,我们Pod中挂载的`/mnt`,实际引用的就是该目录,而我们在`/mnt`下创建的`SUCCESS`文件,也自动写入到了这里。
后面当我们需要为上层应用提供持久化存储时,只需要提供`StorageClass`即可。很多应用都会根据`StorageClass`来创建他们的所需的PVC, 最后再把PVC挂载到他们的Deployment或StatefulSet中使用,比如:efk、jenkins等
## 本地存储目录供应者
当应用对于磁盘I/O性能要求高,比较适合本地文件目录存储,特别地可以本地挂载SSD磁盘(注意本地磁盘需要配置raid冗余策略)。Local Path Provisioner 可以方便地在k8s集群中使用本地文件目录存储。
在kubeasz项目中集成安装
- 1.编辑集群配置文件:clusters/${集群名}/config.yml
``` bash
... 省略
local_path_provisioner_install: "yes" # 修改为yes
# 设置默认本地存储路径
local_path_provisioner_dir: "/opt/local-path-provisioner"
```
- 2.创建 local path provisioner
``` bash
$ dk ezctl setup ${集群名} 07
# 执行成功后验证
$ kubectl get pod --all-namespaces |grep provisioner
```
- 3.验证使用(略)
================================================
FILE: docs/setup/config_guide.md
================================================
# 个性化集群参数配置
`kubeasz`创建集群主要在以下两个地方进行配置:(假设集群名xxxx)
- clusters/xxxx/hosts 文件(模板在example/hosts.multi-node):集群主要节点定义和主要参数配置、全局变量
- clusters/xxxx/config.yml(模板在examples/config.yml):其他参数配置或者部分组件附加参数
## clusters/xxxx/hosts (ansible hosts)
如[集群规划与安装概览](00-planning_and_overall_intro.md)中介绍,主要包括集群节点定义和集群范围的主要参数配置
- 尽量保持配置简单灵活
- 尽量保持配置项稳定
常用设置项:
- 修改容器运行时: CONTAINER_RUNTIME="containerd"
- 修改集群网络插件:CLUSTER_NETWORK="calico"
- 修改容器网络地址:CLUSTER_CIDR="192.168.0.0/16"
- 修改NodePort范围:NODE_PORT_RANGE="30000-32767"
## clusters/xxxx/config.yml
主要包括集群某个具体组件的个性化配置,具体组件的配置项可能会不断增加;可以在不做任何配置更改情况下使用默认值创建集群
根据实际需要配置 k8s 集群,常用举例
- 配置使用离线安装系统包:INSTALL_SOURCE: "offline" (需要ezdown -P 下载离线系统软件)
- 配置CA证书以及其签发证书的有效期
- 配置 apiserver 支持公网域名:MASTER_CERT_HOSTS
- 配置 cluster-addon 组件安装
- ...
================================================
FILE: docs/setup/ex-lb.md
================================================
## EX-LB 负载均衡部署
根据[HA 2x架构](00-planning_and_overall_intro.md),k8s集群自身高可用已经不依赖于外部 lb 服务;但是有时我们要从外部访问 apiserver(比如 CI 流程),就需要 ex_lb 来请求多个 apiserver;
还有一种情况是需要[负载转发到ingress服务](../op/loadballance_ingress_nodeport.md),也需要部署ex_lb;
**注意:当遇到公有云环境无法自建 ex_lb 服务时,可以配置对应的云负载均衡服务**
### ex_lb 服务组件
更新:kubeasz 3.0.2 重写了ex-lb服务安装,利用最小化依赖编译安装的二进制文件,不依赖于linux发行版;优点是可以统一版本和简化离线安装部署,并且理论上能够支持更多linux发行版
ex_lb 服务由 keepalived 和 l4lb 组成:
- l4lb:是一个精简版(仅支持四层转发)的nginx编译二进制版本
- keepalived:利用主备节点vrrp协议通信和虚拟地址,消除l4lb的单点故障;keepalived保持存活,它是基于VRRP协议保证所谓的高可用或热备的,这里用来预防l4lb的单点故障。
keepalived与l4lb配合,实现master的高可用过程如下:
+ 1.keepalived利用vrrp协议生成一个虚拟地址(VIP),正常情况下VIP存活在keepalive的主节点,当主节点故障时,VIP能够漂移到keepalived的备节点,保障VIP地址高可用性。
+ 2.在keepalived的主备节点都配置相同l4lb负载配置,并且监听客户端请求在VIP的地址上,保障随时都有一个l4lb负载均衡在正常工作。并且keepalived启用对l4lb进程的存活检测,一旦主节点l4lb进程故障,VIP也能切换到备节点,从而让备节点的l4lb进行负载工作。
+ 3.在l4lb的配置中配置多个后端真实kube-apiserver的endpoints,并启用存活监测后端kube-apiserver,如果一个kube-apiserver故障,l4lb会将其剔除负载池。
#### 安装l4lb
#### 配置l4lb (roles/ex-lb/templates/l4lb.conf.j2)
配置由全局配置和三个upstream servers配置组成:
- apiservers 用于转发至多个apiserver
- ingress-nodes 用于转发至node节点的ingress http服务,[参阅](../op/loadballance_ingress_nodeport.md)
- ingress-tls-nodes 用于转发至node节点的ingress https服务
#### 安装keepalived
#### 配置keepalived主节点 [keepalived-master.conf.j2](../../roles/ex-lb/templates/keepalived-master.conf.j2)
``` bash
global_defs {
}
vrrp_track_process check-l4lb {
process l4lb
weight -60
delay 3
}
vrrp_instance VI-01 {
state MASTER
priority 120
unicast_src_ip {{ inventory_hostname }}
unicast_peer {
{% for h in groups['ex_lb'] %}{% if h != inventory_hostname %}
{{ h }}
{% endif %}{% endfor %}
}
dont_track_primary
interface {{ LB_IF }}
virtual_router_id {{ ROUTER_ID }}
advert_int 3
track_process {
check-l4lb
}
virtual_ipaddress {
{{ EX_APISERVER_VIP }}
}
}
```
+ vrrp_track_process 定义了监测l4lb进程是否存活,如果进程不存在,根据`weight -60`设置将主节点优先级降低60,这样原先备节点将变成主节点。
+ vrrp_instance 定义了vrrp组,包括优先级、使用端口、router_id、心跳频率、检测脚本、虚拟地址VIP等
+ 特别注意 `virtual_router_id` 标识了一个 VRRP组,在同网段下必须唯一,否则出现 `Keepalived_vrrp: bogus VRRP packet received on eth0 !!!`类似报错
+ 配置 vrrp 协议通过单播发送
#### 配置keepalived备节点 [keepalived-backup.conf.j2](../../roles/ex-lb/templates/keepalived-backup.conf.j2)
+ 备节点的配置类似主节点,除了优先级和检测脚本,其他如 `virtual_router_id` `advert_int` `virtual_ipaddress`必须与主节点一致
### 启动 keepalived 和 l4lb 后验证
+ lb 节点验证
``` bash
systemctl status l4lb # 检查进程状态
journalctl -u l4lb # 检查进程日志是否有报错信息
systemctl status keepalived # 检查进程状态
journalctl -u keepalived # 检查进程日志是否有报错信息
```
+ 在 keepalived 主节点
``` bash
ip a # 检查 master的 VIP地址是否存在
```
### keepalived 主备切换演练
1. 尝试关闭 keepalived主节点上的 l4lb进程,然后在keepalived 备节点上查看 master的 VIP地址是否能够漂移过来,并依次检查上一步中的验证项。
1. 尝试直接关闭 keepalived 主节点系统,检查各验证项。
================================================
FILE: docs/setup/ezctl.md
================================================
# ezctl 命令行介绍
## 为什么使用 ezctl
kubeasz 项目使用ezctl 方便地创建和管理多个k8s 集群,ezctl 使用shell 脚本封装ansible-playbook 执行命令,它十分轻量、简单和易于扩展。
### 使用帮助
随时运行 ezctl 获取命令行提示信息,如下
```
Usage: ezctl COMMAND [args]
-------------------------------------------------------------------------------------
Cluster setups:
list to list all of the managed clusters
checkout to switch default kubeconfig of the cluster
new to start a new k8s deploy with name 'cluster'
setup to setup a cluster, also supporting a step-by-step way
start to start all of the k8s services stopped by 'ezctl stop'
stop to stop all of the k8s services temporarily
upgrade to upgrade the k8s cluster
destroy to destroy the k8s cluster
backup to backup the cluster state (etcd snapshot)
restore to restore the cluster state from backups
start-aio to quickly setup an all-in-one cluster with 'default' settings
Cluster ops:
add-etcd to add a etcd-node to the etcd cluster
add-master to add a master node to the k8s cluster
add-node to add a work node to the k8s cluster
del-etcd to delete a etcd-node from the etcd cluster
del-master to delete a master node from the k8s cluster
del-node to delete a work node from the k8s cluster
Extra operation:
kcfg-adm to manage client kubeconfig of the k8s cluster
Use "ezctl help " for more information about a given command.
```
- 命令集 1:集群安装相关操作
- 显示当前所有管理的集群
- 切换默认集群
- 创建新集群配置
- 安装新集群
- 启动临时停止的集群
- 临时停止某个集群(包括集群内运行的pod)
- 升级集群k8s组件版本
- 删除集群
- 备份集群(仅etcd数据,不包括pv数据和业务应用数据)
- 从备份中恢复集群
- 创建单机集群(类似 minikube)
- 命令集 2:集群节点操作
- 增加 etcd 节点
- 增加主节点
- 增加工作节点
- 删除 etcd 节点
- 删除主节点
- 删除工作节点
- 命令集3:额外操作
- 管理客户端kubeconfig
#### 举例创建、安装新集群流程
- 1.首先创建集群配置实例
``` bash
~# ezctl new k8s-01
2021-01-19 10:48:23 DEBUG generate custom cluster files in /etc/kubeasz/clusters/k8s-01
2021-01-19 10:48:23 DEBUG set version of common plugins
2021-01-19 10:48:23 DEBUG cluster k8s-01: files successfully created.
2021-01-19 10:48:23 INFO next steps 1: to config '/etc/kubeasz/clusters/k8s-01/hosts'
2021-01-19 10:48:23 INFO next steps 2: to config '/etc/kubeasz/clusters/k8s-01/config.yml'
```
然后根据提示配置'/etc/kubeasz/clusters/k8s-01/hosts' 和 '/etc/kubeasz/clusters/k8s-01/config.yml';为方便测试我们在hosts里面设置单节点集群(etcd/kube_master/kube_node配置同一个节点,注意节点需先设置ssh免密码登陆), config.yml 使用默认配置即可。
- 2.然后开始安装集群
``` bash
# 一键安装
ezctl setup k8s-01 all
# 或者分步安装,具体使用 ezctl help setup 查看分步安装帮助信息
# ezctl setup k8s-01 01
# ezctl setup k8s-01 02
# ezctl setup k8s-01 03
# ezctl setup k8s-01 04
...
```
- 3.重复步骤1,2可以创建、管理多个k8s集群(建议ezctl使用独立的部署节点)
ezctl 创建管理的多集群拓扑如下
```
+----------------+ +-----------------+
|ezctl 1.1.1.1 | |cluster-aio: |
+--+---+---+-----+ | |
| | | |master 4.4.4.4 |
| | +-------------------->+etcd 4.4.4.4 |
| | |node 4.4.4.4 |
| +--------------+ +-----------------+
| |
v v
+--+------------+ +---+----------------------------+
| cluster-1: | | cluster-2: |
| | | |
| master 2.2.2.1| | master 3.3.3.1/3.3.3.2 |
| etcd 2.2.2.2| | etcd 3.3.3.1/3.3.3.2/3.3.3.3 |
| node 2.2.2.3| | node 3.3.3.4/3.3.3.5/3.3.3.6 |
+---------------+ +--------------------------------+
```
That's it! 赶紧动手测试吧,欢迎通过 Issues 和 PRs 反馈您的意见和建议!
================================================
FILE: docs/setup/kubeasz_on_public_cloud.md
================================================
# 公有云上部署 kubeasz
在公有云上使用`kubeasz`部署`k8s`集群需要注意以下几个常见问题。
### 安全组
注意虚机的安全组规则配置,一般集群内部节点之间端口全部放开即可;
### 网络组件
一般公有云对网络限制较多,跨节点 pod 通讯需要使用 OVERLAY 添加报头;默认配置详见example/config.yml
- flannel 使用 vxlan 模式:`FLANNEL_BACKEND: "vxlan"`
- calico 开启 ipinip:`CALICO_IPV4POOL_IPIP: "Always"`
- kube-router 开启 ipinip:`OVERLAY_TYPE: "full"`
### 节点公网访问
可以在安装时每个节点绑定`弹性公网地址`(EIP),装完集群解绑;也可以开通NAT网关,或者利用iptables自建上网网关等方式
### 负载均衡
一般云厂商会限制使用`keepalived+haproxy`自建负载均衡,你可以根据云厂商文档使用云负载均衡(内网)四层TCP负载模式;
- kubeasz 2x 版本已无需依赖外部负载均衡实现apiserver的高可用,详见 [2x架构](https://github.com/easzlab/kubeasz/blob/dev2/docs/setup/00-planning_and_overall_intro.md#ha-architecture)
- kubeasz 1x 及以前版本需要负载均衡实现apiserver高可用,详见 [1x架构](https://github.com/easzlab/kubeasz/blob/dev1/docs/setup/00-planning_and_overall_intro.md#ha-architecture)
### 时间同步
一般云厂商提供的虚机都已默认安装时间同步服务,无需自行安装。
### 访问 APISERVER
在公有云上安装完集群后,需要在公网访问集群 apiserver,而我们在安装前可能没有规划公网IP或者公网域名;而 apiserver 肯定需要 https 方式访问,在证书创建时需要加入公网ip/域名;可以参考这里[修改 APISERVER(MASTER)证书](../op/ch_apiserver_cert.md)
## 在公有云上部署多主高可用集群
处理好以上讨论的常见问题后,在公有云上使用 kubeasz 安装集群与自有环境没有差异。
- 使用 kubeasz 2x 版本安装单节点、单主多节点、多主多节点 k8s 集群,云上云下的预期安装体验完全一致
================================================
FILE: docs/setup/mix_arch.md
================================================
# 混合架构集群部署
混合架构集群本文是指集群中既有linux amd64架构机器,也有linux arm64架构机器;这里只记录一个简单的操作说明,实际操作注意风险。
## 部署思路
1. 先选定一台amd64架构的机器做“amd64部署机”,使用它先部署amd64架构的集群
2. 选一台arm64架构的机器做“arm64部署机”,复制amd64部署机的/etc/kubeasz目录文件(除去目录中的bin、down子目录),然后重新下载arm64架构的二进制和镜像,然后添加arm64节点到原有集群即可
## 操作步骤
1. 假设已经正常部署了amd64架构的三节点集群
2. 在“amd64部署机” 目录 /etc/kubeasz 中移除子目录 bin 和 down,然后把整体/etc/kubeasz 目录复制到“arm64部署机”
```
# 登录amd64部署机
cd /etc/kubeasz; mv bin down /tmp/; scp -r /etc/kubeasz root@{_ip_arm64}:/etc/
# 复制完成后找回 bin 和 down 子目录
mv /tmp/bin /etc/kubeasz/; mv /tmp/down /etc/kubeasz/
```
3. 登录“arm64部署机”,执行下载,其他准备工作
```
cd /etc/kubeasz
# 下载基础部分
./ezdown -D
# 下载额外部分(如有)
./ezdown -X ...
# 运行部署容器
./ezdown -S
# 配置机器ssh免密码登录,集群所有节点都免密,包括待新增arm64节点
ssh-copy-id xx.xx.xx.xx
ssh-copy-id ...
# 复制kubeconfig
mkdir /root/.kube/; cp clusters/default/kubectl.kubeconfig /root/.kube/config
```
4. 添加arm64新节点到集群
```
source ~/.bashrc
# 添加新节点 x.x.x.x
dk ezctl add-node default x.x.x.x
```
5. 验证
```
$ kubectl get node -owide
NAME STATUS ROLES AGE VERSION INTERNAL-IP EXTERNAL-IP OS-IMAGE KERNEL-VERSION CONTAINER-RUNTIME
k8s-x.x.x-19 Ready master 5d8h v1.33.1 x.x.x.19 Ubuntu 20.04.4 LTS 5.4.0-122-generic containerd://2.1.1
k8s-x.x.x-90 Ready node 5d8h v1.33.1 x.x.x.90 Ubuntu 22.04.5 LTS 5.15.0-134-generic containerd://2.1.1
k8s-x.x.x-91 Ready node 5d8h v1.33.1 x.x.x.91 Ubuntu 22.04.5 LTS 5.15.0-134-generic containerd://2.1.1
k8s-x.x.x-93 Ready node 79s v1.33.1 x.x.x.93 Ubuntu 22.04.5 LTS 5.15.0-140-generic containerd://2.1.1
$ kubectl describe node|grep beta.kubernetes.io/arch
Labels: beta.kubernetes.io/arch=amd64
Labels: beta.kubernetes.io/arch=amd64
Labels: beta.kubernetes.io/arch=amd64
Labels: beta.kubernetes.io/arch=arm64
```
## 小结
通过以上步骤,成功实现了在amd64集群中添加arm64节点;充分展示kubeasz 项目部署集群的灵活性和可配置性;部署过程中ansible执行的过程性输出内容,以近乎白盒的方式展示每一个细节;假如出错有详细的说明,帮助定位,并且随时可以修改执行脚本,安装的幂等性保证随时可以重新安装以修复错误。`Hack it, and have fun!`
================================================
FILE: docs/setup/multi_os.md
================================================
# 操作系统说明
目前发现部分使用新内核的linux发行版,k8s 安装使用 cgroup v2版本时,有时候安装会失败,需要删除/清理集群后重新安装。已报告可能发生于 Alma Linux 9, Rocky Linux 9, Fedora 37;建议如下步骤处理:
- 1.确认系统使用的cgroup v2版本
```
stat -fc %T /sys/fs/cgroup/
cgroup2fs
```
- 2.初次安装时kubelet可能启动失败,日志报错类似:err="openat2 /sys/fs/cgroup/kubepods.slice/cpu.weight: no such file or directory"
- 3.建议删除集群然后重新安装,一般能够成功
```
# 删除集群
dk ezctl destroy xxxx
# 重启
reboot
# 启动后重新安装
dk ezctl setup xxxx all
```
## Debian
- Debian 11:默认可能没有安装iptables,使用kubeasz 安装前需要执行:
``` bash
apt update
apt install iptables -y
```
## openEuler
- openEuler 24.03 需要安装iptables
``` bash
yum install iptables -y
```
## openSUSE
- openSUSE Leap 15.4:需要安装iptables
``` bash
zypper install iptables
ln -s /usr/sbin/iptables /sbin/iptables
```
================================================
FILE: docs/setup/multi_platform.md
================================================
# 多架构支持
kubeasz 3.4.1 以后支持多CPU架构,当前已支持linux amd64和linux arm64,更多架构支持根据后续需求来计划。
## 使用方式
kubeasz 多架构安装逻辑:根据部署机器(执行ezdown/ezctl命令的机器)的架构,会自动判断下载对应amd64/arm64的二进制文件和容器镜像,然后推送安装到整个集群。
- 暂不支持自动部署混合架构集群,如有需要可以按[说明文档](mix_arch.md)手动操作。
- harbor目前仅支持amd64安装
## 架构支持备忘
#### k8s核心组件本身提供多架构的二进制文件/容器镜像下载,项目调整了下载二进制文件的容器dockerfile
- https://github.com/easzlab/dockerfile-kubeasz-k8s-bin
#### kubeasz其他用到的二进制或镜像,重新调整了容器创建dockerfile
- https://github.com/easzlab/dockerfile-kubeasz-ext-bin
- https://github.com/easzlab/dockerfile-kubeasz-ext-build
- https://github.com/easzlab/dockerfile-kubeasz-sys-pkg
- https://github.com/easzlab/dockerfile-kubeasz-mirrored-images
- https://github.com/easzlab/dockerfile-kubeasz
- https://github.com/easzlab/dockerfile-ansible
#### 其他组件(coredns/network plugin/dashboard/metrics-server等)一般都提供多架构的容器镜像,可以直接下载拉取
================================================
FILE: docs/setup/network-plugin/calico-bgp-rr.md
================================================
# calico 配置 BGP Route Reflectors
`Calico`作为`k8s`的一个流行网络插件,它依赖`BGP`路由协议实现集群节点上的`POD`路由互通;而路由互通的前提是节点间建立 BGP Peer 连接。BGP 路由反射器(Route Reflectors,简称 RR)可以简化集群BGP Peer的连接方式,它是解决BGP扩展性问题的有效方式;具体来说:
- 没有 RR 时,所有节点之间需要两两建立连接(IBGP全互联),节点数量增加将导致连接数剧增、资源占用剧增
- 引入 RR 后,其他 BGP 路由器只需要与它建立连接并交换路由信息,节点数量增加连接数只是线性增加,节省系统资源
calico-node 版本 v3.3 开始支持内建路由反射器,非常方便,因此使用 calico 作为网络插件可以支持大规模节点数的`K8S`集群。
- 建议集群节点数大于50时,应用BGP Route Reflectors 特性
## 前提条件
k8s 集群使用calico网络插件部署成功。本实验环境为按照kubeasz安装的2主2从集群,calico 版本 v3.19.4。
```
$ kubectl get node
NAME STATUS ROLES AGE VERSION
192.168.1.1 Ready,SchedulingDisabled master 178m v1.13.1
192.168.1.2 Ready,SchedulingDisabled master 178m v1.13.1
192.168.1.3 Ready node 178m v1.13.1
192.168.1.4 Ready node 178m v1.13.1
$ kubectl get pod -n kube-system -o wide | grep calico
calico-kube-controllers-77487546bd-jqrlc 1/1 Running 0 179m 192.168.1.3 192.168.1.3
calico-node-67t5m 2/2 Running 0 179m 192.168.1.1 192.168.1.1
calico-node-drmhq 2/2 Running 0 179m 192.168.1.2 192.168.1.2
calico-node-rjtkv 2/2 Running 0 179m 192.168.1.4 192.168.1.4
calico-node-xtspl 2/2 Running 0 179m 192.168.1.3 192.168.1.3
```
查看当前集群中BGP连接情况:可以看到集群中4个节点两两建立了 BGP 连接
```
$ dk ansible -i /etc/kubeasz/clusters/xxx/hosts all -m shell -a '/opt/kube/bin/calicoctl node status'
192.168.1.3 | SUCCESS | rc=0 >>
Calico process is running.
IPv4 BGP status
+--------------+-------------------+-------+----------+-------------+
| PEER ADDRESS | PEER TYPE | STATE | SINCE | INFO |
+--------------+-------------------+-------+----------+-------------+
| 192.168.1.1 | node-to-node mesh | up | 03:08:20 | Established |
| 192.168.1.2 | node-to-node mesh | up | 03:08:18 | Established |
| 192.168.1.4 | node-to-node mesh | up | 03:08:19 | Established |
+--------------+-------------------+-------+----------+-------------+
IPv6 BGP status
No IPv6 peers found.
192.168.1.2 | SUCCESS | rc=0 >>
Calico process is running.
IPv4 BGP status
+--------------+-------------------+-------+----------+-------------+
| PEER ADDRESS | PEER TYPE | STATE | SINCE | INFO |
+--------------+-------------------+-------+----------+-------------+
| 192.168.1.4 | node-to-node mesh | up | 03:08:17 | Established |
| 192.168.1.3 | node-to-node mesh | up | 03:08:18 | Established |
| 192.168.1.1 | node-to-node mesh | up | 03:08:20 | Established |
+--------------+-------------------+-------+----------+-------------+
IPv6 BGP status
No IPv6 peers found.
192.168.1.1 | SUCCESS | rc=0 >>
Calico process is running.
IPv4 BGP status
+--------------+-------------------+-------+----------+-------------+
| PEER ADDRESS | PEER TYPE | STATE | SINCE | INFO |
+--------------+-------------------+-------+----------+-------------+
| 192.168.1.2 | node-to-node mesh | up | 03:08:21 | Established |
| 192.168.1.3 | node-to-node mesh | up | 03:08:21 | Established |
| 192.168.1.4 | node-to-node mesh | up | 03:08:21 | Established |
+--------------+-------------------+-------+----------+-------------+
IPv6 BGP status
No IPv6 peers found.
192.168.1.4 | SUCCESS | rc=0 >>
Calico process is running.
IPv4 BGP status
+--------------+-------------------+-------+----------+-------------+
| PEER ADDRESS | PEER TYPE | STATE | SINCE | INFO |
+--------------+-------------------+-------+----------+-------------+
| 192.168.1.2 | node-to-node mesh | up | 03:08:17 | Established |
| 192.168.1.3 | node-to-node mesh | up | 03:08:19 | Established |
| 192.168.1.1 | node-to-node mesh | up | 03:08:20 | Established |
+--------------+-------------------+-------+----------+-------------+
IPv6 BGP status
No IPv6 peers found.
```
## kubeasz 自动安装启用 route reflector
- 修改`/etc/kubeasz/clusters/xxx/config.yml`文件,设置配置项`CALICO_RR_ENABLED: true`
- 重新执行网络安装 `dk ezctl setup xxx 07`
执行完成,检查bgp连接验证即可。
### 附:手动安装route reflector 过程讲解
- 选择并配置 Route Reflector 节点
首先查看当前集群中的节点:
```
$ calicoctl get node -o wide
NAME ASN IPV4 IPV6
k8s401 (64512) 192.168.1.1/24
k8s402 (64512) 192.168.1.2/24
k8s403 (64512) 192.168.1.3/24
k8s404 (64512) 192.168.1.4/24
```
可以在集群中选择1个或多个节点作为 rr 节点,这里先选择节点:k8s401
``` bash
#配置routeReflectorClusterID
calicoctl patch node k8s401 -p '{"spec": {"bgp": {"routeReflectorClusterID": "244.0.0.1"}}}'
#配置node label
calicoctl patch node k8s401 -p '{"metadata": {"labels": {"route-reflector": "true"}}}'
```
- 配置 BGP node 与 Route Reflector 的连接建立规则
``` bash
$ cat << EOF | calicoctl create -f -
kind: BGPPeer
apiVersion: projectcalico.org/v3
metadata:
name: peer-with-route-reflectors
spec:
nodeSelector: all()
peerSelector: route-reflector == 'true'
EOF
```
- 配置全局禁用全连接(BGP full mesh)
```
$ cat << EOF | calicoctl create -f -
apiVersion: projectcalico.org/v3
kind: BGPConfiguration
metadata:
name: default
spec:
logSeverityScreen: Info
nodeToNodeMeshEnabled: false
asNumber: 64512
EOF
```
- 验证增加 rr 之后的bgp 连接情况
```
$ dk ansible -i /etc/kubeasz/clusters/xxx/hosts all -m shell -a '/opt/kube/bin/calicoctl node status'
192.168.1.4 | SUCCESS | rc=0 >>
Calico process is running.
IPv4 BGP status
+--------------+-----------+-------+----------+-------------+
| PEER ADDRESS | PEER TYPE | STATE | SINCE | INFO |
+--------------+-----------+-------+----------+-------------+
| 192.168.1.1 | node specific | up | 11:02:55 | Established |
+--------------+-----------+-------+----------+-------------+
IPv6 BGP status
No IPv6 peers found.
192.168.1.3 | SUCCESS | rc=0 >>
Calico process is running.
IPv4 BGP status
+--------------+-----------+-------+----------+-------------+
| PEER ADDRESS | PEER TYPE | STATE | SINCE | INFO |
+--------------+-----------+-------+----------+-------------+
| 192.168.1.1 | node specific | up | 11:02:55 | Established |
+--------------+-----------+-------+----------+-------------+
IPv6 BGP status
No IPv6 peers found.
192.168.1.1 | SUCCESS | rc=0 >>
Calico process is running.
IPv4 BGP status
+--------------+---------------+-------+----------+-------------+
| PEER ADDRESS | PEER TYPE | STATE | SINCE | INFO |
+--------------+---------------+-------+----------+-------------+
| 192.168.1.2 | node specific | up | 11:02:55 | Established |
| 192.168.1.3 | node specific | up | 11:02:55 | Established |
| 192.168.1.4 | node specific | up | 11:02:55 | Established |
+--------------+---------------+-------+----------+-------------+
IPv6 BGP status
No IPv6 peers found.
192.168.1.2 | SUCCESS | rc=0 >>
Calico process is running.
IPv4 BGP status
+--------------+-----------+-------+----------+-------------+
| PEER ADDRESS | PEER TYPE | STATE | SINCE | INFO |
+--------------+-----------+-------+----------+-------------+
| 192.168.1.1 | node specific | up | 11:02:55 | Established |
+--------------+-----------+-------+----------+-------------+
IPv6 BGP status
No IPv6 peers found.
```
可以看到所有其他节点都与所选rr节点建立bgp连接。
- 再增加一个 rr 节点(略)
步骤同上,添加成功后可以看到所有其他节点都与两个rr节点建立bgp连接,两个rr节点之间也建立bgp连接。对于节点数较多的`K8S`集群建议配置2-3个 RR 节点。
## 参考文档
- 1.[Calico bgp 配置指南](https://projectcalico.docs.tigera.io/reference/resources/bgpconfig)
- 2.[BGP路由反射器基础](https://www.sohu.com/a/140033025_761420)
================================================
FILE: docs/setup/network-plugin/calico.md
================================================
## 06-安装calico网络组件.md
calico 是k8s社区最流行的网络插件之一,也是k8s-conformance test 默认使用的网络插件,功能丰富,支持network policy;是当前kubeasz项目的默认网络插件。
如果需要安装calico,请在`clusters/xxxx/hosts`文件中设置变量 `CLUSTER_NETWORK="calico"`,参考[这里](../config_guide.md)
``` bash
roles/calico/
├── tasks
│ └── main.yml
├── templates
│ ├── calico-csr.json.j2
│ ├── calicoctl.cfg.j2
│ ├── calico-v3.15.yaml.j2
│ ├── calico-v3.19.yaml.j2
│ └── calico-v3.8.yaml.j2
└── vars
└── main.yml
```
请在另外窗口打开`roles/calico/tasks/main.yml`文件,对照看以下讲解内容。
### 创建calico 证书申请
``` bash
{
"CN": "calico",
"hosts": [],
"key": {
"algo": "rsa",
"size": 2048
},
"names": [
{
"C": "CN",
"ST": "HangZhou",
"L": "XS",
"O": "k8s",
"OU": "System"
}
]
}
```
calico 使用客户端证书,所以hosts字段可以为空;后续可以看到calico证书用在四个地方:
- calico/node 这个docker 容器运行时访问 etcd 使用证书
- cni 配置文件中,cni 插件需要访问 etcd 使用证书
- calicoctl 操作集群网络时访问 etcd 使用证书
- calico/kube-controllers 同步集群网络策略时访问 etcd 使用证书
### 创建 calico DaemonSet yaml文件和rbac 文件
请对照 roles/calico/templates/calico.yaml.j2文件注释和以下注意内容
+ 详细配置参数请参考[calico官方文档](https://projectcalico.docs.tigera.io/reference/node/configuration)
+ 配置ETCD_ENDPOINTS 、CA、证书等,所有{{ }}变量与ansible hosts文件中设置对应
+ 配置集群POD网络 CALICO_IPV4POOL_CIDR={{ CLUSTER_CIDR }}
+ 配置FELIX_DEFAULTENDPOINTTOHOSTACTION=ACCEPT 默认允许Pod到Node的网络流量,更多[felix配置选项](https://projectcalico.docs.tigera.io/reference/felix/configuration)
### 安装calico 网络
+ 安装前检查主机名不能有大写字母,只能由`小写字母` `-` `.` 组成 (name must consist of lower case alphanumeric characters, '-' or '.' (regex: [a-z0-9]([-a-z0-9]*[a-z0-9])?(\.[a-z0-9]([-a-z0-9]*[a-z0-9])?)*))(calico-node v3.0.6以上已经解决主机大写字母问题)
+ **安装前必须确保各节点主机名不重复** ,calico node name 由节点主机名决定,如果重复,那么重复节点在etcd中只存储一份配置,BGP 邻居也不会建立。
+ 安装之前必须确保`kube_master`和`kube_node`节点已经成功部署
+ 轮询等待calico 网络插件安装完成,删除之前kube_node安装时默认cni网络配置
### [可选]配置calicoctl工具 [calicoctl.cfg.j2](roles/calico/templates/calicoctl.cfg.j2)
``` bash
apiVersion: projectcalico.org/v3
kind: CalicoAPIConfig
metadata:
spec:
datastoreType: "etcdv3"
etcdEndpoints: {{ ETCD_ENDPOINTS }}
etcdKeyFile: /etc/calico/ssl/calico-key.pem
etcdCertFile: /etc/calico/ssl/calico.pem
etcdCACertFile: {{ ca_dir }}/ca.pem
```
### 验证calico网络
执行calico安装成功后可以验证如下:(需要等待镜像下载完成,有时候即便上一步已经配置了docker国内加速,还是可能比较慢,请确认以下容器运行起来以后,再执行后续验证步骤)
``` bash
kubectl get pod --all-namespaces
NAMESPACE NAME READY STATUS RESTARTS AGE
kube-system calico-kube-controllers-5c6b98d9df-xj2n4 1/1 Running 0 1m
kube-system calico-node-4hr52 2/2 Running 0 1m
kube-system calico-node-8ctc2 2/2 Running 0 1m
kube-system calico-node-9t8md 2/2 Running 0 1m
```
**查看网卡和路由信息**
先在集群创建几个测试pod: `kubectl run test --image=busybox --replicas=3 sleep 30000`
``` bash
# 查看网卡信息
ip a
```
+ 可以看到包含类似cali1cxxx的网卡,是calico为测试pod生成的
+ tunl0网卡现在不用管,是默认生成的,当开启IPIP 特性时使用的隧道
``` bash
# 查看路由
route -n
Kernel IP routing table
Destination Gateway Genmask Flags Metric Ref Use Iface
0.0.0.0 192.168.1.1 0.0.0.0 UG 0 0 0 ens3
192.168.1.0 0.0.0.0 255.255.255.0 U 0 0 0 ens3
172.17.0.0 0.0.0.0 255.255.0.0 U 0 0 0 docker0
172.20.3.64 192.168.1.34 255.255.255.192 UG 0 0 0 ens3
172.20.33.128 0.0.0.0 255.255.255.192 U 0 0 0 *
172.20.33.129 0.0.0.0 255.255.255.255 UH 0 0 0 caliccc295a6d4f
172.20.104.0 192.168.1.35 255.255.255.192 UG 0 0 0 ens3
172.20.166.128 192.168.1.63 255.255.255.192 UG 0 0 0 ens3
```
**查看所有calico节点状态**
``` bash
calicoctl node status
Calico process is running.
IPv4 BGP status
+--------------+-------------------+-------+----------+-------------+
| PEER ADDRESS | PEER TYPE | STATE | SINCE | INFO |
+--------------+-------------------+-------+----------+-------------+
| 192.168.1.34 | node-to-node mesh | up | 12:34:00 | Established |
| 192.168.1.35 | node-to-node mesh | up | 12:34:00 | Established |
| 192.168.1.63 | node-to-node mesh | up | 12:34:01 | Established |
+--------------+-------------------+-------+----------+-------------+
```
**BGP 协议是通过TCP 连接来建立邻居的,因此可以用netstat 命令验证 BGP Peer**
``` bash
netstat -antlp|grep ESTABLISHED|grep 179
tcp 0 0 192.168.1.66:179 192.168.1.35:41316 ESTABLISHED 28479/bird
tcp 0 0 192.168.1.66:179 192.168.1.34:40243 ESTABLISHED 28479/bird
tcp 0 0 192.168.1.66:179 192.168.1.63:48979 ESTABLISHED 28479/bird
```
**查看etcd中calico相关信息**
因为这里calico网络使用etcd存储数据,所以可以在etcd集群中查看数据
+ calico 3.x 版本默认使用 etcd v3存储,**登录集群的一个etcd 节点**,查看命令:
``` bash
# 查看所有calico相关数据
ETCDCTL_API=3 etcdctl --endpoints="http://127.0.0.1:2379" get --prefix /calico
# 查看 calico网络为各节点分配的网段
ETCDCTL_API=3 etcdctl --endpoints="http://127.0.0.1:2379" get --prefix /calico/ipam/v2/host
```
## 下一步:[设置 BGP Route Reflector](calico-bgp-rr.md)
================================================
FILE: docs/setup/network-plugin/cilium-example.md
================================================
## 开始使用 cilium
以下为简要翻译 `cilium doc`上的一个应用示例[原文](https://docs.cilium.io/en/stable/gettingstarted/http/),部署在单节点k8s 环境的实践。
### 部署示例应用
官方文档用几个`pod/svc` 抽象一个有趣的应用场景(星战迷):星战中帝国方建造了被称为“终极武器”的“死星”,它是一个卫星大小的战斗空间站,它的核心是使用凯伯晶体(Kyber Crystal)的超级激光炮,剧中它的首秀就以完全火力摧毁了“杰达圣城”(Jedha)。下面将用运行于 k8s上的 pod/svc/cilium 等模拟“死星“的一个“飞船登陆”系统安全策略设计。
- deploy/deathstar:作为控制整个“死星”的飞船登陆管理系统,它暴露一个SVC,提供HTTP REST 接口给飞船请求登陆使用;
- pod/tiefighter:作为“帝国”方的常规战斗飞船,它会调用上述 HTTP 接口,请求登陆“死星”;
- pod/xwing:作为“盟军”方的飞行舰,它也尝试调用 HTTP 接口,请求登陆“死星”;
- 注意1:确保各节点时区设置一致、时间同步。 如果你的环境没有提供NTP 时间同步,推荐集成安装[chrony](../guide/chrony.md)
- 注意2:确保在干净的系统上开始安装,不要使用曾经装过kubeadm或其他k8s发行版的环境
- 注意3:建议操作系统升级到新的稳定内核,请结合阅读[内核升级文档](../guide/kernel_upgrade.md)
- 注意4:在公有云上创建多主集群,请结合阅读[在公有云上部署 kubeasz](kubeasz_on_public_cloud.md)
## 高可用集群所需节点配置如下
|角色|数量|描述|
|:-|:-|:-|
|部署节点|1|运行ansible/ezctl命令,一般复用第一个master节点|
|etcd节点|3|注意etcd集群需要1,3,5,...奇数个节点,一般复用master节点|
|master节点|2|高可用集群至少2个master节点|
|node节点|n|运行应用负载的节点,可根据需要提升机器配置/增加节点数|
机器配置:
- master节点:4c/8g内存/50g硬盘
- worker节点:建议8c/32g内存/200g硬盘以上
注意:默认配置下容器运行时和kubelet会占用/var的磁盘空间,如果磁盘分区特殊,可以设置config.yml中的容器运行时和kubelet数据目录:`CONTAINERD_STORAGE_DIR` `DOCKER_STORAGE_DIR` `KUBELET_ROOT_DIR`
在 kubeasz 2x 版本,多节点高可用集群安装可以使用2种方式
- 1.按照本文步骤先规划准备,预先配置节点信息后,直接安装多节点高可用集群
- 2.先部署单节点集群 [AllinOne部署](quickStart.md),然后通过 [节点添加](../op/op-index.md) 扩容成高可用集群
## 部署步骤
以下示例创建一个4节点的多主高可用集群,文档中命令默认都需要root权限运行。
### 1.基础系统配置
+ 2c/4g内存/40g硬盘(该配置仅测试用)
+ 最小化安装`Ubuntu 16.04 server`或者`CentOS 7 Minimal`
+ 配置基础网络、更新源、SSH登录等
### 2.在每个节点安装依赖工具
推荐使用ansible in docker 容器化方式运行,无需安装额外依赖。
### 3.准备ssh免密登陆
配置从部署节点能够ssh免密登陆所有节点,并且设置python软连接
``` bash
#$IP为所有节点地址包括自身,按照提示输入yes 和root密码
ssh-copy-id $IP
```
### 4.在部署节点编排k8s安装
- 4.1 下载项目源码、二进制及离线镜像
下载工具脚本ezdown,举例使用kubeasz版本3.5.0
``` bash
export release=3.5.0
wget https://github.com/easzlab/kubeasz/releases/download/${release}/ezdown
chmod +x ./ezdown
```
下载kubeasz代码、二进制、默认容器镜像(更多关于ezdown的参数,运行./ezdown 查看)
``` bash
# 国内环境
./ezdown -D
# 海外环境
#./ezdown -D -m standard
```
【可选】下载额外容器镜像(cilium,flannel,prometheus等)
``` bash
# 按需下载
./ezdown -X flannel
./ezdown -X prometheus
...
```
【可选】下载离线系统包 (适用于无法使用yum/apt仓库情形)
``` bash
./ezdown -P
```
上述脚本运行成功后,所有文件(kubeasz代码、二进制、离线镜像)均已整理好放入目录`/etc/kubeasz`
- 4.2 创建集群配置实例
``` bash
# 容器化运行kubeasz
./ezdown -S
# 创建新集群 k8s-01
docker exec -it kubeasz ezctl new k8s-01
2021-01-19 10:48:23 DEBUG generate custom cluster files in /etc/kubeasz/clusters/k8s-01
2021-01-19 10:48:23 DEBUG set version of common plugins
2021-01-19 10:48:23 DEBUG cluster k8s-01: files successfully created.
2021-01-19 10:48:23 INFO next steps 1: to config '/etc/kubeasz/clusters/k8s-01/hosts'
2021-01-19 10:48:23 INFO next steps 2: to config '/etc/kubeasz/clusters/k8s-01/config.yml'
```
然后根据提示配置'/etc/kubeasz/clusters/k8s-01/hosts' 和 '/etc/kubeasz/clusters/k8s-01/config.yml':根据前面节点规划修改hosts 文件和其他集群层面的主要配置选项;其他集群组件等配置项可以在config.yml 文件中修改。
- 4.3 开始安装
如果你对集群安装流程不熟悉,请阅读项目首页 **安装步骤** 讲解后分步安装,并对 **每步都进行验证**
``` bash
#建议使用alias命令,查看~/.bashrc 文件应该包含:alias dk='docker exec -it kubeasz'
source ~/.bashrc
# 一键安装,等价于执行docker exec -it kubeasz ezctl setup k8s-01 all
dk ezctl setup k8s-01 all
# 或者分步安装,具体使用 dk ezctl help setup 查看分步安装帮助信息
# dk ezctl setup k8s-01 01
# dk ezctl setup k8s-01 02
# dk ezctl setup k8s-01 03
# dk ezctl setup k8s-01 04
...
```
更多ezctl使用帮助,请参考[这里](ezctl.md)
[后一篇](01-CA_and_prerequisite.md)
================================================
FILE: docs/setup/01-CA_and_prerequisite.md
================================================
# 01-创建证书和环境准备
本步骤主要完成:
- (deprecated) role:os-harden,(未更新上游项目,未验证最新k8s集群安装,不建议启用)可选系统加固,符合linux安全基线,详见[upstream](https://github.com/dev-sec/ansible-collection-hardening/tree/master/roles/os_hardening)
- (optional) role:chrony,[可选集群节点时间同步](../guide/chrony.md)
- role:deploy,创建CA证书、集群组件访问apiserver所需的各种kubeconfig
- role:prepare,系统基础环境配置、分发CA证书、kubectl客户端安装
## deploy 角色
主要任务讲解:roles/deploy/tasks/main.yml
### 创建 CA 证书
kubernetes 系统各组件需要使用 TLS 证书对通信进行加密,使用 CloudFlare 的 PKI 工具集生成自签名的 CA 证书,用来签名后续创建的其它 TLS 证书。[参考阅读](https://coreos.com/os/docs/latest/generate-self-signed-certificates.html)
根据认证对象可以将证书分成三类:服务器证书`server cert`,客户端证书`client cert`,对等证书`peer cert`(既是`server cert`又是`client cert`),在kubernetes 集群中需要的证书种类如下:
+ `etcd` 节点需要标识自己服务的`server cert`,也需要`client cert`与`etcd`集群其他节点交互,当然可以分别指定2个证书,为方便这里使用一个对等证书
+ `master` 节点需要标识 apiserver服务的`server cert`,也需要`client cert`连接`etcd`集群,这里也使用一个对等证书
+ `kubectl` `calico` `kube-proxy` 只需要`client cert`,因此证书请求中 `hosts` 字段可以为空
+ `kubelet` 需要标识自己服务的`server cert`,也需要`client cert`请求`apiserver`,也使用一个对等证书
整个集群要使用统一的CA 证书,只需要在ansible控制端创建,然后分发给其他节点;为了保证安装的幂等性,如果已经存在CA 证书,就跳过创建CA 步骤
#### 创建 CA 配置文件 [ca-config.json.j2](../../roles/deploy/templates/ca-config.json.j2)
``` bash
{
"signing": {
"default": {
"expiry": "{{ CERT_EXPIRY }}"
},
"profiles": {
"kubernetes": {
"usages": [
"signing",
"key encipherment",
"server auth",
"client auth"
],
"expiry": "{{ CERT_EXPIRY }}"
},
"kcfg": {
"usages": [
"signing",
"key encipherment",
"client auth"
],
"expiry": "{{ CUSTOM_EXPIRY }}"
}
}
}
}
```
+ `signing`:表示该证书可用于签名其它证书;生成的 ca.pem 证书中 `CA=TRUE`;
+ `server auth`:表示可以用该 CA 对 server 提供的证书进行验证;
+ `client auth`:表示可以用该 CA 对 client 提供的证书进行验证;
+ `profile kubernetes` 包含了`server auth`和`client auth`,所以可以签发三种不同类型证书;expiry 证书有效期,默认50年
+ `profile kcfg` 在后面客户端kubeconfig证书管理中用到
#### 创建 CA 证书签名请求 [ca-csr.json.j2](../../roles/deploy/templates/ca-csr.json.j2)
``` bash
{
"CN": "kubernetes-ca",
"key": {
"algo": "rsa",
"size": 2048
},
"names": [
{
"C": "CN",
"ST": "HangZhou",
"L": "XS",
"O": "k8s",
"OU": "System"
}
],
"ca": {
"expiry": "876000h"
}
}
```
- `ca expiry` 指定ca证书的有效期,默认100年
#### 生成CA 证书和私钥
``` bash
cfssl gencert -initca ca-csr.json | cfssljson -bare ca
```
### 生成 kubeconfig 配置文件
kubectl使用~/.kube/config 配置文件与kube-apiserver进行交互,且拥有管理 K8S集群的完全权限,
准备kubectl使用的admin 证书签名请求 [admin-csr.json.j2](../../roles/deploy/templates/admin-csr.json.j2)
``` bash
{
"CN": "admin",
"hosts": [],
"key": {
"algo": "rsa",
"size": 2048
},
"names": [
{
"C": "CN",
"ST": "HangZhou",
"L": "XS",
"O": "system:masters",
"OU": "System"
}
]
}
```
+ kubectl 使用客户端证书可以不指定hosts 字段
+ 证书请求中 `O` 指定该证书的 Group 为 `system:masters`,而 `RBAC` 预定义的 `ClusterRoleBinding` 将 Group `system:masters` 与 ClusterRole `cluster-admin` 绑定,这就赋予了kubectl**所有集群权限**
``` bash
$ kubectl describe clusterrolebinding cluster-admin
Name: cluster-admin
Labels: kubernetes.io/bootstrapping=rbac-defaults
Annotations: rbac.authorization.kubernetes.io/autoupdate=true
Role:
Kind: ClusterRole
Name: cluster-admin
Subjects:
Kind Name Namespace
---- ---- ---------
Group system:masters
```
#### 生成 admin 用户证书
```
cfssl gencert -ca=ca.pem -ca-key=ca-key.pem -config=ca-config.json -profile=kubernetes admin-csr.json | cfssljson -bare admin
```
#### 生成 ~/.kube/config 配置文件
使用`kubectl config` 生成kubeconfig 自动保存到 ~/.kube/config,生成后 `cat ~/.kube/config`可以验证配置文件包含 kube-apiserver 地址、证书、用户名等信息。
```
kubectl config set-cluster kubernetes --certificate-authority=ca.pem --embed-certs=true --server=127.0.0.1:8443
kubectl config set-credentials admin --client-certificate=admin.pem --embed-certs=true --client-key=admin-key.pem
kubectl config set-context kubernetes --cluster=kubernetes --user=admin
kubectl config use-context kubernetes
```
### 生成 kube-proxy.kubeconfig 配置文件
创建 kube-proxy 证书请求
``` bash
{
"CN": "system:kube-proxy",
"hosts": [],
"key": {
"algo": "rsa",
"size": 2048
},
"names": [
{
"C": "CN",
"ST": "HangZhou",
"L": "XS",
"O": "k8s",
"OU": "System"
}
]
}
```
+ kube-proxy 使用客户端证书可以不指定hosts 字段
+ CN 指定该证书的 User 为 system:kube-proxy,预定义的 ClusterRoleBinding system:node-proxier 将User system:kube-proxy 与 Role system:node-proxier 绑定,授予了调用 kube-apiserver Proxy 相关 API 的权限;
``` bash
$ kubectl describe clusterrolebinding system:node-proxier
Name: system:node-proxier
Labels: kubernetes.io/bootstrapping=rbac-defaults
Annotations: rbac.authorization.kubernetes.io/autoupdate=true
Role:
Kind: ClusterRole
Name: system:node-proxier
Subjects:
Kind Name Namespace
---- ---- ---------
User system:kube-proxy
```
#### 生成 system:kube-proxy 用户证书
```
cfssl gencert -ca=ca.pem -ca-key=ca-key.pem -config=ca-config.json -profile=kubernetes kube-proxy-csr.json | cfssljson -bare kube-proxy
```
#### 生成 kube-proxy.kubeconfig
使用`kubectl config` 生成kubeconfig 自动保存到 kube-proxy.kubeconfig
```
kubectl config set-cluster kubernetes --certificate-authority=ca.pem --embed-certs=true --server=127.0.0.1:8443 --kubeconfig=kube-proxy.kubeconfig
kubectl config set-credentials kube-proxy --client-certificate=kube-proxy.pem --embed-certs=true --client-key=kube-proxy-key.pem --kubeconfig=kube-proxy.kubeconfig
kubectl config set-context default --cluster=kubernetes --user=kube-proxy --kubeconfig=kube-proxy.kubeconfig
kubectl config use-context default --kubeconfig=kube-proxy.kubeconfig
```
### 创建kube-controller-manager 和 kube-scheduler 组件的kubeconfig 文件
过程与创建kube-proxy.kubeconfig 类似,略。
## prepare 角色
请在另外窗口打开[roles/prepare/tasks/main.yml](../../roles/prepare/tasks/main.yml) 文件,比较简单直观
1. 设置基础操作系统软件和系统参数,请阅读脚本中的注释内容
1. 创建一些基础文件目录、环境变量以及添加本地镜像仓库`easzlab.io.local`的域名解析
1. 分发kubeconfig等配置文件
[后一篇](02-install_etcd.md)
================================================
FILE: docs/setup/02-install_etcd.md
================================================
## 02-安装etcd集群
kuberntes 集群使用 etcd 存储所有数据,是最重要的组件之一,注意 etcd集群需要奇数个节点(1,3,5...),本文档使用3个节点做集群。
请在另外窗口打开[roles/etcd/tasks/main.yml](../../roles/etcd/tasks/main.yml) 文件,对照看以下讲解内容。
### 创建etcd证书
注意:证书是在部署节点创建好之后推送到目标etcd节点上去的,以增加ca证书的安全性
创建ectd证书请求 [etcd-csr.json.j2](../../roles/etcd/templates/etcd-csr.json.j2)
``` bash
{
"CN": "etcd",
"hosts": [
{% for host in groups['etcd'] %}
"{{ host }}",
{% endfor %}
"127.0.0.1"
],
"key": {
"algo": "rsa",
"size": 2048
},
"names": [
{
"C": "CN",
"ST": "HangZhou",
"L": "XS",
"O": "k8s",
"OU": "System"
}
]
}
```
+ etcd使用对等证书,hosts 字段必须指定授权使用该证书的 etcd 节点 IP,这里枚举了所有ectd节点的地址
### 创建etcd 服务文件 [etcd.service.j2](../../roles/etcd/templates/etcd.service.j2)
``` bash
[Unit]
Description=Etcd Server
After=network.target
After=network-online.target
Wants=network-online.target
Documentation=https://github.com/coreos
[Service]
Type=notify
WorkingDirectory={{ ETCD_DATA_DIR }}
ExecStart={{ bin_dir }}/etcd \
--name=etcd-{{ inventory_hostname }} \
--cert-file={{ ca_dir }}/etcd.pem \
--key-file={{ ca_dir }}/etcd-key.pem \
--peer-cert-file={{ ca_dir }}/etcd.pem \
--peer-key-file={{ ca_dir }}/etcd-key.pem \
--trusted-ca-file={{ ca_dir }}/ca.pem \
--peer-trusted-ca-file={{ ca_dir }}/ca.pem \
--initial-advertise-peer-urls=https://{{ inventory_hostname }}:2380 \
--listen-peer-urls=https://{{ inventory_hostname }}:2380 \
--listen-client-urls=https://{{ inventory_hostname }}:2379,http://127.0.0.1:2379 \
--advertise-client-urls=https://{{ inventory_hostname }}:2379 \
--initial-cluster-token=etcd-cluster-0 \
--initial-cluster={{ ETCD_NODES }} \
--initial-cluster-state={{ CLUSTER_STATE }} \
--data-dir={{ ETCD_DATA_DIR }} \
--wal-dir={{ ETCD_WAL_DIR }} \
--snapshot-count=50000 \
--auto-compaction-retention=1 \
--auto-compaction-mode=periodic \
--max-request-bytes=10485760 \
--quota-backend-bytes=8589934592
Restart=always
RestartSec=15
LimitNOFILE=65536
OOMScoreAdjust=-999
[Install]
WantedBy=multi-user.target
```
+ 完整参数列表请使用 `etcd --help` 查询
+ 注意etcd 即需要服务器证书也需要客户端证书,为方便使用一个peer 证书代替两个证书
+ `--initial-cluster-state` 值为 `new` 时,`--name` 的参数值必须位于 `--initial-cluster` 列表中
+ `--snapshot-count` `--auto-compaction-retention` 一些性能优化参数,请查阅etcd项目文档
+ 设置`--data-dir` 和`--wal-dir` 使用不同磁盘目录,可以避免磁盘io竞争,提高性能,具体请参考etcd项目文档
### 验证etcd集群状态
+ systemctl status etcd 查看服务状态
+ journalctl -u etcd 查看运行日志
+ 在任一 etcd 集群节点上执行如下命令
``` bash
# 根据hosts中配置设置shell变量 $NODE_IPS
export NODE_IPS="192.168.1.1 192.168.1.2 192.168.1.3"
for ip in ${NODE_IPS}; do
etcdctl \
--endpoints=https://${ip}:2379 \
--cacert=/etc/kubernetes/ssl/ca.pem \
--cert=/etc/kubernetes/ssl/etcd.pem \
--key=/etc/kubernetes/ssl/etcd-key.pem \
endpoint health; done
# 预期结果
https://192.168.1.1:2379 is healthy: successfully committed proposal: took = 2.210885ms
https://192.168.1.2:2379 is healthy: successfully committed proposal: took = 2.784043ms
https://192.168.1.3:2379 is healthy: successfully committed proposal: took = 3.275709ms
for ip in ${NODE_IPS}; do
etcdctl \
--endpoints=https://${ip}:2379 \
--cacert=/etc/kubernetes/ssl/ca.pem \
--cert=/etc/kubernetes/ssl/etcd.pem \
--key=/etc/kubernetes/ssl/etcd-key.pem \
--write-out=table endpoint status; done
# 预期结果
+----------------------------+------------------+---------+-----------------+---------+--------+-----------------------+--------+-----------+------------+-----------+------------+--------------------+--------+--------------------------+-------------------+
| ENDPOINT | ID | VERSION | STORAGE VERSION | DB SIZE | IN USE | PERCENTAGE NOT IN USE | QUOTA | IS LEADER | IS LEARNER | RAFT TERM | RAFT INDEX | RAFT APPLIED INDEX | ERRORS | DOWNGRADE TARGET VERSION | DOWNGRADE ENABLED |
+----------------------------+------------------+---------+-----------------+---------+--------+-----------------------+--------+-----------+------------+-----------+------------+--------------------+--------+--------------------------+-------------------+
| https://192.168.1.1:2379 | 5f64925bd78a482c | 3.6.4 | 3.6.0 | 38 MB | 28 MB | 28% | 8.6 GB | true | false | 269 | 6582307 | 6582307 | | | false |
+----------------------------+------------------+---------+-----------------+---------+--------+-----------------------+--------+-----------+------------+-----------+------------+--------------------+--------+--------------------------+-------------------+
+----------------------------+-----------------+---------+-----------------+---------+--------+-----------------------+--------+-----------+------------+-----------+------------+--------------------+--------+--------------------------+-------------------+
| ENDPOINT | ID | VERSION | STORAGE VERSION | DB SIZE | IN USE | PERCENTAGE NOT IN USE | QUOTA | IS LEADER | IS LEARNER | RAFT TERM | RAFT INDEX | RAFT APPLIED INDEX | ERRORS | DOWNGRADE TARGET VERSION | DOWNGRADE ENABLED |
+----------------------------+-----------------+---------+-----------------+---------+--------+-----------------------+--------+-----------+------------+-----------+------------+--------------------+--------+--------------------------+-------------------+
| https://192.168.1.2:2379 | 18e1b1602639adb | 3.6.4 | 3.6.0 | 37 MB | 28 MB | 25% | 8.6 GB | false | false | 269 | 6582307 | 6582307 | | | false |
+----------------------------+-----------------+---------+-----------------+---------+--------+-----------------------+--------+-----------+------------+-----------+------------+--------------------+--------+--------------------------+-------------------+
+----------------------------+------------------+---------+-----------------+---------+--------+-----------------------+--------+-----------+------------+-----------+------------+--------------------+--------+--------------------------+-------------------+
| ENDPOINT | ID | VERSION | STORAGE VERSION | DB SIZE | IN USE | PERCENTAGE NOT IN USE | QUOTA | IS LEADER | IS LEARNER | RAFT TERM | RAFT INDEX | RAFT APPLIED INDEX | ERRORS | DOWNGRADE TARGET VERSION | DOWNGRADE ENABLED |
+----------------------------+------------------+---------+-----------------+---------+--------+-----------------------+--------+-----------+------------+-----------+------------+--------------------+--------+--------------------------+-------------------+
| https://192.168.1.3:2379 | 3d375f7546465b4e | 3.6.4 | 3.6.0 | 37 MB | 28 MB | 26% | 8.6 GB | false | false | 269 | 6582308 | 6582308 | | | false |
+----------------------------+------------------+---------+-----------------+---------+--------+-----------------------+--------+-----------+------------+-----------+------------+--------------------+--------+--------------------------+-------------------+
```
- 所有节点可达:etcdctl endpoint health 对所有三个节点都返回 healthy。
- 有且仅有一个领导者:etcdctl endpoint status 显示一个节点 is leader: true,另外两个节点 is leader: false。
- Raft 任期一致:所有三个节点的 raft term 值完全相同。
- Raft 索引同步:所有节点的 raft index 值相差不大(跟随者与领导者的差距在可接受范围内)。
- 无活跃告警:etcdctl alarm list 返回空。
- 节点间网络稳定:没有频繁的领导者切换(通过监控 etcd_server_leader_changes_seen_total 指标)。
- 磁盘空间充足:没有 NOSPACE 告警,且磁盘使用率在安全阈值内(例如低于80%)。
### 磁盘性能
快速的磁盘是 etcd 部署性能和稳定性的最关键因素。
磁盘速度慢会增加 etcd 请求延迟,并可能损害集群稳定性。由于 etcd 的共识协议依赖于将元数据持久地存储到日志中,因此大多数 etcd 集群成员必须将每个请求写入磁盘。此外,etcd 还会逐步将其状态检查点写入磁盘,以便截断此日志。如果这些写入耗时过长,心跳可能会超时并触发选举,从而损害集群的稳定性。通常,要判断磁盘速度是否足以满足 etcd 的要求,可以使用fio等基准测试工具。
etcd 对磁盘写入延迟非常敏感。通常需要 50 的顺序 IOPS(例如,7200 RPM 磁盘)。对于负载较重的集群,建议使用 500 的顺序 IOPS(例如,典型的本地 SSD 或高性能虚拟化块设备)。请注意,大多数云提供商发布的是并发 IOPS,而不是顺序 IOPS;发布的并发 IOPS 可能比顺序 IOPS 高出 10 倍。要测量实际的顺序 IOPS,我们建议使用磁盘基准测试工具,例如diskbench或fio。
``` bash
# 测试示例
mkdir test-data
fio --rw=write --ioengine=sync --fdatasync=1 --directory=test-data --size=2200m --bs=2300 --name=mytest
```
[后一篇](03-container_runtime.md)
================================================
FILE: docs/setup/03-container_runtime.md
================================================
# 03-安装容器运行时
项目根据k8s版本提供不同的默认容器运行时:
- k8s 版本 < 1.24 时,支持docker containerd 可选
- k8s 版本 >= 1.24 时,仅支持 containerd
## 安装containerd
作为 CNCF 毕业项目,containerd 致力于提供简洁、可靠、可扩展的容器运行时;它被设计用来集成到 kubernetes 等系统使用,而不是像 docker 那样独立使用。
- 安装指南 https://github.com/containerd/cri/blob/master/docs/installation.md
- 客户端 circtl 使用指南 https://github.com/containerd/cri/blob/master/docs/crictl.md
- man 文档 https://github.com/containerd/containerd/tree/master/docs/man
## kubeasz 集成安装 containerd
- 注意:k8s 1.24以后,项目已经设置默认容器运行时为 containerd,无需手动修改
- 执行安装:分步安装`ezctl setup xxxx 03`,一键安装`ezctl setup xxxx all`
## 命令对比
|命令 |docker |crictl(推荐) |ctr |
|:- |:- |:- |:- |
|查看容器列表 |docker ps |crictl ps |ctr -n k8s.io c ls |
|查看容器详情 |docker inspect |crictl inspect |ctr -n k8s.io c info |
|查看容器日志 |docker logs |crictl logs |无 |
|容器内执行命令 |docker exec |crictl exec |无 |
|挂载容器 |docker attach |crictl attach |无 |
|容器资源使用 |docker stats |crictl stats |无 |
|创建容器 |docker create |crictl create |ctr -n k8s.io c create |
|启动容器 |docker start |crictl start |ctr -n k8s.io run |
|停止容器 |docker stop |crictl stop |无 |
|删除容器 |docker rm |crictl rm |ctr -n k8s.io c del |
|查看镜像列表 |docker images |crictl images |ctr -n k8s.io i ls |
|查看镜像详情 |docker inspect |crictl inspecti|无 |
|拉取镜像 |docker pull |crictl pull |ctr -n k8s.io i pull |
|推送镜像 |docker push |无 |ctr -n k8s.io i push |
|删除镜像 |docker rmi |crictl rmi |ctr -n k8s.io i rm |
|查看Pod列表 |无 |crictl pods |无 |
|查看Pod详情 |无 |crictl inspectp|无 |
|启动Pod |无 |crictl runp |无 |
|停止Pod |无 |crictl stopp |无 |
[后一篇](04-install_kube_master.md)
================================================
FILE: docs/setup/04-install_kube_master.md
================================================
# 04-安装kube_master节点
部署master节点主要包含三个组件`apiserver` `scheduler` `controller-manager`,其中:
- apiserver提供集群管理的REST API接口,包括认证授权、数据校验以及集群状态变更等
- 只有API Server才直接操作etcd
- 其他模块通过API Server查询或修改数据
- 提供其他模块之间的数据交互和通信的枢纽
- scheduler负责分配调度Pod到集群内的node节点
- 监听kube-apiserver,查询还未分配Node的Pod
- 根据调度策略为这些Pod分配节点
- controller-manager由一系列的控制器组成,它通过apiserver监控整个集群的状态,并确保集群处于预期的工作状态
## 高可用机制
- apiserver 无状态服务,可以通过外部负载均衡实现高可用,如项目采用的两种高可用架构:HA-1x (#584)和 HA-2x (#585)
- controller-manager 组件启动时会进行类似选举(leader);当多副本存在时,如果原先leader挂掉,那么会选举出新的leader,从而保证高可用;
- scheduler 类似选举机制
## 安装流程
``` bash
cat playbooks/04.kube-master.yml
- hosts: kube_master
roles:
- kube-lb # 四层负载均衡,监听在127.0.0.1:6443,转发到真实master节点apiserver服务
- kube-master #
- kube-node # 因为网络、监控等daemonset组件,master节点也推荐安装kubelet和kube-proxy服务
...
```
### 创建 kubernetes 证书签名请求
``` bash
{
"CN": "kubernetes",
"hosts": [
"127.0.0.1",
{% if groups['ex_lb']|length > 0 %}
"{{ hostvars[groups['ex_lb'][0]]['EX_APISERVER_VIP'] }}",
{% endif %}
{% for host in groups['kube_master'] %}
"{{ host }}",
{% endfor %}
"{{ CLUSTER_KUBERNETES_SVC_IP }}",
{% for host in MASTER_CERT_HOSTS %}
"{{ host }}",
{% endfor %}
"kubernetes",
"kubernetes.default",
"kubernetes.default.svc",
"kubernetes.default.svc.cluster",
"kubernetes.default.svc.cluster.local"
],
"key": {
"algo": "rsa",
"size": 2048
},
"names": [
{
"C": "CN",
"ST": "HangZhou",
"L": "XS",
"O": "k8s",
"OU": "System"
}
]
}
```
kubernetes apiserver 使用对等证书,创建时hosts字段需要配置:
- 如果配置 ex_lb,需要把 EX_APISERVER_VIP 也配置进去
- 如果需要外部访问 apiserver,可选在config.yml配置 MASTER_CERT_HOSTS
- `kubectl get svc` 将看到集群中由api-server 创建的默认服务 `kubernetes`,因此也要把 `kubernetes` 服务名和各个服务域名也添加进去
### 创建apiserver的服务配置文件
``` bash
[Unit]
Description=Kubernetes API Server
Documentation=https://github.com/GoogleCloudPlatform/kubernetes
After=network.target
[Service]
ExecStart={{ bin_dir }}/kube-apiserver \
--allow-privileged=true \
--anonymous-auth=false \
--api-audiences=api,istio-ca \
--authorization-mode=Node,RBAC \
--bind-address={{ inventory_hostname }} \
--client-ca-file={{ ca_dir }}/ca.pem \
--endpoint-reconciler-type=lease \
--etcd-cafile={{ ca_dir }}/ca.pem \
--etcd-certfile={{ ca_dir }}/kubernetes.pem \
--etcd-keyfile={{ ca_dir }}/kubernetes-key.pem \
--etcd-servers={{ ETCD_ENDPOINTS }} \
--kubelet-certificate-authority={{ ca_dir }}/ca.pem \
--kubelet-client-certificate={{ ca_dir }}/kubernetes.pem \
--kubelet-client-key={{ ca_dir }}/kubernetes-key.pem \
--secure-port={{ SECURE_PORT }} \
--service-account-issuer=https://kubernetes.default.svc \
--service-account-signing-key-file={{ ca_dir }}/ca-key.pem \
--service-account-key-file={{ ca_dir }}/ca.pem \
--service-cluster-ip-range={{ SERVICE_CIDR }} \
--service-node-port-range={{ NODE_PORT_RANGE }} \
--tls-cert-file={{ ca_dir }}/kubernetes.pem \
--tls-private-key-file={{ ca_dir }}/kubernetes-key.pem \
--requestheader-client-ca-file={{ ca_dir }}/ca.pem \
--requestheader-allowed-names= \
--requestheader-extra-headers-prefix=X-Remote-Extra- \
--requestheader-group-headers=X-Remote-Group \
--requestheader-username-headers=X-Remote-User \
--proxy-client-cert-file={{ ca_dir }}/aggregator-proxy.pem \
--proxy-client-key-file={{ ca_dir }}/aggregator-proxy-key.pem \
--enable-aggregator-routing=true \
--v=2
Restart=always
RestartSec=5
Type=notify
LimitNOFILE=65536
[Install]
WantedBy=multi-user.target
```
+ Kubernetes 对 API 访问需要依次经过认证、授权和准入控制(admission controll),认证解决用户是谁的问题,授权解决用户能做什么的问题,Admission Control则是资源管理方面的作用。
+ 关于authorization-mode=Node,RBAC v1.7+支持Node授权,配合NodeRestriction准入控制来限制kubelet仅可访问node、endpoint、pod、service以及secret、configmap、PV和PVC等相关的资源;需要注意的是v1.7中Node 授权是默认开启的,v1.8中需要显式配置开启,否则 Node无法正常工作
+ 详细参数配置请参考`kube-apiserver --help`,关于认证、授权和准入控制请[阅读](https://github.com/feiskyer/kubernetes-handbook/blob/master/components/apiserver.md)
+ 增加了访问kubelet使用的证书配置,防止匿名访问kubelet的安全漏洞,详见[漏洞说明](../mixes/01.fix_kubelet_annoymous_access.md)
### 创建controller-manager 的服务文件
``` bash
[Unit]
Description=Kubernetes Controller Manager
Documentation=https://github.com/GoogleCloudPlatform/kubernetes
[Service]
ExecStart={{ bin_dir }}/kube-controller-manager \
--allocate-node-cidrs=true \
--authentication-kubeconfig=/etc/kubernetes/kube-controller-manager.kubeconfig \
--authorization-kubeconfig=/etc/kubernetes/kube-controller-manager.kubeconfig \
--bind-address=0.0.0.0 \
--cluster-cidr={{ CLUSTER_CIDR }} \
--cluster-name=kubernetes \
--cluster-signing-cert-file={{ ca_dir }}/ca.pem \
--cluster-signing-key-file={{ ca_dir }}/ca-key.pem \
--kubeconfig=/etc/kubernetes/kube-controller-manager.kubeconfig \
--leader-elect=true \
--node-cidr-mask-size={{ NODE_CIDR_LEN }} \
--root-ca-file={{ ca_dir }}/ca.pem \
--service-account-private-key-file={{ ca_dir }}/ca-key.pem \
--service-cluster-ip-range={{ SERVICE_CIDR }} \
--use-service-account-credentials=true \
--v=2
Restart=always
RestartSec=5
[Install]
WantedBy=multi-user.target
```
+ --cluster-cidr 指定 Cluster 中 Pod 的 CIDR 范围,该网段在各 Node 间必须路由可达(flannel/calico 等网络插件实现)
+ --service-cluster-ip-range 参数指定 Cluster 中 Service 的CIDR范围,必须和 kube-apiserver 中的参数一致
+ --cluster-signing-* 指定的证书和私钥文件用来签名为 TLS BootStrap 创建的证书和私钥
+ --root-ca-file 用来对 kube-apiserver 证书进行校验,指定该参数后,才会在Pod 容器的 ServiceAccount 中放置该 CA 证书文件
+ --leader-elect=true 使用多节点选主的方式选择主节点。只有主节点才会启动所有控制器,而其他从节点则仅执行选主算法
### 创建scheduler 的服务文件
``` bash
[Unit]
Description=Kubernetes Scheduler
Documentation=https://github.com/GoogleCloudPlatform/kubernetes
[Service]
ExecStart={{ bin_dir }}/kube-scheduler \
--authentication-kubeconfig=/etc/kubernetes/kube-scheduler.kubeconfig \
--authorization-kubeconfig=/etc/kubernetes/kube-scheduler.kubeconfig \
--bind-address=0.0.0.0 \
--kubeconfig=/etc/kubernetes/kube-scheduler.kubeconfig \
--leader-elect=true \
--v=2
Restart=always
RestartSec=5
[Install]
WantedBy=multi-user.target
```
+ --leader-elect=true 部署多台机器组成的 master 集群时选举产生一个处于工作状态的 kube-controller-manager 进程
### 在master 节点安装 node 服务: kubelet kube-proxy
项目master 分支使用 DaemonSet 方式安装网络插件,如果master 节点不安装 kubelet 服务是无法安装网络插件的,如果 master 节点不安装网络插件,那么通过`apiserver` 方式无法访问 `dashboard` `kibana`等管理界面,[ISSUES #130](https://github.com/easzlab/kubeasz/issues/130)
在master 节点也同时成为 node 节点后,默认业务 POD也会调度到 master节点;可以使用 `kubectl cordon`命令禁止业务 POD调度到 master节点。
### master 集群的验证
运行 `ansible-playbook 04.kube-master.yml` 成功后,验证 master节点的主要组件:
``` bash
# 查看进程状态
systemctl status kube-apiserver
systemctl status kube-controller-manager
systemctl status kube-scheduler
# 查看进程运行日志
journalctl -u kube-apiserver
journalctl -u kube-controller-manager
journalctl -u kube-scheduler
```
执行 `kubectl get componentstatus` 可以看到
``` bash
NAME STATUS MESSAGE ERROR
scheduler Healthy ok
controller-manager Healthy ok
etcd-0 Healthy {"health": "true"}
etcd-2 Healthy {"health": "true"}
etcd-1 Healthy {"health": "true"}
```
[后一篇](05-install_kube_node.md)
================================================
FILE: docs/setup/05-install_kube_node.md
================================================
## 05-安装kube_node节点
`kube_node` 是集群中运行工作负载的节点,前置条件需要先部署好`kube_master`节点,它需要部署如下组件:
``` bash
cat playbooks/05.kube-node.yml
- hosts: kube_node
roles:
- { role: kube-lb, when: "inventory_hostname not in groups['kube_master']" }
- { role: kube-node, when: "inventory_hostname not in groups['kube_master']" }
```
+ kube-lb:由nginx裁剪编译的四层负载均衡,用于将请求转发到主节点的 apiserver服务
+ kubelet:kube_node上最主要的组件
+ kube-proxy: 发布应用服务与负载均衡
### 创建cni 基础网络插件配置文件
因为后续需要用 `DaemonSet Pod`方式运行k8s网络插件,所以kubelet.server服务必须开启cni相关参数,并且提供cni网络配置文件
### 创建 kubelet 的服务文件
+ 根据官方建议独立使用 kubelet 配置文件,详见roles/kube-node/templates/kubelet-config.yaml.j2
+ 必须先创建工作目录 `/var/lib/kubelet`
``` bash
[Unit]
Description=Kubernetes Kubelet
Documentation=https://github.com/GoogleCloudPlatform/kubernetes
[Service]
WorkingDirectory=/var/lib/kubelet
ExecStartPre=/bin/mount -o remount,rw '/sys/fs/cgroup'
{% if KUBE_RESERVED_ENABLED == "yes" or SYS_RESERVED_ENABLED == "yes" %}
ExecStartPre=/bin/mkdir -p /sys/fs/cgroup/cpu/podruntime.slice
ExecStartPre=/bin/mkdir -p /sys/fs/cgroup/cpuacct/podruntime.slice
ExecStartPre=/bin/mkdir -p /sys/fs/cgroup/cpuset/podruntime.slice
ExecStartPre=/bin/mkdir -p /sys/fs/cgroup/memory/podruntime.slice
ExecStartPre=/bin/mkdir -p /sys/fs/cgroup/pids/podruntime.slice
ExecStartPre=/bin/mkdir -p /sys/fs/cgroup/systemd/podruntime.slice
ExecStartPre=/bin/mkdir -p /sys/fs/cgroup/cpu/system.slice
ExecStartPre=/bin/mkdir -p /sys/fs/cgroup/cpuacct/system.slice
ExecStartPre=/bin/mkdir -p /sys/fs/cgroup/cpuset/system.slice
ExecStartPre=/bin/mkdir -p /sys/fs/cgroup/memory/system.slice
ExecStartPre=/bin/mkdir -p /sys/fs/cgroup/pids/system.slice
ExecStartPre=/bin/mkdir -p /sys/fs/cgroup/systemd/system.slice
ExecStartPre=/bin/mkdir -p /sys/fs/cgroup/hugetlb/podruntime.slice
ExecStartPre=/bin/mkdir -p /sys/fs/cgroup/hugetlb/system.slice
{% endif %}
ExecStart={{ bin_dir }}/kubelet \
--config=/var/lib/kubelet/config.yaml \
--container-runtime-endpoint=unix:///run/containerd/containerd.sock \
--hostname-override={{ K8S_NODENAME }} \
--kubeconfig=/etc/kubernetes/kubelet.kubeconfig \
--root-dir={{ KUBELET_ROOT_DIR }} \
--v=2
Restart=always
RestartSec=5
[Install]
WantedBy=multi-user.target
```
+ --ExecStartPre=/bin/mkdir -p xxx 对于某些系统(centos7)cpuset和hugetlb 是默认没有初始化system.slice 的,需要手动创建,否则在启用--kube-reserved-cgroup 时会报错Failed to start ContainerManager Failed to enforce System Reserved Cgroup Limits
+ 关于kubelet资源预留相关配置请参考 https://kubernetes.io/docs/tasks/administer-cluster/reserve-compute-resources/
### 创建 kube-proxy kubeconfig 文件
该步骤已经在 deploy节点完成,[roles/deploy/tasks/main.yml](../../roles/deploy/tasks/main.yml)
+ 生成的kube-proxy.kubeconfig 配置文件需要移动到/etc/kubernetes/目录,后续kube-proxy服务启动参数里面需要指定
### 创建 kube-proxy服务文件
``` bash
[Unit]
Description=Kubernetes Kube-Proxy Server
Documentation=https://github.com/GoogleCloudPlatform/kubernetes
After=network.target
[Service]
WorkingDirectory=/var/lib/kube-proxy
ExecStart={{ bin_dir }}/kube-proxy \
--config=/var/lib/kube-proxy/kube-proxy-config.yaml
Restart=always
RestartSec=5
LimitNOFILE=65536
[Install]
WantedBy=multi-user.target
```
请注意 [kube-proxy-config](../../roles/kube-node/templates/kube-proxy-config.yaml.j2) 文件的注释说明
### 验证 node 状态
``` bash
systemctl status kubelet # 查看状态
systemctl status kube-proxy
journalctl -u kubelet # 查看日志
journalctl -u kube-proxy
```
运行 `kubectl get node` 可以看到类似
``` bash
NAME STATUS ROLES AGE VERSION
192.168.1.42 Ready 2d v1.9.0
192.168.1.43 Ready 2d v1.9.0
192.168.1.44 Ready 2d v1.9.0
```
[后一篇](06-install_network_plugin.md)
================================================
FILE: docs/setup/06-install_network_plugin.md
================================================
## 06-安装网络组件
首先回顾下K8S网络设计原则,在配置集群网络插件或者实践K8S 应用/服务部署请牢记这些原则:
- 1.每个Pod都拥有一个独立IP地址,Pod内所有容器共享一个网络命名空间
- 2.集群内所有Pod都在一个直接连通的扁平网络中,可通过IP直接访问
- 所有容器之间无需NAT就可以直接互相访问
- 所有Node和所有容器之间无需NAT就可以直接互相访问
- 容器自己看到的IP跟其他容器看到的一样
- 3.Service cluster IP只可在集群内部访问,外部请求需要通过NodePort、LoadBalance或者Ingress来访问
`Container Network Interface (CNI)`是目前CNCF主推的网络模型,它由两部分组成:
- CNI Plugin负责给容器配置网络,它包括两个基本的接口
- 配置网络: AddNetwork(net *NetworkConfig, rt *RuntimeConf) (types.Result, error)
- 清理网络: DelNetwork(net *NetworkConfig, rt *RuntimeConf) error
- IPAM Plugin负责给容器分配IP地址
Kubernetes Pod的网络是这样创建的:
- 0. 每个Pod除了创建时指定的容器外,都有一个kubelet启动时指定的`基础容器`,即`pause`容器
- 1. kubelet创建`基础容器`生成network namespace
- 2. kubelet调用网络CNI driver,由它根据配置调用具体的CNI 插件
- 3. CNI 插件给`基础容器`配置网络
- 4. Pod 中其他的容器共享使用`基础容器`的网络
本项目基于CNI driver 调用各种网络插件来配置kubernetes的网络,常用CNI插件有 `flannel` `calico` `cilium`等等,这些插件各有优势,也在互相借鉴学习优点,比如:在所有node节点都在一个二层网络时候,flannel提供hostgw实现,避免vxlan实现的udp封装开销,估计是目前最高效的;calico也针对L3 Fabric,推出了IPinIP的选项,利用了GRE隧道封装;因此这些插件都能适合很多实际应用场景。
项目当前内置支持的网络插件有:`calico` `cilium` `flannel` `kube-ovn` `kube-router`
### 安装讲解
- [安装calico](network-plugin/calico.md)
- [安装cilium](network-plugin/cilium.md)
- [安装flannel](network-plugin/flannel.md)
- [安装kube-ovn](network-plugin/kube-ovn.md) 暂未更新
- [安装kube-router](network-plugin/kube-router.md) 暂未更新
### 参考
- [kubernetes.io networking docs](https://kubernetes.io/docs/concepts/cluster-administration/networking/)
- [feiskyer-kubernetes指南网络章节](https://github.com/feiskyer/kubernetes-handbook/blob/master/zh/network/network.md)
[后一篇](07-install_cluster_addon.md)
================================================
FILE: docs/setup/07-install_cluster_addon.md
================================================
# 07-安装集群主要插件
目前挑选一些常用、必要的插件自动集成到安装脚本之中:
## 集群默认安装
- [coredns](../guide/kubedns.md)
- [nodelocaldns](../guide/kubedns.md)
- [metrics-server](../guide/metrics-server.md)
- [dashboard](../guide/dashboard.md)
kubeasz 默认安装上述基础插件,并支持离线方式安装(./ezdown -D 命令会自动下载组件镜像,并推送到本地镜像仓库easzlab.io.local:5000)
## 集群可选安装
- [prometheus](../guide/prometheus.md)
- [network_check](network-plugin/network-check.md)
- [nfs_provisioner]()
kubeasz 默认不安装上述插件,可以在配置文件(clusters/xxx/config.yml)中开启,支持离线方式安装(./ezdown -X 会额外下载这些组件镜像,并推送到本地镜像仓库easzlab.io.local:5000)
## 安装脚本
详见`roles/cluster-addon/` 目录
- 1.根据hosts文件中配置的`CLUSTER_DNS_SVC_IP` `CLUSTER_DNS_DOMAIN`等参数生成kubedns.yaml和coredns.yaml文件
- 2.注册变量pod_info,pod_info用来判断现有集群是否已经运行各种插件
- 3.根据pod_info和`配置开关`逐个进行/跳过插件安装
## 下一步
- [创建ex_lb节点组](ex-lb.md), 向集群外提供高可用apiserver
- [创建集群持久化存储](08-cluster-storage.md)
================================================
FILE: docs/setup/08-cluster-storage.md
================================================
# K8S 集群存储
## 前言
在kubernetes(k8s)中对于存储的资源抽象了两个概念,分别是PersistentVolume(PV)、PersistentVolumeClaim(PVC)。
- PV是集群中的资源
- PVC是对这些资源的请求。
如上面所说PV和PVC都只是抽象的概念,在k8s中是通过插件的方式提供具体的存储实现。目前包含有NFS、iSCSI和云提供商指定的存储系统,更多的存储实现[参考官方文档](https://kubernetes.io/docs/concepts/storage/persistent-volumes/#access-modes)。
以下介绍两种`provisioner`, 可以提供静态或者动态的PV
- [nfs-provisioner](https://github.com/kubernetes-sigs/nfs-subdir-external-provisioner): NFS存储目录供应者
- [local-path-provisioner](https://github.com/rancher/local-path-provisioner): 本地存储目录供应者
## NFS存储目录供应者
首先我们需要一个NFS服务器,用于提供底层存储。通过文档[nfs-server](../guide/nfs-server.md),我们可以创建一个NFS服务器。
### 静态 PV
- 创建静态 pv,指定容量,访问模式,回收策略,存储类等
``` bash
apiVersion: v1
kind: PersistentVolume
metadata:
name: pv-es-0
spec:
capacity:
storage: 4Gi
accessModes:
- ReadWriteMany
volumeMode: Filesystem
persistentVolumeReclaimPolicy: Recycle
storageClassName: "es-storage-class"
nfs:
# 根据实际共享目录修改
path: /share/es0
# 根据实际 nfs服务器地址修改
server: 192.168.1.208
```
- 创建 pvc即可绑定使用上述 pv了,具体请看后文 test pod例子
### 创建动态PV
在一个工作k8s 集群中,`PVC`请求会很多,如果每次都需要管理员手动去创建对应的 `PV`资源,那就很不方便;因此 K8S还提供了多种 `provisioner`来动态创建 `PV`,不仅节省了管理员的时间,还可以根据`StorageClasses`封装不同类型的存储供 PVC 选用。
项目中以nfs-client-provisioner为例 https://github.com/kubernetes-sigs/nfs-subdir-external-provisioner
- 1.编辑集群配置文件:clusters/${集群名}/config.yml
``` bash
... 省略
# 在role:cluster-addon 中启用nfs-provisioner 安装
nfs_provisioner_install: "yes" # 修改为yes
nfs_provisioner_namespace: "kube-system"
nfs_provisioner_ver: "v4.0.1"
nfs_storage_class: "managed-nfs-storage"
nfs_server: "192.168.31.244" # 修改为实际nfs server地址
nfs_path: "/data/nfs" # 修改为实际的nfs共享目录
```
- 2.创建 nfs provisioner
``` bash
$ dk ezctl setup ${集群名} 07
# 执行成功后验证
$ kubectl get pod --all-namespaces |grep nfs-client
kube-system nfs-client-provisioner-84ff87c669-ksw95 1/1 Running 0 21m
```
- 3.验证使用动态 PV
在目录clusters/${集群名}/yml/nfs-provisioner/ 有个测试例子
``` bash
$ kubectl apply -f /etc/kubeasz/clusters/hello/yml/nfs-provisioner/test-pod.yaml
# 验证测试pod
kubectl get pod
NAME READY STATUS RESTARTS AGE
test-pod 0/1 Completed 0 6h36m
# 验证自动创建的pv 资源,
kubectl get pv
NAME CAPACITY ACCESS MODES RECLAIM POLICY STATUS CLAIM STORAGECLASS REASON AGE
pvc-44d34a50-e00b-4f6c-8005-40f5cc54af18 2Mi RWX Delete Bound default/test-claim managed-nfs-storage 6h36m
# 验证PVC已经绑定成功:STATUS字段为 Bound
kubectl get pvc
NAME STATUS VOLUME CAPACITY ACCESS MODES STORAGECLASS AGE
test-claim Bound pvc-44d34a50-e00b-4f6c-8005-40f5cc54af18 2Mi RWX managed-nfs-storage 6h37m
```
另外,Pod启动完成后,在挂载的目录中创建一个`SUCCESS`文件。我们可以到NFS服务器去看下:
```
.
└── default-test-claim-pvc-44d34a50-e00b-4f6c-8005-40f5cc54af18
└── SUCCESS
```
如上,可以发现挂载的时候,nfs-client根据PVC自动创建了一个目录,我们Pod中挂载的`/mnt`,实际引用的就是该目录,而我们在`/mnt`下创建的`SUCCESS`文件,也自动写入到了这里。
后面当我们需要为上层应用提供持久化存储时,只需要提供`StorageClass`即可。很多应用都会根据`StorageClass`来创建他们的所需的PVC, 最后再把PVC挂载到他们的Deployment或StatefulSet中使用,比如:efk、jenkins等
## 本地存储目录供应者
当应用对于磁盘I/O性能要求高,比较适合本地文件目录存储,特别地可以本地挂载SSD磁盘(注意本地磁盘需要配置raid冗余策略)。Local Path Provisioner 可以方便地在k8s集群中使用本地文件目录存储。
在kubeasz项目中集成安装
- 1.编辑集群配置文件:clusters/${集群名}/config.yml
``` bash
... 省略
local_path_provisioner_install: "yes" # 修改为yes
# 设置默认本地存储路径
local_path_provisioner_dir: "/opt/local-path-provisioner"
```
- 2.创建 local path provisioner
``` bash
$ dk ezctl setup ${集群名} 07
# 执行成功后验证
$ kubectl get pod --all-namespaces |grep provisioner
```
- 3.验证使用(略)
================================================
FILE: docs/setup/config_guide.md
================================================
# 个性化集群参数配置
`kubeasz`创建集群主要在以下两个地方进行配置:(假设集群名xxxx)
- clusters/xxxx/hosts 文件(模板在example/hosts.multi-node):集群主要节点定义和主要参数配置、全局变量
- clusters/xxxx/config.yml(模板在examples/config.yml):其他参数配置或者部分组件附加参数
## clusters/xxxx/hosts (ansible hosts)
如[集群规划与安装概览](00-planning_and_overall_intro.md)中介绍,主要包括集群节点定义和集群范围的主要参数配置
- 尽量保持配置简单灵活
- 尽量保持配置项稳定
常用设置项:
- 修改容器运行时: CONTAINER_RUNTIME="containerd"
- 修改集群网络插件:CLUSTER_NETWORK="calico"
- 修改容器网络地址:CLUSTER_CIDR="192.168.0.0/16"
- 修改NodePort范围:NODE_PORT_RANGE="30000-32767"
## clusters/xxxx/config.yml
主要包括集群某个具体组件的个性化配置,具体组件的配置项可能会不断增加;可以在不做任何配置更改情况下使用默认值创建集群
根据实际需要配置 k8s 集群,常用举例
- 配置使用离线安装系统包:INSTALL_SOURCE: "offline" (需要ezdown -P 下载离线系统软件)
- 配置CA证书以及其签发证书的有效期
- 配置 apiserver 支持公网域名:MASTER_CERT_HOSTS
- 配置 cluster-addon 组件安装
- ...
================================================
FILE: docs/setup/ex-lb.md
================================================
## EX-LB 负载均衡部署
根据[HA 2x架构](00-planning_and_overall_intro.md),k8s集群自身高可用已经不依赖于外部 lb 服务;但是有时我们要从外部访问 apiserver(比如 CI 流程),就需要 ex_lb 来请求多个 apiserver;
还有一种情况是需要[负载转发到ingress服务](../op/loadballance_ingress_nodeport.md),也需要部署ex_lb;
**注意:当遇到公有云环境无法自建 ex_lb 服务时,可以配置对应的云负载均衡服务**
### ex_lb 服务组件
更新:kubeasz 3.0.2 重写了ex-lb服务安装,利用最小化依赖编译安装的二进制文件,不依赖于linux发行版;优点是可以统一版本和简化离线安装部署,并且理论上能够支持更多linux发行版
ex_lb 服务由 keepalived 和 l4lb 组成:
- l4lb:是一个精简版(仅支持四层转发)的nginx编译二进制版本
- keepalived:利用主备节点vrrp协议通信和虚拟地址,消除l4lb的单点故障;keepalived保持存活,它是基于VRRP协议保证所谓的高可用或热备的,这里用来预防l4lb的单点故障。
keepalived与l4lb配合,实现master的高可用过程如下:
+ 1.keepalived利用vrrp协议生成一个虚拟地址(VIP),正常情况下VIP存活在keepalive的主节点,当主节点故障时,VIP能够漂移到keepalived的备节点,保障VIP地址高可用性。
+ 2.在keepalived的主备节点都配置相同l4lb负载配置,并且监听客户端请求在VIP的地址上,保障随时都有一个l4lb负载均衡在正常工作。并且keepalived启用对l4lb进程的存活检测,一旦主节点l4lb进程故障,VIP也能切换到备节点,从而让备节点的l4lb进行负载工作。
+ 3.在l4lb的配置中配置多个后端真实kube-apiserver的endpoints,并启用存活监测后端kube-apiserver,如果一个kube-apiserver故障,l4lb会将其剔除负载池。
#### 安装l4lb
#### 配置l4lb (roles/ex-lb/templates/l4lb.conf.j2)
配置由全局配置和三个upstream servers配置组成:
- apiservers 用于转发至多个apiserver
- ingress-nodes 用于转发至node节点的ingress http服务,[参阅](../op/loadballance_ingress_nodeport.md)
- ingress-tls-nodes 用于转发至node节点的ingress https服务
#### 安装keepalived
#### 配置keepalived主节点 [keepalived-master.conf.j2](../../roles/ex-lb/templates/keepalived-master.conf.j2)
``` bash
global_defs {
}
vrrp_track_process check-l4lb {
process l4lb
weight -60
delay 3
}
vrrp_instance VI-01 {
state MASTER
priority 120
unicast_src_ip {{ inventory_hostname }}
unicast_peer {
{% for h in groups['ex_lb'] %}{% if h != inventory_hostname %}
{{ h }}
{% endif %}{% endfor %}
}
dont_track_primary
interface {{ LB_IF }}
virtual_router_id {{ ROUTER_ID }}
advert_int 3
track_process {
check-l4lb
}
virtual_ipaddress {
{{ EX_APISERVER_VIP }}
}
}
```
+ vrrp_track_process 定义了监测l4lb进程是否存活,如果进程不存在,根据`weight -60`设置将主节点优先级降低60,这样原先备节点将变成主节点。
+ vrrp_instance 定义了vrrp组,包括优先级、使用端口、router_id、心跳频率、检测脚本、虚拟地址VIP等
+ 特别注意 `virtual_router_id` 标识了一个 VRRP组,在同网段下必须唯一,否则出现 `Keepalived_vrrp: bogus VRRP packet received on eth0 !!!`类似报错
+ 配置 vrrp 协议通过单播发送
#### 配置keepalived备节点 [keepalived-backup.conf.j2](../../roles/ex-lb/templates/keepalived-backup.conf.j2)
+ 备节点的配置类似主节点,除了优先级和检测脚本,其他如 `virtual_router_id` `advert_int` `virtual_ipaddress`必须与主节点一致
### 启动 keepalived 和 l4lb 后验证
+ lb 节点验证
``` bash
systemctl status l4lb # 检查进程状态
journalctl -u l4lb # 检查进程日志是否有报错信息
systemctl status keepalived # 检查进程状态
journalctl -u keepalived # 检查进程日志是否有报错信息
```
+ 在 keepalived 主节点
``` bash
ip a # 检查 master的 VIP地址是否存在
```
### keepalived 主备切换演练
1. 尝试关闭 keepalived主节点上的 l4lb进程,然后在keepalived 备节点上查看 master的 VIP地址是否能够漂移过来,并依次检查上一步中的验证项。
1. 尝试直接关闭 keepalived 主节点系统,检查各验证项。
================================================
FILE: docs/setup/ezctl.md
================================================
# ezctl 命令行介绍
## 为什么使用 ezctl
kubeasz 项目使用ezctl 方便地创建和管理多个k8s 集群,ezctl 使用shell 脚本封装ansible-playbook 执行命令,它十分轻量、简单和易于扩展。
### 使用帮助
随时运行 ezctl 获取命令行提示信息,如下
```
Usage: ezctl COMMAND [args]
-------------------------------------------------------------------------------------
Cluster setups:
list to list all of the managed clusters
checkout to switch default kubeconfig of the cluster
new to start a new k8s deploy with name 'cluster'
setup to setup a cluster, also supporting a step-by-step way
start to start all of the k8s services stopped by 'ezctl stop'
stop to stop all of the k8s services temporarily
upgrade to upgrade the k8s cluster
destroy to destroy the k8s cluster
backup to backup the cluster state (etcd snapshot)
restore to restore the cluster state from backups
start-aio to quickly setup an all-in-one cluster with 'default' settings
Cluster ops:
add-etcd to add a etcd-node to the etcd cluster
add-master to add a master node to the k8s cluster
add-node to add a work node to the k8s cluster
del-etcd to delete a etcd-node from the etcd cluster
del-master to delete a master node from the k8s cluster
del-node to delete a work node from the k8s cluster
Extra operation:
kcfg-adm to manage client kubeconfig of the k8s cluster
Use "ezctl help " for more information about a given command.
```
- 命令集 1:集群安装相关操作
- 显示当前所有管理的集群
- 切换默认集群
- 创建新集群配置
- 安装新集群
- 启动临时停止的集群
- 临时停止某个集群(包括集群内运行的pod)
- 升级集群k8s组件版本
- 删除集群
- 备份集群(仅etcd数据,不包括pv数据和业务应用数据)
- 从备份中恢复集群
- 创建单机集群(类似 minikube)
- 命令集 2:集群节点操作
- 增加 etcd 节点
- 增加主节点
- 增加工作节点
- 删除 etcd 节点
- 删除主节点
- 删除工作节点
- 命令集3:额外操作
- 管理客户端kubeconfig
#### 举例创建、安装新集群流程
- 1.首先创建集群配置实例
``` bash
~# ezctl new k8s-01
2021-01-19 10:48:23 DEBUG generate custom cluster files in /etc/kubeasz/clusters/k8s-01
2021-01-19 10:48:23 DEBUG set version of common plugins
2021-01-19 10:48:23 DEBUG cluster k8s-01: files successfully created.
2021-01-19 10:48:23 INFO next steps 1: to config '/etc/kubeasz/clusters/k8s-01/hosts'
2021-01-19 10:48:23 INFO next steps 2: to config '/etc/kubeasz/clusters/k8s-01/config.yml'
```
然后根据提示配置'/etc/kubeasz/clusters/k8s-01/hosts' 和 '/etc/kubeasz/clusters/k8s-01/config.yml';为方便测试我们在hosts里面设置单节点集群(etcd/kube_master/kube_node配置同一个节点,注意节点需先设置ssh免密码登陆), config.yml 使用默认配置即可。
- 2.然后开始安装集群
``` bash
# 一键安装
ezctl setup k8s-01 all
# 或者分步安装,具体使用 ezctl help setup 查看分步安装帮助信息
# ezctl setup k8s-01 01
# ezctl setup k8s-01 02
# ezctl setup k8s-01 03
# ezctl setup k8s-01 04
...
```
- 3.重复步骤1,2可以创建、管理多个k8s集群(建议ezctl使用独立的部署节点)
ezctl 创建管理的多集群拓扑如下
```
+----------------+ +-----------------+
|ezctl 1.1.1.1 | |cluster-aio: |
+--+---+---+-----+ | |
| | | |master 4.4.4.4 |
| | +-------------------->+etcd 4.4.4.4 |
| | |node 4.4.4.4 |
| +--------------+ +-----------------+
| |
v v
+--+------------+ +---+----------------------------+
| cluster-1: | | cluster-2: |
| | | |
| master 2.2.2.1| | master 3.3.3.1/3.3.3.2 |
| etcd 2.2.2.2| | etcd 3.3.3.1/3.3.3.2/3.3.3.3 |
| node 2.2.2.3| | node 3.3.3.4/3.3.3.5/3.3.3.6 |
+---------------+ +--------------------------------+
```
That's it! 赶紧动手测试吧,欢迎通过 Issues 和 PRs 反馈您的意见和建议!
================================================
FILE: docs/setup/kubeasz_on_public_cloud.md
================================================
# 公有云上部署 kubeasz
在公有云上使用`kubeasz`部署`k8s`集群需要注意以下几个常见问题。
### 安全组
注意虚机的安全组规则配置,一般集群内部节点之间端口全部放开即可;
### 网络组件
一般公有云对网络限制较多,跨节点 pod 通讯需要使用 OVERLAY 添加报头;默认配置详见example/config.yml
- flannel 使用 vxlan 模式:`FLANNEL_BACKEND: "vxlan"`
- calico 开启 ipinip:`CALICO_IPV4POOL_IPIP: "Always"`
- kube-router 开启 ipinip:`OVERLAY_TYPE: "full"`
### 节点公网访问
可以在安装时每个节点绑定`弹性公网地址`(EIP),装完集群解绑;也可以开通NAT网关,或者利用iptables自建上网网关等方式
### 负载均衡
一般云厂商会限制使用`keepalived+haproxy`自建负载均衡,你可以根据云厂商文档使用云负载均衡(内网)四层TCP负载模式;
- kubeasz 2x 版本已无需依赖外部负载均衡实现apiserver的高可用,详见 [2x架构](https://github.com/easzlab/kubeasz/blob/dev2/docs/setup/00-planning_and_overall_intro.md#ha-architecture)
- kubeasz 1x 及以前版本需要负载均衡实现apiserver高可用,详见 [1x架构](https://github.com/easzlab/kubeasz/blob/dev1/docs/setup/00-planning_and_overall_intro.md#ha-architecture)
### 时间同步
一般云厂商提供的虚机都已默认安装时间同步服务,无需自行安装。
### 访问 APISERVER
在公有云上安装完集群后,需要在公网访问集群 apiserver,而我们在安装前可能没有规划公网IP或者公网域名;而 apiserver 肯定需要 https 方式访问,在证书创建时需要加入公网ip/域名;可以参考这里[修改 APISERVER(MASTER)证书](../op/ch_apiserver_cert.md)
## 在公有云上部署多主高可用集群
处理好以上讨论的常见问题后,在公有云上使用 kubeasz 安装集群与自有环境没有差异。
- 使用 kubeasz 2x 版本安装单节点、单主多节点、多主多节点 k8s 集群,云上云下的预期安装体验完全一致
================================================
FILE: docs/setup/mix_arch.md
================================================
# 混合架构集群部署
混合架构集群本文是指集群中既有linux amd64架构机器,也有linux arm64架构机器;这里只记录一个简单的操作说明,实际操作注意风险。
## 部署思路
1. 先选定一台amd64架构的机器做“amd64部署机”,使用它先部署amd64架构的集群
2. 选一台arm64架构的机器做“arm64部署机”,复制amd64部署机的/etc/kubeasz目录文件(除去目录中的bin、down子目录),然后重新下载arm64架构的二进制和镜像,然后添加arm64节点到原有集群即可
## 操作步骤
1. 假设已经正常部署了amd64架构的三节点集群
2. 在“amd64部署机” 目录 /etc/kubeasz 中移除子目录 bin 和 down,然后把整体/etc/kubeasz 目录复制到“arm64部署机”
```
# 登录amd64部署机
cd /etc/kubeasz; mv bin down /tmp/; scp -r /etc/kubeasz root@{_ip_arm64}:/etc/
# 复制完成后找回 bin 和 down 子目录
mv /tmp/bin /etc/kubeasz/; mv /tmp/down /etc/kubeasz/
```
3. 登录“arm64部署机”,执行下载,其他准备工作
```
cd /etc/kubeasz
# 下载基础部分
./ezdown -D
# 下载额外部分(如有)
./ezdown -X ...
# 运行部署容器
./ezdown -S
# 配置机器ssh免密码登录,集群所有节点都免密,包括待新增arm64节点
ssh-copy-id xx.xx.xx.xx
ssh-copy-id ...
# 复制kubeconfig
mkdir /root/.kube/; cp clusters/default/kubectl.kubeconfig /root/.kube/config
```
4. 添加arm64新节点到集群
```
source ~/.bashrc
# 添加新节点 x.x.x.x
dk ezctl add-node default x.x.x.x
```
5. 验证
```
$ kubectl get node -owide
NAME STATUS ROLES AGE VERSION INTERNAL-IP EXTERNAL-IP OS-IMAGE KERNEL-VERSION CONTAINER-RUNTIME
k8s-x.x.x-19 Ready master 5d8h v1.33.1 x.x.x.19 Ubuntu 20.04.4 LTS 5.4.0-122-generic containerd://2.1.1
k8s-x.x.x-90 Ready node 5d8h v1.33.1 x.x.x.90 Ubuntu 22.04.5 LTS 5.15.0-134-generic containerd://2.1.1
k8s-x.x.x-91 Ready node 5d8h v1.33.1 x.x.x.91 Ubuntu 22.04.5 LTS 5.15.0-134-generic containerd://2.1.1
k8s-x.x.x-93 Ready node 79s v1.33.1 x.x.x.93 Ubuntu 22.04.5 LTS 5.15.0-140-generic containerd://2.1.1
$ kubectl describe node|grep beta.kubernetes.io/arch
Labels: beta.kubernetes.io/arch=amd64
Labels: beta.kubernetes.io/arch=amd64
Labels: beta.kubernetes.io/arch=amd64
Labels: beta.kubernetes.io/arch=arm64
```
## 小结
通过以上步骤,成功实现了在amd64集群中添加arm64节点;充分展示kubeasz 项目部署集群的灵活性和可配置性;部署过程中ansible执行的过程性输出内容,以近乎白盒的方式展示每一个细节;假如出错有详细的说明,帮助定位,并且随时可以修改执行脚本,安装的幂等性保证随时可以重新安装以修复错误。`Hack it, and have fun!`
================================================
FILE: docs/setup/multi_os.md
================================================
# 操作系统说明
目前发现部分使用新内核的linux发行版,k8s 安装使用 cgroup v2版本时,有时候安装会失败,需要删除/清理集群后重新安装。已报告可能发生于 Alma Linux 9, Rocky Linux 9, Fedora 37;建议如下步骤处理:
- 1.确认系统使用的cgroup v2版本
```
stat -fc %T /sys/fs/cgroup/
cgroup2fs
```
- 2.初次安装时kubelet可能启动失败,日志报错类似:err="openat2 /sys/fs/cgroup/kubepods.slice/cpu.weight: no such file or directory"
- 3.建议删除集群然后重新安装,一般能够成功
```
# 删除集群
dk ezctl destroy xxxx
# 重启
reboot
# 启动后重新安装
dk ezctl setup xxxx all
```
## Debian
- Debian 11:默认可能没有安装iptables,使用kubeasz 安装前需要执行:
``` bash
apt update
apt install iptables -y
```
## openEuler
- openEuler 24.03 需要安装iptables
``` bash
yum install iptables -y
```
## openSUSE
- openSUSE Leap 15.4:需要安装iptables
``` bash
zypper install iptables
ln -s /usr/sbin/iptables /sbin/iptables
```
================================================
FILE: docs/setup/multi_platform.md
================================================
# 多架构支持
kubeasz 3.4.1 以后支持多CPU架构,当前已支持linux amd64和linux arm64,更多架构支持根据后续需求来计划。
## 使用方式
kubeasz 多架构安装逻辑:根据部署机器(执行ezdown/ezctl命令的机器)的架构,会自动判断下载对应amd64/arm64的二进制文件和容器镜像,然后推送安装到整个集群。
- 暂不支持自动部署混合架构集群,如有需要可以按[说明文档](mix_arch.md)手动操作。
- harbor目前仅支持amd64安装
## 架构支持备忘
#### k8s核心组件本身提供多架构的二进制文件/容器镜像下载,项目调整了下载二进制文件的容器dockerfile
- https://github.com/easzlab/dockerfile-kubeasz-k8s-bin
#### kubeasz其他用到的二进制或镜像,重新调整了容器创建dockerfile
- https://github.com/easzlab/dockerfile-kubeasz-ext-bin
- https://github.com/easzlab/dockerfile-kubeasz-ext-build
- https://github.com/easzlab/dockerfile-kubeasz-sys-pkg
- https://github.com/easzlab/dockerfile-kubeasz-mirrored-images
- https://github.com/easzlab/dockerfile-kubeasz
- https://github.com/easzlab/dockerfile-ansible
#### 其他组件(coredns/network plugin/dashboard/metrics-server等)一般都提供多架构的容器镜像,可以直接下载拉取
================================================
FILE: docs/setup/network-plugin/calico-bgp-rr.md
================================================
# calico 配置 BGP Route Reflectors
`Calico`作为`k8s`的一个流行网络插件,它依赖`BGP`路由协议实现集群节点上的`POD`路由互通;而路由互通的前提是节点间建立 BGP Peer 连接。BGP 路由反射器(Route Reflectors,简称 RR)可以简化集群BGP Peer的连接方式,它是解决BGP扩展性问题的有效方式;具体来说:
- 没有 RR 时,所有节点之间需要两两建立连接(IBGP全互联),节点数量增加将导致连接数剧增、资源占用剧增
- 引入 RR 后,其他 BGP 路由器只需要与它建立连接并交换路由信息,节点数量增加连接数只是线性增加,节省系统资源
calico-node 版本 v3.3 开始支持内建路由反射器,非常方便,因此使用 calico 作为网络插件可以支持大规模节点数的`K8S`集群。
- 建议集群节点数大于50时,应用BGP Route Reflectors 特性
## 前提条件
k8s 集群使用calico网络插件部署成功。本实验环境为按照kubeasz安装的2主2从集群,calico 版本 v3.19.4。
```
$ kubectl get node
NAME STATUS ROLES AGE VERSION
192.168.1.1 Ready,SchedulingDisabled master 178m v1.13.1
192.168.1.2 Ready,SchedulingDisabled master 178m v1.13.1
192.168.1.3 Ready node 178m v1.13.1
192.168.1.4 Ready node 178m v1.13.1
$ kubectl get pod -n kube-system -o wide | grep calico
calico-kube-controllers-77487546bd-jqrlc 1/1 Running 0 179m 192.168.1.3 192.168.1.3
calico-node-67t5m 2/2 Running 0 179m 192.168.1.1 192.168.1.1
calico-node-drmhq 2/2 Running 0 179m 192.168.1.2 192.168.1.2
calico-node-rjtkv 2/2 Running 0 179m 192.168.1.4 192.168.1.4
calico-node-xtspl 2/2 Running 0 179m 192.168.1.3 192.168.1.3
```
查看当前集群中BGP连接情况:可以看到集群中4个节点两两建立了 BGP 连接
```
$ dk ansible -i /etc/kubeasz/clusters/xxx/hosts all -m shell -a '/opt/kube/bin/calicoctl node status'
192.168.1.3 | SUCCESS | rc=0 >>
Calico process is running.
IPv4 BGP status
+--------------+-------------------+-------+----------+-------------+
| PEER ADDRESS | PEER TYPE | STATE | SINCE | INFO |
+--------------+-------------------+-------+----------+-------------+
| 192.168.1.1 | node-to-node mesh | up | 03:08:20 | Established |
| 192.168.1.2 | node-to-node mesh | up | 03:08:18 | Established |
| 192.168.1.4 | node-to-node mesh | up | 03:08:19 | Established |
+--------------+-------------------+-------+----------+-------------+
IPv6 BGP status
No IPv6 peers found.
192.168.1.2 | SUCCESS | rc=0 >>
Calico process is running.
IPv4 BGP status
+--------------+-------------------+-------+----------+-------------+
| PEER ADDRESS | PEER TYPE | STATE | SINCE | INFO |
+--------------+-------------------+-------+----------+-------------+
| 192.168.1.4 | node-to-node mesh | up | 03:08:17 | Established |
| 192.168.1.3 | node-to-node mesh | up | 03:08:18 | Established |
| 192.168.1.1 | node-to-node mesh | up | 03:08:20 | Established |
+--------------+-------------------+-------+----------+-------------+
IPv6 BGP status
No IPv6 peers found.
192.168.1.1 | SUCCESS | rc=0 >>
Calico process is running.
IPv4 BGP status
+--------------+-------------------+-------+----------+-------------+
| PEER ADDRESS | PEER TYPE | STATE | SINCE | INFO |
+--------------+-------------------+-------+----------+-------------+
| 192.168.1.2 | node-to-node mesh | up | 03:08:21 | Established |
| 192.168.1.3 | node-to-node mesh | up | 03:08:21 | Established |
| 192.168.1.4 | node-to-node mesh | up | 03:08:21 | Established |
+--------------+-------------------+-------+----------+-------------+
IPv6 BGP status
No IPv6 peers found.
192.168.1.4 | SUCCESS | rc=0 >>
Calico process is running.
IPv4 BGP status
+--------------+-------------------+-------+----------+-------------+
| PEER ADDRESS | PEER TYPE | STATE | SINCE | INFO |
+--------------+-------------------+-------+----------+-------------+
| 192.168.1.2 | node-to-node mesh | up | 03:08:17 | Established |
| 192.168.1.3 | node-to-node mesh | up | 03:08:19 | Established |
| 192.168.1.1 | node-to-node mesh | up | 03:08:20 | Established |
+--------------+-------------------+-------+----------+-------------+
IPv6 BGP status
No IPv6 peers found.
```
## kubeasz 自动安装启用 route reflector
- 修改`/etc/kubeasz/clusters/xxx/config.yml`文件,设置配置项`CALICO_RR_ENABLED: true`
- 重新执行网络安装 `dk ezctl setup xxx 07`
执行完成,检查bgp连接验证即可。
### 附:手动安装route reflector 过程讲解
- 选择并配置 Route Reflector 节点
首先查看当前集群中的节点:
```
$ calicoctl get node -o wide
NAME ASN IPV4 IPV6
k8s401 (64512) 192.168.1.1/24
k8s402 (64512) 192.168.1.2/24
k8s403 (64512) 192.168.1.3/24
k8s404 (64512) 192.168.1.4/24
```
可以在集群中选择1个或多个节点作为 rr 节点,这里先选择节点:k8s401
``` bash
#配置routeReflectorClusterID
calicoctl patch node k8s401 -p '{"spec": {"bgp": {"routeReflectorClusterID": "244.0.0.1"}}}'
#配置node label
calicoctl patch node k8s401 -p '{"metadata": {"labels": {"route-reflector": "true"}}}'
```
- 配置 BGP node 与 Route Reflector 的连接建立规则
``` bash
$ cat << EOF | calicoctl create -f -
kind: BGPPeer
apiVersion: projectcalico.org/v3
metadata:
name: peer-with-route-reflectors
spec:
nodeSelector: all()
peerSelector: route-reflector == 'true'
EOF
```
- 配置全局禁用全连接(BGP full mesh)
```
$ cat << EOF | calicoctl create -f -
apiVersion: projectcalico.org/v3
kind: BGPConfiguration
metadata:
name: default
spec:
logSeverityScreen: Info
nodeToNodeMeshEnabled: false
asNumber: 64512
EOF
```
- 验证增加 rr 之后的bgp 连接情况
```
$ dk ansible -i /etc/kubeasz/clusters/xxx/hosts all -m shell -a '/opt/kube/bin/calicoctl node status'
192.168.1.4 | SUCCESS | rc=0 >>
Calico process is running.
IPv4 BGP status
+--------------+-----------+-------+----------+-------------+
| PEER ADDRESS | PEER TYPE | STATE | SINCE | INFO |
+--------------+-----------+-------+----------+-------------+
| 192.168.1.1 | node specific | up | 11:02:55 | Established |
+--------------+-----------+-------+----------+-------------+
IPv6 BGP status
No IPv6 peers found.
192.168.1.3 | SUCCESS | rc=0 >>
Calico process is running.
IPv4 BGP status
+--------------+-----------+-------+----------+-------------+
| PEER ADDRESS | PEER TYPE | STATE | SINCE | INFO |
+--------------+-----------+-------+----------+-------------+
| 192.168.1.1 | node specific | up | 11:02:55 | Established |
+--------------+-----------+-------+----------+-------------+
IPv6 BGP status
No IPv6 peers found.
192.168.1.1 | SUCCESS | rc=0 >>
Calico process is running.
IPv4 BGP status
+--------------+---------------+-------+----------+-------------+
| PEER ADDRESS | PEER TYPE | STATE | SINCE | INFO |
+--------------+---------------+-------+----------+-------------+
| 192.168.1.2 | node specific | up | 11:02:55 | Established |
| 192.168.1.3 | node specific | up | 11:02:55 | Established |
| 192.168.1.4 | node specific | up | 11:02:55 | Established |
+--------------+---------------+-------+----------+-------------+
IPv6 BGP status
No IPv6 peers found.
192.168.1.2 | SUCCESS | rc=0 >>
Calico process is running.
IPv4 BGP status
+--------------+-----------+-------+----------+-------------+
| PEER ADDRESS | PEER TYPE | STATE | SINCE | INFO |
+--------------+-----------+-------+----------+-------------+
| 192.168.1.1 | node specific | up | 11:02:55 | Established |
+--------------+-----------+-------+----------+-------------+
IPv6 BGP status
No IPv6 peers found.
```
可以看到所有其他节点都与所选rr节点建立bgp连接。
- 再增加一个 rr 节点(略)
步骤同上,添加成功后可以看到所有其他节点都与两个rr节点建立bgp连接,两个rr节点之间也建立bgp连接。对于节点数较多的`K8S`集群建议配置2-3个 RR 节点。
## 参考文档
- 1.[Calico bgp 配置指南](https://projectcalico.docs.tigera.io/reference/resources/bgpconfig)
- 2.[BGP路由反射器基础](https://www.sohu.com/a/140033025_761420)
================================================
FILE: docs/setup/network-plugin/calico.md
================================================
## 06-安装calico网络组件.md
calico 是k8s社区最流行的网络插件之一,也是k8s-conformance test 默认使用的网络插件,功能丰富,支持network policy;是当前kubeasz项目的默认网络插件。
如果需要安装calico,请在`clusters/xxxx/hosts`文件中设置变量 `CLUSTER_NETWORK="calico"`,参考[这里](../config_guide.md)
``` bash
roles/calico/
├── tasks
│ └── main.yml
├── templates
│ ├── calico-csr.json.j2
│ ├── calicoctl.cfg.j2
│ ├── calico-v3.15.yaml.j2
│ ├── calico-v3.19.yaml.j2
│ └── calico-v3.8.yaml.j2
└── vars
└── main.yml
```
请在另外窗口打开`roles/calico/tasks/main.yml`文件,对照看以下讲解内容。
### 创建calico 证书申请
``` bash
{
"CN": "calico",
"hosts": [],
"key": {
"algo": "rsa",
"size": 2048
},
"names": [
{
"C": "CN",
"ST": "HangZhou",
"L": "XS",
"O": "k8s",
"OU": "System"
}
]
}
```
calico 使用客户端证书,所以hosts字段可以为空;后续可以看到calico证书用在四个地方:
- calico/node 这个docker 容器运行时访问 etcd 使用证书
- cni 配置文件中,cni 插件需要访问 etcd 使用证书
- calicoctl 操作集群网络时访问 etcd 使用证书
- calico/kube-controllers 同步集群网络策略时访问 etcd 使用证书
### 创建 calico DaemonSet yaml文件和rbac 文件
请对照 roles/calico/templates/calico.yaml.j2文件注释和以下注意内容
+ 详细配置参数请参考[calico官方文档](https://projectcalico.docs.tigera.io/reference/node/configuration)
+ 配置ETCD_ENDPOINTS 、CA、证书等,所有{{ }}变量与ansible hosts文件中设置对应
+ 配置集群POD网络 CALICO_IPV4POOL_CIDR={{ CLUSTER_CIDR }}
+ 配置FELIX_DEFAULTENDPOINTTOHOSTACTION=ACCEPT 默认允许Pod到Node的网络流量,更多[felix配置选项](https://projectcalico.docs.tigera.io/reference/felix/configuration)
### 安装calico 网络
+ 安装前检查主机名不能有大写字母,只能由`小写字母` `-` `.` 组成 (name must consist of lower case alphanumeric characters, '-' or '.' (regex: [a-z0-9]([-a-z0-9]*[a-z0-9])?(\.[a-z0-9]([-a-z0-9]*[a-z0-9])?)*))(calico-node v3.0.6以上已经解决主机大写字母问题)
+ **安装前必须确保各节点主机名不重复** ,calico node name 由节点主机名决定,如果重复,那么重复节点在etcd中只存储一份配置,BGP 邻居也不会建立。
+ 安装之前必须确保`kube_master`和`kube_node`节点已经成功部署
+ 轮询等待calico 网络插件安装完成,删除之前kube_node安装时默认cni网络配置
### [可选]配置calicoctl工具 [calicoctl.cfg.j2](roles/calico/templates/calicoctl.cfg.j2)
``` bash
apiVersion: projectcalico.org/v3
kind: CalicoAPIConfig
metadata:
spec:
datastoreType: "etcdv3"
etcdEndpoints: {{ ETCD_ENDPOINTS }}
etcdKeyFile: /etc/calico/ssl/calico-key.pem
etcdCertFile: /etc/calico/ssl/calico.pem
etcdCACertFile: {{ ca_dir }}/ca.pem
```
### 验证calico网络
执行calico安装成功后可以验证如下:(需要等待镜像下载完成,有时候即便上一步已经配置了docker国内加速,还是可能比较慢,请确认以下容器运行起来以后,再执行后续验证步骤)
``` bash
kubectl get pod --all-namespaces
NAMESPACE NAME READY STATUS RESTARTS AGE
kube-system calico-kube-controllers-5c6b98d9df-xj2n4 1/1 Running 0 1m
kube-system calico-node-4hr52 2/2 Running 0 1m
kube-system calico-node-8ctc2 2/2 Running 0 1m
kube-system calico-node-9t8md 2/2 Running 0 1m
```
**查看网卡和路由信息**
先在集群创建几个测试pod: `kubectl run test --image=busybox --replicas=3 sleep 30000`
``` bash
# 查看网卡信息
ip a
```
+ 可以看到包含类似cali1cxxx的网卡,是calico为测试pod生成的
+ tunl0网卡现在不用管,是默认生成的,当开启IPIP 特性时使用的隧道
``` bash
# 查看路由
route -n
Kernel IP routing table
Destination Gateway Genmask Flags Metric Ref Use Iface
0.0.0.0 192.168.1.1 0.0.0.0 UG 0 0 0 ens3
192.168.1.0 0.0.0.0 255.255.255.0 U 0 0 0 ens3
172.17.0.0 0.0.0.0 255.255.0.0 U 0 0 0 docker0
172.20.3.64 192.168.1.34 255.255.255.192 UG 0 0 0 ens3
172.20.33.128 0.0.0.0 255.255.255.192 U 0 0 0 *
172.20.33.129 0.0.0.0 255.255.255.255 UH 0 0 0 caliccc295a6d4f
172.20.104.0 192.168.1.35 255.255.255.192 UG 0 0 0 ens3
172.20.166.128 192.168.1.63 255.255.255.192 UG 0 0 0 ens3
```
**查看所有calico节点状态**
``` bash
calicoctl node status
Calico process is running.
IPv4 BGP status
+--------------+-------------------+-------+----------+-------------+
| PEER ADDRESS | PEER TYPE | STATE | SINCE | INFO |
+--------------+-------------------+-------+----------+-------------+
| 192.168.1.34 | node-to-node mesh | up | 12:34:00 | Established |
| 192.168.1.35 | node-to-node mesh | up | 12:34:00 | Established |
| 192.168.1.63 | node-to-node mesh | up | 12:34:01 | Established |
+--------------+-------------------+-------+----------+-------------+
```
**BGP 协议是通过TCP 连接来建立邻居的,因此可以用netstat 命令验证 BGP Peer**
``` bash
netstat -antlp|grep ESTABLISHED|grep 179
tcp 0 0 192.168.1.66:179 192.168.1.35:41316 ESTABLISHED 28479/bird
tcp 0 0 192.168.1.66:179 192.168.1.34:40243 ESTABLISHED 28479/bird
tcp 0 0 192.168.1.66:179 192.168.1.63:48979 ESTABLISHED 28479/bird
```
**查看etcd中calico相关信息**
因为这里calico网络使用etcd存储数据,所以可以在etcd集群中查看数据
+ calico 3.x 版本默认使用 etcd v3存储,**登录集群的一个etcd 节点**,查看命令:
``` bash
# 查看所有calico相关数据
ETCDCTL_API=3 etcdctl --endpoints="http://127.0.0.1:2379" get --prefix /calico
# 查看 calico网络为各节点分配的网段
ETCDCTL_API=3 etcdctl --endpoints="http://127.0.0.1:2379" get --prefix /calico/ipam/v2/host
```
## 下一步:[设置 BGP Route Reflector](calico-bgp-rr.md)
================================================
FILE: docs/setup/network-plugin/cilium-example.md
================================================
## 开始使用 cilium
以下为简要翻译 `cilium doc`上的一个应用示例[原文](https://docs.cilium.io/en/stable/gettingstarted/http/),部署在单节点k8s 环境的实践。
### 部署示例应用
官方文档用几个`pod/svc` 抽象一个有趣的应用场景(星战迷):星战中帝国方建造了被称为“终极武器”的“死星”,它是一个卫星大小的战斗空间站,它的核心是使用凯伯晶体(Kyber Crystal)的超级激光炮,剧中它的首秀就以完全火力摧毁了“杰达圣城”(Jedha)。下面将用运行于 k8s上的 pod/svc/cilium 等模拟“死星“的一个“飞船登陆”系统安全策略设计。
- deploy/deathstar:作为控制整个“死星”的飞船登陆管理系统,它暴露一个SVC,提供HTTP REST 接口给飞船请求登陆使用;
- pod/tiefighter:作为“帝国”方的常规战斗飞船,它会调用上述 HTTP 接口,请求登陆“死星”;
- pod/xwing:作为“盟军”方的飞行舰,它也尝试调用 HTTP 接口,请求登陆“死星”;
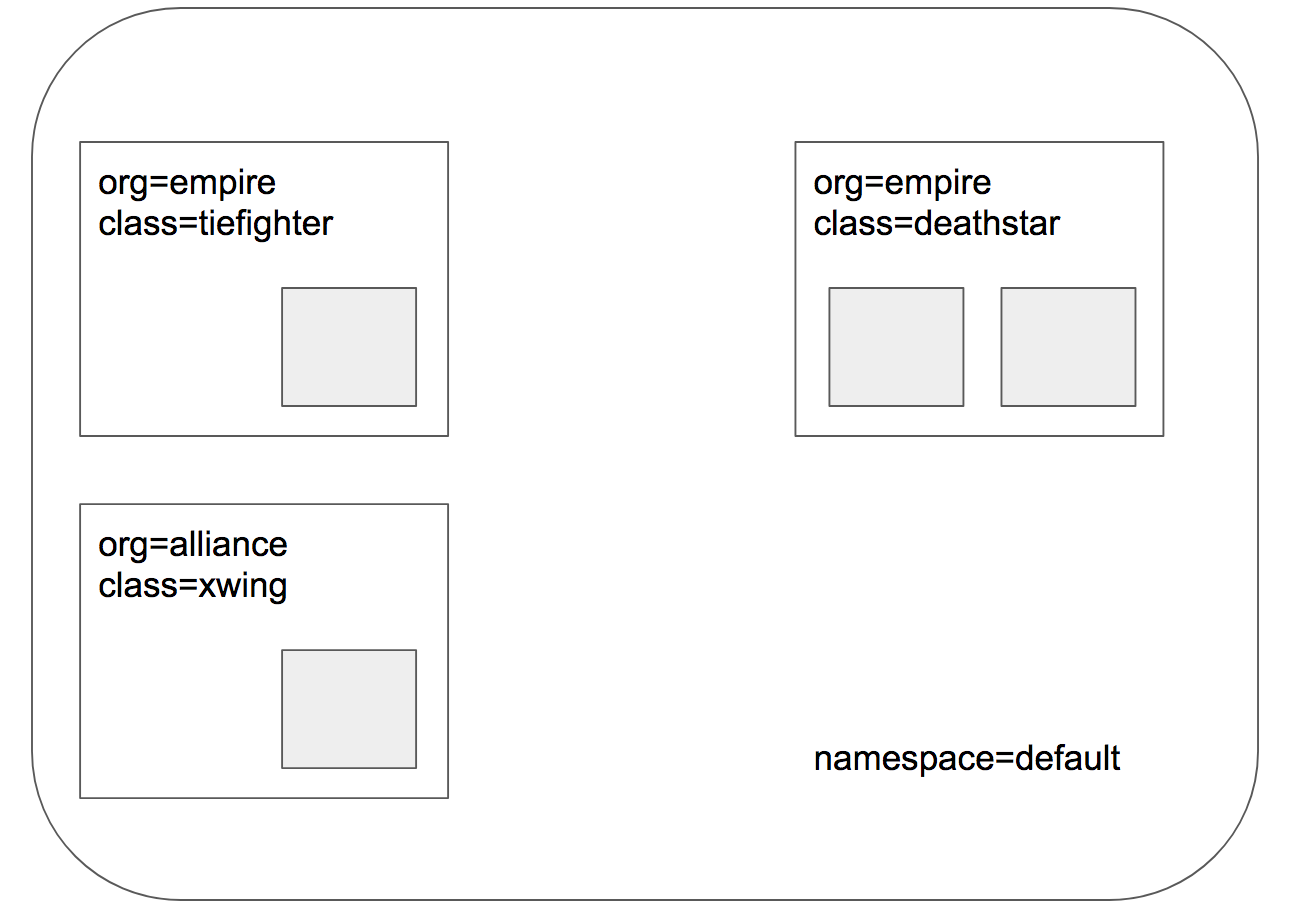 根据文件[http-sw-app.yaml](../../../roles/cilium/files/star_war_example/http-sw-app.yaml) 创建 `$ kubectl create -f http-sw-app.yaml` 后,验证如下:
``` bash
$ kubectl get pods,svc
NAME READY STATUS RESTARTS AGE
pod/deathstar-5fc7c7795d-djf2q 1/1 Running 0 4h
pod/deathstar-5fc7c7795d-hrgst 1/1 Running 0 4h
pod/tiefighter 1/1 Running 0 4h
pod/xwing 1/1 Running 0 4h
NAME TYPE CLUSTER-IP EXTERNAL-IP PORT(S) AGE
service/deathstar ClusterIP 10.68.242.130 80/TCP 4h
service/kubernetes ClusterIP 10.68.0.1 443/TCP 5h
```
每个 POD 在 `cilium` 中都表示为 `Endpoint`,初始每个 `Endpoint` 的”进出安全策略“状态均为 `Disabled`,如下:(已省略部分无关 POD 信息)
``` bash
$ kubectl exec -n kube-system cilium-6t5vx -- cilium endpoint list
ENDPOINT POLICY (ingress) POLICY (egress) IDENTITY LABELS (source:key[=value]) IPv6 IPv4 STATUS
ENFORCEMENT ENFORCEMENT
643 Disabled Disabled 31371 k8s:class=deathstar f00d::ac14:0:0:283 172.20.0.246 ready
k8s:io.cilium.k8s.policy.serviceaccount=default
k8s:io.kubernetes.pod.namespace=default
k8s:org=empire
1011 Disabled Disabled 31371 k8s:class=deathstar f00d::ac14:0:0:3f3 172.20.0.63 ready
k8s:io.cilium.k8s.policy.serviceaccount=default
k8s:io.kubernetes.pod.namespace=default
k8s:org=empire
32030 Disabled Disabled 5350 k8s:class=tiefighter f00d::ac14:0:0:7d1e 172.20.0.201 ready
k8s:io.cilium.k8s.policy.serviceaccount=default
k8s:io.kubernetes.pod.namespace=default
k8s:org=empire
45943 Disabled Disabled 14309 k8s:class=xwing f00d::ac14:0:0:b377 172.20.0.189 ready
k8s:io.cilium.k8s.policy.serviceaccount=default
k8s:io.kubernetes.pod.namespace=default
k8s:org=alliance
52035 Disabled Disabled 4 reserved:health f00d::ac14:0:0:cb43 172.20.0.92 ready
```
### 检查初始状态
当然“死星”应该只允许“帝国”的飞船着陆,因为没有应用任何策略,所以初始状态下“帝国”和“联盟”的飞船都可以登陆,如下测试:
``` bash
$ kubectl exec xwing -- curl -s -XPOST deathstar.default.svc.cluster.local/v1/request-landing
Ship landed # 成功着陆
$ kubectl exec tiefighter -- curl -s -XPOST deathstar.default.svc.cluster.local/v1/request-landing
Ship landed # 成功着陆
```
### 应用 L3/L4 策略
现在我们应用策略,仅让带有标签 `org=empire`的飞船登陆“死星”;那么带有标签 `org=alliance`的“联盟”飞船将禁止登陆;这个就是我们熟悉的传统L3/L4 防火墙策略,并跟踪连接(会话)状态;
根据文件[http-sw-app.yaml](../../../roles/cilium/files/star_war_example/http-sw-app.yaml) 创建 `$ kubectl create -f http-sw-app.yaml` 后,验证如下:
``` bash
$ kubectl get pods,svc
NAME READY STATUS RESTARTS AGE
pod/deathstar-5fc7c7795d-djf2q 1/1 Running 0 4h
pod/deathstar-5fc7c7795d-hrgst 1/1 Running 0 4h
pod/tiefighter 1/1 Running 0 4h
pod/xwing 1/1 Running 0 4h
NAME TYPE CLUSTER-IP EXTERNAL-IP PORT(S) AGE
service/deathstar ClusterIP 10.68.242.130 80/TCP 4h
service/kubernetes ClusterIP 10.68.0.1 443/TCP 5h
```
每个 POD 在 `cilium` 中都表示为 `Endpoint`,初始每个 `Endpoint` 的”进出安全策略“状态均为 `Disabled`,如下:(已省略部分无关 POD 信息)
``` bash
$ kubectl exec -n kube-system cilium-6t5vx -- cilium endpoint list
ENDPOINT POLICY (ingress) POLICY (egress) IDENTITY LABELS (source:key[=value]) IPv6 IPv4 STATUS
ENFORCEMENT ENFORCEMENT
643 Disabled Disabled 31371 k8s:class=deathstar f00d::ac14:0:0:283 172.20.0.246 ready
k8s:io.cilium.k8s.policy.serviceaccount=default
k8s:io.kubernetes.pod.namespace=default
k8s:org=empire
1011 Disabled Disabled 31371 k8s:class=deathstar f00d::ac14:0:0:3f3 172.20.0.63 ready
k8s:io.cilium.k8s.policy.serviceaccount=default
k8s:io.kubernetes.pod.namespace=default
k8s:org=empire
32030 Disabled Disabled 5350 k8s:class=tiefighter f00d::ac14:0:0:7d1e 172.20.0.201 ready
k8s:io.cilium.k8s.policy.serviceaccount=default
k8s:io.kubernetes.pod.namespace=default
k8s:org=empire
45943 Disabled Disabled 14309 k8s:class=xwing f00d::ac14:0:0:b377 172.20.0.189 ready
k8s:io.cilium.k8s.policy.serviceaccount=default
k8s:io.kubernetes.pod.namespace=default
k8s:org=alliance
52035 Disabled Disabled 4 reserved:health f00d::ac14:0:0:cb43 172.20.0.92 ready
```
### 检查初始状态
当然“死星”应该只允许“帝国”的飞船着陆,因为没有应用任何策略,所以初始状态下“帝国”和“联盟”的飞船都可以登陆,如下测试:
``` bash
$ kubectl exec xwing -- curl -s -XPOST deathstar.default.svc.cluster.local/v1/request-landing
Ship landed # 成功着陆
$ kubectl exec tiefighter -- curl -s -XPOST deathstar.default.svc.cluster.local/v1/request-landing
Ship landed # 成功着陆
```
### 应用 L3/L4 策略
现在我们应用策略,仅让带有标签 `org=empire`的飞船登陆“死星”;那么带有标签 `org=alliance`的“联盟”飞船将禁止登陆;这个就是我们熟悉的传统L3/L4 防火墙策略,并跟踪连接(会话)状态;
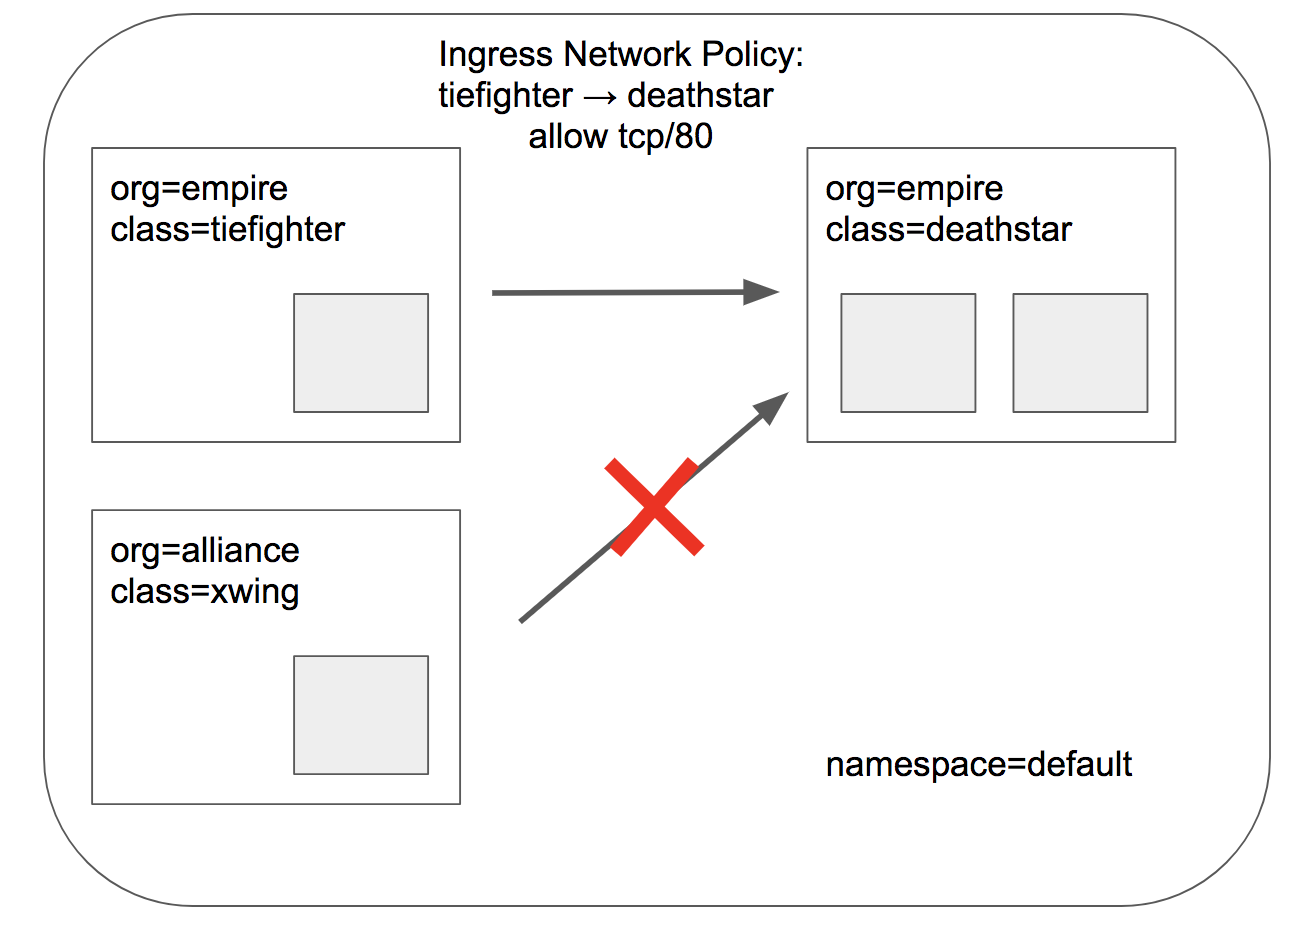 根据文件[sw_l3_l4_policy.yaml](../../../roles/cilium/files/star_war_example/sw_l3_l4_policy.yaml) 创建 `$ kubectl apply -f sw_l3_l4_policy.yaml` 后,验证如下:
``` bash
$ kubectl exec tiefighter -- curl -s -XPOST deathstar.default.svc.cluster.local/v1/request-landing
Ship landed # 成功着陆
$ kubectl exec xwing -- curl -s -XPOST deathstar.default.svc.cluster.local/v1/request-landing
# 失败超时
```
### 查看安全策略
再次执行 `cilium endpoint list`,可以看到标签带`deathstar`的 POD 已经应用了 `Ingress`方向的策略:
``` bash
# kubectl exec -n kube-system cilium-6t5vx -- cilium endpoint list
ENDPOINT POLICY (ingress) POLICY (egress) IDENTITY LABELS (source:key[=value]) IPv6 IPv4 STATUS
ENFORCEMENT ENFORCEMENT
643 Enabled Disabled 31371 k8s:class=deathstar f00d::ac14:0:0:283 172.20.0.246 ready
k8s:io.cilium.k8s.policy.serviceaccount=default
k8s:io.kubernetes.pod.namespace=default
k8s:org=empire
1011 Enabled Disabled 31371 k8s:class=deathstar f00d::ac14:0:0:3f3 172.20.0.63 ready
k8s:io.cilium.k8s.policy.serviceaccount=default
k8s:io.kubernetes.pod.namespace=default
k8s:org=empire
32030 Disabled Disabled 5350 k8s:class=tiefighter f00d::ac14:0:0:7d1e 172.20.0.201 ready
k8s:io.cilium.k8s.policy.serviceaccount=default
k8s:io.kubernetes.pod.namespace=default
k8s:org=empire
45943 Disabled Disabled 14309 k8s:class=xwing f00d::ac14:0:0:b377 172.20.0.189 ready
k8s:io.cilium.k8s.policy.serviceaccount=default
k8s:io.kubernetes.pod.namespace=default
k8s:org=alliance
52035 Disabled Disabled 4 reserved:health f00d::ac14:0:0:cb43 172.20.0.92 ready
```
查看具体策略内容 `kubectl describe cnp rule1`
### L7 安全策略
上述的策略可以进行简单的安全防护了,但是“死星”的这个系统还有很多复杂的功能;比如它还提供了一个内部维护接口,如果被不合理调用将带来严重灾难性后果,也许“联盟”勇士劫持了一架“帝国”飞船正在进行这个任务(虽然我们内心希望他能够成功摧毁“死星”)。不幸的是“死星”系统设计者考虑到这个风险,它有办法严格限制每架飞船能够请求的权限。
没有限制飞船请求权限时,如下运行:
``` bash
$ kubectl exec tiefighter -- curl -s -XPUT deathstar.default.svc.cluster.local/v1/exhaust-port
Panic: deathstar exploded
goroutine 1 [running]:
main.HandleGarbage(0x2080c3f50, 0x2, 0x4, 0x425c0, 0x5, 0xa)
/code/src/github.com/empire/deathstar/
temp/main.go:9 +0x64
main.main()
/code/src/github.com/empire/deathstar/
temp/main.go:5 +0x85
```
根据文件[sw_l3_l4_policy.yaml](../../../roles/cilium/files/star_war_example/sw_l3_l4_policy.yaml) 创建 `$ kubectl apply -f sw_l3_l4_policy.yaml` 后,验证如下:
``` bash
$ kubectl exec tiefighter -- curl -s -XPOST deathstar.default.svc.cluster.local/v1/request-landing
Ship landed # 成功着陆
$ kubectl exec xwing -- curl -s -XPOST deathstar.default.svc.cluster.local/v1/request-landing
# 失败超时
```
### 查看安全策略
再次执行 `cilium endpoint list`,可以看到标签带`deathstar`的 POD 已经应用了 `Ingress`方向的策略:
``` bash
# kubectl exec -n kube-system cilium-6t5vx -- cilium endpoint list
ENDPOINT POLICY (ingress) POLICY (egress) IDENTITY LABELS (source:key[=value]) IPv6 IPv4 STATUS
ENFORCEMENT ENFORCEMENT
643 Enabled Disabled 31371 k8s:class=deathstar f00d::ac14:0:0:283 172.20.0.246 ready
k8s:io.cilium.k8s.policy.serviceaccount=default
k8s:io.kubernetes.pod.namespace=default
k8s:org=empire
1011 Enabled Disabled 31371 k8s:class=deathstar f00d::ac14:0:0:3f3 172.20.0.63 ready
k8s:io.cilium.k8s.policy.serviceaccount=default
k8s:io.kubernetes.pod.namespace=default
k8s:org=empire
32030 Disabled Disabled 5350 k8s:class=tiefighter f00d::ac14:0:0:7d1e 172.20.0.201 ready
k8s:io.cilium.k8s.policy.serviceaccount=default
k8s:io.kubernetes.pod.namespace=default
k8s:org=empire
45943 Disabled Disabled 14309 k8s:class=xwing f00d::ac14:0:0:b377 172.20.0.189 ready
k8s:io.cilium.k8s.policy.serviceaccount=default
k8s:io.kubernetes.pod.namespace=default
k8s:org=alliance
52035 Disabled Disabled 4 reserved:health f00d::ac14:0:0:cb43 172.20.0.92 ready
```
查看具体策略内容 `kubectl describe cnp rule1`
### L7 安全策略
上述的策略可以进行简单的安全防护了,但是“死星”的这个系统还有很多复杂的功能;比如它还提供了一个内部维护接口,如果被不合理调用将带来严重灾难性后果,也许“联盟”勇士劫持了一架“帝国”飞船正在进行这个任务(虽然我们内心希望他能够成功摧毁“死星”)。不幸的是“死星”系统设计者考虑到这个风险,它有办法严格限制每架飞船能够请求的权限。
没有限制飞船请求权限时,如下运行:
``` bash
$ kubectl exec tiefighter -- curl -s -XPUT deathstar.default.svc.cluster.local/v1/exhaust-port
Panic: deathstar exploded
goroutine 1 [running]:
main.HandleGarbage(0x2080c3f50, 0x2, 0x4, 0x425c0, 0x5, 0xa)
/code/src/github.com/empire/deathstar/
temp/main.go:9 +0x64
main.main()
/code/src/github.com/empire/deathstar/
temp/main.go:5 +0x85
```
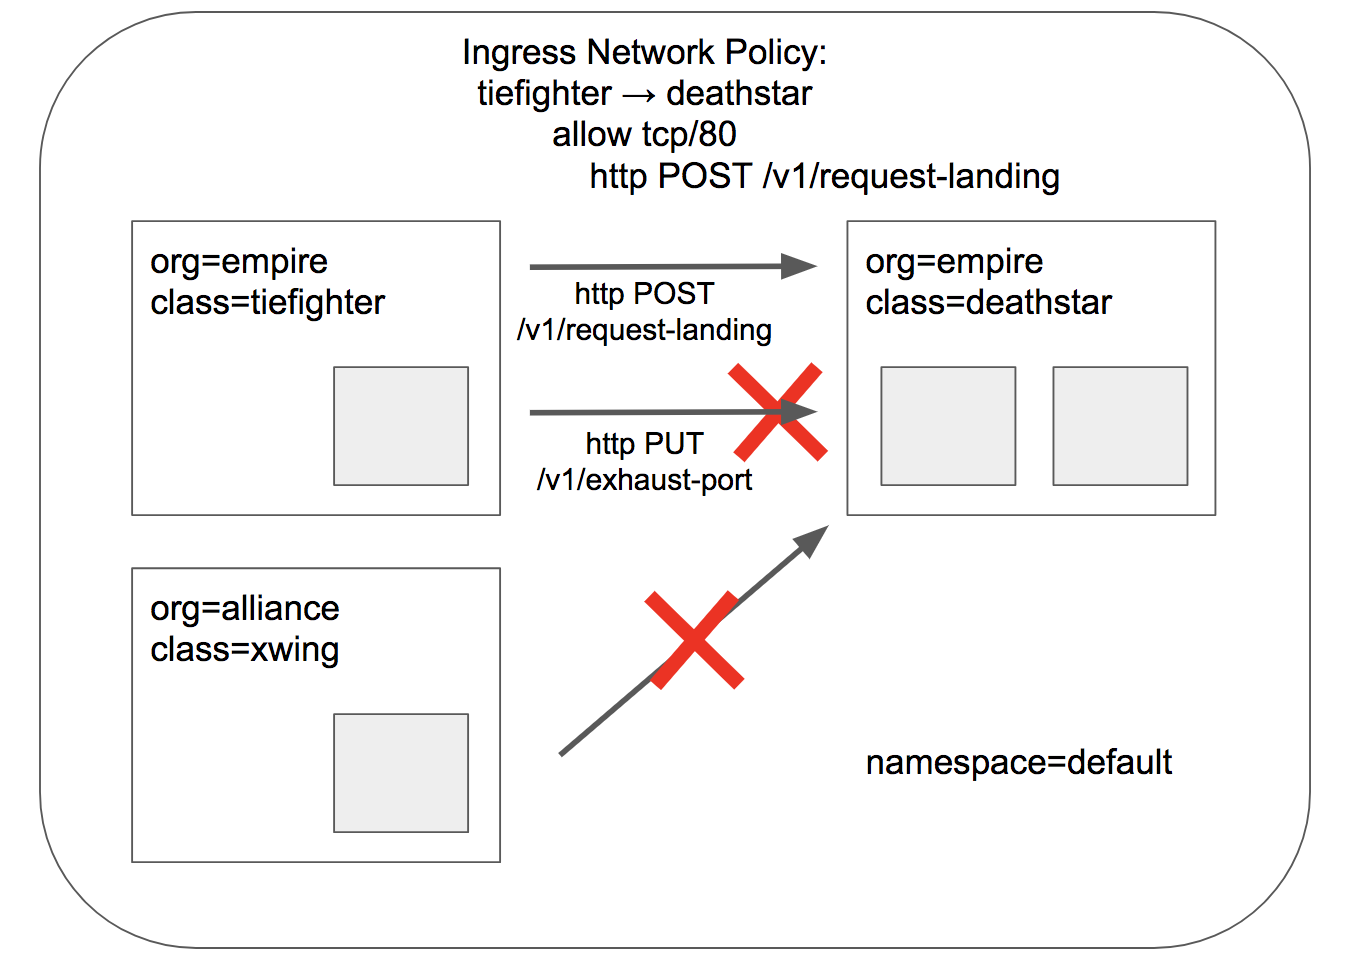 限制L7 的安全策略,根据文件[sw_l3_l4_l7_policy.yaml](../../../roles/cilium/files/star_war_example/sw_l3_l4_l7_policy.yaml) 创建 `$ kubectl apply -f sw_l3_l4_l7_policy.yaml` 后,验证如下:
``` bash
$ kubectl exec tiefighter -- curl -s -XPOST deathstar.default.svc.cluster.local/v1/request-landing
Ship landed
$ kubectl exec tiefighter -- curl -s -XPUT deathstar.default.svc.cluster.local/v1/exhaust-port
Access denied
```
我们同样可以使用 `kubectl desribe cnp`检查更新的策略,或者使用 `cilium` 命令行:
``` bash
$ kubectl exec -n kube-system cilium-6t5vx -- cilium policy get
[
{
"endpointSelector": {
"matchLabels": {
"any:class": "deathstar",
"any:org": "empire",
"k8s:io.kubernetes.pod.namespace": "default"
}
},
"ingress": [
{
"fromEndpoints": [
{
"matchLabels": {
"any:org": "empire",
"k8s:io.kubernetes.pod.namespace": "default"
}
}
],
"toPorts": [
{
"ports": [
{
"port": "80",
"protocol": "TCP"
}
],
"rules": {
"http": [
{
"path": "/v1/request-landing",
"method": "POST"
}
]
}
}
]
}
],
"labels": [
{
"key": "io.cilium.k8s.policy.name",
"value": "rule1",
"source": "k8s"
},
{
"key": "io.cilium.k8s.policy.namespace",
"value": "default",
"source": "k8s"
}
]
}
]
Revision: 267
```
我们看到 `cilium` 可以实现 `7层 HTTP `协议的请求方法(GET/PUT/POST等)、路径(/v1/request-landing)等等安全策略;另外,它还可以防护其他应用(如:Kafka, gRPC, Elasticsearch),可以去官网文档示例学习!
## 参考资料
- [cilium github](https://github.com/cilium/cilium)
- [cilium doc](http://docs.cilium.io)
================================================
FILE: docs/setup/network-plugin/cilium.md
================================================
# 06-安装cilium网络组件
`cilium` 是一个革新的网络与安全组件;基于 linux 内核新技术--`BPF`,它可以透明、零侵入地实现服务间安全策略与可视化,主要优势如下:
- 支持L3/L4, L7(如:HTTP/gRPC/Kafka)的安全策略
- 支持基于安全ID而不是地址+端口的传统防火墙策略
- 支持基于Overlay或Native Routing的扁平多节点pod网络
- Overlay VXLAN 方式类似于 flannel 的VXLAN后端
- 高性能负载均衡,支持DSR
- 支持事件、策略跟踪和监控集成
cilium 项目文档比较完整,建议仔细阅读[官网文档]()
## kubeasz 集成安装 cilium
kubeasz 3.3.1 更新重写了cilium 安装流程,使用helm charts 方式,配置文件在 roles/cilium/templates/values.yaml.j2,请阅读原charts中values.yaml 文件后自定义修改。
- https://docs.cilium.io/en/stable/installation/k8s-install-helm/#k8s-install-helm
- 相关镜像已经离线打包并推送到本地镜像仓库,通过 `ezdown -X` 命令下载cilium等额外镜像
### 0.检查系统内核版本
- Linux kernel >= 4.9.17,如需升级请阅读文档[升级内核](guide/kernel_upgrade.md)
- etcd >= 3.1.0 or consul >= 0.6.4
### 1.选择cilium网络后安装
- 参考[快速指南](../quickStart.md),设置`/etc/kubeasz/clusters/xxx/hosts`文件中变量 `CLUSTER_NETWORK="cilium"`
- 下载额外镜像 `./ezdown -X cilium 和 ./ezdown -X network-check`
- 执行集群安装 `dk ezctl setup xxx all`
注意默认设置未集成cilium_hubble,可以在`/etc/kubeasz/clusters/xxx/config.yml`配置启用后再开始安装。
- cilium_connectivity_check:检查集群cilium网络是否工作正常,非常实用
- cilium_hubble:很酷很实用的监控、策略追踪排查工具
Cilium CLI 和 Hubble CLI 二进制已经默认包含在kubeasz-ext-bin 1.2.0及之后的版本中 https://github.com/kubeasz/dockerfiles/blob/master/kubeasz-ext-bin/Dockerfile
### 2.验证
一键安装完成后如下,注意cilium_connectivity_check 中带`multi-node`的检查任务需要多节点集群才能完成
```
kubectl get pod -A
NAMESPACE NAME READY STATUS RESTARTS AGE
cilium-test echo-a-5dd478f5d8-74xg5 1/1 Running 0 3m10s
cilium-test echo-b-78c79f6cdd-t9vk6 1/1 Running 0 3m10s
cilium-test echo-b-host-75c44b897-c8f5m 1/1 Running 0 3m10s
cilium-test host-to-b-multi-node-clusterip-7895fd494c-92cb2 1/1 Running 0 2m59s
cilium-test host-to-b-multi-node-headless-74bbc877b5-ffxxx 1/1 Running 0 2m59s
cilium-test pod-to-a-allowed-cnp-598fc5c547-b885q 1/1 Running 0 2m59s
cilium-test pod-to-a-b8b456c99-r6272 1/1 Running 0 2m59s
cilium-test pod-to-a-denied-cnp-c78c44f5c-7xhkw 1/1 Running 0 2m59s
cilium-test pod-to-b-intra-node-nodeport-6ccdb55779-j8gnd 1/1 Running 0 2m59s
cilium-test pod-to-b-multi-node-clusterip-55d8448b5c-5b4nj 1/1 Running 0 2m59s
cilium-test pod-to-b-multi-node-headless-5fbf655bb9-pszpr 1/1 Running 0 2m59s
cilium-test pod-to-b-multi-node-nodeport-65f5b95569-qglb7 1/1 Running 0 2m59s
cilium-test pod-to-external-1111-64496c754c-bvqlt 1/1 Running 0 2m59s
cilium-test pod-to-external-fqdn-allow-baidu-cnp-6f96597855-c84zs 1/1 Running 0 2m59s
kube-system cilium-7trcs 1/1 Running 0 3m42s
kube-system cilium-hvclp 1/1 Running 0 3m42s
kube-system cilium-operator-8566689975-vcxpp 1/1 Running 0 3m42s
kube-system cilium-pw2sv 1/1 Running 0 3m42s
kube-system cilium-qppnc 1/1 Running 0 3m42s
kube-system coredns-84b58f6b4-m8x7s 1/1 Running 0 3m20s
kube-system dashboard-metrics-scraper-864d79d497-92l2w 1/1 Running 0 3m14s
kube-system hubble-relay-655dc744d7-8d9n7 1/1 Running 0 3m42s
kube-system hubble-ui-54599d7967-lfkvk 2/2 Running 0 3m42s
kube-system kubernetes-dashboard-5fc74cf5c6-pqdvc 1/1 Running 0 3m14s
kube-system metrics-server-69797698d4-2jbg8 1/1 Running 0 3m17s
kube-system node-local-dns-5n8gc 1/1 Running 0 3m19s
kube-system node-local-dns-5pm2p 1/1 Running 0 3m19s
kube-system node-local-dns-9x229 1/1 Running 0 3m19s
kube-system node-local-dns-jz8lj 1/1 Running 0 3m19s
```
检查 cilium 节点状态
```
cilium status
/¯¯\
/¯¯\__/¯¯\ Cilium: OK
\__/¯¯\__/ Operator: OK
/¯¯\__/¯¯\ Hubble: OK
\__/¯¯\__/ ClusterMesh: disabled
\__/
DaemonSet cilium Desired: 4, Ready: 4/4, Available: 4/4
Deployment cilium-operator Desired: 1, Ready: 1/1, Available: 1/1
Deployment hubble-relay Desired: 1, Ready: 1/1, Available: 1/1
Deployment hubble-ui Desired: 1, Ready: 1/1, Available: 1/1
Containers: cilium Running: 4
cilium-operator Running: 1
hubble-relay Running: 1
hubble-ui Running: 1
Cluster Pods: 17/17 managed by Cilium
Image versions hubble-relay easzlab.io.local:5000/cilium/hubble-relay:v1.11.6: 1
hubble-ui easzlab.io.local:5000/cilium/hubble-ui:v0.9.0: 1
hubble-ui easzlab.io.local:5000/cilium/hubble-ui-backend:v0.9.0: 1
cilium easzlab.io.local:5000/cilium/cilium:v1.11.6: 4
cilium-operator easzlab.io.local:5000/cilium/operator-generic:v1.11.6: 1
```
## cilium network policy
cilium network policy 提供了比k8s network policy更丰富的网络安全策略功能,有兴趣的请阅读官网文档,以下是一个有趣的小例子:
- [星战死星登陆系统](cilium-example.md)
================================================
FILE: docs/setup/network-plugin/flannel.md
================================================
## 06-安装flannel网络组件.md
`Flannel`是最早应用到k8s集群的网络插件之一,简单高效,且提供多个后端`backend`模式供选择;本文介绍以`DaemonSet Pod`方式集成到k8s集群,需要在所有master节点和node节点安装。
### kubeasz 集成安装flannel
- 参考[快速指南](../quickStart.md),设置`/etc/kubeasz/clusters/xxx/hosts`文件中变量 `CLUSTER_NETWORK="flannel"`
- 下载额外镜像 `./ezdown -X flannel`
- 执行集群安装 `dk ezctl setup xxx all`
### 配置介绍
Flannel CNI 插件的配置文件可以包含多个`plugin` 或由其调用其他`plugin`;`Flannel DaemonSet Pod`运行以后会生成`/run/flannel/subnet.env `文件,例如:
``` bash
FLANNEL_NETWORK=10.1.0.0/16
FLANNEL_SUBNET=10.1.17.1/24
FLANNEL_MTU=1472
FLANNEL_IPMASQ=true
```
然后它利用这个文件信息去配置和调用`bridge`插件来生成容器网络,调用`host-local`来管理`IP`地址,例如:
``` bash
{
"name": "mynet",
"type": "bridge",
"mtu": 1472,
"ipMasq": false,
"isGateway": true,
"ipam": {
"type": "host-local",
"subnet": "10.1.17.0/24"
}
}
```
- 更多相关介绍请阅读:
- [flannel kubernetes 集成](https://github.com/coreos/flannel/blob/master/Documentation/kubernetes.md)
- [flannel cni 插件](https://github.com/containernetworking/plugins/tree/master/plugins/meta/flannel)
- [更多 cni 插件](https://github.com/containernetworking/plugins)
- `Flannel DaemonSet` yaml配置文件
请阅读 `roles/flannel/templates/kube-flannel.yaml.j2` 内容,注意:
+ 注意:本安装方式,flannel 通过 apiserver 接口读取 podCidr 信息,详见 https://github.com/coreos/flannel/issues/847;因此想要修改节点pod网段掩码,请在`clusters/xxxx/config.yml` 中修改`NODE_CIDR_LEN`配置项
+ 配置相关RBAC 权限和 `service account`
+ 配置`ConfigMap`包含 CNI配置和 flannel配置(指定backend等),在文件中相关设置对应
### 验证flannel网络
执行flannel安装成功后可以验证如下:(需要等待镜像下载完成,有时候即便上一步已经配置了docker国内加速,还是可能比较慢,请确认以下容器运行起来以后,再执行后续验证步骤)
``` bash
# kubectl get pod --all-namespaces
NAMESPACE NAME READY STATUS RESTARTS AGE
kube-system kube-flannel-ds-m8mzm 1/1 Running 0 3m
kube-system kube-flannel-ds-mnj6j 1/1 Running 0 3m
kube-system kube-flannel-ds-mxn6k 1/1 Running 0 3m
```
在集群创建几个测试pod: `kubectl run test --image=busybox --replicas=3 sleep 30000`
``` bash
# kubectl get pod --all-namespaces -o wide|head -n 4
NAMESPACE NAME READY STATUS RESTARTS AGE IP NODE
default busy-5956b54c8b-ld4gb 1/1 Running 0 9m 172.20.2.7 192.168.1.1
default busy-5956b54c8b-lj9l9 1/1 Running 0 9m 172.20.1.5 192.168.1.2
default busy-5956b54c8b-wwpkz 1/1 Running 0 9m 172.20.0.6 192.168.1.3
# 查看路由
# ip route
default via 192.168.1.254 dev ens3 onlink
192.168.1.0/24 dev ens3 proto kernel scope link src 192.168.1.1
172.17.0.0/16 dev docker0 proto kernel scope link src 172.17.0.1 linkdown
172.20.0.0/24 via 192.168.1.3 dev ens3
172.20.1.0/24 via 192.168.1.2 dev ens3
172.20.2.0/24 dev cni0 proto kernel scope link src 172.20.2.1
```
在各节点上分别 ping 这三个POD IP地址,确保能通:
``` bash
ping 172.20.2.7
ping 172.20.1.5
ping 172.20.0.6
```
================================================
FILE: docs/setup/network-plugin/kube-ovn.md
================================================
## 06-安装kube-ovn网络组件.md
(以下文档暂未更新,以插件官网文档为准)
由灵雀云开源的网络组件 kube-ovn,将已被 openstack 社区采用的成熟网络虚拟化技术 ovs/ovn 引入 kubernetes 平台;为 kubernetes 网络打开了新的大门,令人耳目一新;强烈推荐大家试用该网络组件,反馈建议以帮助项目早日走向成熟。
- 介绍 https://blog.csdn.net/alauda_andy/article/details/88886128
- 项目地址 https://github.com/alauda/kube-ovn
### 特性介绍
kube-ovn 提供了针对企业应用场景下容器网络实用功能,并为实现更高级的网络管理控制提供了可能性;现有主要功能:
- 1.Namespace 和子网的绑定,以及子网间的访问控制;
- 2.静态IP分配;
- 3.动态QoS;
- 4.分布式和集中式网关;
- 5.内嵌 LoadBalancer;
- 6.Pod IP对外直接暴露
- 7.流量镜像
- 8.IPv6
### kubeasz 集成安装 kube-ovn
kube-ovn 的安装十分简单,详见项目的安装文档;基于 kubeasz,以下两步将安装一个集成了 kube-ovn 网络的 k8s 集群;
- 在 ansible hosts 中设置变量 `CLUSTER_NETWORK="kube-ovn"`
- 执行安装 `ansible-playbook 90.setup.yml` 或者 `ezctl setup`
kubeasz 项目为`kube-ovn`网络生成的 ansible role 如下:
``` bash
roles/kube-ovn
├── defaults
│ └── main.yml # kube-ovn 相关配置文件
├── tasks
│ └── main.yml # 安装执行文件
└── templates
├── crd.yaml.j2 # crd 模板
├── kube-ovn.yaml.j2 # kube-ovn yaml 模板
└── ovn.yaml.j2 # ovn yaml 模板
```
安装成功后,可以验证所有 k8s 集群功能正常,查看集群的 pod 网络如下:
```
$ kubectl get pod --all-namespaces -o wide
NAMESPACE NAME READY STATUS RESTARTS AGE IP NODE NOMINATED NODE READINESS GATES
kube-ovn kube-ovn-cni-5php2 1/1 Running 2 35h 192.168.1.43 192.168.1.43
kube-ovn kube-ovn-cni-7dwmx 1/1 Running 2 35h 192.168.1.42 192.168.1.42
kube-ovn kube-ovn-cni-lhlvl 1/1 Running 2 35h 192.168.1.41 192.168.1.41
kube-ovn kube-ovn-controller-57955db7b4-6x6hd 1/1 Running 0 35h 192.168.1.43 192.168.1.43
kube-ovn kube-ovn-controller-57955db7b4-chvz4 1/1 Running 0 35h 192.168.1.42 192.168.1.42
kube-ovn ovn-central-bb8747d77-tr5nz 1/1 Running 0 35h 192.168.1.41 192.168.1.41
kube-ovn ovs-ovn-2qhhr 1/1 Running 0 35h 192.168.1.41 192.168.1.41
kube-ovn ovs-ovn-np8rn 1/1 Running 0 35h 192.168.1.43 192.168.1.43
kube-ovn ovs-ovn-pkjw4 1/1 Running 0 35h 192.168.1.42 192.168.1.42
kube-system coredns-55f46dd959-76qb5 1/1 Running 0 35h 10.16.0.12 192.168.1.42
kube-system coredns-55f46dd959-wn8kw 1/1 Running 0 35h 10.16.0.11 192.168.1.43
kube-system heapster-fdb7596d6-xmmrx 1/1 Running 0 35h 10.16.0.15 192.168.1.42
kube-system kubernetes-dashboard-68ddcc97fc-dwzbf 1/1 Running 0 35h 10.16.0.14 192.168.1.42
kube-system metrics-server-6c898b5b8b-zvct2 1/1 Running 0 35h 10.16.0.13 192.168.1.43
```
直观上 kube-ovn 与传统 k8s 网络(flannel/calico等)比较最大的不同是 pod 子网的分配:
- 传统网络插件下,集群中 pod 一般是不同 node 节点分配不同的子网;然后通过 overlay 等技术打通不同 node 节点的 pod 子网;
- kube-ovn 中 pod 网络根据其所在的 namespace 而定; namespace 在创建时可以根据 annotation 来配置它的子网/网关等参数;默认使用 10.16.0.0/16 的子网;
### 测试 namespace 子网分配
新建一个 subnet 并绑定 namespace 测试分配一个新的 pod 子网
```
# 创建一个 namespace: test-ns
$ cat > test-ns.yaml << EOF
apiVersion: v1
kind: Namespace
metadata:
annotations:
name: test-ns
EOF
$ kubectl apply -f test-ns.yaml
# 创建一个 subnet: test-subnet 并绑定 namespace test-ns
$ cat > test-subnet.yaml << EOF
apiVersion: kubeovn.io/v1
kind: Subnet
metadata:
name: test-subnet
spec:
protocol: IPv4
default: false
namespaces:
- test-ns
cidrBlock: 10.17.0.0/24
gateway: 10.17.0.1
excludeIps:
- 10.17.0.1..10.17.0.10
EOF
$ kubectl apply -f test-subnet.yaml
# 在 test-ns 中创建 nginx 部署
$ kubectl run -n test-ns nginx --image=nginx --replicas=2 --port=80 --expose
# 在 default 中创建 busy 客户端
$ kubectl run busy --image=busybox sleep 360000
```
创建成功后,查看 pod 地址的分配,可以看到确实 test-ns 中 pod 使用新的子网,而 default 中 pod 使用了默认子网,并验证 pod 之间的联通性(默认可通)
```
$ kubectl get pod --all-namespaces -o wide
NAMESPACE NAME READY STATUS RESTARTS AGE IP NODE NOMINATED NODE READINESS GATES
default busy-6c55ccddc5-qrm5j 1/1 Running 0 31h 10.16.0.16 192.168.1.43
kube-ovn kube-ovn-cni-5php2 1/1 Running 2 35h 192.168.1.43 192.168.1.43
kube-ovn kube-ovn-cni-7dwmx 1/1 Running 2 35h 192.168.1.42 192.168.1.42
kube-ovn kube-ovn-cni-lhlvl 1/1 Running 2 35h 192.168.1.41 192.168.1.41
kube-ovn kube-ovn-controller-57955db7b4-6x6hd 1/1 Running 0 35h 192.168.1.43 192.168.1.43
kube-ovn kube-ovn-controller-57955db7b4-chvz4 1/1 Running 0 35h 192.168.1.42 192.168.1.42
kube-ovn ovn-central-bb8747d77-tr5nz 1/1 Running 0 35h 192.168.1.41 192.168.1.41
kube-ovn ovs-ovn-2qhhr 1/1 Running 0 35h 192.168.1.41 192.168.1.41
kube-ovn ovs-ovn-np8rn 1/1 Running 0 35h 192.168.1.43 192.168.1.43
kube-ovn ovs-ovn-pkjw4 1/1 Running 0 35h 192.168.1.42 192.168.1.42
kube-system coredns-55f46dd959-76qb5 1/1 Running 0 35h 10.16.0.12 192.168.1.42
kube-system coredns-55f46dd959-wn8kw 1/1 Running 0 35h 10.16.0.11 192.168.1.43
kube-system heapster-fdb7596d6-xmmrx 1/1 Running 0 35h 10.16.0.15 192.168.1.42
kube-system kubernetes-dashboard-68ddcc97fc-dwzbf 1/1 Running 0 35h 10.16.0.14 192.168.1.42
kube-system metrics-server-6c898b5b8b-zvct2 1/1 Running 0 35h 10.16.0.13 192.168.1.43
test-ns nginx-755464dd6c-s6flj 1/1 Running 0 31h 10.17.0.12 192.168.1.42
test-ns nginx-755464dd6c-zct56 1/1 Running 0 31h 10.17.0.11 192.168.1.43
```
- 更多的测试(pod网络QOS限速,namespace网络隔离等)请参考 kube-ovn 项目说明文档
### 延伸阅读
- [kube-ovn 官方文档](https://github.com/alauda/kube-ovn/tree/master/docs)
- [从 Bridge 到 OVS,探索虚拟交换机](https://www.cnblogs.com/bakari/p/8097439.html)
================================================
FILE: docs/setup/network-plugin/kube-router.md
================================================
# kube-router 网络组件
(以下文档暂未更新,以插件官网文档为准)
kube-router是一个简单、高效的网络插件,它提供一揽子解决方案:
- 基于GoBGP 提供Pod 网络互联(Routing)
- 使用ipsets优化的iptables 提供网络策略支持(Firewall/NetworkPolicy)
- 基于IPVS/LVS 提供高性能服务代理(Service Proxy)(注:由于 k8s 新版本中 ipvs 已可用,因此这里不选择启用kube-router基于ipvs的service proxy)
更多介绍请前往`https://github.com/cloudnativelabs/kube-router`
## 配置
本项目提供多种网络插件可选,如果需要安装kube-router,请在/etc/kubeasz/hosts文件中设置变量 `CLUSTER_NETWORK="kube-router"`,更多设置请查看`roles/kube-router/defaults/main.yml`
- kube-router需要在所有master节点和node节点安装
## 安装
- 单步安装已经集成:`ansible-playbook 90.setup.yml`
- 分步安装请执行:`ansible-playbook 06.network.yml`
## 验证
- 1.pod间网络联通性:略
- 2.host路由表
``` bash
# master上路由
root@master1:~$ ip route
...
172.20.1.0/24 via 192.168.1.2 dev ens3 proto 17
172.20.2.0/24 via 192.168.1.3 dev ens3 proto 17
...
# node3上路由
root@node3:~$ ip route
...
172.20.0.0/24 via 192.168.1.1 dev ens3 proto 17
172.20.1.0/24 via 192.168.1.2 dev ens3 proto 17
172.20.2.0/24 dev kube-bridge proto kernel scope link src 172.20.2.1
...
```
- 3.bgp连接状态
``` bash
# master上
root@master1:~$ netstat -antlp|grep router|grep LISH|grep 179
tcp 0 0 192.168.1.1:179 192.168.1.3:58366 ESTABLISHED 26062/kube-router
tcp 0 0 192.168.1.1:42537 192.168.1.2:179 ESTABLISHED 26062/kube-router
# node3上
root@node3:~$ netstat -antlp|grep router|grep LISH|grep 179
tcp 0 0 192.168.1.3:58366 192.168.1.1:179 ESTABLISHED 18897/kube-router
tcp 0 0 192.168.1.3:179 192.168.1.2:43928 ESTABLISHED 18897/kube-router
```
- 4.NetworkPolicy有效性,验证参照[这里](../../guide/networkpolicy.md)
- 5.ipset列表查看
``` bash
$ ipset list
...
Name: kube-router-pod-subnets
Type: hash:net
Revision: 6
Header: family inet hashsize 1024 maxelem 65536 timeout 0
Size in memory: 672
References: 2
Members:
172.20.1.0/24 timeout 0
172.20.2.0/24 timeout 0
172.20.0.0/24 timeout 0
Name: kube-router-node-ips
Type: hash:ip
Revision: 4
Header: family inet hashsize 1024 maxelem 65536 timeout 0
Size in memory: 416
References: 1
Members:
192.168.1.1 timeout 0
192.168.1.2 timeout 0
192.168.1.3 timeout 0
...
```
================================================
FILE: docs/setup/network-plugin/network-check.md
================================================
# network-check
网络测试组件,根据cilium connectivity-check 脚本修改而来;利用cronjob 定期检测集群各节点、容器、serviceip、nodeport等之间的网络联通性;可以方便的判断当前集群网络是否正常。
目前检测如下:
``` bash
kubectl get cronjobs.batch -n network-test
NAME SCHEDULE SUSPEND ACTIVE LAST SCHEDULE AGE
test01-pod-to-container */5 * * * * False 0 3m19s 6d3h
test02-pod-to-node-nodeport */5 * * * * False 0 3m19s 6d3h
test03-pod-to-multi-node-clusterip */5 * * * * False 1 6d3h 6d3h
test04-pod-to-multi-node-headless */5 * * * * False 1 6d3h 6d3h
test05-pod-to-multi-node-nodeport */5 * * * * False 1 6d3h 6d3h
test06-pod-to-external-1111 */5 * * * * False 0 3m19s 6d3h
test07-pod-to-external-fqdn-baidu */5 * * * * False 0 3m19s 6d3h
test08-host-to-multi-node-clusterip */5 * * * * False 1 6d3h 6d3h
test09-host-to-multi-node-headless */5 * * * * False 1 6d3h 6d3h
```
+ 带`multi-node`的测试需要多节点集群才能运行,如果单节点集群,测试pod会处于`Pending`状态
+ 带`external`的测试需要节点能够访问互联网,否则测试会失败
## 启用网络检测
- 下载额外容器镜像 `./ezdown -X network-check`
- 配置集群,在配置文件`/etc/kubeasz/clusters/xxx/config.yml` (xxx为集群名) 修改如下选项
```
# network-check 自动安装
network_check_enabled: true
network_check_schedule: "*/5 * * * *" # 检测频率,默认5分钟执行一次
```
- 安装网络检测插件 `docker exec -it kubeasz ezctl setup xxx 07`
## 检查测试结果
大约等待5分钟左右,查看运行结果,如果pod 状态为`Completed` 表示检测正常通过。
```
kubectl get pod -n network-test
NAME READY STATUS RESTARTS AGE
echo-server-58d7bb7f6-77ps6 1/1 Running 0 6d4h
echo-server-host-cc87c966d-bk57t 1/1 Running 0 6d4h
test01-pod-to-container-27606775-q6xlb 0/1 Completed 0 3m10s
test02-pod-to-node-nodeport-27606775-x2v5d 0/1 Completed 0 3m10s
test03-pod-to-multi-node-clusterip-27597895-cbq8d 0/1 Pending 0 6d4h
test04-pod-to-multi-node-headless-27597895-qzsgz 0/1 Pending 0 6d4h
test05-pod-to-multi-node-nodeport-27597895-kb5r7 0/1 Pending 0 6d4h
test06-pod-to-external-1111-27606775-p6v8s 0/1 Completed 0 3m10s
test07-pod-to-external-fqdn-baidu-27606775-qdfwd 0/1 Completed 0 3m10s
test08-host-to-multi-node-clusterip-27597895-qsgn9 0/1 Pending 0 6d4h
test09-host-to-multi-node-headless-27597895-hpkt5 0/1 Pending 0 6d4h
```
+ pod 状态为`Completed` 表示检测正常通过
+ pod 状态为`Pending` 表示该检测需要多节点的k8s集群才会运行
## 禁用网络检测
如果集群已经开启网络检测,检测结果符合预期,并且不想继续循环检测时,只要删除对应namespace即可
```
kubectl delete ns network-test
```
================================================
FILE: docs/setup/offline_install.md
================================================
# 离线安装集群
使用kubeasz 离线安装 k8s集群需要下载四个部分:
- kubeasz 项目代码
- 二进制文件(k8s、etcd、containerd等组件)
- 容器镜像文件(calico、coredns、metrics-server等容器镜像)
- 系统软件安装包(ipset、libseccomp2等,仅无法使用本地yum/apt源时需要)
## 离线文件准备
在一台能够访问互联网的服务器上执行:
- 下载工具脚本ezdown,举例使用kubeasz版本3.6.0
``` bash
export release=3.6.0
wget https://github.com/easzlab/kubeasz/releases/download/${release}/ezdown
chmod +x ./ezdown
```
- 使用工具脚本下载(更多关于ezdown的参数,运行./ezdown 查看)
下载kubeasz代码、二进制、默认容器镜像
``` bash
# 国内环境
./ezdown -D
```
[可选]如果需要更多组件,请下载额外容器镜像(cilium,flannel,prometheus等)
``` bash
./ezdown -X flannel
./ezdown -X prometheus
...
```
下载离线系统包 (适用于无法使用yum/apt仓库情形)
``` bash
# 如果操作系统是ubuntu 22.04
./ezdown -P ubuntu_22
```
上述脚本运行成功后,所有文件(kubeasz代码、二进制、离线镜像)均已整理好放入目录`/etc/kubeasz`
- `/etc/kubeasz` 包含 kubeasz 版本为 ${release} 的发布代码
- `/etc/kubeasz/bin` 包含 k8s/etcd/docker/cni 等二进制文件
- `/etc/kubeasz/down` 包含集群安装时需要的离线容器镜像
- `/etc/kubeasz/down/packages` 包含集群安装时需要的系统基础软件
## 离线安装
上述下载完成后,把`/etc/kubeasz`整个目录复制到目标离线服务器相同目录,然后在离线服务器/etc/kubeasz目录下执行:
- 离线安装 docker,检查本地文件,正常会提示所有文件已经下载完成,并上传到本地私有镜像仓库
```
./ezdown -D
./ezdown -X flannel
./ezdown -X prometheus
...
```
- 启动 kubeasz 容器
```
./ezdown -S
```
- 设置参数允许离线安装系统软件包
```
sed -i 's/^INSTALL_SOURCE.*$/INSTALL_SOURCE: "offline"/g' /etc/kubeasz/example/config.yml
```
- 举例安装单节点集群,参考 https://github.com/easzlab/kubeasz/blob/master/docs/setup/quickStart.md
``` bash
source ~/.bashrc
dk ezctl start-aio
# 或者执行 docker exec -it kubeasz ezctl start-aio
```
- 多节点集群,进入kubeasz 容器内 `docker exec -it kubeasz bash`,参考https://github.com/easzlab/kubeasz/blob/master/docs/setup/00-planning_and_overall_intro.md 进行集群规划和设置后使用./ezctl 命令安装
================================================
FILE: docs/setup/quickStart.md
================================================
## 快速指南
本文档适用于kubeasz 3.3.1以上版本,部署单节点集群(aio),作为快速体验k8s集群的测试环境。
### 1.基础系统配置
- 准备一台虚机配置内存4G/硬盘30G以上
- 最小化安装`Ubuntu 22.04 server`
- 配置基础网络、更新源、SSH登录等
**注意:** 确保在干净的系统上开始安装,不能使用曾经装过kubeadm或其他k8s发行版的环境
### 2.下载文件
- 下载工具脚本ezdown,举例使用kubeasz版本3.6.7
``` bash
export release=3.6.7
wget https://github.com/easzlab/kubeasz/releases/download/${release}/ezdown
chmod +x ./ezdown
```
- 使用工具脚本下载(更多关于ezdown的参数,运行./ezdown 查看)
下载kubeasz代码、二进制、默认容器镜像
``` bash
# 国内环境
./ezdown -D
# 海外环境
#./ezdown -D -m standard
```
【可选】下载额外容器镜像(cilium,flannel,prometheus等)
``` bash
# 按需下载
./ezdown -X dashboard
./ezdown -X prometheus
...
```
【可选】下载离线系统包 (适用于无法使用yum/apt仓库情形)
``` bash
./ezdown -P
```
上述脚本运行成功后,所有文件(kubeasz代码、二进制、离线镜像)均已整理好放入目录`/etc/kubeasz`
- `/etc/kubeasz` 包含 kubeasz 版本为 ${release} 的发布代码
- `/etc/kubeasz/bin` 包含 k8s/etcd/docker/cni 等二进制文件
- `/etc/kubeasz/down` 包含集群安装时需要的离线容器镜像
- `/etc/kubeasz/down/packages` 包含集群安装时需要的系统基础软件
### 3.安装集群
- 容器化运行 kubeasz
```
./ezdown -S
```
- 使用默认配置安装 aio 集群
```
docker exec -it kubeasz ezctl start-aio
# 如果安装失败,查看日志排除后,使用如下命令重新安装aio集群
# docker exec -it kubeasz ezctl setup default all
```
### 4.验证安装
``` bash
$ source ~/.bashrc
$ kubectl version # 验证集群版本
$ kubectl get node # 验证节点就绪 (Ready) 状态
$ kubectl get pod -A # 验证集群pod状态,默认已安装网络插件、coredns、metrics-server等
$ kubectl get svc -A # 验证集群服务状态
```
- 登录 `dashboard`可以查看和管理集群,更多内容请查阅[dashboard文档](../guide/dashboard.md)
### 5.清理
以上步骤创建的K8S开发测试环境请尽情折腾,碰到错误尽量通过查看日志、上网搜索、提交`issues`等方式解决;当然你也可以清理集群后重新创建。
在宿主机上,按照如下步骤清理
- 清理集群 `docker exec -it kubeasz ezctl destroy default`
- 重启节点,以确保清理残留的虚拟网卡、路由等信息
================================================
FILE: example/config.yml
================================================
############################
# prepare
############################
# 可选离线安装系统软件包 (offline|online)
INSTALL_SOURCE: "online"
# 可选进行系统安全加固 github.com/dev-sec/ansible-collection-hardening
# (deprecated) 未更新上游项目,未验证最新k8s集群安装,不建议启用
OS_HARDEN: false
############################
# role:deploy
############################
# default: ca will expire in 100 years
# default: certs issued by the ca will expire in 50 years
CA_EXPIRY: "876000h"
CERT_EXPIRY: "438000h"
# force to recreate CA and other certs, not suggested to set 'true'
CHANGE_CA: false
# kubeconfig 配置参数
CLUSTER_NAME: "cluster1"
CONTEXT_NAME: "context-{{ CLUSTER_NAME }}"
# k8s version
K8S_VER: "__k8s_ver__"
# set unique 'k8s_nodename' for each node, if not set(default:'') ip add will be used
# CAUTION: 'k8s_nodename' must consist of lower case alphanumeric characters, '-' or '.',
# and must start and end with an alphanumeric character (e.g. 'example.com'),
# regex used for validation is '[a-z0-9]([-a-z0-9]*[a-z0-9])?(\.[a-z0-9]([-a-z0-9]*[a-z0-9])?)*'
K8S_NODENAME: "{%- if k8s_nodename != '' -%} \
{{ k8s_nodename|replace('_', '-')|lower }} \
{%- else -%} \
k8s-{{ inventory_hostname|replace('.', '-') }} \
{%- endif -%}"
# use 'K8S_NODENAME' to set hostname
ENABLE_SETTING_HOSTNAME: true
############################
# role:etcd
############################
# 设置不同的wal目录,可以避免磁盘io竞争,提高性能
ETCD_DATA_DIR: "/var/lib/etcd"
ETCD_WAL_DIR: ""
############################
# role:runtime [containerd,docker]
############################
# [.]启用拉取加速镜像仓库
ENABLE_MIRROR_REGISTRY: true
# [.]添加信任的私有仓库
# 必须按照如下示例格式,协议头'http://'和'https://'不能省略
INSECURE_REG:
- "http://easzlab.io.local:5000"
- "https://reg.yourcompany.com"
# [.]基础容器镜像
SANDBOX_IMAGE: "easzlab.io.local:5000/easzlab/pause:__pause__"
# [containerd] root 存储目录,默认:/var/lib/containerd
CONTAINERD_ROOT_DIR: "/var/lib/containerd"
# [containerd] state 存储目录,默认:/run/containerd
CONTAINERD_STATE_DIR: "/run/containerd"
# [containerd] config 目录,默认:/etc/containerd
CONTAINERD_CONFIG_DIR: "/etc/containerd"
# [containerd] systemd service 名称,默认:containerd.service
CONTAINERD_SERVICE_NAME: "containerd.service"
# [docker]容器存储目录
DOCKER_STORAGE_DIR: "/var/lib/docker"
# [docker]开启Restful API
DOCKER_ENABLE_REMOTE_API: false
############################
# role:kube-master
############################
# k8s 集群 master 节点证书配置,可以添加多个ip和域名(比如增加公网ip和域名)
MASTER_CERT_HOSTS:
- "10.1.1.1"
- "k8s.easzlab.io"
#- "www.test.com"
# node 节点上 pod 网段掩码长度(决定每个节点最多能分配的pod ip地址)
# 如果flannel 使用 --kube-subnet-mgr 参数,那么它将读取该设置为每个节点分配pod网段
# https://github.com/coreos/flannel/issues/847
NODE_CIDR_LEN: 24
# 是否启用集群audit功能
ENABLE_CLUSTER_AUDIT: false
############################
# role:kube-node
############################
# Kubelet 根目录
KUBELET_ROOT_DIR: "/var/lib/kubelet"
# node节点最大pod 数
MAX_PODS: 110
# 配置为kube组件(kubelet,kube-proxy,dockerd等)预留的资源量
# 数值设置详见templates/kubelet-config.yaml.j2
KUBE_RESERVED_ENABLED: "no"
# k8s 官方不建议草率开启 system-reserved, 除非你基于长期监控,了解系统的资源占用状况;
# 并且随着系统运行时间,需要适当增加资源预留,数值设置详见templates/kubelet-config.yaml.j2
# 系统预留设置基于 4c/8g 虚机,最小化安装系统服务,如果使用高性能物理机可以适当增加预留
# 另外,集群安装时候apiserver等资源占用会短时较大,建议至少预留1g内存
SYS_RESERVED_ENABLED: "no"
############################
# role:network [flannel,calico,cilium,kube-ovn,kube-router]
############################
# ------------------------------------------- flannel
# [flannel]设置flannel 后端"host-gw","vxlan"等
FLANNEL_BACKEND: "vxlan"
DIRECT_ROUTING: false
# [flannel]
flannel_ver: "__flannel__"
# ------------------------------------------- calico
# 模式可选项有: [Always, CrossSubnet, Never],跨子网可以配置为Always与CrossSubnet
# CrossSubnet为隧道+BGP路由混合模式可以提升网络性能,同子网配置为Never即可.
# 公有云建议使用always比较省事,其他的话需要修改各自公有云的网络配置,具体可以参考各个公有云说明
CALICO_ENABLE_OVERLAY: "Always"
# [calico]设置 calico-node使用的host IP,bgp邻居通过该地址建立,可手工指定也可以自动发现
IP_AUTODETECTION_METHOD: "can-reach={{ groups['kube_master'][0] }}"
# [calico]设置calico 网络 backend: bird, vxlan, none
# 少数公有云(Azure)或者私有云不支持IPinIP封包,可以使用 vxlan 模式
CALICO_NETWORKING_BACKEND: "bird"
# [calico]设置calico 是否使用route reflectors
# 如果集群规模超过50个节点,建议启用该特性
CALICO_RR_ENABLED: false
# CALICO_RR_NODES 配置route reflectors的节点,如果未设置默认使用集群master节点
# CALICO_RR_NODES: ["192.168.1.1", "192.168.1.2"]
CALICO_RR_NODES: []
# [calico]更新支持calico 版本: ["3.19", "3.23"]
calico_ver: "__calico__"
# [calico]calico 主版本
calico_ver_main: "{{ calico_ver.split('.')[0] }}.{{ calico_ver.split('.')[1] }}"
# ------------------------------------------- cilium
# [cilium]镜像版本
cilium_ver: "__cilium__"
cilium_connectivity_check: false
cilium_hubble_enabled: false
cilium_hubble_ui_enabled: false
# ------------------------------------------- kube-ovn
# [kube-ovn]离线镜像tar包
kube_ovn_ver: "__kube_ovn__"
# ------------------------------------------- kube-router
# [kube-router]公有云上存在限制,一般需要始终开启 ipinip;自有环境可以设置为 "subnet"
OVERLAY_TYPE: "full"
# [kube-router]NetworkPolicy 支持开关
FIREWALL_ENABLE: true
# [kube-router]kube-router 镜像版本
kube_router_ver: "__kube_router__"
############################
# role:cluster-addon
############################
# coredns 自动安装
dns_install: "yes"
corednsVer: "__coredns__"
ENABLE_LOCAL_DNS_CACHE: true
dnsNodeCacheVer: "__dns_node_cache__"
# 设置 local dns cache 地址
LOCAL_DNS_CACHE: "169.254.20.10"
# metric server 自动安装
metricsserver_install: "yes"
metricsVer: "__metrics__"
# dashboard 自动安装
dashboard_install: "no"
dashboardVer: "__dashboard__"
# local-storage (local-path-provisioner) 自动安装
local_path_provisioner_install: "no"
local_path_provisioner_ver: "__local_path_provisioner__"
local_path_storage_class: "local-path"
# 设置默认本地存储路径
local_path_provisioner_dir: "/opt/local-path-provisioner"
# nfs-provisioner 自动安装
nfs_provisioner_install: "no"
nfs_provisioner_namespace: "kube-system"
nfs_provisioner_ver: "__nfs_provisioner__"
nfs_storage_class: "managed-nfs-storage"
nfs_server: "192.168.1.10"
nfs_path: "/data/nfs"
# openebs 自动安装
openebs_install: "no"
openebs_ver: "__openebs_ver__"
openebs_namespace: "openebs"
openebs_hostpath: "/var/openebs/local"
openebs_hostpath_storage_class: "openebs-hostpath"
openebs_lvm_storage_class: "openebs-lvmpv"
openebs_lvm_vg: "vg_k8s"
# prometheus 自动安装
prom_install: "no"
prom_namespace: "monitor"
prom_storage_class: ""
prom_chart_ver: "__prom_chart__"
# minio 自动安装
minio_install: "no"
minio_namespace: "minio"
minio_storage_class: "{{ openebs_lvm_storage_class }}"
minio_chart_ver: "__minio_chart__"
minio_root_user: "3aea61ca94177dx"
minio_root_password: "0f3b19e46dd3aea61ca94177d"
# 单机版=1,集群版=4以上
minio_pool_servers: 4
minio_pool_size: 10Gi
# 是否启用tls证书,如果未启用则使用http协议
minio_tls_enabled: false
# 是否使用权威证书,如果使用需要提前把证书放到目录 roles/cluster-addon/templates/minio/; 并且要求
# 证书和私钥的名称分别为server.crt和server.key
minio_with_global_cert: false
# nacos 自动安装
nacos_install: "no"
nacos_namespace: "nacos"
nacos_mysql_host: "semisync-mysql-cluster-mysql"
nacos_mysql_db: "nacos"
nacos_mysql_port: "3306"
nacos_mysql_user: "__dbuser__"
nacos_mysql_password: "__yourpassword__"
nacos_storage_class: "{{ openebs_lvm_storage_class }}"
# rocketmq 自动安装
rocketmq_install: "no"
rocketmq_namespace: "rocketmq"
rocketmq_storage_class: "{{ openebs_lvm_storage_class }}"
# network-check 自动安装
network_check_enabled: false
network_check_schedule: "*/5 * * * *"
# kubeblocks 自动安装
kubeblocks_ver: "__kubeblocks_ver__"
kubeblocks_install: "no"
# ingress-nginx 自动安装
# ingress-nginx 只会部署到node with 标签:ingress-controller/provider=ingress-nginx
ingress_nginx_install: "no"
ingress_nginx_namespace: "ingress-nginx"
ingress_nginx_ver: "__ingress_nginx_ver__"
ingress_nginx_metrics_enabled: true # 需要先部署prometheus
# argocd 自动安装
argocd_install: "no"
############################
# role:harbor
############################
# harbor version,完整版本号
HARBOR_VER: "__harbor__"
HARBOR_DOMAIN: "harbor.easzlab.io.local"
HARBOR_PATH: /var/data
HARBOR_TLS_PORT: 8443
HARBOR_REGISTRY: "{{ HARBOR_DOMAIN }}:{{ HARBOR_TLS_PORT }}"
# if set 'false', you need to put certs named harbor.pem and harbor-key.pem in directory 'down'
HARBOR_SELF_SIGNED_CERT: true
# install extra component
HARBOR_WITH_TRIVY: false
================================================
FILE: example/hosts.allinone
================================================
# 'etcd' cluster should have odd member(s) (1,3,5,...)
[etcd]
192.168.1.1
# master node(s), set unique 'k8s_nodename' for each node
# CAUTION: 'k8s_nodename' must consist of lower case alphanumeric characters, '-' or '.',
# and must start and end with an alphanumeric character
[kube_master]
192.168.1.1
# work node(s), set unique 'k8s_nodename' for each node
# CAUTION: 'k8s_nodename' must consist of lower case alphanumeric characters, '-' or '.',
# and must start and end with an alphanumeric character
[kube_node]
192.168.1.1 k8s_nodename=''
# [optional] harbor server, a private docker registry
# 'NEW_INSTALL': 'true' to install a harbor server; 'false' to integrate with existed one
[harbor]
#192.168.1.8 NEW_INSTALL=false
# [optional] loadbalance for accessing k8s from outside
[ex_lb]
#192.168.1.6 LB_ROLE=backup EX_APISERVER_VIP=192.168.1.250 EX_APISERVER_PORT=8443
#192.168.1.7 LB_ROLE=master EX_APISERVER_VIP=192.168.1.250 EX_APISERVER_PORT=8443
# [optional] ntp server for the cluster
[chrony]
#192.168.1.1
[all:vars]
# --------- Main Variables ---------------
# Secure port for apiservers
SECURE_PORT="6443"
# Cluster container-runtime supported: docker, containerd
# if k8s version >= 1.24, docker is not supported
CONTAINER_RUNTIME="containerd"
# Network plugins supported: calico, flannel, kube-router, cilium, kube-ovn
CLUSTER_NETWORK="calico"
# Service proxy mode of kube-proxy: 'iptables' or 'ipvs'
PROXY_MODE="ipvs"
# K8S Service CIDR, not overlap with node(host) networking
SERVICE_CIDR="10.68.0.0/16"
# Cluster CIDR (Pod CIDR), not overlap with node(host) networking
CLUSTER_CIDR="172.20.0.0/16"
# NodePort Range
NODE_PORT_RANGE="30000-32767"
# Cluster DNS Domain
CLUSTER_DNS_DOMAIN="cluster.local"
# -------- Additional Variables (don't change the default value right now)---
# Binaries Directory
bin_dir="/opt/kube/bin"
# Deploy Directory (kubeasz workspace)
base_dir="/etc/kubeasz"
# Directory for a specific cluster
cluster_dir="{{ base_dir }}/clusters/_cluster_name_"
# CA and other components cert/key Directory
ca_dir="/etc/kubernetes/ssl"
# Default 'k8s_nodename' is empty
k8s_nodename=''
# Default python interpreter
ansible_python_interpreter=/usr/bin/python3
================================================
FILE: example/hosts.multi-node
================================================
# 'etcd' cluster should have odd member(s) (1,3,5,...)
[etcd]
192.168.1.1
192.168.1.2
192.168.1.3
# master node(s), set unique 'k8s_nodename' for each node
# CAUTION: 'k8s_nodename' must consist of lower case alphanumeric characters, '-' or '.',
# and must start and end with an alphanumeric character
[kube_master]
192.168.1.1 k8s_nodename='master-01'
192.168.1.2 k8s_nodename='master-02'
192.168.1.3 k8s_nodename='master-03'
# work node(s), set unique 'k8s_nodename' for each node
# CAUTION: 'k8s_nodename' must consist of lower case alphanumeric characters, '-' or '.',
# and must start and end with an alphanumeric character
[kube_node]
192.168.1.4 k8s_nodename='worker-01'
192.168.1.5 k8s_nodename='worker-02'
# [optional] harbor server, a private docker registry
# 'NEW_INSTALL': 'true' to install a harbor server; 'false' to integrate with existed one
[harbor]
#192.168.1.8 NEW_INSTALL=false
# [optional] loadbalance for accessing k8s from outside
[ex_lb]
#192.168.1.6 LB_ROLE=backup EX_APISERVER_VIP=192.168.1.250 EX_APISERVER_PORT=8443
#192.168.1.7 LB_ROLE=master EX_APISERVER_VIP=192.168.1.250 EX_APISERVER_PORT=8443
# [optional] ntp server for the cluster
[chrony]
#192.168.1.1
[all:vars]
# --------- Main Variables ---------------
# Secure port for apiservers
SECURE_PORT="6443"
# Cluster container-runtime supported: docker, containerd
# if k8s version >= 1.24, docker is not supported
CONTAINER_RUNTIME="containerd"
# Network plugins supported: calico, flannel, kube-router, cilium, kube-ovn
CLUSTER_NETWORK="calico"
# Service proxy mode of kube-proxy: 'iptables' or 'ipvs'
PROXY_MODE="ipvs"
# K8S Service CIDR, not overlap with node(host) networking
SERVICE_CIDR="10.68.0.0/16"
# Cluster CIDR (Pod CIDR), not overlap with node(host) networking
CLUSTER_CIDR="172.20.0.0/16"
# NodePort Range
NODE_PORT_RANGE="30000-32767"
# Cluster DNS Domain
CLUSTER_DNS_DOMAIN="cluster.local"
# -------- Additional Variables (don't change the default value right now) ---
# Binaries Directory
bin_dir="/opt/kube/bin"
# Deploy Directory (kubeasz workspace)
base_dir="/etc/kubeasz"
# Directory for a specific cluster
cluster_dir="{{ base_dir }}/clusters/_cluster_name_"
# CA and other components cert/key Directory
ca_dir="/etc/kubernetes/ssl"
# Default 'k8s_nodename' is empty
k8s_nodename=''
# Default python interpreter
ansible_python_interpreter=/usr/bin/python3
================================================
FILE: ezctl
================================================
#!/bin/bash
# Create & manage k8s clusters
# shellcheck disable=SC2155
set -o nounset
set -o errexit
#set -o xtrace
function usage() {
echo -e "\033[33mUsage:\033[0m ezctl COMMAND [args]"
cat < to switch default kubeconfig of the cluster
new to start a new k8s deploy with name 'cluster'
setup to setup a cluster, also supporting a step-by-step way
start to start all of the k8s services stopped by 'ezctl stop'
stop to stop all of the k8s services temporarily
upgrade to upgrade the k8s cluster
destroy to destroy the k8s cluster
backup to backup the cluster state (etcd snapshot)
restore to restore the cluster state from backups
start-aio to quickly setup an all-in-one cluster with default settings
Cluster ops:
add-etcd to add a etcd-node to the etcd cluster
add-master to add a master node to the k8s cluster
add-node to add a work node to the k8s cluster
del-etcd to delete a etcd-node from the etcd cluster
del-master to delete a master node from the k8s cluster
del-node to delete a work node from the k8s cluster
Extra operation:
kca-renew to force renew CA certs and all the other certs (with caution)
kcfg-adm to manage client kubeconfig of the k8s cluster
Use "ezctl help " for more information about a given command.
EOF
}
function logger() {
TIMESTAMP=$(date +'%Y-%m-%d %H:%M:%S')
local FNAME=$(basename "${BASH_SOURCE[1]}")
local SOURCE="\033[36m[$FNAME:${BASH_LINENO[0]}]\033[0m"
case "$1" in
debug)
echo -e "\033[36m$TIMESTAMP\033[0m $SOURCE \033[36mDEBUG $2\033[0m"
;;
info)
echo -e "\033[36m$TIMESTAMP\033[0m $SOURCE \033[32mINFO $2\033[0m"
;;
warn)
echo -e "\033[36m$TIMESTAMP\033[0m $SOURCE \033[33mWARN $2\033[0m"
;;
error)
echo -e "\033[36m$TIMESTAMP\033[0m $SOURCE \033[31mERROR $2\033[0m"
;;
*) ;;
esac
}
function help-info() {
case "$1" in
(setup)
usage-setup
;;
(add-etcd)
echo -e "read more > 'https://github.com/easzlab/kubeasz/blob/master/docs/op/op-etcd.md'"
;;
(add-master)
echo -e "read more > 'https://github.com/easzlab/kubeasz/blob/master/docs/op/op-master.md'"
;;
(add-node)
echo -e "read more > 'https://github.com/easzlab/kubeasz/blob/master/docs/op/op-node.md'"
;;
(del-etcd)
echo -e "read more > 'https://github.com/easzlab/kubeasz/blob/master/docs/op/op-etcd.md'"
;;
(del-master)
echo -e "read more > 'https://github.com/easzlab/kubeasz/blob/master/docs/op/op-master.md'"
;;
(del-node)
echo -e "read more > 'https://github.com/easzlab/kubeasz/blob/master/docs/op/op-node.md'"
;;
(kca-renew)
echo -e "WARNNING: this command should be used with caution"
echo -e "force to recreate CA certs and all of the others certs used in the cluster"
echo -e "it should be used only when the admin.conf leaked"
;;
(kcfg-adm)
usage-kcfg-adm
;;
(*)
echo -e "todo: help info $1"
;;
esac
}
function usage-kcfg-adm(){
echo -e "\033[33mUsage:\033[0m ezctl kcfg-adm "
cat <:
-A to add a client kubeconfig with a newly created user
-D to delete a client kubeconfig with the existed user
-L to list all of the users
-e to set expiry of the user certs in hours (ex. 24h, 8h, 240h)
-t to set a user-type (admin or view)
-u to set a user-name prefix
examples: ./ezctl kcfg-adm test-k8s -L
./ezctl kcfg-adm default -A -e 240h -t admin -u jack
./ezctl kcfg-adm default -D -u jim-202101162141
EOF
}
function usage-setup(){
echo -e "\033[33mUsage:\033[0m ezctl setup "
cat < /dev/null 2>&1 || { logger debug "disable registry mirrors"; registryMirror=false; }
sed -i -e "s/__k8s_ver__/$k8sVer/g" \
-e "s/__flannel__/$flannelVer/g" \
-e "s/__calico__/$calicoVer/g" \
-e "s/__cilium__/$ciliumVer/g" \
-e "s/__kube_ovn__/$kubeOvnVer/g" \
-e "s/__kube_router__/$kubeRouterVer/g" \
-e "s/__coredns__/$corednsVer/g" \
-e "s/__pause__/$pauseVer/g" \
-e "s/__dns_node_cache__/$dnsNodeCacheVer/g" \
-e "s/__dashboard__/$dashboardVer/g" \
-e "s/__local_path_provisioner__/$localpathProvisionerVer/g" \
-e "s/__nfs_provisioner__/$nfsProvisionerVer/g" \
-e "s/__openebs_ver__/$openebsVer/g" \
-e "s/__prom_chart__/$promChartVer/g" \
-e "s/__minio_chart__/$minioOperatorVer/g" \
-e "s/__kubeblocks_ver__/$kubeblocksVer/g" \
-e "s/__ingress_nginx_ver__/$ingressNginxVer/g" \
-e "s/__harbor__/$HARBOR_VER/g" \
-e "s/^ENABLE_MIRROR_REGISTRY.*$/ENABLE_MIRROR_REGISTRY: $registryMirror/g" \
-e "s/__metrics__/$metricsVer/g" "clusters/$1/config.yml"
logger debug "cluster $1: files successfully created."
logger info "next steps 1: to config '$BASE/clusters/$1/hosts'"
logger info "next steps 2: to config '$BASE/clusters/$1/config.yml'"
}
function setup() {
[[ -d "clusters/$1" ]] || { logger error "invalid config, run 'ezctl new $1' first"; return 1; }
[[ -f "bin/kube-apiserver" ]] || { logger error "no binaries founded, run 'ezdown -D' fist"; return 1; }
# for extending usage
EXTRA_ARGS=$(echo "$*"|sed "s/$1 $2//g"|sed "s/^ *//g")
PLAY_BOOK="dummy.yml"
case "$2" in
(01|prepare)
PLAY_BOOK="01.prepare.yml"
;;
(02|etcd)
PLAY_BOOK="02.etcd.yml"
;;
(03|container-runtime)
PLAY_BOOK="03.runtime.yml"
;;
(04|kube-master)
PLAY_BOOK="04.kube-master.yml"
;;
(05|kube-node)
PLAY_BOOK="05.kube-node.yml"
;;
(06|network)
PLAY_BOOK="06.network.yml"
;;
(07|cluster-addon)
PLAY_BOOK="07.cluster-addon.yml"
;;
(90|all)
PLAY_BOOK="90.setup.yml"
;;
(10|ex-lb)
PLAY_BOOK="10.ex-lb.yml"
;;
(11|harbor)
PLAY_BOOK="11.harbor.yml"
;;
(*)
usage-setup
exit 1
;;
esac
COMMAND="ansible-playbook -i clusters/$1/hosts -e @clusters/$1/config.yml $EXTRA_ARGS playbooks/$PLAY_BOOK"
echo "$COMMAND"
k8s_ver=$(bin/kube-apiserver --version|cut -d' ' -f2)
etcd_ver=v$(bin/etcd --version|grep 'etcd Version'|cut -d' ' -f3)
network_cni=$(grep CLUSTER_NETWORK "clusters/$1/hosts"|cut -d'"' -f2|sed 's/-//g')
network_cni_ver=$(grep -i "${network_cni}Ver" ezdown|cut -d'=' -f2|head -n1)
cat < /dev/null 2>&1 || { logger error "md5sum not found"; return 1; }
CLUSTERS=$(cd clusters && echo -- *)
CFG_MD5=$(sed '/server/d' ~/.kube/config|md5sum|cut -d' ' -f1)
cd "$BASE"
logger info "list of managed clusters:"
i=1; for c in $CLUSTERS;
do
if [[ -f "clusters/$c/kubectl.kubeconfig" ]];then
c_md5=$(sed '/server/d' "clusters/$c/kubectl.kubeconfig"|md5sum|cut -d' ' -f1)
if [[ "$c_md5" = "$CFG_MD5" ]];then
echo -e "==> cluster $i:\t$c (\033[32mcurrent\033[0m)"
else
echo -e "==> cluster $i:\t$c"
fi
((i++))
fi
done
}
function checkout() {
[[ -d "clusters/$1" ]] || { logger error "invalid config, run 'ezctl new $1' first"; return 1; }
[[ -f "clusters/$1/kubectl.kubeconfig" ]] || { logger error "invalid kubeconfig, run 'ezctl setup $1' first"; return 1; }
logger info "set default kubeconfig: cluster $1 (\033[32mcurrent\033[0m)"
/bin/cp -f "clusters/$1/kubectl.kubeconfig" ~/.kube/config
}
### in-cluster operation functions ##############################
function add-node() {
# check new node's address regexp
[[ $2 =~ ^(2(5[0-5]{1}|[0-4][0-9]{1})|[0-1]?[0-9]{1,2})(\.(2(5[0-5]{1}|[0-4][0-9]{1})|[0-1]?[0-9]{1,2})){3}$ ]] || { logger error "Invalid ip add:$2"; return 1; }
# check if the new node already exsited
sed -n '/^\[kube_master/,/^\[harbor/p' "$BASE/clusters/$1/hosts"|grep -E "^$2$|^$2 " && { logger error "node $2 already existed in $BASE/clusters/$1/hosts"; return 2; }
logger info "add $2 into 'kube_node' group"
NODE_INFO="${@:2}"
sed -i "/\[kube_node/a $NODE_INFO" "$BASE/clusters/$1/hosts"
logger info "start to add a work node:$2 into cluster:$1"
ansible-playbook -i "$BASE/clusters/$1/hosts" "$BASE/playbooks/22.addnode.yml" -e "NODE_TO_ADD=$2" -e "@clusters/$1/config.yml"
}
function add-master() {
# check new master's address regexp
[[ $2 =~ ^(2(5[0-5]{1}|[0-4][0-9]{1})|[0-1]?[0-9]{1,2})(\.(2(5[0-5]{1}|[0-4][0-9]{1})|[0-1]?[0-9]{1,2})){3}$ ]] || { logger error "Invalid ip add:$2"; return 1; }
# check if the new master already exsited
sed -n '/^\[kube_master/,/^\[kube_node/p' "$BASE/clusters/$1/hosts"|grep -E "^$2$|^$2 " && { logger error "master $2 already existed!"; return 2; }
logger info "add $2 into 'kube_master' group"
MASTER_INFO="${@:2}"
sed -i "/\[kube_master/a $MASTER_INFO" "$BASE/clusters/$1/hosts"
logger info "start to add a master node:$2 into cluster:$1"
ansible-playbook -i "$BASE/clusters/$1/hosts" "$BASE/playbooks/23.addmaster.yml" -e "NODE_TO_ADD=$2" -e "@clusters/$1/config.yml"
logger info "re-setting /etc/hosts for all nodes"
ansible-playbook -i "$BASE/clusters/$1/hosts" "$BASE/playbooks/90.setup.yml" -t set_hosts -e "@clusters/$1/config.yml"
logger info "reconfigure and restart 'kube-lb' service"
ansible-playbook -i "$BASE/clusters/$1/hosts" "$BASE/playbooks/90.setup.yml" -t restart_kube-lb -e "@clusters/$1/config.yml"
logger info "reconfigure and restart 'ex-lb' service"
ansible-playbook -i "$BASE/clusters/$1/hosts" "$BASE/playbooks/10.ex-lb.yml" -t restart_lb -e "@clusters/$1/config.yml"
}
function add-etcd() {
# check new node's address regexp
[[ $2 =~ ^(2(5[0-5]{1}|[0-4][0-9]{1})|[0-1]?[0-9]{1,2})(\.(2(5[0-5]{1}|[0-4][0-9]{1})|[0-1]?[0-9]{1,2})){3}$ ]] || { logger error "Invalid ip add:$2"; return 1; }
# check if the new node already exsited
sed -n '/^\[etcd/,/^\[kube_master/p' "$BASE/clusters/$1/hosts"|grep -E "^$2$|^$2 " && { logger error "etcd $2 already existed!"; return 2; }
logger info "add $2 into 'etcd' group"
ETCD_INFO="${@:2}"
sed -i "/\[etcd/a $ETCD_INFO" "$BASE/clusters/$1/hosts"
logger info "start to add a etcd node:$2 into cluster:$1"
ansible-playbook -i "$BASE/clusters/$1/hosts" "$BASE/playbooks/21.addetcd.yml" -e "NODE_TO_ADD=$2" -e "@clusters/$1/config.yml"
logger info "reconfig &restart the etcd cluster"
ansible-playbook -i "$BASE/clusters/$1/hosts" "$BASE/playbooks/02.etcd.yml" -t restart_etcd -e "@clusters/$1/config.yml"
logger info "restart apiservers to use the new etcd cluster"
ansible-playbook -i "$BASE/clusters/$1/hosts" "$BASE/playbooks/04.kube-master.yml" -t restart_master -e "@clusters/$1/config.yml"
}
function del-etcd() {
# check node's address regexp
[[ $2 =~ ^(2(5[0-5]{1}|[0-4][0-9]{1})|[0-1]?[0-9]{1,2})(\.(2(5[0-5]{1}|[0-4][0-9]{1})|[0-1]?[0-9]{1,2})){3}$ ]] || { logger error "Invalid ip add:$2"; return 1; }
# check if the deleting node exsited
sed -n '/^\[etcd/,/^\[kube_master/p' "$BASE/clusters/$1/hosts"|grep -E "^$2$|^$2 " || { logger error "etcd $2 not existed!"; return 2; }
logger warn "start to delete the etcd node:$2 from cluster:$1"
ansible-playbook -i "$BASE/clusters/$1/hosts" "$BASE/playbooks/31.deletcd.yml" -e "ETCD_TO_DEL=$2" -e "CLUSTER=$1" -e "@clusters/$1/config.yml"
logger info "reconfig &restart the etcd cluster"
ansible-playbook -i "$BASE/clusters/$1/hosts" "$BASE/playbooks/02.etcd.yml" -t restart_etcd -e "@clusters/$1/config.yml"
logger info "restart apiservers to use the new etcd cluster"
ansible-playbook -i "$BASE/clusters/$1/hosts" "$BASE/playbooks/04.kube-master.yml" -t restart_master -e "@clusters/$1/config.yml"
}
function del-node() {
# check node's address regexp
[[ $2 =~ ^(2(5[0-5]{1}|[0-4][0-9]{1})|[0-1]?[0-9]{1,2})(\.(2(5[0-5]{1}|[0-4][0-9]{1})|[0-1]?[0-9]{1,2})){3}$ ]] || { logger error "Invalid ip add:$2"; return 2; }
# check if the deleting node exsited
sed -n '/^\[kube_master/,/^\[harbor/p' "$BASE/clusters/$1/hosts"|grep -E "^$2$|^$2 " || { logger error "node $2 not existed in $BASE/clusters/$1/hosts"; return 2; }
logger warn "start to delete the node:$2 from cluster:$1"
ansible-playbook -i "$BASE/clusters/$1/hosts" "$BASE/playbooks/32.delnode.yml" -e "NODE_TO_DEL=$2" -e "CLUSTER=$1" -e "@clusters/$1/config.yml"
}
function del-master() {
# check node's address regexp
[[ $2 =~ ^(2(5[0-5]{1}|[0-4][0-9]{1})|[0-1]?[0-9]{1,2})(\.(2(5[0-5]{1}|[0-4][0-9]{1})|[0-1]?[0-9]{1,2})){3}$ ]] || { logger error "Invalid ip add:$2"; return 2; }
# check if the deleting master exsited
sed -n '/^\[kube_master/,/^\[kube_node/p' "$BASE/clusters/$1/hosts"|grep -E "^$2$|^$2 " || { logger error "master $2 not existed!"; return 2; }
NODE_NAME=$(bin/kubectl --kubeconfig="clusters/$1/kubectl.kubeconfig" get node -owide|grep " $2 "|awk '{print $1}')
logger warn "start to delete the master:$2 from cluster:$1"
ansible-playbook -i "$BASE/clusters/$1/hosts" "$BASE/playbooks/33.delmaster.yml" -e "NODE_TO_DEL=$2" -e "CLUSTER=$1" -e "@clusters/$1/config.yml"
logger info "reconfig kubeconfig in ansible manage node"
ansible-playbook -i "$BASE/clusters/$1/hosts" "$BASE/roles/deploy/deploy.yml" -t create_kctl_cfg -e "@clusters/$1/config.yml"
logger info "reconfigure and restart 'kube-lb' service"
ansible-playbook -i "$BASE/clusters/$1/hosts" "$BASE/playbooks/90.setup.yml" -t restart_kube-lb -e "@clusters/$1/config.yml"
logger info "reconfigure and restart 'ex-lb' service"
ansible-playbook -i "$BASE/clusters/$1/hosts" "$BASE/playbooks/10.ex-lb.yml" -t restart_lb -e "@clusters/$1/config.yml"
logger info "delete the master-node: $NODE_NAME"
bin/kubectl --kubeconfig="clusters/$1/kubectl.kubeconfig" delete node "$NODE_NAME"
}
function start-aio(){
set +u
# Check ENV 'HOST_IP', exists if the CMD 'ezctl' running in a docker container
if [[ -z $HOST_IP ]];then
# ezctl runs in a host machine, get host's ip
HOST_IF=$(ip route|grep default|head -n1|cut -d' ' -f5)
HOST_IP=$(ip a|grep "$HOST_IF$"|head -n1|awk '{print $2}'|cut -d'/' -f1)
fi
set -u
logger info "get local host ipadd: $HOST_IP"
# allow ssh login using key locally
if [[ ! -e /root/.ssh/id_rsa ]]; then
logger debug "generate ssh key pair"
ssh-keygen -t rsa -b 2048 -N '' -f /root/.ssh/id_rsa > /dev/null
cat /root/.ssh/id_rsa.pub >> /root/.ssh/authorized_keys
ssh-keyscan -t ecdsa -H "$HOST_IP" >> /root/.ssh/known_hosts
fi
new default
/bin/cp -f example/hosts.allinone "clusters/default/hosts"
sed -i "s/_cluster_name_/default/g" "clusters/default/hosts"
sed -i "s/192.168.1.1/$HOST_IP/g" "clusters/default/hosts"
setup default all
}
### Extra functions #############################################
function renew-ca() {
[[ -d "clusters/$1" ]] || { logger error "invalid cluster, run 'ezctl new $1' first"; return 1; }
logger warn "WARNNING: this script should be used with greate caution"
logger warn "WARNNING: it will recreate CA certs and all of the others certs used in the cluster"
COMMAND="ansible-playbook -i clusters/$1/hosts -e @clusters/$1/config.yml -e CHANGE_CA=true playbooks/96.update-certs.yml -t force_change_certs"
echo "$COMMAND"
logger info "cluster:$1 process begins in 5s, press any key to abort:\n"
! (read -r -t5 -n1) || { logger warn "process abort"; return 1; }
${COMMAND} || return 1
}
EXPIRY="4800h" # default cert will expire in 200 days
USER_TYPE="admin" # admin/view, admin=clusterrole:cluster-admin view=clusterrole:view
USER_NAME="user"
function kcfg-adm() {
OPTIND=2
ACTION=""
while getopts "ADLe:t:u:" OPTION; do
case $OPTION in
A)
ACTION="add-kcfg $1"
;;
D)
ACTION="del-kcfg $1"
;;
L)
ACTION="list-kcfg $1"
;;
e)
EXPIRY="$OPTARG"
[[ $OPTARG =~ ^[1-9][0-9]*h$ ]] || { logger error "'-e' must be set like '2h, 5h, 50000h, ...'"; exit 1; }
;;
t)
USER_TYPE="$OPTARG"
[[ $OPTARG =~ ^(admin|view)$ ]] || { logger error "'-t' can only be set as 'admin' or 'view'"; exit 1; }
;;
u)
USER_NAME="$OPTARG"
;;
?)
help-info kcfg-adm
return 1
;;
esac
done
[[ "$ACTION" == "" ]] && { logger error "illegal option"; help-info kcfg-adm; exit 1; }
logger info "$ACTION"
${ACTION} || { logger error "$ACTION fail"; return 1; }
logger info "$ACTION success"
}
function add-kcfg(){
USER_NAME="$USER_NAME"-$(date +'%Y%m%d%H%M')
logger info "add-kcfg in cluster:$1 with user:$USER_NAME"
ansible-playbook -i "clusters/$1/hosts" -e "@clusters/$1/config.yml" -e "CUSTOM_EXPIRY=$EXPIRY" \
-e "USER_TYPE=$USER_TYPE" -e "USER_NAME=$USER_NAME" -e "ADD_KCFG=true" \
-t add-kcfg "roles/deploy/deploy.yml"
}
function del-kcfg(){
logger info "del-kcfg in cluster:$1 with user:$USER_NAME"
CRB=$(bin/kubectl --kubeconfig="clusters/$1/kubectl.kubeconfig" get clusterrolebindings -ojsonpath="{.items[?(@.subjects[0].name == '$USER_NAME')].metadata.name}") && \
bin/kubectl --kubeconfig="clusters/$1/kubectl.kubeconfig" delete clusterrolebindings "$CRB" && \
/bin/rm -f "clusters/$1/ssl/users/$USER_NAME"*
}
function list-kcfg(){
logger info "list-kcfg in cluster:$1"
ADMINS=$(bin/kubectl --kubeconfig="clusters/$1/kubectl.kubeconfig" get clusterrolebindings -ojsonpath='{.items[?(@.roleRef.name == "cluster-admin")].subjects[*].name}')
VIEWS=$(bin/kubectl --kubeconfig="clusters/$1/kubectl.kubeconfig" get clusterrolebindings -ojsonpath='{.items[?(@.roleRef.name == "view")].subjects[*].name}')
ALL=$(bin/kubectl --kubeconfig="clusters/$1/kubectl.kubeconfig" get clusterrolebindings -ojsonpath='{.items[*].subjects[*].name}')
printf "\n%-30s %-15s %-20s\n" USER TYPE "EXPIRY(+8h if in Asia/Shanghai)"
echo "---------------------------------------------------------------------------------"
for u in $ADMINS; do
if [[ $u =~ ^.*-[0-9]{12}$ ]];then
t=$(bin/cfssl-certinfo -cert "clusters/$1/ssl/users/$u.pem"|grep not_after|awk '{print $2}'|sed 's/"//g'|sed 's/,//g')
printf "%-30s %-15s %-20s\n" "$u" cluster-admin "$t"
fi
done;
for u in $VIEWS; do
if [[ $u =~ ^.*-[0-9]{12}$ ]];then
t=$(bin/cfssl-certinfo -cert "clusters/$1/ssl/users/$u.pem"|grep not_after|awk '{print $2}'|sed 's/"//g'|sed 's/,//g')
printf "%-30s %-15s %-20s\n" "$u" view "$t"
fi
done;
for u in $ALL; do
if [[ $u =~ ^.*-[0-9]{12}$ ]];then
[[ $ADMINS == *$u* ]] || [[ $VIEWS == *$u* ]] || {
t=$(bin/cfssl-certinfo -cert "clusters/$1/ssl/users/$u.pem"|grep not_after|awk '{print $2}'|sed 's/"//g'|sed 's/,//g')
printf "%-30s %-15s %-20s\n" "$u" unknown "$t"
}
fi
done;
echo ""
}
### Main Lines ##################################################
function main() {
BASE="/etc/kubeasz"
[[ -d "$BASE" ]] || { logger error "invalid dir:$BASE, try: 'ezdown -D'"; exit 1; }
cd "$BASE"
# check bash shell
readlink /proc/$$/exe|grep -q "bash" || { logger error "you should use bash shell only"; exit 1; }
# check 'ansible' executable
which ansible > /dev/null 2>&1 || { logger error "need 'ansible', try: 'pip install ansible'"; usage; exit 1; }
[ "$#" -gt 0 ] || { usage >&2; exit 2; }
case "$1" in
### in-cluster operations #####################
(add-etcd)
[ "$#" -gt 2 ] || { usage >&2; exit 2; }
add-etcd "${@:2}"
;;
(add-master)
[ "$#" -gt 2 ] || { usage >&2; exit 2; }
add-master "${@:2}"
;;
(add-node)
[ "$#" -gt 2 ] || { usage >&2; exit 2; }
add-node "${@:2}"
;;
(del-etcd)
[ "$#" -eq 3 ] || { usage >&2; exit 2; }
del-etcd "$2" "$3"
;;
(del-master)
[ "$#" -eq 3 ] || { usage >&2; exit 2; }
del-master "$2" "$3"
;;
(del-node)
[ "$#" -eq 3 ] || { usage >&2; exit 2; }
del-node "$2" "$3"
;;
### cluster-wide operations #######################
(checkout)
[ "$#" -eq 2 ] || { usage >&2; exit 2; }
checkout "$2"
;;
(list)
[ "$#" -eq 1 ] || { usage >&2; exit 2; }
list
;;
(new)
[ "$#" -eq 2 ] || { usage >&2; exit 2; }
new "$2"
;;
(setup)
[ "$#" -ge 3 ] || { usage-setup >&2; exit 2; }
setup "${@:2}"
;;
(start)
[ "$#" -eq 2 ] || { usage >&2; exit 2; }
cmd "$2" start
;;
(stop)
[ "$#" -eq 2 ] || { usage >&2; exit 2; }
cmd "$2" stop
;;
(upgrade)
[ "$#" -eq 2 ] || { usage >&2; exit 2; }
cmd "$2" upgrade
;;
(backup)
[ "$#" -eq 2 ] || { usage >&2; exit 2; }
cmd "$2" backup
;;
(restore)
[ "$#" -eq 2 ] || { usage >&2; exit 2; }
cmd "$2" restore
;;
(destroy)
[ "$#" -eq 2 ] || { usage >&2; exit 2; }
cmd "$2" destroy
;;
(start-aio)
[ "$#" -eq 1 ] || { usage >&2; exit 2; }
start-aio
;;
### extra operations ##############################
(kca-renew)
[ "$#" -eq 2 ] || { usage >&2; exit 2; }
renew-ca "$2"
;;
(kcfg-adm)
[ "$#" -gt 2 ] || { usage-kcfg-adm >&2; exit 2; }
kcfg-adm "${@:2}"
;;
(help)
[ "$#" -gt 1 ] || { usage >&2; exit 2; }
help-info "$2"
exit 0
;;
(*)
usage
exit 0
;;
esac
}
main "$@"
================================================
FILE: ezdown
================================================
#!/bin/bash
#--------------------------------------------------
# This script is used for:
# 1. to download the scripts/binaries/images needed for installing a k8s cluster with kubeasz
# 2. to run kubeasz in a container (recommended)
# @author: gjmzj
# @usage: ./ezdown
# @repo: https://github.com/easzlab/kubeasz
#--------------------------------------------------
# shellcheck disable=SC2155
set -o nounset
set -o errexit
set -o pipefail
#set -o xtrace
# default settings, can be overridden by cmd line options, see usage
DOCKER_VER=28.5.2
KUBEASZ_VER=3.6.8
K8S_BIN_VER=v1.34.3
# https://github.com/easzlab/dockerfile-kubeasz-ext-bin
EXT_BIN_VER=1.13.3
# https://github.com/easzlab/dockerfile-kubeasz-sys-pkg
SYS_PKG_VER=1.0.4
HARBOR_VER=v2.12.4
REGISTRY_MIRROR=docker.1ms.run
# images downloaded by default(with 'ezdown -D')
# https://github.com/projectcalico/calico
calicoVer=v3.28.4
# https://github.com/coredns/coredns
corednsVer=1.12.4
# https://kubernetes.io/docs/tasks/administer-cluster/nodelocaldns/
dnsNodeCacheVer=1.26.4
# https://github.com/kubernetes-sigs/metrics-server
metricsVer=v0.8.0
pauseVer=3.10
# images not downloaded by default(only download with 'ezdown -X ***')
# https://github.com/cilium/cilium
# https://docs.cilium.io/en/stable/installation/k8s-install-helm/
ciliumVer=1.17.4
# https://github.com/flannel-io/flannel
flannelVer=v0.27.3
# https://github.com/cloudnativelabs/kube-router
kubeRouterVer=v1.5.4
# https://github.com/kubeovn/kube-ovn
kubeOvnVer=v1.11.5
# https://github.com/kubernetes/dashboard
dashboardVer=7.14.0
# https://github.com/rancher/local-path-provisioner
localpathProvisionerVer=v0.0.31
# https://github.com/kubernetes-sigs/nfs-subdir-external-provisioner
nfsProvisionerVer=v4.0.2
#https://github.com/prometheus-community/helm-charts/tree/main/charts/kube-prometheus-stack
promChartVer=75.7.0
#https://kubeblocks.io/docs/release-1_0/user_docs/overview/introduction
kubeblocksVer=1.0.1
#https://min.io/docs/minio/kubernetes/upstream/operations/install-deploy-manage/deploy-operator-helm.html
minioOperatorVer=7.1.1
# https://openebs.io/docs/quickstart-guide/installation
openebsVer=4.3.2
# https://kubernetes.github.io/ingress-nginx/deploy/
ingressNginxVer=4.13.0
function usage() {
echo -e "\033[33mUsage:\033[0m ezdown [options] [args]"
cat < download system packages of the OS (ubuntu_22,debian_11,...)
-R download Registry(harbor) offline installer
-S start kubeasz in a container
-X download extra images
-d set docker-ce version, default "$DOCKER_VER"
-e set kubeasz-ext-bin version, default "$EXT_BIN_VER"
-k set kubeasz-k8s-bin version, default "$K8S_BIN_VER"
-m set docker registry mirrors, default "docker.1ms.run"
-z set kubeasz version, default "$KUBEASZ_VER"
EOF
}
function usage-down-sys-pkg(){
echo -e "\033[33mUsage:\033[0m ezdown -P "
cat <"
cat < /etc/systemd/system/docker.service << EOF
[Unit]
Description=Docker Application Container Engine
[Service]
Environment="PATH=/opt/kube/bin/docker-bin:/bin:/sbin:/usr/bin:/usr/sbin"
ExecStartPre=/bin/sh -c 'groupadd docker > /dev/null 2>&1 || echo ""'
ExecStart=/opt/kube/bin/docker-bin/dockerd
#ExecStartPost=/sbin/iptables -I FORWARD -s 0.0.0.0/0 -j ACCEPT
ExecReload=/bin/kill -s HUP \$MAINPID
Restart=on-failure
RestartSec=5
LimitNOFILE=infinity
LimitNPROC=infinity
LimitCORE=infinity
Delegate=yes
KillMode=process
[Install]
WantedBy=multi-user.target
EOF
# configuration for dockerd
mkdir -p /etc/docker
DOCKER_VER_MAIN=$(echo "$DOCKER_VER"|cut -d. -f1)
CGROUP_DRIVER="cgroupfs"
((DOCKER_VER_MAIN>=20)) && CGROUP_DRIVER="systemd"
logger debug "generate docker config: /etc/docker/daemon.json"
if [ -n "$REGISTRY_MIRROR" ];then
logger debug "prepare register mirror"
cat > /etc/docker/daemon.json << EOF
{
"exec-opts": ["native.cgroupdriver=$CGROUP_DRIVER"],
"registry-mirrors": [
"https://docker.1ms.run",
"https://hub1.nat.tf",
"https://docker.1panel.live",
"https://hub.rat.dev",
"https://docker.amingg.com"
],
"insecure-registries": ["easzlab.io.local:5000"],
"max-concurrent-downloads": 10,
"log-driver": "json-file",
"log-level": "warn",
"log-opts": {
"max-size": "10m",
"max-file": "3"
},
"data-root": "/var/lib/docker"
}
EOF
else
logger debug "standard config without registry mirrors"
cat > /etc/docker/daemon.json << EOF
{
"exec-opts": ["native.cgroupdriver=$CGROUP_DRIVER"],
"insecure-registries": ["easzlab.io.local:5000"],
"max-concurrent-downloads": 10,
"log-driver": "json-file",
"log-level": "warn",
"log-opts": {
"max-size": "10m",
"max-file": "3"
},
"data-root": "/var/lib/docker"
}
EOF
fi
if [[ -f /etc/selinux/config ]]; then
logger debug "turn off selinux"
getenforce|grep Disabled || setenforce 0
sed -i 's/^SELINUX=.*$/SELINUX=disabled/g' /etc/selinux/config
fi
logger debug "enable and start docker"
systemctl enable docker
systemctl daemon-reload && systemctl restart docker && sleep 3
}
function get_kubeasz() {
# check if kubeasz already existed
[[ -d "$BASE/roles/kube-node" ]] && { logger warn "kubeasz already existed"; return 0; }
if [[ ! -f "$imageDir/kubeasz_$KUBEASZ_VER.tar" ]];then
logger info "downloading kubeasz: $KUBEASZ_VER"
docker pull "easzlab/kubeasz:$KUBEASZ_VER" && \
docker save -o "$imageDir/kubeasz_$KUBEASZ_VER.tar" "easzlab/kubeasz:$KUBEASZ_VER" || \
{ logger error "download failed!"; return 1; }
else
docker load -i "$imageDir/kubeasz_$KUBEASZ_VER.tar"
fi
docker ps -a |grep -q temp_easz && { logger debug "remove existing container"; docker rm -f temp_easz; }
logger debug " run a temporary container"
docker run -d --name temp_easz easzlab/kubeasz:${KUBEASZ_VER} || { logger error "failed."; exit 1; }
[[ -d "$BASE/down" ]] && /bin/mv -f "$BASE/down" /tmp
[[ -d "$BASE/bin" ]] && /bin/mv -f "$BASE/bin" /tmp
rm -rf "$BASE" && \
logger debug "cp kubeasz code from the temporary container" && \
docker cp "temp_easz:$BASE" "$BASE" && \
logger debug "stop&remove temporary container" && \
docker rm -f temp_easz
mkdir -p "$BASE/bin" "$BASE/down"
[[ -d "/tmp/down" ]] && /bin/mv -f /tmp/down/* "$BASE/down"
[[ -d "/tmp/bin" ]] && /bin/mv -f /tmp/bin/* "$BASE/bin"
return 0
}
function get_k8s_bin() {
[[ -f "$BASE/bin/kubelet" ]] && { logger warn "kubernetes binaries existed"; return 0; }
logger info "downloading kubernetes: $K8S_BIN_VER binaries"
docker run --rm -v "$BASE/bin":/tmp/out easzlab/kubeasz-k8s-bin:"$K8S_BIN_VER" \
sh -c "cp -f /k8s/* /tmp/out/"
}
function get_ext_bin() {
[[ -f "$BASE/bin/etcdctl" ]] && { logger warn "extra binaries existed"; return 0; }
logger info "downloading extral binaries kubeasz-ext-bin:$EXT_BIN_VER"
docker run --rm -v "$BASE/bin":/tmp/out "easzlab/kubeasz-ext-bin:$EXT_BIN_VER" \
sh -c "cp -rf /extra/* /tmp/out/"
}
function get_sys_pkg() {
[[ -f "$BASE/down/packages/$1.tgz" ]] && { logger warn "system packages for $1 existed"; return 0; }
docker run --rm -v "$BASE/down":/tmp/out "easzlab/kubeasz-sys-pkg:$SYS_PKG_VER" \
sh -c "cp -r /packages /tmp/out/"
}
function get_harbor_offline_pkg() {
[[ -f "$BASE/down/harbor-offline-installer-$HARBOR_VER.tgz" ]] && { logger warn "harbor-offline existed"; return 0; }
if [[ "$ARCH" == aarch64 ]];then
docker run --rm -v "$BASE/down":/tmp/out "easzlab/harbor-offline:${HARBOR_VER}-aarch64" \
sh -c "cp /harbor-offline-installer-$HARBOR_VER.tgz /tmp/out/"
else
docker run --rm -v "$BASE/down":/tmp/out "easzlab/harbor-offline:$HARBOR_VER" \
sh -c "cp /harbor-offline-installer-$HARBOR_VER.tgz /tmp/out/"
fi
}
function get_default_images() {
logger info "download default images, then upload to the local registry"
IMAGES=(\
"calico/cni:$calicoVer" \
"calico/kube-controllers:$calicoVer" \
"calico/node:$calicoVer" \
"coredns/coredns:$corednsVer" \
"easzlab/k8s-dns-node-cache:$dnsNodeCacheVer" \
"easzlab/metrics-server:$metricsVer" \
"easzlab/pause:$pauseVer" \
)
down_and_save_images
}
function get_extra_images() {
logger info "download images for $1, then upload to the local registry"
case "$1" in
argocd)
IMAGES=(\
"quay.io/argoproj/argocd:v3.2.5" \
"ghcr.io/dexidp/dex:v2.44.0" \
"ecr-public.aws.com/docker/library/redis:8.2.2-alpine" \
)
down_and_save_images argocd
;;
cilium)
IMAGES=(\
"cilium/cilium:v$ciliumVer" \
"cilium/operator-generic:v$ciliumVer" \
"cilium/hubble-relay:v$ciliumVer" \
"cilium/hubble-ui-backend:v0.13.2" \
"cilium/hubble-ui:v0.13.2" \
)
down_and_save_images cilium
;;
flannel)
IMAGES=(\
"ghcr.io/flannel-io/flannel:v0.27.3" \
"ghcr.io/flannel-io/flannel-cni-plugin:v1.7.1-flannel1" \
)
down_and_save_images flannel
;;
ingress-nginx)
IMAGES=(\
"easzlab/ingress-nginx-controller:v1.13.0" \
"easzlab/kube-webhook-certgen:v1.6.0" \
)
down_and_save_images
;;
dashboard)
IMAGES=(\
"kubernetesui/dashboard-api:1.14.0" \
"kubernetesui/dashboard-auth:1.4.0" \
"kubernetesui/dashboard-metrics-scraper:1.2.2" \
"kubernetesui/dashboard-web:1.7.0" \
"kong:3.9" \
)
down_and_save_images kubernetesui
;;
kubeblocks)
IMAGES=(\
"easzlab/snapshot-controller:v8.3.0" \
"apecloud-registry.cn-zhangjiakou.cr.aliyuncs.com/apecloud/kubeblocks-charts:${kubeblocksVer}" \
"apecloud-registry.cn-zhangjiakou.cr.aliyuncs.com/apecloud/kubeblocks:${kubeblocksVer}" \
"apecloud-registry.cn-zhangjiakou.cr.aliyuncs.com/apecloud/kubeblocks-tools:1.0.0" \
"apecloud-registry.cn-zhangjiakou.cr.aliyuncs.com/apecloud/kubeblocks-tools:${kubeblocksVer}" \
"apecloud-registry.cn-zhangjiakou.cr.aliyuncs.com/apecloud/kubeblocks-dataprotection:${kubeblocksVer}" \
"apecloud-registry.cn-zhangjiakou.cr.aliyuncs.com/apecloud/datasafed:0.2.1" \
)
down_and_save_images apecloud
;;
kb-addon-mysql)
IMAGES=(\
"apecloud/mysql_audit_log:8.0.33" \
"apecloud/xtrabackup:8.0" \
"apecloud/jemalloc:5.3.0" \
"apecloud/syncer:0.5.0" \
"apecloud/mysql:8.0.39" \
"apecloud/mysqld-exporter:0.15.1" \
"apecloud/proxysql:2.4.4" \
"apecloud/percona-xtrabackup:8.0" \
"apecloud/wal-g-mysql:2.0.1-1-ubuntu" \
)
down_and_save_images apecloud
;;
kb-addon-pg)
IMAGES=(\
"apecloud/spilo:16.4.0" \
"apecloud/spilo-init:0.1" \
"apecloud/dbctl:0.2.0" \
"apecloud/pgbouncer:1.19.0" \
"apecloud/postgres-exporter:v0.15.0" \
)
down_and_save_images apecloud
;;
kb-addon-redis)
IMAGES=(\
"apecloud/dbctl:0.1.8" \
"apecloud/agamotto:0.1.2-beta.1" \
"apecloud/redis:8.2.1" \
"apecloud/redis-stack-server:7.2.0-v14" \
"apecloud/redis-stack-server:7.2.0-v18" \
)
down_and_save_images apecloud
;;
kb-addon-mongodb)
IMAGES=(\
"apecloud/syncer:0.3.7" \
"apecloud/mongo:5.0.30" \
)
down_and_save_images apecloud
;;
kb-addon-elasticsearch)
IMAGES=(\
"apecloud-registry.cn-zhangjiakou.cr.aliyuncs.com/apecloud/elasticsearch-plugins:0.1.0" \
"apecloud-registry.cn-zhangjiakou.cr.aliyuncs.com/apecloud/elasticsearch:8.8.2" \
"apecloud-registry.cn-zhangjiakou.cr.aliyuncs.com/apecloud/elasticsearch-agent:0.1.0" \
"apecloud-registry.cn-zhangjiakou.cr.aliyuncs.com/apecloud/elasticsearch-exporter:v1.7.0" \
"apecloud-registry.cn-zhangjiakou.cr.aliyuncs.com/apecloud/curl-jq:0.1.0" \
)
down_and_save_images apecloud
;;
kb-addon-clickhouse)
IMAGES=(\
"apecloud-registry.cn-zhangjiakou.cr.aliyuncs.com/apecloud/busybox:1.36" \
"apecloud-registry.cn-zhangjiakou.cr.aliyuncs.com/apecloud/clickhouse:24.8.3-debian-12-r1" \
)
down_and_save_images apecloud
;;
kb-addon-minio)
IMAGES=(\
"apecloud-registry.cn-zhangjiakou.cr.aliyuncs.com/apecloud/minio:RELEASE.2024-06-29T01-20-47Z" \
)
down_and_save_images apecloud
;;
kube-ovn)
IMAGES=(\
"kubeovn/kube-ovn:$kubeOvnVer" \
)
down_and_save_images kubeovn
;;
kube-router)
IMAGES=(\
"cloudnativelabs/kube-router:$kubeRouterVer" \
)
down_and_save_images cloudnativelabs
;;
local-path-provisioner)
IMAGES=(\
"rancher/local-path-provisioner:$localpathProvisionerVer" \
)
down_and_save_images rancher
;;
minio)
IMAGES=(\
"quay.io/minio/operator:v${minioOperatorVer}" \
"quay.io/minio/operator-sidecar:v7.0.1" \
"quay.io/minio/minio:RELEASE.2025-04-08T15-41-24Z" \
)
down_and_save_images minio
;;
nacos)
IMAGES=(\
"nacos/nacos-server:v2.4.3" \
"nacos/nacos-peer-finder-plugin:1.1" \
)
down_and_save_images nacos
;;
network-check)
IMAGES=(\
"easzlab/json-mock:v1.3.0" \
"easzlab/alpine-curl:v7.85.0" \
)
down_and_save_images
;;
nfs-provisioner)
IMAGES=(\
"easzlab/nfs-subdir-external-provisioner:$nfsProvisionerVer" \
)
down_and_save_images
;;
openebs)
IMAGES=(\
"bitnami/kubectl:1.25.15" \
"openebs/provisioner-localpv:4.3.0" \
"openebs/linux-utils:4.2.0" \
"openebs/lvm-driver:1.7.0" \
"easzlab/csi-node-driver-registrar:v2.13.0" \
"easzlab/csi-resizer:v1.11.2" \
"easzlab/csi-snapshotter:v7.0.0" \
"easzlab/csi-provisioner:v5.2.0" \
"easzlab/snapshot-controller:v7.0.0" \
)
down_and_save_images openebs
;;
rocketmq)
IMAGES=(\
"apache/rocketmq-operator:latest" \
"apacherocketmq/rocketmq-broker:4.5.0-alpine-operator-0.3.0" \
"apacherocketmq/rocketmq-nameserver:4.5.0-alpine-operator-0.3.0" \
"apacherocketmq/rocketmq-console:2.0.0" \
)
down_and_save_images rocketmq
;;
prometheus)
IMAGES=(\
"easzlab/kube-state-metrics:v2.16.0" \
"easzlab/kube-webhook-certgen:v1.6.0" \
)
down_and_save_images
IMAGES=(\
"grafana/grafana:12.0.2" \
"quay.io/kiwigrid/k8s-sidecar:1.30.5" \
"quay.io/prometheus-operator/prometheus-config-reloader:v0.83.0" \
"quay.io/prometheus-operator/prometheus-operator:v0.83.0" \
"quay.io/prometheus/alertmanager:v0.28.1" \
"quay.io/prometheus/node-exporter:v1.9.1" \
"quay.io/prometheus/prometheus:v3.4.2" \
)
down_and_save_images prometheus
;;
*)
logger error "invalid option: $1"
usage-down-ext-img
exit 1
;;
esac
}
# 优先下载原始镜像;如果失败,尝试用加速地址下载
function down_and_save_images(){
if [ "$#" -eq 1 ];then
down_and_save_images_orig $1 || down_and_save_images_with_mirror $1
else
down_and_save_images_orig || down_and_save_images_with_mirror
fi
}
# 参数扩展说明:
# ${var%%pattern} - 从**右边**删除**最长匹配**的 pattern 后缀
# ${var%pattern} - 从**右边**删除**最短匹配**的 pattern 后缀
# ${var##pattern} - 从**左边**删除**最长匹配**的 pattern 前缀
# ${var#pattern} - 从**左边**删除**最短匹配**的 pattern 前缀
function down_and_save_images_orig(){
NS="easzlab"
[ "$#" -eq 1 ] && NS="$1"
for item in "${IMAGES[@]}"; do
image_part="${item##*/}"
image_name="${image_part%:*}"
image_tag="${image_part##*:}"
image_file="$imageDir/${image_name}_${image_tag}.tar"
if [[ ! -f "$image_file" ]];then
docker pull "$item" && \
docker save -o "$image_file" "$item" || \
{ logger error "download $item failed!"; return 1; }
else
docker load -i "$image_file"
fi
docker tag "$item" "easzlab.io.local:5000/${NS}/${image_part}"
docker push "easzlab.io.local:5000/${NS}/${image_part}" || \
{ logger error "push easzlab.io.local:5000/${NS}/${image_part} failed!"; return 1; }
done
}
# 尝试使用加速地址下载,比如:alpine:latest 替换成 $REGISTRY_MIRROR/library/alpine:latest 下载
function down_and_save_images_with_mirror(){
[[ "$REGISTRY_MIRROR" == "" ]] && { logger error "no registry mirror set"; return 1; }
NS="easzlab"
[ "$#" -eq 1 ] && NS="$1"
for item in "${IMAGES[@]}"; do
image_part="${item##*/}"
image_name="${image_part%:*}"
image_tag="${image_part##*:}"
image_file="$imageDir/${image_name}_${image_tag}.tar"
item=$(normalize_image "$item")
registry="${item%%/*}"
repository="${item#*/}"
[[ "$registry" == "docker.io" ]] && item="${REGISTRY_MIRROR}/${repository}"
if [[ ! -f "$image_file" ]];then
docker pull "$item" && \
docker save -o "$image_file" "$item" || \
{ logger error "download $item failed!"; return 1; }
else
docker load -i "$image_file"
fi
docker tag "$item" "easzlab.io.local:5000/${NS}/${image_part}"
docker push "easzlab.io.local:5000/${NS}/${image_part}" || \
{ logger error "push easzlab.io.local:5000/${NS}/${image_part} failed!"; return 1; }
done
}
# 将镜像名称转换为标准格式: ${registry}/${repository}:${tag}
# 标准格式规则:
# 1. 如果没有 registry,默认使用 docker.io
# 2. 如果没有 tag,默认使用 latest
# 3. 如果 repository 不包含 /,且 registry 是 docker.io,则添加 library/ 前缀
function normalize_image() {
local image="$1"
local registry=""
local repository=""
local tag=""
# 提取 tag(如果存在)
if [[ "$image" == *":"* ]]; then
tag="${image##*:}"
image="${image%:*}"
else
tag="latest"
fi
# 提取 registry 和 repository
# 判断是否包含 registry(包含域名特征:包含点号或端口号)
if [[ "$image" == *"."* ]] || [[ "$image" == *":"* ]]; then
# 包含 registry
registry="${image%%/*}"
repository="${image#*/}"
else
# 不包含 registry,使用默认的 docker.io
registry="docker.io"
repository="$image"
fi
# 如果 repository 不包含 /,且 registry 是 docker.io,则添加 library/ 前缀
if [[ "$registry" == "docker.io" ]] && [[ "$repository" != *"/"* ]]; then
repository="library/$repository"
fi
# 输出标准格式
echo "${registry}/${repository}:${tag}"
}
function download_all() {
mkdir -p /opt/kube/bin "$BASE/down" "$BASE/bin"
download_docker && \
install_docker && \
get_kubeasz && \
get_k8s_bin && \
get_ext_bin && \
start_local_registry && \
get_default_images
}
function start_local_registry() {
if [[ ! -f "$imageDir/registry-2.tar" ]];then
docker pull "registry:2" && \
docker save -o "$imageDir/registry-2.tar" "registry:2"
fi
docker ps -a --format="{{ .Names }}"|grep local_registry > /dev/null 2>&1 && \
{ logger warn "local_registry is already running"; return 0; }
logger info "start local registry ..."
docker load -i "$imageDir/registry-2.tar" > /dev/null
mkdir -p /opt/kube/registry
docker run -d \
--name local_registry \
--network host \
--restart always \
--volume /opt/kube/registry:/var/lib/registry \
registry:2
sed -i "/easzlab.io.local/d" /etc/hosts
echo "127.0.0.1 easzlab.io.local" >> /etc/hosts
}
function start_kubeasz_docker() {
# create cmd alias in /root/.bashrc
sed -i '/docker exec/d' /root/.bashrc
echo "alias dk='docker exec -it kubeasz' # generated by kubeasz" >> /root/.bashrc
[[ -d "$BASE/roles/kube-node" ]] || { logger error "not initialized. try 'ezdown -D' first."; exit 1; }
docker ps -a --format="{{ .Names }}"|grep kubeasz > /dev/null 2>&1 && \
docker rm -f kubeasz > /dev/null
if [[ ! -f "$imageDir/kubeasz_$KUBEASZ_VER.tar" ]];then
logger info "downloading kubeasz: $KUBEASZ_VER"
docker pull "easzlab/kubeasz:$KUBEASZ_VER" && \
docker save -o "$imageDir/kubeasz_$KUBEASZ_VER.tar" "easzlab/kubeasz:$KUBEASZ_VER"
else
docker load -i "$imageDir/kubeasz_$KUBEASZ_VER.tar"
fi
logger info "try to run kubeasz in a container"
# get host's IP
host_if=$(ip route|grep default|head -n1|cut -d' ' -f5)
host_ip=$(ip a|grep "$host_if$"|head -n1|awk '{print $2}'|cut -d'/' -f1)
logger debug "get host IP: $host_ip"
# allow ssh login using key locally
if [[ ! -e /root/.ssh/id_rsa ]]; then
logger debug "generate ssh key pair"
ssh-keygen -t rsa -b 2048 -N '' -f /root/.ssh/id_rsa > /dev/null
cat /root/.ssh/id_rsa.pub >> /root/.ssh/authorized_keys
ssh-keyscan -t ecdsa -H "$host_ip" >> /root/.ssh/known_hosts
fi
# run kubeasz docker container
docker run --detach \
--env HOST_IP="$host_ip" \
--name kubeasz \
--network host \
--restart always \
--volume "$BASE":"$BASE" \
--volume /root/.kube:/root/.kube \
--volume /root/.ssh:/root/.ssh \
--volume /etc/docker:/etc/docker \
easzlab/kubeasz:${KUBEASZ_VER}
}
### Main Lines ##################################################
function main() {
BASE="/etc/kubeasz"
IMAGES=()
imageDir="$BASE/down"
# check if use bash shell
# readlink /proc/$$/exe|grep -q "bash" || { logger error "you should use bash shell, not sh"; exit 1; }
# check if use with root
# [[ "$EUID" -ne 0 ]] && { logger error "you should run this script as root"; exit 1; }
# get architecture
ARCH=$(uname -m)
[[ "$#" -eq 0 ]] && { usage >&2; exit 1; }
ACTION=""
while getopts "CDP:RSX:d:e:k:m:z:" OPTION; do
case "$OPTION" in
D)
ACTION="download_all"
;;
P)
[[ $OPTARG =~ (ubuntu_[0-9]+|centos_[0-9]+|debian_[0-9]+|fedora_[0-9]+|almalinux_[0-9]+|opensuse_leap_[0-9]+|rocky_[0-9]+) ]] || \
{ usage-down-sys-pkg; exit 1; }
SYS_PKG_VER="${SYS_PKG_VER}_$OPTARG"
ACTION="get_sys_pkg $OPTARG"
;;
R)
ACTION="get_harbor_offline_pkg"
;;
S)
ACTION="start_kubeasz_docker"
;;
X)
ACTION="get_extra_images $OPTARG"
;;
d)
DOCKER_VER="$OPTARG"
;;
e)
EXT_BIN_VER="$OPTARG"
;;
k)
K8S_BIN_VER="$OPTARG"
;;
m)
REGISTRY_MIRROR="$OPTARG"
;;
z)
KUBEASZ_VER="$OPTARG"
;;
?)
usage
exit 1
;;
esac
done
[[ "$ACTION" == "" ]] && { logger error "illegal option"; usage; exit 1; }
# excute cmd "$ACTION"
logger info "Action begin: $ACTION"
${ACTION} || { logger error "Action failed: $ACTION"; return 1; }
logger info "Action successed: $ACTION"
}
main "$@"
================================================
FILE: manifests/deprecated/efk/es-dynamic-pv/es-statefulset.yaml
================================================
# RBAC authn and authz
apiVersion: v1
kind: ServiceAccount
metadata:
name: elasticsearch-logging
namespace: kube-system
labels:
k8s-app: elasticsearch-logging
kubernetes.io/cluster-service: "true"
addonmanager.kubernetes.io/mode: Reconcile
---
kind: ClusterRole
apiVersion: rbac.authorization.k8s.io/v1
metadata:
name: elasticsearch-logging
labels:
k8s-app: elasticsearch-logging
kubernetes.io/cluster-service: "true"
addonmanager.kubernetes.io/mode: Reconcile
rules:
- apiGroups:
- ""
resources:
- "services"
- "namespaces"
- "endpoints"
verbs:
- "get"
---
kind: ClusterRoleBinding
apiVersion: rbac.authorization.k8s.io/v1
metadata:
namespace: kube-system
name: elasticsearch-logging
labels:
k8s-app: elasticsearch-logging
kubernetes.io/cluster-service: "true"
addonmanager.kubernetes.io/mode: Reconcile
subjects:
- kind: ServiceAccount
name: elasticsearch-logging
namespace: kube-system
apiGroup: ""
roleRef:
kind: ClusterRole
name: elasticsearch-logging
apiGroup: ""
---
# Elasticsearch deployment itself
apiVersion: apps/v1
kind: StatefulSet
metadata:
name: elasticsearch-logging
namespace: kube-system
labels:
k8s-app: elasticsearch-logging
version: v6.6.1
kubernetes.io/cluster-service: "true"
addonmanager.kubernetes.io/mode: Reconcile
spec:
serviceName: elasticsearch-logging
replicas: 2
selector:
matchLabels:
k8s-app: elasticsearch-logging
version: v6.6.1
template:
metadata:
labels:
k8s-app: elasticsearch-logging
version: v6.6.1
kubernetes.io/cluster-service: "true"
spec:
serviceAccountName: elasticsearch-logging
containers:
#- image: gcr.io/fluentd-elasticsearch/elasticsearch:v6.6.1
- image: easzlab/elasticsearch:v6.6.1
name: elasticsearch-logging
resources:
# need more cpu upon initialization, therefore burstable class
limits:
cpu: 1000m
requests:
cpu: 100m
ports:
- containerPort: 9200
name: db
protocol: TCP
- containerPort: 9300
name: transport
protocol: TCP
volumeMounts:
- name: elasticsearch-logging
mountPath: /data
env:
- name: "NAMESPACE"
valueFrom:
fieldRef:
fieldPath: metadata.namespace
# Elasticsearch requires vm.max_map_count to be at least 262144.
# If your OS already sets up this number to a higher value, feel free
# to remove this init container.
initContainers:
- image: alpine:3.6
command: ["/sbin/sysctl", "-w", "vm.max_map_count=262144"]
name: elasticsearch-logging-init
securityContext:
privileged: true
volumeClaimTemplates:
- metadata:
name: elasticsearch-logging
spec:
accessModes: [ "ReadWriteMany" ]
storageClassName: "nfs-dynamic-class"
resources:
requests:
storage: 4Gi
================================================
FILE: manifests/deprecated/efk/es-index-rotator/rotator.yaml
================================================
apiVersion: batch/v1beta1
kind: CronJob
metadata:
name: es-index-rotator
namespace: kube-system
spec:
# 每天1点3分执行
schedule: "3 1 */1 * *"
jobTemplate:
spec:
template:
spec:
containers:
- name: es-index-rotator
image: easzlab/es-index-rotator:0.2.1
# 保留最近10天日志
command:
- /bin/rotate.sh
- "10"
- "logstash" # fluented 默认创建的index形如'logstash-2020.01.01'
restartPolicy: OnFailure
concurrencyPolicy: Forbid
successfulJobsHistoryLimit: 2
failedJobsHistoryLimit: 1
================================================
FILE: manifests/deprecated/efk/es-service.yaml
================================================
apiVersion: v1
kind: Service
metadata:
name: elasticsearch-logging
namespace: kube-system
labels:
k8s-app: elasticsearch-logging
kubernetes.io/cluster-service: "true"
addonmanager.kubernetes.io/mode: Reconcile
kubernetes.io/name: "Elasticsearch"
spec:
ports:
- port: 9200
protocol: TCP
targetPort: db
clusterIP: None
selector:
k8s-app: elasticsearch-logging
================================================
FILE: manifests/deprecated/efk/es-static-pv/es-pv0.yaml
================================================
apiVersion: v1
kind: PersistentVolume
metadata:
name: pv-es-0
spec:
capacity:
storage: 4Gi
accessModes:
- ReadWriteMany
volumeMode: Filesystem
persistentVolumeReclaimPolicy: Recycle
storageClassName: "es-storage-class"
nfs:
# 根据实际共享目录修改
path: /share/es0
# 根据实际 nfs服务器地址修改
server: 192.168.1.208
================================================
FILE: manifests/deprecated/efk/es-static-pv/es-pv1.yaml
================================================
apiVersion: v1
kind: PersistentVolume
metadata:
name: pv-es-1
spec:
capacity:
storage: 4Gi
accessModes:
- ReadWriteMany
volumeMode: Filesystem
persistentVolumeReclaimPolicy: Recycle
storageClassName: "es-storage-class"
nfs:
# 根据实际共享目录修改
path: /share/es1
# 根据实际 nfs服务器地址修改
server: 192.168.1.208
================================================
FILE: manifests/deprecated/efk/es-static-pv/es-pv2.yaml
================================================
apiVersion: v1
kind: PersistentVolume
metadata:
name: pv-es-2
spec:
capacity:
storage: 4Gi
accessModes:
- ReadWriteMany
volumeMode: Filesystem
persistentVolumeReclaimPolicy: Recycle
storageClassName: "es-storage-class"
nfs:
# 根据实际共享目录修改
path: /share/es2
# 根据实际 nfs服务器地址修改
server: 192.168.1.208
================================================
FILE: manifests/deprecated/efk/es-static-pv/es-statefulset.yaml
================================================
# RBAC authn and authz
apiVersion: v1
kind: ServiceAccount
metadata:
name: elasticsearch-logging
namespace: kube-system
labels:
k8s-app: elasticsearch-logging
kubernetes.io/cluster-service: "true"
addonmanager.kubernetes.io/mode: Reconcile
---
kind: ClusterRole
apiVersion: rbac.authorization.k8s.io/v1
metadata:
name: elasticsearch-logging
labels:
k8s-app: elasticsearch-logging
kubernetes.io/cluster-service: "true"
addonmanager.kubernetes.io/mode: Reconcile
rules:
- apiGroups:
- ""
resources:
- "services"
- "namespaces"
- "endpoints"
verbs:
- "get"
---
kind: ClusterRoleBinding
apiVersion: rbac.authorization.k8s.io/v1
metadata:
namespace: kube-system
name: elasticsearch-logging
labels:
k8s-app: elasticsearch-logging
kubernetes.io/cluster-service: "true"
addonmanager.kubernetes.io/mode: Reconcile
subjects:
- kind: ServiceAccount
name: elasticsearch-logging
namespace: kube-system
apiGroup: ""
roleRef:
kind: ClusterRole
name: elasticsearch-logging
apiGroup: ""
---
# Elasticsearch deployment itself
apiVersion: apps/v1
kind: StatefulSet
metadata:
name: elasticsearch-logging
namespace: kube-system
labels:
k8s-app: elasticsearch-logging
version: v6.6.1
kubernetes.io/cluster-service: "true"
addonmanager.kubernetes.io/mode: Reconcile
spec:
serviceName: elasticsearch-logging
replicas: 2
selector:
matchLabels:
k8s-app: elasticsearch-logging
version: v6.6.1
template:
metadata:
labels:
k8s-app: elasticsearch-logging
version: v6.6.1
kubernetes.io/cluster-service: "true"
spec:
serviceAccountName: elasticsearch-logging
containers:
#- image: gcr.io/fluentd-elasticsearch/elasticsearch:v6.6.1
- image: easzlab/elasticsearch:v6.6.1
name: elasticsearch-logging
resources:
# need more cpu upon initialization, therefore burstable class
limits:
cpu: 1000m
requests:
cpu: 100m
ports:
- containerPort: 9200
name: db
protocol: TCP
- containerPort: 9300
name: transport
protocol: TCP
volumeMounts:
- name: elasticsearch-logging
mountPath: /data
env:
- name: "NAMESPACE"
valueFrom:
fieldRef:
fieldPath: metadata.namespace
# Elasticsearch requires vm.max_map_count to be at least 262144.
# If your OS already sets up this number to a higher value, feel free
# to remove this init container.
initContainers:
- image: alpine:3.6
command: ["/sbin/sysctl", "-w", "vm.max_map_count=262144"]
name: elasticsearch-logging-init
securityContext:
privileged: true
volumeClaimTemplates:
- metadata:
name: elasticsearch-logging
spec:
accessModes: [ "ReadWriteMany" ]
storageClassName: "es-storage-class"
resources:
requests:
storage: 4Gi
================================================
FILE: manifests/deprecated/efk/es-without-pv/es-statefulset.yaml
================================================
# RBAC authn and authz
apiVersion: v1
kind: ServiceAccount
metadata:
name: elasticsearch-logging
namespace: kube-system
labels:
k8s-app: elasticsearch-logging
kubernetes.io/cluster-service: "true"
addonmanager.kubernetes.io/mode: Reconcile
---
kind: ClusterRole
apiVersion: rbac.authorization.k8s.io/v1
metadata:
name: elasticsearch-logging
labels:
k8s-app: elasticsearch-logging
kubernetes.io/cluster-service: "true"
addonmanager.kubernetes.io/mode: Reconcile
rules:
- apiGroups:
- ""
resources:
- "services"
- "namespaces"
- "endpoints"
verbs:
- "get"
---
kind: ClusterRoleBinding
apiVersion: rbac.authorization.k8s.io/v1
metadata:
namespace: kube-system
name: elasticsearch-logging
labels:
k8s-app: elasticsearch-logging
kubernetes.io/cluster-service: "true"
addonmanager.kubernetes.io/mode: Reconcile
subjects:
- kind: ServiceAccount
name: elasticsearch-logging
namespace: kube-system
apiGroup: ""
roleRef:
kind: ClusterRole
name: elasticsearch-logging
apiGroup: ""
---
# Elasticsearch deployment itself
apiVersion: apps/v1
kind: StatefulSet
metadata:
name: elasticsearch-logging
namespace: kube-system
labels:
k8s-app: elasticsearch-logging
version: v6.6.1
kubernetes.io/cluster-service: "true"
addonmanager.kubernetes.io/mode: Reconcile
spec:
serviceName: elasticsearch-logging
replicas: 2
selector:
matchLabels:
k8s-app: elasticsearch-logging
version: v6.6.1
template:
metadata:
labels:
k8s-app: elasticsearch-logging
version: v6.6.1
kubernetes.io/cluster-service: "true"
spec:
serviceAccountName: elasticsearch-logging
containers:
#- image: gcr.io/fluentd-elasticsearch/elasticsearch:v6.6.1
- image: easzlab/elasticsearch:v6.6.1
name: elasticsearch-logging
resources:
# need more cpu upon initialization, therefore burstable class
limits:
cpu: 1000m
requests:
cpu: 100m
ports:
- containerPort: 9200
name: db
protocol: TCP
- containerPort: 9300
name: transport
protocol: TCP
volumeMounts:
- name: elasticsearch-logging
mountPath: /data
env:
- name: "NAMESPACE"
valueFrom:
fieldRef:
fieldPath: metadata.namespace
volumes:
- name: elasticsearch-logging
emptyDir: {}
# Elasticsearch requires vm.max_map_count to be at least 262144.
# If your OS already sets up this number to a higher value, feel free
# to remove this init container.
initContainers:
- image: alpine:3.6
command: ["/sbin/sysctl", "-w", "vm.max_map_count=262144"]
name: elasticsearch-logging-init
securityContext:
privileged: true
================================================
FILE: manifests/deprecated/efk/fluentd-es-configmap.yaml
================================================
kind: ConfigMap
apiVersion: v1
metadata:
name: fluentd-es-config-v0.2.0
namespace: kube-system
labels:
addonmanager.kubernetes.io/mode: Reconcile
data:
system.conf: |-
root_dir /tmp/fluentd-buffers/
containers.input.conf: |-
# This configuration file for Fluentd / td-agent is used
# to watch changes to Docker log files. The kubelet creates symlinks that
# capture the pod name, namespace, container name & Docker container ID
# to the docker logs for pods in the /var/log/containers directory on the host.
# If running this fluentd configuration in a Docker container, the /var/log
# directory should be mounted in the container.
#
# These logs are then submitted to Elasticsearch which assumes the
# installation of the fluent-plugin-elasticsearch & the
# fluent-plugin-kubernetes_metadata_filter plugins.
# See https://github.com/uken/fluent-plugin-elasticsearch &
# https://github.com/fabric8io/fluent-plugin-kubernetes_metadata_filter for
# more information about the plugins.
#
# Example
# =======
# A line in the Docker log file might look like this JSON:
#
# {"log":"2014/09/25 21:15:03 Got request with path wombat\n",
# "stream":"stderr",
# "time":"2014-09-25T21:15:03.499185026Z"}
#
# The time_format specification below makes sure we properly
# parse the time format produced by Docker. This will be
# submitted to Elasticsearch and should appear like:
# $ curl 'http://elasticsearch-logging:9200/_search?pretty'
# ...
# {
# "_index" : "logstash-2014.09.25",
# "_type" : "fluentd",
# "_id" : "VBrbor2QTuGpsQyTCdfzqA",
# "_score" : 1.0,
# "_source":{"log":"2014/09/25 22:45:50 Got request with path wombat\n",
# "stream":"stderr","tag":"docker.container.all",
# "@timestamp":"2014-09-25T22:45:50+00:00"}
# },
# ...
#
# The Kubernetes fluentd plugin is used to write the Kubernetes metadata to the log
# record & add labels to the log record if properly configured. This enables users
# to filter & search logs on any metadata.
# For example a Docker container's logs might be in the directory:
#
# /var/lib/docker/containers/997599971ee6366d4a5920d25b79286ad45ff37a74494f262e3bc98d909d0a7b
#
# and in the file:
#
# 997599971ee6366d4a5920d25b79286ad45ff37a74494f262e3bc98d909d0a7b-json.log
#
# where 997599971ee6... is the Docker ID of the running container.
# The Kubernetes kubelet makes a symbolic link to this file on the host machine
# in the /var/log/containers directory which includes the pod name and the Kubernetes
# container name:
#
# synthetic-logger-0.25lps-pod_default_synth-lgr-997599971ee6366d4a5920d25b79286ad45ff37a74494f262e3bc98d909d0a7b.log
# ->
# /var/lib/docker/containers/997599971ee6366d4a5920d25b79286ad45ff37a74494f262e3bc98d909d0a7b/997599971ee6366d4a5920d25b79286ad45ff37a74494f262e3bc98d909d0a7b-json.log
#
# The /var/log directory on the host is mapped to the /var/log directory in the container
# running this instance of Fluentd and we end up collecting the file:
#
# /var/log/containers/synthetic-logger-0.25lps-pod_default_synth-lgr-997599971ee6366d4a5920d25b79286ad45ff37a74494f262e3bc98d909d0a7b.log
#
# This results in the tag:
#
# var.log.containers.synthetic-logger-0.25lps-pod_default_synth-lgr-997599971ee6366d4a5920d25b79286ad45ff37a74494f262e3bc98d909d0a7b.log
#
# The Kubernetes fluentd plugin is used to extract the namespace, pod name & container name
# which are added to the log message as a kubernetes field object & the Docker container ID
# is also added under the docker field object.
# The final tag is:
#
# kubernetes.var.log.containers.synthetic-logger-0.25lps-pod_default_synth-lgr-997599971ee6366d4a5920d25b79286ad45ff37a74494f262e3bc98d909d0a7b.log
#
# And the final log record look like:
#
# {
# "log":"2014/09/25 21:15:03 Got request with path wombat\n",
# "stream":"stderr",
# "time":"2014-09-25T21:15:03.499185026Z",
# "kubernetes": {
# "namespace": "default",
# "pod_name": "synthetic-logger-0.25lps-pod",
# "container_name": "synth-lgr"
# },
# "docker": {
# "container_id": "997599971ee6366d4a5920d25b79286ad45ff37a74494f262e3bc98d909d0a7b"
# }
# }
#
# This makes it easier for users to search for logs by pod name or by
# the name of the Kubernetes container regardless of how many times the
# Kubernetes pod has been restarted (resulting in a several Docker container IDs).
# Json Log Example:
# {"log":"[info:2016-02-16T16:04:05.930-08:00] Some log text here\n","stream":"stdout","time":"2016-02-17T00:04:05.931087621Z"}
# CRI Log Example:
# 2016-02-17T00:04:05.931087621Z stdout F [info:2016-02-16T16:04:05.930-08:00] Some log text here
@id fluentd-containers.log
@type tail
path /var/log/containers/*.log
pos_file /var/log/es-containers.log.pos
tag raw.kubernetes.*
read_from_head true
@type multi_format
format json
time_key time
time_format %Y-%m-%dT%H:%M:%S.%NZ
format /^(?
# Detect exceptions in the log output and forward them as one log entry.
@id raw.kubernetes
@type detect_exceptions
remove_tag_prefix raw
message log
stream stream
multiline_flush_interval 5
max_bytes 500000
max_lines 1000
# Concatenate multi-line logs
@id filter_concat
@type concat
key log
use_first_timestamp true
multiline_end_regexp /\n$/
separator ""
# Enriches records with Kubernetes metadata
@id filter_kubernetes_metadata
@type kubernetes_metadata
# Fixes json fields in Elasticsearch
@id filter_parser
@type parser
key_name log
reserve_data true
remove_key_name_field true
@type multi_format
format json
format none
system.input.conf: |-
# Logs from systemd-journal for interesting services.
# TODO(random-liu): Remove this after cri container runtime rolls out.
@id journald-docker
@type systemd
matches [{ "_SYSTEMD_UNIT": "docker.service" }]
@type local
persistent true
path /var/log/journald-docker.pos
read_from_head true
tag docker
@id journald-container-runtime
@type systemd
matches [{ "_SYSTEMD_UNIT": "{{ fluentd_container_runtime_service }}.service" }]
@type local
persistent true
path /var/log/journald-container-runtime.pos
read_from_head true
tag container-runtime
@id journald-etcd
@type systemd
matches [{ "_SYSTEMD_UNIT": "etcd.service" }]
@type local
persistent true
path /var/log/journald-etcd.pos
read_from_head true
tag etcd
@id journald-kube-apiserver
@type systemd
matches [{ "_SYSTEMD_UNIT": "kube-apiserver.service" }]
@type local
persistent true
path /var/log/journald-kube-apiserver.pos
read_from_head true
tag kube-apiserver
@id journald-kube-controller-manager
@type systemd
matches [{ "_SYSTEMD_UNIT": "kube-controller-manager.service" }]
@type local
persistent true
path /var/log/journald-kube-controller-manager.pos
read_from_head true
tag kube-controller-manager
@id journald-kube-scheduler
@type systemd
matches [{ "_SYSTEMD_UNIT": "kube-scheduler.service" }]
@type local
persistent true
path /var/log/journald-kube-scheduler.pos
read_from_head true
tag kube-scheduler
@id journald-kubelet
@type systemd
matches [{ "_SYSTEMD_UNIT": "kubelet.service" }]
@type local
persistent true
path /var/log/journald-kubelet.pos
read_from_head true
tag kubelet
@id journald-kube-proxy
@type systemd
matches [{ "_SYSTEMD_UNIT": "kube-proxy.service" }]
@type local
persistent true
path /var/log/journald-kube-proxy.pos
read_from_head true
tag kube-proxy
@id journald-node-problem-detector
@type systemd
matches [{ "_SYSTEMD_UNIT": "node-problem-detector.service" }]
@type local
persistent true
path /var/log/journald-node-problem-detector.pos
read_from_head true
tag node-problem-detector
@id kernel
@type systemd
matches [{ "_TRANSPORT": "kernel" }]
@type local
persistent true
path /var/log/kernel.pos
fields_strip_underscores true
fields_lowercase true
read_from_head true
tag kernel
forward.input.conf: |-
# Takes the messages sent over TCP
@id forward
@type forward
monitoring.conf: |-
# Prometheus Exporter Plugin
# input plugin that exports metrics
@id prometheus
@type prometheus
@id monitor_agent
@type monitor_agent
# input plugin that collects metrics from MonitorAgent
@id prometheus_monitor
@type prometheus_monitor
host ${hostname}
# input plugin that collects metrics for output plugin
@id prometheus_output_monitor
@type prometheus_output_monitor
host ${hostname}
# input plugin that collects metrics for in_tail plugin
@id prometheus_tail_monitor
@type prometheus_tail_monitor
host ${hostname}
output.conf: |-
@id elasticsearch
@type elasticsearch
@log_level info
type_name _doc
include_tag_key true
host elasticsearch-logging
port 9200
logstash_format true
@type file
path /var/log/fluentd-buffers/kubernetes.system.buffer
flush_mode interval
retry_type exponential_backoff
flush_thread_count 2
flush_interval 5s
retry_forever
retry_max_interval 30
chunk_limit_size 2M
queue_limit_length 8
overflow_action block
================================================
FILE: manifests/deprecated/efk/fluentd-es-ds.yaml
================================================
apiVersion: v1
kind: ServiceAccount
metadata:
name: fluentd-es
namespace: kube-system
labels:
k8s-app: fluentd-es
kubernetes.io/cluster-service: "true"
addonmanager.kubernetes.io/mode: Reconcile
---
kind: ClusterRole
apiVersion: rbac.authorization.k8s.io/v1
metadata:
name: fluentd-es
labels:
k8s-app: fluentd-es
kubernetes.io/cluster-service: "true"
addonmanager.kubernetes.io/mode: Reconcile
rules:
- apiGroups:
- ""
resources:
- "namespaces"
- "pods"
verbs:
- "get"
- "watch"
- "list"
---
kind: ClusterRoleBinding
apiVersion: rbac.authorization.k8s.io/v1
metadata:
name: fluentd-es
labels:
k8s-app: fluentd-es
kubernetes.io/cluster-service: "true"
addonmanager.kubernetes.io/mode: Reconcile
subjects:
- kind: ServiceAccount
name: fluentd-es
namespace: kube-system
apiGroup: ""
roleRef:
kind: ClusterRole
name: fluentd-es
apiGroup: ""
---
apiVersion: apps/v1
kind: DaemonSet
metadata:
name: fluentd-es-v2.4.0
namespace: kube-system
labels:
k8s-app: fluentd-es
version: v2.4.0
kubernetes.io/cluster-service: "true"
addonmanager.kubernetes.io/mode: Reconcile
spec:
selector:
matchLabels:
k8s-app: fluentd-es
version: v2.4.0
template:
metadata:
labels:
k8s-app: fluentd-es
kubernetes.io/cluster-service: "true"
version: v2.4.0
# This annotation ensures that fluentd does not get evicted if the node
# supports critical pod annotation based priority scheme.
# Note that this does not guarantee admission on the nodes (#40573).
annotations:
seccomp.security.alpha.kubernetes.io/pod: 'docker/default'
spec:
priorityClassName: system-node-critical
serviceAccountName: fluentd-es
containers:
- name: fluentd-es
#image: k8s.gcr.io/fluentd-elasticsearch:v2.4.0
image: mirrorgooglecontainers/fluentd-elasticsearch:v2.4.0
env:
- name: FLUENTD_ARGS
value: --no-supervisor -q
resources:
limits:
memory: 500Mi
requests:
cpu: 100m
memory: 200Mi
volumeMounts:
- name: varlog
mountPath: /var/log
- name: varlibdockercontainers
mountPath: /var/lib/docker/containers
readOnly: true
- name: config-volume
mountPath: /etc/fluent/config.d
#nodeSelector:
#beta.kubernetes.io/fluentd-ds-ready: "true"
terminationGracePeriodSeconds: 30
volumes:
- name: varlog
hostPath:
path: /var/log
- name: varlibdockercontainers
hostPath:
path: /var/lib/docker/containers
- name: config-volume
configMap:
name: fluentd-es-config-v0.2.0
================================================
FILE: manifests/deprecated/efk/kibana-deployment.yaml
================================================
apiVersion: apps/v1
kind: Deployment
metadata:
name: kibana-logging
namespace: kube-system
labels:
k8s-app: kibana-logging
kubernetes.io/cluster-service: "true"
addonmanager.kubernetes.io/mode: Reconcile
spec:
replicas: 1
selector:
matchLabels:
k8s-app: kibana-logging
template:
metadata:
labels:
k8s-app: kibana-logging
annotations:
seccomp.security.alpha.kubernetes.io/pod: 'docker/default'
spec:
containers:
- name: kibana-logging
#image: docker.elastic.co/kibana/kibana-oss:6.6.1
image: easzlab/kibana-oss:6.6.1
resources:
# need more cpu upon initialization, therefore burstable class
limits:
cpu: 1000m
requests:
cpu: 100m
env:
- name: ELASTICSEARCH_URL
value: http://elasticsearch-logging:9200
# if kibana service is exposed by nodePort, use lines commited out instead
#- name: SERVER_BASEPATH
# value: ""
- name: SERVER_BASEPATH
value: /api/v1/namespaces/kube-system/services/kibana-logging/proxy
ports:
- containerPort: 5601
name: ui
protocol: TCP
================================================
FILE: manifests/deprecated/efk/kibana-service.yaml
================================================
apiVersion: v1
kind: Service
metadata:
name: kibana-logging
namespace: kube-system
labels:
k8s-app: kibana-logging
kubernetes.io/cluster-service: "true"
addonmanager.kubernetes.io/mode: Reconcile
kubernetes.io/name: "Kibana"
spec:
ports:
- port: 5601
protocol: TCP
targetPort: ui
selector:
k8s-app: kibana-logging
#type: NodePort
================================================
FILE: manifests/deprecated/efk/log-pilot/log-pilot-filebeat.yaml
================================================
apiVersion: apps/v1
kind: DaemonSet
metadata:
name: log-pilot
labels:
app: log-pilot
namespace: kube-system
spec:
selector:
matchLabels:
app: log-pilot
updateStrategy:
type: RollingUpdate
template:
metadata:
labels:
app: log-pilot
spec:
# 是否允许部署到Master节点上
#tolerations:
#- key: node-role.kubernetes.io/master
# effect: NoSchedule
# priorityClassName: system-cluster-critical
containers:
- name: log-pilot
# 版本请参考https://github.com/AliyunContainerService/log-pilot/releases
image: registry.cn-hangzhou.aliyuncs.com/acs/log-pilot:0.9.7-filebeat
resources:
limits:
memory: 500Mi
requests:
cpu: 200m
memory: 200Mi
env:
- name: "NODE_NAME"
valueFrom:
fieldRef:
fieldPath: spec.nodeName
- name: "LOGGING_OUTPUT"
value: "elasticsearch"
# 请确保集群到ES网络可达
- name: "ELASTICSEARCH_HOSTS"
value: "elasticsearch-logging:9200"
# 配置ES访问权限
- name: "ELASTICSEARCH_USER"
value: ""
- name: "ELASTICSEARCH_PASSWORD"
value: ""
volumeMounts:
- name: sock
mountPath: /var/run/docker.sock
- name: root
mountPath: /host
readOnly: true
- name: varlib
mountPath: /var/lib/filebeat
- name: varlog
mountPath: /var/log/filebeat
- name: localtime
mountPath: /etc/localtime
readOnly: true
livenessProbe:
failureThreshold: 3
exec:
command:
- /pilot/healthz
initialDelaySeconds: 10
periodSeconds: 10
successThreshold: 1
timeoutSeconds: 2
securityContext:
capabilities:
add:
- SYS_ADMIN
terminationGracePeriodSeconds: 30
imagePullSecrets:
- name: ydy-test-key
volumes:
- name: sock
hostPath:
path: /var/run/docker.sock
- name: root
hostPath:
path: /
- name: varlib
hostPath:
path: /var/lib/filebeat
type: DirectoryOrCreate
- name: varlog
hostPath:
path: /var/log/filebeat
type: DirectoryOrCreate
- name: localtime
hostPath:
path: /etc/localtime
================================================
FILE: manifests/deprecated/es-cluster/elasticsearch/.helmignore
================================================
.git
# OWNERS file for Kubernetes
OWNERS
================================================
FILE: manifests/deprecated/es-cluster/elasticsearch/Chart.yaml
================================================
name: elasticsearch
home: https://www.elastic.co/products/elasticsearch
version: 1.7.2
appVersion: 6.4.0
description: Flexible and powerful open source, distributed real-time search and analytics
engine.
icon: https://static-www.elastic.co/assets/blteb1c97719574938d/logo-elastic-elasticsearch-lt.svg
sources:
- https://www.elastic.co/products/elasticsearch
- https://github.com/jetstack/elasticsearch-pet
- https://github.com/giantswarm/kubernetes-elastic-stack
- https://github.com/GoogleCloudPlatform/elasticsearch-docker
- https://github.com/clockworksoul/helm-elasticsearch
- https://github.com/pires/kubernetes-elasticsearch-cluster
maintainers:
- name: simonswine
email: christian@jetstack.io
- name: icereval
email: michael.haselton@gmail.com
- name: rendhalver
email: pete.brown@powerhrg.com
================================================
FILE: manifests/deprecated/es-cluster/elasticsearch/OWNERS
================================================
approvers:
- simonswine
- icereval
- rendhalver
reviewers:
- simonswine
- icereval
- rendhalver
================================================
FILE: manifests/deprecated/es-cluster/elasticsearch/README.md
================================================
# Elasticsearch Helm Chart
This chart uses a standard Docker image of Elasticsearch (docker.elastic.co/elasticsearch/elasticsearch-oss) and uses a service pointing to the master's transport port for service discovery.
Elasticsearch does not communicate with the Kubernetes API, hence no need for RBAC permissions.
## Warning for previous users
If you are currently using an earlier version of this Chart you will need to redeploy your Elasticsearch clusters. The discovery method used here is incompatible with using RBAC.
If you are upgrading to Elasticsearch 6 from the 5.5 version used in this chart before, please note that your cluster needs to do a full cluster restart.
The simplest way to do that is to delete the installation (keep the PVs) and install this chart again with the new version.
If you want to avoid doing that upgrade to Elasticsearch 5.6 first before moving on to Elasticsearch 6.0.
## Prerequisites Details
* Kubernetes 1.6+
* PV dynamic provisioning support on the underlying infrastructure
## StatefulSets Details
* https://kubernetes.io/docs/concepts/workloads/controllers/statefulset/
## StatefulSets Caveats
* https://kubernetes.io/docs/concepts/workloads/controllers/statefulset/#limitations
## Todo
* Implement TLS/Auth/Security
* Smarter upscaling/downscaling
* Solution for memory locking
## Chart Details
This chart will do the following:
* Implemented a dynamically scalable elasticsearch cluster using Kubernetes StatefulSets/Deployments
* Multi-role deployment: master, client (coordinating) and data nodes
* Statefulset Supports scaling down without degrading the cluster
## Installing the Chart
To install the chart with the release name `my-release`:
```bash
$ helm repo add incubator http://storage.googleapis.com/kubernetes-charts-incubator
$ helm install --name my-release incubator/elasticsearch
```
## Deleting the Charts
Delete the Helm deployment as normal
```
$ helm delete my-release
```
Deletion of the StatefulSet doesn't cascade to deleting associated PVCs. To delete them:
```
$ kubectl delete pvc -l release=my-release,component=data
```
## Configuration
The following table lists the configurable parameters of the elasticsearch chart and their default values.
| Parameter | Description | Default |
| ------------------------------------ | ------------------------------------------------------------------- | ------------------------------------ |
| `appVersion` | Application Version (Elasticsearch) | `6.4.0` |
| `image.repository` | Container image name | `docker.elastic.co/elasticsearch/elasticsearch-oss` |
| `image.tag` | Container image tag | `6.4.0` |
| `image.pullPolicy` | Container pull policy | `Always` |
| `cluster.name` | Cluster name | `elasticsearch` |
| `cluster.xpackEnable` | Writes the X-Pack configuration options to the configuration file | `false` |
| `cluster.config` | Additional cluster config appended | `{}` |
| `cluster.keystoreSecret` | Name of secret holding secure config options in an es keystore | `nil` |
| `cluster.env` | Cluster environment variables | `{MINIMUM_MASTER_NODES: "2"}` |
| `client.name` | Client component name | `client` |
| `client.replicas` | Client node replicas (deployment) | `2` |
| `client.resources` | Client node resources requests & limits | `{} - cpu limit must be an integer` |
| `client.priorityClassName` | Client priorityClass | `nil` |
| `client.heapSize` | Client node heap size | `512m` |
| `client.podAnnotations` | Client Deployment annotations | `{}` |
| `client.nodeSelector` | Node labels for client pod assignment | `{}` |
| `client.tolerations` | Client tolerations | `[]` |
| `client.serviceAnnotations` | Client Service annotations | `{}` |
| `client.serviceType` | Client service type | `ClusterIP` |
| `client.loadBalancerIP` | Client loadBalancerIP | `{}` |
| `client.loadBalancerSourceRanges` | Client loadBalancerSourceRanges | `{}` |
| `master.exposeHttp` | Expose http port 9200 on master Pods for monitoring, etc | `false` |
| `master.name` | Master component name | `master` |
| `master.replicas` | Master node replicas (deployment) | `2` |
| `master.resources` | Master node resources requests & limits | `{} - cpu limit must be an integer` |
| `master.priorityClassName` | Master priorityClass | `nil` |
| `master.podAnnotations` | Master Deployment annotations | `{}` |
| `master.nodeSelector` | Node labels for master pod assignment | `{}` |
| `master.tolerations` | Master tolerations | `[]` |
| `master.heapSize` | Master node heap size | `512m` |
| `master.name` | Master component name | `master` |
| `master.persistence.enabled` | Master persistent enabled/disabled | `true` |
| `master.persistence.name` | Master statefulset PVC template name | `data` |
| `master.persistence.size` | Master persistent volume size | `4Gi` |
| `master.persistence.storageClass` | Master persistent volume Class | `nil` |
| `master.persistence.accessMode` | Master persistent Access Mode | `ReadWriteOnce` |
| `data.exposeHttp` | Expose http port 9200 on data Pods for monitoring, etc | `false` |
| `data.replicas` | Data node replicas (statefulset) | `2` |
| `data.resources` | Data node resources requests & limits | `{} - cpu limit must be an integer` |
| `data.priorityClassName` | Data priorityClass | `nil` |
| `data.heapSize` | Data node heap size | `1536m` |
| `data.persistence.enabled` | Data persistent enabled/disabled | `true` |
| `data.persistence.name` | Data statefulset PVC template name | `data` |
| `data.persistence.size` | Data persistent volume size | `30Gi` |
| `data.persistence.storageClass` | Data persistent volume Class | `nil` |
| `data.persistence.accessMode` | Data persistent Access Mode | `ReadWriteOnce` |
| `data.podAnnotations` | Data StatefulSet annotations | `{}` |
| `data.nodeSelector` | Node labels for data pod assignment | `{}` |
| `data.tolerations` | Data tolerations | `[]` |
| `data.terminationGracePeriodSeconds` | Data termination grace period (seconds) | `3600` |
| `data.antiAffinity` | Data anti-affinity policy | `soft` |
Specify each parameter using the `--set key=value[,key=value]` argument to `helm install`.
In terms of Memory resources you should make sure that you follow that equation:
- `${role}HeapSize < ${role}MemoryRequests < ${role}MemoryLimits`
The YAML value of cluster.config is appended to elasticsearch.yml file for additional customization ("script.inline: on" for example to allow inline scripting)
# Deep dive
## Application Version
This chart aims to support Elasticsearch v2 and v5 deployments by specifying the `values.yaml` parameter `appVersion`.
### Version Specific Features
* Memory Locking *(variable renamed)*
* Ingest Node *(v5)*
* X-Pack Plugin *(v5)*
Upgrade paths & more info: https://www.elastic.co/guide/en/elasticsearch/reference/current/setup-upgrade.html
## Mlocking
This is a limitation in kubernetes right now. There is no way to raise the
limits of lockable memory, so that these memory areas won't be swapped. This
would degrade performance heavily. The issue is tracked in
[kubernetes/#3595](https://github.com/kubernetes/kubernetes/issues/3595).
```
[WARN ][bootstrap] Unable to lock JVM Memory: error=12,reason=Cannot allocate memory
[WARN ][bootstrap] This can result in part of the JVM being swapped out.
[WARN ][bootstrap] Increase RLIMIT_MEMLOCK, soft limit: 65536, hard limit: 65536
```
## Minimum Master Nodes
> The minimum_master_nodes setting is extremely important to the stability of your cluster. This setting helps prevent split brains, the existence of two masters in a single cluster.
>When you have a split brain, your cluster is at danger of losing data. Because the master is considered the supreme ruler of the cluster, it decides when new indices can be created, how shards are moved, and so forth. If you have two masters, data integrity becomes perilous, since you have two nodes that think they are in charge.
>This setting tells Elasticsearch to not elect a master unless there are enough master-eligible nodes available. Only then will an election take place.
>This setting should always be configured to a quorum (majority) of your master-eligible nodes. A quorum is (number of master-eligible nodes / 2) + 1
More info: https://www.elastic.co/guide/en/elasticsearch/guide/1.x/_important_configuration_changes.html#_minimum_master_nodes
# Client and Coordinating Nodes
Elasticsearch v5 terminology has updated, and now refers to a `Client Node` as a `Coordinating Node`.
More info: https://www.elastic.co/guide/en/elasticsearch/reference/5.5/modules-node.html#coordinating-node
## Select right storage class for SSD volumes
### GCE + Kubernetes 1.5
Create StorageClass for SSD-PD
```
$ kubectl create -f - < >(tee -a "/var/log/elasticsearch-hooks.log")
NODE_NAME=${HOSTNAME}
echo "Prepare to migrate data of the node ${NODE_NAME}"
echo "Move all data from node ${NODE_NAME}"
curl -s -XPUT -H 'Content-Type: application/json' '{{ template "elasticsearch.client.fullname" . }}:9200/_cluster/settings' -d "{
\"transient\" :{
\"cluster.routing.allocation.exclude._name\" : \"${NODE_NAME}\"
}
}"
echo ""
while true ; do
echo -e "Wait for node ${NODE_NAME} to become empty"
SHARDS_ALLOCATION=$(curl -s -XGET 'http://{{ template "elasticsearch.client.fullname" . }}:9200/_cat/shards')
if ! echo "${SHARDS_ALLOCATION}" | grep -E "${NODE_NAME}"; then
break
fi
sleep 1
done
echo "Node ${NODE_NAME} is ready to shutdown"
post-start-hook.sh: |-
#!/bin/bash
exec &> >(tee -a "/var/log/elasticsearch-hooks.log")
NODE_NAME=${HOSTNAME}
CLUSTER_SETTINGS=$(curl -s -XGET "http://{{ template "elasticsearch.client.fullname" . }}:9200/_cluster/settings")
if echo "${CLUSTER_SETTINGS}" | grep -E "${NODE_NAME}"; then
echo "Activate node ${NODE_NAME}"
curl -s -XPUT -H 'Content-Type: application/json' "http://{{ template "elasticsearch.client.fullname" . }}:9200/_cluster/settings" -d "{
\"transient\" :{
\"cluster.routing.allocation.exclude._name\" : null
}
}"
fi
echo "Node ${NODE_NAME} is ready to be used"
================================================
FILE: manifests/deprecated/es-cluster/elasticsearch/templates/data-pdb.yaml
================================================
{{- if .Values.data.podDisruptionBudget.enabled }}
apiVersion: policy/v1beta1
kind: PodDisruptionBudget
metadata:
labels:
app: {{ template "elasticsearch.name" . }}
chart: {{ .Chart.Name }}-{{ .Chart.Version }}
component: "{{ .Values.data.name }}"
heritage: {{ .Release.Service }}
release: {{ .Release.Name }}
name: {{ template "elasticsearch.data.fullname" . }}
spec:
{{- if .Values.data.podDisruptionBudget.minAvailable }}
minAvailable: {{ .Values.data.podDisruptionBudget.minAvailable }}
{{- end }}
{{- if .Values.data.podDisruptionBudget.maxUnavailable }}
maxUnavailable: {{ .Values.data.podDisruptionBudget.maxUnavailable }}
{{- end }}
selector:
matchLabels:
app: {{ template "elasticsearch.name" . }}
component: "{{ .Values.data.name }}"
release: {{ .Release.Name }}
{{- end }}
================================================
FILE: manifests/deprecated/es-cluster/elasticsearch/templates/data-statefulset.yaml
================================================
apiVersion: apps/v1
kind: StatefulSet
metadata:
labels:
app: {{ template "elasticsearch.name" . }}
chart: {{ .Chart.Name }}-{{ .Chart.Version }}
component: "{{ .Values.data.name }}"
heritage: {{ .Release.Service }}
release: {{ .Release.Name }}
name: {{ template "elasticsearch.data.fullname" . }}
spec:
serviceName: {{ template "elasticsearch.data.fullname" . }}
replicas: {{ .Values.data.replicas }}
selector:
matchLabels:
app: {{ template "elasticsearch.name" . }}
component: "{{ .Values.data.name }}"
template:
metadata:
labels:
app: {{ template "elasticsearch.name" . }}
component: "{{ .Values.data.name }}"
release: {{ .Release.Name }}
{{- if .Values.data.podAnnotations }}
annotations:
{{ toYaml .Values.data.podAnnotations | indent 8 }}
{{- end }}
spec:
{{- if .Values.data.priorityClassName }}
priorityClassName: "{{ .Values.data.priorityClassName }}"
{{- end }}
securityContext:
fsGroup: 1000
{{- if eq .Values.data.antiAffinity "hard" }}
affinity:
podAntiAffinity:
requiredDuringSchedulingIgnoredDuringExecution:
- topologyKey: "kubernetes.io/hostname"
labelSelector:
matchLabels:
app: "{{ template "elasticsearch.name" . }}"
release: "{{ .Release.Name }}"
component: "{{ .Values.data.name }}"
{{- else if eq .Values.data.antiAffinity "soft" }}
affinity:
podAntiAffinity:
preferredDuringSchedulingIgnoredDuringExecution:
- weight: 1
podAffinityTerm:
topologyKey: kubernetes.io/hostname
labelSelector:
matchLabels:
app: "{{ template "elasticsearch.name" . }}"
release: "{{ .Release.Name }}"
component: "{{ .Values.data.name }}"
{{- end }}
{{- if .Values.data.nodeSelector }}
nodeSelector:
{{ toYaml .Values.data.nodeSelector | indent 8 }}
{{- end }}
{{- if .Values.data.tolerations }}
tolerations:
{{ toYaml .Values.data.tolerations | indent 8 }}
{{- end }}
initContainers:
# see https://www.elastic.co/guide/en/elasticsearch/reference/current/vm-max-map-count.html
# and https://www.elastic.co/guide/en/elasticsearch/reference/current/setup-configuration-memory.html#mlockall
- name: "sysctl"
image: "{{ .Values.image.repository }}:{{ .Values.image.tag }}"
imagePullPolicy: "Always"
command: ["sysctl", "-w", "vm.max_map_count=262144"]
securityContext:
privileged: true
- name: "chown"
image: "{{ .Values.image.repository }}:{{ .Values.image.tag }}"
imagePullPolicy: {{ .Values.image.pullPolicy | quote }}
command:
- /bin/bash
- -c
- chown -R elasticsearch:elasticsearch /usr/share/elasticsearch/data &&
chown -R elasticsearch:elasticsearch /usr/share/elasticsearch/logs
securityContext:
runAsUser: 0
volumeMounts:
- mountPath: /usr/share/elasticsearch/data
name: data
containers:
- name: elasticsearch
env:
- name: DISCOVERY_SERVICE
value: {{ template "elasticsearch.fullname" . }}-discovery
- name: NODE_MASTER
value: "false"
- name: PROCESSORS
valueFrom:
resourceFieldRef:
resource: limits.cpu
- name: ES_JAVA_OPTS
value: "-Djava.net.preferIPv4Stack=true -Xms{{ .Values.data.heapSize }} -Xmx{{ .Values.data.heapSize }}"
{{- range $key, $value := .Values.cluster.env }}
- name: {{ $key }}
value: {{ $value | quote }}
{{- end }}
image: "{{ .Values.image.repository }}:{{ .Values.image.tag }}"
imagePullPolicy: {{ .Values.image.pullPolicy | quote }}
ports:
- containerPort: 9300
name: transport
{{ if .Values.data.exposeHttp }}
- containerPort: 9200
name: http
{{ end }}
resources:
{{ toYaml .Values.data.resources | indent 12 }}
readinessProbe:
httpGet:
path: /_cluster/health?local=true
port: 9200
initialDelaySeconds: 5
volumeMounts:
- mountPath: /usr/share/elasticsearch/data
name: data
- mountPath: /usr/share/elasticsearch/config/elasticsearch.yml
name: config
subPath: elasticsearch.yml
{{- if hasPrefix "2." .Values.image.tag }}
- mountPath: /usr/share/elasticsearch/config/logging.yml
name: config
subPath: logging.yml
{{- end }}
{{- if hasPrefix "5." .Values.image.tag }}
- mountPath: /usr/share/elasticsearch/config/log4j2.properties
name: config
subPath: log4j2.properties
{{- end }}
- name: config
mountPath: /pre-stop-hook.sh
subPath: pre-stop-hook.sh
- name: config
mountPath: /post-start-hook.sh
subPath: post-start-hook.sh
{{- if .Values.cluster.keystoreSecret }}
- name: keystore
mountPath: "/usr/share/elasticsearch/config/elasticsearch.keystore"
subPath: elasticsearch.keystore
readOnly: true
{{- end }}
lifecycle:
preStop:
exec:
command: ["/bin/bash","/pre-stop-hook.sh"]
postStart:
exec:
command: ["/bin/bash","/post-start-hook.sh"]
terminationGracePeriodSeconds: {{ .Values.data.terminationGracePeriodSeconds }}
{{- if .Values.image.pullSecrets }}
imagePullSecrets:
{{- range $pullSecret := .Values.image.pullSecrets }}
- name: {{ $pullSecret }}
{{- end }}
{{- end }}
volumes:
- name: config
configMap:
name: {{ template "elasticsearch.fullname" . }}
{{- if .Values.cluster.keystoreSecret }}
- name: keystore
secret:
secretName: {{ .Values.cluster.keystoreSecret }}
{{- end }}
{{- if not .Values.data.persistence.enabled }}
- name: data
emptyDir: {}
{{- end }}
updateStrategy:
type: {{ .Values.data.updateStrategy.type }}
{{- if .Values.data.persistence.enabled }}
volumeClaimTemplates:
- metadata:
name: {{ .Values.data.persistence.name }}
spec:
accessModes:
- {{ .Values.data.persistence.accessMode | quote }}
{{- if .Values.data.persistence.storageClass }}
{{- if (eq "-" .Values.data.persistence.storageClass) }}
storageClassName: ""
{{- else }}
storageClassName: "{{ .Values.data.persistence.storageClass }}"
{{- end }}
{{- end }}
resources:
requests:
storage: "{{ .Values.data.persistence.size }}"
{{- end }}
================================================
FILE: manifests/deprecated/es-cluster/elasticsearch/templates/master-pdb.yaml
================================================
{{- if .Values.master.podDisruptionBudget.enabled }}
apiVersion: policy/v1beta1
kind: PodDisruptionBudget
metadata:
labels:
app: {{ template "elasticsearch.name" . }}
chart: {{ .Chart.Name }}-{{ .Chart.Version }}
component: "{{ .Values.master.name }}"
heritage: {{ .Release.Service }}
release: {{ .Release.Name }}
name: {{ template "elasticsearch.master.fullname" . }}
spec:
{{- if .Values.master.podDisruptionBudget.minAvailable }}
minAvailable: {{ .Values.master.podDisruptionBudget.minAvailable }}
{{- end }}
{{- if .Values.master.podDisruptionBudget.maxUnavailable }}
maxUnavailable: {{ .Values.master.podDisruptionBudget.maxUnavailable }}
{{- end }}
selector:
matchLabels:
app: {{ template "elasticsearch.name" . }}
component: "{{ .Values.master.name }}"
release: {{ .Release.Name }}
{{- end }}
================================================
FILE: manifests/deprecated/es-cluster/elasticsearch/templates/master-statefulset.yaml
================================================
apiVersion: apps/v1
kind: StatefulSet
metadata:
labels:
app: {{ template "elasticsearch.name" . }}
chart: {{ .Chart.Name }}-{{ .Chart.Version }}
component: "{{ .Values.master.name }}"
heritage: {{ .Release.Service }}
release: {{ .Release.Name }}
name: {{ template "elasticsearch.master.fullname" . }}
spec:
serviceName: {{ template "elasticsearch.master.fullname" . }}
replicas: {{ .Values.master.replicas }}
selector:
matchLabels:
app: {{ template "elasticsearch.name" . }}
component: "{{ .Values.master.name }}"
template:
metadata:
labels:
app: {{ template "elasticsearch.name" . }}
component: "{{ .Values.master.name }}"
release: {{ .Release.Name }}
{{- if .Values.master.podAnnotations }}
annotations:
{{ toYaml .Values.master.podAnnotations | indent 8 }}
{{- end }}
spec:
{{- if .Values.master.priorityClassName }}
priorityClassName: "{{ .Values.master.priorityClassName }}"
{{- end }}
securityContext:
fsGroup: 1000
{{- if eq .Values.master.antiAffinity "hard" }}
affinity:
podAntiAffinity:
requiredDuringSchedulingIgnoredDuringExecution:
- topologyKey: "kubernetes.io/hostname"
labelSelector:
matchLabels:
app: "{{ template "elasticsearch.name" . }}"
release: "{{ .Release.Name }}"
component: "{{ .Values.master.name }}"
{{- else if eq .Values.master.antiAffinity "soft" }}
affinity:
podAntiAffinity:
preferredDuringSchedulingIgnoredDuringExecution:
- weight: 1
podAffinityTerm:
topologyKey: kubernetes.io/hostname
labelSelector:
matchLabels:
app: "{{ template "elasticsearch.name" . }}"
release: "{{ .Release.Name }}"
component: "{{ .Values.master.name }}"
{{- end }}
{{- if .Values.master.nodeSelector }}
nodeSelector:
{{ toYaml .Values.master.nodeSelector | indent 8 }}
{{- end }}
{{- if .Values.master.tolerations }}
tolerations:
{{ toYaml .Values.master.tolerations | indent 8 }}
{{- end }}
initContainers:
# see https://www.elastic.co/guide/en/elasticsearch/reference/current/vm-max-map-count.html
# and https://www.elastic.co/guide/en/elasticsearch/reference/current/setup-configuration-memory.html#mlockall
- name: "sysctl"
image: "{{ .Values.image.repository }}:{{ .Values.image.tag }}"
imagePullPolicy: "Always"
command: ["sysctl", "-w", "vm.max_map_count=262144"]
securityContext:
privileged: true
- name: "chown"
image: "{{ .Values.image.repository }}:{{ .Values.image.tag }}"
imagePullPolicy: {{ .Values.image.pullPolicy | quote }}
command:
- /bin/bash
- -c
- chown -R elasticsearch:elasticsearch /usr/share/elasticsearch/data &&
chown -R elasticsearch:elasticsearch /usr/share/elasticsearch/logs
securityContext:
runAsUser: 0
volumeMounts:
- mountPath: /usr/share/elasticsearch/data
name: data
containers:
- name: elasticsearch
env:
- name: NODE_DATA
value: "false"
{{- if hasPrefix "5." .Values.appVersion }}
- name: NODE_INGEST
value: "false"
{{- end }}
- name: DISCOVERY_SERVICE
value: {{ template "elasticsearch.fullname" . }}-discovery
- name: PROCESSORS
valueFrom:
resourceFieldRef:
resource: limits.cpu
- name: ES_JAVA_OPTS
value: "-Djava.net.preferIPv4Stack=true -Xms{{ .Values.master.heapSize }} -Xmx{{ .Values.master.heapSize }}"
{{- range $key, $value := .Values.cluster.env }}
- name: {{ $key }}
value: {{ $value | quote }}
{{- end }}
resources:
{{ toYaml .Values.master.resources | indent 12 }}
readinessProbe:
httpGet:
path: /_cluster/health?local=true
port: 9200
initialDelaySeconds: 5
image: "{{ .Values.image.repository }}:{{ .Values.image.tag }}"
imagePullPolicy: {{ .Values.image.pullPolicy | quote }}
ports:
- containerPort: 9300
name: transport
{{ if .Values.master.exposeHttp }}
- containerPort: 9200
name: http
{{ end }}
volumeMounts:
- mountPath: /usr/share/elasticsearch/data
name: data
- mountPath: /usr/share/elasticsearch/config/elasticsearch.yml
name: config
subPath: elasticsearch.yml
{{- if hasPrefix "2." .Values.image.tag }}
- mountPath: /usr/share/elasticsearch/config/logging.yml
name: config
subPath: logging.yml
{{- end }}
{{- if hasPrefix "5." .Values.image.tag }}
- mountPath: /usr/share/elasticsearch/config/log4j2.properties
name: config
subPath: log4j2.properties
{{- end }}
{{- if .Values.cluster.keystoreSecret }}
- name: keystore
mountPath: "/usr/share/elasticsearch/config/elasticsearch.keystore"
subPath: elasticsearch.keystore
readOnly: true
{{- end }}
{{- if .Values.image.pullSecrets }}
imagePullSecrets:
{{- range $pullSecret := .Values.image.pullSecrets }}
- name: {{ $pullSecret }}
{{- end }}
{{- end }}
volumes:
- name: config
configMap:
name: {{ template "elasticsearch.fullname" . }}
{{- if .Values.cluster.keystoreSecret }}
- name: keystore
secret:
secretName: {{ .Values.cluster.keystoreSecret }}
{{- end }}
{{- if not .Values.master.persistence.enabled }}
- name: data
emptyDir: {}
{{- end }}
updateStrategy:
type: {{ .Values.master.updateStrategy.type }}
{{- if .Values.master.persistence.enabled }}
volumeClaimTemplates:
- metadata:
name: {{ .Values.master.persistence.name }}
spec:
accessModes:
- {{ .Values.master.persistence.accessMode | quote }}
{{- if .Values.master.persistence.storageClass }}
{{- if (eq "-" .Values.master.persistence.storageClass) }}
storageClassName: ""
{{- else }}
storageClassName: "{{ .Values.master.persistence.storageClass }}"
{{- end }}
{{- end }}
resources:
requests:
storage: "{{ .Values.master.persistence.size }}"
{{ end }}
================================================
FILE: manifests/deprecated/es-cluster/elasticsearch/templates/master-svc.yaml
================================================
apiVersion: v1
kind: Service
metadata:
labels:
app: {{ template "elasticsearch.name" . }}
chart: {{ .Chart.Name }}-{{ .Chart.Version }}
component: "{{ .Values.master.name }}"
heritage: {{ .Release.Service }}
release: {{ .Release.Name }}
name: {{ template "elasticsearch.fullname" . }}-discovery
spec:
clusterIP: None
ports:
- port: 9300
targetPort: transport
selector:
app: {{ template "elasticsearch.name" . }}
component: "{{ .Values.master.name }}"
release: {{ .Release.Name }}
================================================
FILE: manifests/deprecated/es-cluster/elasticsearch/values.yaml
================================================
# Default values for elasticsearch.
# This is a YAML-formatted file.
# Declare variables to be passed into your templates.
appVersion: "6.4.0"
image:
repository: "docker.elastic.co/elasticsearch/elasticsearch-oss"
tag: "6.4.0"
pullPolicy: "IfNotPresent"
# If specified, use these secrets to access the image
# pullSecrets:
# - registry-secret
cluster:
name: "elasticsearch"
# If you want X-Pack installed, switch to an image that includes it, enable this option and toggle the features you want
# enabled in the environment variables outlined in the README
xpackEnable: false
# Some settings must be placed in a keystore, so they need to be mounted in from a secret.
# Use this setting to specify the name of the secret
# keystoreSecret: eskeystore
config: {}
env:
# IMPORTANT: https://www.elastic.co/guide/en/elasticsearch/reference/current/important-settings.html#minimum_master_nodes
# To prevent data loss, it is vital to configure the discovery.zen.minimum_master_nodes setting so that each master-eligible
# node knows the minimum number of master-eligible nodes that must be visible in order to form a cluster.
MINIMUM_MASTER_NODES: "2"
client:
name: client
replicas: 2
serviceType: ClusterIP
loadBalancerIP: {}
loadBalancerSourceRanges: {}
## (dict) If specified, apply these annotations to the client service
# serviceAnnotations:
# example: client-svc-foo
heapSize: "512m"
antiAffinity: "soft"
nodeSelector: {}
tolerations: []
resources:
limits:
cpu: "1"
# memory: "1024Mi"
requests:
cpu: "25m"
memory: "512Mi"
priorityClassName: ""
## (dict) If specified, apply these annotations to each client Pod
# podAnnotations:
# example: client-foo
podDisruptionBudget:
enabled: false
minAvailable: 1
# maxUnavailable: 1
master:
name: master
exposeHttp: false
replicas: 3
heapSize: "512m"
persistence:
enabled: true
accessMode: ReadWriteOnce
name: data
size: "4Gi"
# storageClass: "ssd"
antiAffinity: "soft"
nodeSelector: {}
tolerations: []
resources:
limits:
cpu: "1"
# memory: "1024Mi"
requests:
cpu: "25m"
memory: "512Mi"
priorityClassName: ""
## (dict) If specified, apply these annotations to each master Pod
# podAnnotations:
# example: master-foo
podDisruptionBudget:
enabled: false
minAvailable: 2 # Same as `cluster.env.MINIMUM_MASTER_NODES`
# maxUnavailable: 1
updateStrategy:
type: OnDelete
data:
name: data
exposeHttp: false
replicas: 2
heapSize: "1536m"
persistence:
enabled: true
accessMode: ReadWriteOnce
name: data
size: "30Gi"
# storageClass: "ssd"
terminationGracePeriodSeconds: 3600
antiAffinity: "soft"
nodeSelector: {}
tolerations: []
resources:
limits:
cpu: "1"
# memory: "2048Mi"
requests:
cpu: "25m"
memory: "1536Mi"
priorityClassName: ""
## (dict) If specified, apply these annotations to each data Pod
# podAnnotations:
# example: data-foo
podDisruptionBudget:
enabled: false
# minAvailable: 1
maxUnavailable: 1
updateStrategy:
type: OnDelete
================================================
FILE: manifests/deprecated/es-cluster/es-values.yaml
================================================
image:
repository: "jmgao1983/elasticsearch"
cluster:
name: "es-on-k8s"
env:
MINIMUM_MASTER_NODES: "2"
client:
serviceType: NodePort
master:
name: master
replicas: 3
heapSize: "512m"
persistence:
enabled: true
accessMode: ReadWriteOnce
name: data
size: "4Gi"
storageClass: "nfs-es"
data:
name: data
replicas: 2
heapSize: "1536m"
persistence:
enabled: true
accessMode: ReadWriteOnce
name: data
size: "40Gi"
storageClass: "nfs-es"
terminationGracePeriodSeconds: 3600
resources:
limits:
cpu: "1"
# memory: "2048Mi"
requests:
cpu: "25m"
memory: "1536Mi"
podDisruptionBudget:
enabled: false
# minAvailable: 1
maxUnavailable: 1
================================================
FILE: manifests/deprecated/ingress/nginx-ingress/nginx-ingress-svc.yaml
================================================
apiVersion: v1
kind: Service
metadata:
name: ingress-nginx
namespace: ingress-nginx
labels:
app.kubernetes.io/name: ingress-nginx
app.kubernetes.io/part-of: ingress-nginx
spec:
type: NodePort
ports:
- name: http
port: 80
targetPort: 80
protocol: TCP
# 集群hosts文件中设置的 NODE_PORT_RANGE 作为 NodePort的可用范围
# 从默认20000~40000之间选一个可用端口,让ingress-controller暴露给外部的访问
nodePort: 23456
- name: https
port: 443
targetPort: 443
protocol: TCP
# 集群hosts文件中设置的 NODE_PORT_RANGE 作为 NodePort的可用范围
# 从默认20000~40000之间选一个可用端口,让ingress-controller暴露https
nodePort: 23457
- name: test-mysql
port: 3306
targetPort: 3306
protocol: TCP
nodePort: 23306
- name: test-mysql-read
port: 3307
targetPort: 3307
protocol: TCP
nodePort: 23307
- name: test-dns
port: 53
targetPort: 53
protocol: UDP
nodePort: 20053
selector:
app.kubernetes.io/name: ingress-nginx
app.kubernetes.io/part-of: ingress-nginx
================================================
FILE: manifests/deprecated/ingress/nginx-ingress/nginx-ingress.yaml
================================================
apiVersion: v1
kind: Namespace
metadata:
name: ingress-nginx
---
kind: ConfigMap
apiVersion: v1
metadata:
name: nginx-configuration
namespace: ingress-nginx
labels:
app.kubernetes.io/name: ingress-nginx
app.kubernetes.io/part-of: ingress-nginx
---
kind: ConfigMap
apiVersion: v1
metadata:
name: tcp-services
namespace: ingress-nginx
labels:
app.kubernetes.io/name: ingress-nginx
app.kubernetes.io/part-of: ingress-nginx
---
kind: ConfigMap
apiVersion: v1
metadata:
name: udp-services
namespace: ingress-nginx
labels:
app.kubernetes.io/name: ingress-nginx
app.kubernetes.io/part-of: ingress-nginx
---
apiVersion: v1
kind: ServiceAccount
metadata:
name: nginx-ingress-serviceaccount
namespace: ingress-nginx
labels:
app.kubernetes.io/name: ingress-nginx
app.kubernetes.io/part-of: ingress-nginx
---
apiVersion: rbac.authorization.k8s.io/v1
kind: ClusterRole
metadata:
name: nginx-ingress-clusterrole
labels:
app.kubernetes.io/name: ingress-nginx
app.kubernetes.io/part-of: ingress-nginx
rules:
- apiGroups:
- ""
resources:
- configmaps
- endpoints
- nodes
- pods
- secrets
verbs:
- list
- watch
- apiGroups:
- ""
resources:
- nodes
verbs:
- get
- apiGroups:
- ""
resources:
- services
verbs:
- get
- list
- watch
- apiGroups:
- "extensions"
resources:
- ingresses
verbs:
- get
- list
- watch
- apiGroups:
- ""
resources:
- events
verbs:
- create
- patch
- apiGroups:
- "extensions"
resources:
- ingresses/status
verbs:
- update
---
apiVersion: rbac.authorization.k8s.io/v1
kind: Role
metadata:
name: nginx-ingress-role
namespace: ingress-nginx
labels:
app.kubernetes.io/name: ingress-nginx
app.kubernetes.io/part-of: ingress-nginx
rules:
- apiGroups:
- ""
resources:
- configmaps
- pods
- secrets
- namespaces
verbs:
- get
- apiGroups:
- ""
resources:
- configmaps
resourceNames:
# Defaults to "-"
# Here: "-"
# This has to be adapted if you change either parameter
# when launching the nginx-ingress-controller.
- "ingress-controller-leader-nginx"
verbs:
- get
- update
- apiGroups:
- ""
resources:
- configmaps
verbs:
- create
- apiGroups:
- ""
resources:
- endpoints
verbs:
- get
---
apiVersion: rbac.authorization.k8s.io/v1
kind: RoleBinding
metadata:
name: nginx-ingress-role-nisa-binding
namespace: ingress-nginx
labels:
app.kubernetes.io/name: ingress-nginx
app.kubernetes.io/part-of: ingress-nginx
roleRef:
apiGroup: rbac.authorization.k8s.io
kind: Role
name: nginx-ingress-role
subjects:
- kind: ServiceAccount
name: nginx-ingress-serviceaccount
namespace: ingress-nginx
---
apiVersion: rbac.authorization.k8s.io/v1
kind: ClusterRoleBinding
metadata:
name: nginx-ingress-clusterrole-nisa-binding
labels:
app.kubernetes.io/name: ingress-nginx
app.kubernetes.io/part-of: ingress-nginx
roleRef:
apiGroup: rbac.authorization.k8s.io
kind: ClusterRole
name: nginx-ingress-clusterrole
subjects:
- kind: ServiceAccount
name: nginx-ingress-serviceaccount
namespace: ingress-nginx
---
apiVersion: apps/v1
kind: Deployment
metadata:
name: nginx-ingress-controller
namespace: ingress-nginx
labels:
app.kubernetes.io/name: ingress-nginx
app.kubernetes.io/part-of: ingress-nginx
spec:
replicas: 1
selector:
matchLabels:
app.kubernetes.io/name: ingress-nginx
app.kubernetes.io/part-of: ingress-nginx
template:
metadata:
labels:
app.kubernetes.io/name: ingress-nginx
app.kubernetes.io/part-of: ingress-nginx
annotations:
prometheus.io/port: "10254"
prometheus.io/scrape: "true"
spec:
serviceAccountName: nginx-ingress-serviceaccount
containers:
- name: nginx-ingress-controller
#image: quay.io/kubernetes-ingress-controller/nginx-ingress-controller:0.21.0
#使用以下镜像,方便国内下载加速
image: jmgao1983/nginx-ingress-controller:0.21.0
args:
- /nginx-ingress-controller
- --configmap=$(POD_NAMESPACE)/nginx-configuration
- --tcp-services-configmap=$(POD_NAMESPACE)/tcp-services
- --udp-services-configmap=$(POD_NAMESPACE)/udp-services
- --publish-service=$(POD_NAMESPACE)/ingress-nginx
- --annotations-prefix=nginx.ingress.kubernetes.io
securityContext:
capabilities:
drop:
- ALL
add:
- NET_BIND_SERVICE
# www-data -> 33
runAsUser: 33
env:
- name: POD_NAME
valueFrom:
fieldRef:
fieldPath: metadata.name
- name: POD_NAMESPACE
valueFrom:
fieldRef:
fieldPath: metadata.namespace
ports:
- name: http
containerPort: 80
- name: https
containerPort: 443
# hostPort可以直接使用node节点的网络端口暴露服务
#- name: mysql
# containerPort: 3306
# hostPort: 3306
#- name: dns
# containerPort: 53
# hostPort: 53
# protocol: UDP
livenessProbe:
failureThreshold: 3
httpGet:
path: /healthz
port: 10254
scheme: HTTP
initialDelaySeconds: 10
periodSeconds: 10
successThreshold: 1
timeoutSeconds: 1
readinessProbe:
failureThreshold: 3
httpGet:
path: /healthz
port: 10254
scheme: HTTP
periodSeconds: 10
successThreshold: 1
timeoutSeconds: 1
---
apiVersion: v1
kind: Service
metadata:
name: ingress-nginx
namespace: ingress-nginx
labels:
app.kubernetes.io/name: ingress-nginx
app.kubernetes.io/part-of: ingress-nginx
spec:
type: NodePort
ports:
- name: http
port: 80
targetPort: 80
protocol: TCP
# 集群hosts文件中设置的 NODE_PORT_RANGE 作为 NodePort的可用范围
# 从默认20000~40000之间选一个可用端口,让ingress-controller暴露给外部的访问
nodePort: 23456
- name: https
port: 443
targetPort: 443
protocol: TCP
# 集群hosts文件中设置的 NODE_PORT_RANGE 作为 NodePort的可用范围
# 从默认20000~40000之间选一个可用端口,让ingress-controller暴露https
nodePort: 23457
selector:
app.kubernetes.io/name: ingress-nginx
app.kubernetes.io/part-of: ingress-nginx
---
================================================
FILE: manifests/deprecated/ingress/nginx-ingress/tcp-services-configmap.yaml
================================================
kind: ConfigMap
apiVersion: v1
metadata:
name: tcp-services
namespace: ingress-nginx
labels:
app.kubernetes.io/name: ingress-nginx
app.kubernetes.io/part-of: ingress-nginx
data:
3306: "mariadb/mydb-mariadb:3306"
3307: "mariadb/mydb-mariadb-slave:3306"
================================================
FILE: manifests/deprecated/ingress/nginx-ingress/udp-services-configmap.yaml
================================================
kind: ConfigMap
apiVersion: v1
metadata:
name: udp-services
namespace: ingress-nginx
labels:
app.kubernetes.io/name: ingress-nginx
app.kubernetes.io/part-of: ingress-nginx
data:
53: "kube-system/kube-dns:53"
================================================
FILE: manifests/deprecated/ingress/test-hello.ing.yaml
================================================
# kubectl run test-hello --image=nginx --expose --port=80
apiVersion: networking.k8s.io/v1beta1
kind: Ingress
metadata:
name: test-hello
spec:
rules:
- host: hello.test.com
http:
paths:
- path: /
backend:
serviceName: test-hello
servicePort: 80
================================================
FILE: manifests/deprecated/ingress/traefik/tls/hello-tls.ing.yaml
================================================
apiVersion: networking.k8s.io/v1beta1
kind: Ingress
metadata:
name: hello-tls-ingress
annotations:
kubernetes.io/ingress.class: traefik
spec:
rules:
- host: hello.test.com
http:
paths:
- backend:
serviceName: test-hello
servicePort: 80
tls:
- secretName: traefik-cert
================================================
FILE: manifests/deprecated/ingress/traefik/tls/k8s-dashboard.ing.yaml
================================================
apiVersion: networking.k8s.io/v1beta1
kind: Ingress
metadata:
name: kubernetes-dashboard
namespace: kube-system
annotations:
traefik.ingress.kubernetes.io/redirect-entry-point: https
spec:
rules:
- host: dashboard.test.com
http:
paths:
- path: /
backend:
serviceName: kubernetes-dashboard
servicePort: 443
================================================
FILE: manifests/deprecated/ingress/traefik/tls/traefik-controller.yaml
================================================
apiVersion: v1
kind: ConfigMap
metadata:
name: traefik-conf
namespace: kube-system
data:
traefik.toml: |
# 设置insecureSkipVerify = true,可以配置backend为443(比如dashboard)的ingress规则
insecureSkipVerify = true
defaultEntryPoints = ["http", "https"]
[entryPoints]
[entryPoints.http]
address = ":80"
### 配置http 强制跳转 https
#[entryPoints.http.redirect]
# entryPoint = "https"
### 配置只信任trustedIPs传递过来X-Forwarded-*,默认全部信任;为了防止客户端地址伪造,需开启这个
#[entryPoints.http.forwardedHeaders]
# trustedIPs = ["10.1.0.0/16", "172.20.0.0/16", "192.168.1.3"]
[entryPoints.https]
address = ":443"
[entryPoints.https.tls]
[[entryPoints.https.tls.certificates]]
CertFile = "/ssl/tls.crt"
KeyFile = "/ssl/tls.key"
---
kind: Deployment
apiVersion: apps/v1
metadata:
name: traefik-ingress-controller
namespace: kube-system
labels:
k8s-app: traefik-ingress-lb
spec:
replicas: 1
selector:
matchLabels:
k8s-app: traefik-ingress-lb
template:
metadata:
labels:
k8s-app: traefik-ingress-lb
name: traefik-ingress-lb
spec:
serviceAccountName: traefik-ingress-controller
terminationGracePeriodSeconds: 60
volumes:
- name: ssl
secret:
secretName: traefik-cert
- name: config
configMap:
name: traefik-conf
#nodeSelector:
# node-role.kubernetes.io/traefik: "true"
containers:
- image: traefik:v1.7.20
imagePullPolicy: IfNotPresent
name: traefik-ingress-lb
volumeMounts:
- mountPath: "/ssl"
name: "ssl"
- mountPath: "/config"
name: "config"
resources:
limits:
cpu: 1000m
memory: 800Mi
requests:
cpu: 500m
memory: 600Mi
args:
- --configfile=/config/traefik.toml
- --api
- --kubernetes
- --logLevel=INFO
securityContext:
capabilities:
drop:
- ALL
add:
- NET_BIND_SERVICE
ports:
- name: http
containerPort: 80
hostPort: 80
- name: https
containerPort: 443
hostPort: 443
---
kind: Service
apiVersion: v1
metadata:
name: traefik-ingress-service
namespace: kube-system
spec:
selector:
k8s-app: traefik-ingress-lb
ports:
- protocol: TCP
# 该端口为 traefik ingress-controller的服务端口
port: 80
# 集群hosts文件中设置的 NODE_PORT_RANGE 作为 NodePort的可用范围
# 从默认20000~40000之间选一个可用端口,让ingress-controller暴露给外部的访问
nodePort: 23456
name: http
- protocol: TCP
#
port: 443
nodePort: 23457
name: https
- protocol: TCP
# 该端口为 traefik 的管理WEB界面
port: 8080
name: admin
type: NodePort
---
kind: ClusterRole
apiVersion: rbac.authorization.k8s.io/v1
metadata:
name: traefik-ingress-controller
rules:
- apiGroups:
- ""
resources:
- pods
- services
- endpoints
- secrets
verbs:
- get
- list
- watch
- apiGroups:
- extensions
resources:
- ingresses
verbs:
- get
- list
- watch
---
kind: ClusterRoleBinding
apiVersion: rbac.authorization.k8s.io/v1
metadata:
name: traefik-ingress-controller
roleRef:
apiGroup: rbac.authorization.k8s.io
kind: ClusterRole
name: traefik-ingress-controller
subjects:
- kind: ServiceAccount
name: traefik-ingress-controller
namespace: kube-system
---
apiVersion: v1
kind: ServiceAccount
metadata:
name: traefik-ingress-controller
namespace: kube-system
================================================
FILE: manifests/deprecated/ingress/traefik/traefik-ingress.yaml
================================================
---
kind: ClusterRole
apiVersion: rbac.authorization.k8s.io/v1
metadata:
name: traefik-ingress-controller
rules:
- apiGroups:
- ""
resources:
- pods
- services
- endpoints
- secrets
verbs:
- get
- list
- watch
- apiGroups:
- extensions
resources:
- ingresses
verbs:
- get
- list
- watch
---
kind: ClusterRoleBinding
apiVersion: rbac.authorization.k8s.io/v1
metadata:
name: traefik-ingress-controller
roleRef:
apiGroup: rbac.authorization.k8s.io
kind: ClusterRole
name: traefik-ingress-controller
subjects:
- kind: ServiceAccount
name: traefik-ingress-controller
namespace: kube-system
---
apiVersion: v1
kind: ServiceAccount
metadata:
name: traefik-ingress-controller
namespace: kube-system
---
kind: Deployment
apiVersion: apps/v1
metadata:
name: traefik-ingress-controller
namespace: kube-system
labels:
k8s-app: traefik-ingress-lb
spec:
replicas: 1
selector:
matchLabels:
k8s-app: traefik-ingress-lb
template:
metadata:
labels:
k8s-app: traefik-ingress-lb
name: traefik-ingress-lb
spec:
serviceAccountName: traefik-ingress-controller
terminationGracePeriodSeconds: 60
containers:
- image: traefik:v1.7.20
imagePullPolicy: IfNotPresent
name: traefik-ingress-lb
args:
- --api
- --kubernetes
- --logLevel=INFO
---
kind: Service
apiVersion: v1
metadata:
name: traefik-ingress-service
namespace: kube-system
spec:
selector:
k8s-app: traefik-ingress-lb
ports:
- protocol: TCP
# 该端口为 traefik ingress-controller的服务端口
port: 80
# 集群hosts文件中设置的 NODE_PORT_RANGE 作为 NodePort的可用范围
# 从默认20000~40000之间选一个可用端口,让ingress-controller暴露给外部的访问
nodePort: 23456
name: web
- protocol: TCP
# 该端口为 traefik 的管理WEB界面
port: 8080
name: admin
type: NodePort
================================================
FILE: manifests/deprecated/ingress/traefik/traefik-ui.ing.yaml
================================================
---
apiVersion: networking.k8s.io/v1beta1
kind: Ingress
metadata:
name: traefik-web-ui
namespace: kube-system
spec:
rules:
- host: traefik-ui.test.com
http:
paths:
- path: /
backend:
serviceName: traefik-ingress-service
servicePort: 8080
================================================
FILE: manifests/deprecated/ingress/whoami.ing.yaml
================================================
# kubectl run whoami --image=emilevauge/whoami --port=80 --expose
apiVersion: networking.k8s.io/v1beta1
kind: Ingress
metadata:
name: test-whoami
spec:
rules:
- host: who.test.com
http:
paths:
- path: /
backend:
serviceName: whoami
servicePort: 80
================================================
FILE: manifests/deprecated/ingress/whoami.yaml
================================================
apiVersion: v1
kind: Service
metadata:
name: whoami
labels:
app: whoami
spec:
ports:
- name: web
port: 80
targetPort: 80
selector:
app: whoami
sessionAffinity: None
#type: NodePort
---
apiVersion: apps/v1
kind: Deployment
metadata:
name: whoami
spec:
replicas: 2
selector:
matchLabels:
app: whoami
template:
metadata:
labels:
app: whoami
spec:
containers:
- name: whoami
image: emilevauge/whoami
ports:
- containerPort: 80
================================================
FILE: manifests/deprecated/jenkins/.helmignore
================================================
# Patterns to ignore when building packages.
# This supports shell glob matching, relative path matching, and
# negation (prefixed with !). Only one pattern per line.
.DS_Store
# Common VCS dirs
.git/
.gitignore
.bzr/
.bzrignore
.hg/
.hgignore
.svn/
# Common backup files
*.swp
*.bak
*.tmp
*~
# Various IDEs
.project
.idea/
*.tmproj
================================================
FILE: manifests/deprecated/jenkins/Chart.yaml
================================================
name: jenkins
home: https://jenkins.io/
version: 0.16.6
appVersion: 2.121.1
description: Open source continuous integration server. It supports multiple SCM tools
including CVS, Subversion and Git. It can execute Apache Ant and Apache Maven-based
projects as well as arbitrary scripts.
sources:
- https://github.com/jenkinsci/jenkins
- https://github.com/jenkinsci/docker-jnlp-slave
maintainers:
- name: lachie83
email: lachlan.evenson@microsoft.com
- name: viglesiasce
email: viglesias@google.com
- name: lusyoe
email: lusyoe@163.com
icon: https://wiki.jenkins-ci.org/download/attachments/2916393/logo.png
================================================
FILE: manifests/deprecated/jenkins/OWNERS
================================================
approvers:
- lachie83
- viglesiasce
reviewers:
- lachie83
- viglesiasce
================================================
FILE: manifests/deprecated/jenkins/README.md
================================================
# Jenkins Helm Chart
Jenkins master and slave cluster utilizing the Jenkins Kubernetes plugin
* https://wiki.jenkins-ci.org/display/JENKINS/Kubernetes+Plugin
Inspired by the awesome work of Carlos Sanchez
## Chart Details
This chart will do the following:
* 1 x Jenkins Master with port 8080 exposed on an external LoadBalancer
* All using Kubernetes Deployments
## Installing the Chart
To install the chart with the release name `my-release`:
```bash
$ helm install --name my-release stable/jenkins
```
## Configuration
The following tables list the configurable parameters of the Jenkins chart and their default values.
### Jenkins Master
| Parameter | Description | Default |
| --------------------------------- | ------------------------------------ | ---------------------------------------------------------------------------- |
| `nameOverride` | Override the resource name prefix | `jenkins` |
| `fullnameOverride` | Override the full resource names | `jenkins-{release-name}` (or `jenkins` if release-name is `jenkins`) |
| `Master.Name` | Jenkins master name | `jenkins-master` |
| `Master.Image` | Master image name | `jenkinsci/jenkins` |
| `Master.ImageTag` | Master image tag | `lts` |
| `Master.ImagePullPolicy` | Master image pull policy | `Always` |
| `Master.ImagePullSecret` | Master image pull secret | Not set |
| `Master.Component` | k8s selector key | `jenkins-master` |
| `Master.UseSecurity` | Use basic security | `true` |
| `Master.AdminUser` | Admin username (and password) created as a secret if useSecurity is true | `admin` |
| `Master.resources` | Resources allocation (Requests and Limits) | `{requests: {cpu: 50m, memory: 256Mi}, limits: {cpu: 2000m, memory: 2048Mi}}`|
| `Master.InitContainerEnv` | Environment variables for Init Container | Not set |
| `Master.ContainerEnv` | Environment variables for Jenkins Container | Not set |
| `Master.UsePodSecurityContext` | Enable pod security context (must be `true` if `RunAsUser` or `FsGroup` are set) | `true` |
| `Master.RunAsUser` | uid that jenkins runs with | `0` |
| `Master.FsGroup` | uid that will be used for persistent volume | `0` |
| `Master.ServiceAnnotations` | Service annotations | `{}` |
| `Master.ServiceType` | k8s service type | `LoadBalancer` |
| `Master.ServicePort` | k8s service port | `8080` |
| `Master.NodePort` | k8s node port | Not set |
| `Master.HealthProbes` | Enable k8s liveness and readiness probes | `true` |
| `Master.HealthProbesLivenessTimeout` | Set the timeout for the liveness probe | `120` |
| `Master.HealthProbesReadinessTimeout` | Set the timeout for the readiness probe | `60` |
| `Master.HealthProbeLivenessFailureThreshold` | Set the failure threshold for the liveness probe | `12` |
| `Master.ContainerPort` | Master listening port | `8080` |
| `Master.SlaveListenerPort` | Listening port for agents | `50000` |
| `Master.DisabledAgentProtocols` | Disabled agent protocols | `JNLP-connect JNLP2-connect` |
| `Master.CSRF.DefaultCrumbIssuer.Enabled` | Enable the default CSRF Crumb issuer | `true` |
| `Master.CSRF.DefaultCrumbIssuer.ProxyCompatability` | Enable proxy compatibility | `true` |
| `Master.CLI` | Enable CLI over remoting | `false` |
| `Master.LoadBalancerSourceRanges` | Allowed inbound IP addresses | `0.0.0.0/0` |
| `Master.LoadBalancerIP` | Optional fixed external IP | Not set |
| `Master.JMXPort` | Open a port, for JMX stats | Not set |
| `Master.CustomConfigMap` | Use a custom ConfigMap | `false` |
| `Master.Ingress.Annotations` | Ingress annotations | `{}` |
| `Master.Ingress.TLS` | Ingress TLS configuration | `[]` |
| `Master.InitScripts` | List of Jenkins init scripts | Not set |
| `Master.CredentialsXmlSecret` | Kubernetes secret that contains a 'credentials.xml' file | Not set |
| `Master.SecretsFilesSecret` | Kubernetes secret that contains 'secrets' files | Not set |
| `Master.Jobs` | Jenkins XML job configs | Not set |
| `Master.InstallPlugins` | List of Jenkins plugins to install | `kubernetes:0.11 workflow-aggregator:2.5 credentials-binding:1.11 git:3.2.0` |
| `Master.ScriptApproval` | List of groovy functions to approve | Not set |
| `Master.NodeSelector` | Node labels for pod assignment | `{}` |
| `Master.Affinity` | Affinity settings | `{}` |
| `Master.Tolerations` | Toleration labels for pod assignment | `{}` |
| `Master.PodAnnotations` | Annotations for master pod | `{}` |
| `NetworkPolicy.Enabled` | Enable creation of NetworkPolicy resources. | `false` |
| `NetworkPolicy.ApiVersion` | NetworkPolicy ApiVersion | `extensions/v1beta1` |
| `rbac.install` | Create service account and ClusterRoleBinding for Kubernetes plugin | `false` |
| `rbac.apiVersion` | RBAC API version | `v1beta1` |
| `rbac.roleRef` | Cluster role name to bind to | `cluster-admin` |
### Jenkins Agent
| Parameter | Description | Default |
| ----------------------- | ----------------------------------------------- | ---------------------- |
| `Agent.AlwaysPullImage` | Always pull agent container image before build | `false` |
| `Agent.Enabled` | Enable Kubernetes plugin jnlp-agent podTemplate | `true` |
| `Agent.Image` | Agent image name | `jenkinsci/jnlp-slave` |
| `Agent.ImagePullSecret` | Agent image pull secret | Not set |
| `Agent.ImageTag` | Agent image tag | `2.62` |
| `Agent.Privileged` | Agent privileged container | `false` |
| `Agent.resources` | Resources allocation (Requests and Limits) | `{requests: {cpu: 200m, memory: 256Mi}, limits: {cpu: 200m, memory: 256Mi}}`|
| `Agent.volumes` | Additional volumes | `nil` |
Specify each parameter using the `--set key=value[,key=value]` argument to `helm install`.
Alternatively, a YAML file that specifies the values for the parameters can be provided while installing the chart. For example,
```bash
$ helm install --name my-release -f values.yaml stable/jenkins
```
> **Tip**: You can use the default [values.yaml](values.yaml)
## Mounting volumes into your Agent pods
Your Jenkins Agents will run as pods, and it's possible to inject volumes where needed:
```yaml
Agent:
volumes:
- type: Secret
secretName: jenkins-mysecrets
mountPath: /var/run/secrets/jenkins-mysecrets
```
The supported volume types are: `ConfigMap`, `EmptyDir`, `HostPath`, `Nfs`, `Pod`, `Secret`. Each type supports a different set of configurable attributes, defined by [the corresponding Java class](https://github.com/jenkinsci/kubernetes-plugin/tree/master/src/main/java/org/csanchez/jenkins/plugins/kubernetes/volumes).
## NetworkPolicy
To make use of the NetworkPolicy resources created by default,
install [a networking plugin that implements the Kubernetes
NetworkPolicy spec](https://kubernetes.io/docs/tasks/administer-cluster/declare-network-policy#before-you-begin).
For Kubernetes v1.5 & v1.6, you must also turn on NetworkPolicy by setting
the DefaultDeny namespace annotation. Note: this will enforce policy for _all_ pods in the namespace:
kubectl annotate namespace default "net.beta.kubernetes.io/network-policy={\"ingress\":{\"isolation\":\"DefaultDeny\"}}"
Install helm chart with network policy enabled:
$ helm install stable/jenkins --set NetworkPolicy.Enabled=true
## Persistence
The Jenkins image stores persistence under `/var/jenkins_home` path of the container. A dynamically managed Persistent Volume
Claim is used to keep the data across deployments, by default. This is known to work in GCE, AWS, and minikube. Alternatively,
a previously configured Persistent Volume Claim can be used.
It is possible to mount several volumes using `Persistence.volumes` and `Persistence.mounts` parameters.
### Persistence Values
| Parameter | Description | Default |
| --------------------------- | ------------------------------- | --------------- |
| `Persistence.Enabled` | Enable the use of a Jenkins PVC | `true` |
| `Persistence.ExistingClaim` | Provide the name of a PVC | `nil` |
| `Persistence.AccessMode` | The PVC access mode | `ReadWriteOnce` |
| `Persistence.Size` | The size of the PVC | `8Gi` |
| `Persistence.volumes` | Additional volumes | `nil` |
| `Persistence.mounts` | Additional mounts | `nil` |
| `Persistence.StorageClass` | The PV Provisioner | `nfs-dynamic-class`|
#### Existing PersistentVolumeClaim
1. Create the PersistentVolume
1. Create the PersistentVolumeClaim
1. Install the chart
```bash
$ helm install --name my-release --set Persistence.ExistingClaim=PVC_NAME stable/jenkins
```
## Custom ConfigMap
When creating a new parent chart with this chart as a dependency, the `CustomConfigMap` parameter can be used to override the default config.xml provided.
It also allows for providing additional xml configuration files that will be copied into `/var/jenkins_home`. In the parent chart's values.yaml,
set the `jenkins.Master.CustomConfigMap` value to true like so
```yaml
jenkins:
Master:
CustomConfigMap: true
```
and provide the file `templates/config.tpl` in your parent chart for your use case. You can start by copying the contents of `config.yaml` from this chart into your parent charts `templates/config.tpl` as a basis for customization. Finally, you'll need to wrap the contents of `templates/config.tpl` like so:
```yaml
{{- define "override_config_map" }}
{{ end }}
```
## RBAC
If running upon a cluster with RBAC enabled you will need to do the following:
* `helm install stable/jenkins --set rbac.install=true`
* Create a Jenkins credential of type Kubernetes service account with service account name provided in the `helm status` output.
* Under configure Jenkins -- Update the credentials config in the cloud section to use the service account credential you created in the step above.
## Run Jenkins as non root user
The default settings of this helm chart let Jenkins run as root user with uid `0`.
Due to security reasons you may want to run Jenkins as a non root user.
Fortunately the default jenkins docker image `jenkins/jenkins` contains a user `jenkins` with uid `1000` that can be used for this purpose.
Simply use the following settings to run Jenkins as `jenkins` user with uid `1000`.
```yaml
jenkins:
Master:
RunAsUser: 1000
FsGroup: 1000
```
Docs taken from https://github.com/jenkinsci/docker/blob/master/Dockerfile:
_Jenkins is run with user `jenkins`, uid = 1000. If you bind mount a volume from the host or a data container,ensure you use the same uid_
## Running behind a forward proxy
The master pod uses an Init Container to install plugins etc. If you are behind a corporate proxy it may be useful to set `Master.InitContainerEnv` to add environment variables such as `http_proxy`, so that these can be downloaded.
Additionally, you may want to add env vars for the Jenkins container, and the JVM (`Master.JavaOpts`).
```yaml
Master:
InitContainerEnv:
- name: http_proxy
value: "http://192.168.64.1:3128"
- name: https_proxy
value: "http://192.168.64.1:3128"
- name: no_proxy
value: ""
ContainerEnv:
- name: http_proxy
value: "http://192.168.64.1:3128"
- name: https_proxy
value: "http://192.168.64.1:3128"
JavaOpts: >-
-Dhttp.proxyHost=192.168.64.1
-Dhttp.proxyPort=3128
-Dhttps.proxyHost=192.168.64.1
-Dhttps.proxyPort=3128
```
================================================
FILE: manifests/deprecated/jenkins/templates/NOTES.txt
================================================
1. Get your '{{ .Values.Master.AdminUser }}' user password by running:
printf $(kubectl get secret --namespace {{ .Release.Namespace }} {{ template "jenkins.fullname" . }} -o jsonpath="{.data.jenkins-admin-password}" | base64 --decode);echo
{{- if .Values.Master.HostName }}
2. Visit http://{{ .Values.Master.HostName }}
{{- else }}
2. Get the Jenkins URL to visit by running these commands in the same shell:
{{- if contains "NodePort" .Values.Master.ServiceType }}
export NODE_PORT=$(kubectl get --namespace {{ .Release.Namespace }} -o jsonpath="{.spec.ports[0].nodePort}" services {{ template "jenkins.fullname" . }})
export NODE_IP=$(kubectl get nodes --namespace {{ .Release.Namespace }} -o jsonpath="{.items[0].status.addresses[0].address}")
echo http://$NODE_IP:$NODE_PORT/login
{{- else if contains "LoadBalancer" .Values.Master.ServiceType }}
NOTE: It may take a few minutes for the LoadBalancer IP to be available.
You can watch the status of by running 'kubectl get svc --namespace {{ .Release.Namespace }} -w {{ template "jenkins.fullname" . }}'
export SERVICE_IP=$(kubectl get svc --namespace {{ .Release.Namespace }} {{ template "jenkins.fullname" . }} --template "{{ "{{ range (index .status.loadBalancer.ingress 0) }}{{ . }}{{ end }}" }}")
echo http://$SERVICE_IP:{{ .Values.Master.ServicePort }}/login
{{- else if contains "ClusterIP" .Values.Master.ServiceType }}
export POD_NAME=$(kubectl get pods --namespace {{ .Release.Namespace }} -l "component={{ template "jenkins.fullname" . }}-master" -o jsonpath="{.items[0].metadata.name}")
echo http://127.0.0.1:{{ .Values.Master.ServicePort }}
kubectl port-forward $POD_NAME {{ .Values.Master.ServicePort }}:{{ .Values.Master.ServicePort }}
{{- end }}
{{- end }}
3. Login with the password from step 1 and the username: {{ .Values.Master.AdminUser }}
For more information on running Jenkins on Kubernetes, visit:
https://cloud.google.com/solutions/jenkins-on-container-engine
{{- if .Values.Persistence.Enabled }}
{{- else }}
#################################################################################
###### WARNING: Persistence is disabled!!! You will lose your data when #####
###### the Jenkins pod is terminated. #####
#################################################################################
{{- end }}
{{- if .Values.rbac.install }}
Configure the Kubernetes plugin in Jenkins to use the following Service Account name {{ template "jenkins.fullname" . }} using the following steps:
Create a Jenkins credential of type Kubernetes service account with service account name {{ template "jenkins.fullname" . }}
Under configure Jenkins -- Update the credentials config in the cloud section to use the service account credential you created in the step above.
{{- end }}
================================================
FILE: manifests/deprecated/jenkins/templates/_helpers.tpl
================================================
{{/* vim: set filetype=mustache: */}}
{{/*
Expand the name of the chart.
*/}}
{{- define "jenkins.name" -}}
{{- default .Chart.Name .Values.nameOverride | trunc 63 | trimSuffix "-" -}}
{{- end -}}
{{/*
Create a default fully qualified app name.
We truncate at 63 chars because some Kubernetes name fields are limited to this (by the DNS naming spec).
If release name contains chart name it will be used as a full name.
*/}}
{{- define "jenkins.fullname" -}}
{{- if .Values.fullnameOverride -}}
{{- .Values.fullnameOverride | trunc 63 | trimSuffix "-" -}}
{{- else -}}
{{- $name := default .Chart.Name .Values.nameOverride -}}
{{- if contains $name .Release.Name -}}
{{- .Release.Name | trunc 63 | trimSuffix "-" -}}
{{- else -}}
{{- printf "%s-%s" .Release.Name $name | trunc 63 | trimSuffix "-" -}}
{{- end -}}
{{- end -}}
{{- end -}}
{{- define "jenkins.kubernetes-version" -}}
{{- range .Values.Master.InstallPlugins -}}
{{ if hasPrefix "kubernetes:" . }}
{{- $split := splitList ":" . }}
{{- printf "%s" (index $split 1 ) -}}
{{- end -}}
{{- end -}}
{{- end -}}
================================================
FILE: manifests/deprecated/jenkins/templates/config.yaml
================================================
{{- if not .Values.Master.CustomConfigMap }}
apiVersion: v1
kind: ConfigMap
metadata:
name: {{ template "jenkins.fullname" . }}
data:
config.xml: |-
{{ .Values.Master.ImageTag }}
0
NORMAL
{{ .Values.Master.UseSecurity }}
true
false
${JENKINS_HOME}/workspace/${ITEM_FULLNAME}
${ITEM_ROOTDIR}/builds
kubernetes
{{- if .Values.Agent.Enabled }}
default
2147483647
0
{{- $local := dict "first" true }}
{{- range $key, $value := .Values.Agent.NodeSelector }}
{{- if not $local.first }},{{- end }}
{{- $key }}={{ $value }}
{{- $_ := set $local "first" false }}
{{- end }}
NORMAL
{{- range $index, $volume := .Values.Agent.volumes }}
{{- range $key, $value := $volume }}{{- if not (eq $key "type") }}
<{{ $key }}>{{ $value }}
{{- end }}{{- end }}
{{- end }}
jnlp
{{ .Values.Agent.Image }}:{{ .Values.Agent.ImageTag }}
{{- if .Values.Agent.Privileged }}
true
{{- else }}
false
{{- end }}
{{ .Values.Agent.AlwaysPullImage }}
/home/jenkins
${computer.jnlpmac} ${computer.name}
false
# Resources configuration is a little hacky. This was to prevent breaking
# changes, and should be cleanned up in the future once everybody had
# enough time to migrate.
{{.Values.Agent.Cpu | default .Values.Agent.resources.requests.cpu}}
{{.Values.Agent.Memory | default .Values.Agent.resources.requests.memory}}
{{.Values.Agent.Cpu | default .Values.Agent.resources.limits.cpu}}
{{.Values.Agent.Memory | default .Values.Agent.resources.limits.memory}}
{{- if .Values.Agent.ImagePullSecret }}
{{ .Values.Agent.ImagePullSecret }}
{{- else }}
{{- end }}
{{- end -}}
https://kubernetes
false
{{ .Release.Namespace }}
http://{{ template "jenkins.fullname" . }}:{{.Values.Master.ServicePort}}{{ default "" .Values.Master.JenkinsUriPrefix }}
{{ template "jenkins.fullname" . }}-agent:50000
10
5
0
0
5
0
All
false
false
All
50000
{{- range .Values.Master.DisabledAgentProtocols }}
{{ . }}
{{- end }}
{{- if .Values.Master.CSRF.DefaultCrumbIssuer.Enabled }}
{{- if .Values.Master.CSRF.DefaultCrumbIssuer.ProxyCompatability }}
true
{{- end }}
{{- end }}
true
{{- if .Values.Master.ScriptApproval }}
scriptapproval.xml: |-
{{- range $key, $val := .Values.Master.ScriptApproval }}
{{ $val }}
{{- end }}
{{- end }}
jenkins.CLI.xml: |-
{{- if .Values.Master.CLI }}
true
{{- else }}
false
{{- end }}
hudson.model.UpdateCenter.xml: |-
default
{{- if .Values.Master.UpdateCenter }}
{{ .Values.Master.UpdateCenter }}
{{- else }}
https://updates.jenkins.io/update-center.json
{{- end }}
apply_config.sh: |-
mkdir -p /usr/share/jenkins/ref/secrets/;
echo "false" > /usr/share/jenkins/ref/secrets/slave-to-master-security-kill-switch;
cp -n /var/jenkins_config/config.xml /var/jenkins_home;
cp -n /var/jenkins_config/jenkins.CLI.xml /var/jenkins_home;
cp -n /var/jenkins_config/hudson.model.UpdateCenter.xml /var/jenkins_home;
{{- if .Values.Master.InstallPlugins }}
# Install missing plugins
cp /var/jenkins_config/plugins.txt /var/jenkins_home;
rm -rf /usr/share/jenkins/ref/plugins/*.lock
/usr/local/bin/install-plugins.sh `echo $(cat /var/jenkins_home/plugins.txt)`;
# Copy plugins to shared volume
cp -n /usr/share/jenkins/ref/plugins/* /var/jenkins_plugins;
{{- end }}
{{- if .Values.Master.ScriptApproval }}
cp -n /var/jenkins_config/scriptapproval.xml /var/jenkins_home/scriptApproval.xml;
{{- end }}
{{- if .Values.Master.InitScripts }}
mkdir -p /var/jenkins_home/init.groovy.d/;
cp -n /var/jenkins_config/*.groovy /var/jenkins_home/init.groovy.d/
{{- end }}
{{- if .Values.Master.CredentialsXmlSecret }}
cp -n /var/jenkins_credentials/credentials.xml /var/jenkins_home;
{{- end }}
{{- if .Values.Master.SecretsFilesSecret }}
cp -n /var/jenkins_secrets/* /usr/share/jenkins/ref/secrets;
{{- end }}
{{- if .Values.Master.Jobs }}
for job in $(ls /var/jenkins_jobs); do
mkdir -p /var/jenkins_home/jobs/$job
cp -n /var/jenkins_jobs/$job /var/jenkins_home/jobs/$job/config.xml
done
{{- end }}
{{- range $key, $val := .Values.Master.InitScripts }}
init{{ $key }}.groovy: |-
{{ $val | indent 4 }}
{{- end }}
plugins.txt: |-
{{- if .Values.Master.InstallPlugins }}
{{- range $index, $val := .Values.Master.InstallPlugins }}
{{ $val | indent 4 }}
{{- end }}
{{- end }}
{{ else }}
{{ include "override_config_map" . }}
{{- end -}}
================================================
FILE: manifests/deprecated/jenkins/templates/home-pvc.yaml
================================================
{{- if and .Values.Persistence.Enabled (not .Values.Persistence.ExistingClaim) -}}
kind: PersistentVolumeClaim
apiVersion: v1
metadata:
{{- if .Values.Persistence.Annotations }}
annotations:
{{ toYaml .Values.Persistence.Annotations | indent 4 }}
{{- end }}
name: {{ template "jenkins.fullname" . }}
labels:
app: {{ template "jenkins.fullname" . }}
chart: "{{ .Chart.Name }}-{{ .Chart.Version }}"
release: "{{ .Release.Name }}"
heritage: "{{ .Release.Service }}"
spec:
accessModes:
- {{ .Values.Persistence.AccessMode | quote }}
resources:
requests:
storage: {{ .Values.Persistence.Size | quote }}
{{- if .Values.Persistence.StorageClass }}
{{- if (eq "-" .Values.Persistence.StorageClass) }}
storageClassName: ""
{{- else }}
storageClassName: "{{ .Values.Persistence.StorageClass }}"
{{- end }}
{{- end }}
{{- end }}
================================================
FILE: manifests/deprecated/jenkins/templates/jenkins-agent-svc.yaml
================================================
apiVersion: v1
kind: Service
metadata:
name: {{ template "jenkins.fullname" . }}-agent
labels:
app: {{ template "jenkins.fullname" . }}
chart: "{{ .Chart.Name }}-{{ .Chart.Version }}"
component: "{{ .Release.Name }}-{{ .Values.Master.Component }}"
{{- if .Values.Master.SlaveListenerServiceAnnotations }}
annotations:
{{ toYaml .Values.Master.SlaveListenerServiceAnnotations | indent 4 }}
{{- end }}
spec:
ports:
- port: {{ .Values.Master.SlaveListenerPort }}
targetPort: {{ .Values.Master.SlaveListenerPort }}
name: slavelistener
selector:
component: "{{ .Release.Name }}-{{ .Values.Master.Component }}"
type: {{ .Values.Master.SlaveListenerServiceType }}
================================================
FILE: manifests/deprecated/jenkins/templates/jenkins-master-deployment.yaml
================================================
apiVersion: apps/v1
kind: Deployment
metadata:
name: {{ template "jenkins.fullname" . }}
labels:
heritage: {{ .Release.Service | quote }}
release: {{ .Release.Name | quote }}
chart: "{{ .Chart.Name }}-{{ .Chart.Version }}"
component: "{{ .Release.Name }}-{{ .Values.Master.Name }}"
spec:
replicas: 1
strategy:
type: RollingUpdate
selector:
matchLabels:
component: "{{ .Release.Name }}-{{ .Values.Master.Component }}"
template:
metadata:
labels:
app: {{ template "jenkins.fullname" . }}
heritage: {{ .Release.Service | quote }}
release: {{ .Release.Name | quote }}
chart: "{{ .Chart.Name }}-{{ .Chart.Version }}"
component: "{{ .Release.Name }}-{{ .Values.Master.Component }}"
annotations:
checksum/config: {{ include (print $.Template.BasePath "/config.yaml") . | sha256sum }}
{{- if .Values.Master.PodAnnotations }}
{{ toYaml .Values.Master.PodAnnotations | indent 8 }}
{{- end }}
spec:
{{- if .Values.Master.NodeSelector }}
nodeSelector:
{{ toYaml .Values.Master.NodeSelector | indent 8 }}
{{- end }}
{{- if .Values.Master.Tolerations }}
tolerations:
{{ toYaml .Values.Master.Tolerations | indent 8 }}
{{- end }}
{{- if .Values.Master.Affinity }}
affinity:
{{ toYaml .Values.Master.Affinity | indent 8 }}
{{- end }}
{{- if .Values.Master.UsePodSecurityContext }}
securityContext:
runAsUser: {{ default 0 .Values.Master.RunAsUser }}
{{- if and (.Values.Master.RunAsUser) (.Values.Master.FsGroup) }}
{{- if not (eq .Values.Master.RunAsUser 0.0) }}
fsGroup: {{ .Values.Master.FsGroup }}
{{- end }}
{{- end }}
{{- end }}
serviceAccountName: {{ if .Values.rbac.install }}{{ template "jenkins.fullname" . }}{{ else }}"{{ .Values.rbac.serviceAccountName }}"{{ end }}
initContainers:
- name: "copy-default-config"
image: "{{ .Values.Master.Image }}:{{ .Values.Master.ImageTag }}"
imagePullPolicy: "{{ .Values.Master.ImagePullPolicy }}"
command: [ "sh", "/var/jenkins_config/apply_config.sh" ]
{{- if .Values.Master.InitContainerEnv }}
env:
{{ toYaml .Values.Master.InitContainerEnv | indent 12 }}
{{- end }}
volumeMounts:
-
mountPath: /var/jenkins_home
name: jenkins-home
-
mountPath: /var/jenkins_config
name: jenkins-config
{{- if .Values.Master.CredentialsXmlSecret }}
-
mountPath: /var/jenkins_credentials
name: jenkins-credentials
readOnly: true
{{- end }}
{{- if .Values.Master.SecretsFilesSecret }}
-
mountPath: /var/jenkins_secrets
name: jenkins-secrets
readOnly: true
{{- end }}
{{- if .Values.Master.Jobs }}
-
mountPath: /var/jenkins_jobs
name: jenkins-jobs
readOnly: true
{{- end }}
{{- if .Values.Master.InstallPlugins }}
-
mountPath: /var/jenkins_plugins
name: plugin-dir
{{- end }}
-
mountPath: /usr/share/jenkins/ref/secrets/
name: secrets-dir
containers:
- name: {{ template "jenkins.fullname" . }}
image: "{{ .Values.Master.Image }}:{{ .Values.Master.ImageTag }}"
imagePullPolicy: "{{ .Values.Master.ImagePullPolicy }}"
{{- if .Values.Master.UseSecurity }}
args: [ "--argumentsRealm.passwd.$(ADMIN_USER)=$(ADMIN_PASSWORD)", "--argumentsRealm.roles.$(ADMIN_USER)=admin"]
{{- end }}
env:
- name: JAVA_OPTS
value: "{{ default "" .Values.Master.JavaOpts}}"
- name: JENKINS_OPTS
value: "{{ if .Values.Master.JenkinsUriPrefix }}--prefix={{ .Values.Master.JenkinsUriPrefix }} {{ end }}{{ default "" .Values.Master.JenkinsOpts}}"
{{- if .Values.Master.UseSecurity }}
- name: ADMIN_PASSWORD
valueFrom:
secretKeyRef:
name: {{ template "jenkins.fullname" . }}
key: jenkins-admin-password
- name: ADMIN_USER
valueFrom:
secretKeyRef:
name: {{ template "jenkins.fullname" . }}
key: jenkins-admin-user
{{- end }}
{{- if .Values.Master.ContainerEnv }}
{{ toYaml .Values.Master.ContainerEnv | indent 12 }}
{{- end }}
ports:
- containerPort: {{ .Values.Master.ContainerPort }}
name: http
- containerPort: {{ .Values.Master.SlaveListenerPort }}
name: slavelistener
{{- if .Values.Master.JMXPort }}
- containerPort: {{ .Values.Master.JMXPort }}
name: jmx
{{- end }}
{{- if .Values.Master.HealthProbes }}
livenessProbe:
httpGet:
path: /login
port: http
initialDelaySeconds: {{ .Values.Master.HealthProbesLivenessTimeout }}
timeoutSeconds: 5
failureThreshold: {{ .Values.Master.HealthProbeLivenessFailureThreshold }}
readinessProbe:
httpGet:
path: /login
port: http
initialDelaySeconds: {{ .Values.Master.HealthProbesReadinessTimeout }}
{{- end }}
resources:
{{ if or .Values.Master.Cpu .Values.Master.Memory }}
requests:
cpu: "{{ .Values.Master.Cpu }}"
memory: "{{ .Values.Master.Memory }}"
{{ else }}
{{ toYaml .Values.Master.resources | indent 12 }}
{{ end }}
volumeMounts:
{{- if .Values.Persistence.mounts }}
{{ toYaml .Values.Persistence.mounts | indent 12 }}
{{- end }}
-
mountPath: /var/jenkins_home
name: jenkins-home
readOnly: false
-
mountPath: /var/jenkins_config
name: jenkins-config
readOnly: true
{{- if .Values.Master.CredentialsXmlSecret }}
-
mountPath: /var/jenkins_credentials
name: jenkins-credentials
readOnly: true
{{- end }}
{{- if .Values.Master.SecretsFilesSecret }}
-
mountPath: /var/jenkins_secrets
name: jenkins-secrets
readOnly: true
{{- end }}
{{- if .Values.Master.Jobs }}
-
mountPath: /var/jenkins_jobs
name: jenkins-jobs
readOnly: true
{{- end }}
{{- if .Values.Master.InstallPlugins }}
-
mountPath: /usr/share/jenkins/ref/plugins/
name: plugin-dir
readOnly: false
{{- end }}
-
mountPath: /usr/share/jenkins/ref/secrets/
name: secrets-dir
readOnly: false
volumes:
{{- if .Values.Persistence.volumes }}
{{ toYaml .Values.Persistence.volumes | indent 6 }}
{{- end }}
- name: jenkins-config
configMap:
name: {{ template "jenkins.fullname" . }}
{{- if .Values.Master.CredentialsXmlSecret }}
- name: jenkins-credentials
secret:
secretName: {{ .Values.Master.CredentialsXmlSecret }}
{{- end }}
{{- if .Values.Master.SecretsFilesSecret }}
- name: jenkins-secrets
secret:
secretName: {{ .Values.Master.SecretsFilesSecret }}
{{- end }}
{{- if .Values.Master.Jobs }}
- name: jenkins-jobs
configMap:
name: {{ template "jenkins.fullname" . }}-jobs
{{- end }}
{{- if .Values.Master.InstallPlugins }}
- name: plugin-dir
emptyDir: {}
{{- end }}
- name: secrets-dir
emptyDir: {}
- name: jenkins-home
{{- if .Values.Persistence.Enabled }}
persistentVolumeClaim:
claimName: {{ .Values.Persistence.ExistingClaim | default (include "jenkins.fullname" .) }}
{{- else }}
emptyDir: {}
{{- end -}}
{{- if .Values.Master.ImagePullSecret }}
imagePullSecrets:
- name: {{ .Values.Master.ImagePullSecret }}
{{- end -}}
================================================
FILE: manifests/deprecated/jenkins/templates/jenkins-master-ingress.yaml
================================================
{{- if .Values.Master.HostName }}
apiVersion: {{ .Values.Master.Ingress.ApiVersion }}
kind: Ingress
metadata:
{{- if .Values.Master.Ingress.Annotations }}
annotations:
{{ toYaml .Values.Master.Ingress.Annotations | indent 4 }}
{{- end }}
name: {{ template "jenkins.fullname" . }}
spec:
rules:
- host: {{ .Values.Master.HostName | quote }}
http:
paths:
- backend:
serviceName: {{ template "jenkins.fullname" . }}
servicePort: {{ .Values.Master.ServicePort }}
{{- if .Values.Master.Ingress.TLS }}
tls:
{{ toYaml .Values.Master.Ingress.TLS | indent 4 }}
{{- end -}}
{{- end }}
================================================
FILE: manifests/deprecated/jenkins/templates/jenkins-master-networkpolicy.yaml
================================================
{{- if .Values.NetworkPolicy.Enabled }}
kind: NetworkPolicy
apiVersion: {{ .Values.NetworkPolicy.ApiVersion }}
metadata:
name: "{{ .Release.Name }}-{{ .Values.Master.Component }}"
spec:
podSelector:
matchLabels:
component: "{{ .Release.Name }}-{{ .Values.Master.Component }}"
ingress:
# Allow web access to the UI
- ports:
- port: {{ .Values.Master.ContainerPort }}
# Allow inbound connections from slave
- from:
- podSelector:
matchLabels:
"jenkins/{{ .Release.Name }}-{{ .Values.Agent.Component }}": "true"
ports:
- port: {{ .Values.Master.SlaveListenerPort }}
{{- if .Values.Agent.Enabled }}
---
kind: NetworkPolicy
apiVersion: {{ .Values.NetworkPolicy.ApiVersion }}
metadata:
name: "{{ .Release.Name }}-{{ .Values.Agent.Component }}"
spec:
podSelector:
matchLabels:
# DefaultDeny
"jenkins/{{ .Release.Name }}-{{ .Values.Agent.Component }}": "true"
{{- end }}
{{- end }}
================================================
FILE: manifests/deprecated/jenkins/templates/jenkins-master-svc.yaml
================================================
apiVersion: v1
kind: Service
metadata:
name: {{template "jenkins.fullname" . }}
labels:
app: {{ template "jenkins.fullname" . }}
heritage: {{.Release.Service | quote }}
release: {{.Release.Name | quote }}
chart: "{{.Chart.Name}}-{{.Chart.Version}}"
component: "{{.Release.Name}}-{{.Values.Master.Component}}"
{{- if .Values.Master.ServiceAnnotations }}
annotations:
{{ toYaml .Values.Master.ServiceAnnotations | indent 4 }}
{{- end }}
spec:
ports:
- port: {{.Values.Master.ServicePort}}
name: http
targetPort: {{.Values.Master.ContainerPort}}
{{if (and (eq .Values.Master.ServiceType "NodePort") (not (empty .Values.Master.NodePort)))}}
nodePort: {{.Values.Master.NodePort}}
{{end}}
selector:
component: "{{.Release.Name}}-{{.Values.Master.Component}}"
type: {{.Values.Master.ServiceType}}
{{if eq .Values.Master.ServiceType "LoadBalancer"}}
loadBalancerSourceRanges: {{.Values.Master.LoadBalancerSourceRanges}}
{{if .Values.Master.LoadBalancerIP}}
loadBalancerIP: {{.Values.Master.LoadBalancerIP}}
{{end}}
{{end}}
================================================
FILE: manifests/deprecated/jenkins/templates/jenkins-test.yaml
================================================
apiVersion: v1
kind: Pod
metadata:
name: "{{ .Release.Name }}-ui-test-{{ randAlphaNum 5 | lower }}"
annotations:
"helm.sh/hook": test-success
spec:
{{- if .Values.Master.NodeSelector }}
nodeSelector:
{{ toYaml .Values.Master.NodeSelector | indent 4 }}
{{- end }}
{{- if .Values.Master.Tolerations }}
tolerations:
{{ toYaml .Values.Master.Tolerations | indent 4 }}
{{- end }}
initContainers:
- name: "test-framework"
image: "dduportal/bats:0.4.0"
command:
- "bash"
- "-c"
- |
set -ex
# copy bats to tools dir
cp -R /usr/local/libexec/ /tools/bats/
volumeMounts:
- mountPath: /tools
name: tools
containers:
- name: {{ .Release.Name }}-ui-test
image: {{ .Values.Master.Image }}:{{ .Values.Master.ImageTag }}
command: ["/tools/bats/bats", "-t", "/tests/run.sh"]
volumeMounts:
- mountPath: /tests
name: tests
readOnly: true
- mountPath: /tools
name: tools
volumes:
- name: tests
configMap:
name: {{ template "jenkins.fullname" . }}-tests
- name: tools
emptyDir: {}
restartPolicy: Never
================================================
FILE: manifests/deprecated/jenkins/templates/jobs.yaml
================================================
{{- if .Values.Master.Jobs }}
apiVersion: v1
kind: ConfigMap
metadata:
name: {{ template "jenkins.fullname" . }}-jobs
data:
{{ .Values.Master.Jobs | indent 2 }}
{{- end -}}
================================================
FILE: manifests/deprecated/jenkins/templates/rbac.yaml
================================================
{{ if .Values.rbac.install }}
{{- $serviceName := include "jenkins.fullname" . -}}
apiVersion: rbac.authorization.k8s.io/{{ required "A valid .Values.rbac.apiVersion entry required!" .Values.rbac.apiVersion }}
kind: ClusterRoleBinding
metadata:
name: {{ $serviceName }}-role-binding
labels:
app: {{ $serviceName }}
chart: "{{ .Chart.Name }}-{{ .Chart.Version }}"
release: "{{ .Release.Name }}"
heritage: "{{ .Release.Service }}"
roleRef:
apiGroup: rbac.authorization.k8s.io
kind: ClusterRole
name: {{ .Values.rbac.roleRef }}
subjects:
- kind: ServiceAccount
name: {{ $serviceName }}
namespace: {{ .Release.Namespace }}
{{ end }}
================================================
FILE: manifests/deprecated/jenkins/templates/secret.yaml
================================================
{{- if .Values.Master.UseSecurity }}
apiVersion: v1
kind: Secret
metadata:
name: {{ template "jenkins.fullname" . }}
labels:
app: {{ template "jenkins.fullname" . }}
chart: "{{ .Chart.Name }}-{{ .Chart.Version }}"
release: "{{ .Release.Name }}"
heritage: "{{ .Release.Service }}"
type: Opaque
data:
{{ if .Values.Master.AdminPassword }}
jenkins-admin-password: {{ .Values.Master.AdminPassword | b64enc | quote }}
{{ else }}
jenkins-admin-password: {{ randAlphaNum 10 | b64enc | quote }}
{{ end }}
jenkins-admin-user: {{ .Values.Master.AdminUser | b64enc | quote }}
{{- end }}
================================================
FILE: manifests/deprecated/jenkins/templates/service-account.yaml
================================================
{{ if .Values.rbac.install }}
{{- $serviceName := include "jenkins.fullname" . -}}
apiVersion: v1
kind: ServiceAccount
metadata:
name: {{ $serviceName }}
labels:
app: {{ $serviceName }}
chart: "{{ .Chart.Name }}-{{ .Chart.Version }}"
release: "{{ .Release.Name }}"
heritage: "{{ .Release.Service }}"
{{ end }}
================================================
FILE: manifests/deprecated/jenkins/templates/test-config.yaml
================================================
apiVersion: v1
kind: ConfigMap
metadata:
name: {{ template "jenkins.fullname" . }}-tests
data:
run.sh: |-
@test "Testing Jenkins UI is accessible" {
curl --retry 48 --retry-delay 10 {{ template "jenkins.fullname" . }}:{{ .Values.Master.ServicePort }}{{ default "" .Values.Master.JenkinsUriPrefix }}/login
}
================================================
FILE: manifests/deprecated/jenkins/values.yaml
================================================
# Default values for jenkins.
# This is a YAML-formatted file.
# Declare name/value pairs to be passed into your templates.
# name: value
## Overrides for generated resource names
# See templates/_helpers.tpl
# nameOverride:
# fullnameOverride:
Master:
Name: jenkins-master
Image: "jenkins/jenkins"
ImageTag: "2.138.2-alpine"
ImagePullPolicy: "IfNotPresent"
# ImagePullSecret: jenkins
Component: "jenkins-master"
UseSecurity: true
AdminUser: admin
AdminPassword: admin
resources:
requests:
cpu: "50m"
memory: "256Mi"
limits:
cpu: "2000m"
memory: "2048Mi"
# Environment variables that get added to the init container (useful for e.g. http_proxy)
# InitContainerEnv:
# - name: http_proxy
# value: "http://192.168.64.1:3128"
# ContainerEnv:
# - name: http_proxy
# value: "http://192.168.64.1:3128"
# Set min/max heap here if needed with:
# JavaOpts: "-Xms512m -Xmx512m"
# JenkinsOpts: ""
# JenkinsUriPrefix: "/jenkins"
# Enable pod security context (must be `true` if RunAsUser or FsGroup are set)
# UsePodSecurityContext: true
# Set RunAsUser to 1000 to let Jenkins run as non-root user 'jenkins' which exists in 'jenkins/jenkins' docker image.
# When setting RunAsUser to a different value than 0 also set FsGroup to the same value:
# RunAsUser:
# FsGroup:
ServicePort: 8080
# For minikube, set this to NodePort, elsewhere use LoadBalancer
# Use ClusterIP if your setup includes ingress controller
ServiceType: ClusterIP
# Master Service annotations
ServiceAnnotations: {}
# service.beta.kubernetes.io/aws-load-balancer-backend-protocol: https
# Used to create Ingress record (should used with ServiceType: ClusterIP)
HostName: jenkins.local.com
# NodePort:
-Djava.awt.headless=true
-Dorg.apache.commons.jelly.tags.fmt.timeZone=Asia/Shanghai
-Dfile.encoding=UTF-8
# -Dcom.sun.management.jmxremote.port=4000
# -Dcom.sun.management.jmxremote.authenticate=false
# -Dcom.sun.management.jmxremote.ssl=false
# JMXPort: 4000
# 插件镜像地址
UpdateCenter: https://mirrors.tuna.tsinghua.edu.cn/jenkins/updates/current/update-center.json
# List of plugins to be install during Jenkins master start
InstallPlugins:
- kubernetes:1.13.5
- workflow-aggregator:2.5
- workflow-job:2.25
- credentials-binding:1.17
- git:3.9.1
- gitlab:1.5.10
# Used to approve a list of groovy functions in pipelines used the script-security plugin. Can be viewed under /scriptApproval
# ScriptApproval:
# - "method groovy.json.JsonSlurperClassic parseText java.lang.String"
# - "new groovy.json.JsonSlurperClassic"
# List of groovy init scripts to be executed during Jenkins master start
InitScripts:
# - |
# print 'adding global pipeline libraries, register properties, bootstrap jobs...'
# Kubernetes secret that contains a 'credentials.xml' for Jenkins
# CredentialsXmlSecret: jenkins-credentials
# Kubernetes secret that contains files to be put in the Jenkins 'secrets' directory,
# useful to manage encryption keys used for credentials.xml for instance (such as
# master.key and hudson.util.Secret)
# SecretsFilesSecret: jenkins-secrets
# Jenkins XML job configs to provision
# Jobs: |-
# test: |-
# <>
CustomConfigMap: false
# Node labels and tolerations for pod assignment
# ref: https://kubernetes.io/docs/concepts/configuration/assign-pod-node/#nodeselector
# ref: https://kubernetes.io/docs/concepts/configuration/assign-pod-node/#taints-and-tolerations-beta-feature
NodeSelector: {}
Tolerations: {}
PodAnnotations: {}
Ingress:
ApiVersion: networking.k8s.io/v1beta1
Annotations:
# kubernetes.io/ingress.class: nginx
# kubernetes.io/tls-acme: "true"
TLS:
# - secretName: jenkins.cluster.local
# hosts:
# - jenkins.cluster.local
Agent:
Enabled: true
Image: jenkinsci/jnlp-slave
ImageTag: alpine
# ImagePullSecret: jenkins
Component: "jenkins-slave"
Privileged: false
resources:
requests:
cpu: "200m"
memory: "256Mi"
limits:
cpu: "200m"
memory: "256Mi"
# You may want to change this to true while testing a new image
AlwaysPullImage: false
# You can define the volumes that you want to mount for this container
# Allowed types are: ConfigMap, EmptyDir, HostPath, Nfs, Pod, Secret
# Configure the attributes as they appear in the corresponding Java class for that type
# https://github.com/jenkinsci/kubernetes-plugin/tree/master/src/main/java/org/csanchez/jenkins/plugins/kubernetes/volumes
volumes:
# - type: Secret
# secretName: mysecret
# mountPath: /var/myapp/mysecret
NodeSelector: {}
# Key Value selectors. Ex:
# jenkins-agent: v1
Persistence:
Enabled: true
## A manually managed Persistent Volume and Claim
## Requires Persistence.Enabled: true
## If defined, PVC must be created manually before volume will be bound
# ExistingClaim:
## jenkins data Persistent Volume Storage Class
## If defined, storageClassName:
## If set to "-", storageClassName: "", which disables dynamic provisioning
## If undefined (the default) or set to null, no storageClassName spec is
## set, choosing the default provisioner. (gp2 on AWS, standard on
## GKE, AWS & OpenStack)
##
StorageClass: "nfs-dynamic-class"
Annotations: {}
AccessMode: ReadWriteOnce
Size: 8Gi
volumes:
# - name: nothing
# emptyDir: {}
mounts:
# - mountPath: /var/nothing
# name: nothing
# readOnly: true
NetworkPolicy:
# Enable creation of NetworkPolicy resources.
Enabled: false
# For Kubernetes v1.7, use 'networking.k8s.io/v1'
ApiVersion: networking.k8s.io/v1
## Install Default RBAC roles and bindings
rbac:
install: true
serviceAccountName: default
# RBAC api version (currently either v1beta1 or v1alpha1 or v1)
apiVersion: v1
# Cluster role reference
roleRef: cluster-admin
================================================
FILE: manifests/deprecated/mariadb-cluster/mariadb/.helmignore
================================================
.git
================================================
FILE: manifests/deprecated/mariadb-cluster/mariadb/Chart.yaml
================================================
name: mariadb
version: 5.5.0
appVersion: 10.1.37
description: Fast, reliable, scalable, and easy to use open-source relational database system. MariaDB Server is intended for mission-critical, heavy-load production systems as well as for embedding into mass-deployed software. Highly available MariaDB cluster.
keywords:
- mariadb
- mysql
- database
- sql
- prometheus
home: https://mariadb.org
icon: https://bitnami.com/assets/stacks/mariadb/img/mariadb-stack-220x234.png
sources:
- https://github.com/bitnami/bitnami-docker-mariadb
- https://github.com/prometheus/mysqld_exporter
maintainers:
- name: Bitnami
email: containers@bitnami.com
engine: gotpl
================================================
FILE: manifests/deprecated/mariadb-cluster/mariadb/OWNERS
================================================
approvers:
- prydonius
- tompizmor
- sameersbn
- carrodher
- juan131
reviewers:
- prydonius
- tompizmor
- sameersbn
- carrodher
- juan131
================================================
FILE: manifests/deprecated/mariadb-cluster/mariadb/README.md
================================================
# MariaDB
[MariaDB](https://mariadb.org) is one of the most popular database servers in the world. It’s made by the original developers of MySQL and guaranteed to stay open source. Notable users include Wikipedia, Facebook and Google.
MariaDB is developed as open source software and as a relational database it provides an SQL interface for accessing data. The latest versions of MariaDB also include GIS and JSON features.
## TL;DR
```bash
$ helm install stable/mariadb
```
## Introduction
This chart bootstraps a [MariaDB](https://github.com/bitnami/bitnami-docker-mariadb) replication cluster deployment on a [Kubernetes](http://kubernetes.io) cluster using the [Helm](https://helm.sh) package manager.
Bitnami charts can be used with [Kubeapps](https://kubeapps.com/) for deployment and management of Helm Charts in clusters.
## Prerequisites
- Kubernetes 1.10+
- PV provisioner support in the underlying infrastructure
## Installing the Chart
To install the chart with the release name `my-release`:
```bash
$ helm install --name my-release stable/mariadb
```
The command deploys MariaDB on the Kubernetes cluster in the default configuration. The [configuration](#configuration) section lists the parameters that can be configured during installation.
> **Tip**: List all releases using `helm list`
## Uninstalling the Chart
To uninstall/delete the `my-release` deployment:
```bash
$ helm delete my-release
```
The command removes all the Kubernetes components associated with the chart and deletes the release.
## Configuration
The following table lists the configurable parameters of the MariaDB chart and their default values.
| Parameter | Description | Default |
|-------------------------------------------|-----------------------------------------------------|-------------------------------------------------------------------|
| `global.imageRegistry` | Global Docker image registry | `nil` |
| `image.registry` | MariaDB image registry | `docker.io` |
| `image.repository` | MariaDB Image name | `bitnami/mariadb` |
| `image.tag` | MariaDB Image tag | `{VERSION}` |
| `image.pullPolicy` | MariaDB image pull policy | `Always` if `imageTag` is `latest`, else `IfNotPresent` |
| `image.pullSecrets` | Specify docker-registry secret names as an array | `[]` (does not add image pull secrets to deployed pods) |
| `image.debug` | Specify if debug logs should be enabled | `false` |
| `service.type` | Kubernetes service type | `ClusterIP` |
| `service.clusterIp` | Specific cluster IP when service type is cluster IP. Use None for headless service | `nil` |
| `service.port` | MySQL service port | `3306` |
| `serviceAccount.create` | Specifies whether a ServiceAccount should be created | `false` |
| `serviceAccount.name` | The name of the ServiceAccount to create | Generated using the mariadb.fullname template |
| `securityContext.enabled` | Enable security context | `true` |
| `securityContext.fsGroup` | Group ID for the container | `1001` |
| `securityContext.runAsUser` | User ID for the container | `1001` |
| `existingSecret` | Use Existing secret for Password details (`rootUser.password`, `db.password`, `replication.password` will be ignored and picked up from this secret) | |
| `rootUser.password` | Password for the `root` user. Ignored if existing secret is provided. | _random 10 character alphanumeric string_ |
| `rootUser.forcePassword` | Force users to specify a password | `false` |
| `db.user` | Username of new user to create | `nil` |
| `db.password` | Password for the new user. Ignored if existing secret is provided. | _random 10 character alphanumeric string if `db.user` is defined_ |
| `db.name` | Name for new database to create | `my_database` |
| `replication.enabled` | MariaDB replication enabled | `true` |
| `replication.user` |MariaDB replication user | `replicator` |
| `replication.password` | MariaDB replication user password. Ignored if existing secret is provided. | _random 10 character alphanumeric string_ |
| `initdbScripts` | List of initdb scripts | `nil` |
| `initdbScriptsConfigMap` | ConfigMap with the initdb scripts (Note: Overrides `initdbScripts`) | `nil` |
| `master.annotations[].key` | key for the the annotation list item | `nil` |
| `master.annotations[].value` | value for the the annotation list item | `nil` |
| `master.affinity` | Master affinity (in addition to master.antiAffinity when set) | `{}` |
| `master.antiAffinity` | Master pod anti-affinity policy | `soft` |
| `master.tolerations` | List of node taints to tolerate (master) | `[]` |
| `master.persistence.enabled` | Enable persistence using PVC | `true` |
| `master.persistence.existingClaim` | Provide an existing `PersistentVolumeClaim` | `nil` |
| `master.persistence.mountPath` | Path to mount the volume at | `/bitnami/mariadb` |
| `master.persistence.annotations` | Persistent Volume Claim annotations | `{}` |
| `master.persistence.storageClass` | Persistent Volume Storage Class | `` |
| `master.persistence.accessModes` | Persistent Volume Access Modes | `[ReadWriteOnce]` |
| `master.persistence.size` | Persistent Volume Size | `8Gi` |
| `master.extraInitContainers` | Additional init containers as a string to be passed to the `tpl` function (master) | |
| `master.config` | Config file for the MariaDB Master server | `_default values in the values.yaml file_` |
| `master.resources` | CPU/Memory resource requests/limits for master node | `{}` |
| `master.livenessProbe.enabled` | Turn on and off liveness probe (master) | `true` |
| `master.livenessProbe.initialDelaySeconds`| Delay before liveness probe is initiated (master) | `120` |
| `master.livenessProbe.periodSeconds` | How often to perform the probe (master) | `10` |
| `master.livenessProbe.timeoutSeconds` | When the probe times out (master) | `1` |
| `master.livenessProbe.successThreshold` | Minimum consecutive successes for the probe (master)| `1` |
| `master.livenessProbe.failureThreshold` | Minimum consecutive failures for the probe (master) | `3` |
| `master.readinessProbe.enabled` | Turn on and off readiness probe (master) | `true` |
| `master.readinessProbe.initialDelaySeconds`| Delay before readiness probe is initiated (master) | `30` |
| `master.readinessProbe.periodSeconds` | How often to perform the probe (master) | `10` |
| `master.readinessProbe.timeoutSeconds` | When the probe times out (master) | `1` |
| `master.readinessProbe.successThreshold` | Minimum consecutive successes for the probe (master)| `1` |
| `master.readinessProbe.failureThreshold` | Minimum consecutive failures for the probe (master) | `3` |
| `slave.replicas` | Desired number of slave replicas | `1` |
| `slave.annotations[].key` | key for the the annotation list item | `nil` |
| `slave.annotations[].value` | value for the the annotation list item | `nil` |
| `slave.affinity` | Slave affinity (in addition to slave.antiAffinity when set) | `{}` |
| `slave.antiAffinity` | Slave pod anti-affinity policy | `soft` |
| `slave.tolerations` | List of node taints to tolerate for (slave) | `[]` |
| `slave.persistence.enabled` | Enable persistence using a `PersistentVolumeClaim` | `true` |
| `slave.persistence.annotations` | Persistent Volume Claim annotations | `{}` |
| `slave.persistence.storageClass` | Persistent Volume Storage Class | `` |
| `slave.persistence.accessModes` | Persistent Volume Access Modes | `[ReadWriteOnce]` |
| `slave.persistence.size` | Persistent Volume Size | `8Gi` |
| `slave.extraInitContainers` | Additional init containers as a string to be passed to the `tpl` function (slave) | |
| `slave.config` | Config file for the MariaDB Slave replicas | `_default values in the values.yaml file_` |
| `slave.resources` | CPU/Memory resource requests/limits for slave node | `{}` |
| `slave.livenessProbe.enabled` | Turn on and off liveness probe (slave) | `true` |
| `slave.livenessProbe.initialDelaySeconds` | Delay before liveness probe is initiated (slave) | `120` |
| `slave.livenessProbe.periodSeconds` | How often to perform the probe (slave) | `10` |
| `slave.livenessProbe.timeoutSeconds` | When the probe times out (slave) | `1` |
| `slave.livenessProbe.successThreshold` | Minimum consecutive successes for the probe (slave) | `1` |
| `slave.livenessProbe.failureThreshold` | Minimum consecutive failures for the probe (slave) | `3` |
| `slave.readinessProbe.enabled` | Turn on and off readiness probe (slave) | `true` |
| `slave.readinessProbe.initialDelaySeconds`| Delay before readiness probe is initiated (slave) | `45` |
| `slave.readinessProbe.periodSeconds` | How often to perform the probe (slave) | `10` |
| `slave.readinessProbe.timeoutSeconds` | When the probe times out (slave) | `1` |
| `slave.readinessProbe.successThreshold` | Minimum consecutive successes for the probe (slave) | `1` |
| `slave.readinessProbe.failureThreshold` | Minimum consecutive failures for the probe (slave) | `3` |
| `metrics.enabled` | Start a side-car prometheus exporter | `false` |
| `metrics.image.registry` | Exporter image registry | `docker.io` |
| `metrics.image.repository` | Exporter image name | `prom/mysqld-exporter` |
| `metrics.image.tag` | Exporter image tag | `v0.10.0` |
| `metrics.image.pullPolicy` | Exporter image pull policy | `IfNotPresent` |
| `metrics.resources` | Exporter resource requests/limit | `nil` |
The above parameters map to the env variables defined in [bitnami/mariadb](http://github.com/bitnami/bitnami-docker-mariadb). For more information please refer to the [bitnami/mariadb](http://github.com/bitnami/bitnami-docker-mariadb) image documentation.
Specify each parameter using the `--set key=value[,key=value]` argument to `helm install`. For example,
```bash
$ helm install --name my-release \
--set root.password=secretpassword,user.database=app_database \
stable/mariadb
```
The above command sets the MariaDB `root` account password to `secretpassword`. Additionally it creates a database named `my_database`.
Alternatively, a YAML file that specifies the values for the parameters can be provided while installing the chart. For example,
```bash
$ helm install --name my-release -f values.yaml stable/mariadb
```
> **Tip**: You can use the default [values.yaml](values.yaml)
## Initialize a fresh instance
The [Bitnami MariaDB](https://github.com/bitnami/bitnami-docker-mariadb) image allows you to use your custom scripts to initialize a fresh instance. In order to execute the scripts, they must be located inside the chart folder `files/docker-entrypoint-initdb.d` so they can be consumed as a ConfigMap.
Alternatively, you can specify custom scripts using the `initdbScripts` parameter as dict.
In addition to these options, you can also set an external ConfigMap with all the initialization scripts. This is done by setting the `initdbScriptsConfigMap` parameter. Note that this will override the two previous options.
The allowed extensions are `.sh`, `.sql` and `.sql.gz`.
## Persistence
The [Bitnami MariaDB](https://github.com/bitnami/bitnami-docker-mariadb) image stores the MariaDB data and configurations at the `/bitnami/mariadb` path of the container.
The chart mounts a [Persistent Volume](kubernetes.io/docs/user-guide/persistent-volumes/) volume at this location. The volume is created using dynamic volume provisioning, by default. An existing PersistentVolumeClaim can be defined.
## Extra Init Containers
The feature allows for specifying a template string for a initContainer in the master/slave pod. Usecases include situations when you need some pre-run setup. For example, in IKS (IBM Cloud Kubernetes Service), non-root users do not have write permission on the volume mount path for NFS-powered file storage. So, you could use a initcontainer to `chown` the mount. See a example below, where we add an initContainer on the master pod that reports to an external resource that the db is going to starting.
`values.yaml`
```yaml
master:
extraInitContainers: |
- name: initcontainer
image: alpine:latest
command: ["/bin/sh", "-c"]
args:
- curl http://api-service.local/db/starting;
```
## Upgrading
It's necessary to set the `rootUser.password` parameter when upgrading for readiness/liveness probes to work properly. When you install this chart for the first time, some notes will be displayed providing the credentials you must use under the 'Administrator credentials' section. Please note down the password and run the command below to upgrade your chart:
```bash
$ helm upgrade my-release stable/mariadb --set rootUser.password=[ROOT_PASSWORD]
```
| Note: you need to substitute the placeholder _[ROOT_PASSWORD]_ with the value obtained in the installation notes.
### To 5.0.0
Backwards compatibility is not guaranteed unless you modify the labels used on the chart's deployments.
Use the workaround below to upgrade from versions previous to 5.0.0. The following example assumes that the release name is mariadb:
```console
$ kubectl delete statefulset opencart-mariadb --cascade=false
```
================================================
FILE: manifests/deprecated/mariadb-cluster/mariadb/files/docker-entrypoint-initdb.d/README.md
================================================
You can copy here your custom .sh, .sql or .sql.gz file so they are executed during the first boot of the image.
More info in the [bitnami-docker-mariadb](https://github.com/bitnami/bitnami-docker-mariadb#initializing-a-new-instance) repository.
================================================
FILE: manifests/deprecated/mariadb-cluster/mariadb/templates/NOTES.txt
================================================
Please be patient while the chart is being deployed
Tip:
Watch the deployment status using the command: kubectl get pods -w --namespace {{ .Release.Namespace }} -l release={{ .Release.Name }}
Services:
echo Master: {{ template "mariadb.fullname" . }}.{{ .Release.Namespace }}.svc.cluster.local:{{ .Values.service.port }}
{{- if .Values.replication.enabled }}
echo Slave: {{ template "slave.fullname" . }}.{{ .Release.Namespace }}.svc.cluster.local:{{ .Values.service.port }}
{{- end }}
Administrator credentials:
Username: root
Password : $(kubectl get secret --namespace {{ .Release.Namespace }} {{ template "mariadb.fullname" . }} -o jsonpath="{.data.mariadb-root-password}" | base64 --decode)
To connect to your database:
1. Run a pod that you can use as a client:
kubectl run {{ template "mariadb.fullname" . }}-client --rm --tty -i --restart='Never' --image {{ template "mariadb.image" . }} --namespace {{ .Release.Namespace }} --command -- bash
2. To connect to master service (read/write):
mysql -h {{ template "mariadb.fullname" . }}.{{ .Release.Namespace }}.svc.cluster.local -uroot -p {{ .Values.db.name }}
{{- if .Values.replication.enabled }}
3. To connect to slave service (read-only):
mysql -h {{ template "slave.fullname" . }}.{{ .Release.Namespace }}.svc.cluster.local -uroot -p {{ .Values.db.name }}
{{- end }}
To upgrade this helm chart:
1. Obtain the password as described on the 'Administrator credentials' section and set the 'rootUser.password' parameter as shown below:
ROOT_PASSWORD=$(kubectl get secret --namespace {{ .Release.Namespace }} {{ template "mariadb.fullname" . }} -o jsonpath="{.data.mariadb-root-password}" | base64 --decode)
helm upgrade {{ .Release.Name }} stable/mariadb --set rootUser.password=$ROOT_PASSWORD
================================================
FILE: manifests/deprecated/mariadb-cluster/mariadb/templates/_helpers.tpl
================================================
{{/* vim: set filetype=mustache: */}}
{{/*
Expand the name of the chart.
*/}}
{{- define "mariadb.name" -}}
{{- default .Chart.Name .Values.nameOverride | trunc 63 | trimSuffix "-" -}}
{{- end -}}
{{/*
Create a default fully qualified app name.
We truncate at 63 chars because some Kubernetes name fields are limited to this (by the DNS naming spec).
If release name contains chart name it will be used as a full name.
*/}}
{{- define "mariadb.fullname" -}}
{{- if .Values.fullnameOverride -}}
{{- .Values.fullnameOverride | trunc 63 | trimSuffix "-" -}}
{{- else -}}
{{- $name := default .Chart.Name .Values.nameOverride -}}
{{- if contains $name .Release.Name -}}
{{- printf .Release.Name | trunc 63 | trimSuffix "-" -}}
{{- else -}}
{{- printf "%s-%s" .Release.Name $name | trunc 63 | trimSuffix "-" -}}
{{- end -}}
{{- end -}}
{{- end -}}
{{- define "master.fullname" -}}
{{- if .Values.replication.enabled -}}
{{- printf "%s-%s" .Release.Name "mariadb-master" | trunc 63 | trimSuffix "-" -}}
{{- else -}}
{{- printf "%s-%s" .Release.Name "mariadb" | trunc 63 | trimSuffix "-" -}}
{{- end -}}
{{- end -}}
{{- define "slave.fullname" -}}
{{- printf "%s-%s" .Release.Name "mariadb-slave" | trunc 63 | trimSuffix "-" -}}
{{- end -}}
{{- define "mariadb.chart" -}}
{{- printf "%s-%s" .Chart.Name .Chart.Version | replace "+" "_" | trunc 63 | trimSuffix "-" -}}
{{- end -}}
{{/*
Return the proper MariaDB image name
*/}}
{{- define "mariadb.image" -}}
{{- $registryName := .Values.image.registry -}}
{{- $repositoryName := .Values.image.repository -}}
{{- $tag := .Values.image.tag | toString -}}
{{/*
Helm 2.11 supports the assignment of a value to a variable defined in a different scope,
but Helm 2.9 and 2.10 doesn't support it, so we need to implement this if-else logic.
Also, we can't use a single if because lazy evaluation is not an option
*/}}
{{- if .Values.global }}
{{- if .Values.global.imageRegistry }}
{{- printf "%s/%s:%s" .Values.global.imageRegistry $repositoryName $tag -}}
{{- else -}}
{{- printf "%s/%s:%s" $registryName $repositoryName $tag -}}
{{- end -}}
{{- else -}}
{{- printf "%s/%s:%s" $registryName $repositoryName $tag -}}
{{- end -}}
{{- end -}}
{{/*
Return the proper metrics image name
*/}}
{{- define "metrics.image" -}}
{{- $registryName := .Values.metrics.image.registry -}}
{{- $repositoryName := .Values.metrics.image.repository -}}
{{- $tag := .Values.metrics.image.tag | toString -}}
{{- printf "%s/%s:%s" $registryName $repositoryName $tag -}}
{{- end -}}
{{ template "mariadb.initdbScriptsCM" . }}
{{/*
Get the initialization scripts ConfigMap name.
*/}}
{{- define "mariadb.initdbScriptsCM" -}}
{{- if .Values.initdbScriptsConfigMap -}}
{{- printf "%s" .Values.initdbScriptsConfigMap -}}
{{- else -}}
{{- printf "%s-init-scripts" (include "mariadb.fullname" .) -}}
{{- end -}}
{{- end -}}
{{/*
Create the name of the service account to use
*/}}
{{- define "mariadb.serviceAccountName" -}}
{{- if .Values.serviceAccount.create -}}
{{ default (include "mariadb.fullname" .) .Values.serviceAccount.name }}
{{- else -}}
{{ default "default" .Values.serviceAccount.name }}
{{- end -}}
{{- end -}}
================================================
FILE: manifests/deprecated/mariadb-cluster/mariadb/templates/initialization-configmap.yaml
================================================
{{- if and (or (.Files.Glob "files/docker-entrypoint-initdb.d/*.{sh,sql,sql.gz}") .Values.initdbScripts) (not .Values.initdbScriptsConfigMap) }}
apiVersion: v1
kind: ConfigMap
metadata:
name: {{ template "master.fullname" . }}-init-scripts
labels:
app: {{ template "mariadb.name" . }}
chart: {{ template "mariadb.chart" . }}
release: {{ .Release.Name | quote }}
heritage: {{ .Release.Service | quote }}
component: "master"
{{- if and (.Files.Glob "files/docker-entrypoint-initdb.d/*.sql.gz") (not .Values.initdbScriptsConfigMap) }}
binaryData:
{{- $root := . }}
{{- range $path, $bytes := .Files.Glob "files/docker-entrypoint-initdb.d/*.sql.gz" }}
{{ base $path }}: {{ $root.Files.Get $path | b64enc | quote }}
{{- end }}
{{- end }}
data:
{{- if and (.Files.Glob "files/docker-entrypoint-initdb.d/*.{sh,sql}") (not .Values.initdbScriptsConfigMap) }}
{{ (.Files.Glob "files/docker-entrypoint-initdb.d/*.{sh,sql}").AsConfig | indent 2 }}
{{- end }}
{{- with .Values.initdbScripts }}
{{ toYaml . | indent 2 }}
{{- end }}
{{ end }}
================================================
FILE: manifests/deprecated/mariadb-cluster/mariadb/templates/master-configmap.yaml
================================================
{{- if .Values.master.config }}
apiVersion: v1
kind: ConfigMap
metadata:
name: {{ template "master.fullname" . }}
labels:
app: {{ template "mariadb.name" . }}
component: "master"
chart: {{ template "mariadb.chart" . }}
release: {{ .Release.Name | quote }}
heritage: {{ .Release.Service | quote }}
data:
my.cnf: |-
{{ .Values.master.config | indent 4 }}
{{- end -}}
================================================
FILE: manifests/deprecated/mariadb-cluster/mariadb/templates/master-statefulset.yaml
================================================
apiVersion: apps/v1
kind: StatefulSet
metadata:
name: {{ template "master.fullname" . }}
labels:
app: "{{ template "mariadb.name" . }}"
chart: {{ template "mariadb.chart" . }}
component: "master"
release: {{ .Release.Name | quote }}
heritage: {{ .Release.Service | quote }}
spec:
selector:
matchLabels:
release: "{{ .Release.Name }}"
component: "master"
app: {{ template "mariadb.name" . }}
serviceName: "{{ template "master.fullname" . }}"
replicas: 1
updateStrategy:
type: RollingUpdate
template:
metadata:
{{- if .Values.master.annotations }}
annotations:
{{- range .Values.master.annotations }}
{{ .key }}: '{{ .value }}'
{{- end }}
{{- end }}
labels:
app: "{{ template "mariadb.name" . }}"
component: "master"
release: "{{ .Release.Name }}"
chart: {{ template "mariadb.chart" . }}
spec:
serviceAccountName: "{{ template "mariadb.serviceAccountName" . }}"
{{- if .Values.securityContext.enabled }}
securityContext:
fsGroup: {{ .Values.securityContext.fsGroup }}
runAsUser: {{ .Values.securityContext.runAsUser }}
{{- end }}
{{- if eq .Values.master.antiAffinity "hard" }}
affinity:
{{- with .Values.master.affinity }}
{{ toYaml . | indent 8 }}
{{- end }}
podAntiAffinity:
requiredDuringSchedulingIgnoredDuringExecution:
- topologyKey: "kubernetes.io/hostname"
labelSelector:
matchLabels:
app: "{{ template "mariadb.name" . }}"
release: "{{ .Release.Name }}"
{{- else if eq .Values.master.antiAffinity "soft" }}
affinity:
{{- with .Values.master.affinity }}
{{ toYaml . | indent 8 }}
{{- end }}
podAntiAffinity:
preferredDuringSchedulingIgnoredDuringExecution:
- weight: 1
podAffinityTerm:
topologyKey: kubernetes.io/hostname
labelSelector:
matchLabels:
app: "{{ template "mariadb.name" . }}"
release: "{{ .Release.Name }}"
{{- else}}
{{- with .Values.master.affinity }}
affinity:
{{ toYaml . | indent 8 }}
{{- end }}
{{- end }}
{{- with .Values.master.tolerations }}
tolerations:
{{ toYaml . | indent 8 }}
{{- end }}
{{- if .Values.image.pullSecrets }}
imagePullSecrets:
{{- range .Values.image.pullSecrets }}
- name: {{ . }}
{{- end}}
{{- end }}
{{- if .Values.master.extraInitContainers }}
initContainers:
{{ tpl .Values.master.extraInitContainers . | indent 6}}
{{- end }}
containers:
- name: "mariadb"
image: {{ template "mariadb.image" . }}
imagePullPolicy: {{ .Values.image.pullPolicy | quote }}
env:
{{- if .Values.image.debug}}
- name: BITNAMI_DEBUG
value: "true"
{{- end }}
- name: MARIADB_ROOT_PASSWORD
valueFrom:
secretKeyRef:
{{- if .Values.existingSecret }}
name: {{ .Values.existingSecret }}
{{- else }}
name: {{ template "mariadb.fullname" . }}
{{- end }}
key: mariadb-root-password
{{- if .Values.db.user }}
- name: MARIADB_USER
value: "{{ .Values.db.user }}"
- name: MARIADB_PASSWORD
valueFrom:
secretKeyRef:
{{- if .Values.existingSecret }}
name: {{ .Values.existingSecret }}
{{- else }}
name: {{ template "mariadb.fullname" . }}
{{- end }}
key: mariadb-password
{{- end }}
- name: MARIADB_DATABASE
value: "{{ .Values.db.name }}"
{{- if .Values.replication.enabled }}
- name: MARIADB_REPLICATION_MODE
value: "master"
- name: MARIADB_REPLICATION_USER
value: "{{ .Values.replication.user }}"
- name: MARIADB_REPLICATION_PASSWORD
valueFrom:
secretKeyRef:
{{- if .Values.existingSecret }}
name: {{ .Values.existingSecret }}
{{- else }}
name: {{ template "mariadb.fullname" . }}
{{- end }}
key: mariadb-replication-password
{{- end }}
ports:
- name: mysql
containerPort: 3306
{{- if .Values.master.livenessProbe.enabled }}
livenessProbe:
exec:
command: ["sh", "-c", "exec mysqladmin status -uroot -p$MARIADB_ROOT_PASSWORD"]
initialDelaySeconds: {{ .Values.master.livenessProbe.initialDelaySeconds }}
periodSeconds: {{ .Values.master.livenessProbe.periodSeconds }}
timeoutSeconds: {{ .Values.master.livenessProbe.timeoutSeconds }}
successThreshold: {{ .Values.master.livenessProbe.successThreshold }}
failureThreshold: {{ .Values.master.livenessProbe.failureThreshold }}
{{- end }}
{{- if .Values.master.readinessProbe.enabled }}
readinessProbe:
exec:
command: ["sh", "-c", "exec mysqladmin status -uroot -p$MARIADB_ROOT_PASSWORD"]
initialDelaySeconds: {{ .Values.master.readinessProbe.initialDelaySeconds }}
periodSeconds: {{ .Values.master.readinessProbe.periodSeconds }}
timeoutSeconds: {{ .Values.master.readinessProbe.timeoutSeconds }}
successThreshold: {{ .Values.master.readinessProbe.successThreshold }}
failureThreshold: {{ .Values.master.readinessProbe.failureThreshold }}
{{- end }}
resources:
{{ toYaml .Values.master.resources | indent 10 }}
volumeMounts:
- name: data
mountPath: {{ .Values.master.persistence.mountPath }}
{{- if or (.Files.Glob "files/docker-entrypoint-initdb.d/*.{sh,sql,sql.gz}") .Values.initdbScriptsConfigMap .Values.initdbScripts }}
- name: custom-init-scripts
mountPath: /docker-entrypoint-initdb.d
{{- end }}
{{- if .Values.master.config }}
- name: config
mountPath: /opt/bitnami/mariadb/conf/my.cnf
subPath: my.cnf
{{- end }}
{{- if .Values.metrics.enabled }}
- name: metrics
image: {{ template "metrics.image" . }}
imagePullPolicy: {{ .Values.metrics.image.pullPolicy | quote }}
env:
- name: MARIADB_ROOT_PASSWORD
valueFrom:
secretKeyRef:
{{- if .Values.existingSecret }}
name: {{ .Values.existingSecret }}
{{- else }}
name: {{ template "mariadb.fullname" . }}
{{- end }}
key: mariadb-root-password
command: [ 'sh', '-c', 'DATA_SOURCE_NAME="root:$MARIADB_ROOT_PASSWORD@(localhost:3306)/" /bin/mysqld_exporter' ]
ports:
- name: metrics
containerPort: 9104
livenessProbe:
httpGet:
path: /metrics
port: metrics
initialDelaySeconds: 15
timeoutSeconds: 5
readinessProbe:
httpGet:
path: /metrics
port: metrics
initialDelaySeconds: 5
timeoutSeconds: 1
resources:
{{ toYaml .Values.metrics.resources | indent 10 }}
{{- end }}
volumes:
{{- if .Values.master.config }}
- name: config
configMap:
name: {{ template "master.fullname" . }}
{{- end }}
{{- if or (.Files.Glob "files/docker-entrypoint-initdb.d/*.{sh,sql,sql.gz}") .Values.initdbScriptsConfigMap .Values.initdbScripts }}
- name: custom-init-scripts
configMap:
name: {{ template "mariadb.initdbScriptsCM" . }}
{{- end }}
{{- if and .Values.master.persistence.enabled .Values.master.persistence.existingClaim }}
- name: data
persistentVolumeClaim:
claimName: {{ .Values.master.persistence.existingClaim }}
{{- else if not .Values.master.persistence.enabled }}
- name: data
emptyDir: {}
{{- else if and .Values.master.persistence.enabled (not .Values.master.persistence.existingClaim) }}
volumeClaimTemplates:
- metadata:
name: data
labels:
app: "{{ template "mariadb.name" . }}"
component: "master"
release: {{ .Release.Name | quote }}
heritage: {{ .Release.Service | quote }}
spec:
accessModes:
{{- range .Values.master.persistence.accessModes }}
- {{ . | quote }}
{{- end }}
resources:
requests:
storage: {{ .Values.master.persistence.size | quote }}
{{- if .Values.master.persistence.storageClass }}
{{- if (eq "-" .Values.master.persistence.storageClass) }}
storageClassName: ""
{{- else }}
storageClassName: {{ .Values.master.persistence.storageClass | quote }}
{{- end }}
{{- end }}
{{- end }}
================================================
FILE: manifests/deprecated/mariadb-cluster/mariadb/templates/master-svc.yaml
================================================
apiVersion: v1
kind: Service
metadata:
name: {{ template "mariadb.fullname" . }}
labels:
app: "{{ template "mariadb.name" . }}"
component: "master"
chart: {{ template "mariadb.chart" . }}
release: {{ .Release.Name | quote }}
heritage: {{ .Release.Service | quote }}
{{- if .Values.metrics.enabled }}
annotations:
{{ toYaml .Values.metrics.annotations | indent 4 }}
{{- end }}
spec:
type: {{ .Values.service.type }}
{{- if eq .Values.service.type "ClusterIP" }}
{{- if .Values.service.clusterIp }}
clusterIP: {{ .Values.service.clusterIp }}
{{- end }}
{{- end }}
ports:
- name: mysql
port: {{ .Values.service.port }}
targetPort: mysql
{{- if eq .Values.service.type "NodePort" }}
{{- if .Values.service.nodePort }}
{{- if .Values.service.nodePort.master }}
nodePort: {{ .Values.service.nodePort.master }}
{{- end }}
{{- end }}
{{- end }}
{{- if .Values.metrics.enabled }}
- name: metrics
port: 9104
targetPort: metrics
{{- end }}
selector:
app: "{{ template "mariadb.name" . }}"
component: "master"
release: "{{ .Release.Name }}"
================================================
FILE: manifests/deprecated/mariadb-cluster/mariadb/templates/secrets.yaml
================================================
{{- if (not .Values.existingSecret) -}}
apiVersion: v1
kind: Secret
metadata:
name: {{ template "mariadb.fullname" . }}
labels:
app: "{{ template "mariadb.name" . }}"
chart: {{ template "mariadb.chart" . }}
release: {{ .Release.Name | quote }}
heritage: {{ .Release.Service | quote }}
type: Opaque
data:
{{- if .Values.rootUser.password }}
mariadb-root-password: "{{ .Values.rootUser.password | b64enc }}"
{{- else if (not .Values.rootUser.forcePassword) }}
mariadb-root-password: "{{ randAlphaNum 10 | b64enc }}"
{{ else }}
mariadb-root-password: {{ required "A MariaDB Root Password is required!" .Values.rootUser.password }}
{{- end }}
{{- if .Values.db.user }}
{{- if .Values.db.password }}
mariadb-password: "{{ .Values.db.password | b64enc }}"
{{- else if (not .Values.db.forcePassword) }}
mariadb-password: "{{ randAlphaNum 10 | b64enc }}"
{{- else }}
mariadb-password: {{ required "A MariaDB Database Password is required!" .Values.db.password }}
{{- end }}
{{- end }}
{{- if .Values.replication.enabled }}
{{- if .Values.replication.password }}
mariadb-replication-password: "{{ .Values.replication.password | b64enc }}"
{{- else if (not .Values.replication.forcePassword) }}
mariadb-replication-password: "{{ randAlphaNum 10 | b64enc }}"
{{- else }}
mariadb-replication-password: {{ required "A MariaDB Replication Password is required!" .Values.replication.password }}
{{- end }}
{{- end }}
{{- end }}
================================================
FILE: manifests/deprecated/mariadb-cluster/mariadb/templates/slave-configmap.yaml
================================================
{{- if and .Values.replication.enabled .Values.slave.config }}
apiVersion: v1
kind: ConfigMap
metadata:
name: {{ template "slave.fullname" . }}
labels:
app: {{ template "mariadb.name" . }}
component: "slave"
chart: {{ template "mariadb.chart" . }}
release: {{ .Release.Name | quote }}
heritage: {{ .Release.Service | quote }}
data:
my.cnf: |-
{{ .Values.slave.config | indent 4 }}
{{- end }}
================================================
FILE: manifests/deprecated/mariadb-cluster/mariadb/templates/slave-statefulset.yaml
================================================
{{- if .Values.replication.enabled }}
apiVersion: apps/v1
kind: StatefulSet
metadata:
name: {{ template "slave.fullname" . }}
labels:
app: "{{ template "mariadb.name" . }}"
chart: {{ template "mariadb.chart" . }}
component: "slave"
release: {{ .Release.Name | quote }}
heritage: {{ .Release.Service | quote }}
spec:
selector:
matchLabels:
release: "{{ .Release.Name }}"
component: "slave"
app: {{ template "mariadb.name" . }}
serviceName: "{{ template "slave.fullname" . }}"
replicas: {{ .Values.slave.replicas }}
updateStrategy:
type: RollingUpdate
template:
metadata:
{{- if .Values.slave.annotations }}
annotations:
{{- range .Values.slave.annotations }}
{{ .key }}: '{{ .value }}'
{{- end }}
{{- end }}
labels:
app: "{{ template "mariadb.name" . }}"
component: "slave"
release: "{{ .Release.Name }}"
chart: {{ template "mariadb.chart" . }}
spec:
serviceAccountName: "{{ template "mariadb.serviceAccountName" . }}"
{{- if .Values.securityContext.enabled }}
securityContext:
fsGroup: {{ .Values.securityContext.fsGroup }}
runAsUser: {{ .Values.securityContext.runAsUser }}
{{- end }}
{{- if eq .Values.slave.antiAffinity "hard" }}
affinity:
{{- with .Values.slave.affinity }}
{{ toYaml . | indent 8 }}
{{- end }}
podAntiAffinity:
requiredDuringSchedulingIgnoredDuringExecution:
- topologyKey: "kubernetes.io/hostname"
labelSelector:
matchLabels:
app: "{{ template "mariadb.name" . }}"
release: "{{ .Release.Name }}"
{{- else if eq .Values.slave.antiAffinity "soft" }}
affinity:
{{- with .Values.slave.affinity }}
{{ toYaml . | indent 8 }}
{{- end }}
podAntiAffinity:
preferredDuringSchedulingIgnoredDuringExecution:
- weight: 1
podAffinityTerm:
topologyKey: kubernetes.io/hostname
labelSelector:
matchLabels:
app: "{{ template "mariadb.name" . }}"
release: "{{ .Release.Name }}"
{{- else}}
{{- with .Values.slave.affinity }}
affinity:
{{ toYaml . | indent 8 }}
{{- end }}
{{- end }}
{{- with .Values.slave.tolerations }}
tolerations:
{{ toYaml . | indent 8 }}
{{- end }}
{{- if .Values.image.pullSecrets }}
imagePullSecrets:
{{- range .Values.image.pullSecrets }}
- name: {{ . }}
{{- end}}
{{- end }}
{{- if .Values.master.extraInitContainers }}
initContainers:
{{ tpl .Values.master.extraInitContainers . | indent 6}}
{{- end }}
containers:
- name: "mariadb"
image: {{ template "mariadb.image" . }}
imagePullPolicy: {{ .Values.image.pullPolicy | quote }}
env:
{{- if .Values.image.debug}}
- name: BITNAMI_DEBUG
value: "true"
{{- end }}
- name: MARIADB_REPLICATION_MODE
value: "slave"
- name: MARIADB_MASTER_HOST
value: {{ template "mariadb.fullname" . }}
- name: MARIADB_MASTER_PORT_NUMBER
value: "3306"
- name: MARIADB_MASTER_ROOT_USER
value: "root"
- name: MARIADB_MASTER_ROOT_PASSWORD
valueFrom:
secretKeyRef:
{{- if .Values.existingSecret }}
name: {{ .Values.existingSecret }}
{{- else }}
name: {{ template "mariadb.fullname" . }}
{{- end }}
key: mariadb-root-password
- name: MARIADB_REPLICATION_USER
value: "{{ .Values.replication.user }}"
- name: MARIADB_REPLICATION_PASSWORD
valueFrom:
secretKeyRef:
{{- if .Values.existingSecret }}
name: {{ .Values.existingSecret }}
{{- else }}
name: {{ template "mariadb.fullname" . }}
{{- end }}
key: mariadb-replication-password
ports:
- name: mysql
containerPort: 3306
{{- if .Values.slave.livenessProbe.enabled }}
livenessProbe:
exec:
command: ["sh", "-c", "exec mysqladmin status -uroot -p$MARIADB_MASTER_ROOT_PASSWORD"]
initialDelaySeconds: {{ .Values.slave.livenessProbe.initialDelaySeconds }}
periodSeconds: {{ .Values.slave.livenessProbe.periodSeconds }}
timeoutSeconds: {{ .Values.slave.livenessProbe.timeoutSeconds }}
successThreshold: {{ .Values.slave.livenessProbe.successThreshold }}
failureThreshold: {{ .Values.slave.livenessProbe.failureThreshold }}
{{- end }}
{{- if .Values.slave.readinessProbe.enabled }}
readinessProbe:
exec:
command: ["sh", "-c", "exec mysqladmin status -uroot -p$MARIADB_MASTER_ROOT_PASSWORD"]
initialDelaySeconds: {{ .Values.slave.readinessProbe.initialDelaySeconds }}
periodSeconds: {{ .Values.slave.readinessProbe.periodSeconds }}
timeoutSeconds: {{ .Values.slave.readinessProbe.timeoutSeconds }}
successThreshold: {{ .Values.slave.readinessProbe.successThreshold }}
failureThreshold: {{ .Values.slave.readinessProbe.failureThreshold }}
{{- end }}
resources:
{{ toYaml .Values.slave.resources | indent 10 }}
volumeMounts:
- name: data
mountPath: /bitnami/mariadb
{{- if .Values.slave.config }}
- name: config
mountPath: /opt/bitnami/mariadb/conf/my.cnf
subPath: my.cnf
{{- end }}
{{- if .Values.metrics.enabled }}
- name: metrics
image: {{ template "metrics.image" . }}
imagePullPolicy: {{ .Values.metrics.image.pullPolicy | quote }}
env:
- name: MARIADB_MASTER_ROOT_PASSWORD
valueFrom:
secretKeyRef:
{{- if .Values.existingSecret }}
name: {{ .Values.existingSecret }}
{{- else }}
name: {{ template "mariadb.fullname" . }}
{{- end }}
key: mariadb-root-password
command: [ 'sh', '-c', 'DATA_SOURCE_NAME="root:$MARIADB_MASTER_ROOT_PASSWORD@(localhost:3306)/" /bin/mysqld_exporter' ]
ports:
- name: metrics
containerPort: 9104
livenessProbe:
httpGet:
path: /metrics
port: metrics
initialDelaySeconds: 15
timeoutSeconds: 5
readinessProbe:
httpGet:
path: /metrics
port: metrics
initialDelaySeconds: 5
timeoutSeconds: 1
resources:
{{ toYaml .Values.metrics.resources | indent 10 }}
{{- end }}
volumes:
{{- if .Values.slave.config }}
- name: config
configMap:
name: {{ template "slave.fullname" . }}
{{- end }}
{{- if .Values.slave.persistence.enabled }}
volumeClaimTemplates:
- metadata:
name: data
labels:
app: "{{ template "mariadb.name" . }}"
component: "slave"
release: {{ .Release.Name | quote }}
heritage: {{ .Release.Service | quote }}
spec:
accessModes:
{{- range .Values.slave.persistence.accessModes }}
- {{ . | quote }}
{{- end }}
resources:
requests:
storage: {{ .Values.slave.persistence.size | quote }}
{{- if .Values.slave.persistence.storageClass }}
{{- if (eq "-" .Values.slave.persistence.storageClass) }}
storageClassName: ""
{{- else }}
storageClassName: {{ .Values.slave.persistence.storageClass | quote }}
{{- end }}
{{- end }}
{{- else }}
- name: "data"
emptyDir: {}
{{- end }}
{{- end }}
================================================
FILE: manifests/deprecated/mariadb-cluster/mariadb/templates/slave-svc.yaml
================================================
{{- if .Values.replication.enabled }}
apiVersion: v1
kind: Service
metadata:
name: {{ template "slave.fullname" . }}
labels:
app: "{{ template "mariadb.name" . }}"
chart: {{ template "mariadb.chart" . }}
component: "slave"
release: {{ .Release.Name | quote }}
heritage: {{ .Release.Service | quote }}
{{- if .Values.metrics.enabled }}
annotations:
{{ toYaml .Values.metrics.annotations | indent 4 }}
{{- end }}
spec:
type: {{ .Values.service.type }}
{{- if eq .Values.service.type "ClusterIP" }}
{{- if .Values.service.clusterIp }}
clusterIP: {{ .Values.service.clusterIp }}
{{- end }}
{{- end }}
ports:
- name: mysql
port: {{ .Values.service.port }}
targetPort: mysql
{{- if (eq .Values.service.type "NodePort") }}
{{- if .Values.service.nodePort }}
{{- if .Values.service.nodePort.slave }}
nodePort: {{ .Values.service.nodePort.slave }}
{{- end }}
{{- end }}
{{- end }}
{{- if .Values.metrics.enabled }}
- name: metrics
port: 9104
targetPort: metrics
{{- end }}
selector:
app: "{{ template "mariadb.name" . }}"
component: "slave"
release: "{{ .Release.Name }}"
{{- end }}
================================================
FILE: manifests/deprecated/mariadb-cluster/mariadb/templates/test-runner.yaml
================================================
apiVersion: v1
kind: Pod
metadata:
name: "{{ template "mariadb.fullname" . }}-test-{{ randAlphaNum 5 | lower }}"
annotations:
"helm.sh/hook": test-success
spec:
initContainers:
- name: "test-framework"
image: "dduportal/bats:0.4.0"
command:
- "bash"
- "-c"
- |
set -ex
# copy bats to tools dir
cp -R /usr/local/libexec/ /tools/bats/
volumeMounts:
- mountPath: /tools
name: tools
containers:
- name: mariadb-test
image: {{ template "mariadb.image" . }}
imagePullPolicy: {{ .Values.image.pullPolicy | quote }}
command: ["/tools/bats/bats", "-t", "/tests/run.sh"]
env:
- name: MARIADB_ROOT_PASSWORD
valueFrom:
secretKeyRef:
{{- if .Values.existingSecret }}
name: {{ .Values.existingSecret }}
{{- else }}
name: {{ template "mariadb.fullname" . }}
{{- end }}
key: mariadb-root-password
volumeMounts:
- mountPath: /tests
name: tests
readOnly: true
- mountPath: /tools
name: tools
volumes:
- name: tests
configMap:
name: {{ template "mariadb.fullname" . }}-tests
- name: tools
emptyDir: {}
restartPolicy: Never
================================================
FILE: manifests/deprecated/mariadb-cluster/mariadb/templates/tests.yaml
================================================
apiVersion: v1
kind: ConfigMap
metadata:
name: {{ template "mariadb.fullname" . }}-tests
data:
run.sh: |-
@test "Testing MariaDB is accessible" {
mysql -h {{ template "mariadb.fullname" . }} -uroot -p$MARIADB_ROOT_PASSWORD -e 'show databases;'
}
================================================
FILE: manifests/deprecated/mariadb-cluster/mariadb/values-production.yaml
================================================
## Global Docker image registry
## Please, note that this will override the image registry for all the images, including dependencies, configured to use the global value
##
# global:
# imageRegistry:
## Bitnami MariaDB image
## ref: https://hub.docker.com/r/bitnami/mariadb/tags/
##
image:
registry: docker.io
repository: bitnami/mariadb
tag: 10.1.37
## Specify a imagePullPolicy
## Defaults to 'Always' if image tag is 'latest', else set to 'IfNotPresent'
## ref: http://kubernetes.io/docs/user-guide/images/#pre-pulling-images
##
pullPolicy: IfNotPresent
## Optionally specify an array of imagePullSecrets.
## Secrets must be manually created in the namespace.
## ref: https://kubernetes.io/docs/tasks/configure-pod-container/pull-image-private-registry/
##
# pullSecrets:
# - myRegistrKeySecretName
## Set to true if you would like to see extra information on logs
## It turns BASH and NAMI debugging in minideb
## ref: https://github.com/bitnami/minideb-extras/#turn-on-bash-debugging
debug: false
service:
## Kubernetes service type, ClusterIP and NodePort are supported at present
type: ClusterIP
# clusterIp: None
port: 3306
## Specify the nodePort value for the LoadBalancer and NodePort service types.
## ref: https://kubernetes.io/docs/concepts/services-networking/service/#type-nodeport
##
# nodePort:
# master: 30001
# slave: 30002
## Pods Service Account
## ref: https://kubernetes.io/docs/tasks/configure-pod-container/configure-service-account/
serviceAccount:
## Specifies whether a ServiceAccount should be created
##
create: false
## The name of the ServiceAccount to use.
## If not set and create is true, a name is generated using the mariadb.fullname template
# name:
## Pod Security Context
## ref: https://kubernetes.io/docs/tasks/configure-pod-container/security-context/
##
securityContext:
enabled: true
fsGroup: 1001
runAsUser: 1001
# # Use existing secret (ignores root, db and replication passwords)
# existingSecret:
rootUser:
## MariaDB admin password
## ref: https://github.com/bitnami/bitnami-docker-mariadb#setting-the-root-password-on-first-run
##
password:
##
## Option to force users to specify a password. That is required for 'helm upgrade' to work properly.
## If it is not force, a random password will be generated.
forcePassword: true
db:
## MariaDB username and password
## ref: https://github.com/bitnami/bitnami-docker-mariadb#creating-a-database-user-on-first-run
##
user:
password:
## Password is ignored if existingSecret is specified.
## Database to create
## ref: https://github.com/bitnami/bitnami-docker-mariadb#creating-a-database-on-first-run
##
name: my_database
## Option to force users to specify a password. That is required for 'helm upgrade' to work properly.
## If it is not force, a random password will be generated.
forcePassword: true
replication:
## Enable replication. This enables the creation of replicas of MariaDB. If false, only a
## master deployment would be created
enabled: true
##
## MariaDB replication user
## ref: https://github.com/bitnami/bitnami-docker-mariadb#setting-up-a-replication-cluster
##
user: replicator
## MariaDB replication user password
## ref: https://github.com/bitnami/bitnami-docker-mariadb#setting-up-a-replication-cluster
##
password:
## Password is ignored if existingSecret is specified.
##
## Option to force users to specify a password. That is required for 'helm upgrade' to work properly.
## If it is not force, a random password will be generated.
forcePassword: true
## initdb scripts
## Specify dictionnary of scripts to be run at first boot
## Alternatively, you can put your scripts under the files/docker-entrypoint-initdb.d directory
##
# initdbScripts:
# my_init_script.sh: |
# #!/bin/sh
# echo "Do something."
#
## ConfigMap with scripts to be run at first boot
## Note: This will override initdbScripts
# initdbScriptsConfigMap:
master:
## Mariadb Master additional pod annotations
## ref: https://kubernetes.io/docs/concepts/overview/working-with-objects/annotations/
# annotations:
# - key: key1
# value: value1
## Affinity for pod assignment
## Ref: https://kubernetes.io/docs/concepts/configuration/assign-pod-node/#affinity-and-anti-affinity
##
affinity: {}
## Kept for backwards compatibility. You can now disable it by removing it.
## if you wish to set it through master.affinity.podAntiAffinity instead.
##
antiAffinity: soft
## Tolerations for pod assignment
## Ref: https://kubernetes.io/docs/concepts/configuration/taint-and-toleration/
##
tolerations: []
## Enable persistence using Persistent Volume Claims
## ref: http://kubernetes.io/docs/user-guide/persistent-volumes/
##
persistence:
## If true, use a Persistent Volume Claim, If false, use emptyDir
##
enabled: true
# Enable persistence using an existing PVC
# existingClaim:
mountPath: /bitnami/mariadb
## Persistent Volume Storage Class
## If defined, storageClassName:
## If set to "-", storageClassName: "", which disables dynamic provisioning
## If undefined (the default) or set to null, no storageClassName spec is
## set, choosing the default provisioner. (gp2 on AWS, standard on
## GKE, AWS & OpenStack)
##
# storageClass: "-"
## Persistent Volume Claim annotations
##
annotations: {}
## Persistent Volume Access Mode
##
accessModes:
- ReadWriteOnce
## Persistent Volume size
##
size: 8Gi
##
extraInitContainers: |
# - name: do-something
# image: busybox
# command: ['do', 'something']
## Configure MySQL with a custom my.cnf file
## ref: https://mysql.com/kb/en/mysql/configuring-mysql-with-mycnf/#example-of-configuration-file
##
config: |-
[mysqld]
skip-name-resolve
explicit_defaults_for_timestamp
basedir=/opt/bitnami/mariadb
port=3306
socket=/opt/bitnami/mariadb/tmp/mysql.sock
tmpdir=/opt/bitnami/mariadb/tmp
max_allowed_packet=16M
bind-address=0.0.0.0
pid-file=/opt/bitnami/mariadb/tmp/mysqld.pid
log-error=/opt/bitnami/mariadb/logs/mysqld.log
character-set-server=UTF8
collation-server=utf8_general_ci
[client]
port=3306
socket=/opt/bitnami/mariadb/tmp/mysql.sock
default-character-set=UTF8
[manager]
port=3306
socket=/opt/bitnami/mariadb/tmp/mysql.sock
pid-file=/opt/bitnami/mariadb/tmp/mysqld.pid
## Configure master resource requests and limits
## ref: http://kubernetes.io/docs/user-guide/compute-resources/
##
resources: {}
livenessProbe:
enabled: true
##
## Initializing the database could take some time
initialDelaySeconds: 120
##
## Default Kubernetes values
periodSeconds: 10
timeoutSeconds: 1
successThreshold: 1
failureThreshold: 3
readinessProbe:
enabled: true
initialDelaySeconds: 15
##
## Default Kubernetes values
periodSeconds: 10
timeoutSeconds: 1
successThreshold: 1
failureThreshold: 3
slave:
replicas: 2
## Mariadb Slave additional pod annotations
## ref: https://kubernetes.io/docs/concepts/overview/working-with-objects/annotations/
# annotations:
# - key: key1
# value: value1
## Affinity for pod assignment
## Ref: https://kubernetes.io/docs/concepts/configuration/assign-pod-node/#affinity-and-anti-affinity
##
affinity: {}
## Kept for backwards compatibility. You can now disable it by removing it.
## if you wish to set it through slave.affinity.podAntiAffinity instead.
##
antiAffinity: soft
## Tolerations for pod assignment
## Ref: https://kubernetes.io/docs/concepts/configuration/taint-and-toleration/
##
tolerations: []
persistence:
## If true, use a Persistent Volume Claim, If false, use emptyDir
##
enabled: true
# storageClass: "-"
annotations:
accessModes:
- ReadWriteOnce
## Persistent Volume size
##
size: 8Gi
##
extraInitContainers: |
# - name: do-something
# image: busybox
# command: ['do', 'something']
## Configure MySQL slave with a custom my.cnf file
## ref: https://mysql.com/kb/en/mysql/configuring-mysql-with-mycnf/#example-of-configuration-file
##
config: |-
[mysqld]
skip-name-resolve
explicit_defaults_for_timestamp
basedir=/opt/bitnami/mariadb
port=3306
socket=/opt/bitnami/mariadb/tmp/mysql.sock
tmpdir=/opt/bitnami/mariadb/tmp
max_allowed_packet=16M
bind-address=0.0.0.0
pid-file=/opt/bitnami/mariadb/tmp/mysqld.pid
log-error=/opt/bitnami/mariadb/logs/mysqld.log
character-set-server=UTF8
collation-server=utf8_general_ci
[client]
port=3306
socket=/opt/bitnami/mariadb/tmp/mysql.sock
default-character-set=UTF8
[manager]
port=3306
socket=/opt/bitnami/mariadb/tmp/mysql.sock
pid-file=/opt/bitnami/mariadb/tmp/mysqld.pid
##
## Configure slave resource requests and limits
## ref: http://kubernetes.io/docs/user-guide/compute-resources/
##
resources: {}
livenessProbe:
enabled: true
##
## Initializing the database could take some time
initialDelaySeconds: 120
##
## Default Kubernetes values
periodSeconds: 10
timeoutSeconds: 1
successThreshold: 1
failureThreshold: 3
readinessProbe:
enabled: true
initialDelaySeconds: 15
##
## Default Kubernetes values
periodSeconds: 10
timeoutSeconds: 1
successThreshold: 1
failureThreshold: 3
metrics:
enabled: true
image:
registry: docker.io
repository: prom/mysqld-exporter
tag: v0.10.0
pullPolicy: IfNotPresent
resources: {}
annotations:
prometheus.io/scrape: "true"
prometheus.io/port: "9104"
================================================
FILE: manifests/deprecated/mariadb-cluster/mariadb/values.yaml
================================================
## Global Docker image registry
## Please, note that this will override the image registry for all the images, including dependencies, configured to use the global value
##
# global:
# imageRegistry:
## Bitnami MariaDB image
## ref: https://hub.docker.com/r/bitnami/mariadb/tags/
##
image:
registry: docker.io
repository: bitnami/mariadb
tag: 10.1.37
## Specify a imagePullPolicy
## Defaults to 'Always' if image tag is 'latest', else set to 'IfNotPresent'
## ref: http://kubernetes.io/docs/user-guide/images/#pre-pulling-images
##
pullPolicy: IfNotPresent
## Optionally specify an array of imagePullSecrets.
## Secrets must be manually created in the namespace.
## ref: https://kubernetes.io/docs/tasks/configure-pod-container/pull-image-private-registry/
##
# pullSecrets:
# - myRegistrKeySecretName
## Set to true if you would like to see extra information on logs
## It turns BASH and NAMI debugging in minideb
## ref: https://github.com/bitnami/minideb-extras/#turn-on-bash-debugging
debug: false
service:
## Kubernetes service type, ClusterIP and NodePort are supported at present
type: ClusterIP
# clusterIp: None
port: 3306
## Specify the nodePort value for the LoadBalancer and NodePort service types.
## ref: https://kubernetes.io/docs/concepts/services-networking/service/#type-nodeport
##
# nodePort:
# master: 30001
# slave: 30002
## Pods Service Account
## ref: https://kubernetes.io/docs/tasks/configure-pod-container/configure-service-account/
serviceAccount:
## Specifies whether a ServiceAccount should be created
##
create: false
## The name of the ServiceAccount to use.
## If not set and create is true, a name is generated using the mariadb.fullname template
# name:
## Pod Security Context
## ref: https://kubernetes.io/docs/tasks/configure-pod-container/security-context/
##
securityContext:
enabled: true
fsGroup: 1001
runAsUser: 1001
# # Use existing secret (ignores root, db and replication passwords)
# existingSecret:
rootUser:
## MariaDB admin password
## ref: https://github.com/bitnami/bitnami-docker-mariadb#setting-the-root-password-on-first-run
##
password:
##
## Option to force users to specify a password. That is required for 'helm upgrade' to work properly.
## If it is not force, a random password will be generated.
forcePassword: false
db:
## MariaDB username and password
## ref: https://github.com/bitnami/bitnami-docker-mariadb#creating-a-database-user-on-first-run
##
user:
password:
## Password is ignored if existingSecret is specified.
## Database to create
## ref: https://github.com/bitnami/bitnami-docker-mariadb#creating-a-database-on-first-run
##
name: my_database
## Option to force users to specify a password. That is required for 'helm upgrade' to work properly.
## If it is not force, a random password will be generated.
forcePassword: false
replication:
## Enable replication. This enables the creation of replicas of MariaDB. If false, only a
## master deployment would be created
enabled: true
##
## MariaDB replication user
## ref: https://github.com/bitnami/bitnami-docker-mariadb#setting-up-a-replication-cluster
##
user: replicator
## MariaDB replication user password
## ref: https://github.com/bitnami/bitnami-docker-mariadb#setting-up-a-replication-cluster
##
password:
## Password is ignored if existingSecret is specified.
##
## Option to force users to specify a password. That is required for 'helm upgrade' to work properly.
## If it is not force, a random password will be generated.
forcePassword: false
## initdb scripts
## Specify dictionnary of scripts to be run at first boot
## Alternatively, you can put your scripts under the files/docker-entrypoint-initdb.d directory
##
# initdbScripts:
# my_init_script.sh: |
# #!/bin/sh
# echo "Do something."
#
## ConfigMap with scripts to be run at first boot
## Note: This will override initdbScripts
# initdbScriptsConfigMap:
master:
## Mariadb Master additional pod annotations
## ref: https://kubernetes.io/docs/concepts/overview/working-with-objects/annotations/
# annotations:
# - key: key1
# value: value1
## Affinity for pod assignment
## Ref: https://kubernetes.io/docs/concepts/configuration/assign-pod-node/#affinity-and-anti-affinity
##
affinity: {}
## Kept for backwards compatibility. You can now disable it by removing it.
## if you wish to set it through master.affinity.podAntiAffinity instead.
##
antiAffinity: soft
## Tolerations for pod assignment
## Ref: https://kubernetes.io/docs/concepts/configuration/taint-and-toleration/
##
tolerations: []
## Enable persistence using Persistent Volume Claims
## ref: http://kubernetes.io/docs/user-guide/persistent-volumes/
##
persistence:
## If true, use a Persistent Volume Claim, If false, use emptyDir
##
enabled: true
# Enable persistence using an existing PVC
# existingClaim:
mountPath: /bitnami/mariadb
## Persistent Volume Storage Class
## If defined, storageClassName:
## If set to "-", storageClassName: "", which disables dynamic provisioning
## If undefined (the default) or set to null, no storageClassName spec is
## set, choosing the default provisioner. (gp2 on AWS, standard on
## GKE, AWS & OpenStack)
##
# storageClass: "-"
## Persistent Volume Claim annotations
##
annotations: {}
## Persistent Volume Access Mode
##
accessModes:
- ReadWriteOnce
## Persistent Volume size
##
size: 8Gi
##
extraInitContainers: |
# - name: do-something
# image: busybox
# command: ['do', 'something']
## Configure MySQL with a custom my.cnf file
## ref: https://mysql.com/kb/en/mysql/configuring-mysql-with-mycnf/#example-of-configuration-file
##
config: |-
[mysqld]
skip-name-resolve
explicit_defaults_for_timestamp
basedir=/opt/bitnami/mariadb
port=3306
socket=/opt/bitnami/mariadb/tmp/mysql.sock
tmpdir=/opt/bitnami/mariadb/tmp
max_allowed_packet=16M
bind-address=0.0.0.0
pid-file=/opt/bitnami/mariadb/tmp/mysqld.pid
log-error=/opt/bitnami/mariadb/logs/mysqld.log
character-set-server=UTF8
collation-server=utf8_general_ci
[client]
port=3306
socket=/opt/bitnami/mariadb/tmp/mysql.sock
default-character-set=UTF8
[manager]
port=3306
socket=/opt/bitnami/mariadb/tmp/mysql.sock
pid-file=/opt/bitnami/mariadb/tmp/mysqld.pid
## Configure master resource requests and limits
## ref: http://kubernetes.io/docs/user-guide/compute-resources/
##
resources: {}
livenessProbe:
enabled: true
##
## Initializing the database could take some time
initialDelaySeconds: 120
##
## Default Kubernetes values
periodSeconds: 10
timeoutSeconds: 1
successThreshold: 1
failureThreshold: 3
readinessProbe:
enabled: true
initialDelaySeconds: 30
##
## Default Kubernetes values
periodSeconds: 10
timeoutSeconds: 1
successThreshold: 1
failureThreshold: 3
slave:
replicas: 1
## Mariadb Slave additional pod annotations
## ref: https://kubernetes.io/docs/concepts/overview/working-with-objects/annotations/
# annotations:
# - key: key1
# value: value1
## Affinity for pod assignment
## Ref: https://kubernetes.io/docs/concepts/configuration/assign-pod-node/#affinity-and-anti-affinity
##
affinity: {}
## Kept for backwards compatibility. You can now disable it by removing it.
## if you wish to set it through slave.affinity.podAntiAffinity instead.
##
antiAffinity: soft
## Tolerations for pod assignment
## Ref: https://kubernetes.io/docs/concepts/configuration/taint-and-toleration/
##
tolerations: []
persistence:
## If true, use a Persistent Volume Claim, If false, use emptyDir
##
enabled: true
# storageClass: "-"
annotations:
accessModes:
- ReadWriteOnce
## Persistent Volume size
##
size: 8Gi
##
extraInitContainers: |
# - name: do-something
# image: busybox
# command: ['do', 'something']
## Configure MySQL slave with a custom my.cnf file
## ref: https://mysql.com/kb/en/mysql/configuring-mysql-with-mycnf/#example-of-configuration-file
##
config: |-
[mysqld]
skip-name-resolve
explicit_defaults_for_timestamp
basedir=/opt/bitnami/mariadb
port=3306
socket=/opt/bitnami/mariadb/tmp/mysql.sock
tmpdir=/opt/bitnami/mariadb/tmp
max_allowed_packet=16M
bind-address=0.0.0.0
pid-file=/opt/bitnami/mariadb/tmp/mysqld.pid
log-error=/opt/bitnami/mariadb/logs/mysqld.log
character-set-server=UTF8
collation-server=utf8_general_ci
[client]
port=3306
socket=/opt/bitnami/mariadb/tmp/mysql.sock
default-character-set=UTF8
[manager]
port=3306
socket=/opt/bitnami/mariadb/tmp/mysql.sock
pid-file=/opt/bitnami/mariadb/tmp/mysqld.pid
##
## Configure slave resource requests and limits
## ref: http://kubernetes.io/docs/user-guide/compute-resources/
##
resources: {}
livenessProbe:
enabled: true
##
## Initializing the database could take some time
initialDelaySeconds: 120
##
## Default Kubernetes values
periodSeconds: 10
timeoutSeconds: 1
successThreshold: 1
failureThreshold: 3
readinessProbe:
enabled: true
initialDelaySeconds: 45
##
## Default Kubernetes values
periodSeconds: 10
timeoutSeconds: 1
successThreshold: 1
failureThreshold: 3
metrics:
enabled: false
image:
registry: docker.io
repository: prom/mysqld-exporter
tag: v0.10.0
pullPolicy: IfNotPresent
resources: {}
annotations:
prometheus.io/scrape: "true"
prometheus.io/port: "9104"
================================================
FILE: manifests/deprecated/mariadb-cluster/my-values.yaml
================================================
## Global Docker image registry
## Please, note that this will override the image registry for all the images, including dependencies, configured to use the global value
##
# global:
# imageRegistry:
## Bitnami MariaDB image
## ref: https://hub.docker.com/r/bitnami/mariadb/tags/
##
image:
registry: docker.io
repository: bitnami/mariadb
tag: 10.1.37
## Specify a imagePullPolicy
## Defaults to 'Always' if image tag is 'latest', else set to 'IfNotPresent'
## ref: http://kubernetes.io/docs/user-guide/images/#pre-pulling-images
##
pullPolicy: IfNotPresent
## Optionally specify an array of imagePullSecrets.
## Secrets must be manually created in the namespace.
## ref: https://kubernetes.io/docs/tasks/configure-pod-container/pull-image-private-registry/
##
# pullSecrets:
# - myRegistrKeySecretName
## Set to true if you would like to see extra information on logs
## It turns BASH and NAMI debugging in minideb
## ref: https://github.com/bitnami/minideb-extras/#turn-on-bash-debugging
debug: false
service:
## Kubernetes service type, ClusterIP and NodePort are supported at present
type: NodePort
# clusterIp: None
port: 3306
## Specify the nodePort value for the LoadBalancer and NodePort service types.
## ref: https://kubernetes.io/docs/concepts/services-networking/service/#type-nodeport
##
nodePort:
master: 33306
slave: 33307
## Pods Service Account
## ref: https://kubernetes.io/docs/tasks/configure-pod-container/configure-service-account/
serviceAccount:
## Specifies whether a ServiceAccount should be created
##
create: false
## The name of the ServiceAccount to use.
## If not set and create is true, a name is generated using the mariadb.fullname template
# name:
## Pod Security Context
## ref: https://kubernetes.io/docs/tasks/configure-pod-container/security-context/
##
securityContext:
enabled: true
fsGroup: 1001
runAsUser: 1001
# # Use existing secret (ignores root, db and replication passwords)
# existingSecret:
rootUser:
## MariaDB admin password
## ref: https://github.com/bitnami/bitnami-docker-mariadb#setting-the-root-password-on-first-run
##
password: test.c0m
##
## Option to force users to specify a password. That is required for 'helm upgrade' to work properly.
## If it is not force, a random password will be generated.
forcePassword: true
db:
## MariaDB username and password
## ref: https://github.com/bitnami/bitnami-docker-mariadb#creating-a-database-user-on-first-run
##
user: hello
password: hello
## Password is ignored if existingSecret is specified.
## Database to create
## ref: https://github.com/bitnami/bitnami-docker-mariadb#creating-a-database-on-first-run
##
name: hello
## Option to force users to specify a password. That is required for 'helm upgrade' to work properly.
## If it is not force, a random password will be generated.
forcePassword: true
replication:
## Enable replication. This enables the creation of replicas of MariaDB. If false, only a
## master deployment would be created
enabled: true
##
## MariaDB replication user
## ref: https://github.com/bitnami/bitnami-docker-mariadb#setting-up-a-replication-cluster
##
user: replicator
## MariaDB replication user password
## ref: https://github.com/bitnami/bitnami-docker-mariadb#setting-up-a-replication-cluster
##
password: R4%forep11CAT0r
## Password is ignored if existingSecret is specified.
##
## Option to force users to specify a password. That is required for 'helm upgrade' to work properly.
## If it is not force, a random password will be generated.
forcePassword: true
## initdb scripts
## Specify dictionnary of scripts to be run at first boot
## Alternatively, you can put your scripts under the files/docker-entrypoint-initdb.d directory
##
# initdbScripts:
# my_init_script.sh: |
# #!/bin/sh
# echo "Do something."
#
## ConfigMap with scripts to be run at first boot
## Note: This will override initdbScripts
# initdbScriptsConfigMap:
master:
## Mariadb Master additional pod annotations
## ref: https://kubernetes.io/docs/concepts/overview/working-with-objects/annotations/
# annotations:
# - key: key1
# value: value1
## Affinity for pod assignment
## Ref: https://kubernetes.io/docs/concepts/configuration/assign-pod-node/#affinity-and-anti-affinity
##
affinity: {}
## Kept for backwards compatibility. You can now disable it by removing it.
## if you wish to set it through master.affinity.podAntiAffinity instead.
##
antiAffinity: soft
## Tolerations for pod assignment
## Ref: https://kubernetes.io/docs/concepts/configuration/taint-and-toleration/
##
tolerations: []
## Enable persistence using Persistent Volume Claims
## ref: http://kubernetes.io/docs/user-guide/persistent-volumes/
##
persistence:
## If true, use a Persistent Volume Claim, If false, use emptyDir
##
enabled: true
# Enable persistence using an existing PVC
# existingClaim:
mountPath: /bitnami/mariadb
## Persistent Volume Storage Class
## If defined, storageClassName:
## If set to "-", storageClassName: "", which disables dynamic provisioning
## If undefined (the default) or set to null, no storageClassName spec is
## set, choosing the default provisioner. (gp2 on AWS, standard on
## GKE, AWS & OpenStack)
##
storageClass: "nfs-db"
## Persistent Volume Claim annotations
##
annotations: {}
## Persistent Volume Access Mode
##
accessModes:
- ReadWriteOnce
## Persistent Volume size
##
size: 5Gi
##
extraInitContainers: |
# - name: do-something
# image: busybox
# command: ['do', 'something']
## Configure MySQL with a custom my.cnf file
## ref: https://mysql.com/kb/en/mysql/configuring-mysql-with-mycnf/#example-of-configuration-file
##
config: |-
[mysqld]
skip-name-resolve
explicit_defaults_for_timestamp
basedir=/opt/bitnami/mariadb
port=3306
socket=/opt/bitnami/mariadb/tmp/mysql.sock
tmpdir=/opt/bitnami/mariadb/tmp
bind-address=0.0.0.0
pid-file=/opt/bitnami/mariadb/tmp/mysqld.pid
log-error=/opt/bitnami/mariadb/logs/mysqld.log
character-set-server=UTF8
collation-server=utf8_general_ci
# optimize
max_allowed_packet = 1024M
table_open_cache = 512
sort_buffer_size = 2M
read_buffer_size = 2M
read_rnd_buffer_size = 8M
thread_cache_size = 8
query_cache_size = 32M
max_heap_table_size=1024M
tmp_table_size=1024M
max_connections=65535
max_connect_errors=65535
wait_timeout=172800
interactive_timeout=172800
connect_timeout=30
# log settings
expire_logs_days=3
[client]
port=3306
socket=/opt/bitnami/mariadb/tmp/mysql.sock
default-character-set=UTF8
[manager]
port=3306
socket=/opt/bitnami/mariadb/tmp/mysql.sock
pid-file=/opt/bitnami/mariadb/tmp/mysqld.pid
## Configure master resource requests and limits
## ref: http://kubernetes.io/docs/user-guide/compute-resources/
##
resources: {}
livenessProbe:
enabled: true
##
## Initializing the database could take some time
initialDelaySeconds: 120
##
## Default Kubernetes values
periodSeconds: 10
timeoutSeconds: 1
successThreshold: 1
failureThreshold: 3
readinessProbe:
enabled: true
initialDelaySeconds: 15
##
## Default Kubernetes values
periodSeconds: 10
timeoutSeconds: 1
successThreshold: 1
failureThreshold: 3
slave:
replicas: 1
## Mariadb Slave additional pod annotations
## ref: https://kubernetes.io/docs/concepts/overview/working-with-objects/annotations/
# annotations:
# - key: key1
# value: value1
## Affinity for pod assignment
## Ref: https://kubernetes.io/docs/concepts/configuration/assign-pod-node/#affinity-and-anti-affinity
##
affinity: {}
## Kept for backwards compatibility. You can now disable it by removing it.
## if you wish to set it through slave.affinity.podAntiAffinity instead.
##
antiAffinity: soft
## Tolerations for pod assignment
## Ref: https://kubernetes.io/docs/concepts/configuration/taint-and-toleration/
##
tolerations: []
persistence:
## If true, use a Persistent Volume Claim, If false, use emptyDir
##
enabled: false
# storageClass: "-"
annotations:
accessModes:
- ReadWriteOnce
## Persistent Volume size
##
size: 5Gi
##
extraInitContainers: |
# - name: do-something
# image: busybox
# command: ['do', 'something']
## Configure MySQL slave with a custom my.cnf file
## ref: https://mysql.com/kb/en/mysql/configuring-mysql-with-mycnf/#example-of-configuration-file
##
config: |-
[mysqld]
skip-name-resolve
explicit_defaults_for_timestamp
basedir=/opt/bitnami/mariadb
port=3306
socket=/opt/bitnami/mariadb/tmp/mysql.sock
tmpdir=/opt/bitnami/mariadb/tmp
bind-address=0.0.0.0
pid-file=/opt/bitnami/mariadb/tmp/mysqld.pid
log-error=/opt/bitnami/mariadb/logs/mysqld.log
character-set-server=UTF8
collation-server=utf8_general_ci
# optimize
max_allowed_packet = 1024M
table_open_cache = 512
sort_buffer_size = 2M
read_buffer_size = 2M
read_rnd_buffer_size = 8M
thread_cache_size = 8
query_cache_size = 32M
max_heap_table_size=1024M
tmp_table_size=1024M
max_connections=65535
max_connect_errors=65535
wait_timeout=172800
interactive_timeout=172800
connect_timeout=30
# log settings
expire_logs_days=3
[client]
port=3306
socket=/opt/bitnami/mariadb/tmp/mysql.sock
default-character-set=UTF8
[manager]
port=3306
socket=/opt/bitnami/mariadb/tmp/mysql.sock
pid-file=/opt/bitnami/mariadb/tmp/mysqld.pid
##
## Configure slave resource requests and limits
## ref: http://kubernetes.io/docs/user-guide/compute-resources/
##
resources: {}
livenessProbe:
enabled: true
##
## Initializing the database could take some time
initialDelaySeconds: 120
##
## Default Kubernetes values
periodSeconds: 10
timeoutSeconds: 1
successThreshold: 1
failureThreshold: 3
readinessProbe:
enabled: true
initialDelaySeconds: 15
##
## Default Kubernetes values
periodSeconds: 10
timeoutSeconds: 1
successThreshold: 1
failureThreshold: 3
metrics:
enabled: false
image:
registry: docker.io
repository: prom/mysqld-exporter
tag: v0.10.0
pullPolicy: IfNotPresent
resources: {}
annotations:
prometheus.io/scrape: "true"
prometheus.io/port: "9104"
================================================
FILE: manifests/deprecated/mysql-cluster/mysql-configmap.yaml
================================================
# https://kubernetes.io/docs/tasks/run-application/run-replicated-stateful-application/
apiVersion: v1
kind: ConfigMap
metadata:
name: mysql
labels:
app: mysql
app.kubernetes.io/name: mysql
data:
primary.cnf: |
# Apply this config only on the primary.
[mysqld]
log-bin
replica.cnf: |
# Apply this config only on replicas.
[mysqld]
super-read-only
================================================
FILE: manifests/deprecated/mysql-cluster/mysql-services.yaml
================================================
# https://kubernetes.io/docs/tasks/run-application/run-replicated-stateful-application/
# Headless service for stable DNS entries of StatefulSet members.
apiVersion: v1
kind: Service
metadata:
name: mysql
labels:
app: mysql
app.kubernetes.io/name: mysql
spec:
ports:
- name: mysql
port: 3306
clusterIP: None
selector:
app: mysql
---
# Client service for connecting to any MySQL instance for reads.
# For writes, you must instead connect to the primary: mysql-0.mysql.
apiVersion: v1
kind: Service
metadata:
name: mysql-read
labels:
app: mysql
app.kubernetes.io/name: mysql
readonly: "true"
spec:
ports:
- name: mysql
port: 3306
selector:
app: mysql
================================================
FILE: manifests/deprecated/mysql-cluster/mysql-statefulset.yaml
================================================
# https://kubernetes.io/docs/tasks/run-application/run-replicated-stateful-application/
apiVersion: apps/v1
kind: StatefulSet
metadata:
name: mysql
spec:
selector:
matchLabels:
app: mysql
app.kubernetes.io/name: mysql
serviceName: mysql
replicas: 2
template:
metadata:
labels:
app: mysql
app.kubernetes.io/name: mysql
spec:
initContainers:
- name: init-mysql
image: mysql:5.7
command:
- bash
- "-c"
- |
set -ex
# Generate mysql server-id from pod ordinal index.
[[ $HOSTNAME =~ -([0-9]+)$ ]] || exit 1
ordinal=${BASH_REMATCH[1]}
echo [mysqld] > /mnt/conf.d/server-id.cnf
# Add an offset to avoid reserved server-id=0 value.
echo server-id=$((100 + $ordinal)) >> /mnt/conf.d/server-id.cnf
# Copy appropriate conf.d files from config-map to emptyDir.
if [[ $ordinal -eq 0 ]]; then
cp /mnt/config-map/primary.cnf /mnt/conf.d/
else
cp /mnt/config-map/replica.cnf /mnt/conf.d/
fi
volumeMounts:
- name: conf
mountPath: /mnt/conf.d
- name: config-map
mountPath: /mnt/config-map
- name: clone-mysql
#image: gcr.io/google-samples/xtrabackup:1.0
image: jmgao1983/xtrabackup:1.0
command:
- bash
- "-c"
- |
set -ex
# Skip the clone if data already exists.
[[ -d /var/lib/mysql/mysql ]] && exit 0
# Skip the clone on primary (ordinal index 0).
[[ `hostname` =~ -([0-9]+)$ ]] || exit 1
ordinal=${BASH_REMATCH[1]}
[[ $ordinal -eq 0 ]] && exit 0
# Clone data from previous peer.
ncat --recv-only mysql-$(($ordinal-1)).mysql 3307 | xbstream -x -C /var/lib/mysql
# Prepare the backup.
xtrabackup --prepare --target-dir=/var/lib/mysql
volumeMounts:
- name: data
mountPath: /var/lib/mysql
subPath: mysql
- name: conf
mountPath: /etc/mysql/conf.d
containers:
- name: mysql
image: mysql:5.7
env:
- name: MYSQL_ALLOW_EMPTY_PASSWORD
value: "1"
ports:
- name: mysql
containerPort: 3306
volumeMounts:
- name: data
mountPath: /var/lib/mysql
subPath: mysql
- name: conf
mountPath: /etc/mysql/conf.d
resources:
requests:
cpu: 500m
memory: 1Gi
livenessProbe:
exec:
command: ["mysqladmin", "ping"]
initialDelaySeconds: 30
periodSeconds: 10
timeoutSeconds: 5
readinessProbe:
exec:
# Check we can execute queries over TCP (skip-networking is off).
command: ["mysql", "-h", "127.0.0.1", "-e", "SELECT 1"]
initialDelaySeconds: 5
periodSeconds: 2
timeoutSeconds: 1
- name: xtrabackup
#image: gcr.io/google-samples/xtrabackup:1.0
image: jmgao1983/xtrabackup:1.0
ports:
- name: xtrabackup
containerPort: 3307
command:
- bash
- "-c"
- |
set -ex
cd /var/lib/mysql
# Determine binlog position of cloned data, if any.
if [[ -f xtrabackup_slave_info && "x$( change_master_to.sql.in
# Ignore xtrabackup_binlog_info in this case (it's useless).
rm -f xtrabackup_slave_info xtrabackup_binlog_info
elif [[ -f xtrabackup_binlog_info ]]; then
# We're cloning directly from primary. Parse binlog position.
[[ `cat xtrabackup_binlog_info` =~ ^(.*?)[[:space:]]+(.*?)$ ]] || exit 1
rm -f xtrabackup_binlog_info xtrabackup_slave_info
echo "CHANGE MASTER TO MASTER_LOG_FILE='${BASH_REMATCH[1]}',\
MASTER_LOG_POS=${BASH_REMATCH[2]}" > change_master_to.sql.in
fi
# Check if we need to complete a clone by starting replication.
if [[ -f change_master_to.sql.in ]]; then
echo "Waiting for mysqld to be ready (accepting connections)"
until mysql -h 127.0.0.1 -e "SELECT 1"; do sleep 1; done
echo "Initializing replication from clone position"
mysql -h 127.0.0.1 \
-e "$(=2.0.1 to >=3.0.0 of this chart, `Role`, `RoleBinding`, and `ServiceAccount` resources should be deleted manually.
### Upgrading the chart from 3.x to 4.x
Starting from version `4.x` HAProxy sidecar prometheus-exporter removed and replaced by the embedded [HAProxy metrics endpoint](https://github.com/haproxy/haproxy/tree/master/contrib/prometheus-exporter), as a result when upgrading from version 3.x to 4.x section `haproxy.exporter` should be removed and the `haproxy.metrics` need to be configured for fit your needs.
## Installing the Chart
To install the chart
```bash
$ helm install stable/redis-ha
```
The command deploys Redis on the Kubernetes cluster in the default configuration. By default this chart install one master pod containing redis master container and sentinel container along with 2 redis slave pods each containing their own sentinel sidecars. The [configuration](#configuration) section lists the parameters that can be configured during installation.
> **Tip**: List all releases using `helm list`
## Uninstalling the Chart
To uninstall/delete the deployment:
```bash
$ helm delete
```
The command removes all the Kubernetes components associated with the chart and deletes the release.
## Configuration
The following table lists the configurable parameters of the Redis chart and their default values.
| Parameter | Description | Default |
|:--------------------------|:---------------------------------------------------------------------------------------------------------------------------------------------------------------------------------------------------------|:-------------------------------------------------------------------------------------------|
| `image` | Redis image | `redis` |
| `imagePullSecrets` | Reference to one or more secrets to be used when pulling redis images | [] |
| `tag` | Redis tag | `5.0.6-alpine` |
| `replicas` | Number of redis master/slave pods | `3` |
| `serviceAccount.create` | Specifies whether a ServiceAccount should be created | `true` |
| `serviceAccount.name` | The name of the ServiceAccount to create | Generated using the redis-ha.fullname template |
| `rbac.create` | Create and use RBAC resources | `true` |
| `redis.port` | Port to access the redis service | `6379` |
| `redis.masterGroupName` | Redis convention for naming the cluster group: must match `^[\\w-\\.]+$` and can be templated | `mymaster` |
| `redis.config` | Any valid redis config options in this section will be applied to each server (see below) | see values.yaml |
| `redis.customConfig` | Allows for custom redis.conf files to be applied. If this is used then `redis.config` is ignored | `` |
| `redis.resources` | CPU/Memory for master/slave nodes resource requests/limits | `{}` |
| `sentinel.port` | Port to access the sentinel service | `26379` |
| `sentinel.quorum` | Minimum number of servers necessary to maintain quorum | `2` |
| `sentinel.config` | Valid sentinel config options in this section will be applied as config options to each sentinel (see below) | see values.yaml |
| `sentinel.customConfig` | Allows for custom sentinel.conf files to be applied. If this is used then `sentinel.config` is ignored | `` |
| `sentinel.resources` | CPU/Memory for sentinel node resource requests/limits | `{}` |
| `init.resources` | CPU/Memory for init Container node resource requests/limits | `{}` |
| `auth` | Enables or disables redis AUTH (Requires `redisPassword` to be set) | `false` |
| `redisPassword` | A password that configures a `requirepass` and `masterauth` in the conf parameters (Requires `auth: enabled`) | `` |
| `authKey` | The key holding the redis password in an existing secret. | `auth` |
| `existingSecret` | An existing secret containing a key defined by `authKey` that configures `requirepass` and `masterauth` in the conf parameters (Requires `auth: enabled`, cannot be used in conjunction with `.Values.redisPassword`) | `` |
| `nodeSelector` | Node labels for pod assignment | `{}` |
| `tolerations` | Toleration labels for pod assignment | `[]` |
| `hardAntiAffinity` | Whether the Redis server pods should be forced to run on separate nodes. | `true` |
| `additionalAffinities` | Additional affinities to add to the Redis server pods. | `{}` |
| `securityContext` | Security context to be added to the Redis server pods. | `{runAsUser: 1000, fsGroup: 1000, runAsNonRoot: true}` |
| `affinity` | Override all other affinity settings with a string. | `""` |
| `persistentVolume.size` | Size for the volume | 10Gi |
| `persistentVolume.annotations` | Annotations for the volume | `{}` |
| `persistentVolume.reclaimPolicy` | Method used to reclaim an obsoleted volume. `Delete` or `Retain` | `""` |
| `emptyDir` | Configuration of `emptyDir`, used only if persistentVolume is disabled and no hostPath specified | `{}` |
| `exporter.enabled` | If `true`, the prometheus exporter sidecar is enabled | `false` |
| `exporter.image` | Exporter image | `oliver006/redis_exporter` |
| `exporter.tag` | Exporter tag | `v0.31.0` |
| `exporter.port` | Exporter port | `9121` |
| `exporter.annotations` | Prometheus scrape annotations | `{prometheus.io/path: /metrics, prometheus.io/port: "9121", prometheus.io/scrape: "true"}` |
| `exporter.extraArgs` | Additional args for the exporter | `{}` |
| `exporter.script` | A custom custom Lua script that will be mounted to exporter for collection of custom metrics. Creates a ConfigMap and sets env var `REDIS_EXPORTER_SCRIPT`. | |
| `exporter.serviceMonitor.enabled` | Use servicemonitor from prometheus operator | `false` |
| `exporter.serviceMonitor.namespace` | Namespace the service monitor is created in | `default` |
| `exporter.serviceMonitor.interval` | Scrape interval, If not set, the Prometheus default scrape interval is used | `nil` |
| `exporter.serviceMonitor.telemetryPath` | Path to redis-exporter telemetry-path | `/metrics` |
| `exporter.serviceMonitor.labels` | Labels for the servicemonitor passed to Prometheus Operator | `{}` |
| `exporter.serviceMonitor.timeout` | How long until a scrape request times out. If not set, the Prometheus default scape timeout is used | `nil` |
| `haproxy.enabled` | Enabled HAProxy LoadBalancing/Proxy | `false` |
| `haproxy.replicas` | Number of HAProxy instances | `3` |
| `haproxy.image.repository`| HAProxy Image Repository | `haproxy` |
| `haproxy.image.tag` | HAProxy Image Tag | `2.0.1` |
| `haproxy.image.pullPolicy`| HAProxy Image PullPolicy | `IfNotPresent` |
| `haproxy.imagePullSecrets`| Reference to one or more secrets to be used when pulling haproxy images | [] |
| `haproxy.annotations` | HAProxy template annotations | `{}` |
| `haproxy.customConfig` | Allows for custom config-haproxy.cfg file to be applied. If this is used then default config will be overwriten | `` |
| `haproxy.extraConfig` | Allows to place any additional configuration section to add to the default config-haproxy.cfg | `` |
| `haproxy.resources` | HAProxy resources | `{}` |
| `haproxy.emptyDir` | Configuration of `emptyDir` | `{}` |
| `haproxy.service.type` | HAProxy service type "ClusterIP", "LoadBalancer" or "NodePort" | `ClusterIP` |
| `haproxy.service.nodePort` | HAProxy service nodePort value (haproxy.service.type must be NodePort) | not set |
| `haproxy.service.annotations` | HAProxy service annotations | `{}` |
| `haproxy.stickyBalancing` | HAProxy sticky load balancing to Redis nodes. Helps with connections shutdown. | `false` |
| `haproxy.hapreadport.enable` | Enable a read only port for redis slaves | `false` |
| `haproxy.hapreadport.port` | Haproxy port for read only redis slaves | `6380` |
| `haproxy.metrics.enabled` | HAProxy enable prometheus metric scraping | `false` |
| `haproxy.metrics.port` | HAProxy prometheus metrics scraping port | `9101` |
| `haproxy.metrics.portName` | HAProxy metrics scraping port name | `exporter-port` |
| `haproxy.metrics.scrapePath` | HAProxy prometheus metrics scraping port | `/metrics` |
| `haproxy.metrics.serviceMonitor.enabled` | Use servicemonitor from prometheus operator for HAProxy metrics | `false` |
| `haproxy.metrics.serviceMonitor.namespace` | Namespace the service monitor for HAProxy metrics is created in | `default` |
| `haproxy.metrics.serviceMonitor.interval` | Scrape interval, If not set, the Prometheus default scrape interval is used | `nil` |
| `haproxy.metrics.serviceMonitor.telemetryPath` | Path to HAProxy metrics telemetry-path | `/metrics` |
| `haproxy.metrics.serviceMonitor.labels` | Labels for the HAProxy metrics servicemonitor passed to Prometheus Operator | `{}` |
| `haproxy.metrics.serviceMonitor.timeout` | How long until a scrape request times out. If not set, the Prometheus default scape timeout is used | `nil` |
| `haproxy.init.resources` | Extra init resources | `{}` |
| `haproxy.timeout.connect` | haproxy.cfg `timeout connect` setting | `4s` |
| `haproxy.timeout.server` | haproxy.cfg `timeout server` setting | `30s` |
| `haproxy.timeout.client` | haproxy.cfg `timeout client` setting | `30s` |
| `haproxy.timeout.check` | haproxy.cfg `timeout check` setting | `2s` |
| `haproxy.priorityClassName` | priorityClassName for `haproxy` deployment | not set |
| `haproxy.securityContext` | Security context to be added to the HAProxy deployment. | `{runAsUser: 1000, fsGroup: 1000, runAsNonRoot: true}` |
| `haproxy.hardAntiAffinity` | Whether the haproxy pods should be forced to run on separate nodes. | `true` |
| `haproxy.affinity` | Override all other haproxy affinity settings with a string. | `""` |
| `haproxy.additionalAffinities` | Additional affinities to add to the haproxy server pods. | `{}` |
| `podDisruptionBudget` | Pod Disruption Budget rules | `{}` |
| `priorityClassName` | priorityClassName for `redis-ha-statefulset` | not set |
| `hostPath.path` | Use this path on the host for data storage | not set |
| `hostPath.chown` | Run an init-container as root to set ownership on the hostPath | `true` |
| `sysctlImage.enabled` | Enable an init container to modify Kernel settings | `false` |
| `sysctlImage.command` | sysctlImage command to execute | [] |
| `sysctlImage.registry` | sysctlImage Init container registry | `docker.io` |
| `sysctlImage.repository` | sysctlImage Init container name | `busybox` |
| `sysctlImage.tag` | sysctlImage Init container tag | `1.31.1` |
| `sysctlImage.pullPolicy` | sysctlImage Init container pull policy | `Always` |
| `sysctlImage.mountHostSys`| Mount the host `/sys` folder to `/host-sys` | `false` |
| `sysctlImage.resources` | sysctlImage resources | `{}` |
| `schedulerName` | Alternate scheduler name | `nil` |
Specify each parameter using the `--set key=value[,key=value]` argument to `helm install`. For example,
```bash
$ helm install \
--set image=redis \
--set tag=5.0.5-alpine \
stable/redis-ha
```
The above command sets the Redis server within `default` namespace.
Alternatively, a YAML file that specifies the values for the parameters can be provided while installing the chart. For example,
```bash
$ helm install -f values.yaml stable/redis-ha
```
> **Tip**: You can use the default [values.yaml](values.yaml)
## Custom Redis and Sentinel config options
This chart allows for most redis or sentinel config options to be passed as a key value pair through the `values.yaml` under `redis.config` and `sentinel.config`. See links below for all available options.
[Example redis.conf](http://download.redis.io/redis-stable/redis.conf)
[Example sentinel.conf](http://download.redis.io/redis-stable/sentinel.conf)
For example `repl-timeout 60` would be added to the `redis.config` section of the `values.yaml` as:
```yml
repl-timeout: "60"
```
Note:
1. Some config options should be renamed by redis version,e.g.:
```
# In redis 5.x,see https://raw.githubusercontent.com/antirez/redis/5.0/redis.conf
min-replicas-to-write: 1
min-replicas-max-lag: 5
# In redis 4.x and redis 3.x,see https://raw.githubusercontent.com/antirez/redis/4.0/redis.conf and https://raw.githubusercontent.com/antirez/redis/3.0/redis.conf
min-slaves-to-write 1
min-slaves-max-lag 5
```
Sentinel options supported must be in the the `sentinel
限制L7 的安全策略,根据文件[sw_l3_l4_l7_policy.yaml](../../../roles/cilium/files/star_war_example/sw_l3_l4_l7_policy.yaml) 创建 `$ kubectl apply -f sw_l3_l4_l7_policy.yaml` 后,验证如下:
``` bash
$ kubectl exec tiefighter -- curl -s -XPOST deathstar.default.svc.cluster.local/v1/request-landing
Ship landed
$ kubectl exec tiefighter -- curl -s -XPUT deathstar.default.svc.cluster.local/v1/exhaust-port
Access denied
```
我们同样可以使用 `kubectl desribe cnp`检查更新的策略,或者使用 `cilium` 命令行:
``` bash
$ kubectl exec -n kube-system cilium-6t5vx -- cilium policy get
[
{
"endpointSelector": {
"matchLabels": {
"any:class": "deathstar",
"any:org": "empire",
"k8s:io.kubernetes.pod.namespace": "default"
}
},
"ingress": [
{
"fromEndpoints": [
{
"matchLabels": {
"any:org": "empire",
"k8s:io.kubernetes.pod.namespace": "default"
}
}
],
"toPorts": [
{
"ports": [
{
"port": "80",
"protocol": "TCP"
}
],
"rules": {
"http": [
{
"path": "/v1/request-landing",
"method": "POST"
}
]
}
}
]
}
],
"labels": [
{
"key": "io.cilium.k8s.policy.name",
"value": "rule1",
"source": "k8s"
},
{
"key": "io.cilium.k8s.policy.namespace",
"value": "default",
"source": "k8s"
}
]
}
]
Revision: 267
```
我们看到 `cilium` 可以实现 `7层 HTTP `协议的请求方法(GET/PUT/POST等)、路径(/v1/request-landing)等等安全策略;另外,它还可以防护其他应用(如:Kafka, gRPC, Elasticsearch),可以去官网文档示例学习!
## 参考资料
- [cilium github](https://github.com/cilium/cilium)
- [cilium doc](http://docs.cilium.io)
================================================
FILE: docs/setup/network-plugin/cilium.md
================================================
# 06-安装cilium网络组件
`cilium` 是一个革新的网络与安全组件;基于 linux 内核新技术--`BPF`,它可以透明、零侵入地实现服务间安全策略与可视化,主要优势如下:
- 支持L3/L4, L7(如:HTTP/gRPC/Kafka)的安全策略
- 支持基于安全ID而不是地址+端口的传统防火墙策略
- 支持基于Overlay或Native Routing的扁平多节点pod网络
- Overlay VXLAN 方式类似于 flannel 的VXLAN后端
- 高性能负载均衡,支持DSR
- 支持事件、策略跟踪和监控集成
cilium 项目文档比较完整,建议仔细阅读[官网文档]()
## kubeasz 集成安装 cilium
kubeasz 3.3.1 更新重写了cilium 安装流程,使用helm charts 方式,配置文件在 roles/cilium/templates/values.yaml.j2,请阅读原charts中values.yaml 文件后自定义修改。
- https://docs.cilium.io/en/stable/installation/k8s-install-helm/#k8s-install-helm
- 相关镜像已经离线打包并推送到本地镜像仓库,通过 `ezdown -X` 命令下载cilium等额外镜像
### 0.检查系统内核版本
- Linux kernel >= 4.9.17,如需升级请阅读文档[升级内核](guide/kernel_upgrade.md)
- etcd >= 3.1.0 or consul >= 0.6.4
### 1.选择cilium网络后安装
- 参考[快速指南](../quickStart.md),设置`/etc/kubeasz/clusters/xxx/hosts`文件中变量 `CLUSTER_NETWORK="cilium"`
- 下载额外镜像 `./ezdown -X cilium 和 ./ezdown -X network-check`
- 执行集群安装 `dk ezctl setup xxx all`
注意默认设置未集成cilium_hubble,可以在`/etc/kubeasz/clusters/xxx/config.yml`配置启用后再开始安装。
- cilium_connectivity_check:检查集群cilium网络是否工作正常,非常实用
- cilium_hubble:很酷很实用的监控、策略追踪排查工具
Cilium CLI 和 Hubble CLI 二进制已经默认包含在kubeasz-ext-bin 1.2.0及之后的版本中 https://github.com/kubeasz/dockerfiles/blob/master/kubeasz-ext-bin/Dockerfile
### 2.验证
一键安装完成后如下,注意cilium_connectivity_check 中带`multi-node`的检查任务需要多节点集群才能完成
```
kubectl get pod -A
NAMESPACE NAME READY STATUS RESTARTS AGE
cilium-test echo-a-5dd478f5d8-74xg5 1/1 Running 0 3m10s
cilium-test echo-b-78c79f6cdd-t9vk6 1/1 Running 0 3m10s
cilium-test echo-b-host-75c44b897-c8f5m 1/1 Running 0 3m10s
cilium-test host-to-b-multi-node-clusterip-7895fd494c-92cb2 1/1 Running 0 2m59s
cilium-test host-to-b-multi-node-headless-74bbc877b5-ffxxx 1/1 Running 0 2m59s
cilium-test pod-to-a-allowed-cnp-598fc5c547-b885q 1/1 Running 0 2m59s
cilium-test pod-to-a-b8b456c99-r6272 1/1 Running 0 2m59s
cilium-test pod-to-a-denied-cnp-c78c44f5c-7xhkw 1/1 Running 0 2m59s
cilium-test pod-to-b-intra-node-nodeport-6ccdb55779-j8gnd 1/1 Running 0 2m59s
cilium-test pod-to-b-multi-node-clusterip-55d8448b5c-5b4nj 1/1 Running 0 2m59s
cilium-test pod-to-b-multi-node-headless-5fbf655bb9-pszpr 1/1 Running 0 2m59s
cilium-test pod-to-b-multi-node-nodeport-65f5b95569-qglb7 1/1 Running 0 2m59s
cilium-test pod-to-external-1111-64496c754c-bvqlt 1/1 Running 0 2m59s
cilium-test pod-to-external-fqdn-allow-baidu-cnp-6f96597855-c84zs 1/1 Running 0 2m59s
kube-system cilium-7trcs 1/1 Running 0 3m42s
kube-system cilium-hvclp 1/1 Running 0 3m42s
kube-system cilium-operator-8566689975-vcxpp 1/1 Running 0 3m42s
kube-system cilium-pw2sv 1/1 Running 0 3m42s
kube-system cilium-qppnc 1/1 Running 0 3m42s
kube-system coredns-84b58f6b4-m8x7s 1/1 Running 0 3m20s
kube-system dashboard-metrics-scraper-864d79d497-92l2w 1/1 Running 0 3m14s
kube-system hubble-relay-655dc744d7-8d9n7 1/1 Running 0 3m42s
kube-system hubble-ui-54599d7967-lfkvk 2/2 Running 0 3m42s
kube-system kubernetes-dashboard-5fc74cf5c6-pqdvc 1/1 Running 0 3m14s
kube-system metrics-server-69797698d4-2jbg8 1/1 Running 0 3m17s
kube-system node-local-dns-5n8gc 1/1 Running 0 3m19s
kube-system node-local-dns-5pm2p 1/1 Running 0 3m19s
kube-system node-local-dns-9x229 1/1 Running 0 3m19s
kube-system node-local-dns-jz8lj 1/1 Running 0 3m19s
```
检查 cilium 节点状态
```
cilium status
/¯¯\
/¯¯\__/¯¯\ Cilium: OK
\__/¯¯\__/ Operator: OK
/¯¯\__/¯¯\ Hubble: OK
\__/¯¯\__/ ClusterMesh: disabled
\__/
DaemonSet cilium Desired: 4, Ready: 4/4, Available: 4/4
Deployment cilium-operator Desired: 1, Ready: 1/1, Available: 1/1
Deployment hubble-relay Desired: 1, Ready: 1/1, Available: 1/1
Deployment hubble-ui Desired: 1, Ready: 1/1, Available: 1/1
Containers: cilium Running: 4
cilium-operator Running: 1
hubble-relay Running: 1
hubble-ui Running: 1
Cluster Pods: 17/17 managed by Cilium
Image versions hubble-relay easzlab.io.local:5000/cilium/hubble-relay:v1.11.6: 1
hubble-ui easzlab.io.local:5000/cilium/hubble-ui:v0.9.0: 1
hubble-ui easzlab.io.local:5000/cilium/hubble-ui-backend:v0.9.0: 1
cilium easzlab.io.local:5000/cilium/cilium:v1.11.6: 4
cilium-operator easzlab.io.local:5000/cilium/operator-generic:v1.11.6: 1
```
## cilium network policy
cilium network policy 提供了比k8s network policy更丰富的网络安全策略功能,有兴趣的请阅读官网文档,以下是一个有趣的小例子:
- [星战死星登陆系统](cilium-example.md)
================================================
FILE: docs/setup/network-plugin/flannel.md
================================================
## 06-安装flannel网络组件.md
`Flannel`是最早应用到k8s集群的网络插件之一,简单高效,且提供多个后端`backend`模式供选择;本文介绍以`DaemonSet Pod`方式集成到k8s集群,需要在所有master节点和node节点安装。
### kubeasz 集成安装flannel
- 参考[快速指南](../quickStart.md),设置`/etc/kubeasz/clusters/xxx/hosts`文件中变量 `CLUSTER_NETWORK="flannel"`
- 下载额外镜像 `./ezdown -X flannel`
- 执行集群安装 `dk ezctl setup xxx all`
### 配置介绍
Flannel CNI 插件的配置文件可以包含多个`plugin` 或由其调用其他`plugin`;`Flannel DaemonSet Pod`运行以后会生成`/run/flannel/subnet.env `文件,例如:
``` bash
FLANNEL_NETWORK=10.1.0.0/16
FLANNEL_SUBNET=10.1.17.1/24
FLANNEL_MTU=1472
FLANNEL_IPMASQ=true
```
然后它利用这个文件信息去配置和调用`bridge`插件来生成容器网络,调用`host-local`来管理`IP`地址,例如:
``` bash
{
"name": "mynet",
"type": "bridge",
"mtu": 1472,
"ipMasq": false,
"isGateway": true,
"ipam": {
"type": "host-local",
"subnet": "10.1.17.0/24"
}
}
```
- 更多相关介绍请阅读:
- [flannel kubernetes 集成](https://github.com/coreos/flannel/blob/master/Documentation/kubernetes.md)
- [flannel cni 插件](https://github.com/containernetworking/plugins/tree/master/plugins/meta/flannel)
- [更多 cni 插件](https://github.com/containernetworking/plugins)
- `Flannel DaemonSet` yaml配置文件
请阅读 `roles/flannel/templates/kube-flannel.yaml.j2` 内容,注意:
+ 注意:本安装方式,flannel 通过 apiserver 接口读取 podCidr 信息,详见 https://github.com/coreos/flannel/issues/847;因此想要修改节点pod网段掩码,请在`clusters/xxxx/config.yml` 中修改`NODE_CIDR_LEN`配置项
+ 配置相关RBAC 权限和 `service account`
+ 配置`ConfigMap`包含 CNI配置和 flannel配置(指定backend等),在文件中相关设置对应
### 验证flannel网络
执行flannel安装成功后可以验证如下:(需要等待镜像下载完成,有时候即便上一步已经配置了docker国内加速,还是可能比较慢,请确认以下容器运行起来以后,再执行后续验证步骤)
``` bash
# kubectl get pod --all-namespaces
NAMESPACE NAME READY STATUS RESTARTS AGE
kube-system kube-flannel-ds-m8mzm 1/1 Running 0 3m
kube-system kube-flannel-ds-mnj6j 1/1 Running 0 3m
kube-system kube-flannel-ds-mxn6k 1/1 Running 0 3m
```
在集群创建几个测试pod: `kubectl run test --image=busybox --replicas=3 sleep 30000`
``` bash
# kubectl get pod --all-namespaces -o wide|head -n 4
NAMESPACE NAME READY STATUS RESTARTS AGE IP NODE
default busy-5956b54c8b-ld4gb 1/1 Running 0 9m 172.20.2.7 192.168.1.1
default busy-5956b54c8b-lj9l9 1/1 Running 0 9m 172.20.1.5 192.168.1.2
default busy-5956b54c8b-wwpkz 1/1 Running 0 9m 172.20.0.6 192.168.1.3
# 查看路由
# ip route
default via 192.168.1.254 dev ens3 onlink
192.168.1.0/24 dev ens3 proto kernel scope link src 192.168.1.1
172.17.0.0/16 dev docker0 proto kernel scope link src 172.17.0.1 linkdown
172.20.0.0/24 via 192.168.1.3 dev ens3
172.20.1.0/24 via 192.168.1.2 dev ens3
172.20.2.0/24 dev cni0 proto kernel scope link src 172.20.2.1
```
在各节点上分别 ping 这三个POD IP地址,确保能通:
``` bash
ping 172.20.2.7
ping 172.20.1.5
ping 172.20.0.6
```
================================================
FILE: docs/setup/network-plugin/kube-ovn.md
================================================
## 06-安装kube-ovn网络组件.md
(以下文档暂未更新,以插件官网文档为准)
由灵雀云开源的网络组件 kube-ovn,将已被 openstack 社区采用的成熟网络虚拟化技术 ovs/ovn 引入 kubernetes 平台;为 kubernetes 网络打开了新的大门,令人耳目一新;强烈推荐大家试用该网络组件,反馈建议以帮助项目早日走向成熟。
- 介绍 https://blog.csdn.net/alauda_andy/article/details/88886128
- 项目地址 https://github.com/alauda/kube-ovn
### 特性介绍
kube-ovn 提供了针对企业应用场景下容器网络实用功能,并为实现更高级的网络管理控制提供了可能性;现有主要功能:
- 1.Namespace 和子网的绑定,以及子网间的访问控制;
- 2.静态IP分配;
- 3.动态QoS;
- 4.分布式和集中式网关;
- 5.内嵌 LoadBalancer;
- 6.Pod IP对外直接暴露
- 7.流量镜像
- 8.IPv6
### kubeasz 集成安装 kube-ovn
kube-ovn 的安装十分简单,详见项目的安装文档;基于 kubeasz,以下两步将安装一个集成了 kube-ovn 网络的 k8s 集群;
- 在 ansible hosts 中设置变量 `CLUSTER_NETWORK="kube-ovn"`
- 执行安装 `ansible-playbook 90.setup.yml` 或者 `ezctl setup`
kubeasz 项目为`kube-ovn`网络生成的 ansible role 如下:
``` bash
roles/kube-ovn
├── defaults
│ └── main.yml # kube-ovn 相关配置文件
├── tasks
│ └── main.yml # 安装执行文件
└── templates
├── crd.yaml.j2 # crd 模板
├── kube-ovn.yaml.j2 # kube-ovn yaml 模板
└── ovn.yaml.j2 # ovn yaml 模板
```
安装成功后,可以验证所有 k8s 集群功能正常,查看集群的 pod 网络如下:
```
$ kubectl get pod --all-namespaces -o wide
NAMESPACE NAME READY STATUS RESTARTS AGE IP NODE NOMINATED NODE READINESS GATES
kube-ovn kube-ovn-cni-5php2 1/1 Running 2 35h 192.168.1.43 192.168.1.43
kube-ovn kube-ovn-cni-7dwmx 1/1 Running 2 35h 192.168.1.42 192.168.1.42
kube-ovn kube-ovn-cni-lhlvl 1/1 Running 2 35h 192.168.1.41 192.168.1.41
kube-ovn kube-ovn-controller-57955db7b4-6x6hd 1/1 Running 0 35h 192.168.1.43 192.168.1.43
kube-ovn kube-ovn-controller-57955db7b4-chvz4 1/1 Running 0 35h 192.168.1.42 192.168.1.42
kube-ovn ovn-central-bb8747d77-tr5nz 1/1 Running 0 35h 192.168.1.41 192.168.1.41
kube-ovn ovs-ovn-2qhhr 1/1 Running 0 35h 192.168.1.41 192.168.1.41
kube-ovn ovs-ovn-np8rn 1/1 Running 0 35h 192.168.1.43 192.168.1.43
kube-ovn ovs-ovn-pkjw4 1/1 Running 0 35h 192.168.1.42 192.168.1.42
kube-system coredns-55f46dd959-76qb5 1/1 Running 0 35h 10.16.0.12 192.168.1.42
kube-system coredns-55f46dd959-wn8kw 1/1 Running 0 35h 10.16.0.11 192.168.1.43
kube-system heapster-fdb7596d6-xmmrx 1/1 Running 0 35h 10.16.0.15 192.168.1.42
kube-system kubernetes-dashboard-68ddcc97fc-dwzbf 1/1 Running 0 35h 10.16.0.14 192.168.1.42
kube-system metrics-server-6c898b5b8b-zvct2 1/1 Running 0 35h 10.16.0.13 192.168.1.43
```
直观上 kube-ovn 与传统 k8s 网络(flannel/calico等)比较最大的不同是 pod 子网的分配:
- 传统网络插件下,集群中 pod 一般是不同 node 节点分配不同的子网;然后通过 overlay 等技术打通不同 node 节点的 pod 子网;
- kube-ovn 中 pod 网络根据其所在的 namespace 而定; namespace 在创建时可以根据 annotation 来配置它的子网/网关等参数;默认使用 10.16.0.0/16 的子网;
### 测试 namespace 子网分配
新建一个 subnet 并绑定 namespace 测试分配一个新的 pod 子网
```
# 创建一个 namespace: test-ns
$ cat > test-ns.yaml << EOF
apiVersion: v1
kind: Namespace
metadata:
annotations:
name: test-ns
EOF
$ kubectl apply -f test-ns.yaml
# 创建一个 subnet: test-subnet 并绑定 namespace test-ns
$ cat > test-subnet.yaml << EOF
apiVersion: kubeovn.io/v1
kind: Subnet
metadata:
name: test-subnet
spec:
protocol: IPv4
default: false
namespaces:
- test-ns
cidrBlock: 10.17.0.0/24
gateway: 10.17.0.1
excludeIps:
- 10.17.0.1..10.17.0.10
EOF
$ kubectl apply -f test-subnet.yaml
# 在 test-ns 中创建 nginx 部署
$ kubectl run -n test-ns nginx --image=nginx --replicas=2 --port=80 --expose
# 在 default 中创建 busy 客户端
$ kubectl run busy --image=busybox sleep 360000
```
创建成功后,查看 pod 地址的分配,可以看到确实 test-ns 中 pod 使用新的子网,而 default 中 pod 使用了默认子网,并验证 pod 之间的联通性(默认可通)
```
$ kubectl get pod --all-namespaces -o wide
NAMESPACE NAME READY STATUS RESTARTS AGE IP NODE NOMINATED NODE READINESS GATES
default busy-6c55ccddc5-qrm5j 1/1 Running 0 31h 10.16.0.16 192.168.1.43
kube-ovn kube-ovn-cni-5php2 1/1 Running 2 35h 192.168.1.43 192.168.1.43
kube-ovn kube-ovn-cni-7dwmx 1/1 Running 2 35h 192.168.1.42 192.168.1.42
kube-ovn kube-ovn-cni-lhlvl 1/1 Running 2 35h 192.168.1.41 192.168.1.41
kube-ovn kube-ovn-controller-57955db7b4-6x6hd 1/1 Running 0 35h 192.168.1.43 192.168.1.43
kube-ovn kube-ovn-controller-57955db7b4-chvz4 1/1 Running 0 35h 192.168.1.42 192.168.1.42
kube-ovn ovn-central-bb8747d77-tr5nz 1/1 Running 0 35h 192.168.1.41 192.168.1.41
kube-ovn ovs-ovn-2qhhr 1/1 Running 0 35h 192.168.1.41 192.168.1.41
kube-ovn ovs-ovn-np8rn 1/1 Running 0 35h 192.168.1.43 192.168.1.43
kube-ovn ovs-ovn-pkjw4 1/1 Running 0 35h 192.168.1.42 192.168.1.42
kube-system coredns-55f46dd959-76qb5 1/1 Running 0 35h 10.16.0.12 192.168.1.42
kube-system coredns-55f46dd959-wn8kw 1/1 Running 0 35h 10.16.0.11 192.168.1.43
kube-system heapster-fdb7596d6-xmmrx 1/1 Running 0 35h 10.16.0.15 192.168.1.42
kube-system kubernetes-dashboard-68ddcc97fc-dwzbf 1/1 Running 0 35h 10.16.0.14 192.168.1.42
kube-system metrics-server-6c898b5b8b-zvct2 1/1 Running 0 35h 10.16.0.13 192.168.1.43
test-ns nginx-755464dd6c-s6flj 1/1 Running 0 31h 10.17.0.12 192.168.1.42
test-ns nginx-755464dd6c-zct56 1/1 Running 0 31h 10.17.0.11 192.168.1.43
```
- 更多的测试(pod网络QOS限速,namespace网络隔离等)请参考 kube-ovn 项目说明文档
### 延伸阅读
- [kube-ovn 官方文档](https://github.com/alauda/kube-ovn/tree/master/docs)
- [从 Bridge 到 OVS,探索虚拟交换机](https://www.cnblogs.com/bakari/p/8097439.html)
================================================
FILE: docs/setup/network-plugin/kube-router.md
================================================
# kube-router 网络组件
(以下文档暂未更新,以插件官网文档为准)
kube-router是一个简单、高效的网络插件,它提供一揽子解决方案:
- 基于GoBGP 提供Pod 网络互联(Routing)
- 使用ipsets优化的iptables 提供网络策略支持(Firewall/NetworkPolicy)
- 基于IPVS/LVS 提供高性能服务代理(Service Proxy)(注:由于 k8s 新版本中 ipvs 已可用,因此这里不选择启用kube-router基于ipvs的service proxy)
更多介绍请前往`https://github.com/cloudnativelabs/kube-router`
## 配置
本项目提供多种网络插件可选,如果需要安装kube-router,请在/etc/kubeasz/hosts文件中设置变量 `CLUSTER_NETWORK="kube-router"`,更多设置请查看`roles/kube-router/defaults/main.yml`
- kube-router需要在所有master节点和node节点安装
## 安装
- 单步安装已经集成:`ansible-playbook 90.setup.yml`
- 分步安装请执行:`ansible-playbook 06.network.yml`
## 验证
- 1.pod间网络联通性:略
- 2.host路由表
``` bash
# master上路由
root@master1:~$ ip route
...
172.20.1.0/24 via 192.168.1.2 dev ens3 proto 17
172.20.2.0/24 via 192.168.1.3 dev ens3 proto 17
...
# node3上路由
root@node3:~$ ip route
...
172.20.0.0/24 via 192.168.1.1 dev ens3 proto 17
172.20.1.0/24 via 192.168.1.2 dev ens3 proto 17
172.20.2.0/24 dev kube-bridge proto kernel scope link src 172.20.2.1
...
```
- 3.bgp连接状态
``` bash
# master上
root@master1:~$ netstat -antlp|grep router|grep LISH|grep 179
tcp 0 0 192.168.1.1:179 192.168.1.3:58366 ESTABLISHED 26062/kube-router
tcp 0 0 192.168.1.1:42537 192.168.1.2:179 ESTABLISHED 26062/kube-router
# node3上
root@node3:~$ netstat -antlp|grep router|grep LISH|grep 179
tcp 0 0 192.168.1.3:58366 192.168.1.1:179 ESTABLISHED 18897/kube-router
tcp 0 0 192.168.1.3:179 192.168.1.2:43928 ESTABLISHED 18897/kube-router
```
- 4.NetworkPolicy有效性,验证参照[这里](../../guide/networkpolicy.md)
- 5.ipset列表查看
``` bash
$ ipset list
...
Name: kube-router-pod-subnets
Type: hash:net
Revision: 6
Header: family inet hashsize 1024 maxelem 65536 timeout 0
Size in memory: 672
References: 2
Members:
172.20.1.0/24 timeout 0
172.20.2.0/24 timeout 0
172.20.0.0/24 timeout 0
Name: kube-router-node-ips
Type: hash:ip
Revision: 4
Header: family inet hashsize 1024 maxelem 65536 timeout 0
Size in memory: 416
References: 1
Members:
192.168.1.1 timeout 0
192.168.1.2 timeout 0
192.168.1.3 timeout 0
...
```
================================================
FILE: docs/setup/network-plugin/network-check.md
================================================
# network-check
网络测试组件,根据cilium connectivity-check 脚本修改而来;利用cronjob 定期检测集群各节点、容器、serviceip、nodeport等之间的网络联通性;可以方便的判断当前集群网络是否正常。
目前检测如下:
``` bash
kubectl get cronjobs.batch -n network-test
NAME SCHEDULE SUSPEND ACTIVE LAST SCHEDULE AGE
test01-pod-to-container */5 * * * * False 0 3m19s 6d3h
test02-pod-to-node-nodeport */5 * * * * False 0 3m19s 6d3h
test03-pod-to-multi-node-clusterip */5 * * * * False 1 6d3h 6d3h
test04-pod-to-multi-node-headless */5 * * * * False 1 6d3h 6d3h
test05-pod-to-multi-node-nodeport */5 * * * * False 1 6d3h 6d3h
test06-pod-to-external-1111 */5 * * * * False 0 3m19s 6d3h
test07-pod-to-external-fqdn-baidu */5 * * * * False 0 3m19s 6d3h
test08-host-to-multi-node-clusterip */5 * * * * False 1 6d3h 6d3h
test09-host-to-multi-node-headless */5 * * * * False 1 6d3h 6d3h
```
+ 带`multi-node`的测试需要多节点集群才能运行,如果单节点集群,测试pod会处于`Pending`状态
+ 带`external`的测试需要节点能够访问互联网,否则测试会失败
## 启用网络检测
- 下载额外容器镜像 `./ezdown -X network-check`
- 配置集群,在配置文件`/etc/kubeasz/clusters/xxx/config.yml` (xxx为集群名) 修改如下选项
```
# network-check 自动安装
network_check_enabled: true
network_check_schedule: "*/5 * * * *" # 检测频率,默认5分钟执行一次
```
- 安装网络检测插件 `docker exec -it kubeasz ezctl setup xxx 07`
## 检查测试结果
大约等待5分钟左右,查看运行结果,如果pod 状态为`Completed` 表示检测正常通过。
```
kubectl get pod -n network-test
NAME READY STATUS RESTARTS AGE
echo-server-58d7bb7f6-77ps6 1/1 Running 0 6d4h
echo-server-host-cc87c966d-bk57t 1/1 Running 0 6d4h
test01-pod-to-container-27606775-q6xlb 0/1 Completed 0 3m10s
test02-pod-to-node-nodeport-27606775-x2v5d 0/1 Completed 0 3m10s
test03-pod-to-multi-node-clusterip-27597895-cbq8d 0/1 Pending 0 6d4h
test04-pod-to-multi-node-headless-27597895-qzsgz 0/1 Pending 0 6d4h
test05-pod-to-multi-node-nodeport-27597895-kb5r7 0/1 Pending 0 6d4h
test06-pod-to-external-1111-27606775-p6v8s 0/1 Completed 0 3m10s
test07-pod-to-external-fqdn-baidu-27606775-qdfwd 0/1 Completed 0 3m10s
test08-host-to-multi-node-clusterip-27597895-qsgn9 0/1 Pending 0 6d4h
test09-host-to-multi-node-headless-27597895-hpkt5 0/1 Pending 0 6d4h
```
+ pod 状态为`Completed` 表示检测正常通过
+ pod 状态为`Pending` 表示该检测需要多节点的k8s集群才会运行
## 禁用网络检测
如果集群已经开启网络检测,检测结果符合预期,并且不想继续循环检测时,只要删除对应namespace即可
```
kubectl delete ns network-test
```
================================================
FILE: docs/setup/offline_install.md
================================================
# 离线安装集群
使用kubeasz 离线安装 k8s集群需要下载四个部分:
- kubeasz 项目代码
- 二进制文件(k8s、etcd、containerd等组件)
- 容器镜像文件(calico、coredns、metrics-server等容器镜像)
- 系统软件安装包(ipset、libseccomp2等,仅无法使用本地yum/apt源时需要)
## 离线文件准备
在一台能够访问互联网的服务器上执行:
- 下载工具脚本ezdown,举例使用kubeasz版本3.6.0
``` bash
export release=3.6.0
wget https://github.com/easzlab/kubeasz/releases/download/${release}/ezdown
chmod +x ./ezdown
```
- 使用工具脚本下载(更多关于ezdown的参数,运行./ezdown 查看)
下载kubeasz代码、二进制、默认容器镜像
``` bash
# 国内环境
./ezdown -D
```
[可选]如果需要更多组件,请下载额外容器镜像(cilium,flannel,prometheus等)
``` bash
./ezdown -X flannel
./ezdown -X prometheus
...
```
下载离线系统包 (适用于无法使用yum/apt仓库情形)
``` bash
# 如果操作系统是ubuntu 22.04
./ezdown -P ubuntu_22
```
上述脚本运行成功后,所有文件(kubeasz代码、二进制、离线镜像)均已整理好放入目录`/etc/kubeasz`
- `/etc/kubeasz` 包含 kubeasz 版本为 ${release} 的发布代码
- `/etc/kubeasz/bin` 包含 k8s/etcd/docker/cni 等二进制文件
- `/etc/kubeasz/down` 包含集群安装时需要的离线容器镜像
- `/etc/kubeasz/down/packages` 包含集群安装时需要的系统基础软件
## 离线安装
上述下载完成后,把`/etc/kubeasz`整个目录复制到目标离线服务器相同目录,然后在离线服务器/etc/kubeasz目录下执行:
- 离线安装 docker,检查本地文件,正常会提示所有文件已经下载完成,并上传到本地私有镜像仓库
```
./ezdown -D
./ezdown -X flannel
./ezdown -X prometheus
...
```
- 启动 kubeasz 容器
```
./ezdown -S
```
- 设置参数允许离线安装系统软件包
```
sed -i 's/^INSTALL_SOURCE.*$/INSTALL_SOURCE: "offline"/g' /etc/kubeasz/example/config.yml
```
- 举例安装单节点集群,参考 https://github.com/easzlab/kubeasz/blob/master/docs/setup/quickStart.md
``` bash
source ~/.bashrc
dk ezctl start-aio
# 或者执行 docker exec -it kubeasz ezctl start-aio
```
- 多节点集群,进入kubeasz 容器内 `docker exec -it kubeasz bash`,参考https://github.com/easzlab/kubeasz/blob/master/docs/setup/00-planning_and_overall_intro.md 进行集群规划和设置后使用./ezctl 命令安装
================================================
FILE: docs/setup/quickStart.md
================================================
## 快速指南
本文档适用于kubeasz 3.3.1以上版本,部署单节点集群(aio),作为快速体验k8s集群的测试环境。
### 1.基础系统配置
- 准备一台虚机配置内存4G/硬盘30G以上
- 最小化安装`Ubuntu 22.04 server`
- 配置基础网络、更新源、SSH登录等
**注意:** 确保在干净的系统上开始安装,不能使用曾经装过kubeadm或其他k8s发行版的环境
### 2.下载文件
- 下载工具脚本ezdown,举例使用kubeasz版本3.6.7
``` bash
export release=3.6.7
wget https://github.com/easzlab/kubeasz/releases/download/${release}/ezdown
chmod +x ./ezdown
```
- 使用工具脚本下载(更多关于ezdown的参数,运行./ezdown 查看)
下载kubeasz代码、二进制、默认容器镜像
``` bash
# 国内环境
./ezdown -D
# 海外环境
#./ezdown -D -m standard
```
【可选】下载额外容器镜像(cilium,flannel,prometheus等)
``` bash
# 按需下载
./ezdown -X dashboard
./ezdown -X prometheus
...
```
【可选】下载离线系统包 (适用于无法使用yum/apt仓库情形)
``` bash
./ezdown -P
```
上述脚本运行成功后,所有文件(kubeasz代码、二进制、离线镜像)均已整理好放入目录`/etc/kubeasz`
- `/etc/kubeasz` 包含 kubeasz 版本为 ${release} 的发布代码
- `/etc/kubeasz/bin` 包含 k8s/etcd/docker/cni 等二进制文件
- `/etc/kubeasz/down` 包含集群安装时需要的离线容器镜像
- `/etc/kubeasz/down/packages` 包含集群安装时需要的系统基础软件
### 3.安装集群
- 容器化运行 kubeasz
```
./ezdown -S
```
- 使用默认配置安装 aio 集群
```
docker exec -it kubeasz ezctl start-aio
# 如果安装失败,查看日志排除后,使用如下命令重新安装aio集群
# docker exec -it kubeasz ezctl setup default all
```
### 4.验证安装
``` bash
$ source ~/.bashrc
$ kubectl version # 验证集群版本
$ kubectl get node # 验证节点就绪 (Ready) 状态
$ kubectl get pod -A # 验证集群pod状态,默认已安装网络插件、coredns、metrics-server等
$ kubectl get svc -A # 验证集群服务状态
```
- 登录 `dashboard`可以查看和管理集群,更多内容请查阅[dashboard文档](../guide/dashboard.md)
### 5.清理
以上步骤创建的K8S开发测试环境请尽情折腾,碰到错误尽量通过查看日志、上网搜索、提交`issues`等方式解决;当然你也可以清理集群后重新创建。
在宿主机上,按照如下步骤清理
- 清理集群 `docker exec -it kubeasz ezctl destroy default`
- 重启节点,以确保清理残留的虚拟网卡、路由等信息
================================================
FILE: example/config.yml
================================================
############################
# prepare
############################
# 可选离线安装系统软件包 (offline|online)
INSTALL_SOURCE: "online"
# 可选进行系统安全加固 github.com/dev-sec/ansible-collection-hardening
# (deprecated) 未更新上游项目,未验证最新k8s集群安装,不建议启用
OS_HARDEN: false
############################
# role:deploy
############################
# default: ca will expire in 100 years
# default: certs issued by the ca will expire in 50 years
CA_EXPIRY: "876000h"
CERT_EXPIRY: "438000h"
# force to recreate CA and other certs, not suggested to set 'true'
CHANGE_CA: false
# kubeconfig 配置参数
CLUSTER_NAME: "cluster1"
CONTEXT_NAME: "context-{{ CLUSTER_NAME }}"
# k8s version
K8S_VER: "__k8s_ver__"
# set unique 'k8s_nodename' for each node, if not set(default:'') ip add will be used
# CAUTION: 'k8s_nodename' must consist of lower case alphanumeric characters, '-' or '.',
# and must start and end with an alphanumeric character (e.g. 'example.com'),
# regex used for validation is '[a-z0-9]([-a-z0-9]*[a-z0-9])?(\.[a-z0-9]([-a-z0-9]*[a-z0-9])?)*'
K8S_NODENAME: "{%- if k8s_nodename != '' -%} \
{{ k8s_nodename|replace('_', '-')|lower }} \
{%- else -%} \
k8s-{{ inventory_hostname|replace('.', '-') }} \
{%- endif -%}"
# use 'K8S_NODENAME' to set hostname
ENABLE_SETTING_HOSTNAME: true
############################
# role:etcd
############################
# 设置不同的wal目录,可以避免磁盘io竞争,提高性能
ETCD_DATA_DIR: "/var/lib/etcd"
ETCD_WAL_DIR: ""
############################
# role:runtime [containerd,docker]
############################
# [.]启用拉取加速镜像仓库
ENABLE_MIRROR_REGISTRY: true
# [.]添加信任的私有仓库
# 必须按照如下示例格式,协议头'http://'和'https://'不能省略
INSECURE_REG:
- "http://easzlab.io.local:5000"
- "https://reg.yourcompany.com"
# [.]基础容器镜像
SANDBOX_IMAGE: "easzlab.io.local:5000/easzlab/pause:__pause__"
# [containerd] root 存储目录,默认:/var/lib/containerd
CONTAINERD_ROOT_DIR: "/var/lib/containerd"
# [containerd] state 存储目录,默认:/run/containerd
CONTAINERD_STATE_DIR: "/run/containerd"
# [containerd] config 目录,默认:/etc/containerd
CONTAINERD_CONFIG_DIR: "/etc/containerd"
# [containerd] systemd service 名称,默认:containerd.service
CONTAINERD_SERVICE_NAME: "containerd.service"
# [docker]容器存储目录
DOCKER_STORAGE_DIR: "/var/lib/docker"
# [docker]开启Restful API
DOCKER_ENABLE_REMOTE_API: false
############################
# role:kube-master
############################
# k8s 集群 master 节点证书配置,可以添加多个ip和域名(比如增加公网ip和域名)
MASTER_CERT_HOSTS:
- "10.1.1.1"
- "k8s.easzlab.io"
#- "www.test.com"
# node 节点上 pod 网段掩码长度(决定每个节点最多能分配的pod ip地址)
# 如果flannel 使用 --kube-subnet-mgr 参数,那么它将读取该设置为每个节点分配pod网段
# https://github.com/coreos/flannel/issues/847
NODE_CIDR_LEN: 24
# 是否启用集群audit功能
ENABLE_CLUSTER_AUDIT: false
############################
# role:kube-node
############################
# Kubelet 根目录
KUBELET_ROOT_DIR: "/var/lib/kubelet"
# node节点最大pod 数
MAX_PODS: 110
# 配置为kube组件(kubelet,kube-proxy,dockerd等)预留的资源量
# 数值设置详见templates/kubelet-config.yaml.j2
KUBE_RESERVED_ENABLED: "no"
# k8s 官方不建议草率开启 system-reserved, 除非你基于长期监控,了解系统的资源占用状况;
# 并且随着系统运行时间,需要适当增加资源预留,数值设置详见templates/kubelet-config.yaml.j2
# 系统预留设置基于 4c/8g 虚机,最小化安装系统服务,如果使用高性能物理机可以适当增加预留
# 另外,集群安装时候apiserver等资源占用会短时较大,建议至少预留1g内存
SYS_RESERVED_ENABLED: "no"
############################
# role:network [flannel,calico,cilium,kube-ovn,kube-router]
############################
# ------------------------------------------- flannel
# [flannel]设置flannel 后端"host-gw","vxlan"等
FLANNEL_BACKEND: "vxlan"
DIRECT_ROUTING: false
# [flannel]
flannel_ver: "__flannel__"
# ------------------------------------------- calico
# 模式可选项有: [Always, CrossSubnet, Never],跨子网可以配置为Always与CrossSubnet
# CrossSubnet为隧道+BGP路由混合模式可以提升网络性能,同子网配置为Never即可.
# 公有云建议使用always比较省事,其他的话需要修改各自公有云的网络配置,具体可以参考各个公有云说明
CALICO_ENABLE_OVERLAY: "Always"
# [calico]设置 calico-node使用的host IP,bgp邻居通过该地址建立,可手工指定也可以自动发现
IP_AUTODETECTION_METHOD: "can-reach={{ groups['kube_master'][0] }}"
# [calico]设置calico 网络 backend: bird, vxlan, none
# 少数公有云(Azure)或者私有云不支持IPinIP封包,可以使用 vxlan 模式
CALICO_NETWORKING_BACKEND: "bird"
# [calico]设置calico 是否使用route reflectors
# 如果集群规模超过50个节点,建议启用该特性
CALICO_RR_ENABLED: false
# CALICO_RR_NODES 配置route reflectors的节点,如果未设置默认使用集群master节点
# CALICO_RR_NODES: ["192.168.1.1", "192.168.1.2"]
CALICO_RR_NODES: []
# [calico]更新支持calico 版本: ["3.19", "3.23"]
calico_ver: "__calico__"
# [calico]calico 主版本
calico_ver_main: "{{ calico_ver.split('.')[0] }}.{{ calico_ver.split('.')[1] }}"
# ------------------------------------------- cilium
# [cilium]镜像版本
cilium_ver: "__cilium__"
cilium_connectivity_check: false
cilium_hubble_enabled: false
cilium_hubble_ui_enabled: false
# ------------------------------------------- kube-ovn
# [kube-ovn]离线镜像tar包
kube_ovn_ver: "__kube_ovn__"
# ------------------------------------------- kube-router
# [kube-router]公有云上存在限制,一般需要始终开启 ipinip;自有环境可以设置为 "subnet"
OVERLAY_TYPE: "full"
# [kube-router]NetworkPolicy 支持开关
FIREWALL_ENABLE: true
# [kube-router]kube-router 镜像版本
kube_router_ver: "__kube_router__"
############################
# role:cluster-addon
############################
# coredns 自动安装
dns_install: "yes"
corednsVer: "__coredns__"
ENABLE_LOCAL_DNS_CACHE: true
dnsNodeCacheVer: "__dns_node_cache__"
# 设置 local dns cache 地址
LOCAL_DNS_CACHE: "169.254.20.10"
# metric server 自动安装
metricsserver_install: "yes"
metricsVer: "__metrics__"
# dashboard 自动安装
dashboard_install: "no"
dashboardVer: "__dashboard__"
# local-storage (local-path-provisioner) 自动安装
local_path_provisioner_install: "no"
local_path_provisioner_ver: "__local_path_provisioner__"
local_path_storage_class: "local-path"
# 设置默认本地存储路径
local_path_provisioner_dir: "/opt/local-path-provisioner"
# nfs-provisioner 自动安装
nfs_provisioner_install: "no"
nfs_provisioner_namespace: "kube-system"
nfs_provisioner_ver: "__nfs_provisioner__"
nfs_storage_class: "managed-nfs-storage"
nfs_server: "192.168.1.10"
nfs_path: "/data/nfs"
# openebs 自动安装
openebs_install: "no"
openebs_ver: "__openebs_ver__"
openebs_namespace: "openebs"
openebs_hostpath: "/var/openebs/local"
openebs_hostpath_storage_class: "openebs-hostpath"
openebs_lvm_storage_class: "openebs-lvmpv"
openebs_lvm_vg: "vg_k8s"
# prometheus 自动安装
prom_install: "no"
prom_namespace: "monitor"
prom_storage_class: ""
prom_chart_ver: "__prom_chart__"
# minio 自动安装
minio_install: "no"
minio_namespace: "minio"
minio_storage_class: "{{ openebs_lvm_storage_class }}"
minio_chart_ver: "__minio_chart__"
minio_root_user: "3aea61ca94177dx"
minio_root_password: "0f3b19e46dd3aea61ca94177d"
# 单机版=1,集群版=4以上
minio_pool_servers: 4
minio_pool_size: 10Gi
# 是否启用tls证书,如果未启用则使用http协议
minio_tls_enabled: false
# 是否使用权威证书,如果使用需要提前把证书放到目录 roles/cluster-addon/templates/minio/; 并且要求
# 证书和私钥的名称分别为server.crt和server.key
minio_with_global_cert: false
# nacos 自动安装
nacos_install: "no"
nacos_namespace: "nacos"
nacos_mysql_host: "semisync-mysql-cluster-mysql"
nacos_mysql_db: "nacos"
nacos_mysql_port: "3306"
nacos_mysql_user: "__dbuser__"
nacos_mysql_password: "__yourpassword__"
nacos_storage_class: "{{ openebs_lvm_storage_class }}"
# rocketmq 自动安装
rocketmq_install: "no"
rocketmq_namespace: "rocketmq"
rocketmq_storage_class: "{{ openebs_lvm_storage_class }}"
# network-check 自动安装
network_check_enabled: false
network_check_schedule: "*/5 * * * *"
# kubeblocks 自动安装
kubeblocks_ver: "__kubeblocks_ver__"
kubeblocks_install: "no"
# ingress-nginx 自动安装
# ingress-nginx 只会部署到node with 标签:ingress-controller/provider=ingress-nginx
ingress_nginx_install: "no"
ingress_nginx_namespace: "ingress-nginx"
ingress_nginx_ver: "__ingress_nginx_ver__"
ingress_nginx_metrics_enabled: true # 需要先部署prometheus
# argocd 自动安装
argocd_install: "no"
############################
# role:harbor
############################
# harbor version,完整版本号
HARBOR_VER: "__harbor__"
HARBOR_DOMAIN: "harbor.easzlab.io.local"
HARBOR_PATH: /var/data
HARBOR_TLS_PORT: 8443
HARBOR_REGISTRY: "{{ HARBOR_DOMAIN }}:{{ HARBOR_TLS_PORT }}"
# if set 'false', you need to put certs named harbor.pem and harbor-key.pem in directory 'down'
HARBOR_SELF_SIGNED_CERT: true
# install extra component
HARBOR_WITH_TRIVY: false
================================================
FILE: example/hosts.allinone
================================================
# 'etcd' cluster should have odd member(s) (1,3,5,...)
[etcd]
192.168.1.1
# master node(s), set unique 'k8s_nodename' for each node
# CAUTION: 'k8s_nodename' must consist of lower case alphanumeric characters, '-' or '.',
# and must start and end with an alphanumeric character
[kube_master]
192.168.1.1
# work node(s), set unique 'k8s_nodename' for each node
# CAUTION: 'k8s_nodename' must consist of lower case alphanumeric characters, '-' or '.',
# and must start and end with an alphanumeric character
[kube_node]
192.168.1.1 k8s_nodename=''
# [optional] harbor server, a private docker registry
# 'NEW_INSTALL': 'true' to install a harbor server; 'false' to integrate with existed one
[harbor]
#192.168.1.8 NEW_INSTALL=false
# [optional] loadbalance for accessing k8s from outside
[ex_lb]
#192.168.1.6 LB_ROLE=backup EX_APISERVER_VIP=192.168.1.250 EX_APISERVER_PORT=8443
#192.168.1.7 LB_ROLE=master EX_APISERVER_VIP=192.168.1.250 EX_APISERVER_PORT=8443
# [optional] ntp server for the cluster
[chrony]
#192.168.1.1
[all:vars]
# --------- Main Variables ---------------
# Secure port for apiservers
SECURE_PORT="6443"
# Cluster container-runtime supported: docker, containerd
# if k8s version >= 1.24, docker is not supported
CONTAINER_RUNTIME="containerd"
# Network plugins supported: calico, flannel, kube-router, cilium, kube-ovn
CLUSTER_NETWORK="calico"
# Service proxy mode of kube-proxy: 'iptables' or 'ipvs'
PROXY_MODE="ipvs"
# K8S Service CIDR, not overlap with node(host) networking
SERVICE_CIDR="10.68.0.0/16"
# Cluster CIDR (Pod CIDR), not overlap with node(host) networking
CLUSTER_CIDR="172.20.0.0/16"
# NodePort Range
NODE_PORT_RANGE="30000-32767"
# Cluster DNS Domain
CLUSTER_DNS_DOMAIN="cluster.local"
# -------- Additional Variables (don't change the default value right now)---
# Binaries Directory
bin_dir="/opt/kube/bin"
# Deploy Directory (kubeasz workspace)
base_dir="/etc/kubeasz"
# Directory for a specific cluster
cluster_dir="{{ base_dir }}/clusters/_cluster_name_"
# CA and other components cert/key Directory
ca_dir="/etc/kubernetes/ssl"
# Default 'k8s_nodename' is empty
k8s_nodename=''
# Default python interpreter
ansible_python_interpreter=/usr/bin/python3
================================================
FILE: example/hosts.multi-node
================================================
# 'etcd' cluster should have odd member(s) (1,3,5,...)
[etcd]
192.168.1.1
192.168.1.2
192.168.1.3
# master node(s), set unique 'k8s_nodename' for each node
# CAUTION: 'k8s_nodename' must consist of lower case alphanumeric characters, '-' or '.',
# and must start and end with an alphanumeric character
[kube_master]
192.168.1.1 k8s_nodename='master-01'
192.168.1.2 k8s_nodename='master-02'
192.168.1.3 k8s_nodename='master-03'
# work node(s), set unique 'k8s_nodename' for each node
# CAUTION: 'k8s_nodename' must consist of lower case alphanumeric characters, '-' or '.',
# and must start and end with an alphanumeric character
[kube_node]
192.168.1.4 k8s_nodename='worker-01'
192.168.1.5 k8s_nodename='worker-02'
# [optional] harbor server, a private docker registry
# 'NEW_INSTALL': 'true' to install a harbor server; 'false' to integrate with existed one
[harbor]
#192.168.1.8 NEW_INSTALL=false
# [optional] loadbalance for accessing k8s from outside
[ex_lb]
#192.168.1.6 LB_ROLE=backup EX_APISERVER_VIP=192.168.1.250 EX_APISERVER_PORT=8443
#192.168.1.7 LB_ROLE=master EX_APISERVER_VIP=192.168.1.250 EX_APISERVER_PORT=8443
# [optional] ntp server for the cluster
[chrony]
#192.168.1.1
[all:vars]
# --------- Main Variables ---------------
# Secure port for apiservers
SECURE_PORT="6443"
# Cluster container-runtime supported: docker, containerd
# if k8s version >= 1.24, docker is not supported
CONTAINER_RUNTIME="containerd"
# Network plugins supported: calico, flannel, kube-router, cilium, kube-ovn
CLUSTER_NETWORK="calico"
# Service proxy mode of kube-proxy: 'iptables' or 'ipvs'
PROXY_MODE="ipvs"
# K8S Service CIDR, not overlap with node(host) networking
SERVICE_CIDR="10.68.0.0/16"
# Cluster CIDR (Pod CIDR), not overlap with node(host) networking
CLUSTER_CIDR="172.20.0.0/16"
# NodePort Range
NODE_PORT_RANGE="30000-32767"
# Cluster DNS Domain
CLUSTER_DNS_DOMAIN="cluster.local"
# -------- Additional Variables (don't change the default value right now) ---
# Binaries Directory
bin_dir="/opt/kube/bin"
# Deploy Directory (kubeasz workspace)
base_dir="/etc/kubeasz"
# Directory for a specific cluster
cluster_dir="{{ base_dir }}/clusters/_cluster_name_"
# CA and other components cert/key Directory
ca_dir="/etc/kubernetes/ssl"
# Default 'k8s_nodename' is empty
k8s_nodename=''
# Default python interpreter
ansible_python_interpreter=/usr/bin/python3
================================================
FILE: ezctl
================================================
#!/bin/bash
# Create & manage k8s clusters
# shellcheck disable=SC2155
set -o nounset
set -o errexit
#set -o xtrace
function usage() {
echo -e "\033[33mUsage:\033[0m ezctl COMMAND [args]"
cat < to switch default kubeconfig of the cluster
new to start a new k8s deploy with name 'cluster'
setup to setup a cluster, also supporting a step-by-step way
start to start all of the k8s services stopped by 'ezctl stop'
stop to stop all of the k8s services temporarily
upgrade to upgrade the k8s cluster
destroy to destroy the k8s cluster
backup to backup the cluster state (etcd snapshot)
restore to restore the cluster state from backups
start-aio to quickly setup an all-in-one cluster with default settings
Cluster ops:
add-etcd to add a etcd-node to the etcd cluster
add-master to add a master node to the k8s cluster
add-node to add a work node to the k8s cluster
del-etcd to delete a etcd-node from the etcd cluster
del-master to delete a master node from the k8s cluster
del-node to delete a work node from the k8s cluster
Extra operation:
kca-renew to force renew CA certs and all the other certs (with caution)
kcfg-adm to manage client kubeconfig of the k8s cluster
Use "ezctl help " for more information about a given command.
EOF
}
function logger() {
TIMESTAMP=$(date +'%Y-%m-%d %H:%M:%S')
local FNAME=$(basename "${BASH_SOURCE[1]}")
local SOURCE="\033[36m[$FNAME:${BASH_LINENO[0]}]\033[0m"
case "$1" in
debug)
echo -e "\033[36m$TIMESTAMP\033[0m $SOURCE \033[36mDEBUG $2\033[0m"
;;
info)
echo -e "\033[36m$TIMESTAMP\033[0m $SOURCE \033[32mINFO $2\033[0m"
;;
warn)
echo -e "\033[36m$TIMESTAMP\033[0m $SOURCE \033[33mWARN $2\033[0m"
;;
error)
echo -e "\033[36m$TIMESTAMP\033[0m $SOURCE \033[31mERROR $2\033[0m"
;;
*) ;;
esac
}
function help-info() {
case "$1" in
(setup)
usage-setup
;;
(add-etcd)
echo -e "read more > 'https://github.com/easzlab/kubeasz/blob/master/docs/op/op-etcd.md'"
;;
(add-master)
echo -e "read more > 'https://github.com/easzlab/kubeasz/blob/master/docs/op/op-master.md'"
;;
(add-node)
echo -e "read more > 'https://github.com/easzlab/kubeasz/blob/master/docs/op/op-node.md'"
;;
(del-etcd)
echo -e "read more > 'https://github.com/easzlab/kubeasz/blob/master/docs/op/op-etcd.md'"
;;
(del-master)
echo -e "read more > 'https://github.com/easzlab/kubeasz/blob/master/docs/op/op-master.md'"
;;
(del-node)
echo -e "read more > 'https://github.com/easzlab/kubeasz/blob/master/docs/op/op-node.md'"
;;
(kca-renew)
echo -e "WARNNING: this command should be used with caution"
echo -e "force to recreate CA certs and all of the others certs used in the cluster"
echo -e "it should be used only when the admin.conf leaked"
;;
(kcfg-adm)
usage-kcfg-adm
;;
(*)
echo -e "todo: help info $1"
;;
esac
}
function usage-kcfg-adm(){
echo -e "\033[33mUsage:\033[0m ezctl kcfg-adm "
cat <:
-A to add a client kubeconfig with a newly created user
-D to delete a client kubeconfig with the existed user
-L to list all of the users
-e to set expiry of the user certs in hours (ex. 24h, 8h, 240h)
-t to set a user-type (admin or view)
-u to set a user-name prefix
examples: ./ezctl kcfg-adm test-k8s -L
./ezctl kcfg-adm default -A -e 240h -t admin -u jack
./ezctl kcfg-adm default -D -u jim-202101162141
EOF
}
function usage-setup(){
echo -e "\033[33mUsage:\033[0m ezctl setup "
cat < /dev/null 2>&1 || { logger debug "disable registry mirrors"; registryMirror=false; }
sed -i -e "s/__k8s_ver__/$k8sVer/g" \
-e "s/__flannel__/$flannelVer/g" \
-e "s/__calico__/$calicoVer/g" \
-e "s/__cilium__/$ciliumVer/g" \
-e "s/__kube_ovn__/$kubeOvnVer/g" \
-e "s/__kube_router__/$kubeRouterVer/g" \
-e "s/__coredns__/$corednsVer/g" \
-e "s/__pause__/$pauseVer/g" \
-e "s/__dns_node_cache__/$dnsNodeCacheVer/g" \
-e "s/__dashboard__/$dashboardVer/g" \
-e "s/__local_path_provisioner__/$localpathProvisionerVer/g" \
-e "s/__nfs_provisioner__/$nfsProvisionerVer/g" \
-e "s/__openebs_ver__/$openebsVer/g" \
-e "s/__prom_chart__/$promChartVer/g" \
-e "s/__minio_chart__/$minioOperatorVer/g" \
-e "s/__kubeblocks_ver__/$kubeblocksVer/g" \
-e "s/__ingress_nginx_ver__/$ingressNginxVer/g" \
-e "s/__harbor__/$HARBOR_VER/g" \
-e "s/^ENABLE_MIRROR_REGISTRY.*$/ENABLE_MIRROR_REGISTRY: $registryMirror/g" \
-e "s/__metrics__/$metricsVer/g" "clusters/$1/config.yml"
logger debug "cluster $1: files successfully created."
logger info "next steps 1: to config '$BASE/clusters/$1/hosts'"
logger info "next steps 2: to config '$BASE/clusters/$1/config.yml'"
}
function setup() {
[[ -d "clusters/$1" ]] || { logger error "invalid config, run 'ezctl new $1' first"; return 1; }
[[ -f "bin/kube-apiserver" ]] || { logger error "no binaries founded, run 'ezdown -D' fist"; return 1; }
# for extending usage
EXTRA_ARGS=$(echo "$*"|sed "s/$1 $2//g"|sed "s/^ *//g")
PLAY_BOOK="dummy.yml"
case "$2" in
(01|prepare)
PLAY_BOOK="01.prepare.yml"
;;
(02|etcd)
PLAY_BOOK="02.etcd.yml"
;;
(03|container-runtime)
PLAY_BOOK="03.runtime.yml"
;;
(04|kube-master)
PLAY_BOOK="04.kube-master.yml"
;;
(05|kube-node)
PLAY_BOOK="05.kube-node.yml"
;;
(06|network)
PLAY_BOOK="06.network.yml"
;;
(07|cluster-addon)
PLAY_BOOK="07.cluster-addon.yml"
;;
(90|all)
PLAY_BOOK="90.setup.yml"
;;
(10|ex-lb)
PLAY_BOOK="10.ex-lb.yml"
;;
(11|harbor)
PLAY_BOOK="11.harbor.yml"
;;
(*)
usage-setup
exit 1
;;
esac
COMMAND="ansible-playbook -i clusters/$1/hosts -e @clusters/$1/config.yml $EXTRA_ARGS playbooks/$PLAY_BOOK"
echo "$COMMAND"
k8s_ver=$(bin/kube-apiserver --version|cut -d' ' -f2)
etcd_ver=v$(bin/etcd --version|grep 'etcd Version'|cut -d' ' -f3)
network_cni=$(grep CLUSTER_NETWORK "clusters/$1/hosts"|cut -d'"' -f2|sed 's/-//g')
network_cni_ver=$(grep -i "${network_cni}Ver" ezdown|cut -d'=' -f2|head -n1)
cat < /dev/null 2>&1 || { logger error "md5sum not found"; return 1; }
CLUSTERS=$(cd clusters && echo -- *)
CFG_MD5=$(sed '/server/d' ~/.kube/config|md5sum|cut -d' ' -f1)
cd "$BASE"
logger info "list of managed clusters:"
i=1; for c in $CLUSTERS;
do
if [[ -f "clusters/$c/kubectl.kubeconfig" ]];then
c_md5=$(sed '/server/d' "clusters/$c/kubectl.kubeconfig"|md5sum|cut -d' ' -f1)
if [[ "$c_md5" = "$CFG_MD5" ]];then
echo -e "==> cluster $i:\t$c (\033[32mcurrent\033[0m)"
else
echo -e "==> cluster $i:\t$c"
fi
((i++))
fi
done
}
function checkout() {
[[ -d "clusters/$1" ]] || { logger error "invalid config, run 'ezctl new $1' first"; return 1; }
[[ -f "clusters/$1/kubectl.kubeconfig" ]] || { logger error "invalid kubeconfig, run 'ezctl setup $1' first"; return 1; }
logger info "set default kubeconfig: cluster $1 (\033[32mcurrent\033[0m)"
/bin/cp -f "clusters/$1/kubectl.kubeconfig" ~/.kube/config
}
### in-cluster operation functions ##############################
function add-node() {
# check new node's address regexp
[[ $2 =~ ^(2(5[0-5]{1}|[0-4][0-9]{1})|[0-1]?[0-9]{1,2})(\.(2(5[0-5]{1}|[0-4][0-9]{1})|[0-1]?[0-9]{1,2})){3}$ ]] || { logger error "Invalid ip add:$2"; return 1; }
# check if the new node already exsited
sed -n '/^\[kube_master/,/^\[harbor/p' "$BASE/clusters/$1/hosts"|grep -E "^$2$|^$2 " && { logger error "node $2 already existed in $BASE/clusters/$1/hosts"; return 2; }
logger info "add $2 into 'kube_node' group"
NODE_INFO="${@:2}"
sed -i "/\[kube_node/a $NODE_INFO" "$BASE/clusters/$1/hosts"
logger info "start to add a work node:$2 into cluster:$1"
ansible-playbook -i "$BASE/clusters/$1/hosts" "$BASE/playbooks/22.addnode.yml" -e "NODE_TO_ADD=$2" -e "@clusters/$1/config.yml"
}
function add-master() {
# check new master's address regexp
[[ $2 =~ ^(2(5[0-5]{1}|[0-4][0-9]{1})|[0-1]?[0-9]{1,2})(\.(2(5[0-5]{1}|[0-4][0-9]{1})|[0-1]?[0-9]{1,2})){3}$ ]] || { logger error "Invalid ip add:$2"; return 1; }
# check if the new master already exsited
sed -n '/^\[kube_master/,/^\[kube_node/p' "$BASE/clusters/$1/hosts"|grep -E "^$2$|^$2 " && { logger error "master $2 already existed!"; return 2; }
logger info "add $2 into 'kube_master' group"
MASTER_INFO="${@:2}"
sed -i "/\[kube_master/a $MASTER_INFO" "$BASE/clusters/$1/hosts"
logger info "start to add a master node:$2 into cluster:$1"
ansible-playbook -i "$BASE/clusters/$1/hosts" "$BASE/playbooks/23.addmaster.yml" -e "NODE_TO_ADD=$2" -e "@clusters/$1/config.yml"
logger info "re-setting /etc/hosts for all nodes"
ansible-playbook -i "$BASE/clusters/$1/hosts" "$BASE/playbooks/90.setup.yml" -t set_hosts -e "@clusters/$1/config.yml"
logger info "reconfigure and restart 'kube-lb' service"
ansible-playbook -i "$BASE/clusters/$1/hosts" "$BASE/playbooks/90.setup.yml" -t restart_kube-lb -e "@clusters/$1/config.yml"
logger info "reconfigure and restart 'ex-lb' service"
ansible-playbook -i "$BASE/clusters/$1/hosts" "$BASE/playbooks/10.ex-lb.yml" -t restart_lb -e "@clusters/$1/config.yml"
}
function add-etcd() {
# check new node's address regexp
[[ $2 =~ ^(2(5[0-5]{1}|[0-4][0-9]{1})|[0-1]?[0-9]{1,2})(\.(2(5[0-5]{1}|[0-4][0-9]{1})|[0-1]?[0-9]{1,2})){3}$ ]] || { logger error "Invalid ip add:$2"; return 1; }
# check if the new node already exsited
sed -n '/^\[etcd/,/^\[kube_master/p' "$BASE/clusters/$1/hosts"|grep -E "^$2$|^$2 " && { logger error "etcd $2 already existed!"; return 2; }
logger info "add $2 into 'etcd' group"
ETCD_INFO="${@:2}"
sed -i "/\[etcd/a $ETCD_INFO" "$BASE/clusters/$1/hosts"
logger info "start to add a etcd node:$2 into cluster:$1"
ansible-playbook -i "$BASE/clusters/$1/hosts" "$BASE/playbooks/21.addetcd.yml" -e "NODE_TO_ADD=$2" -e "@clusters/$1/config.yml"
logger info "reconfig &restart the etcd cluster"
ansible-playbook -i "$BASE/clusters/$1/hosts" "$BASE/playbooks/02.etcd.yml" -t restart_etcd -e "@clusters/$1/config.yml"
logger info "restart apiservers to use the new etcd cluster"
ansible-playbook -i "$BASE/clusters/$1/hosts" "$BASE/playbooks/04.kube-master.yml" -t restart_master -e "@clusters/$1/config.yml"
}
function del-etcd() {
# check node's address regexp
[[ $2 =~ ^(2(5[0-5]{1}|[0-4][0-9]{1})|[0-1]?[0-9]{1,2})(\.(2(5[0-5]{1}|[0-4][0-9]{1})|[0-1]?[0-9]{1,2})){3}$ ]] || { logger error "Invalid ip add:$2"; return 1; }
# check if the deleting node exsited
sed -n '/^\[etcd/,/^\[kube_master/p' "$BASE/clusters/$1/hosts"|grep -E "^$2$|^$2 " || { logger error "etcd $2 not existed!"; return 2; }
logger warn "start to delete the etcd node:$2 from cluster:$1"
ansible-playbook -i "$BASE/clusters/$1/hosts" "$BASE/playbooks/31.deletcd.yml" -e "ETCD_TO_DEL=$2" -e "CLUSTER=$1" -e "@clusters/$1/config.yml"
logger info "reconfig &restart the etcd cluster"
ansible-playbook -i "$BASE/clusters/$1/hosts" "$BASE/playbooks/02.etcd.yml" -t restart_etcd -e "@clusters/$1/config.yml"
logger info "restart apiservers to use the new etcd cluster"
ansible-playbook -i "$BASE/clusters/$1/hosts" "$BASE/playbooks/04.kube-master.yml" -t restart_master -e "@clusters/$1/config.yml"
}
function del-node() {
# check node's address regexp
[[ $2 =~ ^(2(5[0-5]{1}|[0-4][0-9]{1})|[0-1]?[0-9]{1,2})(\.(2(5[0-5]{1}|[0-4][0-9]{1})|[0-1]?[0-9]{1,2})){3}$ ]] || { logger error "Invalid ip add:$2"; return 2; }
# check if the deleting node exsited
sed -n '/^\[kube_master/,/^\[harbor/p' "$BASE/clusters/$1/hosts"|grep -E "^$2$|^$2 " || { logger error "node $2 not existed in $BASE/clusters/$1/hosts"; return 2; }
logger warn "start to delete the node:$2 from cluster:$1"
ansible-playbook -i "$BASE/clusters/$1/hosts" "$BASE/playbooks/32.delnode.yml" -e "NODE_TO_DEL=$2" -e "CLUSTER=$1" -e "@clusters/$1/config.yml"
}
function del-master() {
# check node's address regexp
[[ $2 =~ ^(2(5[0-5]{1}|[0-4][0-9]{1})|[0-1]?[0-9]{1,2})(\.(2(5[0-5]{1}|[0-4][0-9]{1})|[0-1]?[0-9]{1,2})){3}$ ]] || { logger error "Invalid ip add:$2"; return 2; }
# check if the deleting master exsited
sed -n '/^\[kube_master/,/^\[kube_node/p' "$BASE/clusters/$1/hosts"|grep -E "^$2$|^$2 " || { logger error "master $2 not existed!"; return 2; }
NODE_NAME=$(bin/kubectl --kubeconfig="clusters/$1/kubectl.kubeconfig" get node -owide|grep " $2 "|awk '{print $1}')
logger warn "start to delete the master:$2 from cluster:$1"
ansible-playbook -i "$BASE/clusters/$1/hosts" "$BASE/playbooks/33.delmaster.yml" -e "NODE_TO_DEL=$2" -e "CLUSTER=$1" -e "@clusters/$1/config.yml"
logger info "reconfig kubeconfig in ansible manage node"
ansible-playbook -i "$BASE/clusters/$1/hosts" "$BASE/roles/deploy/deploy.yml" -t create_kctl_cfg -e "@clusters/$1/config.yml"
logger info "reconfigure and restart 'kube-lb' service"
ansible-playbook -i "$BASE/clusters/$1/hosts" "$BASE/playbooks/90.setup.yml" -t restart_kube-lb -e "@clusters/$1/config.yml"
logger info "reconfigure and restart 'ex-lb' service"
ansible-playbook -i "$BASE/clusters/$1/hosts" "$BASE/playbooks/10.ex-lb.yml" -t restart_lb -e "@clusters/$1/config.yml"
logger info "delete the master-node: $NODE_NAME"
bin/kubectl --kubeconfig="clusters/$1/kubectl.kubeconfig" delete node "$NODE_NAME"
}
function start-aio(){
set +u
# Check ENV 'HOST_IP', exists if the CMD 'ezctl' running in a docker container
if [[ -z $HOST_IP ]];then
# ezctl runs in a host machine, get host's ip
HOST_IF=$(ip route|grep default|head -n1|cut -d' ' -f5)
HOST_IP=$(ip a|grep "$HOST_IF$"|head -n1|awk '{print $2}'|cut -d'/' -f1)
fi
set -u
logger info "get local host ipadd: $HOST_IP"
# allow ssh login using key locally
if [[ ! -e /root/.ssh/id_rsa ]]; then
logger debug "generate ssh key pair"
ssh-keygen -t rsa -b 2048 -N '' -f /root/.ssh/id_rsa > /dev/null
cat /root/.ssh/id_rsa.pub >> /root/.ssh/authorized_keys
ssh-keyscan -t ecdsa -H "$HOST_IP" >> /root/.ssh/known_hosts
fi
new default
/bin/cp -f example/hosts.allinone "clusters/default/hosts"
sed -i "s/_cluster_name_/default/g" "clusters/default/hosts"
sed -i "s/192.168.1.1/$HOST_IP/g" "clusters/default/hosts"
setup default all
}
### Extra functions #############################################
function renew-ca() {
[[ -d "clusters/$1" ]] || { logger error "invalid cluster, run 'ezctl new $1' first"; return 1; }
logger warn "WARNNING: this script should be used with greate caution"
logger warn "WARNNING: it will recreate CA certs and all of the others certs used in the cluster"
COMMAND="ansible-playbook -i clusters/$1/hosts -e @clusters/$1/config.yml -e CHANGE_CA=true playbooks/96.update-certs.yml -t force_change_certs"
echo "$COMMAND"
logger info "cluster:$1 process begins in 5s, press any key to abort:\n"
! (read -r -t5 -n1) || { logger warn "process abort"; return 1; }
${COMMAND} || return 1
}
EXPIRY="4800h" # default cert will expire in 200 days
USER_TYPE="admin" # admin/view, admin=clusterrole:cluster-admin view=clusterrole:view
USER_NAME="user"
function kcfg-adm() {
OPTIND=2
ACTION=""
while getopts "ADLe:t:u:" OPTION; do
case $OPTION in
A)
ACTION="add-kcfg $1"
;;
D)
ACTION="del-kcfg $1"
;;
L)
ACTION="list-kcfg $1"
;;
e)
EXPIRY="$OPTARG"
[[ $OPTARG =~ ^[1-9][0-9]*h$ ]] || { logger error "'-e' must be set like '2h, 5h, 50000h, ...'"; exit 1; }
;;
t)
USER_TYPE="$OPTARG"
[[ $OPTARG =~ ^(admin|view)$ ]] || { logger error "'-t' can only be set as 'admin' or 'view'"; exit 1; }
;;
u)
USER_NAME="$OPTARG"
;;
?)
help-info kcfg-adm
return 1
;;
esac
done
[[ "$ACTION" == "" ]] && { logger error "illegal option"; help-info kcfg-adm; exit 1; }
logger info "$ACTION"
${ACTION} || { logger error "$ACTION fail"; return 1; }
logger info "$ACTION success"
}
function add-kcfg(){
USER_NAME="$USER_NAME"-$(date +'%Y%m%d%H%M')
logger info "add-kcfg in cluster:$1 with user:$USER_NAME"
ansible-playbook -i "clusters/$1/hosts" -e "@clusters/$1/config.yml" -e "CUSTOM_EXPIRY=$EXPIRY" \
-e "USER_TYPE=$USER_TYPE" -e "USER_NAME=$USER_NAME" -e "ADD_KCFG=true" \
-t add-kcfg "roles/deploy/deploy.yml"
}
function del-kcfg(){
logger info "del-kcfg in cluster:$1 with user:$USER_NAME"
CRB=$(bin/kubectl --kubeconfig="clusters/$1/kubectl.kubeconfig" get clusterrolebindings -ojsonpath="{.items[?(@.subjects[0].name == '$USER_NAME')].metadata.name}") && \
bin/kubectl --kubeconfig="clusters/$1/kubectl.kubeconfig" delete clusterrolebindings "$CRB" && \
/bin/rm -f "clusters/$1/ssl/users/$USER_NAME"*
}
function list-kcfg(){
logger info "list-kcfg in cluster:$1"
ADMINS=$(bin/kubectl --kubeconfig="clusters/$1/kubectl.kubeconfig" get clusterrolebindings -ojsonpath='{.items[?(@.roleRef.name == "cluster-admin")].subjects[*].name}')
VIEWS=$(bin/kubectl --kubeconfig="clusters/$1/kubectl.kubeconfig" get clusterrolebindings -ojsonpath='{.items[?(@.roleRef.name == "view")].subjects[*].name}')
ALL=$(bin/kubectl --kubeconfig="clusters/$1/kubectl.kubeconfig" get clusterrolebindings -ojsonpath='{.items[*].subjects[*].name}')
printf "\n%-30s %-15s %-20s\n" USER TYPE "EXPIRY(+8h if in Asia/Shanghai)"
echo "---------------------------------------------------------------------------------"
for u in $ADMINS; do
if [[ $u =~ ^.*-[0-9]{12}$ ]];then
t=$(bin/cfssl-certinfo -cert "clusters/$1/ssl/users/$u.pem"|grep not_after|awk '{print $2}'|sed 's/"//g'|sed 's/,//g')
printf "%-30s %-15s %-20s\n" "$u" cluster-admin "$t"
fi
done;
for u in $VIEWS; do
if [[ $u =~ ^.*-[0-9]{12}$ ]];then
t=$(bin/cfssl-certinfo -cert "clusters/$1/ssl/users/$u.pem"|grep not_after|awk '{print $2}'|sed 's/"//g'|sed 's/,//g')
printf "%-30s %-15s %-20s\n" "$u" view "$t"
fi
done;
for u in $ALL; do
if [[ $u =~ ^.*-[0-9]{12}$ ]];then
[[ $ADMINS == *$u* ]] || [[ $VIEWS == *$u* ]] || {
t=$(bin/cfssl-certinfo -cert "clusters/$1/ssl/users/$u.pem"|grep not_after|awk '{print $2}'|sed 's/"//g'|sed 's/,//g')
printf "%-30s %-15s %-20s\n" "$u" unknown "$t"
}
fi
done;
echo ""
}
### Main Lines ##################################################
function main() {
BASE="/etc/kubeasz"
[[ -d "$BASE" ]] || { logger error "invalid dir:$BASE, try: 'ezdown -D'"; exit 1; }
cd "$BASE"
# check bash shell
readlink /proc/$$/exe|grep -q "bash" || { logger error "you should use bash shell only"; exit 1; }
# check 'ansible' executable
which ansible > /dev/null 2>&1 || { logger error "need 'ansible', try: 'pip install ansible'"; usage; exit 1; }
[ "$#" -gt 0 ] || { usage >&2; exit 2; }
case "$1" in
### in-cluster operations #####################
(add-etcd)
[ "$#" -gt 2 ] || { usage >&2; exit 2; }
add-etcd "${@:2}"
;;
(add-master)
[ "$#" -gt 2 ] || { usage >&2; exit 2; }
add-master "${@:2}"
;;
(add-node)
[ "$#" -gt 2 ] || { usage >&2; exit 2; }
add-node "${@:2}"
;;
(del-etcd)
[ "$#" -eq 3 ] || { usage >&2; exit 2; }
del-etcd "$2" "$3"
;;
(del-master)
[ "$#" -eq 3 ] || { usage >&2; exit 2; }
del-master "$2" "$3"
;;
(del-node)
[ "$#" -eq 3 ] || { usage >&2; exit 2; }
del-node "$2" "$3"
;;
### cluster-wide operations #######################
(checkout)
[ "$#" -eq 2 ] || { usage >&2; exit 2; }
checkout "$2"
;;
(list)
[ "$#" -eq 1 ] || { usage >&2; exit 2; }
list
;;
(new)
[ "$#" -eq 2 ] || { usage >&2; exit 2; }
new "$2"
;;
(setup)
[ "$#" -ge 3 ] || { usage-setup >&2; exit 2; }
setup "${@:2}"
;;
(start)
[ "$#" -eq 2 ] || { usage >&2; exit 2; }
cmd "$2" start
;;
(stop)
[ "$#" -eq 2 ] || { usage >&2; exit 2; }
cmd "$2" stop
;;
(upgrade)
[ "$#" -eq 2 ] || { usage >&2; exit 2; }
cmd "$2" upgrade
;;
(backup)
[ "$#" -eq 2 ] || { usage >&2; exit 2; }
cmd "$2" backup
;;
(restore)
[ "$#" -eq 2 ] || { usage >&2; exit 2; }
cmd "$2" restore
;;
(destroy)
[ "$#" -eq 2 ] || { usage >&2; exit 2; }
cmd "$2" destroy
;;
(start-aio)
[ "$#" -eq 1 ] || { usage >&2; exit 2; }
start-aio
;;
### extra operations ##############################
(kca-renew)
[ "$#" -eq 2 ] || { usage >&2; exit 2; }
renew-ca "$2"
;;
(kcfg-adm)
[ "$#" -gt 2 ] || { usage-kcfg-adm >&2; exit 2; }
kcfg-adm "${@:2}"
;;
(help)
[ "$#" -gt 1 ] || { usage >&2; exit 2; }
help-info "$2"
exit 0
;;
(*)
usage
exit 0
;;
esac
}
main "$@"
================================================
FILE: ezdown
================================================
#!/bin/bash
#--------------------------------------------------
# This script is used for:
# 1. to download the scripts/binaries/images needed for installing a k8s cluster with kubeasz
# 2. to run kubeasz in a container (recommended)
# @author: gjmzj
# @usage: ./ezdown
# @repo: https://github.com/easzlab/kubeasz
#--------------------------------------------------
# shellcheck disable=SC2155
set -o nounset
set -o errexit
set -o pipefail
#set -o xtrace
# default settings, can be overridden by cmd line options, see usage
DOCKER_VER=28.5.2
KUBEASZ_VER=3.6.8
K8S_BIN_VER=v1.34.3
# https://github.com/easzlab/dockerfile-kubeasz-ext-bin
EXT_BIN_VER=1.13.3
# https://github.com/easzlab/dockerfile-kubeasz-sys-pkg
SYS_PKG_VER=1.0.4
HARBOR_VER=v2.12.4
REGISTRY_MIRROR=docker.1ms.run
# images downloaded by default(with 'ezdown -D')
# https://github.com/projectcalico/calico
calicoVer=v3.28.4
# https://github.com/coredns/coredns
corednsVer=1.12.4
# https://kubernetes.io/docs/tasks/administer-cluster/nodelocaldns/
dnsNodeCacheVer=1.26.4
# https://github.com/kubernetes-sigs/metrics-server
metricsVer=v0.8.0
pauseVer=3.10
# images not downloaded by default(only download with 'ezdown -X ***')
# https://github.com/cilium/cilium
# https://docs.cilium.io/en/stable/installation/k8s-install-helm/
ciliumVer=1.17.4
# https://github.com/flannel-io/flannel
flannelVer=v0.27.3
# https://github.com/cloudnativelabs/kube-router
kubeRouterVer=v1.5.4
# https://github.com/kubeovn/kube-ovn
kubeOvnVer=v1.11.5
# https://github.com/kubernetes/dashboard
dashboardVer=7.14.0
# https://github.com/rancher/local-path-provisioner
localpathProvisionerVer=v0.0.31
# https://github.com/kubernetes-sigs/nfs-subdir-external-provisioner
nfsProvisionerVer=v4.0.2
#https://github.com/prometheus-community/helm-charts/tree/main/charts/kube-prometheus-stack
promChartVer=75.7.0
#https://kubeblocks.io/docs/release-1_0/user_docs/overview/introduction
kubeblocksVer=1.0.1
#https://min.io/docs/minio/kubernetes/upstream/operations/install-deploy-manage/deploy-operator-helm.html
minioOperatorVer=7.1.1
# https://openebs.io/docs/quickstart-guide/installation
openebsVer=4.3.2
# https://kubernetes.github.io/ingress-nginx/deploy/
ingressNginxVer=4.13.0
function usage() {
echo -e "\033[33mUsage:\033[0m ezdown [options] [args]"
cat < download system packages of the OS (ubuntu_22,debian_11,...)
-R download Registry(harbor) offline installer
-S start kubeasz in a container
-X download extra images
-d set docker-ce version, default "$DOCKER_VER"
-e set kubeasz-ext-bin version, default "$EXT_BIN_VER"
-k set kubeasz-k8s-bin version, default "$K8S_BIN_VER"
-m set docker registry mirrors, default "docker.1ms.run"
-z set kubeasz version, default "$KUBEASZ_VER"
EOF
}
function usage-down-sys-pkg(){
echo -e "\033[33mUsage:\033[0m ezdown -P "
cat <"
cat < /etc/systemd/system/docker.service << EOF
[Unit]
Description=Docker Application Container Engine
[Service]
Environment="PATH=/opt/kube/bin/docker-bin:/bin:/sbin:/usr/bin:/usr/sbin"
ExecStartPre=/bin/sh -c 'groupadd docker > /dev/null 2>&1 || echo ""'
ExecStart=/opt/kube/bin/docker-bin/dockerd
#ExecStartPost=/sbin/iptables -I FORWARD -s 0.0.0.0/0 -j ACCEPT
ExecReload=/bin/kill -s HUP \$MAINPID
Restart=on-failure
RestartSec=5
LimitNOFILE=infinity
LimitNPROC=infinity
LimitCORE=infinity
Delegate=yes
KillMode=process
[Install]
WantedBy=multi-user.target
EOF
# configuration for dockerd
mkdir -p /etc/docker
DOCKER_VER_MAIN=$(echo "$DOCKER_VER"|cut -d. -f1)
CGROUP_DRIVER="cgroupfs"
((DOCKER_VER_MAIN>=20)) && CGROUP_DRIVER="systemd"
logger debug "generate docker config: /etc/docker/daemon.json"
if [ -n "$REGISTRY_MIRROR" ];then
logger debug "prepare register mirror"
cat > /etc/docker/daemon.json << EOF
{
"exec-opts": ["native.cgroupdriver=$CGROUP_DRIVER"],
"registry-mirrors": [
"https://docker.1ms.run",
"https://hub1.nat.tf",
"https://docker.1panel.live",
"https://hub.rat.dev",
"https://docker.amingg.com"
],
"insecure-registries": ["easzlab.io.local:5000"],
"max-concurrent-downloads": 10,
"log-driver": "json-file",
"log-level": "warn",
"log-opts": {
"max-size": "10m",
"max-file": "3"
},
"data-root": "/var/lib/docker"
}
EOF
else
logger debug "standard config without registry mirrors"
cat > /etc/docker/daemon.json << EOF
{
"exec-opts": ["native.cgroupdriver=$CGROUP_DRIVER"],
"insecure-registries": ["easzlab.io.local:5000"],
"max-concurrent-downloads": 10,
"log-driver": "json-file",
"log-level": "warn",
"log-opts": {
"max-size": "10m",
"max-file": "3"
},
"data-root": "/var/lib/docker"
}
EOF
fi
if [[ -f /etc/selinux/config ]]; then
logger debug "turn off selinux"
getenforce|grep Disabled || setenforce 0
sed -i 's/^SELINUX=.*$/SELINUX=disabled/g' /etc/selinux/config
fi
logger debug "enable and start docker"
systemctl enable docker
systemctl daemon-reload && systemctl restart docker && sleep 3
}
function get_kubeasz() {
# check if kubeasz already existed
[[ -d "$BASE/roles/kube-node" ]] && { logger warn "kubeasz already existed"; return 0; }
if [[ ! -f "$imageDir/kubeasz_$KUBEASZ_VER.tar" ]];then
logger info "downloading kubeasz: $KUBEASZ_VER"
docker pull "easzlab/kubeasz:$KUBEASZ_VER" && \
docker save -o "$imageDir/kubeasz_$KUBEASZ_VER.tar" "easzlab/kubeasz:$KUBEASZ_VER" || \
{ logger error "download failed!"; return 1; }
else
docker load -i "$imageDir/kubeasz_$KUBEASZ_VER.tar"
fi
docker ps -a |grep -q temp_easz && { logger debug "remove existing container"; docker rm -f temp_easz; }
logger debug " run a temporary container"
docker run -d --name temp_easz easzlab/kubeasz:${KUBEASZ_VER} || { logger error "failed."; exit 1; }
[[ -d "$BASE/down" ]] && /bin/mv -f "$BASE/down" /tmp
[[ -d "$BASE/bin" ]] && /bin/mv -f "$BASE/bin" /tmp
rm -rf "$BASE" && \
logger debug "cp kubeasz code from the temporary container" && \
docker cp "temp_easz:$BASE" "$BASE" && \
logger debug "stop&remove temporary container" && \
docker rm -f temp_easz
mkdir -p "$BASE/bin" "$BASE/down"
[[ -d "/tmp/down" ]] && /bin/mv -f /tmp/down/* "$BASE/down"
[[ -d "/tmp/bin" ]] && /bin/mv -f /tmp/bin/* "$BASE/bin"
return 0
}
function get_k8s_bin() {
[[ -f "$BASE/bin/kubelet" ]] && { logger warn "kubernetes binaries existed"; return 0; }
logger info "downloading kubernetes: $K8S_BIN_VER binaries"
docker run --rm -v "$BASE/bin":/tmp/out easzlab/kubeasz-k8s-bin:"$K8S_BIN_VER" \
sh -c "cp -f /k8s/* /tmp/out/"
}
function get_ext_bin() {
[[ -f "$BASE/bin/etcdctl" ]] && { logger warn "extra binaries existed"; return 0; }
logger info "downloading extral binaries kubeasz-ext-bin:$EXT_BIN_VER"
docker run --rm -v "$BASE/bin":/tmp/out "easzlab/kubeasz-ext-bin:$EXT_BIN_VER" \
sh -c "cp -rf /extra/* /tmp/out/"
}
function get_sys_pkg() {
[[ -f "$BASE/down/packages/$1.tgz" ]] && { logger warn "system packages for $1 existed"; return 0; }
docker run --rm -v "$BASE/down":/tmp/out "easzlab/kubeasz-sys-pkg:$SYS_PKG_VER" \
sh -c "cp -r /packages /tmp/out/"
}
function get_harbor_offline_pkg() {
[[ -f "$BASE/down/harbor-offline-installer-$HARBOR_VER.tgz" ]] && { logger warn "harbor-offline existed"; return 0; }
if [[ "$ARCH" == aarch64 ]];then
docker run --rm -v "$BASE/down":/tmp/out "easzlab/harbor-offline:${HARBOR_VER}-aarch64" \
sh -c "cp /harbor-offline-installer-$HARBOR_VER.tgz /tmp/out/"
else
docker run --rm -v "$BASE/down":/tmp/out "easzlab/harbor-offline:$HARBOR_VER" \
sh -c "cp /harbor-offline-installer-$HARBOR_VER.tgz /tmp/out/"
fi
}
function get_default_images() {
logger info "download default images, then upload to the local registry"
IMAGES=(\
"calico/cni:$calicoVer" \
"calico/kube-controllers:$calicoVer" \
"calico/node:$calicoVer" \
"coredns/coredns:$corednsVer" \
"easzlab/k8s-dns-node-cache:$dnsNodeCacheVer" \
"easzlab/metrics-server:$metricsVer" \
"easzlab/pause:$pauseVer" \
)
down_and_save_images
}
function get_extra_images() {
logger info "download images for $1, then upload to the local registry"
case "$1" in
argocd)
IMAGES=(\
"quay.io/argoproj/argocd:v3.2.5" \
"ghcr.io/dexidp/dex:v2.44.0" \
"ecr-public.aws.com/docker/library/redis:8.2.2-alpine" \
)
down_and_save_images argocd
;;
cilium)
IMAGES=(\
"cilium/cilium:v$ciliumVer" \
"cilium/operator-generic:v$ciliumVer" \
"cilium/hubble-relay:v$ciliumVer" \
"cilium/hubble-ui-backend:v0.13.2" \
"cilium/hubble-ui:v0.13.2" \
)
down_and_save_images cilium
;;
flannel)
IMAGES=(\
"ghcr.io/flannel-io/flannel:v0.27.3" \
"ghcr.io/flannel-io/flannel-cni-plugin:v1.7.1-flannel1" \
)
down_and_save_images flannel
;;
ingress-nginx)
IMAGES=(\
"easzlab/ingress-nginx-controller:v1.13.0" \
"easzlab/kube-webhook-certgen:v1.6.0" \
)
down_and_save_images
;;
dashboard)
IMAGES=(\
"kubernetesui/dashboard-api:1.14.0" \
"kubernetesui/dashboard-auth:1.4.0" \
"kubernetesui/dashboard-metrics-scraper:1.2.2" \
"kubernetesui/dashboard-web:1.7.0" \
"kong:3.9" \
)
down_and_save_images kubernetesui
;;
kubeblocks)
IMAGES=(\
"easzlab/snapshot-controller:v8.3.0" \
"apecloud-registry.cn-zhangjiakou.cr.aliyuncs.com/apecloud/kubeblocks-charts:${kubeblocksVer}" \
"apecloud-registry.cn-zhangjiakou.cr.aliyuncs.com/apecloud/kubeblocks:${kubeblocksVer}" \
"apecloud-registry.cn-zhangjiakou.cr.aliyuncs.com/apecloud/kubeblocks-tools:1.0.0" \
"apecloud-registry.cn-zhangjiakou.cr.aliyuncs.com/apecloud/kubeblocks-tools:${kubeblocksVer}" \
"apecloud-registry.cn-zhangjiakou.cr.aliyuncs.com/apecloud/kubeblocks-dataprotection:${kubeblocksVer}" \
"apecloud-registry.cn-zhangjiakou.cr.aliyuncs.com/apecloud/datasafed:0.2.1" \
)
down_and_save_images apecloud
;;
kb-addon-mysql)
IMAGES=(\
"apecloud/mysql_audit_log:8.0.33" \
"apecloud/xtrabackup:8.0" \
"apecloud/jemalloc:5.3.0" \
"apecloud/syncer:0.5.0" \
"apecloud/mysql:8.0.39" \
"apecloud/mysqld-exporter:0.15.1" \
"apecloud/proxysql:2.4.4" \
"apecloud/percona-xtrabackup:8.0" \
"apecloud/wal-g-mysql:2.0.1-1-ubuntu" \
)
down_and_save_images apecloud
;;
kb-addon-pg)
IMAGES=(\
"apecloud/spilo:16.4.0" \
"apecloud/spilo-init:0.1" \
"apecloud/dbctl:0.2.0" \
"apecloud/pgbouncer:1.19.0" \
"apecloud/postgres-exporter:v0.15.0" \
)
down_and_save_images apecloud
;;
kb-addon-redis)
IMAGES=(\
"apecloud/dbctl:0.1.8" \
"apecloud/agamotto:0.1.2-beta.1" \
"apecloud/redis:8.2.1" \
"apecloud/redis-stack-server:7.2.0-v14" \
"apecloud/redis-stack-server:7.2.0-v18" \
)
down_and_save_images apecloud
;;
kb-addon-mongodb)
IMAGES=(\
"apecloud/syncer:0.3.7" \
"apecloud/mongo:5.0.30" \
)
down_and_save_images apecloud
;;
kb-addon-elasticsearch)
IMAGES=(\
"apecloud-registry.cn-zhangjiakou.cr.aliyuncs.com/apecloud/elasticsearch-plugins:0.1.0" \
"apecloud-registry.cn-zhangjiakou.cr.aliyuncs.com/apecloud/elasticsearch:8.8.2" \
"apecloud-registry.cn-zhangjiakou.cr.aliyuncs.com/apecloud/elasticsearch-agent:0.1.0" \
"apecloud-registry.cn-zhangjiakou.cr.aliyuncs.com/apecloud/elasticsearch-exporter:v1.7.0" \
"apecloud-registry.cn-zhangjiakou.cr.aliyuncs.com/apecloud/curl-jq:0.1.0" \
)
down_and_save_images apecloud
;;
kb-addon-clickhouse)
IMAGES=(\
"apecloud-registry.cn-zhangjiakou.cr.aliyuncs.com/apecloud/busybox:1.36" \
"apecloud-registry.cn-zhangjiakou.cr.aliyuncs.com/apecloud/clickhouse:24.8.3-debian-12-r1" \
)
down_and_save_images apecloud
;;
kb-addon-minio)
IMAGES=(\
"apecloud-registry.cn-zhangjiakou.cr.aliyuncs.com/apecloud/minio:RELEASE.2024-06-29T01-20-47Z" \
)
down_and_save_images apecloud
;;
kube-ovn)
IMAGES=(\
"kubeovn/kube-ovn:$kubeOvnVer" \
)
down_and_save_images kubeovn
;;
kube-router)
IMAGES=(\
"cloudnativelabs/kube-router:$kubeRouterVer" \
)
down_and_save_images cloudnativelabs
;;
local-path-provisioner)
IMAGES=(\
"rancher/local-path-provisioner:$localpathProvisionerVer" \
)
down_and_save_images rancher
;;
minio)
IMAGES=(\
"quay.io/minio/operator:v${minioOperatorVer}" \
"quay.io/minio/operator-sidecar:v7.0.1" \
"quay.io/minio/minio:RELEASE.2025-04-08T15-41-24Z" \
)
down_and_save_images minio
;;
nacos)
IMAGES=(\
"nacos/nacos-server:v2.4.3" \
"nacos/nacos-peer-finder-plugin:1.1" \
)
down_and_save_images nacos
;;
network-check)
IMAGES=(\
"easzlab/json-mock:v1.3.0" \
"easzlab/alpine-curl:v7.85.0" \
)
down_and_save_images
;;
nfs-provisioner)
IMAGES=(\
"easzlab/nfs-subdir-external-provisioner:$nfsProvisionerVer" \
)
down_and_save_images
;;
openebs)
IMAGES=(\
"bitnami/kubectl:1.25.15" \
"openebs/provisioner-localpv:4.3.0" \
"openebs/linux-utils:4.2.0" \
"openebs/lvm-driver:1.7.0" \
"easzlab/csi-node-driver-registrar:v2.13.0" \
"easzlab/csi-resizer:v1.11.2" \
"easzlab/csi-snapshotter:v7.0.0" \
"easzlab/csi-provisioner:v5.2.0" \
"easzlab/snapshot-controller:v7.0.0" \
)
down_and_save_images openebs
;;
rocketmq)
IMAGES=(\
"apache/rocketmq-operator:latest" \
"apacherocketmq/rocketmq-broker:4.5.0-alpine-operator-0.3.0" \
"apacherocketmq/rocketmq-nameserver:4.5.0-alpine-operator-0.3.0" \
"apacherocketmq/rocketmq-console:2.0.0" \
)
down_and_save_images rocketmq
;;
prometheus)
IMAGES=(\
"easzlab/kube-state-metrics:v2.16.0" \
"easzlab/kube-webhook-certgen:v1.6.0" \
)
down_and_save_images
IMAGES=(\
"grafana/grafana:12.0.2" \
"quay.io/kiwigrid/k8s-sidecar:1.30.5" \
"quay.io/prometheus-operator/prometheus-config-reloader:v0.83.0" \
"quay.io/prometheus-operator/prometheus-operator:v0.83.0" \
"quay.io/prometheus/alertmanager:v0.28.1" \
"quay.io/prometheus/node-exporter:v1.9.1" \
"quay.io/prometheus/prometheus:v3.4.2" \
)
down_and_save_images prometheus
;;
*)
logger error "invalid option: $1"
usage-down-ext-img
exit 1
;;
esac
}
# 优先下载原始镜像;如果失败,尝试用加速地址下载
function down_and_save_images(){
if [ "$#" -eq 1 ];then
down_and_save_images_orig $1 || down_and_save_images_with_mirror $1
else
down_and_save_images_orig || down_and_save_images_with_mirror
fi
}
# 参数扩展说明:
# ${var%%pattern} - 从**右边**删除**最长匹配**的 pattern 后缀
# ${var%pattern} - 从**右边**删除**最短匹配**的 pattern 后缀
# ${var##pattern} - 从**左边**删除**最长匹配**的 pattern 前缀
# ${var#pattern} - 从**左边**删除**最短匹配**的 pattern 前缀
function down_and_save_images_orig(){
NS="easzlab"
[ "$#" -eq 1 ] && NS="$1"
for item in "${IMAGES[@]}"; do
image_part="${item##*/}"
image_name="${image_part%:*}"
image_tag="${image_part##*:}"
image_file="$imageDir/${image_name}_${image_tag}.tar"
if [[ ! -f "$image_file" ]];then
docker pull "$item" && \
docker save -o "$image_file" "$item" || \
{ logger error "download $item failed!"; return 1; }
else
docker load -i "$image_file"
fi
docker tag "$item" "easzlab.io.local:5000/${NS}/${image_part}"
docker push "easzlab.io.local:5000/${NS}/${image_part}" || \
{ logger error "push easzlab.io.local:5000/${NS}/${image_part} failed!"; return 1; }
done
}
# 尝试使用加速地址下载,比如:alpine:latest 替换成 $REGISTRY_MIRROR/library/alpine:latest 下载
function down_and_save_images_with_mirror(){
[[ "$REGISTRY_MIRROR" == "" ]] && { logger error "no registry mirror set"; return 1; }
NS="easzlab"
[ "$#" -eq 1 ] && NS="$1"
for item in "${IMAGES[@]}"; do
image_part="${item##*/}"
image_name="${image_part%:*}"
image_tag="${image_part##*:}"
image_file="$imageDir/${image_name}_${image_tag}.tar"
item=$(normalize_image "$item")
registry="${item%%/*}"
repository="${item#*/}"
[[ "$registry" == "docker.io" ]] && item="${REGISTRY_MIRROR}/${repository}"
if [[ ! -f "$image_file" ]];then
docker pull "$item" && \
docker save -o "$image_file" "$item" || \
{ logger error "download $item failed!"; return 1; }
else
docker load -i "$image_file"
fi
docker tag "$item" "easzlab.io.local:5000/${NS}/${image_part}"
docker push "easzlab.io.local:5000/${NS}/${image_part}" || \
{ logger error "push easzlab.io.local:5000/${NS}/${image_part} failed!"; return 1; }
done
}
# 将镜像名称转换为标准格式: ${registry}/${repository}:${tag}
# 标准格式规则:
# 1. 如果没有 registry,默认使用 docker.io
# 2. 如果没有 tag,默认使用 latest
# 3. 如果 repository 不包含 /,且 registry 是 docker.io,则添加 library/ 前缀
function normalize_image() {
local image="$1"
local registry=""
local repository=""
local tag=""
# 提取 tag(如果存在)
if [[ "$image" == *":"* ]]; then
tag="${image##*:}"
image="${image%:*}"
else
tag="latest"
fi
# 提取 registry 和 repository
# 判断是否包含 registry(包含域名特征:包含点号或端口号)
if [[ "$image" == *"."* ]] || [[ "$image" == *":"* ]]; then
# 包含 registry
registry="${image%%/*}"
repository="${image#*/}"
else
# 不包含 registry,使用默认的 docker.io
registry="docker.io"
repository="$image"
fi
# 如果 repository 不包含 /,且 registry 是 docker.io,则添加 library/ 前缀
if [[ "$registry" == "docker.io" ]] && [[ "$repository" != *"/"* ]]; then
repository="library/$repository"
fi
# 输出标准格式
echo "${registry}/${repository}:${tag}"
}
function download_all() {
mkdir -p /opt/kube/bin "$BASE/down" "$BASE/bin"
download_docker && \
install_docker && \
get_kubeasz && \
get_k8s_bin && \
get_ext_bin && \
start_local_registry && \
get_default_images
}
function start_local_registry() {
if [[ ! -f "$imageDir/registry-2.tar" ]];then
docker pull "registry:2" && \
docker save -o "$imageDir/registry-2.tar" "registry:2"
fi
docker ps -a --format="{{ .Names }}"|grep local_registry > /dev/null 2>&1 && \
{ logger warn "local_registry is already running"; return 0; }
logger info "start local registry ..."
docker load -i "$imageDir/registry-2.tar" > /dev/null
mkdir -p /opt/kube/registry
docker run -d \
--name local_registry \
--network host \
--restart always \
--volume /opt/kube/registry:/var/lib/registry \
registry:2
sed -i "/easzlab.io.local/d" /etc/hosts
echo "127.0.0.1 easzlab.io.local" >> /etc/hosts
}
function start_kubeasz_docker() {
# create cmd alias in /root/.bashrc
sed -i '/docker exec/d' /root/.bashrc
echo "alias dk='docker exec -it kubeasz' # generated by kubeasz" >> /root/.bashrc
[[ -d "$BASE/roles/kube-node" ]] || { logger error "not initialized. try 'ezdown -D' first."; exit 1; }
docker ps -a --format="{{ .Names }}"|grep kubeasz > /dev/null 2>&1 && \
docker rm -f kubeasz > /dev/null
if [[ ! -f "$imageDir/kubeasz_$KUBEASZ_VER.tar" ]];then
logger info "downloading kubeasz: $KUBEASZ_VER"
docker pull "easzlab/kubeasz:$KUBEASZ_VER" && \
docker save -o "$imageDir/kubeasz_$KUBEASZ_VER.tar" "easzlab/kubeasz:$KUBEASZ_VER"
else
docker load -i "$imageDir/kubeasz_$KUBEASZ_VER.tar"
fi
logger info "try to run kubeasz in a container"
# get host's IP
host_if=$(ip route|grep default|head -n1|cut -d' ' -f5)
host_ip=$(ip a|grep "$host_if$"|head -n1|awk '{print $2}'|cut -d'/' -f1)
logger debug "get host IP: $host_ip"
# allow ssh login using key locally
if [[ ! -e /root/.ssh/id_rsa ]]; then
logger debug "generate ssh key pair"
ssh-keygen -t rsa -b 2048 -N '' -f /root/.ssh/id_rsa > /dev/null
cat /root/.ssh/id_rsa.pub >> /root/.ssh/authorized_keys
ssh-keyscan -t ecdsa -H "$host_ip" >> /root/.ssh/known_hosts
fi
# run kubeasz docker container
docker run --detach \
--env HOST_IP="$host_ip" \
--name kubeasz \
--network host \
--restart always \
--volume "$BASE":"$BASE" \
--volume /root/.kube:/root/.kube \
--volume /root/.ssh:/root/.ssh \
--volume /etc/docker:/etc/docker \
easzlab/kubeasz:${KUBEASZ_VER}
}
### Main Lines ##################################################
function main() {
BASE="/etc/kubeasz"
IMAGES=()
imageDir="$BASE/down"
# check if use bash shell
# readlink /proc/$$/exe|grep -q "bash" || { logger error "you should use bash shell, not sh"; exit 1; }
# check if use with root
# [[ "$EUID" -ne 0 ]] && { logger error "you should run this script as root"; exit 1; }
# get architecture
ARCH=$(uname -m)
[[ "$#" -eq 0 ]] && { usage >&2; exit 1; }
ACTION=""
while getopts "CDP:RSX:d:e:k:m:z:" OPTION; do
case "$OPTION" in
D)
ACTION="download_all"
;;
P)
[[ $OPTARG =~ (ubuntu_[0-9]+|centos_[0-9]+|debian_[0-9]+|fedora_[0-9]+|almalinux_[0-9]+|opensuse_leap_[0-9]+|rocky_[0-9]+) ]] || \
{ usage-down-sys-pkg; exit 1; }
SYS_PKG_VER="${SYS_PKG_VER}_$OPTARG"
ACTION="get_sys_pkg $OPTARG"
;;
R)
ACTION="get_harbor_offline_pkg"
;;
S)
ACTION="start_kubeasz_docker"
;;
X)
ACTION="get_extra_images $OPTARG"
;;
d)
DOCKER_VER="$OPTARG"
;;
e)
EXT_BIN_VER="$OPTARG"
;;
k)
K8S_BIN_VER="$OPTARG"
;;
m)
REGISTRY_MIRROR="$OPTARG"
;;
z)
KUBEASZ_VER="$OPTARG"
;;
?)
usage
exit 1
;;
esac
done
[[ "$ACTION" == "" ]] && { logger error "illegal option"; usage; exit 1; }
# excute cmd "$ACTION"
logger info "Action begin: $ACTION"
${ACTION} || { logger error "Action failed: $ACTION"; return 1; }
logger info "Action successed: $ACTION"
}
main "$@"
================================================
FILE: manifests/deprecated/efk/es-dynamic-pv/es-statefulset.yaml
================================================
# RBAC authn and authz
apiVersion: v1
kind: ServiceAccount
metadata:
name: elasticsearch-logging
namespace: kube-system
labels:
k8s-app: elasticsearch-logging
kubernetes.io/cluster-service: "true"
addonmanager.kubernetes.io/mode: Reconcile
---
kind: ClusterRole
apiVersion: rbac.authorization.k8s.io/v1
metadata:
name: elasticsearch-logging
labels:
k8s-app: elasticsearch-logging
kubernetes.io/cluster-service: "true"
addonmanager.kubernetes.io/mode: Reconcile
rules:
- apiGroups:
- ""
resources:
- "services"
- "namespaces"
- "endpoints"
verbs:
- "get"
---
kind: ClusterRoleBinding
apiVersion: rbac.authorization.k8s.io/v1
metadata:
namespace: kube-system
name: elasticsearch-logging
labels:
k8s-app: elasticsearch-logging
kubernetes.io/cluster-service: "true"
addonmanager.kubernetes.io/mode: Reconcile
subjects:
- kind: ServiceAccount
name: elasticsearch-logging
namespace: kube-system
apiGroup: ""
roleRef:
kind: ClusterRole
name: elasticsearch-logging
apiGroup: ""
---
# Elasticsearch deployment itself
apiVersion: apps/v1
kind: StatefulSet
metadata:
name: elasticsearch-logging
namespace: kube-system
labels:
k8s-app: elasticsearch-logging
version: v6.6.1
kubernetes.io/cluster-service: "true"
addonmanager.kubernetes.io/mode: Reconcile
spec:
serviceName: elasticsearch-logging
replicas: 2
selector:
matchLabels:
k8s-app: elasticsearch-logging
version: v6.6.1
template:
metadata:
labels:
k8s-app: elasticsearch-logging
version: v6.6.1
kubernetes.io/cluster-service: "true"
spec:
serviceAccountName: elasticsearch-logging
containers:
#- image: gcr.io/fluentd-elasticsearch/elasticsearch:v6.6.1
- image: easzlab/elasticsearch:v6.6.1
name: elasticsearch-logging
resources:
# need more cpu upon initialization, therefore burstable class
limits:
cpu: 1000m
requests:
cpu: 100m
ports:
- containerPort: 9200
name: db
protocol: TCP
- containerPort: 9300
name: transport
protocol: TCP
volumeMounts:
- name: elasticsearch-logging
mountPath: /data
env:
- name: "NAMESPACE"
valueFrom:
fieldRef:
fieldPath: metadata.namespace
# Elasticsearch requires vm.max_map_count to be at least 262144.
# If your OS already sets up this number to a higher value, feel free
# to remove this init container.
initContainers:
- image: alpine:3.6
command: ["/sbin/sysctl", "-w", "vm.max_map_count=262144"]
name: elasticsearch-logging-init
securityContext:
privileged: true
volumeClaimTemplates:
- metadata:
name: elasticsearch-logging
spec:
accessModes: [ "ReadWriteMany" ]
storageClassName: "nfs-dynamic-class"
resources:
requests:
storage: 4Gi
================================================
FILE: manifests/deprecated/efk/es-index-rotator/rotator.yaml
================================================
apiVersion: batch/v1beta1
kind: CronJob
metadata:
name: es-index-rotator
namespace: kube-system
spec:
# 每天1点3分执行
schedule: "3 1 */1 * *"
jobTemplate:
spec:
template:
spec:
containers:
- name: es-index-rotator
image: easzlab/es-index-rotator:0.2.1
# 保留最近10天日志
command:
- /bin/rotate.sh
- "10"
- "logstash" # fluented 默认创建的index形如'logstash-2020.01.01'
restartPolicy: OnFailure
concurrencyPolicy: Forbid
successfulJobsHistoryLimit: 2
failedJobsHistoryLimit: 1
================================================
FILE: manifests/deprecated/efk/es-service.yaml
================================================
apiVersion: v1
kind: Service
metadata:
name: elasticsearch-logging
namespace: kube-system
labels:
k8s-app: elasticsearch-logging
kubernetes.io/cluster-service: "true"
addonmanager.kubernetes.io/mode: Reconcile
kubernetes.io/name: "Elasticsearch"
spec:
ports:
- port: 9200
protocol: TCP
targetPort: db
clusterIP: None
selector:
k8s-app: elasticsearch-logging
================================================
FILE: manifests/deprecated/efk/es-static-pv/es-pv0.yaml
================================================
apiVersion: v1
kind: PersistentVolume
metadata:
name: pv-es-0
spec:
capacity:
storage: 4Gi
accessModes:
- ReadWriteMany
volumeMode: Filesystem
persistentVolumeReclaimPolicy: Recycle
storageClassName: "es-storage-class"
nfs:
# 根据实际共享目录修改
path: /share/es0
# 根据实际 nfs服务器地址修改
server: 192.168.1.208
================================================
FILE: manifests/deprecated/efk/es-static-pv/es-pv1.yaml
================================================
apiVersion: v1
kind: PersistentVolume
metadata:
name: pv-es-1
spec:
capacity:
storage: 4Gi
accessModes:
- ReadWriteMany
volumeMode: Filesystem
persistentVolumeReclaimPolicy: Recycle
storageClassName: "es-storage-class"
nfs:
# 根据实际共享目录修改
path: /share/es1
# 根据实际 nfs服务器地址修改
server: 192.168.1.208
================================================
FILE: manifests/deprecated/efk/es-static-pv/es-pv2.yaml
================================================
apiVersion: v1
kind: PersistentVolume
metadata:
name: pv-es-2
spec:
capacity:
storage: 4Gi
accessModes:
- ReadWriteMany
volumeMode: Filesystem
persistentVolumeReclaimPolicy: Recycle
storageClassName: "es-storage-class"
nfs:
# 根据实际共享目录修改
path: /share/es2
# 根据实际 nfs服务器地址修改
server: 192.168.1.208
================================================
FILE: manifests/deprecated/efk/es-static-pv/es-statefulset.yaml
================================================
# RBAC authn and authz
apiVersion: v1
kind: ServiceAccount
metadata:
name: elasticsearch-logging
namespace: kube-system
labels:
k8s-app: elasticsearch-logging
kubernetes.io/cluster-service: "true"
addonmanager.kubernetes.io/mode: Reconcile
---
kind: ClusterRole
apiVersion: rbac.authorization.k8s.io/v1
metadata:
name: elasticsearch-logging
labels:
k8s-app: elasticsearch-logging
kubernetes.io/cluster-service: "true"
addonmanager.kubernetes.io/mode: Reconcile
rules:
- apiGroups:
- ""
resources:
- "services"
- "namespaces"
- "endpoints"
verbs:
- "get"
---
kind: ClusterRoleBinding
apiVersion: rbac.authorization.k8s.io/v1
metadata:
namespace: kube-system
name: elasticsearch-logging
labels:
k8s-app: elasticsearch-logging
kubernetes.io/cluster-service: "true"
addonmanager.kubernetes.io/mode: Reconcile
subjects:
- kind: ServiceAccount
name: elasticsearch-logging
namespace: kube-system
apiGroup: ""
roleRef:
kind: ClusterRole
name: elasticsearch-logging
apiGroup: ""
---
# Elasticsearch deployment itself
apiVersion: apps/v1
kind: StatefulSet
metadata:
name: elasticsearch-logging
namespace: kube-system
labels:
k8s-app: elasticsearch-logging
version: v6.6.1
kubernetes.io/cluster-service: "true"
addonmanager.kubernetes.io/mode: Reconcile
spec:
serviceName: elasticsearch-logging
replicas: 2
selector:
matchLabels:
k8s-app: elasticsearch-logging
version: v6.6.1
template:
metadata:
labels:
k8s-app: elasticsearch-logging
version: v6.6.1
kubernetes.io/cluster-service: "true"
spec:
serviceAccountName: elasticsearch-logging
containers:
#- image: gcr.io/fluentd-elasticsearch/elasticsearch:v6.6.1
- image: easzlab/elasticsearch:v6.6.1
name: elasticsearch-logging
resources:
# need more cpu upon initialization, therefore burstable class
limits:
cpu: 1000m
requests:
cpu: 100m
ports:
- containerPort: 9200
name: db
protocol: TCP
- containerPort: 9300
name: transport
protocol: TCP
volumeMounts:
- name: elasticsearch-logging
mountPath: /data
env:
- name: "NAMESPACE"
valueFrom:
fieldRef:
fieldPath: metadata.namespace
# Elasticsearch requires vm.max_map_count to be at least 262144.
# If your OS already sets up this number to a higher value, feel free
# to remove this init container.
initContainers:
- image: alpine:3.6
command: ["/sbin/sysctl", "-w", "vm.max_map_count=262144"]
name: elasticsearch-logging-init
securityContext:
privileged: true
volumeClaimTemplates:
- metadata:
name: elasticsearch-logging
spec:
accessModes: [ "ReadWriteMany" ]
storageClassName: "es-storage-class"
resources:
requests:
storage: 4Gi
================================================
FILE: manifests/deprecated/efk/es-without-pv/es-statefulset.yaml
================================================
# RBAC authn and authz
apiVersion: v1
kind: ServiceAccount
metadata:
name: elasticsearch-logging
namespace: kube-system
labels:
k8s-app: elasticsearch-logging
kubernetes.io/cluster-service: "true"
addonmanager.kubernetes.io/mode: Reconcile
---
kind: ClusterRole
apiVersion: rbac.authorization.k8s.io/v1
metadata:
name: elasticsearch-logging
labels:
k8s-app: elasticsearch-logging
kubernetes.io/cluster-service: "true"
addonmanager.kubernetes.io/mode: Reconcile
rules:
- apiGroups:
- ""
resources:
- "services"
- "namespaces"
- "endpoints"
verbs:
- "get"
---
kind: ClusterRoleBinding
apiVersion: rbac.authorization.k8s.io/v1
metadata:
namespace: kube-system
name: elasticsearch-logging
labels:
k8s-app: elasticsearch-logging
kubernetes.io/cluster-service: "true"
addonmanager.kubernetes.io/mode: Reconcile
subjects:
- kind: ServiceAccount
name: elasticsearch-logging
namespace: kube-system
apiGroup: ""
roleRef:
kind: ClusterRole
name: elasticsearch-logging
apiGroup: ""
---
# Elasticsearch deployment itself
apiVersion: apps/v1
kind: StatefulSet
metadata:
name: elasticsearch-logging
namespace: kube-system
labels:
k8s-app: elasticsearch-logging
version: v6.6.1
kubernetes.io/cluster-service: "true"
addonmanager.kubernetes.io/mode: Reconcile
spec:
serviceName: elasticsearch-logging
replicas: 2
selector:
matchLabels:
k8s-app: elasticsearch-logging
version: v6.6.1
template:
metadata:
labels:
k8s-app: elasticsearch-logging
version: v6.6.1
kubernetes.io/cluster-service: "true"
spec:
serviceAccountName: elasticsearch-logging
containers:
#- image: gcr.io/fluentd-elasticsearch/elasticsearch:v6.6.1
- image: easzlab/elasticsearch:v6.6.1
name: elasticsearch-logging
resources:
# need more cpu upon initialization, therefore burstable class
limits:
cpu: 1000m
requests:
cpu: 100m
ports:
- containerPort: 9200
name: db
protocol: TCP
- containerPort: 9300
name: transport
protocol: TCP
volumeMounts:
- name: elasticsearch-logging
mountPath: /data
env:
- name: "NAMESPACE"
valueFrom:
fieldRef:
fieldPath: metadata.namespace
volumes:
- name: elasticsearch-logging
emptyDir: {}
# Elasticsearch requires vm.max_map_count to be at least 262144.
# If your OS already sets up this number to a higher value, feel free
# to remove this init container.
initContainers:
- image: alpine:3.6
command: ["/sbin/sysctl", "-w", "vm.max_map_count=262144"]
name: elasticsearch-logging-init
securityContext:
privileged: true
================================================
FILE: manifests/deprecated/efk/fluentd-es-configmap.yaml
================================================
kind: ConfigMap
apiVersion: v1
metadata:
name: fluentd-es-config-v0.2.0
namespace: kube-system
labels:
addonmanager.kubernetes.io/mode: Reconcile
data:
system.conf: |-
root_dir /tmp/fluentd-buffers/
containers.input.conf: |-
# This configuration file for Fluentd / td-agent is used
# to watch changes to Docker log files. The kubelet creates symlinks that
# capture the pod name, namespace, container name & Docker container ID
# to the docker logs for pods in the /var/log/containers directory on the host.
# If running this fluentd configuration in a Docker container, the /var/log
# directory should be mounted in the container.
#
# These logs are then submitted to Elasticsearch which assumes the
# installation of the fluent-plugin-elasticsearch & the
# fluent-plugin-kubernetes_metadata_filter plugins.
# See https://github.com/uken/fluent-plugin-elasticsearch &
# https://github.com/fabric8io/fluent-plugin-kubernetes_metadata_filter for
# more information about the plugins.
#
# Example
# =======
# A line in the Docker log file might look like this JSON:
#
# {"log":"2014/09/25 21:15:03 Got request with path wombat\n",
# "stream":"stderr",
# "time":"2014-09-25T21:15:03.499185026Z"}
#
# The time_format specification below makes sure we properly
# parse the time format produced by Docker. This will be
# submitted to Elasticsearch and should appear like:
# $ curl 'http://elasticsearch-logging:9200/_search?pretty'
# ...
# {
# "_index" : "logstash-2014.09.25",
# "_type" : "fluentd",
# "_id" : "VBrbor2QTuGpsQyTCdfzqA",
# "_score" : 1.0,
# "_source":{"log":"2014/09/25 22:45:50 Got request with path wombat\n",
# "stream":"stderr","tag":"docker.container.all",
# "@timestamp":"2014-09-25T22:45:50+00:00"}
# },
# ...
#
# The Kubernetes fluentd plugin is used to write the Kubernetes metadata to the log
# record & add labels to the log record if properly configured. This enables users
# to filter & search logs on any metadata.
# For example a Docker container's logs might be in the directory:
#
# /var/lib/docker/containers/997599971ee6366d4a5920d25b79286ad45ff37a74494f262e3bc98d909d0a7b
#
# and in the file:
#
# 997599971ee6366d4a5920d25b79286ad45ff37a74494f262e3bc98d909d0a7b-json.log
#
# where 997599971ee6... is the Docker ID of the running container.
# The Kubernetes kubelet makes a symbolic link to this file on the host machine
# in the /var/log/containers directory which includes the pod name and the Kubernetes
# container name:
#
# synthetic-logger-0.25lps-pod_default_synth-lgr-997599971ee6366d4a5920d25b79286ad45ff37a74494f262e3bc98d909d0a7b.log
# ->
# /var/lib/docker/containers/997599971ee6366d4a5920d25b79286ad45ff37a74494f262e3bc98d909d0a7b/997599971ee6366d4a5920d25b79286ad45ff37a74494f262e3bc98d909d0a7b-json.log
#
# The /var/log directory on the host is mapped to the /var/log directory in the container
# running this instance of Fluentd and we end up collecting the file:
#
# /var/log/containers/synthetic-logger-0.25lps-pod_default_synth-lgr-997599971ee6366d4a5920d25b79286ad45ff37a74494f262e3bc98d909d0a7b.log
#
# This results in the tag:
#
# var.log.containers.synthetic-logger-0.25lps-pod_default_synth-lgr-997599971ee6366d4a5920d25b79286ad45ff37a74494f262e3bc98d909d0a7b.log
#
# The Kubernetes fluentd plugin is used to extract the namespace, pod name & container name
# which are added to the log message as a kubernetes field object & the Docker container ID
# is also added under the docker field object.
# The final tag is:
#
# kubernetes.var.log.containers.synthetic-logger-0.25lps-pod_default_synth-lgr-997599971ee6366d4a5920d25b79286ad45ff37a74494f262e3bc98d909d0a7b.log
#
# And the final log record look like:
#
# {
# "log":"2014/09/25 21:15:03 Got request with path wombat\n",
# "stream":"stderr",
# "time":"2014-09-25T21:15:03.499185026Z",
# "kubernetes": {
# "namespace": "default",
# "pod_name": "synthetic-logger-0.25lps-pod",
# "container_name": "synth-lgr"
# },
# "docker": {
# "container_id": "997599971ee6366d4a5920d25b79286ad45ff37a74494f262e3bc98d909d0a7b"
# }
# }
#
# This makes it easier for users to search for logs by pod name or by
# the name of the Kubernetes container regardless of how many times the
# Kubernetes pod has been restarted (resulting in a several Docker container IDs).
# Json Log Example:
# {"log":"[info:2016-02-16T16:04:05.930-08:00] Some log text here\n","stream":"stdout","time":"2016-02-17T00:04:05.931087621Z"}
# CRI Log Example:
# 2016-02-17T00:04:05.931087621Z stdout F [info:2016-02-16T16:04:05.930-08:00] Some log text here
@id fluentd-containers.log
@type tail
path /var/log/containers/*.log
pos_file /var/log/es-containers.log.pos
tag raw.kubernetes.*
read_from_head true
@type multi_format
format json
time_key time
time_format %Y-%m-%dT%H:%M:%S.%NZ
format /^(?
# Detect exceptions in the log output and forward them as one log entry.
@id raw.kubernetes
@type detect_exceptions
remove_tag_prefix raw
message log
stream stream
multiline_flush_interval 5
max_bytes 500000
max_lines 1000
# Concatenate multi-line logs
@id filter_concat
@type concat
key log
use_first_timestamp true
multiline_end_regexp /\n$/
separator ""
# Enriches records with Kubernetes metadata
@id filter_kubernetes_metadata
@type kubernetes_metadata
# Fixes json fields in Elasticsearch
@id filter_parser
@type parser
key_name log
reserve_data true
remove_key_name_field true
@type multi_format
format json
format none
system.input.conf: |-
# Logs from systemd-journal for interesting services.
# TODO(random-liu): Remove this after cri container runtime rolls out.
@id journald-docker
@type systemd
matches [{ "_SYSTEMD_UNIT": "docker.service" }]
@type local
persistent true
path /var/log/journald-docker.pos
read_from_head true
tag docker
@id journald-container-runtime
@type systemd
matches [{ "_SYSTEMD_UNIT": "{{ fluentd_container_runtime_service }}.service" }]
@type local
persistent true
path /var/log/journald-container-runtime.pos
read_from_head true
tag container-runtime
@id journald-etcd
@type systemd
matches [{ "_SYSTEMD_UNIT": "etcd.service" }]
@type local
persistent true
path /var/log/journald-etcd.pos
read_from_head true
tag etcd
@id journald-kube-apiserver
@type systemd
matches [{ "_SYSTEMD_UNIT": "kube-apiserver.service" }]
@type local
persistent true
path /var/log/journald-kube-apiserver.pos
read_from_head true
tag kube-apiserver
@id journald-kube-controller-manager
@type systemd
matches [{ "_SYSTEMD_UNIT": "kube-controller-manager.service" }]
@type local
persistent true
path /var/log/journald-kube-controller-manager.pos
read_from_head true
tag kube-controller-manager
@id journald-kube-scheduler
@type systemd
matches [{ "_SYSTEMD_UNIT": "kube-scheduler.service" }]
@type local
persistent true
path /var/log/journald-kube-scheduler.pos
read_from_head true
tag kube-scheduler
@id journald-kubelet
@type systemd
matches [{ "_SYSTEMD_UNIT": "kubelet.service" }]
@type local
persistent true
path /var/log/journald-kubelet.pos
read_from_head true
tag kubelet
@id journald-kube-proxy
@type systemd
matches [{ "_SYSTEMD_UNIT": "kube-proxy.service" }]
@type local
persistent true
path /var/log/journald-kube-proxy.pos
read_from_head true
tag kube-proxy
@id journald-node-problem-detector
@type systemd
matches [{ "_SYSTEMD_UNIT": "node-problem-detector.service" }]
@type local
persistent true
path /var/log/journald-node-problem-detector.pos
read_from_head true
tag node-problem-detector
@id kernel
@type systemd
matches [{ "_TRANSPORT": "kernel" }]
@type local
persistent true
path /var/log/kernel.pos
fields_strip_underscores true
fields_lowercase true
read_from_head true
tag kernel
forward.input.conf: |-
# Takes the messages sent over TCP
@id forward
@type forward
monitoring.conf: |-
# Prometheus Exporter Plugin
# input plugin that exports metrics
@id prometheus
@type prometheus
@id monitor_agent
@type monitor_agent
# input plugin that collects metrics from MonitorAgent
@id prometheus_monitor
@type prometheus_monitor
host ${hostname}
# input plugin that collects metrics for output plugin
@id prometheus_output_monitor
@type prometheus_output_monitor
host ${hostname}
# input plugin that collects metrics for in_tail plugin
@id prometheus_tail_monitor
@type prometheus_tail_monitor
host ${hostname}
output.conf: |-
@id elasticsearch
@type elasticsearch
@log_level info
type_name _doc
include_tag_key true
host elasticsearch-logging
port 9200
logstash_format true
@type file
path /var/log/fluentd-buffers/kubernetes.system.buffer
flush_mode interval
retry_type exponential_backoff
flush_thread_count 2
flush_interval 5s
retry_forever
retry_max_interval 30
chunk_limit_size 2M
queue_limit_length 8
overflow_action block
================================================
FILE: manifests/deprecated/efk/fluentd-es-ds.yaml
================================================
apiVersion: v1
kind: ServiceAccount
metadata:
name: fluentd-es
namespace: kube-system
labels:
k8s-app: fluentd-es
kubernetes.io/cluster-service: "true"
addonmanager.kubernetes.io/mode: Reconcile
---
kind: ClusterRole
apiVersion: rbac.authorization.k8s.io/v1
metadata:
name: fluentd-es
labels:
k8s-app: fluentd-es
kubernetes.io/cluster-service: "true"
addonmanager.kubernetes.io/mode: Reconcile
rules:
- apiGroups:
- ""
resources:
- "namespaces"
- "pods"
verbs:
- "get"
- "watch"
- "list"
---
kind: ClusterRoleBinding
apiVersion: rbac.authorization.k8s.io/v1
metadata:
name: fluentd-es
labels:
k8s-app: fluentd-es
kubernetes.io/cluster-service: "true"
addonmanager.kubernetes.io/mode: Reconcile
subjects:
- kind: ServiceAccount
name: fluentd-es
namespace: kube-system
apiGroup: ""
roleRef:
kind: ClusterRole
name: fluentd-es
apiGroup: ""
---
apiVersion: apps/v1
kind: DaemonSet
metadata:
name: fluentd-es-v2.4.0
namespace: kube-system
labels:
k8s-app: fluentd-es
version: v2.4.0
kubernetes.io/cluster-service: "true"
addonmanager.kubernetes.io/mode: Reconcile
spec:
selector:
matchLabels:
k8s-app: fluentd-es
version: v2.4.0
template:
metadata:
labels:
k8s-app: fluentd-es
kubernetes.io/cluster-service: "true"
version: v2.4.0
# This annotation ensures that fluentd does not get evicted if the node
# supports critical pod annotation based priority scheme.
# Note that this does not guarantee admission on the nodes (#40573).
annotations:
seccomp.security.alpha.kubernetes.io/pod: 'docker/default'
spec:
priorityClassName: system-node-critical
serviceAccountName: fluentd-es
containers:
- name: fluentd-es
#image: k8s.gcr.io/fluentd-elasticsearch:v2.4.0
image: mirrorgooglecontainers/fluentd-elasticsearch:v2.4.0
env:
- name: FLUENTD_ARGS
value: --no-supervisor -q
resources:
limits:
memory: 500Mi
requests:
cpu: 100m
memory: 200Mi
volumeMounts:
- name: varlog
mountPath: /var/log
- name: varlibdockercontainers
mountPath: /var/lib/docker/containers
readOnly: true
- name: config-volume
mountPath: /etc/fluent/config.d
#nodeSelector:
#beta.kubernetes.io/fluentd-ds-ready: "true"
terminationGracePeriodSeconds: 30
volumes:
- name: varlog
hostPath:
path: /var/log
- name: varlibdockercontainers
hostPath:
path: /var/lib/docker/containers
- name: config-volume
configMap:
name: fluentd-es-config-v0.2.0
================================================
FILE: manifests/deprecated/efk/kibana-deployment.yaml
================================================
apiVersion: apps/v1
kind: Deployment
metadata:
name: kibana-logging
namespace: kube-system
labels:
k8s-app: kibana-logging
kubernetes.io/cluster-service: "true"
addonmanager.kubernetes.io/mode: Reconcile
spec:
replicas: 1
selector:
matchLabels:
k8s-app: kibana-logging
template:
metadata:
labels:
k8s-app: kibana-logging
annotations:
seccomp.security.alpha.kubernetes.io/pod: 'docker/default'
spec:
containers:
- name: kibana-logging
#image: docker.elastic.co/kibana/kibana-oss:6.6.1
image: easzlab/kibana-oss:6.6.1
resources:
# need more cpu upon initialization, therefore burstable class
limits:
cpu: 1000m
requests:
cpu: 100m
env:
- name: ELASTICSEARCH_URL
value: http://elasticsearch-logging:9200
# if kibana service is exposed by nodePort, use lines commited out instead
#- name: SERVER_BASEPATH
# value: ""
- name: SERVER_BASEPATH
value: /api/v1/namespaces/kube-system/services/kibana-logging/proxy
ports:
- containerPort: 5601
name: ui
protocol: TCP
================================================
FILE: manifests/deprecated/efk/kibana-service.yaml
================================================
apiVersion: v1
kind: Service
metadata:
name: kibana-logging
namespace: kube-system
labels:
k8s-app: kibana-logging
kubernetes.io/cluster-service: "true"
addonmanager.kubernetes.io/mode: Reconcile
kubernetes.io/name: "Kibana"
spec:
ports:
- port: 5601
protocol: TCP
targetPort: ui
selector:
k8s-app: kibana-logging
#type: NodePort
================================================
FILE: manifests/deprecated/efk/log-pilot/log-pilot-filebeat.yaml
================================================
apiVersion: apps/v1
kind: DaemonSet
metadata:
name: log-pilot
labels:
app: log-pilot
namespace: kube-system
spec:
selector:
matchLabels:
app: log-pilot
updateStrategy:
type: RollingUpdate
template:
metadata:
labels:
app: log-pilot
spec:
# 是否允许部署到Master节点上
#tolerations:
#- key: node-role.kubernetes.io/master
# effect: NoSchedule
# priorityClassName: system-cluster-critical
containers:
- name: log-pilot
# 版本请参考https://github.com/AliyunContainerService/log-pilot/releases
image: registry.cn-hangzhou.aliyuncs.com/acs/log-pilot:0.9.7-filebeat
resources:
limits:
memory: 500Mi
requests:
cpu: 200m
memory: 200Mi
env:
- name: "NODE_NAME"
valueFrom:
fieldRef:
fieldPath: spec.nodeName
- name: "LOGGING_OUTPUT"
value: "elasticsearch"
# 请确保集群到ES网络可达
- name: "ELASTICSEARCH_HOSTS"
value: "elasticsearch-logging:9200"
# 配置ES访问权限
- name: "ELASTICSEARCH_USER"
value: ""
- name: "ELASTICSEARCH_PASSWORD"
value: ""
volumeMounts:
- name: sock
mountPath: /var/run/docker.sock
- name: root
mountPath: /host
readOnly: true
- name: varlib
mountPath: /var/lib/filebeat
- name: varlog
mountPath: /var/log/filebeat
- name: localtime
mountPath: /etc/localtime
readOnly: true
livenessProbe:
failureThreshold: 3
exec:
command:
- /pilot/healthz
initialDelaySeconds: 10
periodSeconds: 10
successThreshold: 1
timeoutSeconds: 2
securityContext:
capabilities:
add:
- SYS_ADMIN
terminationGracePeriodSeconds: 30
imagePullSecrets:
- name: ydy-test-key
volumes:
- name: sock
hostPath:
path: /var/run/docker.sock
- name: root
hostPath:
path: /
- name: varlib
hostPath:
path: /var/lib/filebeat
type: DirectoryOrCreate
- name: varlog
hostPath:
path: /var/log/filebeat
type: DirectoryOrCreate
- name: localtime
hostPath:
path: /etc/localtime
================================================
FILE: manifests/deprecated/es-cluster/elasticsearch/.helmignore
================================================
.git
# OWNERS file for Kubernetes
OWNERS
================================================
FILE: manifests/deprecated/es-cluster/elasticsearch/Chart.yaml
================================================
name: elasticsearch
home: https://www.elastic.co/products/elasticsearch
version: 1.7.2
appVersion: 6.4.0
description: Flexible and powerful open source, distributed real-time search and analytics
engine.
icon: https://static-www.elastic.co/assets/blteb1c97719574938d/logo-elastic-elasticsearch-lt.svg
sources:
- https://www.elastic.co/products/elasticsearch
- https://github.com/jetstack/elasticsearch-pet
- https://github.com/giantswarm/kubernetes-elastic-stack
- https://github.com/GoogleCloudPlatform/elasticsearch-docker
- https://github.com/clockworksoul/helm-elasticsearch
- https://github.com/pires/kubernetes-elasticsearch-cluster
maintainers:
- name: simonswine
email: christian@jetstack.io
- name: icereval
email: michael.haselton@gmail.com
- name: rendhalver
email: pete.brown@powerhrg.com
================================================
FILE: manifests/deprecated/es-cluster/elasticsearch/OWNERS
================================================
approvers:
- simonswine
- icereval
- rendhalver
reviewers:
- simonswine
- icereval
- rendhalver
================================================
FILE: manifests/deprecated/es-cluster/elasticsearch/README.md
================================================
# Elasticsearch Helm Chart
This chart uses a standard Docker image of Elasticsearch (docker.elastic.co/elasticsearch/elasticsearch-oss) and uses a service pointing to the master's transport port for service discovery.
Elasticsearch does not communicate with the Kubernetes API, hence no need for RBAC permissions.
## Warning for previous users
If you are currently using an earlier version of this Chart you will need to redeploy your Elasticsearch clusters. The discovery method used here is incompatible with using RBAC.
If you are upgrading to Elasticsearch 6 from the 5.5 version used in this chart before, please note that your cluster needs to do a full cluster restart.
The simplest way to do that is to delete the installation (keep the PVs) and install this chart again with the new version.
If you want to avoid doing that upgrade to Elasticsearch 5.6 first before moving on to Elasticsearch 6.0.
## Prerequisites Details
* Kubernetes 1.6+
* PV dynamic provisioning support on the underlying infrastructure
## StatefulSets Details
* https://kubernetes.io/docs/concepts/workloads/controllers/statefulset/
## StatefulSets Caveats
* https://kubernetes.io/docs/concepts/workloads/controllers/statefulset/#limitations
## Todo
* Implement TLS/Auth/Security
* Smarter upscaling/downscaling
* Solution for memory locking
## Chart Details
This chart will do the following:
* Implemented a dynamically scalable elasticsearch cluster using Kubernetes StatefulSets/Deployments
* Multi-role deployment: master, client (coordinating) and data nodes
* Statefulset Supports scaling down without degrading the cluster
## Installing the Chart
To install the chart with the release name `my-release`:
```bash
$ helm repo add incubator http://storage.googleapis.com/kubernetes-charts-incubator
$ helm install --name my-release incubator/elasticsearch
```
## Deleting the Charts
Delete the Helm deployment as normal
```
$ helm delete my-release
```
Deletion of the StatefulSet doesn't cascade to deleting associated PVCs. To delete them:
```
$ kubectl delete pvc -l release=my-release,component=data
```
## Configuration
The following table lists the configurable parameters of the elasticsearch chart and their default values.
| Parameter | Description | Default |
| ------------------------------------ | ------------------------------------------------------------------- | ------------------------------------ |
| `appVersion` | Application Version (Elasticsearch) | `6.4.0` |
| `image.repository` | Container image name | `docker.elastic.co/elasticsearch/elasticsearch-oss` |
| `image.tag` | Container image tag | `6.4.0` |
| `image.pullPolicy` | Container pull policy | `Always` |
| `cluster.name` | Cluster name | `elasticsearch` |
| `cluster.xpackEnable` | Writes the X-Pack configuration options to the configuration file | `false` |
| `cluster.config` | Additional cluster config appended | `{}` |
| `cluster.keystoreSecret` | Name of secret holding secure config options in an es keystore | `nil` |
| `cluster.env` | Cluster environment variables | `{MINIMUM_MASTER_NODES: "2"}` |
| `client.name` | Client component name | `client` |
| `client.replicas` | Client node replicas (deployment) | `2` |
| `client.resources` | Client node resources requests & limits | `{} - cpu limit must be an integer` |
| `client.priorityClassName` | Client priorityClass | `nil` |
| `client.heapSize` | Client node heap size | `512m` |
| `client.podAnnotations` | Client Deployment annotations | `{}` |
| `client.nodeSelector` | Node labels for client pod assignment | `{}` |
| `client.tolerations` | Client tolerations | `[]` |
| `client.serviceAnnotations` | Client Service annotations | `{}` |
| `client.serviceType` | Client service type | `ClusterIP` |
| `client.loadBalancerIP` | Client loadBalancerIP | `{}` |
| `client.loadBalancerSourceRanges` | Client loadBalancerSourceRanges | `{}` |
| `master.exposeHttp` | Expose http port 9200 on master Pods for monitoring, etc | `false` |
| `master.name` | Master component name | `master` |
| `master.replicas` | Master node replicas (deployment) | `2` |
| `master.resources` | Master node resources requests & limits | `{} - cpu limit must be an integer` |
| `master.priorityClassName` | Master priorityClass | `nil` |
| `master.podAnnotations` | Master Deployment annotations | `{}` |
| `master.nodeSelector` | Node labels for master pod assignment | `{}` |
| `master.tolerations` | Master tolerations | `[]` |
| `master.heapSize` | Master node heap size | `512m` |
| `master.name` | Master component name | `master` |
| `master.persistence.enabled` | Master persistent enabled/disabled | `true` |
| `master.persistence.name` | Master statefulset PVC template name | `data` |
| `master.persistence.size` | Master persistent volume size | `4Gi` |
| `master.persistence.storageClass` | Master persistent volume Class | `nil` |
| `master.persistence.accessMode` | Master persistent Access Mode | `ReadWriteOnce` |
| `data.exposeHttp` | Expose http port 9200 on data Pods for monitoring, etc | `false` |
| `data.replicas` | Data node replicas (statefulset) | `2` |
| `data.resources` | Data node resources requests & limits | `{} - cpu limit must be an integer` |
| `data.priorityClassName` | Data priorityClass | `nil` |
| `data.heapSize` | Data node heap size | `1536m` |
| `data.persistence.enabled` | Data persistent enabled/disabled | `true` |
| `data.persistence.name` | Data statefulset PVC template name | `data` |
| `data.persistence.size` | Data persistent volume size | `30Gi` |
| `data.persistence.storageClass` | Data persistent volume Class | `nil` |
| `data.persistence.accessMode` | Data persistent Access Mode | `ReadWriteOnce` |
| `data.podAnnotations` | Data StatefulSet annotations | `{}` |
| `data.nodeSelector` | Node labels for data pod assignment | `{}` |
| `data.tolerations` | Data tolerations | `[]` |
| `data.terminationGracePeriodSeconds` | Data termination grace period (seconds) | `3600` |
| `data.antiAffinity` | Data anti-affinity policy | `soft` |
Specify each parameter using the `--set key=value[,key=value]` argument to `helm install`.
In terms of Memory resources you should make sure that you follow that equation:
- `${role}HeapSize < ${role}MemoryRequests < ${role}MemoryLimits`
The YAML value of cluster.config is appended to elasticsearch.yml file for additional customization ("script.inline: on" for example to allow inline scripting)
# Deep dive
## Application Version
This chart aims to support Elasticsearch v2 and v5 deployments by specifying the `values.yaml` parameter `appVersion`.
### Version Specific Features
* Memory Locking *(variable renamed)*
* Ingest Node *(v5)*
* X-Pack Plugin *(v5)*
Upgrade paths & more info: https://www.elastic.co/guide/en/elasticsearch/reference/current/setup-upgrade.html
## Mlocking
This is a limitation in kubernetes right now. There is no way to raise the
limits of lockable memory, so that these memory areas won't be swapped. This
would degrade performance heavily. The issue is tracked in
[kubernetes/#3595](https://github.com/kubernetes/kubernetes/issues/3595).
```
[WARN ][bootstrap] Unable to lock JVM Memory: error=12,reason=Cannot allocate memory
[WARN ][bootstrap] This can result in part of the JVM being swapped out.
[WARN ][bootstrap] Increase RLIMIT_MEMLOCK, soft limit: 65536, hard limit: 65536
```
## Minimum Master Nodes
> The minimum_master_nodes setting is extremely important to the stability of your cluster. This setting helps prevent split brains, the existence of two masters in a single cluster.
>When you have a split brain, your cluster is at danger of losing data. Because the master is considered the supreme ruler of the cluster, it decides when new indices can be created, how shards are moved, and so forth. If you have two masters, data integrity becomes perilous, since you have two nodes that think they are in charge.
>This setting tells Elasticsearch to not elect a master unless there are enough master-eligible nodes available. Only then will an election take place.
>This setting should always be configured to a quorum (majority) of your master-eligible nodes. A quorum is (number of master-eligible nodes / 2) + 1
More info: https://www.elastic.co/guide/en/elasticsearch/guide/1.x/_important_configuration_changes.html#_minimum_master_nodes
# Client and Coordinating Nodes
Elasticsearch v5 terminology has updated, and now refers to a `Client Node` as a `Coordinating Node`.
More info: https://www.elastic.co/guide/en/elasticsearch/reference/5.5/modules-node.html#coordinating-node
## Select right storage class for SSD volumes
### GCE + Kubernetes 1.5
Create StorageClass for SSD-PD
```
$ kubectl create -f - < >(tee -a "/var/log/elasticsearch-hooks.log")
NODE_NAME=${HOSTNAME}
echo "Prepare to migrate data of the node ${NODE_NAME}"
echo "Move all data from node ${NODE_NAME}"
curl -s -XPUT -H 'Content-Type: application/json' '{{ template "elasticsearch.client.fullname" . }}:9200/_cluster/settings' -d "{
\"transient\" :{
\"cluster.routing.allocation.exclude._name\" : \"${NODE_NAME}\"
}
}"
echo ""
while true ; do
echo -e "Wait for node ${NODE_NAME} to become empty"
SHARDS_ALLOCATION=$(curl -s -XGET 'http://{{ template "elasticsearch.client.fullname" . }}:9200/_cat/shards')
if ! echo "${SHARDS_ALLOCATION}" | grep -E "${NODE_NAME}"; then
break
fi
sleep 1
done
echo "Node ${NODE_NAME} is ready to shutdown"
post-start-hook.sh: |-
#!/bin/bash
exec &> >(tee -a "/var/log/elasticsearch-hooks.log")
NODE_NAME=${HOSTNAME}
CLUSTER_SETTINGS=$(curl -s -XGET "http://{{ template "elasticsearch.client.fullname" . }}:9200/_cluster/settings")
if echo "${CLUSTER_SETTINGS}" | grep -E "${NODE_NAME}"; then
echo "Activate node ${NODE_NAME}"
curl -s -XPUT -H 'Content-Type: application/json' "http://{{ template "elasticsearch.client.fullname" . }}:9200/_cluster/settings" -d "{
\"transient\" :{
\"cluster.routing.allocation.exclude._name\" : null
}
}"
fi
echo "Node ${NODE_NAME} is ready to be used"
================================================
FILE: manifests/deprecated/es-cluster/elasticsearch/templates/data-pdb.yaml
================================================
{{- if .Values.data.podDisruptionBudget.enabled }}
apiVersion: policy/v1beta1
kind: PodDisruptionBudget
metadata:
labels:
app: {{ template "elasticsearch.name" . }}
chart: {{ .Chart.Name }}-{{ .Chart.Version }}
component: "{{ .Values.data.name }}"
heritage: {{ .Release.Service }}
release: {{ .Release.Name }}
name: {{ template "elasticsearch.data.fullname" . }}
spec:
{{- if .Values.data.podDisruptionBudget.minAvailable }}
minAvailable: {{ .Values.data.podDisruptionBudget.minAvailable }}
{{- end }}
{{- if .Values.data.podDisruptionBudget.maxUnavailable }}
maxUnavailable: {{ .Values.data.podDisruptionBudget.maxUnavailable }}
{{- end }}
selector:
matchLabels:
app: {{ template "elasticsearch.name" . }}
component: "{{ .Values.data.name }}"
release: {{ .Release.Name }}
{{- end }}
================================================
FILE: manifests/deprecated/es-cluster/elasticsearch/templates/data-statefulset.yaml
================================================
apiVersion: apps/v1
kind: StatefulSet
metadata:
labels:
app: {{ template "elasticsearch.name" . }}
chart: {{ .Chart.Name }}-{{ .Chart.Version }}
component: "{{ .Values.data.name }}"
heritage: {{ .Release.Service }}
release: {{ .Release.Name }}
name: {{ template "elasticsearch.data.fullname" . }}
spec:
serviceName: {{ template "elasticsearch.data.fullname" . }}
replicas: {{ .Values.data.replicas }}
selector:
matchLabels:
app: {{ template "elasticsearch.name" . }}
component: "{{ .Values.data.name }}"
template:
metadata:
labels:
app: {{ template "elasticsearch.name" . }}
component: "{{ .Values.data.name }}"
release: {{ .Release.Name }}
{{- if .Values.data.podAnnotations }}
annotations:
{{ toYaml .Values.data.podAnnotations | indent 8 }}
{{- end }}
spec:
{{- if .Values.data.priorityClassName }}
priorityClassName: "{{ .Values.data.priorityClassName }}"
{{- end }}
securityContext:
fsGroup: 1000
{{- if eq .Values.data.antiAffinity "hard" }}
affinity:
podAntiAffinity:
requiredDuringSchedulingIgnoredDuringExecution:
- topologyKey: "kubernetes.io/hostname"
labelSelector:
matchLabels:
app: "{{ template "elasticsearch.name" . }}"
release: "{{ .Release.Name }}"
component: "{{ .Values.data.name }}"
{{- else if eq .Values.data.antiAffinity "soft" }}
affinity:
podAntiAffinity:
preferredDuringSchedulingIgnoredDuringExecution:
- weight: 1
podAffinityTerm:
topologyKey: kubernetes.io/hostname
labelSelector:
matchLabels:
app: "{{ template "elasticsearch.name" . }}"
release: "{{ .Release.Name }}"
component: "{{ .Values.data.name }}"
{{- end }}
{{- if .Values.data.nodeSelector }}
nodeSelector:
{{ toYaml .Values.data.nodeSelector | indent 8 }}
{{- end }}
{{- if .Values.data.tolerations }}
tolerations:
{{ toYaml .Values.data.tolerations | indent 8 }}
{{- end }}
initContainers:
# see https://www.elastic.co/guide/en/elasticsearch/reference/current/vm-max-map-count.html
# and https://www.elastic.co/guide/en/elasticsearch/reference/current/setup-configuration-memory.html#mlockall
- name: "sysctl"
image: "{{ .Values.image.repository }}:{{ .Values.image.tag }}"
imagePullPolicy: "Always"
command: ["sysctl", "-w", "vm.max_map_count=262144"]
securityContext:
privileged: true
- name: "chown"
image: "{{ .Values.image.repository }}:{{ .Values.image.tag }}"
imagePullPolicy: {{ .Values.image.pullPolicy | quote }}
command:
- /bin/bash
- -c
- chown -R elasticsearch:elasticsearch /usr/share/elasticsearch/data &&
chown -R elasticsearch:elasticsearch /usr/share/elasticsearch/logs
securityContext:
runAsUser: 0
volumeMounts:
- mountPath: /usr/share/elasticsearch/data
name: data
containers:
- name: elasticsearch
env:
- name: DISCOVERY_SERVICE
value: {{ template "elasticsearch.fullname" . }}-discovery
- name: NODE_MASTER
value: "false"
- name: PROCESSORS
valueFrom:
resourceFieldRef:
resource: limits.cpu
- name: ES_JAVA_OPTS
value: "-Djava.net.preferIPv4Stack=true -Xms{{ .Values.data.heapSize }} -Xmx{{ .Values.data.heapSize }}"
{{- range $key, $value := .Values.cluster.env }}
- name: {{ $key }}
value: {{ $value | quote }}
{{- end }}
image: "{{ .Values.image.repository }}:{{ .Values.image.tag }}"
imagePullPolicy: {{ .Values.image.pullPolicy | quote }}
ports:
- containerPort: 9300
name: transport
{{ if .Values.data.exposeHttp }}
- containerPort: 9200
name: http
{{ end }}
resources:
{{ toYaml .Values.data.resources | indent 12 }}
readinessProbe:
httpGet:
path: /_cluster/health?local=true
port: 9200
initialDelaySeconds: 5
volumeMounts:
- mountPath: /usr/share/elasticsearch/data
name: data
- mountPath: /usr/share/elasticsearch/config/elasticsearch.yml
name: config
subPath: elasticsearch.yml
{{- if hasPrefix "2." .Values.image.tag }}
- mountPath: /usr/share/elasticsearch/config/logging.yml
name: config
subPath: logging.yml
{{- end }}
{{- if hasPrefix "5." .Values.image.tag }}
- mountPath: /usr/share/elasticsearch/config/log4j2.properties
name: config
subPath: log4j2.properties
{{- end }}
- name: config
mountPath: /pre-stop-hook.sh
subPath: pre-stop-hook.sh
- name: config
mountPath: /post-start-hook.sh
subPath: post-start-hook.sh
{{- if .Values.cluster.keystoreSecret }}
- name: keystore
mountPath: "/usr/share/elasticsearch/config/elasticsearch.keystore"
subPath: elasticsearch.keystore
readOnly: true
{{- end }}
lifecycle:
preStop:
exec:
command: ["/bin/bash","/pre-stop-hook.sh"]
postStart:
exec:
command: ["/bin/bash","/post-start-hook.sh"]
terminationGracePeriodSeconds: {{ .Values.data.terminationGracePeriodSeconds }}
{{- if .Values.image.pullSecrets }}
imagePullSecrets:
{{- range $pullSecret := .Values.image.pullSecrets }}
- name: {{ $pullSecret }}
{{- end }}
{{- end }}
volumes:
- name: config
configMap:
name: {{ template "elasticsearch.fullname" . }}
{{- if .Values.cluster.keystoreSecret }}
- name: keystore
secret:
secretName: {{ .Values.cluster.keystoreSecret }}
{{- end }}
{{- if not .Values.data.persistence.enabled }}
- name: data
emptyDir: {}
{{- end }}
updateStrategy:
type: {{ .Values.data.updateStrategy.type }}
{{- if .Values.data.persistence.enabled }}
volumeClaimTemplates:
- metadata:
name: {{ .Values.data.persistence.name }}
spec:
accessModes:
- {{ .Values.data.persistence.accessMode | quote }}
{{- if .Values.data.persistence.storageClass }}
{{- if (eq "-" .Values.data.persistence.storageClass) }}
storageClassName: ""
{{- else }}
storageClassName: "{{ .Values.data.persistence.storageClass }}"
{{- end }}
{{- end }}
resources:
requests:
storage: "{{ .Values.data.persistence.size }}"
{{- end }}
================================================
FILE: manifests/deprecated/es-cluster/elasticsearch/templates/master-pdb.yaml
================================================
{{- if .Values.master.podDisruptionBudget.enabled }}
apiVersion: policy/v1beta1
kind: PodDisruptionBudget
metadata:
labels:
app: {{ template "elasticsearch.name" . }}
chart: {{ .Chart.Name }}-{{ .Chart.Version }}
component: "{{ .Values.master.name }}"
heritage: {{ .Release.Service }}
release: {{ .Release.Name }}
name: {{ template "elasticsearch.master.fullname" . }}
spec:
{{- if .Values.master.podDisruptionBudget.minAvailable }}
minAvailable: {{ .Values.master.podDisruptionBudget.minAvailable }}
{{- end }}
{{- if .Values.master.podDisruptionBudget.maxUnavailable }}
maxUnavailable: {{ .Values.master.podDisruptionBudget.maxUnavailable }}
{{- end }}
selector:
matchLabels:
app: {{ template "elasticsearch.name" . }}
component: "{{ .Values.master.name }}"
release: {{ .Release.Name }}
{{- end }}
================================================
FILE: manifests/deprecated/es-cluster/elasticsearch/templates/master-statefulset.yaml
================================================
apiVersion: apps/v1
kind: StatefulSet
metadata:
labels:
app: {{ template "elasticsearch.name" . }}
chart: {{ .Chart.Name }}-{{ .Chart.Version }}
component: "{{ .Values.master.name }}"
heritage: {{ .Release.Service }}
release: {{ .Release.Name }}
name: {{ template "elasticsearch.master.fullname" . }}
spec:
serviceName: {{ template "elasticsearch.master.fullname" . }}
replicas: {{ .Values.master.replicas }}
selector:
matchLabels:
app: {{ template "elasticsearch.name" . }}
component: "{{ .Values.master.name }}"
template:
metadata:
labels:
app: {{ template "elasticsearch.name" . }}
component: "{{ .Values.master.name }}"
release: {{ .Release.Name }}
{{- if .Values.master.podAnnotations }}
annotations:
{{ toYaml .Values.master.podAnnotations | indent 8 }}
{{- end }}
spec:
{{- if .Values.master.priorityClassName }}
priorityClassName: "{{ .Values.master.priorityClassName }}"
{{- end }}
securityContext:
fsGroup: 1000
{{- if eq .Values.master.antiAffinity "hard" }}
affinity:
podAntiAffinity:
requiredDuringSchedulingIgnoredDuringExecution:
- topologyKey: "kubernetes.io/hostname"
labelSelector:
matchLabels:
app: "{{ template "elasticsearch.name" . }}"
release: "{{ .Release.Name }}"
component: "{{ .Values.master.name }}"
{{- else if eq .Values.master.antiAffinity "soft" }}
affinity:
podAntiAffinity:
preferredDuringSchedulingIgnoredDuringExecution:
- weight: 1
podAffinityTerm:
topologyKey: kubernetes.io/hostname
labelSelector:
matchLabels:
app: "{{ template "elasticsearch.name" . }}"
release: "{{ .Release.Name }}"
component: "{{ .Values.master.name }}"
{{- end }}
{{- if .Values.master.nodeSelector }}
nodeSelector:
{{ toYaml .Values.master.nodeSelector | indent 8 }}
{{- end }}
{{- if .Values.master.tolerations }}
tolerations:
{{ toYaml .Values.master.tolerations | indent 8 }}
{{- end }}
initContainers:
# see https://www.elastic.co/guide/en/elasticsearch/reference/current/vm-max-map-count.html
# and https://www.elastic.co/guide/en/elasticsearch/reference/current/setup-configuration-memory.html#mlockall
- name: "sysctl"
image: "{{ .Values.image.repository }}:{{ .Values.image.tag }}"
imagePullPolicy: "Always"
command: ["sysctl", "-w", "vm.max_map_count=262144"]
securityContext:
privileged: true
- name: "chown"
image: "{{ .Values.image.repository }}:{{ .Values.image.tag }}"
imagePullPolicy: {{ .Values.image.pullPolicy | quote }}
command:
- /bin/bash
- -c
- chown -R elasticsearch:elasticsearch /usr/share/elasticsearch/data &&
chown -R elasticsearch:elasticsearch /usr/share/elasticsearch/logs
securityContext:
runAsUser: 0
volumeMounts:
- mountPath: /usr/share/elasticsearch/data
name: data
containers:
- name: elasticsearch
env:
- name: NODE_DATA
value: "false"
{{- if hasPrefix "5." .Values.appVersion }}
- name: NODE_INGEST
value: "false"
{{- end }}
- name: DISCOVERY_SERVICE
value: {{ template "elasticsearch.fullname" . }}-discovery
- name: PROCESSORS
valueFrom:
resourceFieldRef:
resource: limits.cpu
- name: ES_JAVA_OPTS
value: "-Djava.net.preferIPv4Stack=true -Xms{{ .Values.master.heapSize }} -Xmx{{ .Values.master.heapSize }}"
{{- range $key, $value := .Values.cluster.env }}
- name: {{ $key }}
value: {{ $value | quote }}
{{- end }}
resources:
{{ toYaml .Values.master.resources | indent 12 }}
readinessProbe:
httpGet:
path: /_cluster/health?local=true
port: 9200
initialDelaySeconds: 5
image: "{{ .Values.image.repository }}:{{ .Values.image.tag }}"
imagePullPolicy: {{ .Values.image.pullPolicy | quote }}
ports:
- containerPort: 9300
name: transport
{{ if .Values.master.exposeHttp }}
- containerPort: 9200
name: http
{{ end }}
volumeMounts:
- mountPath: /usr/share/elasticsearch/data
name: data
- mountPath: /usr/share/elasticsearch/config/elasticsearch.yml
name: config
subPath: elasticsearch.yml
{{- if hasPrefix "2." .Values.image.tag }}
- mountPath: /usr/share/elasticsearch/config/logging.yml
name: config
subPath: logging.yml
{{- end }}
{{- if hasPrefix "5." .Values.image.tag }}
- mountPath: /usr/share/elasticsearch/config/log4j2.properties
name: config
subPath: log4j2.properties
{{- end }}
{{- if .Values.cluster.keystoreSecret }}
- name: keystore
mountPath: "/usr/share/elasticsearch/config/elasticsearch.keystore"
subPath: elasticsearch.keystore
readOnly: true
{{- end }}
{{- if .Values.image.pullSecrets }}
imagePullSecrets:
{{- range $pullSecret := .Values.image.pullSecrets }}
- name: {{ $pullSecret }}
{{- end }}
{{- end }}
volumes:
- name: config
configMap:
name: {{ template "elasticsearch.fullname" . }}
{{- if .Values.cluster.keystoreSecret }}
- name: keystore
secret:
secretName: {{ .Values.cluster.keystoreSecret }}
{{- end }}
{{- if not .Values.master.persistence.enabled }}
- name: data
emptyDir: {}
{{- end }}
updateStrategy:
type: {{ .Values.master.updateStrategy.type }}
{{- if .Values.master.persistence.enabled }}
volumeClaimTemplates:
- metadata:
name: {{ .Values.master.persistence.name }}
spec:
accessModes:
- {{ .Values.master.persistence.accessMode | quote }}
{{- if .Values.master.persistence.storageClass }}
{{- if (eq "-" .Values.master.persistence.storageClass) }}
storageClassName: ""
{{- else }}
storageClassName: "{{ .Values.master.persistence.storageClass }}"
{{- end }}
{{- end }}
resources:
requests:
storage: "{{ .Values.master.persistence.size }}"
{{ end }}
================================================
FILE: manifests/deprecated/es-cluster/elasticsearch/templates/master-svc.yaml
================================================
apiVersion: v1
kind: Service
metadata:
labels:
app: {{ template "elasticsearch.name" . }}
chart: {{ .Chart.Name }}-{{ .Chart.Version }}
component: "{{ .Values.master.name }}"
heritage: {{ .Release.Service }}
release: {{ .Release.Name }}
name: {{ template "elasticsearch.fullname" . }}-discovery
spec:
clusterIP: None
ports:
- port: 9300
targetPort: transport
selector:
app: {{ template "elasticsearch.name" . }}
component: "{{ .Values.master.name }}"
release: {{ .Release.Name }}
================================================
FILE: manifests/deprecated/es-cluster/elasticsearch/values.yaml
================================================
# Default values for elasticsearch.
# This is a YAML-formatted file.
# Declare variables to be passed into your templates.
appVersion: "6.4.0"
image:
repository: "docker.elastic.co/elasticsearch/elasticsearch-oss"
tag: "6.4.0"
pullPolicy: "IfNotPresent"
# If specified, use these secrets to access the image
# pullSecrets:
# - registry-secret
cluster:
name: "elasticsearch"
# If you want X-Pack installed, switch to an image that includes it, enable this option and toggle the features you want
# enabled in the environment variables outlined in the README
xpackEnable: false
# Some settings must be placed in a keystore, so they need to be mounted in from a secret.
# Use this setting to specify the name of the secret
# keystoreSecret: eskeystore
config: {}
env:
# IMPORTANT: https://www.elastic.co/guide/en/elasticsearch/reference/current/important-settings.html#minimum_master_nodes
# To prevent data loss, it is vital to configure the discovery.zen.minimum_master_nodes setting so that each master-eligible
# node knows the minimum number of master-eligible nodes that must be visible in order to form a cluster.
MINIMUM_MASTER_NODES: "2"
client:
name: client
replicas: 2
serviceType: ClusterIP
loadBalancerIP: {}
loadBalancerSourceRanges: {}
## (dict) If specified, apply these annotations to the client service
# serviceAnnotations:
# example: client-svc-foo
heapSize: "512m"
antiAffinity: "soft"
nodeSelector: {}
tolerations: []
resources:
limits:
cpu: "1"
# memory: "1024Mi"
requests:
cpu: "25m"
memory: "512Mi"
priorityClassName: ""
## (dict) If specified, apply these annotations to each client Pod
# podAnnotations:
# example: client-foo
podDisruptionBudget:
enabled: false
minAvailable: 1
# maxUnavailable: 1
master:
name: master
exposeHttp: false
replicas: 3
heapSize: "512m"
persistence:
enabled: true
accessMode: ReadWriteOnce
name: data
size: "4Gi"
# storageClass: "ssd"
antiAffinity: "soft"
nodeSelector: {}
tolerations: []
resources:
limits:
cpu: "1"
# memory: "1024Mi"
requests:
cpu: "25m"
memory: "512Mi"
priorityClassName: ""
## (dict) If specified, apply these annotations to each master Pod
# podAnnotations:
# example: master-foo
podDisruptionBudget:
enabled: false
minAvailable: 2 # Same as `cluster.env.MINIMUM_MASTER_NODES`
# maxUnavailable: 1
updateStrategy:
type: OnDelete
data:
name: data
exposeHttp: false
replicas: 2
heapSize: "1536m"
persistence:
enabled: true
accessMode: ReadWriteOnce
name: data
size: "30Gi"
# storageClass: "ssd"
terminationGracePeriodSeconds: 3600
antiAffinity: "soft"
nodeSelector: {}
tolerations: []
resources:
limits:
cpu: "1"
# memory: "2048Mi"
requests:
cpu: "25m"
memory: "1536Mi"
priorityClassName: ""
## (dict) If specified, apply these annotations to each data Pod
# podAnnotations:
# example: data-foo
podDisruptionBudget:
enabled: false
# minAvailable: 1
maxUnavailable: 1
updateStrategy:
type: OnDelete
================================================
FILE: manifests/deprecated/es-cluster/es-values.yaml
================================================
image:
repository: "jmgao1983/elasticsearch"
cluster:
name: "es-on-k8s"
env:
MINIMUM_MASTER_NODES: "2"
client:
serviceType: NodePort
master:
name: master
replicas: 3
heapSize: "512m"
persistence:
enabled: true
accessMode: ReadWriteOnce
name: data
size: "4Gi"
storageClass: "nfs-es"
data:
name: data
replicas: 2
heapSize: "1536m"
persistence:
enabled: true
accessMode: ReadWriteOnce
name: data
size: "40Gi"
storageClass: "nfs-es"
terminationGracePeriodSeconds: 3600
resources:
limits:
cpu: "1"
# memory: "2048Mi"
requests:
cpu: "25m"
memory: "1536Mi"
podDisruptionBudget:
enabled: false
# minAvailable: 1
maxUnavailable: 1
================================================
FILE: manifests/deprecated/ingress/nginx-ingress/nginx-ingress-svc.yaml
================================================
apiVersion: v1
kind: Service
metadata:
name: ingress-nginx
namespace: ingress-nginx
labels:
app.kubernetes.io/name: ingress-nginx
app.kubernetes.io/part-of: ingress-nginx
spec:
type: NodePort
ports:
- name: http
port: 80
targetPort: 80
protocol: TCP
# 集群hosts文件中设置的 NODE_PORT_RANGE 作为 NodePort的可用范围
# 从默认20000~40000之间选一个可用端口,让ingress-controller暴露给外部的访问
nodePort: 23456
- name: https
port: 443
targetPort: 443
protocol: TCP
# 集群hosts文件中设置的 NODE_PORT_RANGE 作为 NodePort的可用范围
# 从默认20000~40000之间选一个可用端口,让ingress-controller暴露https
nodePort: 23457
- name: test-mysql
port: 3306
targetPort: 3306
protocol: TCP
nodePort: 23306
- name: test-mysql-read
port: 3307
targetPort: 3307
protocol: TCP
nodePort: 23307
- name: test-dns
port: 53
targetPort: 53
protocol: UDP
nodePort: 20053
selector:
app.kubernetes.io/name: ingress-nginx
app.kubernetes.io/part-of: ingress-nginx
================================================
FILE: manifests/deprecated/ingress/nginx-ingress/nginx-ingress.yaml
================================================
apiVersion: v1
kind: Namespace
metadata:
name: ingress-nginx
---
kind: ConfigMap
apiVersion: v1
metadata:
name: nginx-configuration
namespace: ingress-nginx
labels:
app.kubernetes.io/name: ingress-nginx
app.kubernetes.io/part-of: ingress-nginx
---
kind: ConfigMap
apiVersion: v1
metadata:
name: tcp-services
namespace: ingress-nginx
labels:
app.kubernetes.io/name: ingress-nginx
app.kubernetes.io/part-of: ingress-nginx
---
kind: ConfigMap
apiVersion: v1
metadata:
name: udp-services
namespace: ingress-nginx
labels:
app.kubernetes.io/name: ingress-nginx
app.kubernetes.io/part-of: ingress-nginx
---
apiVersion: v1
kind: ServiceAccount
metadata:
name: nginx-ingress-serviceaccount
namespace: ingress-nginx
labels:
app.kubernetes.io/name: ingress-nginx
app.kubernetes.io/part-of: ingress-nginx
---
apiVersion: rbac.authorization.k8s.io/v1
kind: ClusterRole
metadata:
name: nginx-ingress-clusterrole
labels:
app.kubernetes.io/name: ingress-nginx
app.kubernetes.io/part-of: ingress-nginx
rules:
- apiGroups:
- ""
resources:
- configmaps
- endpoints
- nodes
- pods
- secrets
verbs:
- list
- watch
- apiGroups:
- ""
resources:
- nodes
verbs:
- get
- apiGroups:
- ""
resources:
- services
verbs:
- get
- list
- watch
- apiGroups:
- "extensions"
resources:
- ingresses
verbs:
- get
- list
- watch
- apiGroups:
- ""
resources:
- events
verbs:
- create
- patch
- apiGroups:
- "extensions"
resources:
- ingresses/status
verbs:
- update
---
apiVersion: rbac.authorization.k8s.io/v1
kind: Role
metadata:
name: nginx-ingress-role
namespace: ingress-nginx
labels:
app.kubernetes.io/name: ingress-nginx
app.kubernetes.io/part-of: ingress-nginx
rules:
- apiGroups:
- ""
resources:
- configmaps
- pods
- secrets
- namespaces
verbs:
- get
- apiGroups:
- ""
resources:
- configmaps
resourceNames:
# Defaults to "-"
# Here: "-"
# This has to be adapted if you change either parameter
# when launching the nginx-ingress-controller.
- "ingress-controller-leader-nginx"
verbs:
- get
- update
- apiGroups:
- ""
resources:
- configmaps
verbs:
- create
- apiGroups:
- ""
resources:
- endpoints
verbs:
- get
---
apiVersion: rbac.authorization.k8s.io/v1
kind: RoleBinding
metadata:
name: nginx-ingress-role-nisa-binding
namespace: ingress-nginx
labels:
app.kubernetes.io/name: ingress-nginx
app.kubernetes.io/part-of: ingress-nginx
roleRef:
apiGroup: rbac.authorization.k8s.io
kind: Role
name: nginx-ingress-role
subjects:
- kind: ServiceAccount
name: nginx-ingress-serviceaccount
namespace: ingress-nginx
---
apiVersion: rbac.authorization.k8s.io/v1
kind: ClusterRoleBinding
metadata:
name: nginx-ingress-clusterrole-nisa-binding
labels:
app.kubernetes.io/name: ingress-nginx
app.kubernetes.io/part-of: ingress-nginx
roleRef:
apiGroup: rbac.authorization.k8s.io
kind: ClusterRole
name: nginx-ingress-clusterrole
subjects:
- kind: ServiceAccount
name: nginx-ingress-serviceaccount
namespace: ingress-nginx
---
apiVersion: apps/v1
kind: Deployment
metadata:
name: nginx-ingress-controller
namespace: ingress-nginx
labels:
app.kubernetes.io/name: ingress-nginx
app.kubernetes.io/part-of: ingress-nginx
spec:
replicas: 1
selector:
matchLabels:
app.kubernetes.io/name: ingress-nginx
app.kubernetes.io/part-of: ingress-nginx
template:
metadata:
labels:
app.kubernetes.io/name: ingress-nginx
app.kubernetes.io/part-of: ingress-nginx
annotations:
prometheus.io/port: "10254"
prometheus.io/scrape: "true"
spec:
serviceAccountName: nginx-ingress-serviceaccount
containers:
- name: nginx-ingress-controller
#image: quay.io/kubernetes-ingress-controller/nginx-ingress-controller:0.21.0
#使用以下镜像,方便国内下载加速
image: jmgao1983/nginx-ingress-controller:0.21.0
args:
- /nginx-ingress-controller
- --configmap=$(POD_NAMESPACE)/nginx-configuration
- --tcp-services-configmap=$(POD_NAMESPACE)/tcp-services
- --udp-services-configmap=$(POD_NAMESPACE)/udp-services
- --publish-service=$(POD_NAMESPACE)/ingress-nginx
- --annotations-prefix=nginx.ingress.kubernetes.io
securityContext:
capabilities:
drop:
- ALL
add:
- NET_BIND_SERVICE
# www-data -> 33
runAsUser: 33
env:
- name: POD_NAME
valueFrom:
fieldRef:
fieldPath: metadata.name
- name: POD_NAMESPACE
valueFrom:
fieldRef:
fieldPath: metadata.namespace
ports:
- name: http
containerPort: 80
- name: https
containerPort: 443
# hostPort可以直接使用node节点的网络端口暴露服务
#- name: mysql
# containerPort: 3306
# hostPort: 3306
#- name: dns
# containerPort: 53
# hostPort: 53
# protocol: UDP
livenessProbe:
failureThreshold: 3
httpGet:
path: /healthz
port: 10254
scheme: HTTP
initialDelaySeconds: 10
periodSeconds: 10
successThreshold: 1
timeoutSeconds: 1
readinessProbe:
failureThreshold: 3
httpGet:
path: /healthz
port: 10254
scheme: HTTP
periodSeconds: 10
successThreshold: 1
timeoutSeconds: 1
---
apiVersion: v1
kind: Service
metadata:
name: ingress-nginx
namespace: ingress-nginx
labels:
app.kubernetes.io/name: ingress-nginx
app.kubernetes.io/part-of: ingress-nginx
spec:
type: NodePort
ports:
- name: http
port: 80
targetPort: 80
protocol: TCP
# 集群hosts文件中设置的 NODE_PORT_RANGE 作为 NodePort的可用范围
# 从默认20000~40000之间选一个可用端口,让ingress-controller暴露给外部的访问
nodePort: 23456
- name: https
port: 443
targetPort: 443
protocol: TCP
# 集群hosts文件中设置的 NODE_PORT_RANGE 作为 NodePort的可用范围
# 从默认20000~40000之间选一个可用端口,让ingress-controller暴露https
nodePort: 23457
selector:
app.kubernetes.io/name: ingress-nginx
app.kubernetes.io/part-of: ingress-nginx
---
================================================
FILE: manifests/deprecated/ingress/nginx-ingress/tcp-services-configmap.yaml
================================================
kind: ConfigMap
apiVersion: v1
metadata:
name: tcp-services
namespace: ingress-nginx
labels:
app.kubernetes.io/name: ingress-nginx
app.kubernetes.io/part-of: ingress-nginx
data:
3306: "mariadb/mydb-mariadb:3306"
3307: "mariadb/mydb-mariadb-slave:3306"
================================================
FILE: manifests/deprecated/ingress/nginx-ingress/udp-services-configmap.yaml
================================================
kind: ConfigMap
apiVersion: v1
metadata:
name: udp-services
namespace: ingress-nginx
labels:
app.kubernetes.io/name: ingress-nginx
app.kubernetes.io/part-of: ingress-nginx
data:
53: "kube-system/kube-dns:53"
================================================
FILE: manifests/deprecated/ingress/test-hello.ing.yaml
================================================
# kubectl run test-hello --image=nginx --expose --port=80
apiVersion: networking.k8s.io/v1beta1
kind: Ingress
metadata:
name: test-hello
spec:
rules:
- host: hello.test.com
http:
paths:
- path: /
backend:
serviceName: test-hello
servicePort: 80
================================================
FILE: manifests/deprecated/ingress/traefik/tls/hello-tls.ing.yaml
================================================
apiVersion: networking.k8s.io/v1beta1
kind: Ingress
metadata:
name: hello-tls-ingress
annotations:
kubernetes.io/ingress.class: traefik
spec:
rules:
- host: hello.test.com
http:
paths:
- backend:
serviceName: test-hello
servicePort: 80
tls:
- secretName: traefik-cert
================================================
FILE: manifests/deprecated/ingress/traefik/tls/k8s-dashboard.ing.yaml
================================================
apiVersion: networking.k8s.io/v1beta1
kind: Ingress
metadata:
name: kubernetes-dashboard
namespace: kube-system
annotations:
traefik.ingress.kubernetes.io/redirect-entry-point: https
spec:
rules:
- host: dashboard.test.com
http:
paths:
- path: /
backend:
serviceName: kubernetes-dashboard
servicePort: 443
================================================
FILE: manifests/deprecated/ingress/traefik/tls/traefik-controller.yaml
================================================
apiVersion: v1
kind: ConfigMap
metadata:
name: traefik-conf
namespace: kube-system
data:
traefik.toml: |
# 设置insecureSkipVerify = true,可以配置backend为443(比如dashboard)的ingress规则
insecureSkipVerify = true
defaultEntryPoints = ["http", "https"]
[entryPoints]
[entryPoints.http]
address = ":80"
### 配置http 强制跳转 https
#[entryPoints.http.redirect]
# entryPoint = "https"
### 配置只信任trustedIPs传递过来X-Forwarded-*,默认全部信任;为了防止客户端地址伪造,需开启这个
#[entryPoints.http.forwardedHeaders]
# trustedIPs = ["10.1.0.0/16", "172.20.0.0/16", "192.168.1.3"]
[entryPoints.https]
address = ":443"
[entryPoints.https.tls]
[[entryPoints.https.tls.certificates]]
CertFile = "/ssl/tls.crt"
KeyFile = "/ssl/tls.key"
---
kind: Deployment
apiVersion: apps/v1
metadata:
name: traefik-ingress-controller
namespace: kube-system
labels:
k8s-app: traefik-ingress-lb
spec:
replicas: 1
selector:
matchLabels:
k8s-app: traefik-ingress-lb
template:
metadata:
labels:
k8s-app: traefik-ingress-lb
name: traefik-ingress-lb
spec:
serviceAccountName: traefik-ingress-controller
terminationGracePeriodSeconds: 60
volumes:
- name: ssl
secret:
secretName: traefik-cert
- name: config
configMap:
name: traefik-conf
#nodeSelector:
# node-role.kubernetes.io/traefik: "true"
containers:
- image: traefik:v1.7.20
imagePullPolicy: IfNotPresent
name: traefik-ingress-lb
volumeMounts:
- mountPath: "/ssl"
name: "ssl"
- mountPath: "/config"
name: "config"
resources:
limits:
cpu: 1000m
memory: 800Mi
requests:
cpu: 500m
memory: 600Mi
args:
- --configfile=/config/traefik.toml
- --api
- --kubernetes
- --logLevel=INFO
securityContext:
capabilities:
drop:
- ALL
add:
- NET_BIND_SERVICE
ports:
- name: http
containerPort: 80
hostPort: 80
- name: https
containerPort: 443
hostPort: 443
---
kind: Service
apiVersion: v1
metadata:
name: traefik-ingress-service
namespace: kube-system
spec:
selector:
k8s-app: traefik-ingress-lb
ports:
- protocol: TCP
# 该端口为 traefik ingress-controller的服务端口
port: 80
# 集群hosts文件中设置的 NODE_PORT_RANGE 作为 NodePort的可用范围
# 从默认20000~40000之间选一个可用端口,让ingress-controller暴露给外部的访问
nodePort: 23456
name: http
- protocol: TCP
#
port: 443
nodePort: 23457
name: https
- protocol: TCP
# 该端口为 traefik 的管理WEB界面
port: 8080
name: admin
type: NodePort
---
kind: ClusterRole
apiVersion: rbac.authorization.k8s.io/v1
metadata:
name: traefik-ingress-controller
rules:
- apiGroups:
- ""
resources:
- pods
- services
- endpoints
- secrets
verbs:
- get
- list
- watch
- apiGroups:
- extensions
resources:
- ingresses
verbs:
- get
- list
- watch
---
kind: ClusterRoleBinding
apiVersion: rbac.authorization.k8s.io/v1
metadata:
name: traefik-ingress-controller
roleRef:
apiGroup: rbac.authorization.k8s.io
kind: ClusterRole
name: traefik-ingress-controller
subjects:
- kind: ServiceAccount
name: traefik-ingress-controller
namespace: kube-system
---
apiVersion: v1
kind: ServiceAccount
metadata:
name: traefik-ingress-controller
namespace: kube-system
================================================
FILE: manifests/deprecated/ingress/traefik/traefik-ingress.yaml
================================================
---
kind: ClusterRole
apiVersion: rbac.authorization.k8s.io/v1
metadata:
name: traefik-ingress-controller
rules:
- apiGroups:
- ""
resources:
- pods
- services
- endpoints
- secrets
verbs:
- get
- list
- watch
- apiGroups:
- extensions
resources:
- ingresses
verbs:
- get
- list
- watch
---
kind: ClusterRoleBinding
apiVersion: rbac.authorization.k8s.io/v1
metadata:
name: traefik-ingress-controller
roleRef:
apiGroup: rbac.authorization.k8s.io
kind: ClusterRole
name: traefik-ingress-controller
subjects:
- kind: ServiceAccount
name: traefik-ingress-controller
namespace: kube-system
---
apiVersion: v1
kind: ServiceAccount
metadata:
name: traefik-ingress-controller
namespace: kube-system
---
kind: Deployment
apiVersion: apps/v1
metadata:
name: traefik-ingress-controller
namespace: kube-system
labels:
k8s-app: traefik-ingress-lb
spec:
replicas: 1
selector:
matchLabels:
k8s-app: traefik-ingress-lb
template:
metadata:
labels:
k8s-app: traefik-ingress-lb
name: traefik-ingress-lb
spec:
serviceAccountName: traefik-ingress-controller
terminationGracePeriodSeconds: 60
containers:
- image: traefik:v1.7.20
imagePullPolicy: IfNotPresent
name: traefik-ingress-lb
args:
- --api
- --kubernetes
- --logLevel=INFO
---
kind: Service
apiVersion: v1
metadata:
name: traefik-ingress-service
namespace: kube-system
spec:
selector:
k8s-app: traefik-ingress-lb
ports:
- protocol: TCP
# 该端口为 traefik ingress-controller的服务端口
port: 80
# 集群hosts文件中设置的 NODE_PORT_RANGE 作为 NodePort的可用范围
# 从默认20000~40000之间选一个可用端口,让ingress-controller暴露给外部的访问
nodePort: 23456
name: web
- protocol: TCP
# 该端口为 traefik 的管理WEB界面
port: 8080
name: admin
type: NodePort
================================================
FILE: manifests/deprecated/ingress/traefik/traefik-ui.ing.yaml
================================================
---
apiVersion: networking.k8s.io/v1beta1
kind: Ingress
metadata:
name: traefik-web-ui
namespace: kube-system
spec:
rules:
- host: traefik-ui.test.com
http:
paths:
- path: /
backend:
serviceName: traefik-ingress-service
servicePort: 8080
================================================
FILE: manifests/deprecated/ingress/whoami.ing.yaml
================================================
# kubectl run whoami --image=emilevauge/whoami --port=80 --expose
apiVersion: networking.k8s.io/v1beta1
kind: Ingress
metadata:
name: test-whoami
spec:
rules:
- host: who.test.com
http:
paths:
- path: /
backend:
serviceName: whoami
servicePort: 80
================================================
FILE: manifests/deprecated/ingress/whoami.yaml
================================================
apiVersion: v1
kind: Service
metadata:
name: whoami
labels:
app: whoami
spec:
ports:
- name: web
port: 80
targetPort: 80
selector:
app: whoami
sessionAffinity: None
#type: NodePort
---
apiVersion: apps/v1
kind: Deployment
metadata:
name: whoami
spec:
replicas: 2
selector:
matchLabels:
app: whoami
template:
metadata:
labels:
app: whoami
spec:
containers:
- name: whoami
image: emilevauge/whoami
ports:
- containerPort: 80
================================================
FILE: manifests/deprecated/jenkins/.helmignore
================================================
# Patterns to ignore when building packages.
# This supports shell glob matching, relative path matching, and
# negation (prefixed with !). Only one pattern per line.
.DS_Store
# Common VCS dirs
.git/
.gitignore
.bzr/
.bzrignore
.hg/
.hgignore
.svn/
# Common backup files
*.swp
*.bak
*.tmp
*~
# Various IDEs
.project
.idea/
*.tmproj
================================================
FILE: manifests/deprecated/jenkins/Chart.yaml
================================================
name: jenkins
home: https://jenkins.io/
version: 0.16.6
appVersion: 2.121.1
description: Open source continuous integration server. It supports multiple SCM tools
including CVS, Subversion and Git. It can execute Apache Ant and Apache Maven-based
projects as well as arbitrary scripts.
sources:
- https://github.com/jenkinsci/jenkins
- https://github.com/jenkinsci/docker-jnlp-slave
maintainers:
- name: lachie83
email: lachlan.evenson@microsoft.com
- name: viglesiasce
email: viglesias@google.com
- name: lusyoe
email: lusyoe@163.com
icon: https://wiki.jenkins-ci.org/download/attachments/2916393/logo.png
================================================
FILE: manifests/deprecated/jenkins/OWNERS
================================================
approvers:
- lachie83
- viglesiasce
reviewers:
- lachie83
- viglesiasce
================================================
FILE: manifests/deprecated/jenkins/README.md
================================================
# Jenkins Helm Chart
Jenkins master and slave cluster utilizing the Jenkins Kubernetes plugin
* https://wiki.jenkins-ci.org/display/JENKINS/Kubernetes+Plugin
Inspired by the awesome work of Carlos Sanchez
## Chart Details
This chart will do the following:
* 1 x Jenkins Master with port 8080 exposed on an external LoadBalancer
* All using Kubernetes Deployments
## Installing the Chart
To install the chart with the release name `my-release`:
```bash
$ helm install --name my-release stable/jenkins
```
## Configuration
The following tables list the configurable parameters of the Jenkins chart and their default values.
### Jenkins Master
| Parameter | Description | Default |
| --------------------------------- | ------------------------------------ | ---------------------------------------------------------------------------- |
| `nameOverride` | Override the resource name prefix | `jenkins` |
| `fullnameOverride` | Override the full resource names | `jenkins-{release-name}` (or `jenkins` if release-name is `jenkins`) |
| `Master.Name` | Jenkins master name | `jenkins-master` |
| `Master.Image` | Master image name | `jenkinsci/jenkins` |
| `Master.ImageTag` | Master image tag | `lts` |
| `Master.ImagePullPolicy` | Master image pull policy | `Always` |
| `Master.ImagePullSecret` | Master image pull secret | Not set |
| `Master.Component` | k8s selector key | `jenkins-master` |
| `Master.UseSecurity` | Use basic security | `true` |
| `Master.AdminUser` | Admin username (and password) created as a secret if useSecurity is true | `admin` |
| `Master.resources` | Resources allocation (Requests and Limits) | `{requests: {cpu: 50m, memory: 256Mi}, limits: {cpu: 2000m, memory: 2048Mi}}`|
| `Master.InitContainerEnv` | Environment variables for Init Container | Not set |
| `Master.ContainerEnv` | Environment variables for Jenkins Container | Not set |
| `Master.UsePodSecurityContext` | Enable pod security context (must be `true` if `RunAsUser` or `FsGroup` are set) | `true` |
| `Master.RunAsUser` | uid that jenkins runs with | `0` |
| `Master.FsGroup` | uid that will be used for persistent volume | `0` |
| `Master.ServiceAnnotations` | Service annotations | `{}` |
| `Master.ServiceType` | k8s service type | `LoadBalancer` |
| `Master.ServicePort` | k8s service port | `8080` |
| `Master.NodePort` | k8s node port | Not set |
| `Master.HealthProbes` | Enable k8s liveness and readiness probes | `true` |
| `Master.HealthProbesLivenessTimeout` | Set the timeout for the liveness probe | `120` |
| `Master.HealthProbesReadinessTimeout` | Set the timeout for the readiness probe | `60` |
| `Master.HealthProbeLivenessFailureThreshold` | Set the failure threshold for the liveness probe | `12` |
| `Master.ContainerPort` | Master listening port | `8080` |
| `Master.SlaveListenerPort` | Listening port for agents | `50000` |
| `Master.DisabledAgentProtocols` | Disabled agent protocols | `JNLP-connect JNLP2-connect` |
| `Master.CSRF.DefaultCrumbIssuer.Enabled` | Enable the default CSRF Crumb issuer | `true` |
| `Master.CSRF.DefaultCrumbIssuer.ProxyCompatability` | Enable proxy compatibility | `true` |
| `Master.CLI` | Enable CLI over remoting | `false` |
| `Master.LoadBalancerSourceRanges` | Allowed inbound IP addresses | `0.0.0.0/0` |
| `Master.LoadBalancerIP` | Optional fixed external IP | Not set |
| `Master.JMXPort` | Open a port, for JMX stats | Not set |
| `Master.CustomConfigMap` | Use a custom ConfigMap | `false` |
| `Master.Ingress.Annotations` | Ingress annotations | `{}` |
| `Master.Ingress.TLS` | Ingress TLS configuration | `[]` |
| `Master.InitScripts` | List of Jenkins init scripts | Not set |
| `Master.CredentialsXmlSecret` | Kubernetes secret that contains a 'credentials.xml' file | Not set |
| `Master.SecretsFilesSecret` | Kubernetes secret that contains 'secrets' files | Not set |
| `Master.Jobs` | Jenkins XML job configs | Not set |
| `Master.InstallPlugins` | List of Jenkins plugins to install | `kubernetes:0.11 workflow-aggregator:2.5 credentials-binding:1.11 git:3.2.0` |
| `Master.ScriptApproval` | List of groovy functions to approve | Not set |
| `Master.NodeSelector` | Node labels for pod assignment | `{}` |
| `Master.Affinity` | Affinity settings | `{}` |
| `Master.Tolerations` | Toleration labels for pod assignment | `{}` |
| `Master.PodAnnotations` | Annotations for master pod | `{}` |
| `NetworkPolicy.Enabled` | Enable creation of NetworkPolicy resources. | `false` |
| `NetworkPolicy.ApiVersion` | NetworkPolicy ApiVersion | `extensions/v1beta1` |
| `rbac.install` | Create service account and ClusterRoleBinding for Kubernetes plugin | `false` |
| `rbac.apiVersion` | RBAC API version | `v1beta1` |
| `rbac.roleRef` | Cluster role name to bind to | `cluster-admin` |
### Jenkins Agent
| Parameter | Description | Default |
| ----------------------- | ----------------------------------------------- | ---------------------- |
| `Agent.AlwaysPullImage` | Always pull agent container image before build | `false` |
| `Agent.Enabled` | Enable Kubernetes plugin jnlp-agent podTemplate | `true` |
| `Agent.Image` | Agent image name | `jenkinsci/jnlp-slave` |
| `Agent.ImagePullSecret` | Agent image pull secret | Not set |
| `Agent.ImageTag` | Agent image tag | `2.62` |
| `Agent.Privileged` | Agent privileged container | `false` |
| `Agent.resources` | Resources allocation (Requests and Limits) | `{requests: {cpu: 200m, memory: 256Mi}, limits: {cpu: 200m, memory: 256Mi}}`|
| `Agent.volumes` | Additional volumes | `nil` |
Specify each parameter using the `--set key=value[,key=value]` argument to `helm install`.
Alternatively, a YAML file that specifies the values for the parameters can be provided while installing the chart. For example,
```bash
$ helm install --name my-release -f values.yaml stable/jenkins
```
> **Tip**: You can use the default [values.yaml](values.yaml)
## Mounting volumes into your Agent pods
Your Jenkins Agents will run as pods, and it's possible to inject volumes where needed:
```yaml
Agent:
volumes:
- type: Secret
secretName: jenkins-mysecrets
mountPath: /var/run/secrets/jenkins-mysecrets
```
The supported volume types are: `ConfigMap`, `EmptyDir`, `HostPath`, `Nfs`, `Pod`, `Secret`. Each type supports a different set of configurable attributes, defined by [the corresponding Java class](https://github.com/jenkinsci/kubernetes-plugin/tree/master/src/main/java/org/csanchez/jenkins/plugins/kubernetes/volumes).
## NetworkPolicy
To make use of the NetworkPolicy resources created by default,
install [a networking plugin that implements the Kubernetes
NetworkPolicy spec](https://kubernetes.io/docs/tasks/administer-cluster/declare-network-policy#before-you-begin).
For Kubernetes v1.5 & v1.6, you must also turn on NetworkPolicy by setting
the DefaultDeny namespace annotation. Note: this will enforce policy for _all_ pods in the namespace:
kubectl annotate namespace default "net.beta.kubernetes.io/network-policy={\"ingress\":{\"isolation\":\"DefaultDeny\"}}"
Install helm chart with network policy enabled:
$ helm install stable/jenkins --set NetworkPolicy.Enabled=true
## Persistence
The Jenkins image stores persistence under `/var/jenkins_home` path of the container. A dynamically managed Persistent Volume
Claim is used to keep the data across deployments, by default. This is known to work in GCE, AWS, and minikube. Alternatively,
a previously configured Persistent Volume Claim can be used.
It is possible to mount several volumes using `Persistence.volumes` and `Persistence.mounts` parameters.
### Persistence Values
| Parameter | Description | Default |
| --------------------------- | ------------------------------- | --------------- |
| `Persistence.Enabled` | Enable the use of a Jenkins PVC | `true` |
| `Persistence.ExistingClaim` | Provide the name of a PVC | `nil` |
| `Persistence.AccessMode` | The PVC access mode | `ReadWriteOnce` |
| `Persistence.Size` | The size of the PVC | `8Gi` |
| `Persistence.volumes` | Additional volumes | `nil` |
| `Persistence.mounts` | Additional mounts | `nil` |
| `Persistence.StorageClass` | The PV Provisioner | `nfs-dynamic-class`|
#### Existing PersistentVolumeClaim
1. Create the PersistentVolume
1. Create the PersistentVolumeClaim
1. Install the chart
```bash
$ helm install --name my-release --set Persistence.ExistingClaim=PVC_NAME stable/jenkins
```
## Custom ConfigMap
When creating a new parent chart with this chart as a dependency, the `CustomConfigMap` parameter can be used to override the default config.xml provided.
It also allows for providing additional xml configuration files that will be copied into `/var/jenkins_home`. In the parent chart's values.yaml,
set the `jenkins.Master.CustomConfigMap` value to true like so
```yaml
jenkins:
Master:
CustomConfigMap: true
```
and provide the file `templates/config.tpl` in your parent chart for your use case. You can start by copying the contents of `config.yaml` from this chart into your parent charts `templates/config.tpl` as a basis for customization. Finally, you'll need to wrap the contents of `templates/config.tpl` like so:
```yaml
{{- define "override_config_map" }}
{{ end }}
```
## RBAC
If running upon a cluster with RBAC enabled you will need to do the following:
* `helm install stable/jenkins --set rbac.install=true`
* Create a Jenkins credential of type Kubernetes service account with service account name provided in the `helm status` output.
* Under configure Jenkins -- Update the credentials config in the cloud section to use the service account credential you created in the step above.
## Run Jenkins as non root user
The default settings of this helm chart let Jenkins run as root user with uid `0`.
Due to security reasons you may want to run Jenkins as a non root user.
Fortunately the default jenkins docker image `jenkins/jenkins` contains a user `jenkins` with uid `1000` that can be used for this purpose.
Simply use the following settings to run Jenkins as `jenkins` user with uid `1000`.
```yaml
jenkins:
Master:
RunAsUser: 1000
FsGroup: 1000
```
Docs taken from https://github.com/jenkinsci/docker/blob/master/Dockerfile:
_Jenkins is run with user `jenkins`, uid = 1000. If you bind mount a volume from the host or a data container,ensure you use the same uid_
## Running behind a forward proxy
The master pod uses an Init Container to install plugins etc. If you are behind a corporate proxy it may be useful to set `Master.InitContainerEnv` to add environment variables such as `http_proxy`, so that these can be downloaded.
Additionally, you may want to add env vars for the Jenkins container, and the JVM (`Master.JavaOpts`).
```yaml
Master:
InitContainerEnv:
- name: http_proxy
value: "http://192.168.64.1:3128"
- name: https_proxy
value: "http://192.168.64.1:3128"
- name: no_proxy
value: ""
ContainerEnv:
- name: http_proxy
value: "http://192.168.64.1:3128"
- name: https_proxy
value: "http://192.168.64.1:3128"
JavaOpts: >-
-Dhttp.proxyHost=192.168.64.1
-Dhttp.proxyPort=3128
-Dhttps.proxyHost=192.168.64.1
-Dhttps.proxyPort=3128
```
================================================
FILE: manifests/deprecated/jenkins/templates/NOTES.txt
================================================
1. Get your '{{ .Values.Master.AdminUser }}' user password by running:
printf $(kubectl get secret --namespace {{ .Release.Namespace }} {{ template "jenkins.fullname" . }} -o jsonpath="{.data.jenkins-admin-password}" | base64 --decode);echo
{{- if .Values.Master.HostName }}
2. Visit http://{{ .Values.Master.HostName }}
{{- else }}
2. Get the Jenkins URL to visit by running these commands in the same shell:
{{- if contains "NodePort" .Values.Master.ServiceType }}
export NODE_PORT=$(kubectl get --namespace {{ .Release.Namespace }} -o jsonpath="{.spec.ports[0].nodePort}" services {{ template "jenkins.fullname" . }})
export NODE_IP=$(kubectl get nodes --namespace {{ .Release.Namespace }} -o jsonpath="{.items[0].status.addresses[0].address}")
echo http://$NODE_IP:$NODE_PORT/login
{{- else if contains "LoadBalancer" .Values.Master.ServiceType }}
NOTE: It may take a few minutes for the LoadBalancer IP to be available.
You can watch the status of by running 'kubectl get svc --namespace {{ .Release.Namespace }} -w {{ template "jenkins.fullname" . }}'
export SERVICE_IP=$(kubectl get svc --namespace {{ .Release.Namespace }} {{ template "jenkins.fullname" . }} --template "{{ "{{ range (index .status.loadBalancer.ingress 0) }}{{ . }}{{ end }}" }}")
echo http://$SERVICE_IP:{{ .Values.Master.ServicePort }}/login
{{- else if contains "ClusterIP" .Values.Master.ServiceType }}
export POD_NAME=$(kubectl get pods --namespace {{ .Release.Namespace }} -l "component={{ template "jenkins.fullname" . }}-master" -o jsonpath="{.items[0].metadata.name}")
echo http://127.0.0.1:{{ .Values.Master.ServicePort }}
kubectl port-forward $POD_NAME {{ .Values.Master.ServicePort }}:{{ .Values.Master.ServicePort }}
{{- end }}
{{- end }}
3. Login with the password from step 1 and the username: {{ .Values.Master.AdminUser }}
For more information on running Jenkins on Kubernetes, visit:
https://cloud.google.com/solutions/jenkins-on-container-engine
{{- if .Values.Persistence.Enabled }}
{{- else }}
#################################################################################
###### WARNING: Persistence is disabled!!! You will lose your data when #####
###### the Jenkins pod is terminated. #####
#################################################################################
{{- end }}
{{- if .Values.rbac.install }}
Configure the Kubernetes plugin in Jenkins to use the following Service Account name {{ template "jenkins.fullname" . }} using the following steps:
Create a Jenkins credential of type Kubernetes service account with service account name {{ template "jenkins.fullname" . }}
Under configure Jenkins -- Update the credentials config in the cloud section to use the service account credential you created in the step above.
{{- end }}
================================================
FILE: manifests/deprecated/jenkins/templates/_helpers.tpl
================================================
{{/* vim: set filetype=mustache: */}}
{{/*
Expand the name of the chart.
*/}}
{{- define "jenkins.name" -}}
{{- default .Chart.Name .Values.nameOverride | trunc 63 | trimSuffix "-" -}}
{{- end -}}
{{/*
Create a default fully qualified app name.
We truncate at 63 chars because some Kubernetes name fields are limited to this (by the DNS naming spec).
If release name contains chart name it will be used as a full name.
*/}}
{{- define "jenkins.fullname" -}}
{{- if .Values.fullnameOverride -}}
{{- .Values.fullnameOverride | trunc 63 | trimSuffix "-" -}}
{{- else -}}
{{- $name := default .Chart.Name .Values.nameOverride -}}
{{- if contains $name .Release.Name -}}
{{- .Release.Name | trunc 63 | trimSuffix "-" -}}
{{- else -}}
{{- printf "%s-%s" .Release.Name $name | trunc 63 | trimSuffix "-" -}}
{{- end -}}
{{- end -}}
{{- end -}}
{{- define "jenkins.kubernetes-version" -}}
{{- range .Values.Master.InstallPlugins -}}
{{ if hasPrefix "kubernetes:" . }}
{{- $split := splitList ":" . }}
{{- printf "%s" (index $split 1 ) -}}
{{- end -}}
{{- end -}}
{{- end -}}
================================================
FILE: manifests/deprecated/jenkins/templates/config.yaml
================================================
{{- if not .Values.Master.CustomConfigMap }}
apiVersion: v1
kind: ConfigMap
metadata:
name: {{ template "jenkins.fullname" . }}
data:
config.xml: |-
{{ .Values.Master.ImageTag }}
0
NORMAL
{{ .Values.Master.UseSecurity }}
true
false
${JENKINS_HOME}/workspace/${ITEM_FULLNAME}
${ITEM_ROOTDIR}/builds
kubernetes
{{- if .Values.Agent.Enabled }}
default
2147483647
0
{{- $local := dict "first" true }}
{{- range $key, $value := .Values.Agent.NodeSelector }}
{{- if not $local.first }},{{- end }}
{{- $key }}={{ $value }}
{{- $_ := set $local "first" false }}
{{- end }}
NORMAL
{{- range $index, $volume := .Values.Agent.volumes }}
{{- range $key, $value := $volume }}{{- if not (eq $key "type") }}
<{{ $key }}>{{ $value }}
{{- end }}{{- end }}
{{- end }}
jnlp
{{ .Values.Agent.Image }}:{{ .Values.Agent.ImageTag }}
{{- if .Values.Agent.Privileged }}
true
{{- else }}
false
{{- end }}
{{ .Values.Agent.AlwaysPullImage }}
/home/jenkins
${computer.jnlpmac} ${computer.name}
false
# Resources configuration is a little hacky. This was to prevent breaking
# changes, and should be cleanned up in the future once everybody had
# enough time to migrate.
{{.Values.Agent.Cpu | default .Values.Agent.resources.requests.cpu}}
{{.Values.Agent.Memory | default .Values.Agent.resources.requests.memory}}
{{.Values.Agent.Cpu | default .Values.Agent.resources.limits.cpu}}
{{.Values.Agent.Memory | default .Values.Agent.resources.limits.memory}}
{{- if .Values.Agent.ImagePullSecret }}
{{ .Values.Agent.ImagePullSecret }}
{{- else }}
{{- end }}
{{- end -}}
https://kubernetes
false
{{ .Release.Namespace }}
http://{{ template "jenkins.fullname" . }}:{{.Values.Master.ServicePort}}{{ default "" .Values.Master.JenkinsUriPrefix }}
{{ template "jenkins.fullname" . }}-agent:50000
10
5
0
0
5
0
All
false
false
All
50000
{{- range .Values.Master.DisabledAgentProtocols }}
{{ . }}
{{- end }}
{{- if .Values.Master.CSRF.DefaultCrumbIssuer.Enabled }}
{{- if .Values.Master.CSRF.DefaultCrumbIssuer.ProxyCompatability }}
true
{{- end }}
{{- end }}
true
{{- if .Values.Master.ScriptApproval }}
scriptapproval.xml: |-
{{- range $key, $val := .Values.Master.ScriptApproval }}
{{ $val }}
{{- end }}
{{- end }}
jenkins.CLI.xml: |-
{{- if .Values.Master.CLI }}
true
{{- else }}
false
{{- end }}
hudson.model.UpdateCenter.xml: |-
default
{{- if .Values.Master.UpdateCenter }}
{{ .Values.Master.UpdateCenter }}
{{- else }}
https://updates.jenkins.io/update-center.json
{{- end }}
apply_config.sh: |-
mkdir -p /usr/share/jenkins/ref/secrets/;
echo "false" > /usr/share/jenkins/ref/secrets/slave-to-master-security-kill-switch;
cp -n /var/jenkins_config/config.xml /var/jenkins_home;
cp -n /var/jenkins_config/jenkins.CLI.xml /var/jenkins_home;
cp -n /var/jenkins_config/hudson.model.UpdateCenter.xml /var/jenkins_home;
{{- if .Values.Master.InstallPlugins }}
# Install missing plugins
cp /var/jenkins_config/plugins.txt /var/jenkins_home;
rm -rf /usr/share/jenkins/ref/plugins/*.lock
/usr/local/bin/install-plugins.sh `echo $(cat /var/jenkins_home/plugins.txt)`;
# Copy plugins to shared volume
cp -n /usr/share/jenkins/ref/plugins/* /var/jenkins_plugins;
{{- end }}
{{- if .Values.Master.ScriptApproval }}
cp -n /var/jenkins_config/scriptapproval.xml /var/jenkins_home/scriptApproval.xml;
{{- end }}
{{- if .Values.Master.InitScripts }}
mkdir -p /var/jenkins_home/init.groovy.d/;
cp -n /var/jenkins_config/*.groovy /var/jenkins_home/init.groovy.d/
{{- end }}
{{- if .Values.Master.CredentialsXmlSecret }}
cp -n /var/jenkins_credentials/credentials.xml /var/jenkins_home;
{{- end }}
{{- if .Values.Master.SecretsFilesSecret }}
cp -n /var/jenkins_secrets/* /usr/share/jenkins/ref/secrets;
{{- end }}
{{- if .Values.Master.Jobs }}
for job in $(ls /var/jenkins_jobs); do
mkdir -p /var/jenkins_home/jobs/$job
cp -n /var/jenkins_jobs/$job /var/jenkins_home/jobs/$job/config.xml
done
{{- end }}
{{- range $key, $val := .Values.Master.InitScripts }}
init{{ $key }}.groovy: |-
{{ $val | indent 4 }}
{{- end }}
plugins.txt: |-
{{- if .Values.Master.InstallPlugins }}
{{- range $index, $val := .Values.Master.InstallPlugins }}
{{ $val | indent 4 }}
{{- end }}
{{- end }}
{{ else }}
{{ include "override_config_map" . }}
{{- end -}}
================================================
FILE: manifests/deprecated/jenkins/templates/home-pvc.yaml
================================================
{{- if and .Values.Persistence.Enabled (not .Values.Persistence.ExistingClaim) -}}
kind: PersistentVolumeClaim
apiVersion: v1
metadata:
{{- if .Values.Persistence.Annotations }}
annotations:
{{ toYaml .Values.Persistence.Annotations | indent 4 }}
{{- end }}
name: {{ template "jenkins.fullname" . }}
labels:
app: {{ template "jenkins.fullname" . }}
chart: "{{ .Chart.Name }}-{{ .Chart.Version }}"
release: "{{ .Release.Name }}"
heritage: "{{ .Release.Service }}"
spec:
accessModes:
- {{ .Values.Persistence.AccessMode | quote }}
resources:
requests:
storage: {{ .Values.Persistence.Size | quote }}
{{- if .Values.Persistence.StorageClass }}
{{- if (eq "-" .Values.Persistence.StorageClass) }}
storageClassName: ""
{{- else }}
storageClassName: "{{ .Values.Persistence.StorageClass }}"
{{- end }}
{{- end }}
{{- end }}
================================================
FILE: manifests/deprecated/jenkins/templates/jenkins-agent-svc.yaml
================================================
apiVersion: v1
kind: Service
metadata:
name: {{ template "jenkins.fullname" . }}-agent
labels:
app: {{ template "jenkins.fullname" . }}
chart: "{{ .Chart.Name }}-{{ .Chart.Version }}"
component: "{{ .Release.Name }}-{{ .Values.Master.Component }}"
{{- if .Values.Master.SlaveListenerServiceAnnotations }}
annotations:
{{ toYaml .Values.Master.SlaveListenerServiceAnnotations | indent 4 }}
{{- end }}
spec:
ports:
- port: {{ .Values.Master.SlaveListenerPort }}
targetPort: {{ .Values.Master.SlaveListenerPort }}
name: slavelistener
selector:
component: "{{ .Release.Name }}-{{ .Values.Master.Component }}"
type: {{ .Values.Master.SlaveListenerServiceType }}
================================================
FILE: manifests/deprecated/jenkins/templates/jenkins-master-deployment.yaml
================================================
apiVersion: apps/v1
kind: Deployment
metadata:
name: {{ template "jenkins.fullname" . }}
labels:
heritage: {{ .Release.Service | quote }}
release: {{ .Release.Name | quote }}
chart: "{{ .Chart.Name }}-{{ .Chart.Version }}"
component: "{{ .Release.Name }}-{{ .Values.Master.Name }}"
spec:
replicas: 1
strategy:
type: RollingUpdate
selector:
matchLabels:
component: "{{ .Release.Name }}-{{ .Values.Master.Component }}"
template:
metadata:
labels:
app: {{ template "jenkins.fullname" . }}
heritage: {{ .Release.Service | quote }}
release: {{ .Release.Name | quote }}
chart: "{{ .Chart.Name }}-{{ .Chart.Version }}"
component: "{{ .Release.Name }}-{{ .Values.Master.Component }}"
annotations:
checksum/config: {{ include (print $.Template.BasePath "/config.yaml") . | sha256sum }}
{{- if .Values.Master.PodAnnotations }}
{{ toYaml .Values.Master.PodAnnotations | indent 8 }}
{{- end }}
spec:
{{- if .Values.Master.NodeSelector }}
nodeSelector:
{{ toYaml .Values.Master.NodeSelector | indent 8 }}
{{- end }}
{{- if .Values.Master.Tolerations }}
tolerations:
{{ toYaml .Values.Master.Tolerations | indent 8 }}
{{- end }}
{{- if .Values.Master.Affinity }}
affinity:
{{ toYaml .Values.Master.Affinity | indent 8 }}
{{- end }}
{{- if .Values.Master.UsePodSecurityContext }}
securityContext:
runAsUser: {{ default 0 .Values.Master.RunAsUser }}
{{- if and (.Values.Master.RunAsUser) (.Values.Master.FsGroup) }}
{{- if not (eq .Values.Master.RunAsUser 0.0) }}
fsGroup: {{ .Values.Master.FsGroup }}
{{- end }}
{{- end }}
{{- end }}
serviceAccountName: {{ if .Values.rbac.install }}{{ template "jenkins.fullname" . }}{{ else }}"{{ .Values.rbac.serviceAccountName }}"{{ end }}
initContainers:
- name: "copy-default-config"
image: "{{ .Values.Master.Image }}:{{ .Values.Master.ImageTag }}"
imagePullPolicy: "{{ .Values.Master.ImagePullPolicy }}"
command: [ "sh", "/var/jenkins_config/apply_config.sh" ]
{{- if .Values.Master.InitContainerEnv }}
env:
{{ toYaml .Values.Master.InitContainerEnv | indent 12 }}
{{- end }}
volumeMounts:
-
mountPath: /var/jenkins_home
name: jenkins-home
-
mountPath: /var/jenkins_config
name: jenkins-config
{{- if .Values.Master.CredentialsXmlSecret }}
-
mountPath: /var/jenkins_credentials
name: jenkins-credentials
readOnly: true
{{- end }}
{{- if .Values.Master.SecretsFilesSecret }}
-
mountPath: /var/jenkins_secrets
name: jenkins-secrets
readOnly: true
{{- end }}
{{- if .Values.Master.Jobs }}
-
mountPath: /var/jenkins_jobs
name: jenkins-jobs
readOnly: true
{{- end }}
{{- if .Values.Master.InstallPlugins }}
-
mountPath: /var/jenkins_plugins
name: plugin-dir
{{- end }}
-
mountPath: /usr/share/jenkins/ref/secrets/
name: secrets-dir
containers:
- name: {{ template "jenkins.fullname" . }}
image: "{{ .Values.Master.Image }}:{{ .Values.Master.ImageTag }}"
imagePullPolicy: "{{ .Values.Master.ImagePullPolicy }}"
{{- if .Values.Master.UseSecurity }}
args: [ "--argumentsRealm.passwd.$(ADMIN_USER)=$(ADMIN_PASSWORD)", "--argumentsRealm.roles.$(ADMIN_USER)=admin"]
{{- end }}
env:
- name: JAVA_OPTS
value: "{{ default "" .Values.Master.JavaOpts}}"
- name: JENKINS_OPTS
value: "{{ if .Values.Master.JenkinsUriPrefix }}--prefix={{ .Values.Master.JenkinsUriPrefix }} {{ end }}{{ default "" .Values.Master.JenkinsOpts}}"
{{- if .Values.Master.UseSecurity }}
- name: ADMIN_PASSWORD
valueFrom:
secretKeyRef:
name: {{ template "jenkins.fullname" . }}
key: jenkins-admin-password
- name: ADMIN_USER
valueFrom:
secretKeyRef:
name: {{ template "jenkins.fullname" . }}
key: jenkins-admin-user
{{- end }}
{{- if .Values.Master.ContainerEnv }}
{{ toYaml .Values.Master.ContainerEnv | indent 12 }}
{{- end }}
ports:
- containerPort: {{ .Values.Master.ContainerPort }}
name: http
- containerPort: {{ .Values.Master.SlaveListenerPort }}
name: slavelistener
{{- if .Values.Master.JMXPort }}
- containerPort: {{ .Values.Master.JMXPort }}
name: jmx
{{- end }}
{{- if .Values.Master.HealthProbes }}
livenessProbe:
httpGet:
path: /login
port: http
initialDelaySeconds: {{ .Values.Master.HealthProbesLivenessTimeout }}
timeoutSeconds: 5
failureThreshold: {{ .Values.Master.HealthProbeLivenessFailureThreshold }}
readinessProbe:
httpGet:
path: /login
port: http
initialDelaySeconds: {{ .Values.Master.HealthProbesReadinessTimeout }}
{{- end }}
resources:
{{ if or .Values.Master.Cpu .Values.Master.Memory }}
requests:
cpu: "{{ .Values.Master.Cpu }}"
memory: "{{ .Values.Master.Memory }}"
{{ else }}
{{ toYaml .Values.Master.resources | indent 12 }}
{{ end }}
volumeMounts:
{{- if .Values.Persistence.mounts }}
{{ toYaml .Values.Persistence.mounts | indent 12 }}
{{- end }}
-
mountPath: /var/jenkins_home
name: jenkins-home
readOnly: false
-
mountPath: /var/jenkins_config
name: jenkins-config
readOnly: true
{{- if .Values.Master.CredentialsXmlSecret }}
-
mountPath: /var/jenkins_credentials
name: jenkins-credentials
readOnly: true
{{- end }}
{{- if .Values.Master.SecretsFilesSecret }}
-
mountPath: /var/jenkins_secrets
name: jenkins-secrets
readOnly: true
{{- end }}
{{- if .Values.Master.Jobs }}
-
mountPath: /var/jenkins_jobs
name: jenkins-jobs
readOnly: true
{{- end }}
{{- if .Values.Master.InstallPlugins }}
-
mountPath: /usr/share/jenkins/ref/plugins/
name: plugin-dir
readOnly: false
{{- end }}
-
mountPath: /usr/share/jenkins/ref/secrets/
name: secrets-dir
readOnly: false
volumes:
{{- if .Values.Persistence.volumes }}
{{ toYaml .Values.Persistence.volumes | indent 6 }}
{{- end }}
- name: jenkins-config
configMap:
name: {{ template "jenkins.fullname" . }}
{{- if .Values.Master.CredentialsXmlSecret }}
- name: jenkins-credentials
secret:
secretName: {{ .Values.Master.CredentialsXmlSecret }}
{{- end }}
{{- if .Values.Master.SecretsFilesSecret }}
- name: jenkins-secrets
secret:
secretName: {{ .Values.Master.SecretsFilesSecret }}
{{- end }}
{{- if .Values.Master.Jobs }}
- name: jenkins-jobs
configMap:
name: {{ template "jenkins.fullname" . }}-jobs
{{- end }}
{{- if .Values.Master.InstallPlugins }}
- name: plugin-dir
emptyDir: {}
{{- end }}
- name: secrets-dir
emptyDir: {}
- name: jenkins-home
{{- if .Values.Persistence.Enabled }}
persistentVolumeClaim:
claimName: {{ .Values.Persistence.ExistingClaim | default (include "jenkins.fullname" .) }}
{{- else }}
emptyDir: {}
{{- end -}}
{{- if .Values.Master.ImagePullSecret }}
imagePullSecrets:
- name: {{ .Values.Master.ImagePullSecret }}
{{- end -}}
================================================
FILE: manifests/deprecated/jenkins/templates/jenkins-master-ingress.yaml
================================================
{{- if .Values.Master.HostName }}
apiVersion: {{ .Values.Master.Ingress.ApiVersion }}
kind: Ingress
metadata:
{{- if .Values.Master.Ingress.Annotations }}
annotations:
{{ toYaml .Values.Master.Ingress.Annotations | indent 4 }}
{{- end }}
name: {{ template "jenkins.fullname" . }}
spec:
rules:
- host: {{ .Values.Master.HostName | quote }}
http:
paths:
- backend:
serviceName: {{ template "jenkins.fullname" . }}
servicePort: {{ .Values.Master.ServicePort }}
{{- if .Values.Master.Ingress.TLS }}
tls:
{{ toYaml .Values.Master.Ingress.TLS | indent 4 }}
{{- end -}}
{{- end }}
================================================
FILE: manifests/deprecated/jenkins/templates/jenkins-master-networkpolicy.yaml
================================================
{{- if .Values.NetworkPolicy.Enabled }}
kind: NetworkPolicy
apiVersion: {{ .Values.NetworkPolicy.ApiVersion }}
metadata:
name: "{{ .Release.Name }}-{{ .Values.Master.Component }}"
spec:
podSelector:
matchLabels:
component: "{{ .Release.Name }}-{{ .Values.Master.Component }}"
ingress:
# Allow web access to the UI
- ports:
- port: {{ .Values.Master.ContainerPort }}
# Allow inbound connections from slave
- from:
- podSelector:
matchLabels:
"jenkins/{{ .Release.Name }}-{{ .Values.Agent.Component }}": "true"
ports:
- port: {{ .Values.Master.SlaveListenerPort }}
{{- if .Values.Agent.Enabled }}
---
kind: NetworkPolicy
apiVersion: {{ .Values.NetworkPolicy.ApiVersion }}
metadata:
name: "{{ .Release.Name }}-{{ .Values.Agent.Component }}"
spec:
podSelector:
matchLabels:
# DefaultDeny
"jenkins/{{ .Release.Name }}-{{ .Values.Agent.Component }}": "true"
{{- end }}
{{- end }}
================================================
FILE: manifests/deprecated/jenkins/templates/jenkins-master-svc.yaml
================================================
apiVersion: v1
kind: Service
metadata:
name: {{template "jenkins.fullname" . }}
labels:
app: {{ template "jenkins.fullname" . }}
heritage: {{.Release.Service | quote }}
release: {{.Release.Name | quote }}
chart: "{{.Chart.Name}}-{{.Chart.Version}}"
component: "{{.Release.Name}}-{{.Values.Master.Component}}"
{{- if .Values.Master.ServiceAnnotations }}
annotations:
{{ toYaml .Values.Master.ServiceAnnotations | indent 4 }}
{{- end }}
spec:
ports:
- port: {{.Values.Master.ServicePort}}
name: http
targetPort: {{.Values.Master.ContainerPort}}
{{if (and (eq .Values.Master.ServiceType "NodePort") (not (empty .Values.Master.NodePort)))}}
nodePort: {{.Values.Master.NodePort}}
{{end}}
selector:
component: "{{.Release.Name}}-{{.Values.Master.Component}}"
type: {{.Values.Master.ServiceType}}
{{if eq .Values.Master.ServiceType "LoadBalancer"}}
loadBalancerSourceRanges: {{.Values.Master.LoadBalancerSourceRanges}}
{{if .Values.Master.LoadBalancerIP}}
loadBalancerIP: {{.Values.Master.LoadBalancerIP}}
{{end}}
{{end}}
================================================
FILE: manifests/deprecated/jenkins/templates/jenkins-test.yaml
================================================
apiVersion: v1
kind: Pod
metadata:
name: "{{ .Release.Name }}-ui-test-{{ randAlphaNum 5 | lower }}"
annotations:
"helm.sh/hook": test-success
spec:
{{- if .Values.Master.NodeSelector }}
nodeSelector:
{{ toYaml .Values.Master.NodeSelector | indent 4 }}
{{- end }}
{{- if .Values.Master.Tolerations }}
tolerations:
{{ toYaml .Values.Master.Tolerations | indent 4 }}
{{- end }}
initContainers:
- name: "test-framework"
image: "dduportal/bats:0.4.0"
command:
- "bash"
- "-c"
- |
set -ex
# copy bats to tools dir
cp -R /usr/local/libexec/ /tools/bats/
volumeMounts:
- mountPath: /tools
name: tools
containers:
- name: {{ .Release.Name }}-ui-test
image: {{ .Values.Master.Image }}:{{ .Values.Master.ImageTag }}
command: ["/tools/bats/bats", "-t", "/tests/run.sh"]
volumeMounts:
- mountPath: /tests
name: tests
readOnly: true
- mountPath: /tools
name: tools
volumes:
- name: tests
configMap:
name: {{ template "jenkins.fullname" . }}-tests
- name: tools
emptyDir: {}
restartPolicy: Never
================================================
FILE: manifests/deprecated/jenkins/templates/jobs.yaml
================================================
{{- if .Values.Master.Jobs }}
apiVersion: v1
kind: ConfigMap
metadata:
name: {{ template "jenkins.fullname" . }}-jobs
data:
{{ .Values.Master.Jobs | indent 2 }}
{{- end -}}
================================================
FILE: manifests/deprecated/jenkins/templates/rbac.yaml
================================================
{{ if .Values.rbac.install }}
{{- $serviceName := include "jenkins.fullname" . -}}
apiVersion: rbac.authorization.k8s.io/{{ required "A valid .Values.rbac.apiVersion entry required!" .Values.rbac.apiVersion }}
kind: ClusterRoleBinding
metadata:
name: {{ $serviceName }}-role-binding
labels:
app: {{ $serviceName }}
chart: "{{ .Chart.Name }}-{{ .Chart.Version }}"
release: "{{ .Release.Name }}"
heritage: "{{ .Release.Service }}"
roleRef:
apiGroup: rbac.authorization.k8s.io
kind: ClusterRole
name: {{ .Values.rbac.roleRef }}
subjects:
- kind: ServiceAccount
name: {{ $serviceName }}
namespace: {{ .Release.Namespace }}
{{ end }}
================================================
FILE: manifests/deprecated/jenkins/templates/secret.yaml
================================================
{{- if .Values.Master.UseSecurity }}
apiVersion: v1
kind: Secret
metadata:
name: {{ template "jenkins.fullname" . }}
labels:
app: {{ template "jenkins.fullname" . }}
chart: "{{ .Chart.Name }}-{{ .Chart.Version }}"
release: "{{ .Release.Name }}"
heritage: "{{ .Release.Service }}"
type: Opaque
data:
{{ if .Values.Master.AdminPassword }}
jenkins-admin-password: {{ .Values.Master.AdminPassword | b64enc | quote }}
{{ else }}
jenkins-admin-password: {{ randAlphaNum 10 | b64enc | quote }}
{{ end }}
jenkins-admin-user: {{ .Values.Master.AdminUser | b64enc | quote }}
{{- end }}
================================================
FILE: manifests/deprecated/jenkins/templates/service-account.yaml
================================================
{{ if .Values.rbac.install }}
{{- $serviceName := include "jenkins.fullname" . -}}
apiVersion: v1
kind: ServiceAccount
metadata:
name: {{ $serviceName }}
labels:
app: {{ $serviceName }}
chart: "{{ .Chart.Name }}-{{ .Chart.Version }}"
release: "{{ .Release.Name }}"
heritage: "{{ .Release.Service }}"
{{ end }}
================================================
FILE: manifests/deprecated/jenkins/templates/test-config.yaml
================================================
apiVersion: v1
kind: ConfigMap
metadata:
name: {{ template "jenkins.fullname" . }}-tests
data:
run.sh: |-
@test "Testing Jenkins UI is accessible" {
curl --retry 48 --retry-delay 10 {{ template "jenkins.fullname" . }}:{{ .Values.Master.ServicePort }}{{ default "" .Values.Master.JenkinsUriPrefix }}/login
}
================================================
FILE: manifests/deprecated/jenkins/values.yaml
================================================
# Default values for jenkins.
# This is a YAML-formatted file.
# Declare name/value pairs to be passed into your templates.
# name: value
## Overrides for generated resource names
# See templates/_helpers.tpl
# nameOverride:
# fullnameOverride:
Master:
Name: jenkins-master
Image: "jenkins/jenkins"
ImageTag: "2.138.2-alpine"
ImagePullPolicy: "IfNotPresent"
# ImagePullSecret: jenkins
Component: "jenkins-master"
UseSecurity: true
AdminUser: admin
AdminPassword: admin
resources:
requests:
cpu: "50m"
memory: "256Mi"
limits:
cpu: "2000m"
memory: "2048Mi"
# Environment variables that get added to the init container (useful for e.g. http_proxy)
# InitContainerEnv:
# - name: http_proxy
# value: "http://192.168.64.1:3128"
# ContainerEnv:
# - name: http_proxy
# value: "http://192.168.64.1:3128"
# Set min/max heap here if needed with:
# JavaOpts: "-Xms512m -Xmx512m"
# JenkinsOpts: ""
# JenkinsUriPrefix: "/jenkins"
# Enable pod security context (must be `true` if RunAsUser or FsGroup are set)
# UsePodSecurityContext: true
# Set RunAsUser to 1000 to let Jenkins run as non-root user 'jenkins' which exists in 'jenkins/jenkins' docker image.
# When setting RunAsUser to a different value than 0 also set FsGroup to the same value:
# RunAsUser:
# FsGroup:
ServicePort: 8080
# For minikube, set this to NodePort, elsewhere use LoadBalancer
# Use ClusterIP if your setup includes ingress controller
ServiceType: ClusterIP
# Master Service annotations
ServiceAnnotations: {}
# service.beta.kubernetes.io/aws-load-balancer-backend-protocol: https
# Used to create Ingress record (should used with ServiceType: ClusterIP)
HostName: jenkins.local.com
# NodePort:
-Djava.awt.headless=true
-Dorg.apache.commons.jelly.tags.fmt.timeZone=Asia/Shanghai
-Dfile.encoding=UTF-8
# -Dcom.sun.management.jmxremote.port=4000
# -Dcom.sun.management.jmxremote.authenticate=false
# -Dcom.sun.management.jmxremote.ssl=false
# JMXPort: 4000
# 插件镜像地址
UpdateCenter: https://mirrors.tuna.tsinghua.edu.cn/jenkins/updates/current/update-center.json
# List of plugins to be install during Jenkins master start
InstallPlugins:
- kubernetes:1.13.5
- workflow-aggregator:2.5
- workflow-job:2.25
- credentials-binding:1.17
- git:3.9.1
- gitlab:1.5.10
# Used to approve a list of groovy functions in pipelines used the script-security plugin. Can be viewed under /scriptApproval
# ScriptApproval:
# - "method groovy.json.JsonSlurperClassic parseText java.lang.String"
# - "new groovy.json.JsonSlurperClassic"
# List of groovy init scripts to be executed during Jenkins master start
InitScripts:
# - |
# print 'adding global pipeline libraries, register properties, bootstrap jobs...'
# Kubernetes secret that contains a 'credentials.xml' for Jenkins
# CredentialsXmlSecret: jenkins-credentials
# Kubernetes secret that contains files to be put in the Jenkins 'secrets' directory,
# useful to manage encryption keys used for credentials.xml for instance (such as
# master.key and hudson.util.Secret)
# SecretsFilesSecret: jenkins-secrets
# Jenkins XML job configs to provision
# Jobs: |-
# test: |-
# <>
CustomConfigMap: false
# Node labels and tolerations for pod assignment
# ref: https://kubernetes.io/docs/concepts/configuration/assign-pod-node/#nodeselector
# ref: https://kubernetes.io/docs/concepts/configuration/assign-pod-node/#taints-and-tolerations-beta-feature
NodeSelector: {}
Tolerations: {}
PodAnnotations: {}
Ingress:
ApiVersion: networking.k8s.io/v1beta1
Annotations:
# kubernetes.io/ingress.class: nginx
# kubernetes.io/tls-acme: "true"
TLS:
# - secretName: jenkins.cluster.local
# hosts:
# - jenkins.cluster.local
Agent:
Enabled: true
Image: jenkinsci/jnlp-slave
ImageTag: alpine
# ImagePullSecret: jenkins
Component: "jenkins-slave"
Privileged: false
resources:
requests:
cpu: "200m"
memory: "256Mi"
limits:
cpu: "200m"
memory: "256Mi"
# You may want to change this to true while testing a new image
AlwaysPullImage: false
# You can define the volumes that you want to mount for this container
# Allowed types are: ConfigMap, EmptyDir, HostPath, Nfs, Pod, Secret
# Configure the attributes as they appear in the corresponding Java class for that type
# https://github.com/jenkinsci/kubernetes-plugin/tree/master/src/main/java/org/csanchez/jenkins/plugins/kubernetes/volumes
volumes:
# - type: Secret
# secretName: mysecret
# mountPath: /var/myapp/mysecret
NodeSelector: {}
# Key Value selectors. Ex:
# jenkins-agent: v1
Persistence:
Enabled: true
## A manually managed Persistent Volume and Claim
## Requires Persistence.Enabled: true
## If defined, PVC must be created manually before volume will be bound
# ExistingClaim:
## jenkins data Persistent Volume Storage Class
## If defined, storageClassName:
## If set to "-", storageClassName: "", which disables dynamic provisioning
## If undefined (the default) or set to null, no storageClassName spec is
## set, choosing the default provisioner. (gp2 on AWS, standard on
## GKE, AWS & OpenStack)
##
StorageClass: "nfs-dynamic-class"
Annotations: {}
AccessMode: ReadWriteOnce
Size: 8Gi
volumes:
# - name: nothing
# emptyDir: {}
mounts:
# - mountPath: /var/nothing
# name: nothing
# readOnly: true
NetworkPolicy:
# Enable creation of NetworkPolicy resources.
Enabled: false
# For Kubernetes v1.7, use 'networking.k8s.io/v1'
ApiVersion: networking.k8s.io/v1
## Install Default RBAC roles and bindings
rbac:
install: true
serviceAccountName: default
# RBAC api version (currently either v1beta1 or v1alpha1 or v1)
apiVersion: v1
# Cluster role reference
roleRef: cluster-admin
================================================
FILE: manifests/deprecated/mariadb-cluster/mariadb/.helmignore
================================================
.git
================================================
FILE: manifests/deprecated/mariadb-cluster/mariadb/Chart.yaml
================================================
name: mariadb
version: 5.5.0
appVersion: 10.1.37
description: Fast, reliable, scalable, and easy to use open-source relational database system. MariaDB Server is intended for mission-critical, heavy-load production systems as well as for embedding into mass-deployed software. Highly available MariaDB cluster.
keywords:
- mariadb
- mysql
- database
- sql
- prometheus
home: https://mariadb.org
icon: https://bitnami.com/assets/stacks/mariadb/img/mariadb-stack-220x234.png
sources:
- https://github.com/bitnami/bitnami-docker-mariadb
- https://github.com/prometheus/mysqld_exporter
maintainers:
- name: Bitnami
email: containers@bitnami.com
engine: gotpl
================================================
FILE: manifests/deprecated/mariadb-cluster/mariadb/OWNERS
================================================
approvers:
- prydonius
- tompizmor
- sameersbn
- carrodher
- juan131
reviewers:
- prydonius
- tompizmor
- sameersbn
- carrodher
- juan131
================================================
FILE: manifests/deprecated/mariadb-cluster/mariadb/README.md
================================================
# MariaDB
[MariaDB](https://mariadb.org) is one of the most popular database servers in the world. It’s made by the original developers of MySQL and guaranteed to stay open source. Notable users include Wikipedia, Facebook and Google.
MariaDB is developed as open source software and as a relational database it provides an SQL interface for accessing data. The latest versions of MariaDB also include GIS and JSON features.
## TL;DR
```bash
$ helm install stable/mariadb
```
## Introduction
This chart bootstraps a [MariaDB](https://github.com/bitnami/bitnami-docker-mariadb) replication cluster deployment on a [Kubernetes](http://kubernetes.io) cluster using the [Helm](https://helm.sh) package manager.
Bitnami charts can be used with [Kubeapps](https://kubeapps.com/) for deployment and management of Helm Charts in clusters.
## Prerequisites
- Kubernetes 1.10+
- PV provisioner support in the underlying infrastructure
## Installing the Chart
To install the chart with the release name `my-release`:
```bash
$ helm install --name my-release stable/mariadb
```
The command deploys MariaDB on the Kubernetes cluster in the default configuration. The [configuration](#configuration) section lists the parameters that can be configured during installation.
> **Tip**: List all releases using `helm list`
## Uninstalling the Chart
To uninstall/delete the `my-release` deployment:
```bash
$ helm delete my-release
```
The command removes all the Kubernetes components associated with the chart and deletes the release.
## Configuration
The following table lists the configurable parameters of the MariaDB chart and their default values.
| Parameter | Description | Default |
|-------------------------------------------|-----------------------------------------------------|-------------------------------------------------------------------|
| `global.imageRegistry` | Global Docker image registry | `nil` |
| `image.registry` | MariaDB image registry | `docker.io` |
| `image.repository` | MariaDB Image name | `bitnami/mariadb` |
| `image.tag` | MariaDB Image tag | `{VERSION}` |
| `image.pullPolicy` | MariaDB image pull policy | `Always` if `imageTag` is `latest`, else `IfNotPresent` |
| `image.pullSecrets` | Specify docker-registry secret names as an array | `[]` (does not add image pull secrets to deployed pods) |
| `image.debug` | Specify if debug logs should be enabled | `false` |
| `service.type` | Kubernetes service type | `ClusterIP` |
| `service.clusterIp` | Specific cluster IP when service type is cluster IP. Use None for headless service | `nil` |
| `service.port` | MySQL service port | `3306` |
| `serviceAccount.create` | Specifies whether a ServiceAccount should be created | `false` |
| `serviceAccount.name` | The name of the ServiceAccount to create | Generated using the mariadb.fullname template |
| `securityContext.enabled` | Enable security context | `true` |
| `securityContext.fsGroup` | Group ID for the container | `1001` |
| `securityContext.runAsUser` | User ID for the container | `1001` |
| `existingSecret` | Use Existing secret for Password details (`rootUser.password`, `db.password`, `replication.password` will be ignored and picked up from this secret) | |
| `rootUser.password` | Password for the `root` user. Ignored if existing secret is provided. | _random 10 character alphanumeric string_ |
| `rootUser.forcePassword` | Force users to specify a password | `false` |
| `db.user` | Username of new user to create | `nil` |
| `db.password` | Password for the new user. Ignored if existing secret is provided. | _random 10 character alphanumeric string if `db.user` is defined_ |
| `db.name` | Name for new database to create | `my_database` |
| `replication.enabled` | MariaDB replication enabled | `true` |
| `replication.user` |MariaDB replication user | `replicator` |
| `replication.password` | MariaDB replication user password. Ignored if existing secret is provided. | _random 10 character alphanumeric string_ |
| `initdbScripts` | List of initdb scripts | `nil` |
| `initdbScriptsConfigMap` | ConfigMap with the initdb scripts (Note: Overrides `initdbScripts`) | `nil` |
| `master.annotations[].key` | key for the the annotation list item | `nil` |
| `master.annotations[].value` | value for the the annotation list item | `nil` |
| `master.affinity` | Master affinity (in addition to master.antiAffinity when set) | `{}` |
| `master.antiAffinity` | Master pod anti-affinity policy | `soft` |
| `master.tolerations` | List of node taints to tolerate (master) | `[]` |
| `master.persistence.enabled` | Enable persistence using PVC | `true` |
| `master.persistence.existingClaim` | Provide an existing `PersistentVolumeClaim` | `nil` |
| `master.persistence.mountPath` | Path to mount the volume at | `/bitnami/mariadb` |
| `master.persistence.annotations` | Persistent Volume Claim annotations | `{}` |
| `master.persistence.storageClass` | Persistent Volume Storage Class | `` |
| `master.persistence.accessModes` | Persistent Volume Access Modes | `[ReadWriteOnce]` |
| `master.persistence.size` | Persistent Volume Size | `8Gi` |
| `master.extraInitContainers` | Additional init containers as a string to be passed to the `tpl` function (master) | |
| `master.config` | Config file for the MariaDB Master server | `_default values in the values.yaml file_` |
| `master.resources` | CPU/Memory resource requests/limits for master node | `{}` |
| `master.livenessProbe.enabled` | Turn on and off liveness probe (master) | `true` |
| `master.livenessProbe.initialDelaySeconds`| Delay before liveness probe is initiated (master) | `120` |
| `master.livenessProbe.periodSeconds` | How often to perform the probe (master) | `10` |
| `master.livenessProbe.timeoutSeconds` | When the probe times out (master) | `1` |
| `master.livenessProbe.successThreshold` | Minimum consecutive successes for the probe (master)| `1` |
| `master.livenessProbe.failureThreshold` | Minimum consecutive failures for the probe (master) | `3` |
| `master.readinessProbe.enabled` | Turn on and off readiness probe (master) | `true` |
| `master.readinessProbe.initialDelaySeconds`| Delay before readiness probe is initiated (master) | `30` |
| `master.readinessProbe.periodSeconds` | How often to perform the probe (master) | `10` |
| `master.readinessProbe.timeoutSeconds` | When the probe times out (master) | `1` |
| `master.readinessProbe.successThreshold` | Minimum consecutive successes for the probe (master)| `1` |
| `master.readinessProbe.failureThreshold` | Minimum consecutive failures for the probe (master) | `3` |
| `slave.replicas` | Desired number of slave replicas | `1` |
| `slave.annotations[].key` | key for the the annotation list item | `nil` |
| `slave.annotations[].value` | value for the the annotation list item | `nil` |
| `slave.affinity` | Slave affinity (in addition to slave.antiAffinity when set) | `{}` |
| `slave.antiAffinity` | Slave pod anti-affinity policy | `soft` |
| `slave.tolerations` | List of node taints to tolerate for (slave) | `[]` |
| `slave.persistence.enabled` | Enable persistence using a `PersistentVolumeClaim` | `true` |
| `slave.persistence.annotations` | Persistent Volume Claim annotations | `{}` |
| `slave.persistence.storageClass` | Persistent Volume Storage Class | `` |
| `slave.persistence.accessModes` | Persistent Volume Access Modes | `[ReadWriteOnce]` |
| `slave.persistence.size` | Persistent Volume Size | `8Gi` |
| `slave.extraInitContainers` | Additional init containers as a string to be passed to the `tpl` function (slave) | |
| `slave.config` | Config file for the MariaDB Slave replicas | `_default values in the values.yaml file_` |
| `slave.resources` | CPU/Memory resource requests/limits for slave node | `{}` |
| `slave.livenessProbe.enabled` | Turn on and off liveness probe (slave) | `true` |
| `slave.livenessProbe.initialDelaySeconds` | Delay before liveness probe is initiated (slave) | `120` |
| `slave.livenessProbe.periodSeconds` | How often to perform the probe (slave) | `10` |
| `slave.livenessProbe.timeoutSeconds` | When the probe times out (slave) | `1` |
| `slave.livenessProbe.successThreshold` | Minimum consecutive successes for the probe (slave) | `1` |
| `slave.livenessProbe.failureThreshold` | Minimum consecutive failures for the probe (slave) | `3` |
| `slave.readinessProbe.enabled` | Turn on and off readiness probe (slave) | `true` |
| `slave.readinessProbe.initialDelaySeconds`| Delay before readiness probe is initiated (slave) | `45` |
| `slave.readinessProbe.periodSeconds` | How often to perform the probe (slave) | `10` |
| `slave.readinessProbe.timeoutSeconds` | When the probe times out (slave) | `1` |
| `slave.readinessProbe.successThreshold` | Minimum consecutive successes for the probe (slave) | `1` |
| `slave.readinessProbe.failureThreshold` | Minimum consecutive failures for the probe (slave) | `3` |
| `metrics.enabled` | Start a side-car prometheus exporter | `false` |
| `metrics.image.registry` | Exporter image registry | `docker.io` |
| `metrics.image.repository` | Exporter image name | `prom/mysqld-exporter` |
| `metrics.image.tag` | Exporter image tag | `v0.10.0` |
| `metrics.image.pullPolicy` | Exporter image pull policy | `IfNotPresent` |
| `metrics.resources` | Exporter resource requests/limit | `nil` |
The above parameters map to the env variables defined in [bitnami/mariadb](http://github.com/bitnami/bitnami-docker-mariadb). For more information please refer to the [bitnami/mariadb](http://github.com/bitnami/bitnami-docker-mariadb) image documentation.
Specify each parameter using the `--set key=value[,key=value]` argument to `helm install`. For example,
```bash
$ helm install --name my-release \
--set root.password=secretpassword,user.database=app_database \
stable/mariadb
```
The above command sets the MariaDB `root` account password to `secretpassword`. Additionally it creates a database named `my_database`.
Alternatively, a YAML file that specifies the values for the parameters can be provided while installing the chart. For example,
```bash
$ helm install --name my-release -f values.yaml stable/mariadb
```
> **Tip**: You can use the default [values.yaml](values.yaml)
## Initialize a fresh instance
The [Bitnami MariaDB](https://github.com/bitnami/bitnami-docker-mariadb) image allows you to use your custom scripts to initialize a fresh instance. In order to execute the scripts, they must be located inside the chart folder `files/docker-entrypoint-initdb.d` so they can be consumed as a ConfigMap.
Alternatively, you can specify custom scripts using the `initdbScripts` parameter as dict.
In addition to these options, you can also set an external ConfigMap with all the initialization scripts. This is done by setting the `initdbScriptsConfigMap` parameter. Note that this will override the two previous options.
The allowed extensions are `.sh`, `.sql` and `.sql.gz`.
## Persistence
The [Bitnami MariaDB](https://github.com/bitnami/bitnami-docker-mariadb) image stores the MariaDB data and configurations at the `/bitnami/mariadb` path of the container.
The chart mounts a [Persistent Volume](kubernetes.io/docs/user-guide/persistent-volumes/) volume at this location. The volume is created using dynamic volume provisioning, by default. An existing PersistentVolumeClaim can be defined.
## Extra Init Containers
The feature allows for specifying a template string for a initContainer in the master/slave pod. Usecases include situations when you need some pre-run setup. For example, in IKS (IBM Cloud Kubernetes Service), non-root users do not have write permission on the volume mount path for NFS-powered file storage. So, you could use a initcontainer to `chown` the mount. See a example below, where we add an initContainer on the master pod that reports to an external resource that the db is going to starting.
`values.yaml`
```yaml
master:
extraInitContainers: |
- name: initcontainer
image: alpine:latest
command: ["/bin/sh", "-c"]
args:
- curl http://api-service.local/db/starting;
```
## Upgrading
It's necessary to set the `rootUser.password` parameter when upgrading for readiness/liveness probes to work properly. When you install this chart for the first time, some notes will be displayed providing the credentials you must use under the 'Administrator credentials' section. Please note down the password and run the command below to upgrade your chart:
```bash
$ helm upgrade my-release stable/mariadb --set rootUser.password=[ROOT_PASSWORD]
```
| Note: you need to substitute the placeholder _[ROOT_PASSWORD]_ with the value obtained in the installation notes.
### To 5.0.0
Backwards compatibility is not guaranteed unless you modify the labels used on the chart's deployments.
Use the workaround below to upgrade from versions previous to 5.0.0. The following example assumes that the release name is mariadb:
```console
$ kubectl delete statefulset opencart-mariadb --cascade=false
```
================================================
FILE: manifests/deprecated/mariadb-cluster/mariadb/files/docker-entrypoint-initdb.d/README.md
================================================
You can copy here your custom .sh, .sql or .sql.gz file so they are executed during the first boot of the image.
More info in the [bitnami-docker-mariadb](https://github.com/bitnami/bitnami-docker-mariadb#initializing-a-new-instance) repository.
================================================
FILE: manifests/deprecated/mariadb-cluster/mariadb/templates/NOTES.txt
================================================
Please be patient while the chart is being deployed
Tip:
Watch the deployment status using the command: kubectl get pods -w --namespace {{ .Release.Namespace }} -l release={{ .Release.Name }}
Services:
echo Master: {{ template "mariadb.fullname" . }}.{{ .Release.Namespace }}.svc.cluster.local:{{ .Values.service.port }}
{{- if .Values.replication.enabled }}
echo Slave: {{ template "slave.fullname" . }}.{{ .Release.Namespace }}.svc.cluster.local:{{ .Values.service.port }}
{{- end }}
Administrator credentials:
Username: root
Password : $(kubectl get secret --namespace {{ .Release.Namespace }} {{ template "mariadb.fullname" . }} -o jsonpath="{.data.mariadb-root-password}" | base64 --decode)
To connect to your database:
1. Run a pod that you can use as a client:
kubectl run {{ template "mariadb.fullname" . }}-client --rm --tty -i --restart='Never' --image {{ template "mariadb.image" . }} --namespace {{ .Release.Namespace }} --command -- bash
2. To connect to master service (read/write):
mysql -h {{ template "mariadb.fullname" . }}.{{ .Release.Namespace }}.svc.cluster.local -uroot -p {{ .Values.db.name }}
{{- if .Values.replication.enabled }}
3. To connect to slave service (read-only):
mysql -h {{ template "slave.fullname" . }}.{{ .Release.Namespace }}.svc.cluster.local -uroot -p {{ .Values.db.name }}
{{- end }}
To upgrade this helm chart:
1. Obtain the password as described on the 'Administrator credentials' section and set the 'rootUser.password' parameter as shown below:
ROOT_PASSWORD=$(kubectl get secret --namespace {{ .Release.Namespace }} {{ template "mariadb.fullname" . }} -o jsonpath="{.data.mariadb-root-password}" | base64 --decode)
helm upgrade {{ .Release.Name }} stable/mariadb --set rootUser.password=$ROOT_PASSWORD
================================================
FILE: manifests/deprecated/mariadb-cluster/mariadb/templates/_helpers.tpl
================================================
{{/* vim: set filetype=mustache: */}}
{{/*
Expand the name of the chart.
*/}}
{{- define "mariadb.name" -}}
{{- default .Chart.Name .Values.nameOverride | trunc 63 | trimSuffix "-" -}}
{{- end -}}
{{/*
Create a default fully qualified app name.
We truncate at 63 chars because some Kubernetes name fields are limited to this (by the DNS naming spec).
If release name contains chart name it will be used as a full name.
*/}}
{{- define "mariadb.fullname" -}}
{{- if .Values.fullnameOverride -}}
{{- .Values.fullnameOverride | trunc 63 | trimSuffix "-" -}}
{{- else -}}
{{- $name := default .Chart.Name .Values.nameOverride -}}
{{- if contains $name .Release.Name -}}
{{- printf .Release.Name | trunc 63 | trimSuffix "-" -}}
{{- else -}}
{{- printf "%s-%s" .Release.Name $name | trunc 63 | trimSuffix "-" -}}
{{- end -}}
{{- end -}}
{{- end -}}
{{- define "master.fullname" -}}
{{- if .Values.replication.enabled -}}
{{- printf "%s-%s" .Release.Name "mariadb-master" | trunc 63 | trimSuffix "-" -}}
{{- else -}}
{{- printf "%s-%s" .Release.Name "mariadb" | trunc 63 | trimSuffix "-" -}}
{{- end -}}
{{- end -}}
{{- define "slave.fullname" -}}
{{- printf "%s-%s" .Release.Name "mariadb-slave" | trunc 63 | trimSuffix "-" -}}
{{- end -}}
{{- define "mariadb.chart" -}}
{{- printf "%s-%s" .Chart.Name .Chart.Version | replace "+" "_" | trunc 63 | trimSuffix "-" -}}
{{- end -}}
{{/*
Return the proper MariaDB image name
*/}}
{{- define "mariadb.image" -}}
{{- $registryName := .Values.image.registry -}}
{{- $repositoryName := .Values.image.repository -}}
{{- $tag := .Values.image.tag | toString -}}
{{/*
Helm 2.11 supports the assignment of a value to a variable defined in a different scope,
but Helm 2.9 and 2.10 doesn't support it, so we need to implement this if-else logic.
Also, we can't use a single if because lazy evaluation is not an option
*/}}
{{- if .Values.global }}
{{- if .Values.global.imageRegistry }}
{{- printf "%s/%s:%s" .Values.global.imageRegistry $repositoryName $tag -}}
{{- else -}}
{{- printf "%s/%s:%s" $registryName $repositoryName $tag -}}
{{- end -}}
{{- else -}}
{{- printf "%s/%s:%s" $registryName $repositoryName $tag -}}
{{- end -}}
{{- end -}}
{{/*
Return the proper metrics image name
*/}}
{{- define "metrics.image" -}}
{{- $registryName := .Values.metrics.image.registry -}}
{{- $repositoryName := .Values.metrics.image.repository -}}
{{- $tag := .Values.metrics.image.tag | toString -}}
{{- printf "%s/%s:%s" $registryName $repositoryName $tag -}}
{{- end -}}
{{ template "mariadb.initdbScriptsCM" . }}
{{/*
Get the initialization scripts ConfigMap name.
*/}}
{{- define "mariadb.initdbScriptsCM" -}}
{{- if .Values.initdbScriptsConfigMap -}}
{{- printf "%s" .Values.initdbScriptsConfigMap -}}
{{- else -}}
{{- printf "%s-init-scripts" (include "mariadb.fullname" .) -}}
{{- end -}}
{{- end -}}
{{/*
Create the name of the service account to use
*/}}
{{- define "mariadb.serviceAccountName" -}}
{{- if .Values.serviceAccount.create -}}
{{ default (include "mariadb.fullname" .) .Values.serviceAccount.name }}
{{- else -}}
{{ default "default" .Values.serviceAccount.name }}
{{- end -}}
{{- end -}}
================================================
FILE: manifests/deprecated/mariadb-cluster/mariadb/templates/initialization-configmap.yaml
================================================
{{- if and (or (.Files.Glob "files/docker-entrypoint-initdb.d/*.{sh,sql,sql.gz}") .Values.initdbScripts) (not .Values.initdbScriptsConfigMap) }}
apiVersion: v1
kind: ConfigMap
metadata:
name: {{ template "master.fullname" . }}-init-scripts
labels:
app: {{ template "mariadb.name" . }}
chart: {{ template "mariadb.chart" . }}
release: {{ .Release.Name | quote }}
heritage: {{ .Release.Service | quote }}
component: "master"
{{- if and (.Files.Glob "files/docker-entrypoint-initdb.d/*.sql.gz") (not .Values.initdbScriptsConfigMap) }}
binaryData:
{{- $root := . }}
{{- range $path, $bytes := .Files.Glob "files/docker-entrypoint-initdb.d/*.sql.gz" }}
{{ base $path }}: {{ $root.Files.Get $path | b64enc | quote }}
{{- end }}
{{- end }}
data:
{{- if and (.Files.Glob "files/docker-entrypoint-initdb.d/*.{sh,sql}") (not .Values.initdbScriptsConfigMap) }}
{{ (.Files.Glob "files/docker-entrypoint-initdb.d/*.{sh,sql}").AsConfig | indent 2 }}
{{- end }}
{{- with .Values.initdbScripts }}
{{ toYaml . | indent 2 }}
{{- end }}
{{ end }}
================================================
FILE: manifests/deprecated/mariadb-cluster/mariadb/templates/master-configmap.yaml
================================================
{{- if .Values.master.config }}
apiVersion: v1
kind: ConfigMap
metadata:
name: {{ template "master.fullname" . }}
labels:
app: {{ template "mariadb.name" . }}
component: "master"
chart: {{ template "mariadb.chart" . }}
release: {{ .Release.Name | quote }}
heritage: {{ .Release.Service | quote }}
data:
my.cnf: |-
{{ .Values.master.config | indent 4 }}
{{- end -}}
================================================
FILE: manifests/deprecated/mariadb-cluster/mariadb/templates/master-statefulset.yaml
================================================
apiVersion: apps/v1
kind: StatefulSet
metadata:
name: {{ template "master.fullname" . }}
labels:
app: "{{ template "mariadb.name" . }}"
chart: {{ template "mariadb.chart" . }}
component: "master"
release: {{ .Release.Name | quote }}
heritage: {{ .Release.Service | quote }}
spec:
selector:
matchLabels:
release: "{{ .Release.Name }}"
component: "master"
app: {{ template "mariadb.name" . }}
serviceName: "{{ template "master.fullname" . }}"
replicas: 1
updateStrategy:
type: RollingUpdate
template:
metadata:
{{- if .Values.master.annotations }}
annotations:
{{- range .Values.master.annotations }}
{{ .key }}: '{{ .value }}'
{{- end }}
{{- end }}
labels:
app: "{{ template "mariadb.name" . }}"
component: "master"
release: "{{ .Release.Name }}"
chart: {{ template "mariadb.chart" . }}
spec:
serviceAccountName: "{{ template "mariadb.serviceAccountName" . }}"
{{- if .Values.securityContext.enabled }}
securityContext:
fsGroup: {{ .Values.securityContext.fsGroup }}
runAsUser: {{ .Values.securityContext.runAsUser }}
{{- end }}
{{- if eq .Values.master.antiAffinity "hard" }}
affinity:
{{- with .Values.master.affinity }}
{{ toYaml . | indent 8 }}
{{- end }}
podAntiAffinity:
requiredDuringSchedulingIgnoredDuringExecution:
- topologyKey: "kubernetes.io/hostname"
labelSelector:
matchLabels:
app: "{{ template "mariadb.name" . }}"
release: "{{ .Release.Name }}"
{{- else if eq .Values.master.antiAffinity "soft" }}
affinity:
{{- with .Values.master.affinity }}
{{ toYaml . | indent 8 }}
{{- end }}
podAntiAffinity:
preferredDuringSchedulingIgnoredDuringExecution:
- weight: 1
podAffinityTerm:
topologyKey: kubernetes.io/hostname
labelSelector:
matchLabels:
app: "{{ template "mariadb.name" . }}"
release: "{{ .Release.Name }}"
{{- else}}
{{- with .Values.master.affinity }}
affinity:
{{ toYaml . | indent 8 }}
{{- end }}
{{- end }}
{{- with .Values.master.tolerations }}
tolerations:
{{ toYaml . | indent 8 }}
{{- end }}
{{- if .Values.image.pullSecrets }}
imagePullSecrets:
{{- range .Values.image.pullSecrets }}
- name: {{ . }}
{{- end}}
{{- end }}
{{- if .Values.master.extraInitContainers }}
initContainers:
{{ tpl .Values.master.extraInitContainers . | indent 6}}
{{- end }}
containers:
- name: "mariadb"
image: {{ template "mariadb.image" . }}
imagePullPolicy: {{ .Values.image.pullPolicy | quote }}
env:
{{- if .Values.image.debug}}
- name: BITNAMI_DEBUG
value: "true"
{{- end }}
- name: MARIADB_ROOT_PASSWORD
valueFrom:
secretKeyRef:
{{- if .Values.existingSecret }}
name: {{ .Values.existingSecret }}
{{- else }}
name: {{ template "mariadb.fullname" . }}
{{- end }}
key: mariadb-root-password
{{- if .Values.db.user }}
- name: MARIADB_USER
value: "{{ .Values.db.user }}"
- name: MARIADB_PASSWORD
valueFrom:
secretKeyRef:
{{- if .Values.existingSecret }}
name: {{ .Values.existingSecret }}
{{- else }}
name: {{ template "mariadb.fullname" . }}
{{- end }}
key: mariadb-password
{{- end }}
- name: MARIADB_DATABASE
value: "{{ .Values.db.name }}"
{{- if .Values.replication.enabled }}
- name: MARIADB_REPLICATION_MODE
value: "master"
- name: MARIADB_REPLICATION_USER
value: "{{ .Values.replication.user }}"
- name: MARIADB_REPLICATION_PASSWORD
valueFrom:
secretKeyRef:
{{- if .Values.existingSecret }}
name: {{ .Values.existingSecret }}
{{- else }}
name: {{ template "mariadb.fullname" . }}
{{- end }}
key: mariadb-replication-password
{{- end }}
ports:
- name: mysql
containerPort: 3306
{{- if .Values.master.livenessProbe.enabled }}
livenessProbe:
exec:
command: ["sh", "-c", "exec mysqladmin status -uroot -p$MARIADB_ROOT_PASSWORD"]
initialDelaySeconds: {{ .Values.master.livenessProbe.initialDelaySeconds }}
periodSeconds: {{ .Values.master.livenessProbe.periodSeconds }}
timeoutSeconds: {{ .Values.master.livenessProbe.timeoutSeconds }}
successThreshold: {{ .Values.master.livenessProbe.successThreshold }}
failureThreshold: {{ .Values.master.livenessProbe.failureThreshold }}
{{- end }}
{{- if .Values.master.readinessProbe.enabled }}
readinessProbe:
exec:
command: ["sh", "-c", "exec mysqladmin status -uroot -p$MARIADB_ROOT_PASSWORD"]
initialDelaySeconds: {{ .Values.master.readinessProbe.initialDelaySeconds }}
periodSeconds: {{ .Values.master.readinessProbe.periodSeconds }}
timeoutSeconds: {{ .Values.master.readinessProbe.timeoutSeconds }}
successThreshold: {{ .Values.master.readinessProbe.successThreshold }}
failureThreshold: {{ .Values.master.readinessProbe.failureThreshold }}
{{- end }}
resources:
{{ toYaml .Values.master.resources | indent 10 }}
volumeMounts:
- name: data
mountPath: {{ .Values.master.persistence.mountPath }}
{{- if or (.Files.Glob "files/docker-entrypoint-initdb.d/*.{sh,sql,sql.gz}") .Values.initdbScriptsConfigMap .Values.initdbScripts }}
- name: custom-init-scripts
mountPath: /docker-entrypoint-initdb.d
{{- end }}
{{- if .Values.master.config }}
- name: config
mountPath: /opt/bitnami/mariadb/conf/my.cnf
subPath: my.cnf
{{- end }}
{{- if .Values.metrics.enabled }}
- name: metrics
image: {{ template "metrics.image" . }}
imagePullPolicy: {{ .Values.metrics.image.pullPolicy | quote }}
env:
- name: MARIADB_ROOT_PASSWORD
valueFrom:
secretKeyRef:
{{- if .Values.existingSecret }}
name: {{ .Values.existingSecret }}
{{- else }}
name: {{ template "mariadb.fullname" . }}
{{- end }}
key: mariadb-root-password
command: [ 'sh', '-c', 'DATA_SOURCE_NAME="root:$MARIADB_ROOT_PASSWORD@(localhost:3306)/" /bin/mysqld_exporter' ]
ports:
- name: metrics
containerPort: 9104
livenessProbe:
httpGet:
path: /metrics
port: metrics
initialDelaySeconds: 15
timeoutSeconds: 5
readinessProbe:
httpGet:
path: /metrics
port: metrics
initialDelaySeconds: 5
timeoutSeconds: 1
resources:
{{ toYaml .Values.metrics.resources | indent 10 }}
{{- end }}
volumes:
{{- if .Values.master.config }}
- name: config
configMap:
name: {{ template "master.fullname" . }}
{{- end }}
{{- if or (.Files.Glob "files/docker-entrypoint-initdb.d/*.{sh,sql,sql.gz}") .Values.initdbScriptsConfigMap .Values.initdbScripts }}
- name: custom-init-scripts
configMap:
name: {{ template "mariadb.initdbScriptsCM" . }}
{{- end }}
{{- if and .Values.master.persistence.enabled .Values.master.persistence.existingClaim }}
- name: data
persistentVolumeClaim:
claimName: {{ .Values.master.persistence.existingClaim }}
{{- else if not .Values.master.persistence.enabled }}
- name: data
emptyDir: {}
{{- else if and .Values.master.persistence.enabled (not .Values.master.persistence.existingClaim) }}
volumeClaimTemplates:
- metadata:
name: data
labels:
app: "{{ template "mariadb.name" . }}"
component: "master"
release: {{ .Release.Name | quote }}
heritage: {{ .Release.Service | quote }}
spec:
accessModes:
{{- range .Values.master.persistence.accessModes }}
- {{ . | quote }}
{{- end }}
resources:
requests:
storage: {{ .Values.master.persistence.size | quote }}
{{- if .Values.master.persistence.storageClass }}
{{- if (eq "-" .Values.master.persistence.storageClass) }}
storageClassName: ""
{{- else }}
storageClassName: {{ .Values.master.persistence.storageClass | quote }}
{{- end }}
{{- end }}
{{- end }}
================================================
FILE: manifests/deprecated/mariadb-cluster/mariadb/templates/master-svc.yaml
================================================
apiVersion: v1
kind: Service
metadata:
name: {{ template "mariadb.fullname" . }}
labels:
app: "{{ template "mariadb.name" . }}"
component: "master"
chart: {{ template "mariadb.chart" . }}
release: {{ .Release.Name | quote }}
heritage: {{ .Release.Service | quote }}
{{- if .Values.metrics.enabled }}
annotations:
{{ toYaml .Values.metrics.annotations | indent 4 }}
{{- end }}
spec:
type: {{ .Values.service.type }}
{{- if eq .Values.service.type "ClusterIP" }}
{{- if .Values.service.clusterIp }}
clusterIP: {{ .Values.service.clusterIp }}
{{- end }}
{{- end }}
ports:
- name: mysql
port: {{ .Values.service.port }}
targetPort: mysql
{{- if eq .Values.service.type "NodePort" }}
{{- if .Values.service.nodePort }}
{{- if .Values.service.nodePort.master }}
nodePort: {{ .Values.service.nodePort.master }}
{{- end }}
{{- end }}
{{- end }}
{{- if .Values.metrics.enabled }}
- name: metrics
port: 9104
targetPort: metrics
{{- end }}
selector:
app: "{{ template "mariadb.name" . }}"
component: "master"
release: "{{ .Release.Name }}"
================================================
FILE: manifests/deprecated/mariadb-cluster/mariadb/templates/secrets.yaml
================================================
{{- if (not .Values.existingSecret) -}}
apiVersion: v1
kind: Secret
metadata:
name: {{ template "mariadb.fullname" . }}
labels:
app: "{{ template "mariadb.name" . }}"
chart: {{ template "mariadb.chart" . }}
release: {{ .Release.Name | quote }}
heritage: {{ .Release.Service | quote }}
type: Opaque
data:
{{- if .Values.rootUser.password }}
mariadb-root-password: "{{ .Values.rootUser.password | b64enc }}"
{{- else if (not .Values.rootUser.forcePassword) }}
mariadb-root-password: "{{ randAlphaNum 10 | b64enc }}"
{{ else }}
mariadb-root-password: {{ required "A MariaDB Root Password is required!" .Values.rootUser.password }}
{{- end }}
{{- if .Values.db.user }}
{{- if .Values.db.password }}
mariadb-password: "{{ .Values.db.password | b64enc }}"
{{- else if (not .Values.db.forcePassword) }}
mariadb-password: "{{ randAlphaNum 10 | b64enc }}"
{{- else }}
mariadb-password: {{ required "A MariaDB Database Password is required!" .Values.db.password }}
{{- end }}
{{- end }}
{{- if .Values.replication.enabled }}
{{- if .Values.replication.password }}
mariadb-replication-password: "{{ .Values.replication.password | b64enc }}"
{{- else if (not .Values.replication.forcePassword) }}
mariadb-replication-password: "{{ randAlphaNum 10 | b64enc }}"
{{- else }}
mariadb-replication-password: {{ required "A MariaDB Replication Password is required!" .Values.replication.password }}
{{- end }}
{{- end }}
{{- end }}
================================================
FILE: manifests/deprecated/mariadb-cluster/mariadb/templates/slave-configmap.yaml
================================================
{{- if and .Values.replication.enabled .Values.slave.config }}
apiVersion: v1
kind: ConfigMap
metadata:
name: {{ template "slave.fullname" . }}
labels:
app: {{ template "mariadb.name" . }}
component: "slave"
chart: {{ template "mariadb.chart" . }}
release: {{ .Release.Name | quote }}
heritage: {{ .Release.Service | quote }}
data:
my.cnf: |-
{{ .Values.slave.config | indent 4 }}
{{- end }}
================================================
FILE: manifests/deprecated/mariadb-cluster/mariadb/templates/slave-statefulset.yaml
================================================
{{- if .Values.replication.enabled }}
apiVersion: apps/v1
kind: StatefulSet
metadata:
name: {{ template "slave.fullname" . }}
labels:
app: "{{ template "mariadb.name" . }}"
chart: {{ template "mariadb.chart" . }}
component: "slave"
release: {{ .Release.Name | quote }}
heritage: {{ .Release.Service | quote }}
spec:
selector:
matchLabels:
release: "{{ .Release.Name }}"
component: "slave"
app: {{ template "mariadb.name" . }}
serviceName: "{{ template "slave.fullname" . }}"
replicas: {{ .Values.slave.replicas }}
updateStrategy:
type: RollingUpdate
template:
metadata:
{{- if .Values.slave.annotations }}
annotations:
{{- range .Values.slave.annotations }}
{{ .key }}: '{{ .value }}'
{{- end }}
{{- end }}
labels:
app: "{{ template "mariadb.name" . }}"
component: "slave"
release: "{{ .Release.Name }}"
chart: {{ template "mariadb.chart" . }}
spec:
serviceAccountName: "{{ template "mariadb.serviceAccountName" . }}"
{{- if .Values.securityContext.enabled }}
securityContext:
fsGroup: {{ .Values.securityContext.fsGroup }}
runAsUser: {{ .Values.securityContext.runAsUser }}
{{- end }}
{{- if eq .Values.slave.antiAffinity "hard" }}
affinity:
{{- with .Values.slave.affinity }}
{{ toYaml . | indent 8 }}
{{- end }}
podAntiAffinity:
requiredDuringSchedulingIgnoredDuringExecution:
- topologyKey: "kubernetes.io/hostname"
labelSelector:
matchLabels:
app: "{{ template "mariadb.name" . }}"
release: "{{ .Release.Name }}"
{{- else if eq .Values.slave.antiAffinity "soft" }}
affinity:
{{- with .Values.slave.affinity }}
{{ toYaml . | indent 8 }}
{{- end }}
podAntiAffinity:
preferredDuringSchedulingIgnoredDuringExecution:
- weight: 1
podAffinityTerm:
topologyKey: kubernetes.io/hostname
labelSelector:
matchLabels:
app: "{{ template "mariadb.name" . }}"
release: "{{ .Release.Name }}"
{{- else}}
{{- with .Values.slave.affinity }}
affinity:
{{ toYaml . | indent 8 }}
{{- end }}
{{- end }}
{{- with .Values.slave.tolerations }}
tolerations:
{{ toYaml . | indent 8 }}
{{- end }}
{{- if .Values.image.pullSecrets }}
imagePullSecrets:
{{- range .Values.image.pullSecrets }}
- name: {{ . }}
{{- end}}
{{- end }}
{{- if .Values.master.extraInitContainers }}
initContainers:
{{ tpl .Values.master.extraInitContainers . | indent 6}}
{{- end }}
containers:
- name: "mariadb"
image: {{ template "mariadb.image" . }}
imagePullPolicy: {{ .Values.image.pullPolicy | quote }}
env:
{{- if .Values.image.debug}}
- name: BITNAMI_DEBUG
value: "true"
{{- end }}
- name: MARIADB_REPLICATION_MODE
value: "slave"
- name: MARIADB_MASTER_HOST
value: {{ template "mariadb.fullname" . }}
- name: MARIADB_MASTER_PORT_NUMBER
value: "3306"
- name: MARIADB_MASTER_ROOT_USER
value: "root"
- name: MARIADB_MASTER_ROOT_PASSWORD
valueFrom:
secretKeyRef:
{{- if .Values.existingSecret }}
name: {{ .Values.existingSecret }}
{{- else }}
name: {{ template "mariadb.fullname" . }}
{{- end }}
key: mariadb-root-password
- name: MARIADB_REPLICATION_USER
value: "{{ .Values.replication.user }}"
- name: MARIADB_REPLICATION_PASSWORD
valueFrom:
secretKeyRef:
{{- if .Values.existingSecret }}
name: {{ .Values.existingSecret }}
{{- else }}
name: {{ template "mariadb.fullname" . }}
{{- end }}
key: mariadb-replication-password
ports:
- name: mysql
containerPort: 3306
{{- if .Values.slave.livenessProbe.enabled }}
livenessProbe:
exec:
command: ["sh", "-c", "exec mysqladmin status -uroot -p$MARIADB_MASTER_ROOT_PASSWORD"]
initialDelaySeconds: {{ .Values.slave.livenessProbe.initialDelaySeconds }}
periodSeconds: {{ .Values.slave.livenessProbe.periodSeconds }}
timeoutSeconds: {{ .Values.slave.livenessProbe.timeoutSeconds }}
successThreshold: {{ .Values.slave.livenessProbe.successThreshold }}
failureThreshold: {{ .Values.slave.livenessProbe.failureThreshold }}
{{- end }}
{{- if .Values.slave.readinessProbe.enabled }}
readinessProbe:
exec:
command: ["sh", "-c", "exec mysqladmin status -uroot -p$MARIADB_MASTER_ROOT_PASSWORD"]
initialDelaySeconds: {{ .Values.slave.readinessProbe.initialDelaySeconds }}
periodSeconds: {{ .Values.slave.readinessProbe.periodSeconds }}
timeoutSeconds: {{ .Values.slave.readinessProbe.timeoutSeconds }}
successThreshold: {{ .Values.slave.readinessProbe.successThreshold }}
failureThreshold: {{ .Values.slave.readinessProbe.failureThreshold }}
{{- end }}
resources:
{{ toYaml .Values.slave.resources | indent 10 }}
volumeMounts:
- name: data
mountPath: /bitnami/mariadb
{{- if .Values.slave.config }}
- name: config
mountPath: /opt/bitnami/mariadb/conf/my.cnf
subPath: my.cnf
{{- end }}
{{- if .Values.metrics.enabled }}
- name: metrics
image: {{ template "metrics.image" . }}
imagePullPolicy: {{ .Values.metrics.image.pullPolicy | quote }}
env:
- name: MARIADB_MASTER_ROOT_PASSWORD
valueFrom:
secretKeyRef:
{{- if .Values.existingSecret }}
name: {{ .Values.existingSecret }}
{{- else }}
name: {{ template "mariadb.fullname" . }}
{{- end }}
key: mariadb-root-password
command: [ 'sh', '-c', 'DATA_SOURCE_NAME="root:$MARIADB_MASTER_ROOT_PASSWORD@(localhost:3306)/" /bin/mysqld_exporter' ]
ports:
- name: metrics
containerPort: 9104
livenessProbe:
httpGet:
path: /metrics
port: metrics
initialDelaySeconds: 15
timeoutSeconds: 5
readinessProbe:
httpGet:
path: /metrics
port: metrics
initialDelaySeconds: 5
timeoutSeconds: 1
resources:
{{ toYaml .Values.metrics.resources | indent 10 }}
{{- end }}
volumes:
{{- if .Values.slave.config }}
- name: config
configMap:
name: {{ template "slave.fullname" . }}
{{- end }}
{{- if .Values.slave.persistence.enabled }}
volumeClaimTemplates:
- metadata:
name: data
labels:
app: "{{ template "mariadb.name" . }}"
component: "slave"
release: {{ .Release.Name | quote }}
heritage: {{ .Release.Service | quote }}
spec:
accessModes:
{{- range .Values.slave.persistence.accessModes }}
- {{ . | quote }}
{{- end }}
resources:
requests:
storage: {{ .Values.slave.persistence.size | quote }}
{{- if .Values.slave.persistence.storageClass }}
{{- if (eq "-" .Values.slave.persistence.storageClass) }}
storageClassName: ""
{{- else }}
storageClassName: {{ .Values.slave.persistence.storageClass | quote }}
{{- end }}
{{- end }}
{{- else }}
- name: "data"
emptyDir: {}
{{- end }}
{{- end }}
================================================
FILE: manifests/deprecated/mariadb-cluster/mariadb/templates/slave-svc.yaml
================================================
{{- if .Values.replication.enabled }}
apiVersion: v1
kind: Service
metadata:
name: {{ template "slave.fullname" . }}
labels:
app: "{{ template "mariadb.name" . }}"
chart: {{ template "mariadb.chart" . }}
component: "slave"
release: {{ .Release.Name | quote }}
heritage: {{ .Release.Service | quote }}
{{- if .Values.metrics.enabled }}
annotations:
{{ toYaml .Values.metrics.annotations | indent 4 }}
{{- end }}
spec:
type: {{ .Values.service.type }}
{{- if eq .Values.service.type "ClusterIP" }}
{{- if .Values.service.clusterIp }}
clusterIP: {{ .Values.service.clusterIp }}
{{- end }}
{{- end }}
ports:
- name: mysql
port: {{ .Values.service.port }}
targetPort: mysql
{{- if (eq .Values.service.type "NodePort") }}
{{- if .Values.service.nodePort }}
{{- if .Values.service.nodePort.slave }}
nodePort: {{ .Values.service.nodePort.slave }}
{{- end }}
{{- end }}
{{- end }}
{{- if .Values.metrics.enabled }}
- name: metrics
port: 9104
targetPort: metrics
{{- end }}
selector:
app: "{{ template "mariadb.name" . }}"
component: "slave"
release: "{{ .Release.Name }}"
{{- end }}
================================================
FILE: manifests/deprecated/mariadb-cluster/mariadb/templates/test-runner.yaml
================================================
apiVersion: v1
kind: Pod
metadata:
name: "{{ template "mariadb.fullname" . }}-test-{{ randAlphaNum 5 | lower }}"
annotations:
"helm.sh/hook": test-success
spec:
initContainers:
- name: "test-framework"
image: "dduportal/bats:0.4.0"
command:
- "bash"
- "-c"
- |
set -ex
# copy bats to tools dir
cp -R /usr/local/libexec/ /tools/bats/
volumeMounts:
- mountPath: /tools
name: tools
containers:
- name: mariadb-test
image: {{ template "mariadb.image" . }}
imagePullPolicy: {{ .Values.image.pullPolicy | quote }}
command: ["/tools/bats/bats", "-t", "/tests/run.sh"]
env:
- name: MARIADB_ROOT_PASSWORD
valueFrom:
secretKeyRef:
{{- if .Values.existingSecret }}
name: {{ .Values.existingSecret }}
{{- else }}
name: {{ template "mariadb.fullname" . }}
{{- end }}
key: mariadb-root-password
volumeMounts:
- mountPath: /tests
name: tests
readOnly: true
- mountPath: /tools
name: tools
volumes:
- name: tests
configMap:
name: {{ template "mariadb.fullname" . }}-tests
- name: tools
emptyDir: {}
restartPolicy: Never
================================================
FILE: manifests/deprecated/mariadb-cluster/mariadb/templates/tests.yaml
================================================
apiVersion: v1
kind: ConfigMap
metadata:
name: {{ template "mariadb.fullname" . }}-tests
data:
run.sh: |-
@test "Testing MariaDB is accessible" {
mysql -h {{ template "mariadb.fullname" . }} -uroot -p$MARIADB_ROOT_PASSWORD -e 'show databases;'
}
================================================
FILE: manifests/deprecated/mariadb-cluster/mariadb/values-production.yaml
================================================
## Global Docker image registry
## Please, note that this will override the image registry for all the images, including dependencies, configured to use the global value
##
# global:
# imageRegistry:
## Bitnami MariaDB image
## ref: https://hub.docker.com/r/bitnami/mariadb/tags/
##
image:
registry: docker.io
repository: bitnami/mariadb
tag: 10.1.37
## Specify a imagePullPolicy
## Defaults to 'Always' if image tag is 'latest', else set to 'IfNotPresent'
## ref: http://kubernetes.io/docs/user-guide/images/#pre-pulling-images
##
pullPolicy: IfNotPresent
## Optionally specify an array of imagePullSecrets.
## Secrets must be manually created in the namespace.
## ref: https://kubernetes.io/docs/tasks/configure-pod-container/pull-image-private-registry/
##
# pullSecrets:
# - myRegistrKeySecretName
## Set to true if you would like to see extra information on logs
## It turns BASH and NAMI debugging in minideb
## ref: https://github.com/bitnami/minideb-extras/#turn-on-bash-debugging
debug: false
service:
## Kubernetes service type, ClusterIP and NodePort are supported at present
type: ClusterIP
# clusterIp: None
port: 3306
## Specify the nodePort value for the LoadBalancer and NodePort service types.
## ref: https://kubernetes.io/docs/concepts/services-networking/service/#type-nodeport
##
# nodePort:
# master: 30001
# slave: 30002
## Pods Service Account
## ref: https://kubernetes.io/docs/tasks/configure-pod-container/configure-service-account/
serviceAccount:
## Specifies whether a ServiceAccount should be created
##
create: false
## The name of the ServiceAccount to use.
## If not set and create is true, a name is generated using the mariadb.fullname template
# name:
## Pod Security Context
## ref: https://kubernetes.io/docs/tasks/configure-pod-container/security-context/
##
securityContext:
enabled: true
fsGroup: 1001
runAsUser: 1001
# # Use existing secret (ignores root, db and replication passwords)
# existingSecret:
rootUser:
## MariaDB admin password
## ref: https://github.com/bitnami/bitnami-docker-mariadb#setting-the-root-password-on-first-run
##
password:
##
## Option to force users to specify a password. That is required for 'helm upgrade' to work properly.
## If it is not force, a random password will be generated.
forcePassword: true
db:
## MariaDB username and password
## ref: https://github.com/bitnami/bitnami-docker-mariadb#creating-a-database-user-on-first-run
##
user:
password:
## Password is ignored if existingSecret is specified.
## Database to create
## ref: https://github.com/bitnami/bitnami-docker-mariadb#creating-a-database-on-first-run
##
name: my_database
## Option to force users to specify a password. That is required for 'helm upgrade' to work properly.
## If it is not force, a random password will be generated.
forcePassword: true
replication:
## Enable replication. This enables the creation of replicas of MariaDB. If false, only a
## master deployment would be created
enabled: true
##
## MariaDB replication user
## ref: https://github.com/bitnami/bitnami-docker-mariadb#setting-up-a-replication-cluster
##
user: replicator
## MariaDB replication user password
## ref: https://github.com/bitnami/bitnami-docker-mariadb#setting-up-a-replication-cluster
##
password:
## Password is ignored if existingSecret is specified.
##
## Option to force users to specify a password. That is required for 'helm upgrade' to work properly.
## If it is not force, a random password will be generated.
forcePassword: true
## initdb scripts
## Specify dictionnary of scripts to be run at first boot
## Alternatively, you can put your scripts under the files/docker-entrypoint-initdb.d directory
##
# initdbScripts:
# my_init_script.sh: |
# #!/bin/sh
# echo "Do something."
#
## ConfigMap with scripts to be run at first boot
## Note: This will override initdbScripts
# initdbScriptsConfigMap:
master:
## Mariadb Master additional pod annotations
## ref: https://kubernetes.io/docs/concepts/overview/working-with-objects/annotations/
# annotations:
# - key: key1
# value: value1
## Affinity for pod assignment
## Ref: https://kubernetes.io/docs/concepts/configuration/assign-pod-node/#affinity-and-anti-affinity
##
affinity: {}
## Kept for backwards compatibility. You can now disable it by removing it.
## if you wish to set it through master.affinity.podAntiAffinity instead.
##
antiAffinity: soft
## Tolerations for pod assignment
## Ref: https://kubernetes.io/docs/concepts/configuration/taint-and-toleration/
##
tolerations: []
## Enable persistence using Persistent Volume Claims
## ref: http://kubernetes.io/docs/user-guide/persistent-volumes/
##
persistence:
## If true, use a Persistent Volume Claim, If false, use emptyDir
##
enabled: true
# Enable persistence using an existing PVC
# existingClaim:
mountPath: /bitnami/mariadb
## Persistent Volume Storage Class
## If defined, storageClassName:
## If set to "-", storageClassName: "", which disables dynamic provisioning
## If undefined (the default) or set to null, no storageClassName spec is
## set, choosing the default provisioner. (gp2 on AWS, standard on
## GKE, AWS & OpenStack)
##
# storageClass: "-"
## Persistent Volume Claim annotations
##
annotations: {}
## Persistent Volume Access Mode
##
accessModes:
- ReadWriteOnce
## Persistent Volume size
##
size: 8Gi
##
extraInitContainers: |
# - name: do-something
# image: busybox
# command: ['do', 'something']
## Configure MySQL with a custom my.cnf file
## ref: https://mysql.com/kb/en/mysql/configuring-mysql-with-mycnf/#example-of-configuration-file
##
config: |-
[mysqld]
skip-name-resolve
explicit_defaults_for_timestamp
basedir=/opt/bitnami/mariadb
port=3306
socket=/opt/bitnami/mariadb/tmp/mysql.sock
tmpdir=/opt/bitnami/mariadb/tmp
max_allowed_packet=16M
bind-address=0.0.0.0
pid-file=/opt/bitnami/mariadb/tmp/mysqld.pid
log-error=/opt/bitnami/mariadb/logs/mysqld.log
character-set-server=UTF8
collation-server=utf8_general_ci
[client]
port=3306
socket=/opt/bitnami/mariadb/tmp/mysql.sock
default-character-set=UTF8
[manager]
port=3306
socket=/opt/bitnami/mariadb/tmp/mysql.sock
pid-file=/opt/bitnami/mariadb/tmp/mysqld.pid
## Configure master resource requests and limits
## ref: http://kubernetes.io/docs/user-guide/compute-resources/
##
resources: {}
livenessProbe:
enabled: true
##
## Initializing the database could take some time
initialDelaySeconds: 120
##
## Default Kubernetes values
periodSeconds: 10
timeoutSeconds: 1
successThreshold: 1
failureThreshold: 3
readinessProbe:
enabled: true
initialDelaySeconds: 15
##
## Default Kubernetes values
periodSeconds: 10
timeoutSeconds: 1
successThreshold: 1
failureThreshold: 3
slave:
replicas: 2
## Mariadb Slave additional pod annotations
## ref: https://kubernetes.io/docs/concepts/overview/working-with-objects/annotations/
# annotations:
# - key: key1
# value: value1
## Affinity for pod assignment
## Ref: https://kubernetes.io/docs/concepts/configuration/assign-pod-node/#affinity-and-anti-affinity
##
affinity: {}
## Kept for backwards compatibility. You can now disable it by removing it.
## if you wish to set it through slave.affinity.podAntiAffinity instead.
##
antiAffinity: soft
## Tolerations for pod assignment
## Ref: https://kubernetes.io/docs/concepts/configuration/taint-and-toleration/
##
tolerations: []
persistence:
## If true, use a Persistent Volume Claim, If false, use emptyDir
##
enabled: true
# storageClass: "-"
annotations:
accessModes:
- ReadWriteOnce
## Persistent Volume size
##
size: 8Gi
##
extraInitContainers: |
# - name: do-something
# image: busybox
# command: ['do', 'something']
## Configure MySQL slave with a custom my.cnf file
## ref: https://mysql.com/kb/en/mysql/configuring-mysql-with-mycnf/#example-of-configuration-file
##
config: |-
[mysqld]
skip-name-resolve
explicit_defaults_for_timestamp
basedir=/opt/bitnami/mariadb
port=3306
socket=/opt/bitnami/mariadb/tmp/mysql.sock
tmpdir=/opt/bitnami/mariadb/tmp
max_allowed_packet=16M
bind-address=0.0.0.0
pid-file=/opt/bitnami/mariadb/tmp/mysqld.pid
log-error=/opt/bitnami/mariadb/logs/mysqld.log
character-set-server=UTF8
collation-server=utf8_general_ci
[client]
port=3306
socket=/opt/bitnami/mariadb/tmp/mysql.sock
default-character-set=UTF8
[manager]
port=3306
socket=/opt/bitnami/mariadb/tmp/mysql.sock
pid-file=/opt/bitnami/mariadb/tmp/mysqld.pid
##
## Configure slave resource requests and limits
## ref: http://kubernetes.io/docs/user-guide/compute-resources/
##
resources: {}
livenessProbe:
enabled: true
##
## Initializing the database could take some time
initialDelaySeconds: 120
##
## Default Kubernetes values
periodSeconds: 10
timeoutSeconds: 1
successThreshold: 1
failureThreshold: 3
readinessProbe:
enabled: true
initialDelaySeconds: 15
##
## Default Kubernetes values
periodSeconds: 10
timeoutSeconds: 1
successThreshold: 1
failureThreshold: 3
metrics:
enabled: true
image:
registry: docker.io
repository: prom/mysqld-exporter
tag: v0.10.0
pullPolicy: IfNotPresent
resources: {}
annotations:
prometheus.io/scrape: "true"
prometheus.io/port: "9104"
================================================
FILE: manifests/deprecated/mariadb-cluster/mariadb/values.yaml
================================================
## Global Docker image registry
## Please, note that this will override the image registry for all the images, including dependencies, configured to use the global value
##
# global:
# imageRegistry:
## Bitnami MariaDB image
## ref: https://hub.docker.com/r/bitnami/mariadb/tags/
##
image:
registry: docker.io
repository: bitnami/mariadb
tag: 10.1.37
## Specify a imagePullPolicy
## Defaults to 'Always' if image tag is 'latest', else set to 'IfNotPresent'
## ref: http://kubernetes.io/docs/user-guide/images/#pre-pulling-images
##
pullPolicy: IfNotPresent
## Optionally specify an array of imagePullSecrets.
## Secrets must be manually created in the namespace.
## ref: https://kubernetes.io/docs/tasks/configure-pod-container/pull-image-private-registry/
##
# pullSecrets:
# - myRegistrKeySecretName
## Set to true if you would like to see extra information on logs
## It turns BASH and NAMI debugging in minideb
## ref: https://github.com/bitnami/minideb-extras/#turn-on-bash-debugging
debug: false
service:
## Kubernetes service type, ClusterIP and NodePort are supported at present
type: ClusterIP
# clusterIp: None
port: 3306
## Specify the nodePort value for the LoadBalancer and NodePort service types.
## ref: https://kubernetes.io/docs/concepts/services-networking/service/#type-nodeport
##
# nodePort:
# master: 30001
# slave: 30002
## Pods Service Account
## ref: https://kubernetes.io/docs/tasks/configure-pod-container/configure-service-account/
serviceAccount:
## Specifies whether a ServiceAccount should be created
##
create: false
## The name of the ServiceAccount to use.
## If not set and create is true, a name is generated using the mariadb.fullname template
# name:
## Pod Security Context
## ref: https://kubernetes.io/docs/tasks/configure-pod-container/security-context/
##
securityContext:
enabled: true
fsGroup: 1001
runAsUser: 1001
# # Use existing secret (ignores root, db and replication passwords)
# existingSecret:
rootUser:
## MariaDB admin password
## ref: https://github.com/bitnami/bitnami-docker-mariadb#setting-the-root-password-on-first-run
##
password:
##
## Option to force users to specify a password. That is required for 'helm upgrade' to work properly.
## If it is not force, a random password will be generated.
forcePassword: false
db:
## MariaDB username and password
## ref: https://github.com/bitnami/bitnami-docker-mariadb#creating-a-database-user-on-first-run
##
user:
password:
## Password is ignored if existingSecret is specified.
## Database to create
## ref: https://github.com/bitnami/bitnami-docker-mariadb#creating-a-database-on-first-run
##
name: my_database
## Option to force users to specify a password. That is required for 'helm upgrade' to work properly.
## If it is not force, a random password will be generated.
forcePassword: false
replication:
## Enable replication. This enables the creation of replicas of MariaDB. If false, only a
## master deployment would be created
enabled: true
##
## MariaDB replication user
## ref: https://github.com/bitnami/bitnami-docker-mariadb#setting-up-a-replication-cluster
##
user: replicator
## MariaDB replication user password
## ref: https://github.com/bitnami/bitnami-docker-mariadb#setting-up-a-replication-cluster
##
password:
## Password is ignored if existingSecret is specified.
##
## Option to force users to specify a password. That is required for 'helm upgrade' to work properly.
## If it is not force, a random password will be generated.
forcePassword: false
## initdb scripts
## Specify dictionnary of scripts to be run at first boot
## Alternatively, you can put your scripts under the files/docker-entrypoint-initdb.d directory
##
# initdbScripts:
# my_init_script.sh: |
# #!/bin/sh
# echo "Do something."
#
## ConfigMap with scripts to be run at first boot
## Note: This will override initdbScripts
# initdbScriptsConfigMap:
master:
## Mariadb Master additional pod annotations
## ref: https://kubernetes.io/docs/concepts/overview/working-with-objects/annotations/
# annotations:
# - key: key1
# value: value1
## Affinity for pod assignment
## Ref: https://kubernetes.io/docs/concepts/configuration/assign-pod-node/#affinity-and-anti-affinity
##
affinity: {}
## Kept for backwards compatibility. You can now disable it by removing it.
## if you wish to set it through master.affinity.podAntiAffinity instead.
##
antiAffinity: soft
## Tolerations for pod assignment
## Ref: https://kubernetes.io/docs/concepts/configuration/taint-and-toleration/
##
tolerations: []
## Enable persistence using Persistent Volume Claims
## ref: http://kubernetes.io/docs/user-guide/persistent-volumes/
##
persistence:
## If true, use a Persistent Volume Claim, If false, use emptyDir
##
enabled: true
# Enable persistence using an existing PVC
# existingClaim:
mountPath: /bitnami/mariadb
## Persistent Volume Storage Class
## If defined, storageClassName:
## If set to "-", storageClassName: "", which disables dynamic provisioning
## If undefined (the default) or set to null, no storageClassName spec is
## set, choosing the default provisioner. (gp2 on AWS, standard on
## GKE, AWS & OpenStack)
##
# storageClass: "-"
## Persistent Volume Claim annotations
##
annotations: {}
## Persistent Volume Access Mode
##
accessModes:
- ReadWriteOnce
## Persistent Volume size
##
size: 8Gi
##
extraInitContainers: |
# - name: do-something
# image: busybox
# command: ['do', 'something']
## Configure MySQL with a custom my.cnf file
## ref: https://mysql.com/kb/en/mysql/configuring-mysql-with-mycnf/#example-of-configuration-file
##
config: |-
[mysqld]
skip-name-resolve
explicit_defaults_for_timestamp
basedir=/opt/bitnami/mariadb
port=3306
socket=/opt/bitnami/mariadb/tmp/mysql.sock
tmpdir=/opt/bitnami/mariadb/tmp
max_allowed_packet=16M
bind-address=0.0.0.0
pid-file=/opt/bitnami/mariadb/tmp/mysqld.pid
log-error=/opt/bitnami/mariadb/logs/mysqld.log
character-set-server=UTF8
collation-server=utf8_general_ci
[client]
port=3306
socket=/opt/bitnami/mariadb/tmp/mysql.sock
default-character-set=UTF8
[manager]
port=3306
socket=/opt/bitnami/mariadb/tmp/mysql.sock
pid-file=/opt/bitnami/mariadb/tmp/mysqld.pid
## Configure master resource requests and limits
## ref: http://kubernetes.io/docs/user-guide/compute-resources/
##
resources: {}
livenessProbe:
enabled: true
##
## Initializing the database could take some time
initialDelaySeconds: 120
##
## Default Kubernetes values
periodSeconds: 10
timeoutSeconds: 1
successThreshold: 1
failureThreshold: 3
readinessProbe:
enabled: true
initialDelaySeconds: 30
##
## Default Kubernetes values
periodSeconds: 10
timeoutSeconds: 1
successThreshold: 1
failureThreshold: 3
slave:
replicas: 1
## Mariadb Slave additional pod annotations
## ref: https://kubernetes.io/docs/concepts/overview/working-with-objects/annotations/
# annotations:
# - key: key1
# value: value1
## Affinity for pod assignment
## Ref: https://kubernetes.io/docs/concepts/configuration/assign-pod-node/#affinity-and-anti-affinity
##
affinity: {}
## Kept for backwards compatibility. You can now disable it by removing it.
## if you wish to set it through slave.affinity.podAntiAffinity instead.
##
antiAffinity: soft
## Tolerations for pod assignment
## Ref: https://kubernetes.io/docs/concepts/configuration/taint-and-toleration/
##
tolerations: []
persistence:
## If true, use a Persistent Volume Claim, If false, use emptyDir
##
enabled: true
# storageClass: "-"
annotations:
accessModes:
- ReadWriteOnce
## Persistent Volume size
##
size: 8Gi
##
extraInitContainers: |
# - name: do-something
# image: busybox
# command: ['do', 'something']
## Configure MySQL slave with a custom my.cnf file
## ref: https://mysql.com/kb/en/mysql/configuring-mysql-with-mycnf/#example-of-configuration-file
##
config: |-
[mysqld]
skip-name-resolve
explicit_defaults_for_timestamp
basedir=/opt/bitnami/mariadb
port=3306
socket=/opt/bitnami/mariadb/tmp/mysql.sock
tmpdir=/opt/bitnami/mariadb/tmp
max_allowed_packet=16M
bind-address=0.0.0.0
pid-file=/opt/bitnami/mariadb/tmp/mysqld.pid
log-error=/opt/bitnami/mariadb/logs/mysqld.log
character-set-server=UTF8
collation-server=utf8_general_ci
[client]
port=3306
socket=/opt/bitnami/mariadb/tmp/mysql.sock
default-character-set=UTF8
[manager]
port=3306
socket=/opt/bitnami/mariadb/tmp/mysql.sock
pid-file=/opt/bitnami/mariadb/tmp/mysqld.pid
##
## Configure slave resource requests and limits
## ref: http://kubernetes.io/docs/user-guide/compute-resources/
##
resources: {}
livenessProbe:
enabled: true
##
## Initializing the database could take some time
initialDelaySeconds: 120
##
## Default Kubernetes values
periodSeconds: 10
timeoutSeconds: 1
successThreshold: 1
failureThreshold: 3
readinessProbe:
enabled: true
initialDelaySeconds: 45
##
## Default Kubernetes values
periodSeconds: 10
timeoutSeconds: 1
successThreshold: 1
failureThreshold: 3
metrics:
enabled: false
image:
registry: docker.io
repository: prom/mysqld-exporter
tag: v0.10.0
pullPolicy: IfNotPresent
resources: {}
annotations:
prometheus.io/scrape: "true"
prometheus.io/port: "9104"
================================================
FILE: manifests/deprecated/mariadb-cluster/my-values.yaml
================================================
## Global Docker image registry
## Please, note that this will override the image registry for all the images, including dependencies, configured to use the global value
##
# global:
# imageRegistry:
## Bitnami MariaDB image
## ref: https://hub.docker.com/r/bitnami/mariadb/tags/
##
image:
registry: docker.io
repository: bitnami/mariadb
tag: 10.1.37
## Specify a imagePullPolicy
## Defaults to 'Always' if image tag is 'latest', else set to 'IfNotPresent'
## ref: http://kubernetes.io/docs/user-guide/images/#pre-pulling-images
##
pullPolicy: IfNotPresent
## Optionally specify an array of imagePullSecrets.
## Secrets must be manually created in the namespace.
## ref: https://kubernetes.io/docs/tasks/configure-pod-container/pull-image-private-registry/
##
# pullSecrets:
# - myRegistrKeySecretName
## Set to true if you would like to see extra information on logs
## It turns BASH and NAMI debugging in minideb
## ref: https://github.com/bitnami/minideb-extras/#turn-on-bash-debugging
debug: false
service:
## Kubernetes service type, ClusterIP and NodePort are supported at present
type: NodePort
# clusterIp: None
port: 3306
## Specify the nodePort value for the LoadBalancer and NodePort service types.
## ref: https://kubernetes.io/docs/concepts/services-networking/service/#type-nodeport
##
nodePort:
master: 33306
slave: 33307
## Pods Service Account
## ref: https://kubernetes.io/docs/tasks/configure-pod-container/configure-service-account/
serviceAccount:
## Specifies whether a ServiceAccount should be created
##
create: false
## The name of the ServiceAccount to use.
## If not set and create is true, a name is generated using the mariadb.fullname template
# name:
## Pod Security Context
## ref: https://kubernetes.io/docs/tasks/configure-pod-container/security-context/
##
securityContext:
enabled: true
fsGroup: 1001
runAsUser: 1001
# # Use existing secret (ignores root, db and replication passwords)
# existingSecret:
rootUser:
## MariaDB admin password
## ref: https://github.com/bitnami/bitnami-docker-mariadb#setting-the-root-password-on-first-run
##
password: test.c0m
##
## Option to force users to specify a password. That is required for 'helm upgrade' to work properly.
## If it is not force, a random password will be generated.
forcePassword: true
db:
## MariaDB username and password
## ref: https://github.com/bitnami/bitnami-docker-mariadb#creating-a-database-user-on-first-run
##
user: hello
password: hello
## Password is ignored if existingSecret is specified.
## Database to create
## ref: https://github.com/bitnami/bitnami-docker-mariadb#creating-a-database-on-first-run
##
name: hello
## Option to force users to specify a password. That is required for 'helm upgrade' to work properly.
## If it is not force, a random password will be generated.
forcePassword: true
replication:
## Enable replication. This enables the creation of replicas of MariaDB. If false, only a
## master deployment would be created
enabled: true
##
## MariaDB replication user
## ref: https://github.com/bitnami/bitnami-docker-mariadb#setting-up-a-replication-cluster
##
user: replicator
## MariaDB replication user password
## ref: https://github.com/bitnami/bitnami-docker-mariadb#setting-up-a-replication-cluster
##
password: R4%forep11CAT0r
## Password is ignored if existingSecret is specified.
##
## Option to force users to specify a password. That is required for 'helm upgrade' to work properly.
## If it is not force, a random password will be generated.
forcePassword: true
## initdb scripts
## Specify dictionnary of scripts to be run at first boot
## Alternatively, you can put your scripts under the files/docker-entrypoint-initdb.d directory
##
# initdbScripts:
# my_init_script.sh: |
# #!/bin/sh
# echo "Do something."
#
## ConfigMap with scripts to be run at first boot
## Note: This will override initdbScripts
# initdbScriptsConfigMap:
master:
## Mariadb Master additional pod annotations
## ref: https://kubernetes.io/docs/concepts/overview/working-with-objects/annotations/
# annotations:
# - key: key1
# value: value1
## Affinity for pod assignment
## Ref: https://kubernetes.io/docs/concepts/configuration/assign-pod-node/#affinity-and-anti-affinity
##
affinity: {}
## Kept for backwards compatibility. You can now disable it by removing it.
## if you wish to set it through master.affinity.podAntiAffinity instead.
##
antiAffinity: soft
## Tolerations for pod assignment
## Ref: https://kubernetes.io/docs/concepts/configuration/taint-and-toleration/
##
tolerations: []
## Enable persistence using Persistent Volume Claims
## ref: http://kubernetes.io/docs/user-guide/persistent-volumes/
##
persistence:
## If true, use a Persistent Volume Claim, If false, use emptyDir
##
enabled: true
# Enable persistence using an existing PVC
# existingClaim:
mountPath: /bitnami/mariadb
## Persistent Volume Storage Class
## If defined, storageClassName:
## If set to "-", storageClassName: "", which disables dynamic provisioning
## If undefined (the default) or set to null, no storageClassName spec is
## set, choosing the default provisioner. (gp2 on AWS, standard on
## GKE, AWS & OpenStack)
##
storageClass: "nfs-db"
## Persistent Volume Claim annotations
##
annotations: {}
## Persistent Volume Access Mode
##
accessModes:
- ReadWriteOnce
## Persistent Volume size
##
size: 5Gi
##
extraInitContainers: |
# - name: do-something
# image: busybox
# command: ['do', 'something']
## Configure MySQL with a custom my.cnf file
## ref: https://mysql.com/kb/en/mysql/configuring-mysql-with-mycnf/#example-of-configuration-file
##
config: |-
[mysqld]
skip-name-resolve
explicit_defaults_for_timestamp
basedir=/opt/bitnami/mariadb
port=3306
socket=/opt/bitnami/mariadb/tmp/mysql.sock
tmpdir=/opt/bitnami/mariadb/tmp
bind-address=0.0.0.0
pid-file=/opt/bitnami/mariadb/tmp/mysqld.pid
log-error=/opt/bitnami/mariadb/logs/mysqld.log
character-set-server=UTF8
collation-server=utf8_general_ci
# optimize
max_allowed_packet = 1024M
table_open_cache = 512
sort_buffer_size = 2M
read_buffer_size = 2M
read_rnd_buffer_size = 8M
thread_cache_size = 8
query_cache_size = 32M
max_heap_table_size=1024M
tmp_table_size=1024M
max_connections=65535
max_connect_errors=65535
wait_timeout=172800
interactive_timeout=172800
connect_timeout=30
# log settings
expire_logs_days=3
[client]
port=3306
socket=/opt/bitnami/mariadb/tmp/mysql.sock
default-character-set=UTF8
[manager]
port=3306
socket=/opt/bitnami/mariadb/tmp/mysql.sock
pid-file=/opt/bitnami/mariadb/tmp/mysqld.pid
## Configure master resource requests and limits
## ref: http://kubernetes.io/docs/user-guide/compute-resources/
##
resources: {}
livenessProbe:
enabled: true
##
## Initializing the database could take some time
initialDelaySeconds: 120
##
## Default Kubernetes values
periodSeconds: 10
timeoutSeconds: 1
successThreshold: 1
failureThreshold: 3
readinessProbe:
enabled: true
initialDelaySeconds: 15
##
## Default Kubernetes values
periodSeconds: 10
timeoutSeconds: 1
successThreshold: 1
failureThreshold: 3
slave:
replicas: 1
## Mariadb Slave additional pod annotations
## ref: https://kubernetes.io/docs/concepts/overview/working-with-objects/annotations/
# annotations:
# - key: key1
# value: value1
## Affinity for pod assignment
## Ref: https://kubernetes.io/docs/concepts/configuration/assign-pod-node/#affinity-and-anti-affinity
##
affinity: {}
## Kept for backwards compatibility. You can now disable it by removing it.
## if you wish to set it through slave.affinity.podAntiAffinity instead.
##
antiAffinity: soft
## Tolerations for pod assignment
## Ref: https://kubernetes.io/docs/concepts/configuration/taint-and-toleration/
##
tolerations: []
persistence:
## If true, use a Persistent Volume Claim, If false, use emptyDir
##
enabled: false
# storageClass: "-"
annotations:
accessModes:
- ReadWriteOnce
## Persistent Volume size
##
size: 5Gi
##
extraInitContainers: |
# - name: do-something
# image: busybox
# command: ['do', 'something']
## Configure MySQL slave with a custom my.cnf file
## ref: https://mysql.com/kb/en/mysql/configuring-mysql-with-mycnf/#example-of-configuration-file
##
config: |-
[mysqld]
skip-name-resolve
explicit_defaults_for_timestamp
basedir=/opt/bitnami/mariadb
port=3306
socket=/opt/bitnami/mariadb/tmp/mysql.sock
tmpdir=/opt/bitnami/mariadb/tmp
bind-address=0.0.0.0
pid-file=/opt/bitnami/mariadb/tmp/mysqld.pid
log-error=/opt/bitnami/mariadb/logs/mysqld.log
character-set-server=UTF8
collation-server=utf8_general_ci
# optimize
max_allowed_packet = 1024M
table_open_cache = 512
sort_buffer_size = 2M
read_buffer_size = 2M
read_rnd_buffer_size = 8M
thread_cache_size = 8
query_cache_size = 32M
max_heap_table_size=1024M
tmp_table_size=1024M
max_connections=65535
max_connect_errors=65535
wait_timeout=172800
interactive_timeout=172800
connect_timeout=30
# log settings
expire_logs_days=3
[client]
port=3306
socket=/opt/bitnami/mariadb/tmp/mysql.sock
default-character-set=UTF8
[manager]
port=3306
socket=/opt/bitnami/mariadb/tmp/mysql.sock
pid-file=/opt/bitnami/mariadb/tmp/mysqld.pid
##
## Configure slave resource requests and limits
## ref: http://kubernetes.io/docs/user-guide/compute-resources/
##
resources: {}
livenessProbe:
enabled: true
##
## Initializing the database could take some time
initialDelaySeconds: 120
##
## Default Kubernetes values
periodSeconds: 10
timeoutSeconds: 1
successThreshold: 1
failureThreshold: 3
readinessProbe:
enabled: true
initialDelaySeconds: 15
##
## Default Kubernetes values
periodSeconds: 10
timeoutSeconds: 1
successThreshold: 1
failureThreshold: 3
metrics:
enabled: false
image:
registry: docker.io
repository: prom/mysqld-exporter
tag: v0.10.0
pullPolicy: IfNotPresent
resources: {}
annotations:
prometheus.io/scrape: "true"
prometheus.io/port: "9104"
================================================
FILE: manifests/deprecated/mysql-cluster/mysql-configmap.yaml
================================================
# https://kubernetes.io/docs/tasks/run-application/run-replicated-stateful-application/
apiVersion: v1
kind: ConfigMap
metadata:
name: mysql
labels:
app: mysql
app.kubernetes.io/name: mysql
data:
primary.cnf: |
# Apply this config only on the primary.
[mysqld]
log-bin
replica.cnf: |
# Apply this config only on replicas.
[mysqld]
super-read-only
================================================
FILE: manifests/deprecated/mysql-cluster/mysql-services.yaml
================================================
# https://kubernetes.io/docs/tasks/run-application/run-replicated-stateful-application/
# Headless service for stable DNS entries of StatefulSet members.
apiVersion: v1
kind: Service
metadata:
name: mysql
labels:
app: mysql
app.kubernetes.io/name: mysql
spec:
ports:
- name: mysql
port: 3306
clusterIP: None
selector:
app: mysql
---
# Client service for connecting to any MySQL instance for reads.
# For writes, you must instead connect to the primary: mysql-0.mysql.
apiVersion: v1
kind: Service
metadata:
name: mysql-read
labels:
app: mysql
app.kubernetes.io/name: mysql
readonly: "true"
spec:
ports:
- name: mysql
port: 3306
selector:
app: mysql
================================================
FILE: manifests/deprecated/mysql-cluster/mysql-statefulset.yaml
================================================
# https://kubernetes.io/docs/tasks/run-application/run-replicated-stateful-application/
apiVersion: apps/v1
kind: StatefulSet
metadata:
name: mysql
spec:
selector:
matchLabels:
app: mysql
app.kubernetes.io/name: mysql
serviceName: mysql
replicas: 2
template:
metadata:
labels:
app: mysql
app.kubernetes.io/name: mysql
spec:
initContainers:
- name: init-mysql
image: mysql:5.7
command:
- bash
- "-c"
- |
set -ex
# Generate mysql server-id from pod ordinal index.
[[ $HOSTNAME =~ -([0-9]+)$ ]] || exit 1
ordinal=${BASH_REMATCH[1]}
echo [mysqld] > /mnt/conf.d/server-id.cnf
# Add an offset to avoid reserved server-id=0 value.
echo server-id=$((100 + $ordinal)) >> /mnt/conf.d/server-id.cnf
# Copy appropriate conf.d files from config-map to emptyDir.
if [[ $ordinal -eq 0 ]]; then
cp /mnt/config-map/primary.cnf /mnt/conf.d/
else
cp /mnt/config-map/replica.cnf /mnt/conf.d/
fi
volumeMounts:
- name: conf
mountPath: /mnt/conf.d
- name: config-map
mountPath: /mnt/config-map
- name: clone-mysql
#image: gcr.io/google-samples/xtrabackup:1.0
image: jmgao1983/xtrabackup:1.0
command:
- bash
- "-c"
- |
set -ex
# Skip the clone if data already exists.
[[ -d /var/lib/mysql/mysql ]] && exit 0
# Skip the clone on primary (ordinal index 0).
[[ `hostname` =~ -([0-9]+)$ ]] || exit 1
ordinal=${BASH_REMATCH[1]}
[[ $ordinal -eq 0 ]] && exit 0
# Clone data from previous peer.
ncat --recv-only mysql-$(($ordinal-1)).mysql 3307 | xbstream -x -C /var/lib/mysql
# Prepare the backup.
xtrabackup --prepare --target-dir=/var/lib/mysql
volumeMounts:
- name: data
mountPath: /var/lib/mysql
subPath: mysql
- name: conf
mountPath: /etc/mysql/conf.d
containers:
- name: mysql
image: mysql:5.7
env:
- name: MYSQL_ALLOW_EMPTY_PASSWORD
value: "1"
ports:
- name: mysql
containerPort: 3306
volumeMounts:
- name: data
mountPath: /var/lib/mysql
subPath: mysql
- name: conf
mountPath: /etc/mysql/conf.d
resources:
requests:
cpu: 500m
memory: 1Gi
livenessProbe:
exec:
command: ["mysqladmin", "ping"]
initialDelaySeconds: 30
periodSeconds: 10
timeoutSeconds: 5
readinessProbe:
exec:
# Check we can execute queries over TCP (skip-networking is off).
command: ["mysql", "-h", "127.0.0.1", "-e", "SELECT 1"]
initialDelaySeconds: 5
periodSeconds: 2
timeoutSeconds: 1
- name: xtrabackup
#image: gcr.io/google-samples/xtrabackup:1.0
image: jmgao1983/xtrabackup:1.0
ports:
- name: xtrabackup
containerPort: 3307
command:
- bash
- "-c"
- |
set -ex
cd /var/lib/mysql
# Determine binlog position of cloned data, if any.
if [[ -f xtrabackup_slave_info && "x$( change_master_to.sql.in
# Ignore xtrabackup_binlog_info in this case (it's useless).
rm -f xtrabackup_slave_info xtrabackup_binlog_info
elif [[ -f xtrabackup_binlog_info ]]; then
# We're cloning directly from primary. Parse binlog position.
[[ `cat xtrabackup_binlog_info` =~ ^(.*?)[[:space:]]+(.*?)$ ]] || exit 1
rm -f xtrabackup_binlog_info xtrabackup_slave_info
echo "CHANGE MASTER TO MASTER_LOG_FILE='${BASH_REMATCH[1]}',\
MASTER_LOG_POS=${BASH_REMATCH[2]}" > change_master_to.sql.in
fi
# Check if we need to complete a clone by starting replication.
if [[ -f change_master_to.sql.in ]]; then
echo "Waiting for mysqld to be ready (accepting connections)"
until mysql -h 127.0.0.1 -e "SELECT 1"; do sleep 1; done
echo "Initializing replication from clone position"
mysql -h 127.0.0.1 \
-e "$(=2.0.1 to >=3.0.0 of this chart, `Role`, `RoleBinding`, and `ServiceAccount` resources should be deleted manually.
### Upgrading the chart from 3.x to 4.x
Starting from version `4.x` HAProxy sidecar prometheus-exporter removed and replaced by the embedded [HAProxy metrics endpoint](https://github.com/haproxy/haproxy/tree/master/contrib/prometheus-exporter), as a result when upgrading from version 3.x to 4.x section `haproxy.exporter` should be removed and the `haproxy.metrics` need to be configured for fit your needs.
## Installing the Chart
To install the chart
```bash
$ helm install stable/redis-ha
```
The command deploys Redis on the Kubernetes cluster in the default configuration. By default this chart install one master pod containing redis master container and sentinel container along with 2 redis slave pods each containing their own sentinel sidecars. The [configuration](#configuration) section lists the parameters that can be configured during installation.
> **Tip**: List all releases using `helm list`
## Uninstalling the Chart
To uninstall/delete the deployment:
```bash
$ helm delete
```
The command removes all the Kubernetes components associated with the chart and deletes the release.
## Configuration
The following table lists the configurable parameters of the Redis chart and their default values.
| Parameter | Description | Default |
|:--------------------------|:---------------------------------------------------------------------------------------------------------------------------------------------------------------------------------------------------------|:-------------------------------------------------------------------------------------------|
| `image` | Redis image | `redis` |
| `imagePullSecrets` | Reference to one or more secrets to be used when pulling redis images | [] |
| `tag` | Redis tag | `5.0.6-alpine` |
| `replicas` | Number of redis master/slave pods | `3` |
| `serviceAccount.create` | Specifies whether a ServiceAccount should be created | `true` |
| `serviceAccount.name` | The name of the ServiceAccount to create | Generated using the redis-ha.fullname template |
| `rbac.create` | Create and use RBAC resources | `true` |
| `redis.port` | Port to access the redis service | `6379` |
| `redis.masterGroupName` | Redis convention for naming the cluster group: must match `^[\\w-\\.]+$` and can be templated | `mymaster` |
| `redis.config` | Any valid redis config options in this section will be applied to each server (see below) | see values.yaml |
| `redis.customConfig` | Allows for custom redis.conf files to be applied. If this is used then `redis.config` is ignored | `` |
| `redis.resources` | CPU/Memory for master/slave nodes resource requests/limits | `{}` |
| `sentinel.port` | Port to access the sentinel service | `26379` |
| `sentinel.quorum` | Minimum number of servers necessary to maintain quorum | `2` |
| `sentinel.config` | Valid sentinel config options in this section will be applied as config options to each sentinel (see below) | see values.yaml |
| `sentinel.customConfig` | Allows for custom sentinel.conf files to be applied. If this is used then `sentinel.config` is ignored | `` |
| `sentinel.resources` | CPU/Memory for sentinel node resource requests/limits | `{}` |
| `init.resources` | CPU/Memory for init Container node resource requests/limits | `{}` |
| `auth` | Enables or disables redis AUTH (Requires `redisPassword` to be set) | `false` |
| `redisPassword` | A password that configures a `requirepass` and `masterauth` in the conf parameters (Requires `auth: enabled`) | `` |
| `authKey` | The key holding the redis password in an existing secret. | `auth` |
| `existingSecret` | An existing secret containing a key defined by `authKey` that configures `requirepass` and `masterauth` in the conf parameters (Requires `auth: enabled`, cannot be used in conjunction with `.Values.redisPassword`) | `` |
| `nodeSelector` | Node labels for pod assignment | `{}` |
| `tolerations` | Toleration labels for pod assignment | `[]` |
| `hardAntiAffinity` | Whether the Redis server pods should be forced to run on separate nodes. | `true` |
| `additionalAffinities` | Additional affinities to add to the Redis server pods. | `{}` |
| `securityContext` | Security context to be added to the Redis server pods. | `{runAsUser: 1000, fsGroup: 1000, runAsNonRoot: true}` |
| `affinity` | Override all other affinity settings with a string. | `""` |
| `persistentVolume.size` | Size for the volume | 10Gi |
| `persistentVolume.annotations` | Annotations for the volume | `{}` |
| `persistentVolume.reclaimPolicy` | Method used to reclaim an obsoleted volume. `Delete` or `Retain` | `""` |
| `emptyDir` | Configuration of `emptyDir`, used only if persistentVolume is disabled and no hostPath specified | `{}` |
| `exporter.enabled` | If `true`, the prometheus exporter sidecar is enabled | `false` |
| `exporter.image` | Exporter image | `oliver006/redis_exporter` |
| `exporter.tag` | Exporter tag | `v0.31.0` |
| `exporter.port` | Exporter port | `9121` |
| `exporter.annotations` | Prometheus scrape annotations | `{prometheus.io/path: /metrics, prometheus.io/port: "9121", prometheus.io/scrape: "true"}` |
| `exporter.extraArgs` | Additional args for the exporter | `{}` |
| `exporter.script` | A custom custom Lua script that will be mounted to exporter for collection of custom metrics. Creates a ConfigMap and sets env var `REDIS_EXPORTER_SCRIPT`. | |
| `exporter.serviceMonitor.enabled` | Use servicemonitor from prometheus operator | `false` |
| `exporter.serviceMonitor.namespace` | Namespace the service monitor is created in | `default` |
| `exporter.serviceMonitor.interval` | Scrape interval, If not set, the Prometheus default scrape interval is used | `nil` |
| `exporter.serviceMonitor.telemetryPath` | Path to redis-exporter telemetry-path | `/metrics` |
| `exporter.serviceMonitor.labels` | Labels for the servicemonitor passed to Prometheus Operator | `{}` |
| `exporter.serviceMonitor.timeout` | How long until a scrape request times out. If not set, the Prometheus default scape timeout is used | `nil` |
| `haproxy.enabled` | Enabled HAProxy LoadBalancing/Proxy | `false` |
| `haproxy.replicas` | Number of HAProxy instances | `3` |
| `haproxy.image.repository`| HAProxy Image Repository | `haproxy` |
| `haproxy.image.tag` | HAProxy Image Tag | `2.0.1` |
| `haproxy.image.pullPolicy`| HAProxy Image PullPolicy | `IfNotPresent` |
| `haproxy.imagePullSecrets`| Reference to one or more secrets to be used when pulling haproxy images | [] |
| `haproxy.annotations` | HAProxy template annotations | `{}` |
| `haproxy.customConfig` | Allows for custom config-haproxy.cfg file to be applied. If this is used then default config will be overwriten | `` |
| `haproxy.extraConfig` | Allows to place any additional configuration section to add to the default config-haproxy.cfg | `` |
| `haproxy.resources` | HAProxy resources | `{}` |
| `haproxy.emptyDir` | Configuration of `emptyDir` | `{}` |
| `haproxy.service.type` | HAProxy service type "ClusterIP", "LoadBalancer" or "NodePort" | `ClusterIP` |
| `haproxy.service.nodePort` | HAProxy service nodePort value (haproxy.service.type must be NodePort) | not set |
| `haproxy.service.annotations` | HAProxy service annotations | `{}` |
| `haproxy.stickyBalancing` | HAProxy sticky load balancing to Redis nodes. Helps with connections shutdown. | `false` |
| `haproxy.hapreadport.enable` | Enable a read only port for redis slaves | `false` |
| `haproxy.hapreadport.port` | Haproxy port for read only redis slaves | `6380` |
| `haproxy.metrics.enabled` | HAProxy enable prometheus metric scraping | `false` |
| `haproxy.metrics.port` | HAProxy prometheus metrics scraping port | `9101` |
| `haproxy.metrics.portName` | HAProxy metrics scraping port name | `exporter-port` |
| `haproxy.metrics.scrapePath` | HAProxy prometheus metrics scraping port | `/metrics` |
| `haproxy.metrics.serviceMonitor.enabled` | Use servicemonitor from prometheus operator for HAProxy metrics | `false` |
| `haproxy.metrics.serviceMonitor.namespace` | Namespace the service monitor for HAProxy metrics is created in | `default` |
| `haproxy.metrics.serviceMonitor.interval` | Scrape interval, If not set, the Prometheus default scrape interval is used | `nil` |
| `haproxy.metrics.serviceMonitor.telemetryPath` | Path to HAProxy metrics telemetry-path | `/metrics` |
| `haproxy.metrics.serviceMonitor.labels` | Labels for the HAProxy metrics servicemonitor passed to Prometheus Operator | `{}` |
| `haproxy.metrics.serviceMonitor.timeout` | How long until a scrape request times out. If not set, the Prometheus default scape timeout is used | `nil` |
| `haproxy.init.resources` | Extra init resources | `{}` |
| `haproxy.timeout.connect` | haproxy.cfg `timeout connect` setting | `4s` |
| `haproxy.timeout.server` | haproxy.cfg `timeout server` setting | `30s` |
| `haproxy.timeout.client` | haproxy.cfg `timeout client` setting | `30s` |
| `haproxy.timeout.check` | haproxy.cfg `timeout check` setting | `2s` |
| `haproxy.priorityClassName` | priorityClassName for `haproxy` deployment | not set |
| `haproxy.securityContext` | Security context to be added to the HAProxy deployment. | `{runAsUser: 1000, fsGroup: 1000, runAsNonRoot: true}` |
| `haproxy.hardAntiAffinity` | Whether the haproxy pods should be forced to run on separate nodes. | `true` |
| `haproxy.affinity` | Override all other haproxy affinity settings with a string. | `""` |
| `haproxy.additionalAffinities` | Additional affinities to add to the haproxy server pods. | `{}` |
| `podDisruptionBudget` | Pod Disruption Budget rules | `{}` |
| `priorityClassName` | priorityClassName for `redis-ha-statefulset` | not set |
| `hostPath.path` | Use this path on the host for data storage | not set |
| `hostPath.chown` | Run an init-container as root to set ownership on the hostPath | `true` |
| `sysctlImage.enabled` | Enable an init container to modify Kernel settings | `false` |
| `sysctlImage.command` | sysctlImage command to execute | [] |
| `sysctlImage.registry` | sysctlImage Init container registry | `docker.io` |
| `sysctlImage.repository` | sysctlImage Init container name | `busybox` |
| `sysctlImage.tag` | sysctlImage Init container tag | `1.31.1` |
| `sysctlImage.pullPolicy` | sysctlImage Init container pull policy | `Always` |
| `sysctlImage.mountHostSys`| Mount the host `/sys` folder to `/host-sys` | `false` |
| `sysctlImage.resources` | sysctlImage resources | `{}` |
| `schedulerName` | Alternate scheduler name | `nil` |
Specify each parameter using the `--set key=value[,key=value]` argument to `helm install`. For example,
```bash
$ helm install \
--set image=redis \
--set tag=5.0.5-alpine \
stable/redis-ha
```
The above command sets the Redis server within `default` namespace.
Alternatively, a YAML file that specifies the values for the parameters can be provided while installing the chart. For example,
```bash
$ helm install -f values.yaml stable/redis-ha
```
> **Tip**: You can use the default [values.yaml](values.yaml)
## Custom Redis and Sentinel config options
This chart allows for most redis or sentinel config options to be passed as a key value pair through the `values.yaml` under `redis.config` and `sentinel.config`. See links below for all available options.
[Example redis.conf](http://download.redis.io/redis-stable/redis.conf)
[Example sentinel.conf](http://download.redis.io/redis-stable/sentinel.conf)
For example `repl-timeout 60` would be added to the `redis.config` section of the `values.yaml` as:
```yml
repl-timeout: "60"
```
Note:
1. Some config options should be renamed by redis version,e.g.:
```
# In redis 5.x,see https://raw.githubusercontent.com/antirez/redis/5.0/redis.conf
min-replicas-to-write: 1
min-replicas-max-lag: 5
# In redis 4.x and redis 3.x,see https://raw.githubusercontent.com/antirez/redis/4.0/redis.conf and https://raw.githubusercontent.com/antirez/redis/3.0/redis.conf
min-slaves-to-write 1
min-slaves-max-lag 5
```
Sentinel options supported must be in the the `sentinel