Showing preview only (248K chars total). Download the full file or copy to clipboard to get everything.
Repository: elmoallistair/qwiklabs
Branch: master
Commit: 864109d1199b
Files: 82
Total size: 221.8 KB
Directory structure:
gitextract_6rdyb3hi/

├── CONTRIBUTING.md
├── labs/
│   ├── arc130_analyze-sentiment-with-natural-language-api-challenge-lab/
│   │   ├── code.gs
│   │   ├── readme.md
│   │   └── script.sh
│   ├── gsp101_google-cloud-essential-skills-challenge-lab/
│   │   ├── guide.txt
│   │   └── readme.md
│   ├── gsp1151_generative_ai_with_vertex_ai-prompt_design/
│   │   ├── intro_prompt_design.ipynb
│   │   └── readme.md
│   ├── gsp301_deploy-a-compute-instance-with-a-remote-startup-script/
│   │   ├── readme.md
│   │   └── script.sh
│   ├── gsp302_configure-a-firewall-and-a-startup-script-with-deployment-manager/
│   │   ├── guide.txt
│   │   ├── qwiklabs.jinja
│   │   ├── qwiklabs.yaml
│   │   └── readme.md
│   ├── gsp303_configure-secure-rdp-using-a-windows-bastion-host/
│   │   ├── readme.md
│   │   └── script.sh
│   ├── gsp304_build-and-deploy-a-docker-image-to-a-kubernetes/
│   │   ├── readme.md
│   │   └── script.sh
│   ├── gsp305_scale-out-and-update-a-containerized-application-on-a-kubernetes-cluster/
│   │   ├── readme.md
│   │   └── script.sh
│   ├── gsp306_migrate-a-mysql-database-to-google-cloud-sql/
│   │   ├── guide.txt
│   │   └── readme.md
│   ├── gsp311_automate-interactions-with-contact-center-ai-challenge-lab/
│   │   ├── guide.txt
│   │   └── readme.md
│   ├── gsp313_create-and-manage-cloud-resources/
│   │   ├── readme.md
│   │   └── script.sh
│   ├── gsp314_deploy-and-manage-cloud-environments-with-google-cloud-challenge-lab/
│   │   ├── guide.txt
│   │   └── readme.md
│   ├── gsp315_perform-foundational-infrastructure-tasks-in-google-cloud/
│   │   ├── readme.md
│   │   └── script.sh
│   ├── gsp318_deploy-to-kubernetes-in-google-cloud-challenge-lab/
│   │   ├── readme.md
│   │   └── script.sh
│   ├── gsp319_build-a-website-on-google-cloud-challenge-lab/
│   │   ├── readme.md
│   │   └── script.sh
│   ├── gsp321_set-up-and-configure-a-cloud-environment-in-google-cloud-challenge-lab/
│   │   ├── guide.txt
│   │   └── readme.md
│   ├── gsp322_build-and-secure-networks-in-google-cloud-challenge-lab/
│   │   ├── guide.txt
│   │   └── readme.md
│   ├── gsp323_perform-foundation-data-ml-and-ai-task-challenge-lab/
│   │   ├── guide.txt
│   │   ├── lab.schema
│   │   ├── readme.md
│   │   └── request.json
│   ├── gsp324_explore-machine-learning-models-with-explainable-ai-challenge-lab/
│   │   ├── guide.txt
│   │   ├── readme.md
│   │   └── what-if-tool-challenge.ipynb
│   ├── gsp325_building-interactive-apps-with-google-assistant-challenge-lab/
│   │   ├── guide.txt
│   │   ├── main.py
│   │   ├── main_final.py
│   │   ├── readme.md
│   │   └── requirements.txt
│   ├── gsp327_enginner-data-in-google-cloud-challenge-lab/
│   │   ├── query.sql
│   │   └── readme.md
│   ├── gsp328_serverless-cloud-run-development-challenge-lab/
│   │   ├── readme.md
│   │   └── script.sh
│   ├── gsp329_integrate-with-machine-learning-apis-challenge-lab/
│   │   ├── analyze-images.py
│   │   ├── guide.txt
│   │   └── readme.md
│   ├── gsp330_implement-devops-in-google-cloud-challenge-lab/
│   │   ├── readme.md
│   │   └── script.sh
│   ├── gsp335_secure-workloads-in-google-kubernetes-engine-challenge-lab/
│   │   ├── guide.txt
│   │   └── readme.md
│   ├── gsp342_ensure-access-and-identity-in-google-cloud-challenge-lab/
│   │   ├── readme.md
│   │   └── script.sh
│   ├── gsp343_optimize-costs-for-google-kubernetes-engine-challenge-lab/
│   │   ├── readme.md
│   │   └── script.sh
│   ├── gsp344_serverless-firebase-development-challenge-lab/
│   │   ├── readme.md
│   │   └── script.sh
│   ├── gsp345_automating-infrastructure-on-google-cloud-with-terraform-challenge-lab/
│   │   ├── readme.md
│   │   └── script.sh
│   ├── gsp361_build-lookml-objects-in-looker-challenge-lab/
│   │   ├── order_items.view
│   │   ├── part_1-3_training_ecommerce.model
│   │   ├── part_4_training_ecommerce.model
│   │   └── user_details.view
│   ├── gsp374_perform-predictive-data-analysis-in-bigquery-challenge-lab/
│   │   ├── query.sql
│   │   └── readme.md
│   ├── gsp388_monitor-and-log-with-google-cloud-operations-suite-challenge-lab/
│   │   ├── guide.txt
│   │   ├── readme.md
│   │   └── startup-script.sh
│   └── gsp787_insights-from-data-with-bigquery-challenge-lab/
│       ├── query.sql
│       └── readme.md
├── learning-resources.md
└── readme.md
================================================
FILE CONTENTS
================================================
================================================
FILE: CONTRIBUTING.md
================================================
# Contributing
## What you can contribute?
* Add new labs guide
* Improve/Fix/Update existing lab
* Add another lab resources
* Add another learning resources (README.md)
## Lab folder name format
`[lab_code]_lab-name`
example:
`gsp301_deploy-a-compute-instance-with-a-remote-startup-script`
Place the folder in `qwiklabs/labs/`folder in this repo
## Lab folder contents
* `readme.md` with:
* Lab name with Heading1 (`#`) style linked to qwiklabs lab url
* Lab overview
* Challenge scenario (if challenge lab)
* `guide.txt` or `script.sh` that contains step-by-step how to complete lab
* Other resources like notebook, script or file (Optional)
For example, have a look at this [folder](https://github.com/elmoallistair/qwiklabs/tree/master/labs/gsp325_building-interactive-apps-with-google-assistant-challenge-lab)
**Note**: This repo contains only challenge labs
================================================
FILE: labs/arc130_analyze-sentiment-with-natural-language-api-challenge-lab/code.gs
================================================
/**
* @OnlyCurrentDoc
*
* The above comment directs Apps Script to limit the scope of file
* access for this add-on. It specifies that this add-on will only
* attempt to read or modify the files in which the add-on is used,
* and not all of the user's files. The authorization request message
* presented to users will reflect this limited scope.
*/
/**
* Creates a menu entry in the Google Docs UI when the document is
* opened.
*
*/
function onOpen() {
var ui = DocumentApp.getUi();
ui.createMenu('Natural Language Tools')
.addItem('Mark Sentiment', 'markSentiment')
.addToUi();
}
/**
* Gets the user-selected text and highlights it based on sentiment
* with green for positive sentiment, red for negative, and yellow
* for neutral.
*
*/
function markSentiment() {
var POSITIVE_COLOR = '#00ff00'; // Colors for sentiments
var NEGATIVE_COLOR = '#ff0000';
var NEUTRAL_COLOR = '#ffff00';
var NEGATIVE_CUTOFF = -0.2; // Thresholds for sentiments
var POSITIVE_CUTOFF = 0.2;
var selection = DocumentApp.getActiveDocument().getSelection();
if (selection) {
var string = getSelectedText();
var sentiment = retrieveSentiment(string);
// Select the appropriate color
var color = NEUTRAL_COLOR;
if (sentiment <= NEGATIVE_CUTOFF) {
color = NEGATIVE_COLOR;
}
if (sentiment >= POSITIVE_CUTOFF) {
color = POSITIVE_COLOR;
}
// Highlight the text
var elements = selection.getSelectedElements();
for (var i = 0; i < elements.length; i++) {
if (elements[i].isPartial()) {
var element = elements[i].getElement().editAsText();
var startIndex = elements[i].getStartOffset();
var endIndex = elements[i].getEndOffsetInclusive();
element.setBackgroundColor(startIndex, endIndex, color);
} else {
var element = elements[i].getElement().editAsText();
foundText = elements[i].getElement().editAsText();
foundText.setBackgroundColor(color);
}
}
}
}
/**
* Returns a string with the contents of the selected text.
* If no text is selected, returns an empty string.
*/
function getSelectedText() {
var selection = DocumentApp.getActiveDocument().getSelection();
var string = "";
if (selection) {
var elements = selection.getSelectedElements();
for (var i = 0; i < elements.length; i++) {
if (elements[i].isPartial()) {
var element = elements[i].getElement().asText();
var startIndex = elements[i].getStartOffset();
var endIndex = elements[i].getEndOffsetInclusive() + 1;
var text = element.getText().substring(startIndex, endIndex);
string = string + text;
} else {
var element = elements[i].getElement();
// Only translate elements that can be edited as text; skip
// images and other non-text elements.
if (element.editAsText) {
string = string + element.asText().getText();
}
}
}
}
return string;
}
/** Given a string, will call the Natural Language API and retrieve
* the sentiment of the string. The sentiment will be a real
* number in the range -1 to 1, where -1 is highly negative
* sentiment and 1 is highly positive.
*/
function retrieveSentiment (line) {
var apiKey = "AIzaSyDjt9FLVPJbECuOxuU2Be4OYsQ0EC8RH8I";
var apiEndpoint = "https://language.googleapis.com/v1/documents:analyzeSentiment?key= + apiKey;
// Create a structure with the text, its language, its type,
// and its encoding
var docDetails = {
language: 'en-us',
type: 'PLAIN_TEXT',
content: line
};
var nlData = {
document: docDetails,
encodingType: 'UTF8'
};
// Package all of the options and the data together for the call
var nlOptions = {
method : 'post',
contentType: 'application/json',
payload : JSON.stringify(nlData)
};
// And make the call
var response = UrlFetchApp.fetch(apiEndpoint, nlOptions);
var data = JSON.parse(response);
var sentiment = 0.0;
// Ensure all pieces were in the returned value
if (data && data.documentSentiment
&& data.documentSentiment.score){
sentiment = data.documentSentiment.score;
}
return sentiment;
}
================================================
FILE: labs/arc130_analyze-sentiment-with-natural-language-api-challenge-lab/readme.md
================================================
# Analyze Sentiment with Natural Language API: Challenge Lab
## Challenge scenario
You recently joined an organization and are working as a junior cloud engineer as part of a team. You have been assigned machine learning (ML) projects and one of your client requirements is to use the Cloud Natural Language API service in Google Cloud to perform tasks for the completion of a project.
You are expected to have the skills and knowledge for the tasks that follow.
## Your challenge
For this challenge, you are asked to set up Google Docs and perform sentiment analysis on some reviews provided by customers, analyze syntax and parts of speech using the Natural language API, and create a Natural Language API request for a language other than English.
You need to:
- Create an API key.
- Set up Google Docs and call the Natural Language API.
- Analyze syntax and parts of speech with the Natural Language API.
- Perform multilingual natural language processing.
- For this challenge lab, a virtual machine (VM) instance named lab-vm has been configured for you to complete tasks 3 and 4.
Some standards you should follow:
- Ensure that any needed APIs (such as the Cloud Natural Language API) are successfully enabled.
================================================
FILE: labs/arc130_analyze-sentiment-with-natural-language-api-challenge-lab/script.sh
================================================
# Task 1. Create an API key
export API_KEY=AIzaSyDjt9FLVPJbECuOxuU2Be4OYsQ0EC8RH8I # your_generated_api_key
# Task 2. Set up Google Docs and call the Natural Language API
# Follow instruction written on lab
# Task 3. Analyze syntax and parts of speech with the Natural Language API
# Create a JSON file called analyze-request.json
cat > analyze-request.json <<EOF_END
{
"document":{
"type":"PLAIN_TEXT",
"content": "Google, headquartered in Mountain View, unveiled the new Android phone at the Consumer Electronic Show. Sundar Pichai said in his keynote that users love their new Android phones."
},
"encodingType": "UTF8"
}
EOF_END
# Pass the request and save it into file
curl -s -H "Content-Type: application/json" \
-H "Authorization: Bearer $(gcloud auth print-access-token)" \
"https://language.googleapis.com/v1/documents:analyzeSyntax" \
-d @analyze-request.json > analyze-response.txt
# Task 4. Perform multilingual natural language processing
# Create a JSON file called multi-nl-request.json
cat > multi-nl-request.json <<EOF_END
{
"document":{
"type":"PLAIN_TEXT",
"content":"Le bureau japonais de Google est situé à Roppongi Hills, Tokyo."
}
}
EOF_END
# Pass the request and save it into file
curl -s -H "Content-Type: application/json" \
-H "Authorization: Bearer $(gcloud auth print-access-token)" \
"https://language.googleapis.com/v1/documents:analyzeEntities" \
-d @multi-nl-request.json > multi-response.txt
================================================
FILE: labs/gsp101_google-cloud-essential-skills-challenge-lab/guide.txt
================================================
# Google Cloud Essential Skills: Challenge Lab
# https://www.qwiklabs.com/focuses/1734?parent=catalog
# Task 1: Create a Compute Engine instance, add necessary firewall rules.
- Navigation menu > Compute Engine > VM instances
- Create VM with name "apache" and enable "allow http traffic"
# Task 2: Configure Apache2 Web Server in your instance
- SSH into apache VM
- *in ssh*
- run: sudo apt-get update
- run: sudo apt install apache2
- exit ssh
# Task 3: Test your server
- Click apache VM External IP and verify Apache2 Debian Default Page showed up
================================================
FILE: labs/gsp101_google-cloud-essential-skills-challenge-lab/readme.md
================================================
# [Google Cloud Essential Skills: Challenge Lab](https://www.qwiklabs.com/focuses/1734?parent=catalog)
## Challenge scenario
Your company is ready to launch a brand new product! Because you are entering a totally new space, you have decided to deploy a new website as part of the product launch. The new site is complete, but the person who built the new site left the company before they could deploy it.
================================================
FILE: labs/gsp1151_generative_ai_with_vertex_ai-prompt_design/intro_prompt_design.ipynb
================================================
{
"cells": [
{
"cell_type": "code",
"execution_count": null,
"metadata": {
"id": "ur8xi4C7S06n"
},
"outputs": [],
"source": [
"# Copyright 2024 Google LLC\n",
"#\n",
"# Licensed under the Apache License, Version 2.0 (the \"License\");\n",
"# you may not use this file except in compliance with the License.\n",
"# You may obtain a copy of the License at\n",
"#\n",
"# https://www.apache.org/licenses/LICENSE-2.0\n",
"#\n",
"# Unless required by applicable law or agreed to in writing, software\n",
"# distributed under the License is distributed on an \"AS IS\" BASIS,\n",
"# WITHOUT WARRANTIES OR CONDITIONS OF ANY KIND, either express or implied.\n",
"# See the License for the specific language governing permissions and\n",
"# limitations under the License."
]
},
{
"cell_type": "markdown",
"metadata": {
"id": "JAPoU8Sm5E6e"
},
"source": [
"# Prompt Design - Best Practices\n",
"\n",
"> **NOTE:** This notebook uses the PaLM generative model, which will reach its [discontinuation date in October 2024](https://cloud.google.com/vertex-ai/generative-ai/docs/model-reference/text#model_versions). Please refer to [this updated notebook](https://github.com/GoogleCloudPlatform/generative-ai/blob/main/gemini/prompts/intro_prompt_design.ipynb) for a version which uses the latest Gemini model.\n",
"\n",
"<table align=\"left\">\n",
" <td style=\"text-align: center\">\n",
" <a href=\"https://colab.research.google.com/github/GoogleCloudPlatform/generative-ai/blob/main/language/prompts/intro_prompt_design.ipynb\">\n",
" <img src=\"https://cloud.google.com/ml-engine/images/colab-logo-32px.png\" alt=\"Google Colaboratory logo\"><br> Run in Colab\n",
" </a>\n",
" </td>\n",
" <td style=\"text-align: center\">\n",
" <a href=\"https://github.com/GoogleCloudPlatform/generative-ai/blob/main/language/prompts/intro_prompt_design.ipynb\">\n",
" <img src=\"https://cloud.google.com/ml-engine/images/github-logo-32px.png\" alt=\"GitHub logo\"><br> View on GitHub\n",
" </a>\n",
" </td>\n",
" <td style=\"text-align: center\">\n",
" <a href=\"https://console.cloud.google.com/vertex-ai/workbench/deploy-notebook?download_url=https://raw.githubusercontent.com/GoogleCloudPlatform/generative-ai/main/language/prompts/intro_prompt_design.ipynb\">\n",
" <img src=\"https://lh3.googleusercontent.com/UiNooY4LUgW_oTvpsNhPpQzsstV5W8F7rYgxgGBD85cWJoLmrOzhVs_ksK_vgx40SHs7jCqkTkCk=e14-rj-sc0xffffff-h130-w32\" alt=\"Vertex AI logo\"><br> Open in Vertex AI Workbench\n",
" </a>\n",
" </td>\n",
"</table>\n"
]
},
{
"cell_type": "markdown",
"metadata": {},
"source": [
"| | |\n",
"|-|-|\n",
"|Author(s) | [Polong Lin](https://github.com/polong-lin) |"
]
},
{
"cell_type": "markdown",
"metadata": {
"id": "tvgnzT1CKxrO"
},
"source": [
"## Overview\n",
"\n",
"This notebook covers the essentials of prompt engineering, including some best practices.\n",
"\n",
"Learn more about prompt design in the [official documentation](https://cloud.google.com/vertex-ai/docs/generative-ai/text/text-overview)."
]
},
{
"cell_type": "markdown",
"metadata": {
"id": "d975e698c9a4"
},
"source": [
"### Objective\n",
"\n",
"In this notebook, you learn best practices around prompt engineering -- how to design prompts to improve the quality of your responses.\n",
"\n",
"This notebook covers the following best practices for prompt engineering:\n",
"\n",
"- Be concise\n",
"- Be specific and well-defined\n",
"- Ask one task at a time\n",
"- Turn generative tasks into classification tasks\n",
"- Improve response quality by including examples"
]
},
{
"cell_type": "markdown",
"metadata": {
"id": "ea013f50403c"
},
"source": [
"### Costs\n",
"This tutorial uses billable components of Google Cloud:\n",
"\n",
"* Vertex AI Generative AI Studio\n",
"\n",
"Learn about [Vertex AI pricing](https://cloud.google.com/vertex-ai/pricing),\n",
"and use the [Pricing Calculator](https://cloud.google.com/products/calculator/)\n",
"to generate a cost estimate based on your projected usage."
]
},
{
"cell_type": "markdown",
"metadata": {
"id": "3e663cb43fa0"
},
"source": [
"### Install Vertex AI SDK"
]
},
{
"cell_type": "code",
"execution_count": 2,
"metadata": {
"id": "82ad0c445061",
"tags": []
},
"outputs": [
{
"name": "stdout",
"output_type": "stream",
"text": [
"Note: you may need to restart the kernel to use updated packages.\n"
]
}
],
"source": [
"%pip install --upgrade google-cloud-aiplatform -q"
]
},
{
"cell_type": "markdown",
"metadata": {
"id": "cebd6983cbad"
},
"source": [
"**Note:** Kindly ignore the deprecation warnings and incompatibility errors related to pip dependencies.\n",
"\n",
"**Colab only:** Run the following cell to restart the kernel or use the button to restart the kernel. For **Vertex AI Workbench** you can restart the terminal using the button on top."
]
},
{
"cell_type": "code",
"execution_count": 3,
"metadata": {
"id": "bea801acf6b5",
"tags": []
},
"outputs": [
{
"data": {
"text/plain": [
"{'status': 'ok', 'restart': True}"
]
},
"execution_count": 3,
"metadata": {},
"output_type": "execute_result"
}
],
"source": [
"# Automatically restart kernel after installs so that your environment can access the new packages\n",
"import IPython\n",
"\n",
"app = IPython.Application.instance()\n",
"app.kernel.do_shutdown(True)"
]
},
{
"cell_type": "markdown",
"metadata": {
"id": "7a386d25fa8f"
},
"source": [
"### Authenticating your notebook environment\n",
"\n",
"- If you are using **Colab** to run this notebook, run the cell below and continue.\n",
"- If you are using **Vertex AI Workbench**, check out the setup instructions [here](https://github.com/GoogleCloudPlatform/generative-ai/tree/main/setup-env)."
]
},
{
"cell_type": "code",
"execution_count": 1,
"metadata": {
"id": "1bd1dca8e9a7",
"tags": []
},
"outputs": [],
"source": [
"import sys\n",
"\n",
"if \"google.colab\" in sys.modules:\n",
" from google.colab import auth\n",
"\n",
" auth.authenticate_user()"
]
},
{
"cell_type": "markdown",
"metadata": {},
"source": [
"- If you are running this notebook in a local development environment:\n",
" - Install the [Google Cloud SDK](https://cloud.google.com/sdk).\n",
" - Obtain authentication credentials. Create local credentials by running the following command and following the oauth2 flow (read more about the command [here](https://cloud.google.com/sdk/gcloud/reference/beta/auth/application-default/login)):\n",
"\n",
" ```bash\n",
" gcloud auth application-default login\n",
" ```"
]
},
{
"cell_type": "markdown",
"metadata": {
"id": "960505627ddf"
},
"source": [
"### Import libraries"
]
},
{
"cell_type": "markdown",
"metadata": {
"id": "ue7q-YO3Scpp"
},
"source": [
"**Colab only:** Run the following cell to initialize the Vertex AI SDK. For Vertex AI Workbench, you don't need to run this."
]
},
{
"cell_type": "code",
"execution_count": 5,
"metadata": {
"id": "NGvWtLAyScpp",
"tags": []
},
"outputs": [],
"source": [
"import vertexai\n",
"\n",
"PROJECT_ID = \"qwiklabs-gcp-03-6dcee18ee273\" # @param {type:\"string\"}\n",
"REGION = \"us-central1\" # @param {type:\"string\"}\n",
"\n",
"vertexai.init(project=PROJECT_ID, location=REGION)"
]
},
{
"cell_type": "code",
"execution_count": 6,
"metadata": {
"id": "PyQmSRbKA8r-",
"tags": []
},
"outputs": [],
"source": [
"from vertexai.language_models import TextGenerationModel\n",
"from vertexai.language_models import ChatModel"
]
},
{
"cell_type": "markdown",
"metadata": {
"id": "UP76a2la7O-a"
},
"source": [
"### Load model"
]
},
{
"cell_type": "code",
"execution_count": 7,
"metadata": {
"id": "7isig7e07O-a",
"tags": []
},
"outputs": [
{
"name": "stderr",
"output_type": "stream",
"text": [
"WARNING: All log messages before absl::InitializeLog() is called are written to STDERR\n",
"I0000 00:00:1723731517.766789 12353 config.cc:230] gRPC experiments enabled: call_status_override_on_cancellation, event_engine_dns, event_engine_listener, http2_stats_fix, monitoring_experiment, pick_first_new, trace_record_callops, work_serializer_clears_time_cache\n"
]
}
],
"source": [
"generation_model = TextGenerationModel.from_pretrained(\"text-bison\")"
]
},
{
"cell_type": "markdown",
"metadata": {
"id": "fIPcn5dZ7O-b"
},
"source": [
"## Prompt engineering best practices"
]
},
{
"cell_type": "markdown",
"metadata": {
"id": "df7d153f4928"
},
"source": [
"Prompt engineering is all about how to design your prompts so that the response is what you were indeed hoping to see.\n",
"\n",
"The idea of using \"unfancy\" prompts is to minimize the noise in your prompt to reduce the possibility of the LLM misinterpreting the intent of the prompt. Below are a few guidelines on how to engineer \"unfancy\" prompts.\n",
"\n",
"In this section, you'll cover the following best practices when engineering prompts:\n",
"\n",
"* Be concise\n",
"* Be specific, and well-defined\n",
"* Ask one task at a time\n",
"* Improve response quality by including examples\n",
"* Turn generative tasks to classification tasks to improve safety"
]
},
{
"cell_type": "markdown",
"metadata": {
"id": "43c1169ac435"
},
"source": [
"### Be concise"
]
},
{
"cell_type": "markdown",
"metadata": {
"id": "d0f380f1620e"
},
"source": [
"🛑 Not recommended. The prompt below is unnecessarily verbose."
]
},
{
"cell_type": "code",
"execution_count": 8,
"metadata": {
"colab": {
"base_uri": "https://localhost:8080/"
},
"id": "b6a1697c3603",
"outputId": "2f22ac3b-181c-4c8f-a7a3-82cd70e804fb",
"tags": []
},
"outputs": [
{
"name": "stdout",
"output_type": "stream",
"text": [
" Here are some potential names for a flower shop that specializes in selling bouquets of dried flowers:\n",
"\n",
"- Everlasting Blooms\n",
"- Dried Flower Delights\n",
"- Nature's Treasures\n",
"- Rustic Florals\n",
"- Timeless Botanicals\n",
"- Floral Keepsakes\n",
"- Dried Flower Gallery\n",
"- Botanical Memories\n",
"- Forever Flowers\n",
"- Pressed Petals\n"
]
}
],
"source": [
"prompt = \"What do you think could be a good name for a flower shop that specializes in selling bouquets of dried flowers more than fresh flowers? Thank you!\"\n",
"\n",
"print(generation_model.predict(prompt=prompt, max_output_tokens=256).text)"
]
},
{
"cell_type": "markdown",
"metadata": {
"id": "2307f56a9b75"
},
"source": [
"✅ Recommended. The prompt below is to the point and concise."
]
},
{
"cell_type": "code",
"execution_count": 9,
"metadata": {
"id": "fc666404f47c",
"tags": []
},
"outputs": [
{
"name": "stdout",
"output_type": "stream",
"text": [
" **The Everlasting Bloom**\n",
"**Dried Delights**\n",
"**Nature's Treasures**\n",
"**Rustic Blooms**\n",
"**Vintage Florals**\n",
"**Dried Floral Creations**\n",
"**Preserved Petals**\n",
"**Eternal Elegance**\n",
"**Botanical Beauties**\n",
"**Nature's Keepsakes**\n"
]
}
],
"source": [
"prompt = \"Suggest a name for a flower shop that sells bouquets of dried flowers\"\n",
"\n",
"print(generation_model.predict(prompt=prompt, max_output_tokens=256).text)"
]
},
{
"cell_type": "markdown",
"metadata": {
"id": "17f6c48bba91"
},
"source": [
"### Be specific, and well-defined"
]
},
{
"cell_type": "markdown",
"metadata": {
"id": "269b428e1563"
},
"source": [
"Suppose that you want to brainstorm creative ways to describe Earth."
]
},
{
"cell_type": "markdown",
"metadata": {
"id": "6436ee2ff406"
},
"source": [
"🛑 Not recommended. The prompt below is too generic."
]
},
{
"cell_type": "code",
"execution_count": 11,
"metadata": {
"id": "261b7f6e94c5",
"tags": []
},
"outputs": [
{
"name": "stdout",
"output_type": "stream",
"text": [
" Earth is the third planet from the Sun and the only astronomical object known to harbor life. While larger than Mercury and Venus, Earth is smaller than Mars and the gas and ice giants of the outer Solar System. Earth is the only planet in our solar system not named after a Greek or Roman deity. Instead, its name comes from the Old English word \"erda,\" which means \"ground\" or \"soil.\"\n",
"\n",
"Earth is the only planet in the Solar System known to support life. It is the only planet with liquid water on its surface, and it has a breathable atmosphere. Earth is also the only planet with a magnetic field, which protects it from harmful solar radiation.\n",
"\n",
"Earth is a dynamic planet. Its climate is constantly changing, and its surface is constantly being reshaped by geological processes. Earth is also home to a wide variety of life forms, from microscopic bacteria to giant whales.\n",
"\n",
"Here are some of the key facts about Earth:\n",
"\n",
"* **Mass:** 5.972 × 10^24 kilograms\n",
"* **Volume:** 1.08321 × 10^12 cubic kilometers\n",
"* **Density:** 5,515 kilograms per cubic meter\n",
"* **Surface area:** 510\n"
]
}
],
"source": [
"prompt = \"Tell me about Earth\"\n",
"\n",
"print(generation_model.predict(prompt=prompt, max_output_tokens=256).text)"
]
},
{
"cell_type": "markdown",
"metadata": {
"id": "0bebfecd2912"
},
"source": [
"✅ Recommended. The prompt below is specific and well-defined."
]
},
{
"cell_type": "code",
"execution_count": null,
"metadata": {
"id": "242b1b3bae6e"
},
"outputs": [],
"source": [
"prompt = \"Generate a list of ways that makes Earth unique compared to other planets\"\n",
"\n",
"print(generation_model.predict(prompt=prompt, max_output_tokens=256).text)"
]
},
{
"cell_type": "markdown",
"metadata": {
"id": "20dca9a05eab"
},
"source": [
"### Ask one task at a time"
]
},
{
"cell_type": "markdown",
"metadata": {
"id": "f9019d443179"
},
"source": [
"🛑 Not recommended. The prompt below has two parts to the question that could be asked separately."
]
},
{
"cell_type": "code",
"execution_count": 12,
"metadata": {
"id": "70b3b5e5825d",
"tags": []
},
"outputs": [
{
"name": "stdout",
"output_type": "stream",
"text": [
" **The best method of boiling water:**\n",
"\n",
"The best method of boiling water depends on the situation and the equipment available. Here are a few common methods:\n",
"\n",
"1. **Electric kettle:** An electric kettle is a convenient and efficient way to boil water. It is quick and easy to use, and it automatically turns off when the water reaches the desired temperature.\n",
"\n",
"2. **Stovetop kettle:** A stovetop kettle is a traditional method of boiling water. It is placed on a stove or cooktop and heated until the water reaches the desired temperature. Stovetop kettles can be made of various materials, such as stainless steel, aluminum, or copper.\n",
"\n",
"3. **Microwave:** A microwave can be used to boil water quickly and easily. Place a microwave-safe container filled with water in the microwave and heat it on high power for 2-3 minutes, or until the water reaches the desired temperature.\n",
"\n",
"4. **Campfire:** If you are outdoors and do not have access to electricity or a stove, you can boil water over a campfire. Fill a pot or kettle with water and place it over the fire. Keep an eye on the water and remove it from the fire once it reaches the desired temperature.\n",
"\n",
"**Why is the sky blue?\n"
]
}
],
"source": [
"prompt = \"What's the best method of boiling water and why is the sky blue?\"\n",
"\n",
"print(generation_model.predict(prompt=prompt, max_output_tokens=256).text)"
]
},
{
"cell_type": "markdown",
"metadata": {
"id": "7936fb58c16a"
},
"source": [
"✅ Recommended. The prompts below asks one task a time."
]
},
{
"cell_type": "code",
"execution_count": 13,
"metadata": {
"id": "2564dad6c8db",
"tags": []
},
"outputs": [
{
"name": "stdout",
"output_type": "stream",
"text": [
" The best method of boiling water depends on the specific situation and available resources. Here are a few common methods:\n",
"\n",
"1. **Electric Kettle:**\n",
" - Electric kettles are designed specifically for boiling water and are very efficient.\n",
" - They heat water quickly and automatically turn off when the water reaches the boiling point.\n",
" - Electric kettles are convenient and safe to use.\n",
"\n",
"2. **Stovetop Kettle or Pot:**\n",
" - Traditional kettles or pots can be used to boil water on a stovetop.\n",
" - Fill the kettle or pot with water and place it on the stove over medium-high heat.\n",
" - Keep an eye on the water and remove it from the heat once it starts boiling.\n",
"\n",
"3. **Microwave:**\n",
" - Microwaves can be used to boil water quickly.\n",
" - Place a microwave-safe container filled with water in the microwave and heat it on high power for 2-3 minutes, depending on the amount of water.\n",
" - Be careful when handling the container as it will be hot.\n",
"\n",
"4. **Campfire or Outdoor Stove:**\n",
" - If you're outdoors, you can boil water over a campfire or using a portable outdoor stove.\n",
" -\n"
]
}
],
"source": [
"prompt = \"What's the best method of boiling water?\"\n",
"\n",
"print(generation_model.predict(prompt=prompt, max_output_tokens=256).text)"
]
},
{
"cell_type": "code",
"execution_count": 14,
"metadata": {
"id": "770c695ade92",
"tags": []
},
"outputs": [
{
"name": "stdout",
"output_type": "stream",
"text": [
" The sky appears blue due to a phenomenon called Rayleigh scattering. This occurs when sunlight, which is composed of all colors of the visible spectrum, interacts with molecules in the Earth's atmosphere, primarily nitrogen and oxygen.\n",
"\n",
"When sunlight enters the atmosphere, it encounters these molecules and particles. The shorter wavelengths of light, such as blue and violet, are more likely to be scattered by these particles than the longer wavelengths, such as red and orange. This is because the shorter wavelengths have a higher frequency and interact more strongly with the molecules and particles in the atmosphere.\n",
"\n",
"As a result, the blue and violet light is scattered in all directions, creating the appearance of a blue sky. The other colors of the spectrum, such as red and orange, are less scattered and continue on their path towards the observer's eyes, contributing to the overall color of the sky.\n",
"\n",
"The amount of scattering depends on the wavelength of light and the density of the particles in the atmosphere. This is why the sky appears darker at night or during cloudy weather, as there are fewer particles to scatter the sunlight.\n",
"\n",
"Additionally, the position of the sun in the sky also affects the color of the sky. At sunrise and sunset, the sunlight has to travel through more of the atmosphere to reach our eyes\n"
]
}
],
"source": [
"prompt = \"Why is the sky blue?\"\n",
"\n",
"print(generation_model.predict(prompt=prompt, max_output_tokens=256).text)"
]
},
{
"cell_type": "markdown",
"metadata": {
"id": "ff606011aa86"
},
"source": [
"### Watch out for hallucinations"
]
},
{
"cell_type": "markdown",
"metadata": {
"id": "956ce45b06a7"
},
"source": [
"Although LLMs have been trained on a large amount of data, they can generate text containing statements not grounded in truth or reality; these responses from the LLM are often referred to as \"hallucinations\" due to their limited memorization capabilities. Note that simply prompting the LLM to provide a citation isn't a fix to this problem, as there are instances of LLMs providing false or inaccurate citations. Dealing with hallucinations is a fundamental challenge of LLMs and an ongoing research area, so it is important to be cognizant that LLMs may seem to give you confident, correct-sounding statements that are in fact incorrect. \n",
"\n",
"Note that if you intend to use LLMs for the creative use cases, hallucinating could actually be quite useful."
]
},
{
"cell_type": "markdown",
"metadata": {
"id": "0c9d5f66179a"
},
"source": [
"Try the prompt like the one below repeatedly. You may notice that sometimes it will confidently, but inaccurately, say \"The first elephant to visit the moon was Luna\"."
]
},
{
"cell_type": "code",
"execution_count": 15,
"metadata": {
"id": "d813b9061b08",
"tags": []
},
"outputs": [
{
"name": "stdout",
"output_type": "stream",
"text": [
" No elephant has ever visited the moon.\n"
]
}
],
"source": [
"prompt = \"Who was the first elephant to visit the moon?\"\n",
"\n",
"print(generation_model.predict(prompt=prompt, max_output_tokens=256).text)"
]
},
{
"cell_type": "markdown",
"metadata": {},
"source": [
"Clearly the chatbot is hallucinating since no elephant has ever flown to the moon. But how do we prevent these kinds of inappropriate questions and more specifically, reduce hallucinations? \n",
"\n",
"There is one possible method called the Determine Appropriate Response (DARE) prompt, which cleverly uses the LLM itself to decide whether it should answer a question based on what its mission is.\n",
"\n",
"Let's see how it works by creating a chatbot for a travel website with a slight twist."
]
},
{
"cell_type": "code",
"execution_count": 17,
"metadata": {
"tags": []
},
"outputs": [
{
"name": "stdout",
"output_type": "stream",
"text": [
" Hello! I'm here to help you plan your next trip. Whether you're looking for a relaxing beach vacation or an adventurous city getaway, I can help you find the perfect destination and activities for your budget and interests.\n"
]
}
],
"source": [
"chat_model = ChatModel.from_pretrained(\"chat-bison@002\")\n",
"\n",
"chat = chat_model.start_chat()\n",
"dare_prompt = \"\"\"Remember that before you answer a question, you must check to see if it complies with your mission.\n",
"If not, you can say, Sorry I can't answer that question.\"\"\"\n",
"\n",
"print(\n",
" chat.send_message(\n",
" f\"\"\"\n",
"Hello! You are an AI chatbot for a travel web site.\n",
"Your mission is to provide helpful queries for travelers.\n",
"\n",
"{dare_prompt}\n",
"\"\"\"\n",
" ).text\n",
")"
]
},
{
"cell_type": "markdown",
"metadata": {},
"source": [
"Suppose we ask a simple question about one of Italy's most famous tourist spots."
]
},
{
"cell_type": "code",
"execution_count": 18,
"metadata": {
"tags": []
},
"outputs": [
{
"name": "stdout",
"output_type": "stream",
"text": [
" There are many great places for sightseeing in Milan, Italy. Some of the most popular include:\n",
"\n",
"* The Duomo: This stunning Gothic cathedral is one of the most iconic landmarks in Milan. It took nearly 600 years to complete, and its intricate details are truly breathtaking.\n",
"* The Galleria Vittorio Emanuele II: This beautiful shopping arcade is located in the heart of Milan. It's home to some of the most luxurious shops in the world, as well as several cafes and restaurants.\n",
"* The Sforza Castle: This historic castle was once the home of the ruling Sforza family. Today, it houses several museums, including the Pinacoteca di Brera, which features a collection of Renaissance and Baroque art.\n",
"* The Parco Sempione: This large park is located just outside the city center. It's a great place to relax and enjoy the outdoors. There are several playgrounds, a lake, and even a small zoo.\n",
"* The Navigli: This network of canals is a popular spot for locals and tourists alike. You can take a boat ride along the canals, or simply stroll along the banks and enjoy the scenery.\n"
]
}
],
"source": [
"prompt = \"What is the best place for sightseeing in Milan, Italy?\"\n",
"print(chat.send_message(prompt).text)"
]
},
{
"cell_type": "markdown",
"metadata": {},
"source": [
"Now let us pretend to be a not-so-nice user and ask the chatbot a question that is unrelated to travel."
]
},
{
"cell_type": "code",
"execution_count": 19,
"metadata": {
"tags": []
},
"outputs": [
{
"name": "stdout",
"output_type": "stream",
"text": [
" Sorry, I can't answer that question. There have been no elephants on the moon.\n"
]
}
],
"source": [
"prompt = \"Who was the first elephant to visit the moon?\"\n",
"print(chat.send_message(prompt).text)"
]
},
{
"cell_type": "markdown",
"metadata": {},
"source": [
"You can see that the DARE prompt added a layer of guard rails that prevented the chatbot from veering off course."
]
},
{
"cell_type": "markdown",
"metadata": {
"id": "029e23abfd56"
},
"source": [
"### Turn generative tasks into classification tasks to reduce output variability"
]
},
{
"cell_type": "markdown",
"metadata": {
"id": "d943941d6e59"
},
"source": [
"#### Generative tasks lead to higher output variability"
]
},
{
"cell_type": "markdown",
"metadata": {
"id": "37528e6c9754"
},
"source": [
"The prompt below results in an open-ended response, useful for brainstorming, but response is highly variable."
]
},
{
"cell_type": "code",
"execution_count": 20,
"metadata": {
"id": "a8e2dc39e9ae",
"tags": []
},
"outputs": [
{
"name": "stdout",
"output_type": "stream",
"text": [
" **Project: Build a Text-Based Adventure Game**\n",
"\n",
"**Overview:**\n",
"Create a text-based adventure game where the player navigates through different scenarios, interacts with characters, and solves puzzles to progress. This project will help you practice your programming skills, problem-solving abilities, and creativity.\n",
"\n",
"**Steps:**\n",
"\n",
"1. **Design the Game:**\n",
" - Plan the game's storyline, characters, and scenarios.\n",
" - Create a map or flowchart to visualize the game's structure.\n",
"\n",
"2. **Choose a Programming Language:**\n",
" - Select a programming language you're familiar with, such as Python or Java.\n",
"\n",
"3. **Implement the Game Logic:**\n",
" - Write code to handle player input, process commands, and update the game state.\n",
" - Use conditional statements and loops to control the game's flow.\n",
"\n",
"4. **Create the Game World:**\n",
" - Describe the different locations and scenarios in the game using text.\n",
" - Use descriptive language to immerse the player in the game world.\n",
"\n",
"5. **Add Characters and Interactions:**\n",
" - Introduce non-playable characters (NPCs) with unique personalities and dialogue.\n",
" - Allow players to interact with NPCs through text-based conversations.\n"
]
}
],
"source": [
"prompt = \"I'm a high school student. Recommend me a programming activity to improve my skills.\"\n",
"\n",
"print(generation_model.predict(prompt=prompt, max_output_tokens=256).text)"
]
},
{
"cell_type": "markdown",
"metadata": {
"id": "f71a6fa2b4bb"
},
"source": [
"#### Classification tasks reduces output variability"
]
},
{
"cell_type": "markdown",
"metadata": {
"id": "917517465dac"
},
"source": [
"The prompt below results in a choice and may be useful if you want the output to be easier to control."
]
},
{
"cell_type": "code",
"execution_count": 21,
"metadata": {
"id": "3feb93d9df81",
"tags": []
},
"outputs": [
{
"name": "stdout",
"output_type": "stream",
"text": [
" As a high school student, I would suggest learning Python. Here are a few reasons why:\n",
"\n",
"**1. Versatility:** Python is a general-purpose programming language, which means it can be used for a wide variety of tasks, including web development, data science, machine learning, and artificial intelligence. This versatility makes it a valuable skill to have in today's job market.\n",
"\n",
"**2. Popularity:** Python is one of the most popular programming languages in the world, and its popularity is only growing. This means there are many resources available to help you learn Python, including online tutorials, courses, and books.\n",
"\n",
"**3. Ease of learning:** Python is known for being relatively easy to learn, even for beginners. Its syntax is simple and straightforward, and it has a large standard library that provides many built-in functions and modules.\n",
"\n",
"**4. Community support:** Python has a large and active community of developers who are willing to help beginners. There are many online forums and communities where you can ask questions and get help with your Python code.\n",
"\n",
"**5. Career opportunities:** Python is in high demand in the tech industry, and many jobs require Python skills. Learning Python can open up a wide range of career opportunities for you in the future.\n"
]
}
],
"source": [
"prompt = \"\"\"I'm a high school student. Which of these activities do you suggest and why:\n",
"a) learn Python\n",
"b) learn JavaScript\n",
"c) learn Fortran\n",
"\"\"\"\n",
"\n",
"print(generation_model.predict(prompt=prompt, max_output_tokens=256).text)"
]
},
{
"cell_type": "markdown",
"metadata": {
"id": "32290ac9fb2b"
},
"source": [
"### Improve response quality by including examples"
]
},
{
"cell_type": "markdown",
"metadata": {
"id": "132834f5db2c"
},
"source": [
"Another way to improve response quality is to add examples in your prompt. The LLM learns in-context from the examples on how to respond. Typically, one to five examples (shots) are enough to improve the quality of responses. Including too many examples can cause the model to over-fit the data and reduce the quality of responses.\n",
"\n",
"Similar to classical model training, the quality and distribution of the examples is very important. Pick examples that are representative of the scenarios that you need the model to learn, and keep the distribution of the examples (e.g. number of examples per class in the case of classification) aligned with your actual distribution."
]
},
{
"cell_type": "markdown",
"metadata": {
"id": "46520d938b6a"
},
"source": [
"#### Zero-shot prompt"
]
},
{
"cell_type": "markdown",
"metadata": {
"id": "46d3b47e6cea"
},
"source": [
"Below is an example of zero-shot prompting, where you don't provide any examples to the LLM within the prompt itself."
]
},
{
"cell_type": "code",
"execution_count": 22,
"metadata": {
"id": "2cbe03eb0b71",
"tags": []
},
"outputs": [
{
"name": "stdout",
"output_type": "stream",
"text": [
" positive\n"
]
}
],
"source": [
"prompt = \"\"\"Decide whether a Tweet's sentiment is positive, neutral, or negative.\n",
"\n",
"Tweet: I loved the new YouTube video you made!\n",
"Sentiment:\n",
"\"\"\"\n",
"\n",
"print(generation_model.predict(prompt=prompt, max_output_tokens=256).text)"
]
},
{
"cell_type": "markdown",
"metadata": {
"id": "b0daabca1359"
},
"source": [
"#### One-shot prompt"
]
},
{
"cell_type": "markdown",
"metadata": {
"id": "42c4652fc5c2"
},
"source": [
"Below is an example of one-shot prompting, where you provide one example to the LLM within the prompt to give some guidance on what type of response you want."
]
},
{
"cell_type": "code",
"execution_count": null,
"metadata": {
"id": "cfe584860787"
},
"outputs": [],
"source": [
"prompt = \"\"\"Decide whether a Tweet's sentiment is positive, neutral, or negative.\n",
"\n",
"Tweet: I loved the new YouTube video you made!\n",
"Sentiment: positive\n",
"\n",
"Tweet: That was awful. Super boring 😠\n",
"Sentiment:\n",
"\"\"\"\n",
"\n",
"print(generation_model.predict(prompt=prompt, max_output_tokens=256).text)"
]
},
{
"cell_type": "markdown",
"metadata": {
"id": "ef58c35005c0"
},
"source": [
"#### Few-shot prompt"
]
},
{
"cell_type": "markdown",
"metadata": {
"id": "b630e8947b60"
},
"source": [
"Below is an example of few-shot prompting, where you provide a few examples to the LLM within the prompt to give some guidance on what type of response you want."
]
},
{
"cell_type": "code",
"execution_count": null,
"metadata": {
"id": "fb3ba21bbd11"
},
"outputs": [],
"source": [
"prompt = \"\"\"Decide whether a Tweet's sentiment is positive, neutral, or negative.\n",
"\n",
"Tweet: I loved the new YouTube video you made!\n",
"Sentiment: positive\n",
"\n",
"Tweet: That was awful. Super boring 😠\n",
"Sentiment: negative\n",
"\n",
"Tweet: Something surprised me about this video - it was actually original. It was not the same old recycled stuff that I always see. Watch it - you will not regret it.\n",
"Sentiment:\n",
"\"\"\"\n",
"\n",
"print(generation_model.predict(prompt=prompt, max_output_tokens=256).text)"
]
},
{
"cell_type": "markdown",
"metadata": {
"id": "a4023be726eb"
},
"source": [
"#### Choosing between zero-shot, one-shot, few-shot prompting methods"
]
},
{
"cell_type": "markdown",
"metadata": {
"id": "6d7870ff75cc"
},
"source": [
"Which prompt technique to use will solely depends on your goal. The zero-shot prompts are more open-ended and can give you creative answers, while one-shot and few-shot prompts teach the model how to behave so you can get more predictable answers that are consistent with the examples provided."
]
}
],
"metadata": {
"colab": {
"name": "intro_prompt_design.ipynb",
"toc_visible": true
},
"environment": {
"kernel": "python3",
"name": "tf2-cpu.2-16.m124",
"type": "gcloud",
"uri": "us-docker.pkg.dev/deeplearning-platform-release/gcr.io/tf2-cpu.2-16:m124"
},
"kernelspec": {
"display_name": "Python 3 (Local)",
"language": "python",
"name": "python3"
},
"language_info": {
"codemirror_mode": {
"name": "ipython",
"version": 3
},
"file_extension": ".py",
"mimetype": "text/x-python",
"name": "python",
"nbconvert_exporter": "python",
"pygments_lexer": "ipython3",
"version": "3.10.14"
}
},
"nbformat": 4,
"nbformat_minor": 4
}
================================================
FILE: labs/gsp1151_generative_ai_with_vertex_ai-prompt_design/readme.md
================================================
### Generative AI with Vertex AI: Prompt Design
The Vertex AI SDK for text enables you to structure prompts however you like. You can add contextual information, instructions, examples, questions, lists, and any other types of text content that you can think of.
In this lab, you will learn about prompt design and various text generation use cases using the Vertex AI SDK.
#### What you will learn:
How to get started with prompt engineering with the Vertex AI SDK:
- Best practices
- Zero-, one- and few-shot prompting
How to explore some text generation use cases with the Vertex AI SDK:
- Ideation
- Q&A
- Text classification
- Text extraction
- Text summarization
================================================
FILE: labs/gsp301_deploy-a-compute-instance-with-a-remote-startup-script/readme.md
================================================
# [Deploy a Compute Instance with a Remote Startup Script](https://www.qwiklabs.com/focuses/1735?parent=catalog)
## Topics tested
* Create a storage bucket for startup scripts.
* Create a virtual machine that runs a startup script from Cloud Storage.
* Configure HTTP access for the virtual machine.
* Deploy an application on an instance.
## Challenge scenario
You have been given the responsibility of managing the configuration of your organization's Google Cloud virtual machines. You have decided to make some changes to the framework used for managing the deployment and configuration machines - you want to make it easier to modify the startup scripts used to initialize a number of the compute instances. Instead of storing startup scripts directly in the instances' metadata, you have decided to store the scripts in a Cloud Storage bucket and then configure the virtual machines to point to the relevant script file in the bucket.
A basic bash script that installs the Apache web server software called install-web.sh has been provided for you as a sample startup script. You can download this from the Student Resources links on the left side of the page.
================================================
FILE: labs/gsp301_deploy-a-compute-instance-with-a-remote-startup-script/script.sh
================================================
# Deploy a Compute Instance with a Remote Startup Script
# https://google.qwiklabs.com/focuses/1735?parent=catalog
# Task 1: Confirm that a Google Cloud Storage bucket exists that contains a file
gsutil mb gs://$DEVSHELL_PROJECT_ID
gsutil cp gs://sureskills-ql/challenge-labs/ch01-startup-script/install-web.sh gs://$DEVSHELL_PROJECT_ID
# Task 2: Confirm that a compute instance has been created that has a remote startup script called install-web.sh configured
gcloud compute instances create example-instance --zone=us-central1-a --tags=http-server --metadata startup-script-url=gs://$DEVSHELL_PROJECT_ID/install-web.sh
# Task 3: Confirm that a HTTP access firewall rule exists with tag that applies to that virtual machine
gcloud compute firewall-rules create allow-http --target-tags http-server --source-ranges 0.0.0.0/0 --allow tcp:80
# Task 4: Connect to the server ip-address using HTTP and get a non-error response
# After firewall creation (Task 3) just wait and then check the score
================================================
FILE: labs/gsp302_configure-a-firewall-and-a-startup-script-with-deployment-manager/guide.txt
================================================
# Configure a Firewall and a Startup Script with Deployment Manager
# https://qwiklabs.com/focuses/1736?parent=catalog
# Open the Cloud Shell, run:
mkdir deployment_manager
cd deployment_manager
gsutil cp gs://spls/gsp302/* .
# use nano or open editor to edit qwiklabs.jinja and qwiklabs.yaml
# check the in this repo folder for reference
# back to cloud shell, run:
gcloud deployment-manager deployments create vm-test --config=qwiklabs.yaml
================================================
FILE: labs/gsp302_configure-a-firewall-and-a-startup-script-with-deployment-manager/qwiklabs.jinja
================================================
resources:
- type: compute.v1.instance
name: vm-{{ env["deployment"] }}
properties:
zone: {{ properties["zone"] }}
machineType: https://www.googleapis.com/compute/v1/projects/{{ env["project"] }}/zones/{{ properties["zone"] }}/machineTypes/f1-micro
tags:
items:
- 'http'
metadata:
items:
# For more ways to use startup scripts on an instance, see:
# https://cloud.google.com/compute/docs/startupscript
- key: startup-script
value: |
#!/bin/bash
apt-get update
apt-get install -y apache2
disks:
- deviceName: boot
type: PERSISTENT
boot: true
autoDelete: true
initializeParams:
diskName: disk-{{ env["deployment"] }}
sourceImage: https://www.googleapis.com/compute/v1/projects/debian-cloud/global/images/family/debian-9
networkInterfaces:
- network: https://www.googleapis.com/compute/v1/projects/{{ env["project"] }}/global/networks/default
# Access Config required to give the instance a public IP address
accessConfigs:
- name: External NAT
type: ONE_TO_ONE_NAT
- type: compute.v1.firewall
name: {{ env["project"] }}-allow-http
properties:
network: https://www.googleapis.com/compute/v1/projects/{{ env["project"] }}/global/networks/default
sourceRanges: [0.0.0.0/0]
targetTags: ['http']
allowed:
- IPProtocol: tcp
ports: ['80']
================================================
FILE: labs/gsp302_configure-a-firewall-and-a-startup-script-with-deployment-manager/qwiklabs.yaml
================================================
imports:
- path: qwiklabs.jinja
resources:
- name: qwiklabs
type: qwiklabs.jinja
properties:
zone: us-central1-a
================================================
FILE: labs/gsp302_configure-a-firewall-and-a-startup-script-with-deployment-manager/readme.md
================================================
# [Configure a Firewall and a Startup Script with Deployment Manager](https://www.qwiklabs.com/focuses/1736?parent=catalog)
## Topics tested
* Configure a deployment template to include a startup script
* Configure a deployment template to add a firewall rule allowing http traffic
* Configure a deployment template to add a networking tag to a compute instance
* Deploy a configuration using Deployment Manager
## Challenge scenario
Your company is ready to launch a brand new product and you have been asked to develop a Deployment Manager template to deploy and configure the Google Cloud environment that is required to support this product. To start off, you've been given an existing basic deployment manager template that just deploys a single compute instance.
================================================
FILE: labs/gsp303_configure-secure-rdp-using-a-windows-bastion-host/readme.md
================================================
# [Configure Secure RDP using a Windows Bastion Host](https://www.qwiklabs.com/focuses/1737?parent=catalog)
## Topics tested
* Create a new VPC to host secure production Windows services.
* Create a Windows host connected to a subnet in the new VPC with an internal only network interface.
* Create a Windows bastion host (jump box) in with an externally accessible network interface.
* Configure firewalls rules to enable management of the secure Windows host from the Internet using the bastion host as a jump box.
## Challenge scenario
Your company has decided to deploy new application services in the cloud and your assignment is developing a secure framework for managing the Windows services that will be deployed. You will need to create a new VPC network environment for the secure production Windows servers.
Production servers must initially be completely isolated from external networks and cannot be directly accessible from, or be able to connect directly to, the internet. In order to configure and manage your first server in this environment, you will also need to deploy a bastion host, or jump box, that can be accessed from the internet using the Microsoft Remote Desktop Protocol (RDP). The bastion host should only be accessible via RDP from the internet, and should only be able to communicate with the other compute instances inside the VPC network using RDP.
Your company also has a monitoring system running from the default VPC network, so all compute instances must have a second network interface with an internal only connection to the default VPC network.
================================================
FILE: labs/gsp303_configure-secure-rdp-using-a-windows-bastion-host/script.sh
================================================
# Configure Secure RDP using a Windows Bastion Host
# https://www.qwiklabs.com/focuses/1737?parent=catalog
# Task 1 : A new non-default VPC has been created
gcloud compute networks create securenetwork --subnet-mode=custom
# Task 2 : The new VPC contains a new non-default subnet within it
gcloud compute networks subnets create securenetwork --network=securenetwork --region=us-central1 --range=192.168.1.0/24
# Task 3 : A firewall rule exists that allows TCP port 3389 traffic ( for RDP )
gcloud compute firewall-rules create myfirewalls --network securenetwork --allow=tcp:3389 --target-tags=rdp
# Task 4 : A Windows compute instance called vm-bastionhost exists that has a public ip-address to which the TCP port 3389 firewall rule applies.
gcloud compute instances create vm-bastionhost --zone=us-central1-a --machine-type=n1-standard-2 --subnet=securenetwork --network-tier=PREMIUM --maintenance-policy=MIGRATE --scopes=https://www.googleapis.com/auth/devstorage.read_only,https://www.googleapis.com/auth/logging.write,https://www.googleapis.com/auth/monitoring.write,https://www.googleapis.com/auth/servicecontrol,https://www.googleapis.com/auth/service.management.readonly,https://www.googleapis.com/auth/trace.append --tags=rdp --image=windows-server-2016-dc-v20200211 --image-project=windows-cloud --boot-disk-size=50GB --boot-disk-type=pd-standard --boot-disk-device-name=vm-bastionhost --reservation-affinity=any
# Task 5 : A Windows compute instance called vm-securehost exists that does not have a public ip-address
gcloud compute instances create vm-securehost --zone=us-central1-a --machine-type=n1-standard-2 --subnet=securenetwork --no-address --maintenance-policy=MIGRATE --scopes=https://www.googleapis.com/auth/devstorage.read_only,https://www.googleapis.com/auth/logging.write,https://www.googleapis.com/auth/monitoring.write,https://www.googleapis.com/auth/servicecontrol,https://www.googleapis.com/auth/service.management.readonly,https://www.googleapis.com/auth/trace.append --tags=rdp --image=windows-server-2016-dc-v20200211 --image-project=windows-cloud --boot-disk-size=50GB --boot-disk-type=pd-standard --boot-disk-device-name=vm-securehost --reservation-affinity=any
# Task 6 : The vm-securehost is running Microsoft IIS web server software.
gcloud compute reset-windows-password vm-bastionhost --user app_admin --zone us-central1-a (choose Y and copy the password)
gcloud compute reset-windows-password vm-securehost --user app_admin --zone us-central1-a (choose Y and copy the password)
# Install Chrome RDP for Google Cloud Platform (https://chrome.google.com/webstore/detail/chrome-rdp-for-google-clo/mpbbnannobiobpnfblimoapbephgifkm)
# Go to Compute Engine > VM instances
# Click RDP on vm-bastionhost, fill username with app_admin and password with your copied vm-bastionhost's password
# Click Search, search for Remote Desktop Connection and run it
# Copy and paste the internal ip from vm-securehost, click Connect
# Fill username with app_admin and password with your copied vm-securehost's password
# Click Search, type Powershell, right click and Run as Administrator
# Run: Install-WindowsFeature -name Web-Server -IncludeManagementTools
================================================
FILE: labs/gsp304_build-and-deploy-a-docker-image-to-a-kubernetes/readme.md
================================================
# [Build and Deploy a Docker Image to a Kubernetes Cluster](https://www.qwiklabs.com/focuses/1738?parent=catalog)
## Topics tested
* Build and tag a Docker Image of a sample application
* Push the tagged image to Container Registry
* Create a Kubernetes cluster
* Deploy the application to the Kubernetes cluster
## Challenge scenario
Your development team is interested in adopting a containerized microservices approach to application architecture. You need to test a sample application they have provided for you to make sure that that it can be deployed to a Google Kubernetes container. The development group provided a simple Go application called echo-web with a Dockerfile and the associated context that allows you to build a Docker image immediately.
================================================
FILE: labs/gsp304_build-and-deploy-a-docker-image-to-a-kubernetes/script.sh
================================================
# Build and Deploy a Docker Image to a Kubernetes Cluster
# https://www.qwiklabs.com/focuses/1738?parent=catalog
# Task 1 : An application image with a v1 tag has been pushed to the gcr.io repository
mkdir echo-web && cd echo-web
gsutil cp -r gs://$DEVSHELL_PROJECT_ID/echo-web.tar.gz .
tar -xzf echo-web.tar.gz
rm echo-web.tar.gz
cd echo-web
docker build -t echo-app:v1 .
docker tag echo-app:v1 gcr.io/$DEVSHELL_PROJECT_ID/echo-app:v1
docker push gcr.io/$DEVSHELL_PROJECT_ID/echo-app:v1
# Task 2 : A new Kubernetes cluster exists (zone: us-central1-a)
gcloud config set compute/zone us-central1-a
gcloud container clusters create echo-cluster --num-nodes=2 --machine-type=n1-standard-2
# Task 3 : Check that an application has been deployed to the cluster
kubectl create deployment echo-web --image=gcr.io/$DEVSHELL_PROJECT_ID/echo-app:v1
# Task 4 : Test that a service exists that responds to requests like Echo-app
kubectl expose deployment echo-web --type=LoadBalancer --port 80 --target-port 8000
================================================
FILE: labs/gsp305_scale-out-and-update-a-containerized-application-on-a-kubernetes-cluster/readme.md
================================================
# [Scale Out and Update a Containerized Application on a Kubernetes Cluster](https://www.qwiklabs.com/focuses/1739?parent=catalog)
## Topics tested
* Update a docker application and push a new version to a container repository.
* Deploy the updated application version to a Kubernetes cluster.
* Scale out the application so that it is running 2 replicas.
## Challenge scenario
You are taking over ownership of a test environment and have been given an updated version of a containerized test application to deploy. Your systems' architecture team has started adopting a containerized microservice architecture. You are responsible for managing the containerized test web applications. You will first deploy the initial version of a test application, called echo-app to a Kubernetes cluster called echo-cluster in a deployment called echo-web.
Before you get started, open the navigation menu and select Storage. The last steps in the Deployment Manager script used to set up your environment creates a bucket.
Refresh the Storage browser until you see your bucket. You can move on once your Console resembles the following:
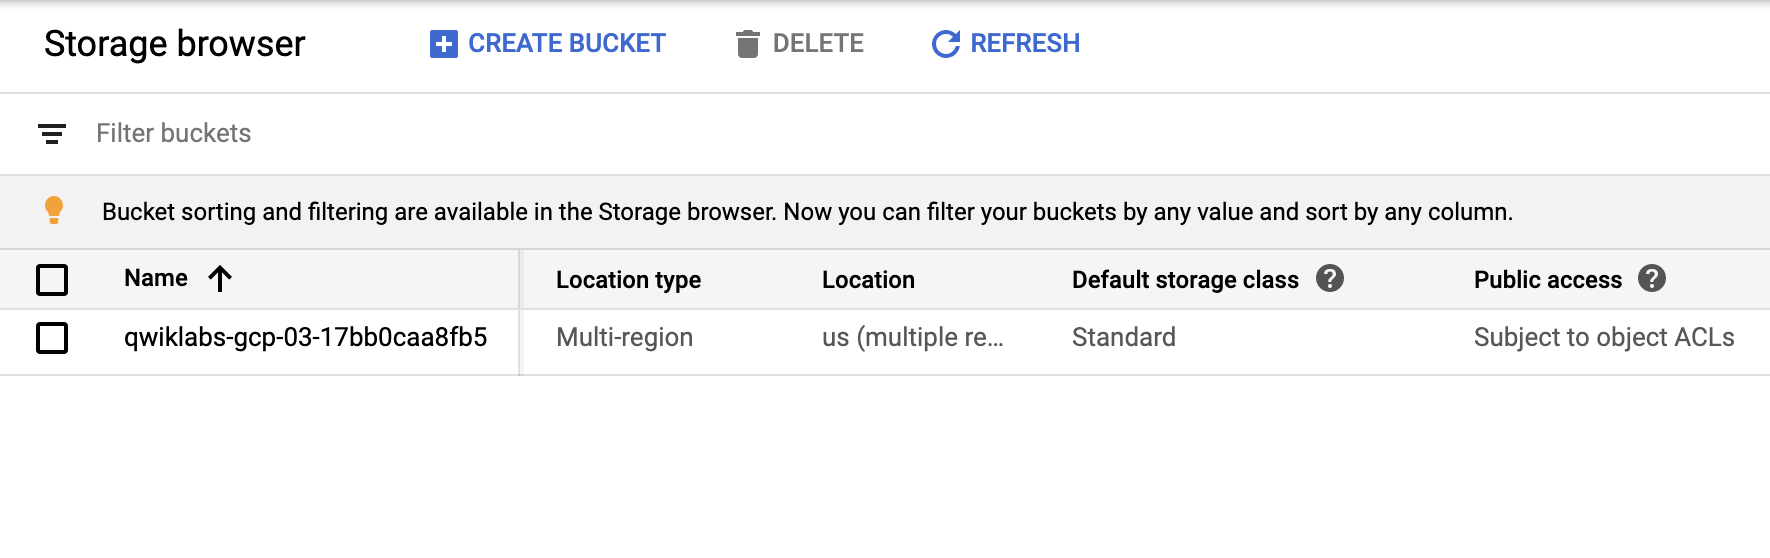
Check to make sure your GKE cluster has been created before continuing. Open the navigation menu and select Kuberntes Engine > Clusters.
Continue when you see a green checkmark next to echo-cluster:

To deploy your first version of the application, run the following commands in Cloud Shell to get up and running:
`gcloud container clusters get-credentials echo-cluster --zone=us-central1-a`
`kubectl create deployment echo-web --image=gcr.io/qwiklabs-resources/echo-app:v1`
`kubectl expose deployment echo-web --type=LoadBalancer --port 80 --target-port 8000`
================================================
FILE: labs/gsp305_scale-out-and-update-a-containerized-application-on-a-kubernetes-cluster/script.sh
================================================
# Scale Out and Update a Containerized Application on a Kubernetes Cluster
# https://www.qwiklabs.com/focuses/1739?parent=catalog
# Task 1 : Check that there is a tagged image in gcr.io for echo-app:v2
mkdir echo-web && cd echo-web
gsutil cp -r gs://$DEVSHELL_PROJECT_ID/echo-web-v2.tar.gz .
tar -xzf echo-web-v2.tar.gz
rm echo-web-v2.tar.gz
docker build -t echo-app:v2 .
docker tag echo-app:v2 gcr.io/$DEVSHELL_PROJECT_ID/echo-app:v2
docker push gcr.io/$DEVSHELL_PROJECT_ID/echo-app:v2
# Task 2 : Echo-app:v2 is running on the Kubernetes cluster
gcloud container clusters get-credentials echo-cluster --zone=us-central1-a
kubectl create deployment echo-web --image=gcr.io/qwiklabs-resources/echo-app:v2
# Task 3 : The Kubernetes cluster deployment reports 2 replicas.
kubectl scale deployment echo-web --replicas=2
# Task 4 : The application must respond to web requests with V2.0.0
kubectl expose deployment echo-web --type=LoadBalancer --port 80 --target-port 8000
================================================
FILE: labs/gsp306_migrate-a-mysql-database-to-google-cloud-sql/guide.txt
================================================
# Migrate a MySQL Database to Google Cloud SQL
# https://www.qwiklabs.com/focuses/1740?parent=catalog
# Task 1: Check that there is a Cloud SQL instance
- Go to SQL -> Create Instance -> MySQL -> fill the name with "lab" and fill the password
It will take a several times to create the instance, you can go to Task 2 without waiting here
# Task 2: Check that there is a user database on the Cloud SQL instance
- Go to Compute Engine, click SSH button on "blog" instance
- run mysqldump --databases wordpress -h localhost -u blogadmin -p --hex-blob --skip-triggers --single-transaction --default-character-set=utf8mb4 > wordpress.sql
- Enter the password with Password1*
- run export PROJECT_ID=$(gcloud info --format='value(config.project)')
- run gsutil mb gs://${PROJECT_ID}
- run gsutil cp ~/wordpress.sql gs://${PROJECT_ID}
- Back to Cloud Console -> SQL -> lab -> Databases -> Create Database
- Fill the database name with wordpress and on character set, choose utf8mb4 then click Create
- Click Overview -> Import -> Browse -> Select wordpress.sql from your bucket -> Select -> Import
- Check Your Progress
# Task 3: Check that the blog instance is authorized to access Cloud SQL
- On left panel, click Users -> Add User Account
- Fill the name field with blogadmin and password field with Password1* -> add
- On the left pannel, Click Connections
- Click Add Network Under the Authorized networks
- Fill the name with blog
- Fill the Network with IP Address from Demo Blog Site Field, Change the latest part of the IP address with 0 and add /24 ( example: If IP = 34.123.155.123, fill with 34.123.155.0/24 )
- Check Your Progress
# Task 4: Check that wp-config.php points to the Cloud SQL instance
- Go to SQL -> Copy the Public IP Address from lab SQL instance
- Go to VM Instances click SSH Shell at "blog"
- run cd /var/www/html/wordpress/
- run sudo nano wp-config.php
- Change localhost string on DB_HOST with Public IP Address of SQL Instance that has copied before
- Check Your Progress
# Task 5: Check that the blog still responds to requests
- Now You can open your Demo Blog Site in the new tab and verify that no error
- Check Your Progress
================================================
FILE: labs/gsp306_migrate-a-mysql-database-to-google-cloud-sql/readme.md
================================================
# [Migrate a MySQL Database to Google Cloud SQL](https://www.qwiklabs.com/focuses/1740?parent=catalog)
## Topics tested
* Create a Google Cloud SQL instance and create a database
* Import a MySQL database into Cloud SQL
* Reconfigure an application to use Cloud SQL instead of a local MySQL database
## Challenge Scenario
Your WordPress blog is running on a server that is no longer suitable. As the first part of a complete migration exercise, you are migrating the locally hosted database used by the blog to Cloud SQL.
The existing WordPress installation is installed in the `/var/www/html/wordpress` directory in the instance called `blog` that is already running in the lab. You can access the blog by opening a web browser and pointing to the external IP address of the blog instance.
The existing database for the blog is provided by MySQL running on the same server. The existing MySQL database is called `wordpress` and the user called __blogadmin__ with password __Password1*__ , which provides full access to that database.
================================================
FILE: labs/gsp311_automate-interactions-with-contact-center-ai-challenge-lab/guide.txt
================================================
# Automate Interactions with Contact Center AI: Challenge Lab
# https://www.qwiklabs.com/focuses/12008?parent=catalog
# Setup
git clone https://github.com/GoogleCloudPlatform/dataflow-contact-center-speech-analysis.git
# Task 1: Create a Regional Cloud Storage bucket
- Go to Storage > Bucket > Create bucket
- Use your project id as name
- LOCATION MUST BE IN us-central1
# Task 2: Create a Cloud Function
- Go to Cloud Function > Create Function
- name: use default
- Trigger: Cloud Storage
- Event Type: Finalize/Create
- Bucket: <your_bucket_name>
- Runtime: Node.js 8
- index.js: use this code https://github.com/GoogleCloudPlatform/dataflow-contact-center-speech-analysis/blob/master/saf-longrun-job-func/index.js
- package.json: use this code https://github.com/GoogleCloudPlatform/dataflow-contact-center-speech-analysis/blob/master/saf-longrun-job-func/package.json
- Entry point: safLongRunJobFunc
- Click Environment Variables, Networking, Timeouts and more. Make sure region is us-central1
- DEPLOY
# Task 3: Create a BigQuery dataset
- Go to BigQuery > Create dataset with Name: lab
# Task 4: Create a Pub/Sub topic
- Go to Pub/Sub > Topics > Create Topic with Topic ID: speech2text
# Task 5: Create a Regional Cloud Storage bucket with DFaudio folder
- Back to your cloud storage, click your bucket and create a folder called DFaudio
# Task 6: Deploy Dataflow pipeline
- Open cloud shell, run:
# make sure you already clone the repo in # Setup
cd dataflow-contact-center-speech-analysis/saf-longrun-job-dataflow
python -m virtualenv env -p python3
source env/bin/activate
pip install apache-beam[gcp]
pip install dateparser
export PROJECT_ID=[YOUR_PROJECT_ID]
export TOPIC_NAME=speech2text
export BUCKET_NAME=[YOUR_BUCKET_NAME]
export DATASET_NAME=lab
export TABLE_NAME=transcript
python3 saflongrunjobdataflow.py --project=$PROJECT_ID --input_topic=projects/$PROJECT_ID/topics/$TOPIC_NAME --runner=DataflowRunner --region=us-central1 --temp_location=gs://$BUCKET_NAME/tmp --output_bigquery=$DATASET_NAME.$TABLE_NAME --requirements_file="requirements.txt"
- Check your pipeline in Dataflow
# Task 7: Process the sample audio files
- Open cloud shell, run:
gsutil -h x-goog-meta-callid:1234567 -h x-goog-meta-stereo:false -h x-goog-meta-pubsubtopicname:$TOPIC_NAME -h x-goog-meta-year:2019 -h x-goog-meta-month:11 -h x-goog-meta-day:06 -h x-goog-meta-starttime:1116 cp gs://qwiklabs-bucket-gsp311/speech_commercial_mono.flac gs://$BUCKET_NAME/DFaudio
gsutil -h x-goog-meta-callid:1234567 -h x-goog-meta-stereo:true -h x-goog-meta-pubsubtopicname:$TOPIC_NAME -h x-goog-meta-year:2019 -h x-goog-meta-month:11 -h x-goog-meta-day:06 -h x-goog-meta-starttime:1116 cp gs://qwiklabs-bucket-gsp311/speech_commercial_stereo.wav gs://$BUCKET_NAME/DFaudio
# Task 8: Run a Data Loss Prevention Job
- Back to BigQuery
- Click new generated table (transcript table)
- Click More > Query Settings
- Destination: Choose Set a destination table for query result
- Table name: copied
- SELECT * FROM `[YOUR_PROJECT_ID].lab.transcript`
# expected row of output: 1 row
- Click at generated copied table
- Click EXPORT > Scan with DLP
- Job ID: scan-copied
- leave all default > CREATE
- Wait its status to Done, check your progress
================================================
FILE: labs/gsp311_automate-interactions-with-contact-center-ai-challenge-lab/readme.md
================================================
# [Automate Interactions with Contact Center AI: Challenge Lab ](https://www.qwiklabs.com/focuses/12008?parent=catalog)
## Topics tested
* Create a Cloud Storage bucket
* Create a Cloud Function
* Create a BigQuery dataset and table from an existing schema
* Create a Pub/Sub topic
* Deploy Dataflow pipeline
* Write SQL queries
## Challenge Scenario
Your company is ready to launch a new marketing campaign. For that, they would like to know what customers have been calling customer service about and what is the sentiment around those topics. They will be sending the data to a third-party for further analysis, so sensitive data such as customer's name, phone number, address, email, SSN, should all be redacted from the data. Right now all the data that they have is available as call recordings and they have not been processed/analyzed yet.
================================================
FILE: labs/gsp313_create-and-manage-cloud-resources/readme.md
================================================
# [Create and Manage Cloud Resources: Challenge Lab ](https://www.qwiklabs.com/focuses/10258?parent=catalog)
## Overview
This lab is recommended for students who have enrolled in the labs in the [Create and Manage Cloud Resources](https://google.qwiklabs.com/quests/120) quest. Be sure to review those labs before starting this lab. Are you ready for the challenge?
Topics tested:
* Create an instance
* Create a 3-node Kubernetes cluster and run a simple service
* Create an HTTP(s) load balancer in front of two web servers
## Challenge Scenario
You have started a new role as a Junior Cloud Engineer for Jooli, Inc. You are expected to help manage the infrastructure at Jooli. Common tasks include provisioning resources for projects.
You are expected to have the skills and knowledge for these tasks, so step-by-step guides are not provided.
Some Jooli, Inc. standards you should follow:
* Create all resources in the default region or zone, unless otherwise directed.
* Naming normally uses the format team-resource; for example, an instance could be named nucleus-webserver1.
* Allocate cost-effective resource sizes. Projects are monitored, and excessive resource use will result in the containing project's termination (and possibly yours), so plan carefully. This is the guidance the monitoring team is willing to share: unless directed, use f1-micro for small Linux VMs, and use n1-standard-1 for Windows or other applications, such as Kubernetes nodes.
================================================
FILE: labs/gsp313_create-and-manage-cloud-resources/script.sh
================================================
# Create and Manage Cloud Resources: Challenge Lab
# https://www.qwiklabs.com/focuses/10258
# 1. Create a project jumphost instance (zone: us-east1-b)
gcloud compute instances create nucleus-jumphost-850 \
--zone="us-east1-b" \
--machine-type="f1-micro" \
--boot-disk-size=10GB
# if failed to check, go create it manually
# 2. Create a Kubernetes service cluster
gcloud config set compute/zone us-east1-b
gcloud container clusters create nucleus-jumphost-webserver1
gcloud container clusters get-credentials nucleus-jumphost-webserver1
kubectl create deployment hello-app --image=gcr.io/google-samples/hello-app:2.0
kubectl expose deployment hello-app --type=LoadBalancer --port 8083
kubectl get service
# 3. Create the web server frontend
## 3.1 Create Instance Template
cat << EOF > startup.sh
#! /bin/bash
apt-get update
apt-get install -y nginx
service nginx start
sed -i -- 's/nginx/Google Cloud Platform - '"\$HOSTNAME"'/' /var/www/html/index.nginx-debian.html
EOF
gcloud compute instance-templates create nginx-template \
--metadata-from-file startup-script=startup.sh
## 3.2 Create Target Pool
gcloud compute target-pools create nginx-pool
# NOTE: Create it us-east1 region
## 3.3 Create managed instance group
gcloud compute instance-groups managed create nginx-group \
--base-instance-name nginx \
--size 2 \
--template nginx-template \
--target-pool nginx-pool
## 3.4 Create firewall rule
gcloud compute firewall-rules create accept-tcp-rule-525 --allow tcp:80
gcloud compute forwarding-rules create nginx-lb \
--region us-east1 \
--ports=80 \
--target-pool nginx-pool
## 3.5 Create health check
gcloud compute http-health-checks create http-basic-check
gcloud compute instance-groups managed set-named-ports nginx-group \
--named-ports http:80
## 3.6 Create backend service
gcloud compute backend-services create nginx-backend \
--protocol HTTP --http-health-checks http-basic-check --global
gcloud compute backend-services add-backend nginx-backend \
--instance-group nginx-group \
--instance-group-zone us-east1-b \
--global
## 3.7 Create url map
gcloud compute url-maps create web-map \
--default-service nginx-backend
gcloud compute target-http-proxies create http-lb-proxy \
--url-map web-map
## 3.8 Create forwarding rule
gcloud compute forwarding-rules create http-content-rule \
--global \
--target-http-proxy http-lb-proxy \
--ports 80
## 3.9 Testing traffic sent to your instances
## Network services > Load balancing
## Click web-map
## Click the name of the backend
## Open new tab
## Paste http://IP_ADDRESS/ in the URL bar (replace IP_ADDRESS with the load balancer's IP address)
================================================
FILE: labs/gsp314_deploy-and-manage-cloud-environments-with-google-cloud-challenge-lab/guide.txt
================================================
# Deploy and Manage Cloud Environments with Google Cloud: Challenge Lab
# https://www.qwiklabs.com/focuses/10417?parent=catalog
# Task 1: Create the production environment
# 1.1 Create the kraken-prod-vpc
- Go to Compute Engine > VM instances
- SSH to kraken-jumphost
- *in ssh window*
cd /work/dm
sed -i s/SET_REGION/us-east1/g prod-network.yaml
gcloud deployment-manager deployments create prod-network --config=prod-network.yaml
# 1.2 Create a Kubernetes cluster in the new network
gcloud config set compute/zone us-east1-b
gcloud container clusters create kraken-prod --num-nodes 2 --network kraken-prod-vpc --subnetwork kraken-prod-subnet
gcloud container clusters get-credentials kraken-prod
# 1.3 Create the frontend and backend deployments and services
cd /work/k8s
for F in $(ls *.yaml); do kubectl create -f $F; done
kubectl get services
# Task 2: Setup the Admin instance
# 2.1 Create a VM instance
- *in ssh window*
gcloud config set compute/zone us-east1-b
gcloud compute instances create kraken-admin --network-interface="subnet=kraken-mgmt-subnet" --network-interface="subnet=kraken-prod-subnet"
# 2.2 Create a Monitoring workspace
- Go to Navigation menu > Monitoring > Alerting (left pane) > Create Policy
- In What do you want to track? Click Add Condition
- In Target section
- Resource Type: VM Instance
- Metric: CPU Utilization, compute.googleapis.com/instance/cpu/utilization
- Filter: instance_name='kraken-admin'
- In Configuration section
- Threshold: 50
- In What are the steps to fix the issue?, Alert name: kraken-admin
# Task 3: Verify the Spinnaker deployment
# 3.1 Connect the Spinnaker console
- Open Cloud Shell, run:
gcloud config set compute/zone us-east1-b
gcloud container clusters get-credentials spinnaker-tutorial
DECK_POD=$(kubectl get pods --namespace default -l "cluster=spin-deck" -o jsonpath="{.items[0].metadata.name}")
kubectl port-forward --namespace default $DECK_POD 8080:9000 >> /dev/null &
- In cloud shell, click Web Preview > Preview on port 8080
- *in spinnaker*
- Go to Application > Click sample > Go to Pipelines
- Start manual Execution
- Pipeline: Deploy (ignore warning)
- In PUBSUB pipeline, click at orange tab > Deploy to production? Click Continue
# 3.2 Clone your source code repository
- Open Cloud shell
- *in cloud shell*
gcloud config set compute/zone us-east1-b
gcloud source repos clone sample-app
cd sample-app
touch a
git config --global user.email "$(gcloud config get-value account)"
git config --global user.name "Student"
git commit -a -m "change"
git tag v1.0.1
git push --tags
# 3.3 Triggering your pipeline from code changes
- Back to spinnaker pipeline
- In Manual START pipeline, click at orange tab > Deploy to production? Click Continue
- Start manual Execution
- Pipeline: Deploy (ignore warning)
- In New Manual START pipeline, click at orange tab > Deploy to production? Click Continue
- After all pipeline Status: SUCCEEDED, check your progress
================================================
FILE: labs/gsp314_deploy-and-manage-cloud-environments-with-google-cloud-challenge-lab/readme.md
================================================
# [Deploy and Manage Cloud Environments with Google Cloud: Challenge Lab](https://www.qwiklabs.com/focuses/10417?parent=catalog)
## Topics tested:
* Complete the production application environment.
* Ensure monitoring and alerts enabled on key development components.
* Test the Spinnaker CI/CD deployed environment is working as expected.
## Challenge scenario
You have started a new role as a Cloud Architect for Jooli Inc. You are expected to help design and manage the infrastructure at Jooli. Common tasks revolve around designing environments for the various projects within the Jooli Inc. family but also include provisioning resources for projects.
You are expected to have the skills and knowledge for these tasks, so don't expect step-by-step guides.
You have been asked to assist the kraken team complete setting up their product development environment. The previous Cloud Architect working with the kraken team was unfortunately too curious about if krakens were real or not, and has gone missing after venturing out into the open sea last weekend in search of such a beast.
Jooli Inc. management has supreme faith in your abilities, don't let them down! (Seriously, they don't need the dates to slip further).
The kraken team are building a next generation tool and they will host the application on Kubernetes. The project source code is stored in Cloud Source Repositories, with Spinnaker building and deploying any changes into the build Kubernetes environment.
================================================
FILE: labs/gsp315_perform-foundational-infrastructure-tasks-in-google-cloud/readme.md
================================================
# [Perform Foundational Infrastructure Tasks in Google Cloud: Challenge Lab ](https://www.qwiklabs.com/focuses/10379?parent=catalog)
## Your challenge
You are now asked to help a newly formed development team with some of their initial work on a new project around storing and organizing photographs, called memories. You have been asked to assist the memories team with initial configuration for their application development environment; you receive the following request to complete the following tasks:
* Create a bucket for storing the photographs.
* Create a Pub/Sub topic that will be used by a Cloud Function you create.
* Create a Cloud Function.
* Remove the previous cloud engineer’s access from the memories project.
Some Jooli Inc. standards you should follow:
* Create all resources in the **us-east1** region and **us-east1-b** zone, unless otherwise directed.
* Use the project VPCs.
* Naming is normally team-resource, e.g. an instance could be named **kraken-webserver1**
* Allocate cost effective resource sizes. Projects are monitored and excessive resource use will result in the containing project's termination (and possibly yours), so beware. This is the guidance the monitoring team is willing to share; unless directed, use **f1-micro** for small Linux VMs and **n1-standard-1** for Windows or other applications such as Kubernetes nodes.
================================================
FILE: labs/gsp315_perform-foundational-infrastructure-tasks-in-google-cloud/script.sh
================================================
export PROJECT_ID=$DEVSHELL_PROJECT_ID
# 1. Create a bucket
gsutil mb gs://$PROJECT_ID
# 2. Create a Pub/Sub topic
gcloud pubsub topics create $PROJECT_ID
# 3. Create the Cloud Function
# Go to Cloud Functions > Create Function
# Trigger: Cloud Storage
# Event type: Finalize/Create
# Entry Point: thumbnail
# Runtime: Node.js
# fill index.js and package.json with given scripts
# replace line 15 in index.js, in this case, fill with your project id
# upload one JPG or PNG image into the bucket
# 4. Remove the previous cloud engineer
# Go to IAM > find your second username > Click Pencil Icon > Delete
================================================
FILE: labs/gsp318_deploy-to-kubernetes-in-google-cloud-challenge-lab/readme.md
================================================
# [Deploy to Kubernetes in Google Cloud: Challenge Lab](https://www.cloudskillsboost.google/focuses/10457?parent=catalog)
## Challenge scenario
You have just completed training on containers and their creation and management and now you need to demonstrate to the Jooli Inc. development team your new skills. You have to help with some of their initial work on a new project around an application environment utilizing Kubernetes. Some of the work was already done for you, but other parts require your expert skills.
You are expected to create container images, store the images in a repository, and expose a deployment in Kubernetes. Your know that Kurt, your supervisor, will ask you to complete these tasks:
- Create a Docker image and store the Dockerfile.
- Test the created Docker image.
- Push the Docker image into the Artifact Registry.
- Use the image to create and expose a deployment in Kubernetes
================================================
FILE: labs/gsp318_deploy-to-kubernetes-in-google-cloud-challenge-lab/script.sh
================================================
# Deploy to Kubernetes in Google Cloud: Challenge Lab
# https://www.cloudskillsboost.google/focuses/10457?parent=catalog
# Task 1. Create a Docker image and store the Dockerfile
# Open Cloud shell, run:
source <(gsutil cat gs://cloud-training/gsp318/marking/setup_marking_v2.sh)
gcloud source repos clone valkyrie-app
cd valkyrie-app
cat > Dockerfile <<EOF
FROM golang:1.10
WORKDIR /go/src/app
COPY source .
RUN go install -v
ENTRYPOINT ["app","-single=true","-port=8080"]
EOF
docker build -t valkyrie-dev:v0.0.3 .
bash ~/marking/step1_v2.sh
# Task 2. Test the created Docker image
# Open Cloud shell, run:
docker run -p 8080:8080 valkyrie-dev:v0.0.3 &
bash ~/marking/step2_v2.sh
# Task 3. Push the Docker image to the Artifact Registry
- Navigation Menu > Artifact Registry > Repositories > Create Repository:
- Name: valkyrie-docker-repo
- Format: Docker
- Region: us-central1
- Create
# Open Cloud shell, run:
gcloud auth configure-docker us-central1-docker.pkg.dev
export PROJECT_ID=$(gcloud config get-value project)
docker build -t us-central1-docker.pkg.dev/$PROJECT_ID/valkyrie-docker-repo/valkyrie-dev:v0.0.3 .
docker push us-central1-docker.pkg.dev/$PROJECT_ID/valkyrie-docker-repo/valkyrie-dev:v0.0.3
# Task 4. Create and expose a deployment in Kubernetes
# Open Cloud shell, run:
sed -i s#IMAGE_HERE#us-central1-docker.pkg.dev/$PROJECT_ID/valkyrie-docker-repo/valkyrie-dev:v0.0.3#g k8s/deployment.yaml
gcloud container clusters get-credentials valkyrie-dev --zone us-east1-d
kubectl create -f k8s/deployment.yaml
kubectl create -f k8s/service.yaml
================================================
FILE: labs/gsp319_build-a-website-on-google-cloud-challenge-lab/readme.md
================================================
# [Build a Website on Google Cloud: Challenge Lab](https://www.qwiklabs.com/focuses/11765?parent=catalog)
## Topics tested
* Building and refactoring a monolithic web app into microservices
* Deploying microservices in GKE
* Exposing the Services deployed on GKE
## Challenge lab scenario
You have just started a new role at FancyStore, Inc.
Your task is to take the company's existing monolithic e-commerce website and break it into a series of logically separated microservices. The existing monolith code is sitting in a GitHub repo, and you will be expected to containerize this app and then refactor it.
You are expected to have the skills and knowledge for these tasks, so don't expect step-by-step guides.
You have been asked to take the lead on this, after the last team suffered from monolith-related burnout and left for greener pastures (literally, they are running a lavender farm now). You will be tasked with pulling down the source code, building a container from it (one of the farmers left you a Dockerfile), and then pushing it out to GKE.
You should first build, deploy, and test the Monolith, just to make sure that the source code is sound. After that, you should break out the constituent services into their own microservice deployments.
Some FancyStore, Inc. standards you should follow:
* Create your cluster in us-central-1.
* Naming is normally team-resource, e.g. an instance could be named fancystore-orderservice1.
* Allocate cost effective resource sizes. Projects are monitored and excessive resource use will result in the containing project's termination.
* Use the n1-standard-1 machine type unless directed otherwise.
================================================
FILE: labs/gsp319_build-a-website-on-google-cloud-challenge-lab/script.sh
================================================
# Build a Website on Google Cloud: Challenge Lab
# https://www.qwiklabs.com/focuses/11765?parent=catalog
# Setup
gcloud config set compute/zone us-central1-a
# Task 1: Download the monolith code and build your container
# Reference: Deploy Your Website on Cloud Run
git clone https://github.com/googlecodelabs/monolith-to-microservices.git
cd ~/monolith-to-microservices
./setup.sh
gcloud services enable container.googleapis.com
gcloud container clusters create fancy-cluster --num-nodes 3
gcloud compute instances list
cd ~/monolith-to-microservices
./deploy-monolith.sh
kubectl get service monolith
cd ~/monolith-to-microservices/monolith
gcloud builds submit --tag gcr.io/${GOOGLE_CLOUD_PROJECT}/fancytest:1.0.0 .
# Task 2: Create a kubernetes cluster and deploy the application
# Reference: Lab Deploy, Scale, and Update Your Website on Google Kubernetes Engine
kubectl create deployment fancytest --image=gcr.io/${GOOGLE_CLOUD_PROJECT}/fancytest:1.0.0
kubectl get all
kubectl expose deployment fancytest --type=LoadBalancer --port 80 --target-port 8080
kubectl get service fancytest
# Task 3: Create a containerized version of your Microservices
# Reference: Lab Migrating a Monolithic Website to Microservices on Google Kubernetes Engine
cd ~/monolith-to-microservices/microservices/src/orders
gcloud builds submit --tag gcr.io/${GOOGLE_CLOUD_PROJECT}/orders:1.0.0 .
cd ~/monolith-to-microservices/microservices/src/products
gcloud builds submit --tag gcr.io/${GOOGLE_CLOUD_PROJECT}/products:1.0.0 .
# Task 4: Deploy the new microservices
kubectl create deployment orders --image=gcr.io/${GOOGLE_CLOUD_PROJECT}/orders:1.0.0
kubectl create deployment products --image=gcr.io/${GOOGLE_CLOUD_PROJECT}/products:1.0.0
kubectl get all
kubectl expose deployment orders --type=LoadBalancer --port 80 --target-port 8081
kubectl expose deployment products --type=LoadBalancer --port 80 --target-port 8082
kubectl get service orders
kubectl get service products
# Task 5: Create a containerized version of the Frontend microservice
cd ~/monolith-to-microservices/react-app
kubectl get service # Copy the EXTERNAL-IP
nano .env # EDIT FILE WITH THIS:
# REACT_APP_ORDERS_URL=http://<ORDERS_IP_ADDRESS>/api/orders
# REACT_APP_PRODUCTS_URL=http://<PRODUCTS_IP_ADDRESS>/api/products
npm run build
cd ~/monolith-to-microservices/microservices/src/frontend
gcloud builds submit --tag gcr.io/${GOOGLE_CLOUD_PROJECT}/frontend:1.0.0 .
# Task 6: Deploy the Frontend microservice
kubectl create deployment frontend --image=gcr.io/${GOOGLE_CLOUD_PROJECT}/frontend:1.0.0
kubectl expose deployment frontend --type=LoadBalancer --port 80 --target-port 8080
================================================
FILE: labs/gsp321_set-up-and-configure-a-cloud-environment-in-google-cloud-challenge-lab/guide.txt
================================================
# Set up and Configure a Cloud Environment in Google Cloud: Challenge Lab
# https://www.qwiklabs.com/focuses/10603?parent=catalog
# NOTE: Create all resources in the us-east1 region and us-east1-b zone, unless otherwise directed.
# Task 1: Create development VPC manually
- Go to Navigation menu > VPC Network > Create VPC Network
- Name: griffin-dev-vpc
- Subnet creation mode: Custom
- New subnet:
- Name: griffin-dev-wp
- Region: us-east1
- IP address range: 192.168.16.0/20
- Click Add subnet:
- Name: griffin-dev-mgmt
- Region: us-east1
- IP address range: 192.168.32.0/20
- CREATE
# Task 2: Create production VPC using Deployment Manager
- Open Cloud Shell
- run: gsutil cp -r gs://cloud-training/gsp321/dm ~/
- run: cd dm
- run: nano prod-network.yaml
- replace SET_REGION to us-east1
- save
- run: gcloud deployment-manager deployments create griffin-prod --config prod-network.yaml
- Confirm deployment (Open Deployment Manager)
# Task 3: Create bastion host
- Go to Compute Engine > VM instances > Create
- Name: bastion
- Region: us-east1
- Expand Management, security, disk, networking, sole tenany section
- Networking section:
- Network tags: bastion
- Network interfaces:
- setup two network interfaces
- griffin-dev-mgmt
- griffin-prod-mgmt
- Create
- Go to VPC network > Firewall
- Create firewall rule
- Name: allow-bastion-dev-ssh
- Network: griffin-dev-vpc
- Target tags: bastion
- Source IP ranges: 192.168.32.0/20
- Protols and ports: check tcp > fill with 22
- Create
- Create second firewall rule
- Name: allow-bastion-prod-ssh
- Network: griffin-prod-vpc
- Target tags: bastion
- Source IP ranges: 192.168.48.0/20
- Protols and ports: check tcp > fill with 22
- Create
# Task 4: Create and configure Cloud SQL Instance
- Go to SQL > Create instance > Choose MySQL
- Name: griffin-dev-db
- Root password: <your_password> example: 123456
- Region: us-east1
- Zone: us-east1-b
- Create
- Wait instance updated
- Connect to this instance section > Click Connect using Cloud Shell
- Go to Cloud shell
- run: gcloud sql connect griffin-dev-db --user=root --quiet
- enter your sql root password
- *in sql console*
- run: CREATE DATABASE wordpress;
- run: GRANT ALL PRIVILEGES ON wordpress.* TO "wp_user"@"%" IDENTIFIED BY "stormwind_rules";
- run: FLUSH PRIVILEGES;
- type exit to quit
# Task 5: Create Kubernetes cluster
- Go to Kubernetes Engine > Clusters > Create cluster
- Name: griffin-dev
- Zone: us-east1-b
- Click default-pool dropdown (left pane)
- Number of nodes: 2
- Click Nodes
- Series: N1
- Machine type: n1-standard-4
- Click Networking tab (left pane)
- Network: griffin-dev-vpc
- Node subnet: griffin-dev-wp
- CREATE
# Task 6: Prepare the Kubernetes cluster
- Open Cloud Shell
- run: gsutil cp -r gs://cloud-training/gsp321/wp-k8s ~/
- run: cd ~/wp-k8s
- run: nano wp-env.yaml
- Replace <username_goes_here> to wp_user
- Replace <password_goes_here> to stormwind_rules
- Save
- Connect to Kubernetes cluster > Run in Cloud Shell
- run: gcloud container clusters get-credentials griffin-dev --zone=us-east1-b
- run: kubectl apply -f wp-env.yaml
- run: gcloud iam service-accounts keys create key.json --iam-account=cloud-sql-proxy@$GOOGLE_CLOUD_PROJECT.iam.gserviceaccount.com
- run: kubectl create secret generic cloudsql-instance-credentials --from-file key.json
# Task 7: Create a WordPress deployment
- Open Cloud Shell
- run: cd ~/wp-k8s
- Edit wp-deployment.yaml (choose one between sheel or editor)
- with shell :
- run: nano wp-deployment.yaml
- Replace YOUR_SQL_INSTANCE with SQL Instance connection name (SQL > Connect to this instance > Look at connection name)
- Save
- with editor :
- Click 'Open Editor'
- Go to file wp-k8s/wp-deployment.yaml
- Find YOUR_SQL_INSTANCE with Ctrl + F
- Replace YOUR_SQL_INSTANCE with SQL Instance connection name (SQL > Connect to this instance > Look at connection name)
- File > Save
- Go back to Cloud Shell
- run: kubectl create -f wp-deployment.yaml
- run: kubectl create -f wp-service.yaml
- Go to Kubernetes Engine > Service & Ingress > Click Endpoints (and copy for next task)
- Tips: If your website failed to showed (database issue) you can still complete this lab
# Task 8: Enable monitoring
- Go to Monitoring (Navigation > Monitoring) > Uptime checks (left pane) > CREATE UPTIME CHECK
- Title: WordPress Uptime
- Protocol: HTTP
- Resource Type: URL
- Hostname: <YOUR-WORDPRESS_ENDPOINT>
- Path: /
- Click TEST > SAVE
# Tips: If TEST failed (caused by issue in task 7) you can SAVE directly (Click button NEXT until you able to click SAVE button)
# Task 9: Provide access for an additional engineer
- Go to IAM & Admin > IAM
- Click +ADD
- New members: Paste your second user account
- In Role dropdown, select Project > Editor
- SAVE
================================================
FILE: labs/gsp321_set-up-and-configure-a-cloud-environment-in-google-cloud-challenge-lab/readme.md
================================================
# [Set up and Configure a Cloud Environment in Google Cloud: Challenge Lab ](https://www.qwiklabs.com/focuses/10603?parent=catalog)
## Topics tested:
* Creating and using VPCs and subnets
* Creating a Kubernetes cluster
* Configuring and launching a Kubernetes deployment and service
* Setting up stackdriver monitoring
* Configuring an IAM role for an account
## Challenge scenario
As a cloud engineer in Jooli Inc. and recently trained with Google Cloud and Kubernetes you have been asked to help a new team (Griffin) set up their environment. The team has asked for your help and has done some work, but needs you to complete the work.
You are expected to have the skills and knowledge for these tasks so don’t expect step-by-step guides.
You need to complete the following tasks:
* Create a development VPC with three subnets manually
* Create a production VPC with three subnets using a provided Deployment Manager configuration
* Create a bastion that is connected to both VPCs
* Create a development Cloud SQL Instance and connect and prepare the WordPress environment
* Create a Kubernetes cluster in the development VPC for WordPress
* Prepare the Kubernetes cluster for the WordPress environment
* Create a WordPress deployment using the supplied configuration
* Enable monitoring of the cluster via stackdriver
* Provide access for an additional engineer
================================================
FILE: labs/gsp322_build-and-secure-networks-in-google-cloud-challenge-lab/guide.txt
================================================
# Build and Secure Networks in Google Cloud: Challenge Lab
# https://www.qwiklabs.com/focuses/12068?parent=catalog
# Task 1: Remove the overly permissive rules
- Go to VPC Network > Firewall > Delete open-access rule (Checks its box and Click Delete)
# Task 2: Start the bastion host instance
- Go to Compute Engine > VM instance
- You will see bastion isntance with stopped condition, start it (Checks its box and Click Start/Resume)
# Task 3: Create a firewall rule that allows SSH (tcp/22) from the IAP service and add network tag on bastion
- In VM instances, Click bastion instance
- Click Edit > Add bastion to the Network tags
- SAVE
- Back to Firewall rule page > Create firewall rule with configuration:
- Name: allow-ssh-from-iap
- Network: acme-vpc
- Target tags: bastion
- Source IP ranges: 35.235.240.0/20
- Protocols and ports: Check TCP and input 22 (to allow SSH)
# Task 4: Create a firewall rule that allows traffic on HTTP (tcp/80) to any address and add network tag on juice-shop
- In VM instances, Click juice-shop instance
- Click Edit > Add juice-shop to the Network tags
- SAVE
- In Firewall rule > Create second firewall rule with configuration:
- Name: allow-http-ingress
- Network: acme-vpc
- Target tags: juice-shop
- Source IP ranges: 0.0.0.0/0
- Protocols and ports: Check TCP and input 80 (to allow HTTP)
# Task 5: Create a firewall rule that allows traffic on SSH (tcp/22) from acme-mgmt-subnet network address and add network tag on juice-shop
- In Firewall rule > Create third firewall rule with configuration:
- Name: allow-ssh-from-mgmt-subnet
- Network: acme-vpc
- Target tags: bastion and juice-shop
- Source IP ranges: <IP address range of your acme-mgmt-subnet>
# Note: go to VPC network and have a look to IP address ranges of acme-mgmt-subnet
- Protocols and ports: Select TCP and enter 22 (to allow SSH)
# Task 6: SSH to bastion host via IAP and juice-shop via bastion
- Go to Compute Engine > VM instances
- Copy juice-shop Internal IP
- SSH on bastion instance
- *in ssh window
- run: ssh <juice-shop Internal IP>
================================================
FILE: labs/gsp322_build-and-secure-networks-in-google-cloud-challenge-lab/readme.md
================================================
# [Build and Secure Networks in Google Cloud: Challenge Lab](https://www.qwiklabs.com/focuses/12068?parent=catalog)
## Topics tested
* Secure remote ssh access via IAP-enabled bastion
* Firewall configuration and review
## Challenge scenario
You are a security consultant brought in by a Jeff, who owns a small local company, to help him with his very successful website (juiceshop). Jeff is new to Google Cloud and had his neighbour's son set up the initial site. The neighbour's son has since had to leave for college, but before leaving, he made sure the site was running.
================================================
FILE: labs/gsp323_perform-foundation-data-ml-and-ai-task-challenge-lab/guide.txt
================================================
# Perform Foundational Data, ML, and AI Tasks in Google Cloud: Challenge Lab
# https://www.qwiklabs.com/focuses/11044?parent=catalog
# Task 1: Run a simple Dataflow job
1.1 Create bigquery dataset
- Navigation menu > BigQuery > Click your project >
- Click CREATE DATASET (Dataset ID: lab, leave all default) > Create dataset
- *in cloud shell*
- run: gsutil cp gs://cloud-training/gsp323/lab.csv .
- run: gsutil cp gs://cloud-training/gsp323/lab.schema .
- run: cat lab.schema # copy the value within [] under "BigQuery Schema":
- Back to BigQuery page, click lab dataset, click CREATE TABLE
- *in create table dialog*
- Create table from: Google Cloud Storage
- Select file from GCS bucket: gs://cloud-training/gsp323/lab.csv
- Table name: customers
- Enable edit as text
- Paste output from previous cat lab.schema
1.2 Create bucket
- Navigation Menu > Storage > CREATE BUCKET > use your project id as bucket name > Create
1.3 Create dataflow job
- Navigation Menu > Dataflow > CREATE JOB FROM TEMPLATE
- *in create job from template section*
- Job name: give an arbitrary job name
- Dataflow template: Process Data in Bulk (batch) -> Text Files on Cloud Storage to BigQuery
- Required parameters:
Field Value
- JavaScript UDF path gs://cloud-training/gsp323/lab.js
- JSON path gs://cloud-training/gsp323/lab.schema
- JavaScript UDF name transform
- BigQuery output table YOUR_PROJECT:lab.customers
- Cloud Storage input path gs://cloud-training/gsp323/lab.csv
- Temporary BigQuery directory gs://YOUR_PROJECT/bigquery_temp
- Temporary location gs://YOUR_PROJECT/temp
- RUN JOB
(Continue to the Task 2 while waiting the Run Job done)
# Task 2: Run a simple Dataproc job
2.1 Create Dataproc Cluster
- Navigation Menu > Dataproc > Cluster > Create Cluster
- *in create cluster section*
- region: us-central-1
- Create
- Continue to Task 3 while waiting the Cluster creation completed
- Click your cluster name > VM INSTANCES > Click SSH
- run: hdfs dfs -cp gs://cloud-training/gsp323/data.txt /data.txt
- Close SSH window
- SUBMIT JOB
- *in submit a job section*
Field Value
- Region us-central1
- Job type Spark
- Main class or jar org.apache.spark.examples.SparkPageRank
- Jar files file:///usr/lib/spark/examples/jars/spark-examples.jar
- Arguments /data.txt
# Task 3: Run a simple Dataprep job
3.1 Import csv to dataprep
- Navigation menu > Dataprep > Import Data > Choose GCS
- *in import data section*
- Click pencil icon under Choose a file or folder
- Copy: gs://cloud-training/gsp323/runs.csv
- Click Go
- See imported runs.csv in right pane, click Import & Wrangle
3.2 Transform data
- Search column10 column
- See detail page > click FAILURE > Click Delete rows with in suggestion menu > Add
- Search column9 column
- Click dropdown menu > Filter rows > On column Values > Contains...
- *in filter rows section*
- Column: column9
- Pattern to match: /(^0$|^0\.0$)/
- Action: Delete matching rows
- Click Add
- For rename column > click column one by one > Rename
before after
column2 runid
column3 userid
column4 labid
column5 lab_title
column6 start
column7 end
column8 time
column9 score
column10 state
- Confirm the recipe (total 11 steps -> 2 delete, 9 rename)
- Run Job
# Task 4: AI
- Navigation menu> APIs & Services > Credentials
- Click CREATE CREDENTIALS > Choose API > Copy your API Key
- Click RESTRICT KEY > SAVE > wait 5 min
- Open cloud shell
4.1 Use Google Cloud Speech API to analyze the audio file
- *in cloud shell*
- *note*: FOLLOW THIS LAB -> https://www.qwiklabs.com/focuses/588?parent=catalog
- export API_KEY=<YOUR-API-KEY>
- nano request.json
- copy and save:
{
"config": {
"encoding":"FLAC",
"languageCode": "en-US"
},
"audio": {
"uri":"gs://cloud-training/gsp323/task4.flac"
}
}
- curl -s -X POST -H "Content-Type: application/json" --data-binary @request.json "https://speech.googleapis.com/v1/speech:recognize?key=${API_KEY}" > result.json
- gsutil cp result.json gs://<your_project_id>-marking/task4-gcs.result
-- Alternate: --
gcloud iam service-accounts create my-natlang-sa \
--display-name "my natural language service account"
gcloud iam service-accounts keys create ~/key.json \
--iam-account my-natlang-sa@${GOOGLE_CLOUD_PROJECT}.iam.gserviceaccount.com
export GOOGLE_APPLICATION_CREDENTIALS="/home/$USER/key.json"
gcloud auth activate-service-account my-natlang-sa@${GOOGLE_CLOUD_PROJECT}.iam.gserviceaccount.com --key-file=$GOOGLE_APPLICATION_CREDENTIALS
gcloud ml language analyze-entities --content="Old Norse texts portray Odin as one-eyed and long-bearded, frequently wielding a spear named Gungnir and wearing a cloak and a broad hat." > result.json
gcloud auth login (Copy the token from the link provided)
gsutil cp result.json gs://$GOOGLE_CLOUD_PROJECT-marking/task4-cnl.result
================================================
FILE: labs/gsp323_perform-foundation-data-ml-and-ai-task-challenge-lab/lab.schema
================================================
[
{"type":"STRING","name":"guid"},
{"type":"BOOLEAN","name":"isActive"},
{"type":"STRING","name":"firstname"},
{"type":"STRING","name":"surname"},
{"type":"STRING","name":"company"},
{"type":"STRING","name":"email"},
{"type":"STRING","name":"phone"},
{"type":"STRING","name":"address"},
{"type":"STRING","name":"about"},
{"type":"TIMESTAMP","name":"registered"},
{"type":"FLOAT","name":"latitude"},
{"type":"FLOAT","name":"longitude"}
]
================================================
FILE: labs/gsp323_perform-foundation-data-ml-and-ai-task-challenge-lab/readme.md
================================================
# [Perform Foundational Data, ML, and AI Tasks in Google Cloud: Challenge Lab ](https://www.qwiklabs.com/focuses/11044?parent=catalog)
## Topics tested:
* Create a simple Dataproc job
* Create a simple DataFlow job
* Create a simple Dataprep job
* Perform one of the three Google machine learning backed API tasks
## Challenge Scenario
As a junior data engineer in Jooli Inc. and recently trained with Google Cloud and a number of data services you have been asked to demonstrate your newly learned skills. The team has asked you to complete the following tasks.
You are expected to have the skills and knowledge for these tasks so don’t expect step-by-step guides.
================================================
FILE: labs/gsp323_perform-foundation-data-ml-and-ai-task-challenge-lab/request.json
================================================
{
"config": {
"encoding":"FLAC",
"languageCode": "en-US"
},
"audio": {
"uri":"gs://cloud-training/gsp323/task4.flac"
}
}
================================================
FILE: labs/gsp324_explore-machine-learning-models-with-explainable-ai-challenge-lab/guide.txt
================================================
# Explore Machine Learning Models with Explainable AI: Challenge Lab
# https://www.qwiklabs.com/focuses/12011?parent=catalog
# Steps:
# 1. Create a bucket
- Navigation > Storage > Bucket > Create Bucket with name of your Project ID
# 2. Start JupyterLab Notebook
- Navigation > AI Platform > New Instance > Choose latest version of Tensorflow (2.x) without GPU > Create
- Open JupyterLab (wait a minute)
- *in jupyterlab*
- Click the terminal
- run: git clone https://github.com/GoogleCloudPlatform/training-data-analyst
- Go to training-data-analyst/quests/dei.
- Open notebook what-if-tool-challenge.ipynb
- Run and modify some cells (have a look at notebook in this repo folder for reference)
================================================
FILE: labs/gsp324_explore-machine-learning-models-with-explainable-ai-challenge-lab/readme.md
================================================
# [Explore Machine Learning Models with Explainable AI: Challenge Lab](https://www.qwiklabs.com/focuses/12011?parent=catalog)
## Topics tested:
* Launching an AI Platform Notebook
* Downloading and exploring a sample dataset
* Building and training two different TensorFlow models
* Deploying models to the Cloud AI Platform
* Using the What-If Tool to compare the models
## Challenge scenario
You are a curious coder who wants to explore biases in public datasets using the What-If Tool. You decide to pull some mortgage [data](https://www.consumerfinance.gov/data-research/hmda/historic-data/) to train a couple of machine learning models to predict whether an applicant will be granted a loan. You specifically want to investigate how the two models perform when they are trained on different proportions of males and females in the datasets, and visualize their differences in the What-If Tool.
You are expected to have the skills and knowledge for these tasks, so don’t expect step-by-step guides.
================================================
FILE: labs/gsp324_explore-machine-learning-models-with-explainable-ai-challenge-lab/what-if-tool-challenge.ipynb
================================================
{
"cells": [
{
"cell_type": "markdown",
"metadata": {
"colab_type": "text",
"id": "bTry4ZMD2859"
},
"source": [
"# What-If Tool Challenge Lab\n",
"\n",
"In this notebook, you will use mortgage data from NY in 2017 to create two binary classifiers to determine if a mortgage applicant will be granted a loan.\n",
"\n",
"You will train classifiers on two datasets. One will be trained on the complete dataset, and the other will be trained on a subset of the dataset, where 90% of the female applicants that were granted a loan were removed from the training data (so the dataset has 90% less females that were granted loans).\n",
"\n",
"You will then compare and examine the two models using the What-If Tool.\n",
"\n",
"In this notebook, you will be exepcted to:\n",
"* Understand how the data is processed \n",
"* Write TensorFlow code to build and train two models\n",
"* Write code to deploy the the models to AI Platform\n",
"* Examine the models in the What-If Tool"
]
},
{
"cell_type": "markdown",
"metadata": {
"colab_type": "text",
"id": "zU9bzX-VWQCb"
},
"source": [
"# Download and import the data\n",
"\n",
"Here, you'll import some modules and download some data from the Consumer Finance public [datasets](https://www.consumerfinance.gov/data-research/hmda/historic-data/?geo=ny&records=all-records&field_descriptions=labels)."
]
},
{
"cell_type": "code",
"execution_count": 1,
"metadata": {
"colab": {},
"colab_type": "code",
"id": "nhmYvLmUxSqU"
},
"outputs": [],
"source": [
"import pandas as pd\n",
"import numpy as np\n",
"import collections\n",
"from sklearn import preprocessing\n",
"from sklearn.model_selection import train_test_split\n",
"from sklearn.metrics import accuracy_score, confusion_matrix\n",
"from sklearn.utils import shuffle\n",
"from witwidget.notebook.visualization import WitWidget, WitConfigBuilder"
]
},
{
"cell_type": "code",
"execution_count": 2,
"metadata": {
"colab": {},
"colab_type": "code",
"id": "oVhFQBvggsio"
},
"outputs": [
{
"name": "stdout",
"output_type": "stream",
"text": [
"--2020-09-13 04:39:03-- https://files.consumerfinance.gov/hmda-historic-loan-data/hmda_2017_ny_all-records_labels.zip\n",
"Resolving files.consumerfinance.gov (files.consumerfinance.gov)... 13.224.11.76, 13.224.11.92, 13.224.11.24, ...\n",
"Connecting to files.consumerfinance.gov (files.consumerfinance.gov)|13.224.11.76|:443... connected.\n",
"HTTP request sent, awaiting response... 200 OK\n",
"Length: 17466285 (17M) [application/zip]\n",
"Saving to: ‘hmda_2017_ny_all-records_labels.zip’\n",
"\n",
"hmda_2017_ny_all-re 100%[===================>] 16.66M 14.4MB/s in 1.2s \n",
"\n",
"2020-09-13 04:39:05 (14.4 MB/s) - ‘hmda_2017_ny_all-records_labels.zip’ saved [17466285/17466285]\n",
"\n",
"Archive: hmda_2017_ny_all-records_labels.zip\n",
" inflating: hmda_2017_ny_all-records_labels.csv \n"
]
}
],
"source": [
"!wget https://files.consumerfinance.gov/hmda-historic-loan-data/hmda_2017_ny_all-records_labels.zip\n",
"!unzip hmda_2017_ny_all-records_labels.zip"
]
},
{
"cell_type": "markdown",
"metadata": {
"colab_type": "text",
"id": "uFyKHeHZD1e6"
},
"source": [
"# Process the Data\n",
"\n",
"In this section, you **don't need to write any code**. We suggest you read through the cells to understand how the dataset is processed.\n",
"\n",
"Here, we start by importing the dataset into a Pandas dataframe. Then we process the data to exclude incomplete information and make a simple binary classification of loan approvals. We then create two datasets, one complete and one where 90% of female applicants are removed."
]
},
{
"cell_type": "code",
"execution_count": 3,
"metadata": {
"colab": {},
"colab_type": "code",
"id": "LSsrdPdyCVYn"
},
"outputs": [],
"source": [
"# Set column dtypes for Pandas\n",
"column_names = collections.OrderedDict({\n",
" 'as_of_year': np.int16,\n",
" 'agency_abbr': 'category',\n",
" 'loan_type': 'category',\n",
" 'property_type': 'category',\n",
" 'loan_purpose': 'category',\n",
" 'owner_occupancy': np.int8,\n",
" 'loan_amt_000s': np.float64,\n",
" 'preapproval': 'category',\n",
" 'county_code': np.float64,\n",
" 'applicant_income_00s': np.float64,\n",
" 'purchaser_type': 'category',\n",
" 'hoepa_status': 'category',\n",
" 'lien_status': 'category',\n",
" 'population': np.float64,\n",
" 'ffiec_median_fam_income': np.float64,\n",
" 'tract_to_msamd_income': np.float64,\n",
" 'num_of_owner_occupied_units': np.float64,\n",
" 'number_of_1_to_4_family_units': np.float64,\n",
" 'approved': np.int8, \n",
" 'applicant_race_name_3': 'category',\n",
" 'applicant_race_name_4': 'category',\n",
" 'applicant_race_name_5': 'category',\n",
" 'co_applicant_race_name_3': 'category',\n",
" 'co_applicant_race_name_4': 'category',\n",
" 'co_applicant_race_name_5': 'category'\n",
"})\n",
"\n",
"# Import the CSV into a dataframe\n",
"data = pd.read_csv('hmda_2017_ny_all-records_labels.csv', dtype=column_names)\n",
"data = shuffle(data, random_state=2)"
]
},
{
"cell_type": "markdown",
"metadata": {
"colab_type": "text",
"id": "5fMc5a2eY3Kh"
},
"source": [
"## Extract columns and create dummy dataframes\n",
"\n",
"We first specify which columns to keep then drop the columns that don't have `loan originated` or `loan denied`, to make this a simple binary classification.\n",
"\n",
"We then create two dataframes `binary_df` and `bad_binary_df`. The first will include all the data, and the second will have 90% of female applicants removed, respectively. We then convert them into \"dummy\" dataframes to turn categorical string features into simple 0/1 features and normalize all the columns."
]
},
{
"cell_type": "code",
"execution_count": 4,
"metadata": {
"colab": {},
"colab_type": "code",
"id": "qWNJwq2-Htxz"
},
"outputs": [],
"source": [
"# Only use a subset of the columns for these models\n",
"text_columns_to_keep = [\n",
" 'agency_name',\n",
" 'loan_type_name',\n",
" 'property_type_name',\n",
" 'loan_purpose_name',\n",
" 'owner_occupancy_name',\n",
" 'applicant_ethnicity_name',\n",
" 'applicant_race_name_1',\n",
" 'applicant_sex_name', \n",
"]\n",
"numeric_columns_to_keep = [\n",
" 'loan_amount_000s',\n",
" 'applicant_income_000s',\n",
" 'population',\n",
" 'minority_population',\n",
" 'hud_median_family_income' \n",
"]\n",
"\n",
"columns_to_keep = text_columns_to_keep + numeric_columns_to_keep + ['action_taken_name']\n",
"\n",
"# Drop columns with incomplete information and drop columns that don't have loan orignated or denied, to make this a simple binary classification\n",
"df = data[columns_to_keep].dropna()\n",
"binary_df = df[df.action_taken_name.isin(['Loan originated', 'Application denied by financial institution'])].copy()\n",
"binary_df.loc[:,'loan_granted'] = np.where(binary_df['action_taken_name'] == 'Loan originated', 1, 0)\n",
"binary_df = binary_df.drop(columns=['action_taken_name'])\n",
"\n",
"# Drop 90% of loaned female applicants for a \"bad training data\" version\n",
"loaned_females = (binary_df['applicant_sex_name'] == 'Female') & (binary_df['loan_granted'] == 1)\n",
"bad_binary_df = binary_df.drop(binary_df[loaned_females].sample(frac=.9).index)"
]
},
{
"cell_type": "code",
"execution_count": 5,
"metadata": {
"colab": {},
"colab_type": "code",
"id": "ic6mWTvENrLd"
},
"outputs": [
{
"name": "stdout",
"output_type": "stream",
"text": [
"1 223026\n",
"0 63001\n",
"Name: loan_granted, dtype: int64\n"
]
}
],
"source": [
"# Now lets' see the distribution of approved / denied classes (0: denied, 1: approved)\n",
"print(binary_df['loan_granted'].value_counts())"
]
},
{
"cell_type": "code",
"execution_count": 6,
"metadata": {
"colab": {},
"colab_type": "code",
"id": "6h3kQmIqMLYr"
},
"outputs": [],
"source": [
"# Turn categorical string features into simple 0/1 features (like turning \"sex\" into \"sex_male\" and \"sex_female\")\n",
"dummies_df = pd.get_dummies(binary_df, columns=text_columns_to_keep)\n",
"dummies_df = dummies_df.sample(frac=1).reset_index(drop=True)\n",
"\n",
"bad_dummies_df = pd.get_dummies(bad_binary_df, columns=text_columns_to_keep)\n",
"bad_dummies_df = bad_dummies_df.sample(frac=1).reset_index(drop=True)"
]
},
{
"cell_type": "code",
"execution_count": 7,
"metadata": {
"colab": {},
"colab_type": "code",
"id": "3VfdY4PzWOoI"
},
"outputs": [],
"source": [
"# Normalize the numeric columns so that they all have the same scale to simplify modeling/training\n",
"def normalize():\n",
" min_max_scaler = preprocessing.MinMaxScaler()\n",
" column_names_to_normalize = ['loan_amount_000s', 'applicant_income_000s', 'minority_population', 'hud_median_family_income', 'population']\n",
" x = dummies_df[column_names_to_normalize].values\n",
" x_scaled = min_max_scaler.fit_transform(x)\n",
" df_temp = pd.DataFrame(x_scaled, columns=column_names_to_normalize, index = dummies_df.index)\n",
" dummies_df[column_names_to_normalize] = df_temp\n",
"\n",
" x = bad_dummies_df[column_names_to_normalize].values\n",
" x_scaled = min_max_scaler.fit_transform(x)\n",
" bad_df_temp = pd.DataFrame(x_scaled, columns=column_names_to_normalize, index = bad_dummies_df.index)\n",
" bad_dummies_df[column_names_to_normalize] = bad_df_temp\n",
"\n",
"normalize()"
]
},
{
"cell_type": "markdown",
"metadata": {
"colab_type": "text",
"id": "m20NBqsMaMkx"
},
"source": [
"## Get the Train & Test Data\n",
"\n",
"Now, let's get the train and test data for our models.\n",
"\n",
"For the **first** model, you'll use `train_data` and `train_labels`.\n",
"\n",
"For the **second** model, you'll use `limited_train_data` and `limited_train_labels`."
]
},
{
"cell_type": "code",
"execution_count": 8,
"metadata": {
"colab": {},
"colab_type": "code",
"id": "Np8JM4KINnKC"
},
"outputs": [],
"source": [
"# Get the training data & labels\n",
"test_data_with_labels = dummies_df\n",
"\n",
"train_data = dummies_df\n",
"train_labels = train_data['loan_granted']\n",
"train_data = train_data.drop(columns=['loan_granted'])\n",
"\n",
"# Get the bad (limited) training data and labels\n",
"limited_train_data = bad_dummies_df\n",
"limited_train_labels = limited_train_data['loan_granted']\n",
"limited_train_data = bad_dummies_df.drop(columns=['loan_granted'])\n",
"\n",
"# Split the data into train / test sets for Model 1\n",
"x,y = train_data,train_labels\n",
"train_data,test_data,train_labels,test_labels = train_test_split(x,y)\n",
"\n",
"# Split the bad data into train / test sets for Model 2\n",
"lim_x,lim_y=limited_train_data,limited_train_labels\n",
"limited_train_data,limited_test_data,limited_train_labels,limited_test_labels = train_test_split(lim_x,lim_y)"
]
},
{
"cell_type": "markdown",
"metadata": {
"colab_type": "text",
"id": "MyUxXszu0Mp0"
},
"source": [
"# Create and train your TensorFlow models\n",
"\n",
"In this section, you will write code to train two TensorFlow Keras models."
]
},
{
"cell_type": "markdown",
"metadata": {
"colab_type": "text",
"id": "K685pKOMUPQD"
},
"source": [
"## Train your first model on the complete dataset.\n",
"\n",
"* **Important**: your first model should be named **model**.\n",
"* The data will come from `train_data` and `train_labels`.\n",
"\n",
"If you get stuck, you can view the documentation [here](https://www.tensorflow.org/api_docs/python/tf/keras/Sequential)."
]
},
{
"cell_type": "code",
"execution_count": 9,
"metadata": {
"colab": {},
"colab_type": "code",
"id": "PvgHgZ-agsi_"
},
"outputs": [],
"source": [
"# import TF modules\n",
"from tensorflow.keras import layers\n",
"from tensorflow.keras import initializers\n",
"from tensorflow.keras import optimizers\n",
"from tensorflow.keras.models import Sequential\n",
"from tensorflow.keras.layers import Dense"
]
},
{
"cell_type": "code",
"execution_count": 10,
"metadata": {
"colab": {},
"colab_type": "code",
"id": "l4qrBBr5bUSK"
},
"outputs": [
{
"name": "stdout",
"output_type": "stream",
"text": [
"Epoch 1/10\n",
"95/95 [==============================] - 4s 44ms/step - loss: 0.1629 - accuracy: 0.7821 - val_loss: 0.1539 - val_accuracy: 0.7841\n",
"Epoch 2/10\n",
"95/95 [==============================] - 4s 39ms/step - loss: 0.1517 - accuracy: 0.7895 - val_loss: 0.1524 - val_accuracy: 0.7893\n",
"Epoch 3/10\n",
"95/95 [==============================] - 2s 25ms/step - loss: 0.1507 - accuracy: 0.7920 - val_loss: 0.1516 - val_accuracy: 0.7904\n",
"Epoch 4/10\n",
"95/95 [==============================] - 4s 39ms/step - loss: 0.1502 - accuracy: 0.7927 - val_loss: 0.1513 - val_accuracy: 0.7910\n",
"Epoch 5/10\n",
"95/95 [==============================] - 5s 49ms/step - loss: 0.1500 - accuracy: 0.7926 - val_loss: 0.1513 - val_accuracy: 0.7907\n",
"Epoch 6/10\n",
"95/95 [==============================] - 4s 45ms/step - loss: 0.1499 - accuracy: 0.7928 - val_loss: 0.1507 - val_accuracy: 0.7906\n",
"Epoch 7/10\n",
"95/95 [==============================] - 4s 43ms/step - loss: 0.1497 - accuracy: 0.7931 - val_loss: 0.1508 - val_accuracy: 0.7908\n",
"Epoch 8/10\n",
"95/95 [==============================] - 5s 48ms/step - loss: 0.1495 - accuracy: 0.7937 - val_loss: 0.1506 - val_accuracy: 0.7911\n",
"Epoch 9/10\n",
"95/95 [==============================] - 3s 35ms/step - loss: 0.1494 - accuracy: 0.7938 - val_loss: 0.1507 - val_accuracy: 0.7906\n",
"Epoch 10/10\n",
"95/95 [==============================] - 4s 44ms/step - loss: 0.1493 - accuracy: 0.7939 - val_loss: 0.1506 - val_accuracy: 0.7907\n"
]
},
{
"data": {
"text/plain": [
"<tensorflow.python.keras.callbacks.History at 0x7fc80088dd90>"
]
},
"execution_count": 10,
"metadata": {},
"output_type": "execute_result"
}
],
"source": [
"# This is the size of the array you'll be feeding into our model for each example\n",
"input_size = len(train_data.iloc[0])\n",
"\n",
"# Train the first model on the complete dataset. Use `train_data` for your data and `train_labels` for you labels.\n",
"\n",
"# ---- TODO ---------\n",
"# create the model = Sequential()\n",
"# model.add (your layers)\n",
"# model.compile\n",
"# model.fit\n",
"\n",
"# Important: your first model should be named model\n",
"model = Sequential() \n",
"model.add(layers.Dense(200, input_shape=(input_size,), activation='relu'))\n",
"model.add(layers.Dense(50, activation='relu'))\n",
"model.add(layers.Dense(20, activation='relu'))\n",
"model.add(layers.Dense(1, activation='sigmoid'))\n",
"# The data will come from train_data and train_labels.\n",
"model.compile(loss='mean_squared_error', optimizer='adam', metrics=['accuracy'])\n",
"model.fit(train_data, train_labels, epochs=10, batch_size=2048, validation_split=0.1)"
]
},
{
"cell_type": "code",
"execution_count": 11,
"metadata": {
"colab": {},
"colab_type": "code",
"id": "CWGEGaxPgsjD"
},
"outputs": [
{
"name": "stdout",
"output_type": "stream",
"text": [
"WARNING:tensorflow:From /opt/conda/lib/python3.7/site-packages/tensorflow/python/training/tracking/tracking.py:111: Model.state_updates (from tensorflow.python.keras.engine.training) is deprecated and will be removed in a future version.\n",
"Instructions for updating:\n",
"This property should not be used in TensorFlow 2.0, as updates are applied automatically.\n",
"WARNING:tensorflow:From /opt/conda/lib/python3.7/site-packages/tensorflow/python/training/tracking/tracking.py:111: Layer.updates (from tensorflow.python.keras.engine.base_layer) is deprecated and will be removed in a future version.\n",
"Instructions for updating:\n",
"This property should not be used in TensorFlow 2.0, as updates are applied automatically.\n",
"INFO:tensorflow:Assets written to: saved_model/my_model/assets\n"
]
}
],
"source": [
"# Save your model\n",
"!mkdir -p saved_model\n",
"model.save('saved_model/my_model') "
]
},
{
"cell_type": "code",
"execution_count": 12,
"metadata": {
"colab": {},
"colab_type": "code",
"id": "hg0bnNVwgsjF"
},
"outputs": [
{
"name": "stdout",
"output_type": "stream",
"text": [
"Model 1 Accuracy: 79.42%\n"
]
}
],
"source": [
"# Get predictions on the test set and print the accuracy score (Model 1)\n",
"y_pred = model.predict(test_data)\n",
"acc = accuracy_score(test_labels, y_pred.round())\n",
"print(\"Model 1 Accuracy: %.2f%%\" % (acc * 100.0))"
]
},
{
"cell_type": "markdown",
"metadata": {
"colab_type": "text",
"id": "U2hPhuA-UXTT"
},
"source": [
"## Train your second model on the limited datset.\n",
"\n",
"* **Important**: your second model should be named **limited_model**.\n",
"* The data will come from `limited_train_data` and `limited_train_labels`.\n",
"\n",
"\n",
"If you get stuck, you can view the documentation [here](https://www.tensorflow.org/api_docs/python/tf/keras/Sequential)."
]
},
{
"cell_type": "code",
"execution_count": 13,
"metadata": {
"colab": {},
"colab_type": "code",
"id": "NP8cr7JvgsjH"
},
"outputs": [
{
"name": "stdout",
"output_type": "stream",
"text": [
"Epoch 1/10\n",
"74/74 [==============================] - 4s 47ms/step - loss: 0.1695 - accuracy: 0.7611 - val_loss: 0.1529 - val_accuracy: 0.7856\n",
"Epoch 2/10\n",
"74/74 [==============================] - 3s 39ms/step - loss: 0.1538 - accuracy: 0.7836 - val_loss: 0.1518 - val_accuracy: 0.7879\n",
"Epoch 3/10\n",
"74/74 [==============================] - 3s 34ms/step - loss: 0.1529 - accuracy: 0.7870 - val_loss: 0.1514 - val_accuracy: 0.7892\n",
"Epoch 4/10\n",
"74/74 [==============================] - 2s 33ms/step - loss: 0.1523 - accuracy: 0.7878 - val_loss: 0.1514 - val_accuracy: 0.7885\n",
"Epoch 5/10\n",
"74/74 [==============================] - 3s 37ms/step - loss: 0.1521 - accuracy: 0.7884 - val_loss: 0.1514 - val_accuracy: 0.7886\n",
"Epoch 6/10\n",
"74/74 [==============================] - 3s 39ms/step - loss: 0.1519 - accuracy: 0.7887 - val_loss: 0.1513 - val_accuracy: 0.7889\n",
"Epoch 7/10\n",
"74/74 [==============================] - 3s 44ms/step - loss: 0.1517 - accuracy: 0.7887 - val_loss: 0.1519 - val_accuracy: 0.7877\n",
"Epoch 8/10\n",
"74/74 [==============================] - 3s 39ms/step - loss: 0.1516 - accuracy: 0.7886 - val_loss: 0.1509 - val_accuracy: 0.7897\n",
"Epoch 9/10\n",
"74/74 [==============================] - 3s 44ms/step - loss: 0.1516 - accuracy: 0.7888 - val_loss: 0.1510 - val_accuracy: 0.7885\n",
"Epoch 10/10\n",
"74/74 [==============================] - 3s 41ms/step - loss: 0.1514 - accuracy: 0.7891 - val_loss: 0.1510 - val_accuracy: 0.7886\n"
]
},
{
"data": {
"text/plain": [
"<tensorflow.python.keras.callbacks.History at 0x7fc7cc3e4110>"
]
},
"execution_count": 13,
"metadata": {},
"output_type": "execute_result"
}
],
"source": [
"# Train your second model on the limited dataset. Use `limited_train_data` for your data and `limited_train_labels` for your labels.\n",
"# Use the same input_size for the limited_model\n",
"\n",
"# ---- TODO ---------\n",
"# create the limited_model = Sequential()\n",
"# limited_model.add (your layers)\n",
"# limited_model.compile\n",
"# limited_model.fit\n",
"\n",
"# Important: your second model should be named limited_model.\n",
"limited_model = Sequential()\n",
"limited_model.add(layers.Dense(200, input_shape=(input_size,), activation='relu'))\n",
"limited_model.add(layers.Dense(50, activation='relu'))\n",
"limited_model.add(layers.Dense(20, activation='relu'))\n",
"limited_model.add(layers.Dense(1, activation='sigmoid'))\n",
"limited_model.compile(loss='mean_squared_error', optimizer='adam', metrics=['accuracy'])\n",
"# The data will come from limited_train_data and limited_train_labels.\n",
"limited_model.fit(limited_train_data, limited_train_labels, epochs=10, batch_size=2048, validation_split=0.1)"
]
},
{
"cell_type": "code",
"execution_count": 14,
"metadata": {
"colab": {},
"colab_type": "code",
"id": "5UauXNlMgsjK"
},
"outputs": [
{
"name": "stdout",
"output_type": "stream",
"text": [
"INFO:tensorflow:Assets written to: saved_limited_model/my_limited_model/assets\n"
]
}
],
"source": [
"# Save your model\n",
"!mkdir -p saved_limited_model\n",
"limited_model.save('saved_limited_model/my_limited_model') "
]
},
{
"cell_type": "code",
"execution_count": 15,
"metadata": {
"colab": {},
"colab_type": "code",
"id": "n0UxiCcygsjM"
},
"outputs": [
{
"name": "stdout",
"output_type": "stream",
"text": [
"Model 2 Accuracy: 79.00%\n"
]
}
],
"source": [
"# Get predictions on the test set and print the accuracy score (Model 2)\n",
"limited_y_pred = limited_model.predict(limited_test_data)\n",
"acc = accuracy_score(limited_test_labels, limited_y_pred.round())\n",
"print(\"Model 2 Accuracy: %.2f%%\" % (acc * 100.0))"
]
},
{
"cell_type": "markdown",
"metadata": {
"colab_type": "text",
"id": "-5X33HRf0b2C"
},
"source": [
"# Deploy your models to the AI Platform\n",
"\n",
"In this section, you will first need to create a Cloud Storage bucket to store your models, then you will use gcloud commands to copy them over.\n",
"\n",
"You will then create two AI Platform model resources and their associated versions."
]
},
{
"cell_type": "code",
"execution_count": 16,
"metadata": {
"colab": {},
"colab_type": "code",
"id": "Jfp8H0esC6k_"
},
"outputs": [],
"source": [
"# ---- TODO ---------\n",
"\n",
"# Fill out this information:\n",
"\n",
"GCP_PROJECT = 'qwiklabs-gcp-01-e1542ddae711' # change with your project id\n",
"MODEL_BUCKET = 'gs://qwiklabs-gcp-01-e1542ddae711' # change with gs://<your project id>\n",
"MODEL_NAME = 'complete_model' #do not modify \n",
"LIM_MODEL_NAME = 'limited_model' #do not modify\n",
"VERSION_NAME = 'v1'\n",
"REGION = 'us-central1'"
]
},
{
"cell_type": "code",
"execution_count": 17,
"metadata": {
"colab": {},
"colab_type": "code",
"id": "NJOTCAsLDjcF"
},
"outputs": [
{
"name": "stdout",
"output_type": "stream",
"text": [
"Copying file://./saved_model/my_model/saved_model.pb [Content-Type=application/octet-stream]...\n",
"Copying file://./saved_model/my_model/variables/variables.index [Content-Type=application/octet-stream]...\n",
"Copying file://./saved_model/my_model/variables/variables.data-00000-of-00001 [Content-Type=application/octet-stream]...\n",
"- [3 files][332.2 KiB/332.2 KiB] \n",
"Operation completed over 3 objects/332.2 KiB. \n",
"Copying file://./saved_limited_model/my_limited_model/saved_model.pb [Content-Type=application/octet-stream]...\n",
"Copying file://./saved_limited_model/my_limited_model/variables/variables.index [Content-Type=application/octet-stream]...\n",
"Copying file://./saved_limited_model/my_limited_model/variables/variables.data-00000-of-00001 [Content-Type=application/octet-stream]...\n",
"- [3 files][332.9 KiB/332.9 KiB] \n",
"Operation completed over 3 objects/332.9 KiB. \n"
]
}
],
"source": [
"# Copy your model files to Cloud Storage (these file paths are your 'origin' for the AI Platform Model)\n",
"!gsutil cp -r ./saved_model $MODEL_BUCKET\n",
"!gsutil cp -r ./saved_limited_model $MODEL_BUCKET"
]
},
{
"cell_type": "code",
"execution_count": 18,
"metadata": {
"colab": {},
"colab_type": "code",
"id": "dbGP-3qIDoza"
},
"outputs": [
{
"name": "stdout",
"output_type": "stream",
"text": [
"Updated property [core/project].\n"
]
}
],
"source": [
"# Configure gcloud to use your project\n",
"!gcloud config set project $GCP_PROJECT"
]
},
{
"cell_type": "markdown",
"metadata": {
"colab_type": "text",
"id": "V1RF5Ga_HAva"
},
"source": [
"## Create your first AI Platform model: **complete_model**\n",
"\n",
"Here's what you will need to create your AI Platform model:\n",
"\n",
"* Version (`VERSION_NAME`)\n",
"* Model (`MODEL_NAME`=`complete_model`)\n",
"* Framework (`TensorFlow`)\n",
"* Runtime version (`2.1`)\n",
"* Origin (directory path to your model in the Cloud Storage bucket)\n",
"* Staging-bucket (`MODEL_BUCKET`)\n",
"* Python version (`3.7`)\n"
]
},
{
"cell_type": "markdown",
"metadata": {
"colab_type": "text",
"id": "LGtP39EAgd9N"
},
"source": [
"1. You will first need to create a model resource with the name `$MODEL_NAME` and region `$REGION`.\n",
"\n",
"2. Then you will create a version for your model with the information specified above.\n",
"\n",
"Be sure to name your first model **complete_model**.\n",
"\n",
"If you get stuck, you can always find the documentation for this [here](https://cloud.google.com/ai-platform/prediction/docs/deploying-models#gcloud).\n",
"\n",
"To use bash in the code cells, you can put a `!` before the command (as seen in cells above) and use a `$` in front of your environment variables."
]
},
{
"cell_type": "code",
"execution_count": 19,
"metadata": {
"colab": {},
"colab_type": "code",
"id": "BSfwEaE8DpOP"
},
"outputs": [
{
"name": "stdout",
"output_type": "stream",
"text": [
"Using endpoint [https://ml.googleapis.com/]\n",
"Created ml engine model [projects/qwiklabs-gcp-01-e1542ddae711/models/complete_model].\n"
]
}
],
"source": [
"# 1. Create an AI Platform model resource for your COMPLETE model\n",
"\n",
"# ---- TODO ---------\n",
"!gcloud ai-platform models create $MODEL_NAME --regions $REGION"
]
},
{
"cell_type": "code",
"execution_count": 20,
"metadata": {
"colab": {},
"colab_type": "code",
"id": "QN6oEh1TX0Bf"
},
"outputs": [
{
"name": "stdout",
"output_type": "stream",
"text": [
"Using endpoint [https://ml.googleapis.com/]\n",
"Creating version (this might take a few minutes)......done. \n"
]
}
],
"source": [
"# 2. Now create a version. This will take a couple of minutes to deploy.\n",
"\n",
"# ---- TODO ------\n",
"!gcloud ai-platform versions create $VERSION_NAME \\\n",
"--model=$MODEL_NAME \\\n",
"--framework='Tensorflow' \\\n",
"--runtime-version=2.1 \\\n",
"--origin=$MODEL_BUCKET/saved_model/my_model \\\n",
"--staging-bucket=$MODEL_BUCKET \\\n",
"--python-version=3.7"
]
},
{
"cell_type": "markdown",
"metadata": {
"colab_type": "text",
"id": "TNCuzUbsKuUv"
},
"source": [
"## Create your second AI Platform model: **limited_model**\n",
"\n",
"Here's what you will need to create your AI Platform model:\n",
"\n",
"* Version (`VERSION_NAME`)\n",
"* Model (`LIM_MODEL_NAME`)\n",
"* Framework (`TensorFlow`)\n",
"* Runtime version (`2.1`)\n",
"* Origin (directory path to your second model in the Cloud Storage bucket)\n",
"* Staging-bucket (`MODEL_BUCKET`)\n",
"* Python version (`3.7`)"
]
},
{
"cell_type": "markdown",
"metadata": {
"colab_type": "text",
"id": "kHCNMxEtgVII"
},
"source": [
"1. You will first need to create a model resource with the name `$LIM_MODEL_NAME` and region `$REGION`.\n",
"\n",
"2. Then you will create a version for your model with the information specified above.\n",
"\n",
"Be sure to name your second model **limited_model**.\n",
"\n",
"If you get stuck, you can always find the documentation for this [here](https://cloud.google.com/ai-platform/prediction/docs/deploying-models#gcloud_1).\n",
"\n",
"To use bash in the code cells, you can put a `!` before the command (as seen in cells above) and use a `$` in front of your environment variables. "
]
},
{
"cell_type": "code",
"execution_count": 21,
"metadata": {
"colab": {},
"colab_type": "code",
"id": "xuPue_4Mgsjd"
},
"outputs": [
{
"name": "stdout",
"output_type": "stream",
"text": [
"Using endpoint [https://ml.googleapis.com/]\n",
"Created ml engine model [projects/qwiklabs-gcp-01-e1542ddae711/models/limited_model].\n"
]
}
],
"source": [
"# 1. Create an AI Platform model resource for your LIMITED model\n",
"\n",
"# ---- TODO ---------\n",
"!gcloud ai-platform models create $LIM_MODEL_NAME --regions $REGION"
]
},
{
"cell_type": "code",
"execution_count": 22,
"metadata": {
"colab": {},
"colab_type": "code",
"id": "IMF5kzNjYBys"
},
"outputs": [
{
"name": "stdout",
"output_type": "stream",
"text": [
"Using endpoint [https://ml.googleapis.com/]\n",
"Creating version (this might take a few minutes)......done. \n"
]
}
],
"source": [
"# 2. Now create a version. This will take a couple of minutes to deploy.\n",
"\n",
"# ---- TODO ------\n",
"!gcloud ai-platform versions create $VERSION_NAME \\\n",
"--model=$LIM_MODEL_NAME \\\n",
"--framework='Tensorflow' \\\n",
"--runtime-version=2.1 \\\n",
"--origin=$MODEL_BUCKET/saved_limited_model/my_limited_model \\\n",
"--staging-bucket=$MODEL_BUCKET \\\n",
"--python-version=3.7"
]
},
{
"cell_type": "markdown",
"metadata": {
"colab_type": "text",
"id": "4IZAJ1LrqUha"
},
"source": [
"# Using the What-if Tool to interpret your model\n",
"Once your models have deployed, you're now ready to connect them to the What-if Tool using the WitWidget. \n",
"\n",
"We've provided the Config Builder code and a couple of functions to get the class predictions from the models, which are necessary inputs for the WIT. If you've successfully deployed and saved your models, **you won't need to modify any code in this cell**."
]
},
{
"cell_type": "code",
"execution_count": 26,
"metadata": {
"colab": {},
"colab_type": "code",
"id": "bQrAb7lbOhvI"
},
"outputs": [
{
"data": {
"text/html": [
"<style>.container { width:100% !important; }</style>"
],
"text/plain": [
"<IPython.core.display.HTML object>"
]
},
"metadata": {},
"output_type": "display_data"
},
{
"data": {
"application/vnd.jupyter.widget-view+json": {
"model_id": "de56fa62d2be45a3badba1c1920b44c2",
"version_major": 2,
"version_minor": 0
},
"text/plain": [
"WitWidget(config={'model_type': 'classification', 'label_vocab': ['denied', 'accepted'], 'feature_names': ['lo…"
]
},
"metadata": {},
"output_type": "display_data"
}
],
"source": [
"#@title Show model results in WIT\n",
"num_datapoints = 1000 #@param {type: \"number\"}\n",
"\n",
"# Column indices to strip out from data from WIT before passing it to the model.\n",
"columns_not_for_model_input = [\n",
" test_data_with_labels.columns.get_loc('loan_granted'),\n",
"]\n",
"\n",
"# Return model predictions.\n",
"def custom_predict(examples_to_infer):\n",
" # Delete columns not used by model\n",
" model_inputs = np.delete(\n",
" np.array(examples_to_infer), columns_not_for_model_input, axis=1).tolist()\n",
" # Get the class predictions from the model.\n",
" preds = model.predict(model_inputs)\n",
" preds = [[1 - pred[0], pred[0]] for pred in preds]\n",
" return preds\n",
" \n",
"# Return 'limited' model predictions.\n",
"def limited_custom_predict(examples_to_infer):\n",
" # Delete columns not used by model\n",
" model_inputs = np.delete(\n",
" np.array(examples_to_infer), columns_not_for_model_input, axis=1).tolist()\n",
" # Get the class predictions from the model.\n",
" preds = limited_model.predict(model_inputs)\n",
" preds = [[1 - pred[0], pred[0]] for pred in preds]\n",
" return preds\n",
"\n",
"examples_for_wit = test_data_with_labels.values.tolist()\n",
"column_names = test_data_with_labels.columns.tolist()\n",
"\n",
"config_builder = (WitConfigBuilder(\n",
" examples_for_wit[:num_datapoints],feature_names=column_names)\n",
" .set_custom_predict_fn(limited_custom_predict)\n",
" .set_target_feature('loan_granted')\n",
" .set_label_vocab(['denied', 'accepted'])\n",
" .set_compare_custom_predict_fn(custom_predict)\n",
" .set_model_name('limited')\n",
" .set_compare_model_name('complete'))\n",
"WitWidget(config_builder, height=800)"
]
},
{
"cell_type": "code",
"execution_count": 24,
"metadata": {},
"outputs": [
{
"ename": "NameError",
"evalue": "name 'bad_custom_predict' is not defined",
"output_type": "error",
"traceback": [
"\u001b[0;31m---------------------------------------------------------------------------\u001b[0m",
"\u001b[0;31mNameError\u001b[0m Traceback (most recent call last)",
"\u001b[0;32m<ipython-input-24-6c8de7807d1a>\u001b[0m in \u001b[0;36m<module>\u001b[0;34m\u001b[0m\n\u001b[1;32m 1\u001b[0m config_builder = (WitConfigBuilder(\n\u001b[1;32m 2\u001b[0m examples_for_wit[:num_datapoints],feature_names=column_names)\n\u001b[0;32m----> 3\u001b[0;31m \u001b[0;34m.\u001b[0m\u001b[0mset_custom_predict_fn\u001b[0m\u001b[0;34m(\u001b[0m\u001b[0mbad_custom_predict\u001b[0m\u001b[0;34m)\u001b[0m\u001b[0;34m\u001b[0m\u001b[0;34m\u001b[0m\u001b[0m\n\u001b[0m\u001b[1;32m 4\u001b[0m \u001b[0;34m.\u001b[0m\u001b[0mset_target_feature\u001b[0m\u001b[0;34m(\u001b[0m\u001b[0;34m'loan_granted'\u001b[0m\u001b[0;34m)\u001b[0m\u001b[0;34m\u001b[0m\u001b[0;34m\u001b[0m\u001b[0m\n\u001b[1;32m 5\u001b[0m \u001b[0;34m.\u001b[0m\u001b[0mset_label_vocab\u001b[0m\u001b[0;34m(\u001b[0m\u001b[0;34m[\u001b[0m\u001b[0;34m'denied'\u001b[0m\u001b[0;34m,\u001b[0m \u001b[0;34m'accepted'\u001b[0m\u001b[0;34m]\u001b[0m\u001b[0;34m)\u001b[0m\u001b[0;34m\u001b[0m\u001b[0;34m\u001b[0m\u001b[0m\n",
"\u001b[0;31mNameError\u001b[0m: name 'bad_custom_predict' is not defined"
]
}
],
"source": [
"#@title Show model results in WIT\n",
"num_datapoints = 1000 #@param {type: \"number\"}\n",
"\n",
"# Column indices to strip out from data from WIT before passing it to the model.\n",
"columns_not_for_model_input = [\n",
" test_data_with_labels.columns.get_loc('loan_granted'),\n",
"]\n",
"\n",
"# Return model predictions.\n",
"def custom_predict(examples_to_infer):\n",
" # Delete columns not used by model\n",
" model_inputs = np.delete(\n",
" np.array(examples_to_infer), columns_not_for_model_input, axis=1).tolist()\n",
" # Get the class predictions from the model.\n",
" preds = model.predict(model_inputs)\n",
" preds = [[1 - pred[0], pred[0]] for pred in preds]\n",
" return preds\n",
" \n",
"# Return 'limited' model predictions.\n",
"def limited_custom_predict(examples_to_infer):\n",
" # Delete columns not used by model\n",
" model_inputs = np.delete(\n",
" np.array(examples_to_infer), columns_not_for_model_input, axis=1).tolist()\n",
" # Get the class predictions from the model.\n",
" preds = limited_model.predict(model_inputs)\n",
" preds = [[1 - pred[0], pred[0]] for pred in preds]\n",
" return preds\n",
"\n",
"examples_for_wit = test_data_with_labels.values.tolist()\n",
"column_names = test_data_with_labels.columns.tolist()\n",
"\n",
"config_builder = (WitConfigBuilder(\n",
" examples_for_wit[:num_datapoints],feature_names=column_names)\n",
" .set_custom_predict_fn(bad_custom_predict)\n",
" .set_target_feature('loan_granted')\n",
" .set_label_vocab(['denied', 'accepted'])\n",
" .set_compare_custom_predict_fn(custom_predict)\n",
" .set_model_name('limited')\n",
" .set_compare_model_name('complete'))\n",
"WitWidget(config_builder, height=800)"
]
},
{
"cell_type": "code",
"execution_count": null,
"metadata": {},
"outputs": [],
"source": []
}
],
"metadata": {
"colab": {
"collapsed_sections": [],
"machine_shape": "hm",
"name": "what-if-tool-challenge.ipynb",
"provenance": []
},
"environment": {
"name": "tf2-2-3-gpu.2-3.m55",
"type": "gcloud",
"uri": "gcr.io/deeplearning-platform-release/tf2-2-3-gpu.2-3:m55"
},
"kernelspec": {
"display_name": "Python 3",
"language": "python",
"name": "python3"
},
"language_info": {
"codemirror_mode": {
"name": "ipython",
"version": 3
},
"file_extension": ".py",
"mimetype": "text/x-python",
"name": "python",
"nbconvert_exporter": "python",
"pygments_lexer": "ipython3",
"version": "3.7.8"
}
},
"nbformat": 4,
"nbformat_minor": 4
}
================================================
FILE: labs/gsp325_building-interactive-apps-with-google-assistant-challenge-lab/guide.txt
================================================
# Build Interactive Apps with Google Assistant: Challenge Lab
# https://www.qwiklabs.com/focuses/11881?parent=catalog
# Task 1: Create the Cloud Function for the Magic Eight Ball app for Google Assistant
# TODO 1.1: Create a python Cloud Function
- Go to Cloud Function (Navigation > Cloud Function)
- Create Function
- *in create function section (Configuration)*
- Function name: magic_eight_ball
- Authentical: Allow unauthenticated invocations > SAVE
- NEXT
- *in create function section (Code)*
- Runtime: Python 3.7
- Entry point: magic_eight_ball
- main.py and requirements.txt: paste given code
- Deploy
# TODO 1.2: Grant Cloud Functions Invoker to allUsers.
- Click function name (magic_eight_ball)
- Go to Permission tab
- Check box row that contains allUser with Member: allUser and Role: Cloud Function Invoker
# Task 2: Create the Lab Magic 8 Ball app for Google Assistant
# TODO 2.1: Create a fulfillment that enables a webhook to your cloud function created in task 1.
- Go to Actions control (link in lab) or https://console.actions.google.com/
- Click New Project and Choose your GCP Project ID
- After login, click the Action Console logo (on uppper left) and select your project
- *in action control*
- *in Action Console Overview section*
- Go to Quick Setup > Decide how your Action is invoked
- *in Invocation section*
- Display name: your initial + magic 8 ball(ignore error)
- Back to action control
- Go to Build your action > Add Action(s) > Get started > Custom Intent > Build > Login Dialogflow
- *in Diagflow* # if login take too much time, try refresh
- Create Agent
- Agent name: magic_eight_ball
- Google Project: select your project ID
- CREATE
- Go to Fullfilment (left pane) tab
- Enable webhook
- Insert URL with your Cloud Function Trigger URL (Go to your cloud function > Trigger tab > Copy the url) > SAVE
# TODO 2.2: Create Default Welcome Intent Text Response to Welcome to the lab magic 8 ball, ask me a yes or no question and I will predict the future!
- *in Diagflow*
- Click Intents (left pane)
- Click Default Welcome Intent
- Scroll to Responses section
- Click ADD RESPONSE > Text response
- Paste this: Welcome to the lab magic 8 ball, ask me a yes or no question and I will predict the future!
- SAVE
# TODO 2.3: Create Default Fallback Intent to enable Set this intent as end of conversation and enable Enable webhook call for this intent
- *in Diagflow*
- Click Intents (left pane)
- Click Default Fallback Intent
- Enable "Set this intent as end of conversation" in response section
- Enable "Enable webhook call for this intent" in fulfillment section
- SAVE
# TODO 2.4: Testing
- *in Diagflow*
- Click Integrations tab (left pane)
- Click INTEGRATION SETTINGS > TEST
- Enable Web & App Activity pop up will showed up > Visit Activity controls > Enable "Web & Activity" > Back to Test tab
- *in Action Control Test tab
- Click "Talk to <your_initial_name> magic 8 ball"
- Type this: Will I complete this challenge lab?
# Task 3: Add multilingual support to your magic_eight_ball Cloud Function
# TODO: Add multilingual support
- *in your cloud function*
- Edit
- Add code to main.py (check main_final.py file)
- DEPLOY
- *in Action Control Test tab
- Test this sentences:
- 我会完成这个挑战实验室吗
- ¿Completaré este laboratorio de desafío?
- இந்த சவால் ஆய்வகத்தை நான் முடிக்கலாமா?
================================================
FILE: labs/gsp325_building-interactive-apps-with-google-assistant-challenge-lab/main.py
================================================
import random
import logging
import google.cloud.logging
from google.cloud import translate_v2 as translate
from flask import Flask, request, make_response, jsonify
def magic_eight_ball(request):
client = google.cloud.logging.Client()
client.get_default_handler()
client.setup_logging()
choices = [
"It is certain.", "It is decidedly so.", "Without a doubt.",
"Yes - definitely.", "You may rely on it.", "As I see it, yes.",
"Most likely.", "Outlook good.", "Yes.","Signs point to yes.",
"Reply hazy, try again.", "Ask again later.",
"Better not tell you now.", "Cannot predict now.",
"Concentrate and ask again.", "Don't count on it.",
"My reply is no.", "My sources say no.", "Outlook not so good.",
"Very doubtful."
]
magic_eight_ball_response = random.choice(choices)
logging.info(magic_eight_ball_response)
return make_response(jsonify({'fulfillmentText': magic_eight_ball_response }))
================================================
FILE: labs/gsp325_building-interactive-apps-with-google-assistant-challenge-lab/main_final.py
================================================
# script for last task
import random
import logging
import google.cloud.logging
from google.cloud import translate_v2 as translate
from flask import Flask, request, make_response, jsonify
def magic_eight_ball(request):
client = google.cloud.logging.Client()
client.get_default_handler()
client.setup_logging()
choices = [
"It is certain.", "It is decidedly so.", "Without a doubt.",
"Yes - definitely.", "You may rely on it.", "As I see it, yes.",
"Most likely.", "Outlook good.", "Yes.","Signs point to yes.",
"Reply hazy, try again.", "Ask again later.",
"Better not tell you now.", "Cannot predict now.",
"Concentrate and ask again.", "Don't count on it.",
"My reply is no.", "My sources say no.", "Outlook not so good.",
"Very doubtful."
]
magic_eight_ball_response = random.choice(choices)
request_json = request.get_json()
if request_json and 'queryResult' in request_json:
question = request_json.get('queryResult').get('queryText')
# try to identify the language
language = 'en'
translate_client = translate.Client()
detected_language = translate_client.detect_language(question)
if detected_language['language'] == 'und':
language = 'en'
elif detected_language['language'] != 'en':
language = detected_language['language']
# translate if not english
if language != 'en':
logging.info(f'translating from en to {language}')
translated_text = translate_client.translate(
magic_eight_ball_response, target_language=language)
magic_eight_ball_response = translated_text['translatedText']
logging.info(magic_eight_ball_response)
return make_response(jsonify({'fulfillmentText': magic_eight_ball_response }))
================================================
FILE: labs/gsp325_building-interactive-apps-with-google-assistant-challenge-lab/readme.md
================================================
# [Build Interactive Apps with Google Assistant: Challenge Lab](https://www.qwiklabs.com/focuses/11881?parent=catalog)
## Topics tested:
* Creating an Actions project
* Setup Dialogflow
* Configure Dialogflow intents
* Use a webhook in a Dialogflow intent
* Adding code to the right place to call the Google Translate API
## Challenge scenario
As a junior developer in Jooli Inc. and recently trained with Google Cloud and Dialogflow you have been asked to help a new team (Taniwha) set up their environment. The team has asked for your help and has done some work, but needs you to complete the work.
You are expected to have the skills and knowledge for these tasks so don’t expect step-by-step guides.
================================================
FILE: labs/gsp325_building-interactive-apps-with-google-assistant-challenge-lab/requirements.txt
================================================
google-cloud-translate
google-cloud-logging
================================================
FILE: labs/gsp327_enginner-data-in-google-cloud-challenge-lab/query.sql
================================================
-- Engineer Data in Google Cloud: Challenge Lab
-- https://www.qwiklabs.com/focuses/12379?parent=catalog
-- Setup:
-- go to bigquery
-- Task 1: Clean your training data
-- Make sure:
-- Target column is called fare_amount
-- Data Cleaning Tasks:
-- Keep rows for trip_distance > 0
-- Remove rows for fare_amount > 2.5
-- Ensure that the latitudes and longitudes are reasonable for the use case. ??
-- Create a new column called total_amount from tolls_amount + fare_amount
-- Sample the dataset < 1,000,000 rows
-- Only copy fields that will be used in your model
-- 1.1 clean data, run this query:
-- start query
#standardSQL
SELECT
pickup_datetime,
pickup_longitude AS pickuplon,
pickup_latitude AS pickuplat,
dropoff_longitude AS dropofflon,
dropoff_latitude AS dropofflat,
passenger_count AS passengers,
( tolls_amount + fare_amount ) AS fare_amount
FROM
`<your_gcp_project_id>.taxirides.historical_taxi_rides_raw` -- change this
WHERE
trip_distance > 0
AND fare_amount >= 2.5
AND passenger_count > 0
AND pickup_longitude BETWEEN -75 AND -73
AND dropoff_longitude BETWEEN -75 AND -73
AND pickup_latitude BETWEEN 40 AND 42
AND dropoff_latitude BETWEEN 40 AND 42
AND RAND() < 999999 / 1031673361
-- end query
-- 1.2 save query, follow this:
- click SAVE RESULT under query editor, choose BiQquery table
- input taxi_training_data as table name
- save and check your first progress
--------------------------------------------------------------------------------
-- Task 2: Create a BQML model called taxirides.fare_model
-- build a BQML model that predicts fare_amount.
-- call the model taxirides.fare_model.
-- your model will need an RMSE of 10 or less to complete the task.
-- 2.1 create a model, run this query:
-- start query
#standardSQL
CREATE or REPLACE MODEL
taxirides.fare_model OPTIONS (model_type='linear_reg', labels=['fare_amount']) AS
WITH taxitrips AS (
SELECT *, ST_Distance(ST_GeogPoint(pickuplon, pickuplat), ST_GeogPoint(dropofflon, dropofflat)) AS euclidean
FROM `taxirides.taxi_training_data`
)
SELECT * FROM taxitrips
-- expected output: This statement created a new model named <your_gcp_project_id>:taxirides.fare_model.
-- end query
-- 2.2 evaluate model, run this query:
-- start query
#standardSQL
SELECT
SQRT(mean_squared_error) AS rmse
FROM
ML.EVALUATE (
MODEL taxirides.fare_model, (
WITH taxitrips AS (
SELECT *, ST_Distance(ST_GeogPoint(pickuplon, pickuplat), ST_GeogPoint(dropofflon, dropofflat)) AS euclidean
FROM `taxirides.taxi_training_data`
) SELECT * FROM taxitrips
)
)
-- expected result (rmse): 4.870798438873309
-- end query
-- check your second progress
--------------------------------------------------------------------------------
-- Task 3: Perform a batch prediction on new data
-- Make sure you store the results in a table called 2015_fare_amount_predictions.
-- 3.1 run his query:
-- start query
#standardSQL
CREATE or REPLACE MODEL taxirides.fare_model OPTIONS (
model_type='linear_reg',
labels=['fare_amount']
) AS WITH taxitrips AS (
SELECT
*,
ST_Distance(ST_GeogPoint(pickuplon, pickuplat), ST_GeogPoint(dropofflon, dropofflat)) AS euclidean
FROM
`taxirides.taxi_training_data`
)
SELECT * FROM taxitrips
-- end query
-- 3.2 evaluate model
-- start query
#standardSQL
SELECT
*
FROM
ML.PREDICT(
MODEL `taxirides.fare_model`,(
WITH taxitrips AS (
SELECT *, ST_Distance(ST_GeogPoint(pickuplon, pickuplat) , ST_GeogPoint(dropofflon, dropofflat)) AS euclidean
FROM `taxirides.report_prediction_data`
) SELECT * FROM taxitrips
)
)
-- end query
-- 3.3 save result, repeat step 1.2 step with table name: 2015_fare_amount_predictions
-- check your third progress
================================================
FILE: labs/gsp327_enginner-data-in-google-cloud-challenge-lab/readme.md
================================================
# [Engineer Data in Google Cloud: Challenge Lab](https://www.qwiklabs.com/focuses/12379?parent=catalog)
## Overview
Topics tested:
* Create a new BigQuery table from existing data
* Clean data for ML Model using BigQuery, Dataprep or Dataflow
* Build and tune a model in BQML
* Perform a batch prediction into a new table with BQML
## Challenge scenario
You have started a new role as a Data Engineer for TaxiCab Inc. You are expected to import some historical data to a working BigQuery dataset, and build a basic model that predicts fares based on information available when a new ride starts. Leadership is interested in building an app and estimating for users how much a ride will cost. The source data will be provided in your project.
You are expected to have the skills and knowledge for these tasks, so don't expect step-by-step guides to be provided.
================================================
FILE: labs/gsp328_serverless-cloud-run-development-challenge-lab/readme.md
================================================
# [Serverless Cloud Run Development: Challenge Lab](https://google.qwiklabs.com/focuses/14744?parent=catalog)
## Situational Overview
Pet Theory is a veterinary practice who are keen to utilise serverless architecture to update their existing systems.
In this challenge lab, you are part of the development team and have been assigned the task of migrating a service to serverless. Pay close attention to the provided instructions to successfully complete the exercise.
================================================
FILE: labs/gsp328_serverless-cloud-run-development-challenge-lab/script.sh
================================================
# Serverless Cloud Run Development: Challenge Lab
# https://www.qwiklabs.com/focuses/14744
# Provision the Qwiklabs environment
gcloud config set project \
$(gcloud projects list --format='value(PROJECT_ID)' \
--filter='qwiklabs-gcp')
gcloud config set run/region us-central1
gcloud config set run/platform managed
git clone https://github.com/rosera/pet-theory.git && cd pet-theory/lab07
# Task 1. Enable a Public Service
cd ~/pet-theory/lab07/unit-api-billing
gcloud builds submit \
--tag gcr.io/$GOOGLE_CLOUD_PROJECT/billing-staging-api:0.1
gcloud run deploy public-billing-service-460 \
--image gcr.io/$GOOGLE_CLOUD_PROJECT/billing-staging-api:0.1 \
--allow-unauthenticated
# If the check fails, try to check the progress from the checkpoints menu on the right
# If still fails, keep doing it
# Task 2. Deploy a Frontend Service
cd ~/pet-theory/lab07/staging-frontend-billing
gcloud builds submit \
--tag gcr.io/$GOOGLE_CLOUD_PROJECT/frontend-staging:0.1
gcloud run deploy frontend-staging-service-483 \
--image gcr.io/$GOOGLE_CLOUD_PROJECT/frontend-staging:0.1 \
--allow-unauthenticated
# If the check fails, try to check the progress from the checkpoints menu on the right
# If still fails, keep doing it
# Task 3. Deploy a Private Service
cd ~/pet-theory/lab07/staging-api-billing
gcloud beta run services delete public-billing-service
gcloud builds submit \
--tag gcr.io/$GOOGLE_CLOUD_PROJECT/billing-staging-api:0.2
gcloud run deploy private-billing-service-491 \
--image gcr.io/$GOOGLE_CLOUD_PROJECT/billing-staging-api:0.2 \
--no-allow-unauthenticated
BILLING_SERVICE=private-billing-service-491
BILLING_URL=$(gcloud run services describe $BILLING_SERVICE \
--format "value(status.URL)")
curl -X get -H "Authorization: Bearer $(gcloud auth print-identity-token)" $BILLING_URL
# If the check fails, try to check the progress from the checkpoints menu on the right
# If still fails, keep doing it
# Task 4. Create a Billing Service Account
gcloud iam service-accounts create billing-service-sa-581 --display-name "Billing Service Cloud Run"
# If the check fails, try to check the progress from the checkpoints menu on the right
# If still fails, keep doing it
# Task 5. Deploy the Billing Service
cd ~/pet-theory/lab07/prod-api-billing
gcloud builds submit \
--tag gcr.io/$GOOGLE_CLOUD_PROJECT/billing-prod-api:0.1
gcloud run deploy billing-prod-service-327 \
--image gcr.io/$GOOGLE_CLOUD_PROJECT/billing-prod-api:0.1 \
--no-allow-unauthenticated
gcloud run services add-iam-policy-binding billing-prod-service-327 \
--member=serviceAccount:billing-service-sa-581@$GOOGLE_CLOUD_PROJECT.iam.gserviceaccount.com \
--role=roles/run.invoker
PROD_BILLING_SERVICE=private-billing-service-491
PROD_BILLING_URL=$(gcloud run services \
describe $PROD_BILLING_SERVICE \
--format "value(status.URL)")
curl -X get -H "Authorization: Bearer \
$(gcloud auth print-identity-token)" \
$PROD_BILLING_URL
# If the check fails, try to check the progress from the checkpoints menu on the right
# If still fails, keep doing it
# Task 6. Frontend Service Account
gcloud iam service-accounts create frontend-service-sa-475 --display-name "Billing Service Cloud Run Invoker"
# If the check fails, try to check the progress from the checkpoints menu on the right
# If still fails, keep doing it
# Task 7. Redeploy the Frontend Service
cd ~/pet-theory/lab07/prod-frontend-billing
gcloud builds submit \
--tag gcr.io/$GOOGLE_CLOUD_PROJECT/frontend-prod:0.1
gcloud run deploy frontend-prod-service-818 \
--image gcr.io/$GOOGLE_CLOUD_PROJECT/frontend-prod:0.1 \
--allow-unauthenticated
gcloud run services add-iam-policy-binding frontend-prod-service-818 \
--member=serviceAccount:frontend-service-sa-475@$GOOGLE_CLOUD_PROJECT.iam.gserviceaccount.com \
--role=roles/run.invoker
# If the check fails, try to check the progress from the checkpoints menu on the right
# If still fails, keep doing it
================================================
FILE: labs/gsp329_integrate-with-machine-learning-apis-challenge-lab/analyze-images.py
================================================
# DONT CHANGE ANYTHING
# Dataset: image_classification_dataset
# Table name: image_text_detail
import os
import sys
# Import Google Cloud Library modules
from google.cloud import storage, bigquery, language, vision, translate_v2
if ('GOOGLE_APPLICATION_CREDENTIALS' in os.environ):
if (not os.path.exists(os.environ['GOOGLE_APPLICATION_CREDENTIALS'])):
print ("The GOOGLE_APPLICATION_CREDENTIALS file does not exist.\n")
exit()
else:
print ("The GOOGLE_APPLICATION_CREDENTIALS environment variable is not defined.\n")
exit()
if len(sys.argv)<3:
print('You must provide parameters for the Google Cloud project ID and Storage bucket')
print(f'python3 {sys.argv[0]}[PROJECT_NAME] [BUCKET_NAME]')
exit()
project_name = sys.argv[1]
bucket_name = sys.argv[2]
# Set up our GCS, BigQuery, and Natural Language clients
storage_client = storage.Client()
bq_client = bigquery.Client(project=project_name)
nl_client = language.LanguageServiceClient()
# Set up client objects for the vision and translate_v2 API Libraries
vision_client = vision.ImageAnnotatorClient()
translate_client = translate_v2.Client()
# Setup the BigQuery dataset and table objects
dataset_ref = bq_client.dataset('image_classification_dataset')
dataset = bigquery.Dataset(dataset_ref)
table_ref = dataset.table('image_text_detail')
table = bq_client.get_table(table_ref)
# Create an array to store results data to be inserted into the BigQuery table
rows_for_bq = []
# Get a list of the files in the Cloud Storage Bucket
files = storage_client.bucket(bucket_name).list_blobs()
bucket = storage_client.bucket(bucket_name)
print('Processing image files from GCS. This will take a few minutes..')
# Process files from Cloud Storage and save the result to send to BigQuery
for file in files:
if file.name.endswith('jpg') or file.name.endswith('png'):
file_content = file.download_as_string()
# TBD: Create a Vision API image object called image_object
# Ref: https://googleapis.dev/python/vision/latest/gapic/v1/types.html#google.cloud.vision_v1.types.Image
from google.cloud import vision_v1
import io
client = vision.ImageAnnotatorClient()
# TBD: Detect text in the image and save the response data into an object called response
# Ref: https://googleapis.dev/python/vision/latest/gapic/v1/api.html#google.cloud.vision_v1.ImageAnnotatorClient.document_text_detection
image = vision_v1.types.Image(content=file_content)
response = client.text_detection(image=image)
# Save the text content found by the vision API into a variable called text_data
text_data = response.text_annotations[0].description
# Save the text detection response data in <filename>.txt to cloud storage
file_name = file.name.split('.')[0] + '.txt'
blob = bucket.blob(file_name)
# Upload the contents of the text_data string variable to the Cloud Storage file
blob.upload_from_string(text_data, content_type='text/plain')
# Extract the description and locale data from the response file
# into variables called desc and locale
# using response object properties e.g. response.text_annotations[0].description
desc = response.text_annotations[0].description
locale = response.text_annotations[0].locale
# if the locale is English (en) save the description as the translated_txt
if locale == 'en':
translated_text = desc
else:
# TBD: For non EN locales pass the description data to the translation API
# ref: https://googleapis.dev/python/translation/latest/client.html#google.cloud.translate_v2.client.Client.translate
# Set the target_language locale to 'en')
from google.cloud import translate_v2 as translate
client = translate.Client()
translation = translate_client.translate(text_data, target_language='en')
translated_text = translation['translatedText']
print(translated_text)
# if there is response data save the original text read from the image,
# the locale, translated text, and filename
if len(response.text_annotations) > 0:
rows_for_bq.append((desc, locale, translated_text, file.name))
print('Writing Vision API image data to BigQuery...')
# Write original text, locale and translated text to BQ
# TBD: When the script is working uncomment the next line to upload results to BigQuery
errors = bq_client.insert_rows(table, rows_for_bq)
assert errors == []
================================================
FILE: labs/gsp329_integrate-with-machine-learning-apis-challenge-lab/guide.txt
================================================
# Integrate with Machine Learning APIs: Challenge Lab
# https://www.qwiklabs.com/focuses/12704?parent=catalog
# Run this in cloud shell:
export SANAME=challenge
gcloud iam service-accounts create $SANAME
gcloud projects add-iam-policy-binding $DEVSHELL_PROJECT_ID --member=serviceAccount:$SANAME@$DEVSHELL_PROJECT_ID.iam.gserviceaccount.com --role=roles/bigquery.admin
gcloud projects add-iam-policy-binding $DEVSHELL_PROJECT_ID --member=serviceAccount:$SANAME@$DEVSHELL_PROJECT_ID.iam.gserviceaccount.com --role=roles/storage.admin
gcloud iam service-accounts keys create sa-key.json --iam-account $SANAME@$DEVSHELL_PROJECT_ID.iam.gserviceaccount.com
export GOOGLE_APPLICATION_CREDENTIALS=${PWD}/sa-key.json
gsutil cp gs://$DEVSHELL_PROJECT_ID/analyze-images.py .
# Check your progress #1 and #2
# use nano or editor to modify analyze-images.py, check this file in repo folder
# After modify, run this in cloud shell:
python3 analyze-images.py $DEVSHELL_PROJECT_ID $DEVSHELL_PROJECT_ID
# Check your progress #3 and #4
# Go to BigQuery, run:
SELECT locale, COUNT(locale) as OCCURENCE FROM `<QWIKLABS_PROJECT_ID>.image_classification_dataset.image_text_detail` GROUP BY locale
# Check your progress #5
================================================
FILE: labs/gsp329_integrate-with-machine-learning-apis-challenge-lab/readme.md
================================================
# [Integrate with Machine Learning APIs](https://www.qwiklabs.com/focuses/12704?parent=catalog)
## Topics tested
* Grant the service account admin privileges for BigQuery and Cloud Storage.
* Create and download a service account credentials file to provide Google Cloud credentials to a Python application.
* Modify a Python script to extract text from image files using the Google Cloud Vision API.
* Modify a Python script to translate text using the Google Translate API.
* Check which languages are in the extracted data by executing a BigQuery SQL query.
## Challenge scenario
You have started a new role as a member of the Analytics team for Jooli Inc. You are expected to help with the development and assessment of data sets for your company's Machine Learning projects. Common tasks include preparing, cleaning, and analyzing diverse data sets.
You are expected to have the skills and knowledge for these tasks, so don't expect step-by-step guides to be provided.
================================================
FILE: labs/gsp330_implement-devops-in-google-cloud-challenge-lab/readme.md
================================================
# [Implement DevOps in Google Cloud: Challenge Lab ](https://www.qwiklabs.com/focuses/13287?parent=catalog)
## Topics tested
* Use Jenkins console logs to resolve application deployment issues.
* Deploy and a development update to a sample application for Jenkins to deply using a development pipeline.
* Deploy and test a Kubernetes Canary deployment for a sample application.
* Push the Canary application branch to master and confirm this triggers a production pipeline update.
## Challenge scenario
You have started a new role as a Junior Cloud Engineer for Jooli Inc. You're expected to help manage the Cloud infrastructure and deployment tools at Jooli. Common tasks include provisioning resources for projects and implementing new products and services to help improve Jooli's service management in real time.
================================================
FILE: labs/gsp330_implement-devops-in-google-cloud-challenge-lab/script.sh
================================================
# Implement DevOps in Google Cloud: Challenge Lab
# https://www.qwiklabs.com/focuses/13287?parent=catalog
# Open Cloud shell, run:
gcloud config set compute/zone us-east1-b
git clone https://source.developers.google.com/p/$DEVSHELL_PROJECT_ID/r/sample-app
gcloud container clusters get-credentials jenkins-cd
kubectl create clusterrolebinding cluster-admin-binding --clusterrole=cluster-admin --user=$(gcloud config get-value account)
helm repo add stable https://charts.helm.sh/stable
helm repo update
helm install cd stable/jenkins
export POD_NAME=$(kubectl get pods --namespace default -l "app.kubernetes.io/component=jenkins-master" -l "app.kubernetes.io/instance=cd" -o jsonpath="{.items[0].metadata.name}")
kubectl port-forward $POD_NAME 8080:8080 >> /dev/null &
printf $(kubectl get secret cd-jenkins -o jsonpath="{.data.jenkins-admin-password}" | base64 --decode);echo
# Note: copy the output (Jenkins password)
- Preview on Port 8000, Sign in jenkins
- username: admin
- password: see at your cloud shell output
# Back to Cloud shell, run:
cd sample-app
kubectl create ns production
kubectl apply -f k8s/production -n production
kubectl apply -f k8s/canary -n production
kubectl apply -f k8s/services -n production
kubectl get svc
kubectl get service gceme-frontend -n production
git init
git config credential.helper gcloud.sh
git remote add origin https://source.developers.google.com/p/$DEVSHELL_PROJECT_ID/r/sample-app
git config --global user.email "student-00-b41cda9e7603@qwiklabs.net"
git config --global user.name "[YOUR_USERNAME]"
git add .
git commit -m "initial commit"
git push origin master
# Back to Jenkins Dashboard > Manage Jenkins (left pane) > manage Credentials
# - Look at "Stores scoped", click Jenkins
# - Click Global credentials (unrestricted)
# - Click Add Credentials
# - Kind: Google Service Account from metadata
# - Project Name: <your_project_id>
# - Click OK
#
# Back to Jenkins Dashboard > New Item (left pane)
# Enter an item name: sample-app
# Click Multibranch Pipeline
# OK
# *in sample-app config*
# - Branch Sources: Git
# - Project Repository: https://source.developers.google.com/p/[PROJECT_ID]/r/sample-app
# - Credentials: qwiklabs service account
# - Scan Multibranch Pipeline Triggers, check "Periodically if not otherwise run"
# - Interval: 1 minute
# - SAVE # building will take long time
# # Note: Repeat if you see error msg while scanning Multibranch Pipeline Log
# - CHECK YOUR FIRST CHECKPOINT
#
# Back to Cloud Shell
git checkout -b new-feature
edit main.go
# change the version number to "2.0.0".
# example: version string = "2.0.0" (in line 46)
edit html.go
# change both lines that contains the word blue to orange
# example: <div class="card orange"> (in line 37 and 81)
# Back to Cloud Shell
git add Jenkinsfile html.go main.go
git commit -m "Version 2.0.0"
git push origin new-feature
# Check your sample-app branches from jenkins dashboard (new-feature branch)
# Back to Cloud Shell
curl http://localhost:8001/api/v1/namespaces/new-feature/services/gceme-frontend:80/proxy/version
kubectl get service gceme-frontend -n production
git checkout -b canary
git push origin canary
git checkout master
git push origin master
# Check your sample-app branches from jenkins dashboard (canary branch)
# Back to Cloud Shell
export FRONTEND_SERVICE_IP=$(kubectl get -o \
jsonpath="{.status.loadBalancer.ingress[0].ip}" --namespace=production services gceme-frontend)
while true; do curl http://$FRONTEND_SERVICE_IP/version; sleep 1; done
# after the you see output 2.0.0, run:
kubectl get service gceme-frontend -n production
# CHECK YOUR #2 #3 AND #4 CHECKPOINT (may be a delay)
###############################################################################################
# Note if task 4 not yet marked, try run:
git merge canary
git push origin master
# may take a long delay before check progress
================================================
FILE: labs/gsp335_secure-workloads-in-google-kubernetes-engine-challenge-lab/guide.txt
================================================
Open Cloud Shell and run these commands.
========== Task 0 =========
gsutil -m cp gs://cloud-training/gsp335/* .
========== Task 1 =========
gcloud container clusters create demo1 --machine-type n1-standard-4 --num-nodes 2 --zone us-central1-c --enable-network-policy
gcloud container clusters get-credentials demo1 --zone us-central1-c
========== Task 2 =========
gcloud sql instances create wordpress --region=us-central1
gcloud sql databases create wordpress --instance wordpress
gcloud sql users create dbpress --instance=wordpress --host=% --password='P@ssword!'
gcloud sql users create wordpress1 --instance=wordpress --host=% --password='P@ssword!'
gcloud iam service-accounts create sa-wordpress --display-name sa-wordpress
gcloud projects add-iam-policy-binding $GOOGLE_CLOUD_PROJECT --role roles/cloudsql.client --member serviceAccount:sa-wordpress@$GOOGLE_CLOUD_PROJECT.iam.gserviceaccount.com
gcloud iam service-accounts keys create key.json --iam-account sa-wordpress@$GOOGLE_CLOUD_PROJECT.iam.gserviceaccount.com
kubectl create secret generic cloudsql-instance-credentials --from-file key.json
kubectl create secret generic cloudsql-db-credentials \
--from-literal username=wordpress \
--from-literal password='P@ssword!'
kubectl apply -f volume.yaml
sed -i s/INSTANCE_CONNECTION_NAME/${GOOGLE_CLOUD_PROJECT}:us-central1:wordpress/g wordpress.yaml
kubectl apply -f wordpress.yaml
========== Task 3 =========
helm repo add stable https://charts.helm.sh/stable
helm repo update
helm install nginx-ingress stable/nginx-ingress --set rbac.create=true
# Check the service nginx-ingress-controller as an external IP address before continuing to the next step.
kubectl get svc
# If you face any internal error, execute the command again
. add_ip.sh
kubectl apply --validate=false -f https://github.com/jetstack/cert-manager/releases/download/v1.2.0/cert-manager.yaml
kubectl create clusterrolebinding cluster-admin-binding \
--clusterrole=cluster-admin \
--user=$(gcloud config get-value core/account)
sed -i s/LAB_EMAIL_ADDRESS/sa-wordpress@$GOOGLE_CLOUD_PROJECT.iam.gserviceaccount.com/g issuer.yaml
kubectl apply -f issuer.yaml
HOST_NAME=$(echo $USER | tr -d '_').labdns.xyz
sed -i s/HOST_NAME/${HOST_NAME}/g ingress.yaml
kubectl apply -f ingress.yaml
========== Task 4 =========
kubectl apply -f network-policy.yaml
nano network-policy.yaml
# Add the following code at the last
# start here
---
apiVersion: networking.k8s.io/v1
kind: NetworkPolicy
metadata:
name: allow-nginx-access-to-internet
spec:
podSelector:
matchLabels:
app: nginx-ingress
policyTypes:
- Ingress
ingress:
- {}
# end here
# The file should look like Screenshot1.png
# Save file by CTRL+X then Y enter.
kubectl apply -f network-policy.yaml
========== Task 5 =========
gcloud services enable \
container.googleapis.com \
containeranalysis.googleapis.com \
binaryauthorization.googleapis.com
gcloud container clusters update demo1 --enable-binauthz --zone us-central1-c
gcloud container binauthz policy export > bin-auth-policy.yaml
nano bin-auth-policy.yaml
# Add the four values and change
- namePattern: docker.io/library/wordpress:latest
- namePattern: us.gcr.io/k8s-artifacts-prod/ingress-nginx/*
- namePattern: gcr.io/cloudsql-docker/*
- namePattern: quay.io/jetstack/*
defaultAdmissionRule:
enforcementMode: ENFORCED_BLOCK_AND_AUDIT_LOG
evaluationMode: ALWAYS_DENY
globalPolicyEvaluationMode: ENABLE
# End
# The file should look like Screenshot2.png
# Save file by CTRL+X then Y enter.
gcloud container binauthz policy import bin-auth-policy.yaml
========== Task 6 =========
kubectl apply -f psp-restrictive.yaml
kubectl apply -f psp-role.yaml
kubectl apply -f psp-use.yaml
================================================
FILE: labs/gsp335_secure-workloads-in-google-kubernetes-engine-challenge-lab/readme.md
================================================
# [Secure Workloads in Google Kubernetes Engine: Challenge Lab](https://www.qwiklabs.com/focuses/13389?parent=catalog)
## Topics tested:
* Enable TLS access using nginx-ingress and cert-manager.io
* Secure traffic with a network policy
* Enable Binary Authorization to ensure only approved images are deployed
* Ensure that pods do not allow escalations to root
## Challenge Scenario
As a newly trained Kubernetes engineer in Jooli Inc. you have been asked to demonstrate to the security team features to protect Kubernetes workloads.
You are expected to have the skills and knowledge for these tasks so don’t expect step-by-step guides.
Some Jooli Inc. standards you should follow:
* Create all resources in the us-east1 region and us-east1-b zone, unless otherwise directed.
* Use the project VPCs.
* Naming is normally team-resource, e.g. an instance could be named kraken-webserver1.
* Allocate cost effective resource sizes. Projects are monitored and excessive resource use will result in the containing project's termination (and possibly yours), so beware. This is the guidance the monitoring team is willing to share: unless directed, use n1-standard-1.
================================================
FILE: labs/gsp342_ensure-access-and-identity-in-google-cloud-challenge-lab/readme.md
================================================
# [Ensure Access & Identity in Google Cloud: Challenge Lab](https://www.cloudskillsboost.google/focuses/14572?parent=catalog)
## Topics tested:
* Create a custom security role.
* Create a service account.
* Bind IAM security roles to a service account.
* Create a private Kubernetes Engine cluster in a custom subnet.
* Deploy an application to a private Kubernetes Engine cluster
## Challenge scenario
You have started a new role as a junior member of the security team for the Orca team in Jooli Inc. Your team is responsible for ensuring the security of the Cloud infrastucture and services that the company's applications depend on.
You are expected to have the skills and knowledge for these tasks, so don't expect step-by-step guides to be provided.
================================================
FILE: labs/gsp342_ensure-access-and-identity-in-google-cloud-challenge-lab/script.sh
================================================
##################################################################################################
#Task 1: Create a custom security role.
#Buka Cloud Shell dan buat file konfigurasi misal : role-definition.yaml
nano role-definition.yaml
#---Copy paste teks di bawah ini kedalam file role-definition.yaml hapus tanda # pada awal baris---
#title: "Silakan isi title Anda"
#description: "Silakan isi description Anda"
#includedPermissions:
#- storage.buckets.get
#- storage.objects.get
#- storage.objects.list
#- storage.objects.update
#- storage.objects.create
#--------------------------------------------------------------------------------------------------
#Selanjutnya eksekusi script di bawah ini untuk membuat custom role
gcloud iam roles create [GANTI_DENGAN_NAMA_CUSTOM_ROLE_YANG_DIMINTA] \
--project $DEVSHELL_PROJECT_ID \
--file role-definition.yaml
##################################################################################################
##################################################################################################
#Task 2: Create a service account
#dan
#Task 3: Bind a custom security role to an account
#Pada halaman browser Google Cloud Console pilih menu IAM & Admin
#Selanjutnya pilih Service Accounts
#Pilih Create Service Account
#Isi form pembuatan service account dengan ketentuan sebagai berikut :
#Service account name : [ISI_DENGAN_NAMA_SERVICE_ACCOUNT_YANG DIMINTA] misal : orca-private-cluster-263-sa
#Isi Roles dengan : orca_....
#Tambahkan Roles : Monitoring Viewer, Monitoring Metric Write, dan Logs Writer
#Klik Continue
#Klik Done
##################################################################################################
##################################################################################################
#Task 4: Create and configure a new Kubernetes Engine private cluster
#Pada Cloud Shell ketik perintah di bawah ini :
gcloud container clusters create [GANTI_DENGAN_NAMA_CLUSTER_YANG_DIMINTA] \
--num-nodes 1\
--master-ipv4-cidr=172.16.0.64/28 \
--network orca-build-vpc \
--subnetwork orca-build-subnet \
--enable-master-authorized-networks \
--master-authorized-networks 192.168.10.2/32 \
--enable-ip-alias \
--enable-private-nodes \
--enable-private-endpoint \
--service-account [GANTI_DENGAN_NAMA_SERVICE_ACCOUNT_PADA_LANGKAH_SEBELUMNYA]@[GANTI_DENGAN_PROJECT_ID_ANDA].iam.gserviceaccount.com \
--zone us-east1-b
##################################################################################################
##################################################################################################
#Task 5: Deploy an application to a private Kubernetes Engine cluster
#Akses SSH VM Instance orca-jumphost
#Jalankan script di bawah ini :
gcloud container clusters get-credentials [GANTI_DENGAN_NAMA_CLUSTER_YANG_DIBUAT_PADA_LANGKAH SEBLUMNYA] \
--internal-ip \
--zone us-east1-b \
--project [GANTI_DENGAN_PROJECT_ID_ANDA]
#Selanjutnya jalankan perintah berikut :
kubectl create deployment hello-server --image=gcr.io/google-samples/hello-app:1.0
#################################################################################################
################################################################################################
#Selamat mencoba, apabila dalam prosesnya terjadi kesalahan, mohon kiranya review dan perbaikannya
#Terima kasih :)
#Salam, Laurensius Dede Suhardiman
################################################################################################
================================================
FILE: labs/gsp343_optimize-costs-for-google-kubernetes-engine-challenge-lab/readme.md
================================================
# [Optimize Costs for Google Kubernetes Engine: Challenge Lab ](https://www.qwiklabs.com/focuses/16327?parent=catalog)
## Topics tested:
In this challenge lab you will be assessed on your knowledge of the following areas:
* Deploying an app on a multi-tenant cluster
* Migrating cluster workloads to an optimized node pool
* Rolling out an application update while maintaining cluster availability
* Cluster and pod autoscaling
## Challenge scenario
You are the lead Google Kubernetes Engine admin on a team that manages the online shop for OnlineBoutique.
You are ready to deploy your team's site to Google Kubernetes Engine but you are still looking for ways to make sure that you're able to keep costs down and performance up.
You will be responsible for deploying the OnlineBoutique app to GKE and making some configuration changes that have been recommended for cost optimization.
Here are some guidelines you've been requested to follow when deploying:
* Create the cluster in the us-central1 region
* The naming scheme is team-resource, e.g. a cluster could be named onlineboutique-cluster
* For your initial cluster, start with machine size n1-standard-2 (2 vCPU, 8G memory)
================================================
FILE: labs/gsp343_optimize-costs-for-google-kubernetes-engine-challenge-lab/script.sh
================================================
# Task 1. Create our cluster and deploy our app
ZONE=us-central1-b
gcloud container clusters create onlineboutique-cluster --project=$DEVSHELL_PROJECT_ID --zone=$ZONE --machine-type=n1-standard-2 --num-nodes=2
kubectl create namespace dev
kubectl create namespace prod
git clone https://github.com/GoogleCloudPlatform/microservices-demo.git &&
cd microservices-demo && kubectl apply -f ./release/kubernetes-manifests.yaml --namespace dev
- Click refresh till status of all module is Ok except loadgenerator
- Press Ctrl+c to exit
kubectl get svc -w --namespace dev
- In the GCP Console go to Navigation Menu >Kubernets Engine> Service and Ingress >click endpoints frontend-external
- or In the Cloud Shell Copy and Paste the code
kubectl get svc -w --namespace dev
#Task 2. Migrate to an Optimized Nodepool
gcloud container node-pools create optimized-pool --cluster=onlineboutique-cluster --machine-type=custom-2-3584 --num-nodes=2 --zone=$ZONE
for node in $(kubectl get nodes -l cloud.google.com/gke-nodepool=default-pool -o=name); do kubectl cordon "$node"; done
for node in $(kubectl get nodes -l cloud.google.com/gke-nodepool=default-pool -o=name); do kubectl drain --force --ignore-daemonsets --delete-local-data --grace-period=10 "$node"; done
kubectl get pods -o=wide --namespace=dev
gcloud container node-pools delete default-pool --cluster onlineboutique-cluster --zone $ZONE
# Task 3. Apply a Frontend Update
kubectl create poddisruptionbudget onlineboutique-frontend-pdb --selector app=frontend --min-available 1 --namespace dev
- Edit your frontend deployment and change its image to the updated one.
KUBE_EDITOR="nano" kubectl edit deployment/frontend --namespace dev
- Change the following line:
- Find the image under spec replace with:
image: gcr.io/qwiklabs-resources/onlineboutique-frontend:v2.1
- Find the imagePullPolicy under image replace with:
imagePullPolicy: Always
- Press ctrl+x, Y then enter to exit & save
kubectl autoscale deployment frontend --cpu-percent=50 --min=1 --max=13 --namespace dev
kubectl get hpa --namespace dev
# Task 4. Autoscale from Estimated Traffic
gcloud beta container clusters update onlineboutique-cluster --enable-autoscaling --min-nodes 1 --max-nodes 6 --zone $ZONE
================================================
FILE: labs/gsp344_serverless-firebase-development-challenge-lab/readme.md
================================================
# [Serverless Firebase Development: Challenge Lab](https://www.qwiklabs.com/focuses/14677?parent=catalog)
## Prerequisites
In this challenge lab you will be assessed on your knowledge of the following areas:
* Firestore
* Cloud Run
* Cloud Build
* Container Registry
## Challenge scenario
In this lab you will create a frontend solution using a Rest API and Firestore database. Cloud Firestore is a NoSQL document database that is part of the Firebase platform where you can store, sync, and query data for your mobile and web apps at scale. Lab content is based on resolving a real world scenario through the use of Google Cloud serverless infrastructure.
================================================
FILE: labs/gsp344_serverless-firebase-development-challenge-lab/script.sh
================================================
gcloud config set project $(gcloud projects list --format='value(PROJECT_ID)' --filter='qwiklabs-gcp')
git clone https://github.com/rosera/pet-theory.git
# 1. Firestore Database Create
Go to Firestore > Select Naive Mode > Location: nam5 > Create Database
# 2. Firestore Database Populate
cd pet-theory/lab06/firebase-import-csv/solution
npm install
node index.js netflix_titles_original.csv
# 3. Cloud Build Rest API Staging
cd ~/pet-theory/lab06/firebase-rest-api/solution-01
npm install
gcloud builds submit --tag gcr.io/$GOOGLE_CLOUD_PROJECT/rest-api:0.1
gcloud beta run deploy netflix-dataset-service-574 --image gcr.io/$GOOGLE_CLOUD_PROJECT/rest-api:0.1 --max-instances=1 --allow-unauthenticated
# Choose 23 and us-central1
# 4. Cloud Build Rest API Production
cd ~/pet-theory/lab06/firebase-rest-api/solution-02
npm install
gcloud builds submit --tag gcr.io/$GOOGLE_CLOUD_PROJECT/rest-api:0.2
gcloud beta run deploy netflix-dataset-service-574 --image gcr.io/$GOOGLE_CLOUD_PROJECT/rest-api:0.2 --max-instances=1 --allow-unauthenticated
# go to cloud run and click netflix-dataset-service-574 then copy the url
SERVICE_URL=<copy
gitextract_6rdyb3hi/ ├── CONTRIBUTING.md ├── labs/ │ ├── arc130_analyze-sentiment-with-natural-language-api-challenge-lab/ │ │ ├── code.gs │ │ ├── readme.md │ │ └── script.sh │ ├── gsp101_google-cloud-essential-skills-challenge-lab/ │ │ ├── guide.txt │ │ └── readme.md │ ├── gsp1151_generative_ai_with_vertex_ai-prompt_design/ │ │ ├── intro_prompt_design.ipynb │ │ └── readme.md │ ├── gsp301_deploy-a-compute-instance-with-a-remote-startup-script/ │ │ ├── readme.md │ │ └── script.sh │ ├── gsp302_configure-a-firewall-and-a-startup-script-with-deployment-manager/ │ │ ├── guide.txt │ │ ├── qwiklabs.jinja │ │ ├── qwiklabs.yaml │ │ └── readme.md │ ├── gsp303_configure-secure-rdp-using-a-windows-bastion-host/ │ │ ├── readme.md │ │ └── script.sh │ ├── gsp304_build-and-deploy-a-docker-image-to-a-kubernetes/ │ │ ├── readme.md │ │ └── script.sh │ ├── gsp305_scale-out-and-update-a-containerized-application-on-a-kubernetes-cluster/ │ │ ├── readme.md │ │ └── script.sh │ ├── gsp306_migrate-a-mysql-database-to-google-cloud-sql/ │ │ ├── guide.txt │ │ └── readme.md │ ├── gsp311_automate-interactions-with-contact-center-ai-challenge-lab/ │ │ ├── guide.txt │ │ └── readme.md │ ├── gsp313_create-and-manage-cloud-resources/ │ │ ├── readme.md │ │ └── script.sh │ ├── gsp314_deploy-and-manage-cloud-environments-with-google-cloud-challenge-lab/ │ │ ├── guide.txt │ │ └── readme.md │ ├── gsp315_perform-foundational-infrastructure-tasks-in-google-cloud/ │ │ ├── readme.md │ │ └── script.sh │ ├── gsp318_deploy-to-kubernetes-in-google-cloud-challenge-lab/ │ │ ├── readme.md │ │ └── script.sh │ ├── gsp319_build-a-website-on-google-cloud-challenge-lab/ │ │ ├── readme.md │ │ └── script.sh │ ├── gsp321_set-up-and-configure-a-cloud-environment-in-google-cloud-challenge-lab/ │ │ ├── guide.txt │ │ └── readme.md │ ├── gsp322_build-and-secure-networks-in-google-cloud-challenge-lab/ │ │ ├── guide.txt │ │ └── readme.md │ ├── gsp323_perform-foundation-data-ml-and-ai-task-challenge-lab/ │ │ ├── guide.txt │ │ ├── lab.schema │ │ ├── readme.md │ │ └── request.json │ ├── gsp324_explore-machine-learning-models-with-explainable-ai-challenge-lab/ │ │ ├── guide.txt │ │ ├── readme.md │ │ └── what-if-tool-challenge.ipynb │ ├── gsp325_building-interactive-apps-with-google-assistant-challenge-lab/ │ │ ├── guide.txt │ │ ├── main.py │ │ ├── main_final.py │ │ ├── readme.md │ │ └── requirements.txt │ ├── gsp327_enginner-data-in-google-cloud-challenge-lab/ │ │ ├── query.sql │ │ └── readme.md │ ├── gsp328_serverless-cloud-run-development-challenge-lab/ │ │ ├── readme.md │ │ └── script.sh │ ├── gsp329_integrate-with-machine-learning-apis-challenge-lab/ │ │ ├── analyze-images.py │ │ ├── guide.txt │ │ └── readme.md │ ├── gsp330_implement-devops-in-google-cloud-challenge-lab/ │ │ ├── readme.md │ │ └── script.sh │ ├── gsp335_secure-workloads-in-google-kubernetes-engine-challenge-lab/ │ │ ├── guide.txt │ │ └── readme.md │ ├── gsp342_ensure-access-and-identity-in-google-cloud-challenge-lab/ │ │ ├── readme.md │ │ └── script.sh │ ├── gsp343_optimize-costs-for-google-kubernetes-engine-challenge-lab/ │ │ ├── readme.md │ │ └── script.sh │ ├── gsp344_serverless-firebase-development-challenge-lab/ │ │ ├── readme.md │ │ └── script.sh │ ├── gsp345_automating-infrastructure-on-google-cloud-with-terraform-challenge-lab/ │ │ ├── readme.md │ │ └── script.sh │ ├── gsp361_build-lookml-objects-in-looker-challenge-lab/ │ │ ├── order_items.view │ │ ├── part_1-3_training_ecommerce.model │ │ ├── part_4_training_ecommerce.model │ │ └── user_details.view │ ├── gsp374_perform-predictive-data-analysis-in-bigquery-challenge-lab/ │ │ ├── query.sql │ │ └── readme.md │ ├── gsp388_monitor-and-log-with-google-cloud-operations-suite-challenge-lab/ │ │ ├── guide.txt │ │ ├── readme.md │ │ └── startup-script.sh │ └── gsp787_insights-from-data-with-bigquery-challenge-lab/ │ ├── query.sql │ └── readme.md ├── learning-resources.md └── readme.md
SYMBOL INDEX (3 symbols across 3 files)

FILE: labs/gsp325_building-interactive-apps-with-google-assistant-challenge-lab/main.py
  function magic_eight_ball (line 7) | def magic_eight_ball(request):

FILE: labs/gsp325_building-interactive-apps-with-google-assistant-challenge-lab/main_final.py
  function magic_eight_ball (line 9) | def magic_eight_ball(request):

FILE: labs/gsp374_perform-predictive-data-analysis-in-bigquery-challenge-lab/query.sql
  function `soccer.GetShotDistanceToGoal662` (line 72) | CREATE FUNCTION `soccer.GetShotDistanceToGoal662`(x INT64, y INT64)
Condensed preview — 82 files, each showing path, character count, and a content snippet. Download the .json file or copy for the full structured content (248K chars).
[
{
"path": "CONTRIBUTING.md",
"chars": 882,
"preview": "# Contributing\n\n## What you can contribute?\n\n* Add new labs guide\n* Improve/Fix/Update existing lab\n* Add another lab re"
},
{
"path": "labs/arc130_analyze-sentiment-with-natural-language-api-challenge-lab/code.gs",
"chars": 4380,
"preview": " /**\n * @OnlyCurrentDoc\n *\n * The above comment directs Apps Script to limit the scope of file\n * access for this a"
},
{
"path": "labs/arc130_analyze-sentiment-with-natural-language-api-challenge-lab/readme.md",
"chars": 1226,
"preview": "# Analyze Sentiment with Natural Language API: Challenge Lab\n\n## Challenge scenario\n\nYou recently joined an organization"
},
{
"path": "labs/arc130_analyze-sentiment-with-natural-language-api-challenge-lab/script.sh",
"chars": 1462,
"preview": "# Task 1. Create an API key\nexport API_KEY=AIzaSyDjt9FLVPJbECuOxuU2Be4OYsQ0EC8RH8I # your_generated_api_key\n\n# Task 2. S"
},
{
"path": "labs/gsp101_google-cloud-essential-skills-challenge-lab/guide.txt",
"chars": 606,
"preview": "# Google Cloud Essential Skills: Challenge Lab \n# https://www.qwiklabs.com/focuses/1734?parent=catalog\n\n# Task 1: Create"
},
{
"path": "labs/gsp101_google-cloud-essential-skills-challenge-lab/readme.md",
"chars": 408,
"preview": "# [Google Cloud Essential Skills: Challenge Lab](https://www.qwiklabs.com/focuses/1734?parent=catalog)\n\n## Challenge sce"
},
{
"path": "labs/gsp1151_generative_ai_with_vertex_ai-prompt_design/intro_prompt_design.ipynb",
"chars": 36705,
"preview": "{\n \"cells\": [\n {\n \"cell_type\": \"code\",\n \"execution_count\": null,\n \"metadata\": {\n \"id\": \"ur8xi4C7S06n\"\n },\n "
},
{
"path": "labs/gsp1151_generative_ai_with_vertex_ai-prompt_design/readme.md",
"chars": 675,
"preview": "### Generative AI with Vertex AI: Prompt Design\n\nThe Vertex AI SDK for text enables you to structure prompts however you"
},
{
"path": "labs/gsp301_deploy-a-compute-instance-with-a-remote-startup-script/readme.md",
"chars": 1172,
"preview": "# [Deploy a Compute Instance with a Remote Startup Script](https://www.qwiklabs.com/focuses/1735?parent=catalog)\n\n## Top"
},
{
"path": "labs/gsp301_deploy-a-compute-instance-with-a-remote-startup-script/script.sh",
"chars": 998,
"preview": "# Deploy a Compute Instance with a Remote Startup Script\n# https://google.qwiklabs.com/focuses/1735?parent=catalog\n\n# Ta"
},
{
"path": "labs/gsp302_configure-a-firewall-and-a-startup-script-with-deployment-manager/guide.txt",
"chars": 445,
"preview": "# Configure a Firewall and a Startup Script with Deployment Manager\n# https://qwiklabs.com/focuses/1736?parent=catalog\n\n"
},
{
"path": "labs/gsp302_configure-a-firewall-and-a-startup-script-with-deployment-manager/qwiklabs.jinja",
"chars": 1441,
"preview": "resources:\n- type: compute.v1.instance\n name: vm-{{ env[\"deployment\"] }}\n properties:\n zone: {{ properties[\"zone\"] "
},
{
"path": "labs/gsp302_configure-a-firewall-and-a-startup-script-with-deployment-manager/qwiklabs.yaml",
"chars": 122,
"preview": "imports:\n- path: qwiklabs.jinja\n\nresources:\n- name: qwiklabs\n type: qwiklabs.jinja\n properties:\n zone: us-central1-"
},
{
"path": "labs/gsp302_configure-a-firewall-and-a-startup-script-with-deployment-manager/readme.md",
"chars": 773,
"preview": "# [Configure a Firewall and a Startup Script with Deployment Manager](https://www.qwiklabs.com/focuses/1736?parent=catal"
},
{
"path": "labs/gsp303_configure-secure-rdp-using-a-windows-bastion-host/readme.md",
"chars": 1593,
"preview": "# [Configure Secure RDP using a Windows Bastion Host](https://www.qwiklabs.com/focuses/1737?parent=catalog)\n\n## Topics t"
},
{
"path": "labs/gsp303_configure-secure-rdp-using-a-windows-bastion-host/script.sh",
"chars": 3191,
"preview": "# Configure Secure RDP using a Windows Bastion Host\n# https://www.qwiklabs.com/focuses/1737?parent=catalog\n\n# Task 1 : A"
},
{
"path": "labs/gsp304_build-and-deploy-a-docker-image-to-a-kubernetes/readme.md",
"chars": 766,
"preview": "# [Build and Deploy a Docker Image to a Kubernetes Cluster](https://www.qwiklabs.com/focuses/1738?parent=catalog)\n\n## To"
},
{
"path": "labs/gsp304_build-and-deploy-a-docker-image-to-a-kubernetes/script.sh",
"chars": 1006,
"preview": "# Build and Deploy a Docker Image to a Kubernetes Cluster\n# https://www.qwiklabs.com/focuses/1738?parent=catalog\n\n# Task"
},
{
"path": "labs/gsp305_scale-out-and-update-a-containerized-application-on-a-kubernetes-cluster/readme.md",
"chars": 1886,
"preview": "# [Scale Out and Update a Containerized Application on a Kubernetes Cluster](https://www.qwiklabs.com/focuses/1739?paren"
},
{
"path": "labs/gsp305_scale-out-and-update-a-containerized-application-on-a-kubernetes-cluster/script.sh",
"chars": 972,
"preview": "# Scale Out and Update a Containerized Application on a Kubernetes Cluster\n# https://www.qwiklabs.com/focuses/1739?paren"
},
{
"path": "labs/gsp306_migrate-a-mysql-database-to-google-cloud-sql/guide.txt",
"chars": 2248,
"preview": "# Migrate a MySQL Database to Google Cloud SQL\n# https://www.qwiklabs.com/focuses/1740?parent=catalog\n\n# Task 1: Check t"
},
{
"path": "labs/gsp306_migrate-a-mysql-database-to-google-cloud-sql/readme.md",
"chars": 1041,
"preview": "# [Migrate a MySQL Database to Google Cloud SQL](https://www.qwiklabs.com/focuses/1740?parent=catalog)\n\n## Topics tested"
},
{
"path": "labs/gsp311_automate-interactions-with-contact-center-ai-challenge-lab/guide.txt",
"chars": 3316,
"preview": "# Automate Interactions with Contact Center AI: Challenge Lab\n# https://www.qwiklabs.com/focuses/12008?parent=catalog\n\n#"
},
{
"path": "labs/gsp311_automate-interactions-with-contact-center-ai-challenge-lab/readme.md",
"chars": 852,
"preview": "# [Automate Interactions with Contact Center AI: Challenge Lab ](https://www.qwiklabs.com/focuses/12008?parent=catalog)\n"
},
{
"path": "labs/gsp313_create-and-manage-cloud-resources/readme.md",
"chars": 1472,
"preview": "# [Create and Manage Cloud Resources: Challenge Lab ](https://www.qwiklabs.com/focuses/10258?parent=catalog)\n\n## Overvie"
},
{
"path": "labs/gsp313_create-and-manage-cloud-resources/script.sh",
"chars": 2714,
"preview": "# Create and Manage Cloud Resources: Challenge Lab\n# https://www.qwiklabs.com/focuses/10258\n\n# 1. Create a project jumph"
},
{
"path": "labs/gsp314_deploy-and-manage-cloud-environments-with-google-cloud-challenge-lab/guide.txt",
"chars": 3021,
"preview": "# Deploy and Manage Cloud Environments with Google Cloud: Challenge Lab\n# https://www.qwiklabs.com/focuses/10417?parent="
},
{
"path": "labs/gsp314_deploy-and-manage-cloud-environments-with-google-cloud-challenge-lab/readme.md",
"chars": 1487,
"preview": "# [Deploy and Manage Cloud Environments with Google Cloud: Challenge Lab](https://www.qwiklabs.com/focuses/10417?parent="
},
{
"path": "labs/gsp315_perform-foundational-infrastructure-tasks-in-google-cloud/readme.md",
"chars": 1370,
"preview": "# [Perform Foundational Infrastructure Tasks in Google Cloud: Challenge Lab ](https://www.qwiklabs.com/focuses/10379?par"
},
{
"path": "labs/gsp315_perform-foundational-infrastructure-tasks-in-google-cloud/script.sh",
"chars": 609,
"preview": "export PROJECT_ID=$DEVSHELL_PROJECT_ID\n\n# 1. Create a bucket\ngsutil mb gs://$PROJECT_ID\n\n# 2. Create a Pub/Sub topic\ngcl"
},
{
"path": "labs/gsp318_deploy-to-kubernetes-in-google-cloud-challenge-lab/readme.md",
"chars": 927,
"preview": "# [Deploy to Kubernetes in Google Cloud: Challenge Lab](https://www.cloudskillsboost.google/focuses/10457?parent=catalog"
},
{
"path": "labs/gsp318_deploy-to-kubernetes-in-google-cloud-challenge-lab/script.sh",
"chars": 1721,
"preview": "# Deploy to Kubernetes in Google Cloud: Challenge Lab\n# https://www.cloudskillsboost.google/focuses/10457?parent=catalog"
},
{
"path": "labs/gsp319_build-a-website-on-google-cloud-challenge-lab/readme.md",
"chars": 1666,
"preview": "# [Build a Website on Google Cloud: Challenge Lab](https://www.qwiklabs.com/focuses/11765?parent=catalog)\n\n## Topics tes"
},
{
"path": "labs/gsp319_build-a-website-on-google-cloud-challenge-lab/script.sh",
"chars": 2656,
"preview": "# Build a Website on Google Cloud: Challenge Lab\n# https://www.qwiklabs.com/focuses/11765?parent=catalog\n\n# Setup\ngcloud"
},
{
"path": "labs/gsp321_set-up-and-configure-a-cloud-environment-in-google-cloud-challenge-lab/guide.txt",
"chars": 5941,
"preview": "# Set up and Configure a Cloud Environment in Google Cloud: Challenge Lab \n# https://www.qwiklabs.com/focuses/10603?pare"
},
{
"path": "labs/gsp321_set-up-and-configure-a-cloud-environment-in-google-cloud-challenge-lab/readme.md",
"chars": 1372,
"preview": "# [Set up and Configure a Cloud Environment in Google Cloud: Challenge Lab ](https://www.qwiklabs.com/focuses/10603?pare"
},
{
"path": "labs/gsp322_build-and-secure-networks-in-google-cloud-challenge-lab/guide.txt",
"chars": 2299,
"preview": "# Build and Secure Networks in Google Cloud: Challenge Lab \n# https://www.qwiklabs.com/focuses/12068?parent=catalog\n\n# T"
},
{
"path": "labs/gsp322_build-and-secure-networks-in-google-cloud-challenge-lab/readme.md",
"chars": 581,
"preview": "# [Build and Secure Networks in Google Cloud: Challenge Lab](https://www.qwiklabs.com/focuses/12068?parent=catalog) \n\n##"
},
{
"path": "labs/gsp323_perform-foundation-data-ml-and-ai-task-challenge-lab/guide.txt",
"chars": 6172,
"preview": "# Perform Foundational Data, ML, and AI Tasks in Google Cloud: Challenge Lab \n# https://www.qwiklabs.com/focuses/11044?p"
},
{
"path": "labs/gsp323_perform-foundation-data-ml-and-ai-task-challenge-lab/lab.schema",
"chars": 484,
"preview": "[\n {\"type\":\"STRING\",\"name\":\"guid\"},\n {\"type\":\"BOOLEAN\",\"name\":\"isActive\"},\n {\"type\":\"STRING\",\"name\":\"firstname\""
},
{
"path": "labs/gsp323_perform-foundation-data-ml-and-ai-task-challenge-lab/readme.md",
"chars": 670,
"preview": "# [Perform Foundational Data, ML, and AI Tasks in Google Cloud: Challenge Lab ](https://www.qwiklabs.com/focuses/11044?p"
},
{
"path": "labs/gsp323_perform-foundation-data-ml-and-ai-task-challenge-lab/request.json",
"chars": 160,
"preview": "{\n \"config\": {\n \"encoding\":\"FLAC\",\n \"languageCode\": \"en-US\"\n },\n \"audio\": {\n \"uri\":\"gs://c"
},
{
"path": "labs/gsp324_explore-machine-learning-models-with-explainable-ai-challenge-lab/guide.txt",
"chars": 743,
"preview": "# Explore Machine Learning Models with Explainable AI: Challenge Lab \n# https://www.qwiklabs.com/focuses/12011?parent=ca"
},
{
"path": "labs/gsp324_explore-machine-learning-models-with-explainable-ai-challenge-lab/readme.md",
"chars": 1008,
"preview": "# [Explore Machine Learning Models with Explainable AI: Challenge Lab](https://www.qwiklabs.com/focuses/12011?parent=cat"
},
{
"path": "labs/gsp324_explore-machine-learning-models-with-explainable-ai-challenge-lab/what-if-tool-challenge.ipynb",
"chars": 39298,
"preview": "{\n \"cells\": [\n {\n \"cell_type\": \"markdown\",\n \"metadata\": {\n \"colab_type\": \"text\",\n \"id\": \"bTry4ZMD2859\"\n },\n"
},
{
"path": "labs/gsp325_building-interactive-apps-with-google-assistant-challenge-lab/guide.txt",
"chars": 4202,
"preview": "# Build Interactive Apps with Google Assistant: Challenge Lab \n# https://www.qwiklabs.com/focuses/11881?parent=catalog\n\n"
},
{
"path": "labs/gsp325_building-interactive-apps-with-google-assistant-challenge-lab/main.py",
"chars": 992,
"preview": "import random\nimport logging\nimport google.cloud.logging\nfrom google.cloud import translate_v2 as translate\nfrom flask i"
},
{
"path": "labs/gsp325_building-interactive-apps-with-google-assistant-challenge-lab/main_final.py",
"chars": 1818,
"preview": "# script for last task\n\nimport random\nimport logging\nimport google.cloud.logging\nfrom google.cloud import translate_v2 a"
},
{
"path": "labs/gsp325_building-interactive-apps-with-google-assistant-challenge-lab/readme.md",
"chars": 709,
"preview": "# [Build Interactive Apps with Google Assistant: Challenge Lab](https://www.qwiklabs.com/focuses/11881?parent=catalog)\n\n"
},
{
"path": "labs/gsp325_building-interactive-apps-with-google-assistant-challenge-lab/requirements.txt",
"chars": 44,
"preview": "google-cloud-translate\ngoogle-cloud-logging\n"
},
{
"path": "labs/gsp327_enginner-data-in-google-cloud-challenge-lab/query.sql",
"chars": 4037,
"preview": "-- Engineer Data in Google Cloud: Challenge Lab \n-- https://www.qwiklabs.com/focuses/12379?parent=catalog\n\n\n-- Setup:\n "
},
{
"path": "labs/gsp327_enginner-data-in-google-cloud-challenge-lab/readme.md",
"chars": 867,
"preview": "# [Engineer Data in Google Cloud: Challenge Lab](https://www.qwiklabs.com/focuses/12379?parent=catalog)\n\n## Overview\n\nTo"
},
{
"path": "labs/gsp328_serverless-cloud-run-development-challenge-lab/readme.md",
"chars": 473,
"preview": "# [Serverless Cloud Run Development: Challenge Lab](https://google.qwiklabs.com/focuses/14744?parent=catalog)\n\n## Situat"
},
{
"path": "labs/gsp328_serverless-cloud-run-development-challenge-lab/script.sh",
"chars": 3979,
"preview": "# Serverless Cloud Run Development: Challenge Lab\n# https://www.qwiklabs.com/focuses/14744\n\n# Provision the Qwiklabs env"
},
{
"path": "labs/gsp329_integrate-with-machine-learning-apis-challenge-lab/analyze-images.py",
"chars": 4615,
"preview": "# DONT CHANGE ANYTHING\n\n# Dataset: image_classification_dataset\n# Table name: image_text_detail\nimport os\nimport sys\n\n# "
},
{
"path": "labs/gsp329_integrate-with-machine-learning-apis-challenge-lab/guide.txt",
"chars": 1207,
"preview": "# Integrate with Machine Learning APIs: Challenge Lab \n# https://www.qwiklabs.com/focuses/12704?parent=catalog\n\n# Run th"
},
{
"path": "labs/gsp329_integrate-with-machine-learning-apis-challenge-lab/readme.md",
"chars": 979,
"preview": "# [Integrate with Machine Learning APIs](https://www.qwiklabs.com/focuses/12704?parent=catalog)\n\n## Topics tested\n\n* Gra"
},
{
"path": "labs/gsp330_implement-devops-in-google-cloud-challenge-lab/readme.md",
"chars": 820,
"preview": "# [Implement DevOps in Google Cloud: Challenge Lab ](https://www.qwiklabs.com/focuses/13287?parent=catalog)\n\n## Topics t"
},
{
"path": "labs/gsp330_implement-devops-in-google-cloud-challenge-lab/script.sh",
"chars": 4001,
"preview": "# Implement DevOps in Google Cloud: Challenge Lab \n# https://www.qwiklabs.com/focuses/13287?parent=catalog\n\n# Open Cloud"
},
{
"path": "labs/gsp335_secure-workloads-in-google-kubernetes-engine-challenge-lab/guide.txt",
"chars": 3746,
"preview": "Open Cloud Shell and run these commands.\n\n\n========== Task 0 =========\n\ngsutil -m cp gs://cloud-training/gsp335/* .\n\n\n=="
},
{
"path": "labs/gsp335_secure-workloads-in-google-kubernetes-engine-challenge-lab/readme.md",
"chars": 1175,
"preview": "# [Secure Workloads in Google Kubernetes Engine: Challenge Lab](https://www.qwiklabs.com/focuses/13389?parent=catalog)\n\n"
},
{
"path": "labs/gsp342_ensure-access-and-identity-in-google-cloud-challenge-lab/readme.md",
"chars": 761,
"preview": "# [Ensure Access & Identity in Google Cloud: Challenge Lab](https://www.cloudskillsboost.google/focuses/14572?parent=cat"
},
{
"path": "labs/gsp342_ensure-access-and-identity-in-google-cloud-challenge-lab/script.sh",
"chars": 3541,
"preview": "##################################################################################################\n#Task 1: Create a cus"
},
{
"path": "labs/gsp343_optimize-costs-for-google-kubernetes-engine-challenge-lab/readme.md",
"chars": 1191,
"preview": "# [Optimize Costs for Google Kubernetes Engine: Challenge Lab ](https://www.qwiklabs.com/focuses/16327?parent=catalog)\n\n"
},
{
"path": "labs/gsp343_optimize-costs-for-google-kubernetes-engine-challenge-lab/script.sh",
"chars": 2243,
"preview": "# Task 1. Create our cluster and deploy our app\nZONE=us-central1-b\n\ngcloud container clusters create onlineboutique-clus"
},
{
"path": "labs/gsp344_serverless-firebase-development-challenge-lab/readme.md",
"chars": 660,
"preview": "# [Serverless Firebase Development: Challenge Lab](https://www.qwiklabs.com/focuses/14677?parent=catalog)\n\n## Prerequisi"
},
{
"path": "labs/gsp344_serverless-firebase-development-challenge-lab/script.sh",
"chars": 1995,
"preview": "gcloud config set project $(gcloud projects list --format='value(PROJECT_ID)' --filter='qwiklabs-gcp')\ngit clone https:/"
},
{
"path": "labs/gsp345_automating-infrastructure-on-google-cloud-with-terraform-challenge-lab/readme.md",
"chars": 980,
"preview": "# [Automating Infrastructure on Google Cloud with Terraform: Challenge Lab](https://www.cloudskillsboost.google/catalog_"
},
{
"path": "labs/gsp345_automating-infrastructure-on-google-cloud-with-terraform-challenge-lab/script.sh",
"chars": 8784,
"preview": "# Automating Infrastructure on Google Cloud with Terraform: Challenge Lab\n# https://www.cloudskillsboost.google/catalog_"
},
{
"path": "labs/gsp361_build-lookml-objects-in-looker-challenge-lab/order_items.view",
"chars": 1339,
"preview": "view: order_items_challenge {\n sql_table_name: `cloud-training-demos.looker_ecomm.order_items’ ;;\n \n drill_fields: ["
},
{
"path": "labs/gsp361_build-lookml-objects-in-looker-challenge-lab/part_1-3_training_ecommerce.model",
"chars": 2152,
"preview": "connection: \"bigquery_public_data_looker\"\n\n# include all the views\ninclude: \"/views/*.view\"\ninclude: \"/z_tests/*.lkml\"\ni"
},
{
"path": "labs/gsp361_build-lookml-objects-in-looker-challenge-lab/part_4_training_ecommerce.model",
"chars": 1739,
"preview": "connection: \"bigquery_public_data_looker\"\n\ninclude: \"/views/*.view\"\ninclude: \"/z_tests/*.lkml\"\ninclude: \"/**/*.dashboard"
},
{
"path": "labs/gsp361_build-lookml-objects-in-looker-challenge-lab/user_details.view",
"chars": 728,
"preview": "#include: \"training_ecommerce.model.lkml\"\n\nview: user_details {\n derived_table: {\n explore_source: order_items {\n "
},
{
"path": "labs/gsp374_perform-predictive-data-analysis-in-bigquery-challenge-lab/query.sql",
"chars": 6938,
"preview": "-- Task 2. Analyze soccer data\n-- Build a query that shows the success rate on penalty kicks by each player.\nSELECT\n pl"
},
{
"path": "labs/gsp374_perform-predictive-data-analysis-in-bigquery-challenge-lab/readme.md",
"chars": 808,
"preview": "# Perform Predictive Data Analysis in BigQuery: Challenge Lab\n\n## Topics tested\n\n- Upload files from Cloud Storage into "
},
{
"path": "labs/gsp388_monitor-and-log-with-google-cloud-operations-suite-challenge-lab/guide.txt",
"chars": 1619,
"preview": "# 1. Check that Cloud Monitoring has been enabled\nOpen Monitoring from console\n\n# 2. Check that the video queue length c"
},
{
"path": "labs/gsp388_monitor-and-log-with-google-cloud-operations-suite-challenge-lab/readme.md",
"chars": 1316,
"preview": "# [Monitor and Log with Google Cloud Operations Suite: Challenge Lab](https://www.qwiklabs.com/focuses/13786?parent=cata"
},
{
"path": "labs/gsp388_monitor-and-log-with-google-cloud-operations-suite-challenge-lab/startup-script.sh",
"chars": 939,
"preview": "#!/bin/bash\nsudo curl -O https://storage.googleapis.com/golang/go1.10.2.linux-amd64.tar.gz\nsudo tar -xvf go1.10.2.linux-"
},
{
"path": "labs/gsp787_insights-from-data-with-bigquery-challenge-lab/query.sql",
"chars": 8431,
"preview": "-- Insights from Data with BigQuery: Challenge Lab \n-- https://www.qwiklabs.com/focuses/11988?parent=catalog\n\n-- Setup: "
},
{
"path": "labs/gsp787_insights-from-data-with-bigquery-challenge-lab/readme.md",
"chars": 765,
"preview": "# [Insights from Data with BigQuery: Challenge Lab](https://www.qwiklabs.com/focuses/11988?parent=catalog)\n\n## Scenario\n"
},
{
"path": "learning-resources.md",
"chars": 822,
"preview": "## Learning GCP Resources\n\n* Try GCP for [free](http://bit.ly/2HuW2ed) \n* Google Cloud [Documentation](https://cloud.goo"
},
{
"path": "readme.md",
"chars": 1157,
"preview": "\n\n# Google Cloud AI Study Jam: #JuaraGCP Season 10\n\nDate: 20 August 2024 at 12:00 - 15 September 2024 "
}
]
About this extraction
This page contains the full source code of the elmoallistair/qwiklabs GitHub repository, extracted and formatted as plain text for AI agents and large language models (LLMs). The extraction includes 82 files (221.8 KB), approximately 62.5k tokens, and a symbol index with 3 extracted functions, classes, methods, constants, and types. Use this with OpenClaw, Claude, ChatGPT, Cursor, Windsurf, or any other AI tool that accepts text input. You can copy the full output to your clipboard or download it as a .txt file.
Extracted by GitExtract — free GitHub repo to text converter for AI. Built by Nikandr Surkov.