| Name | Count | Remarks |
| PCB | 1 set | 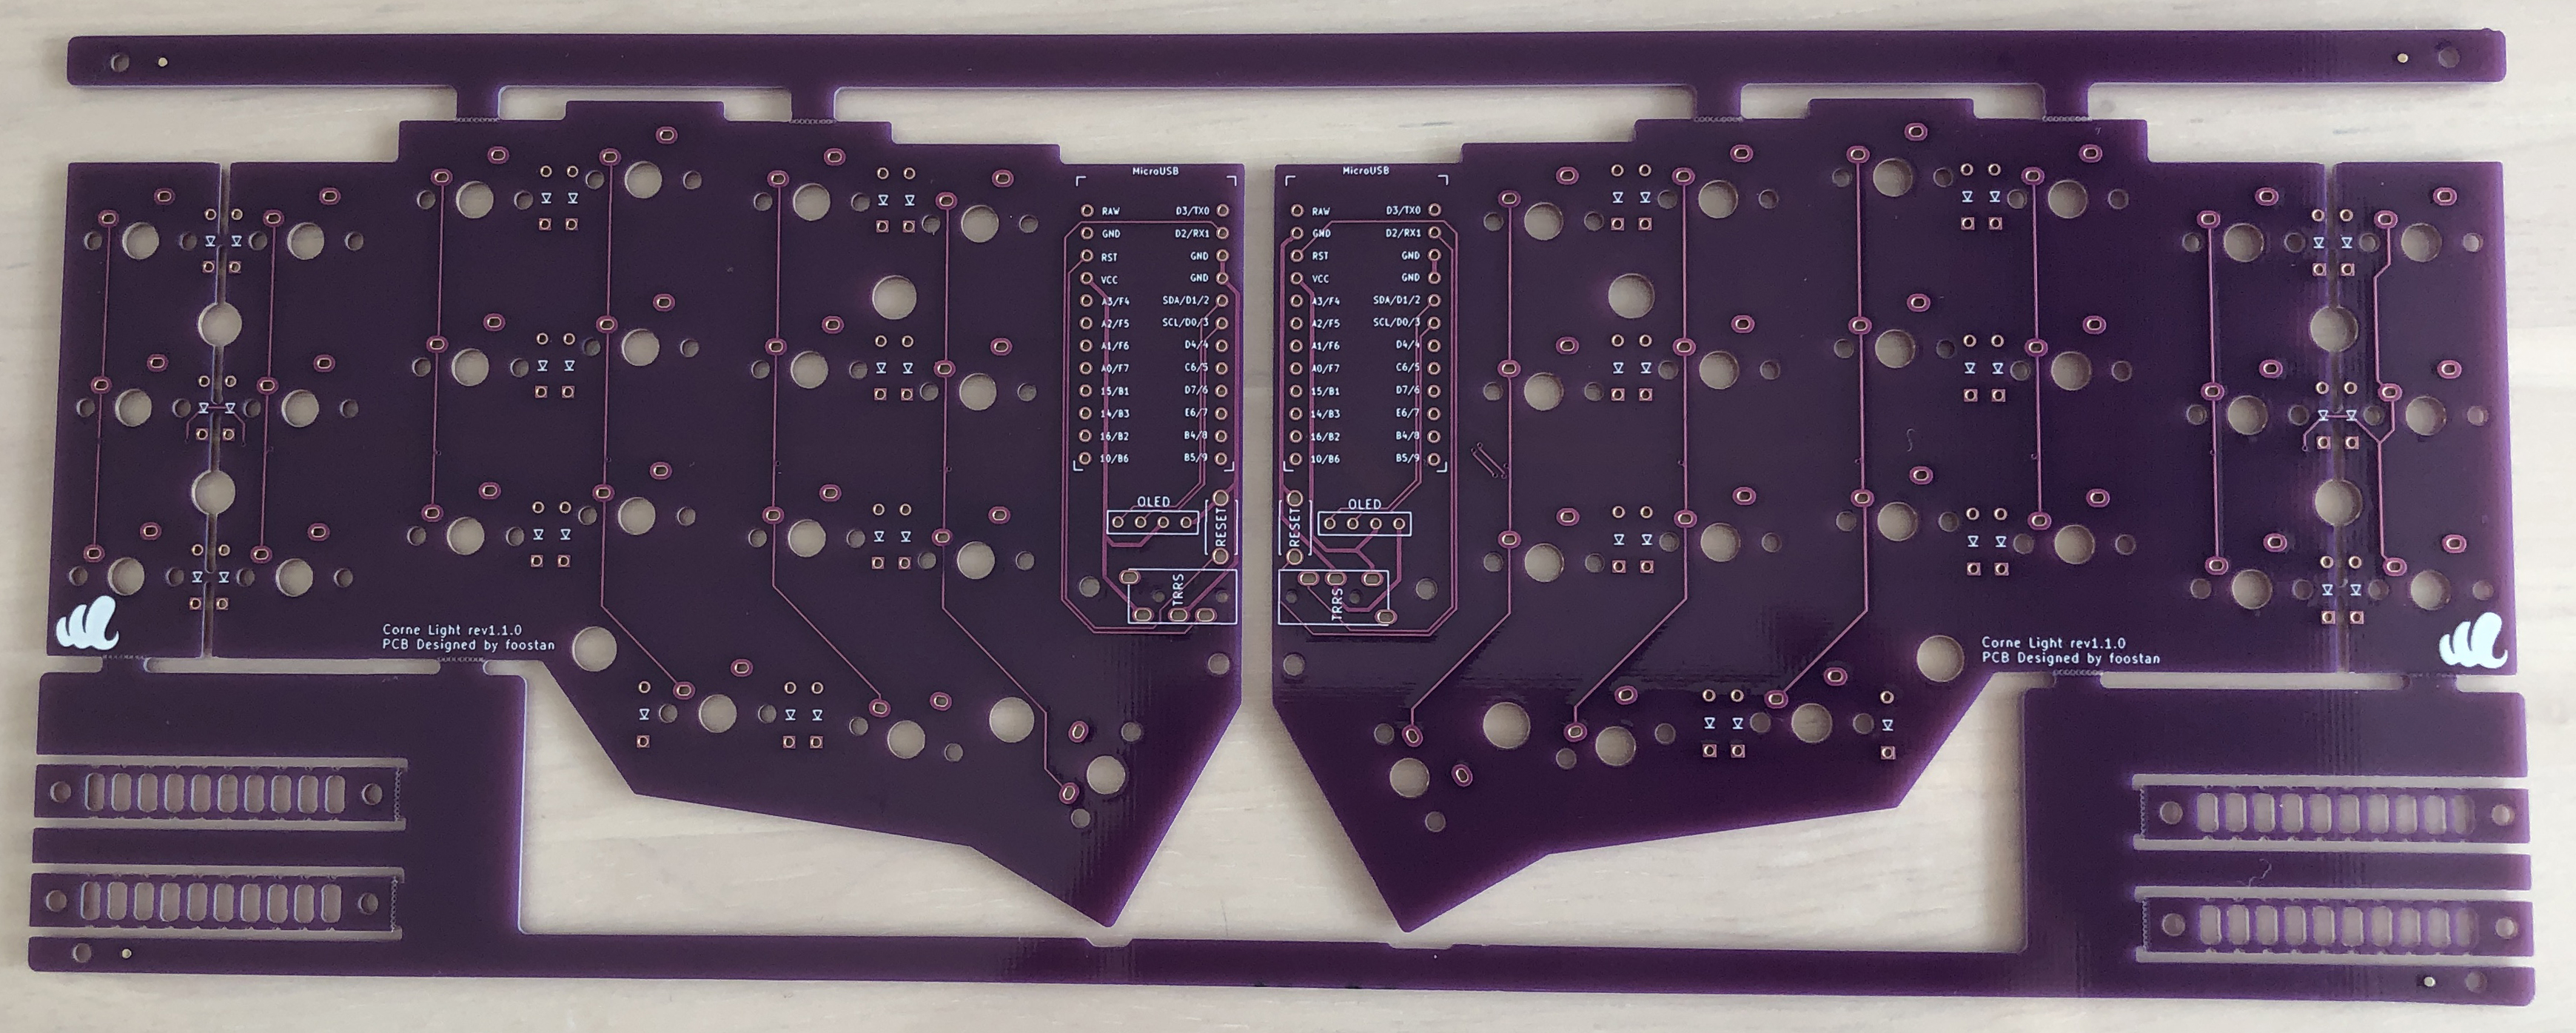 |
| Top plate | 2 sheets | 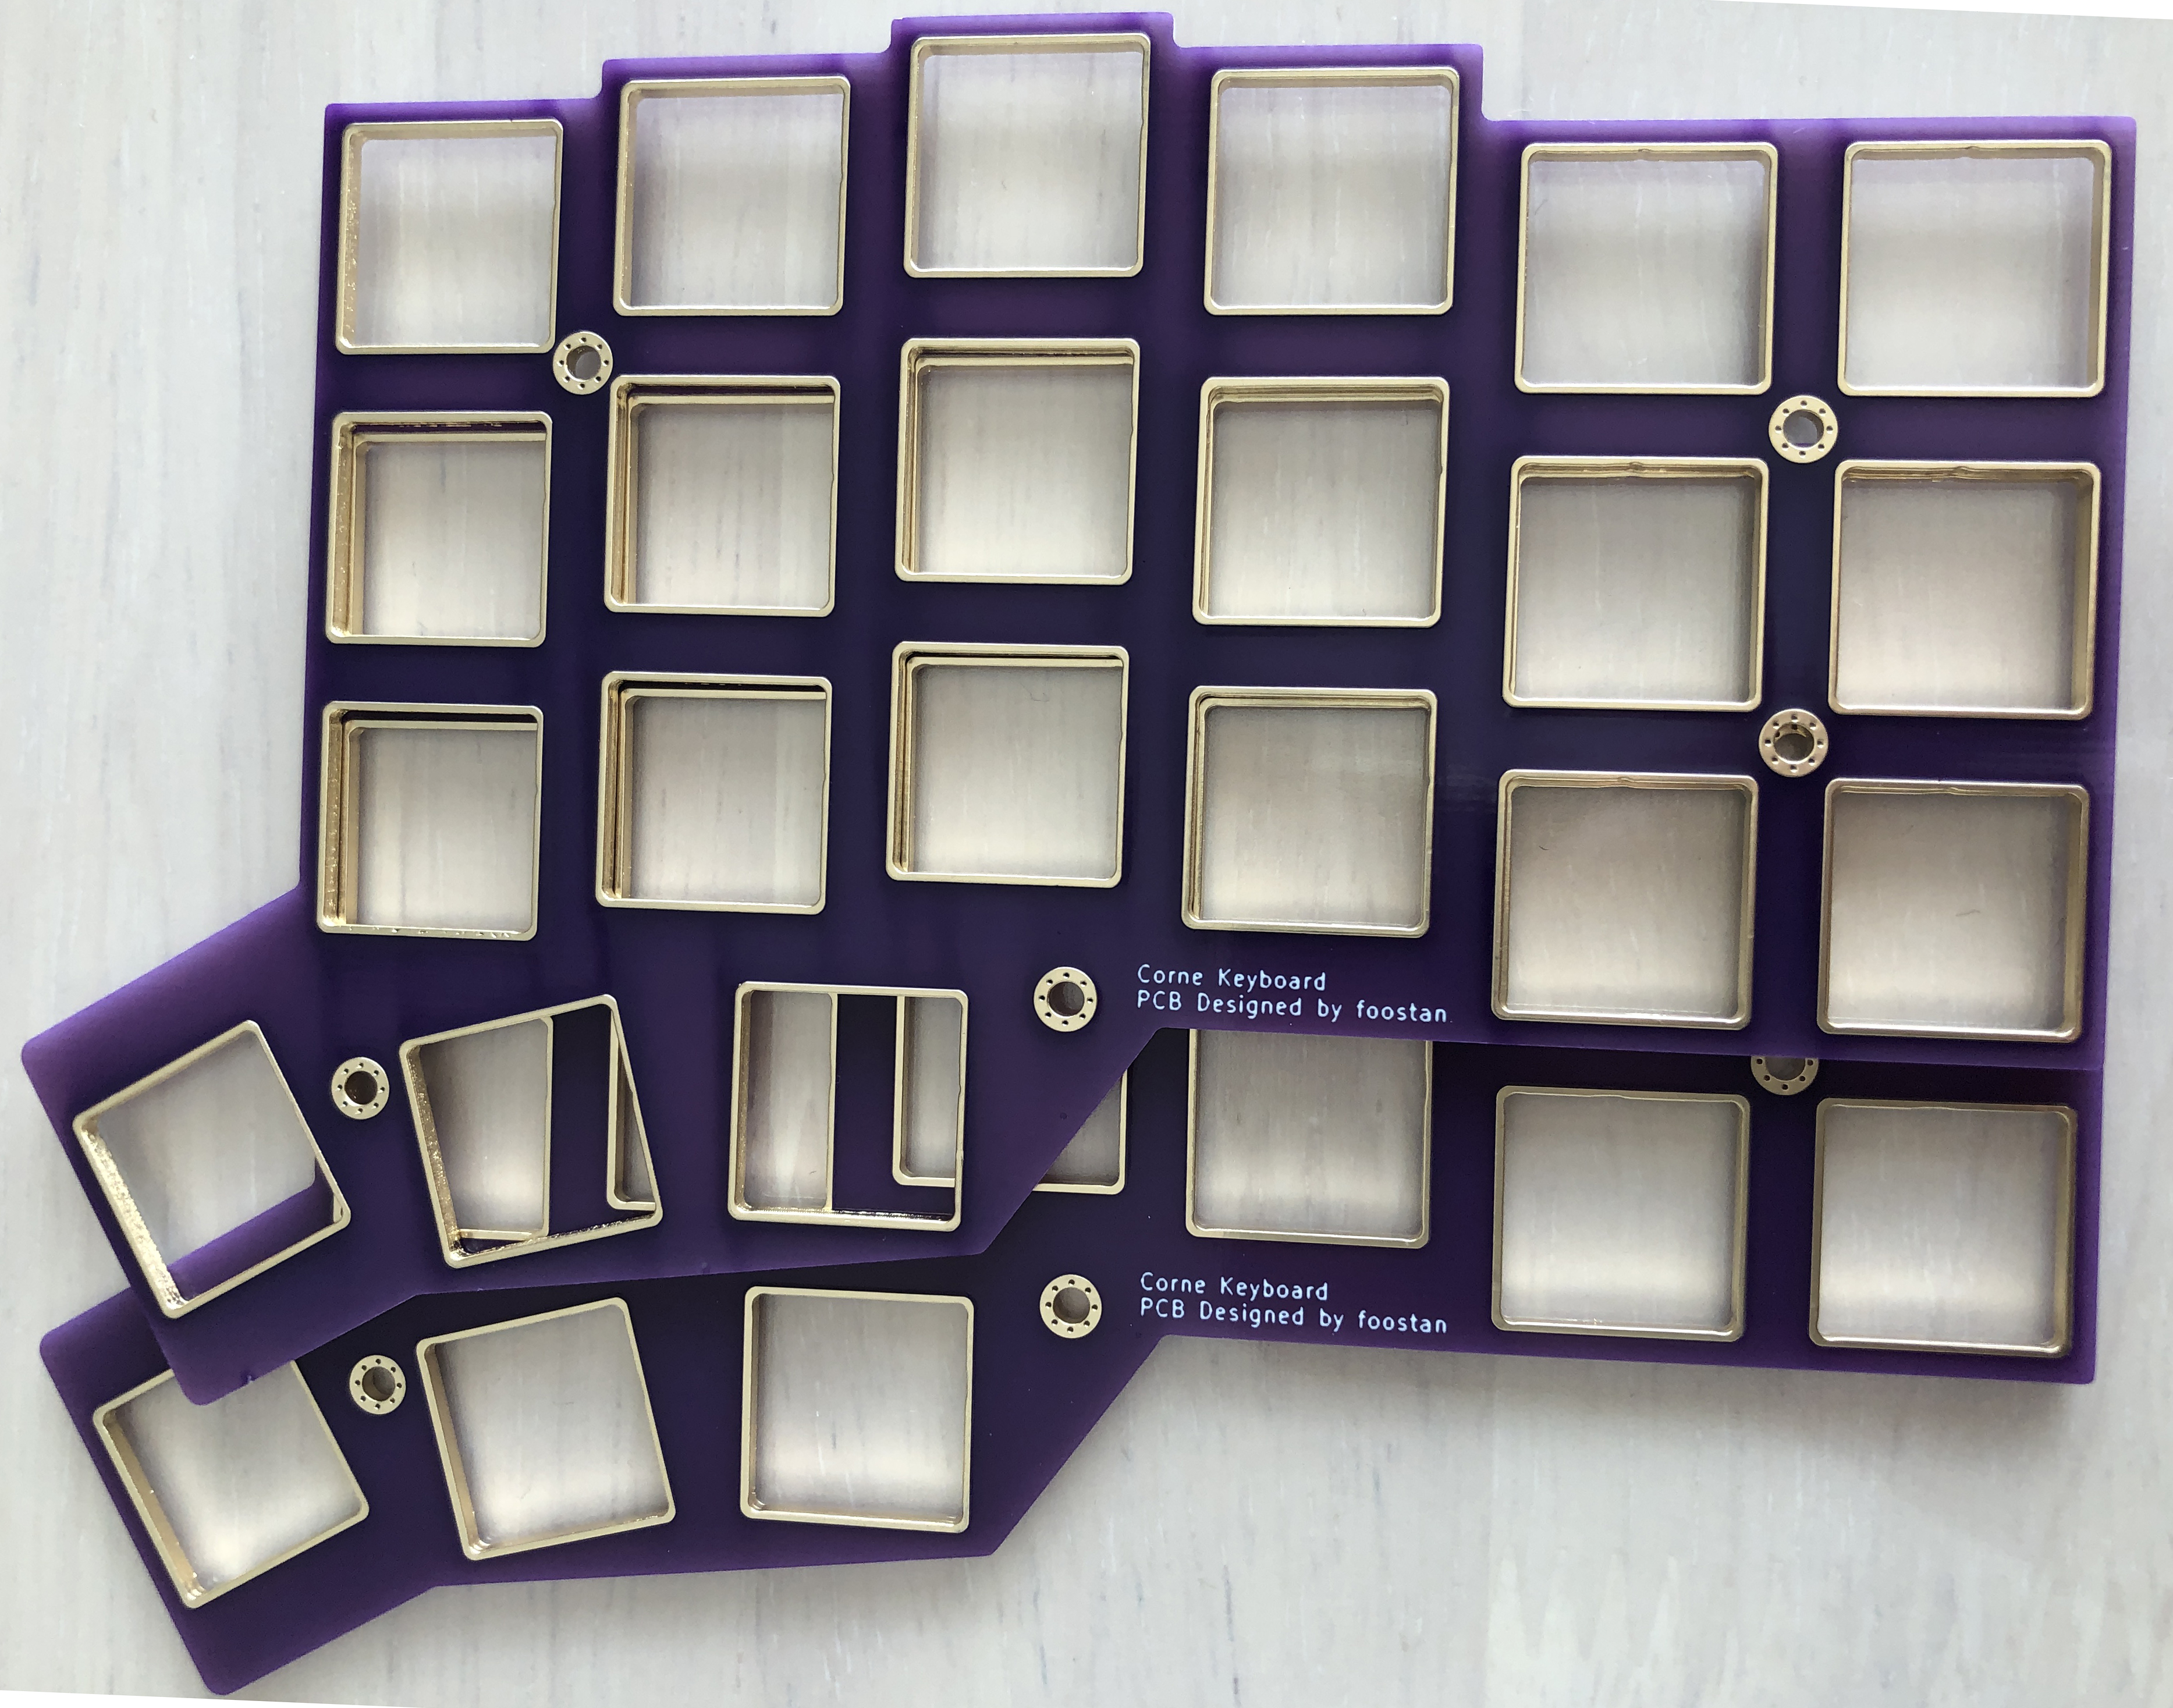 |
| Bottom plate | 2 sheets | 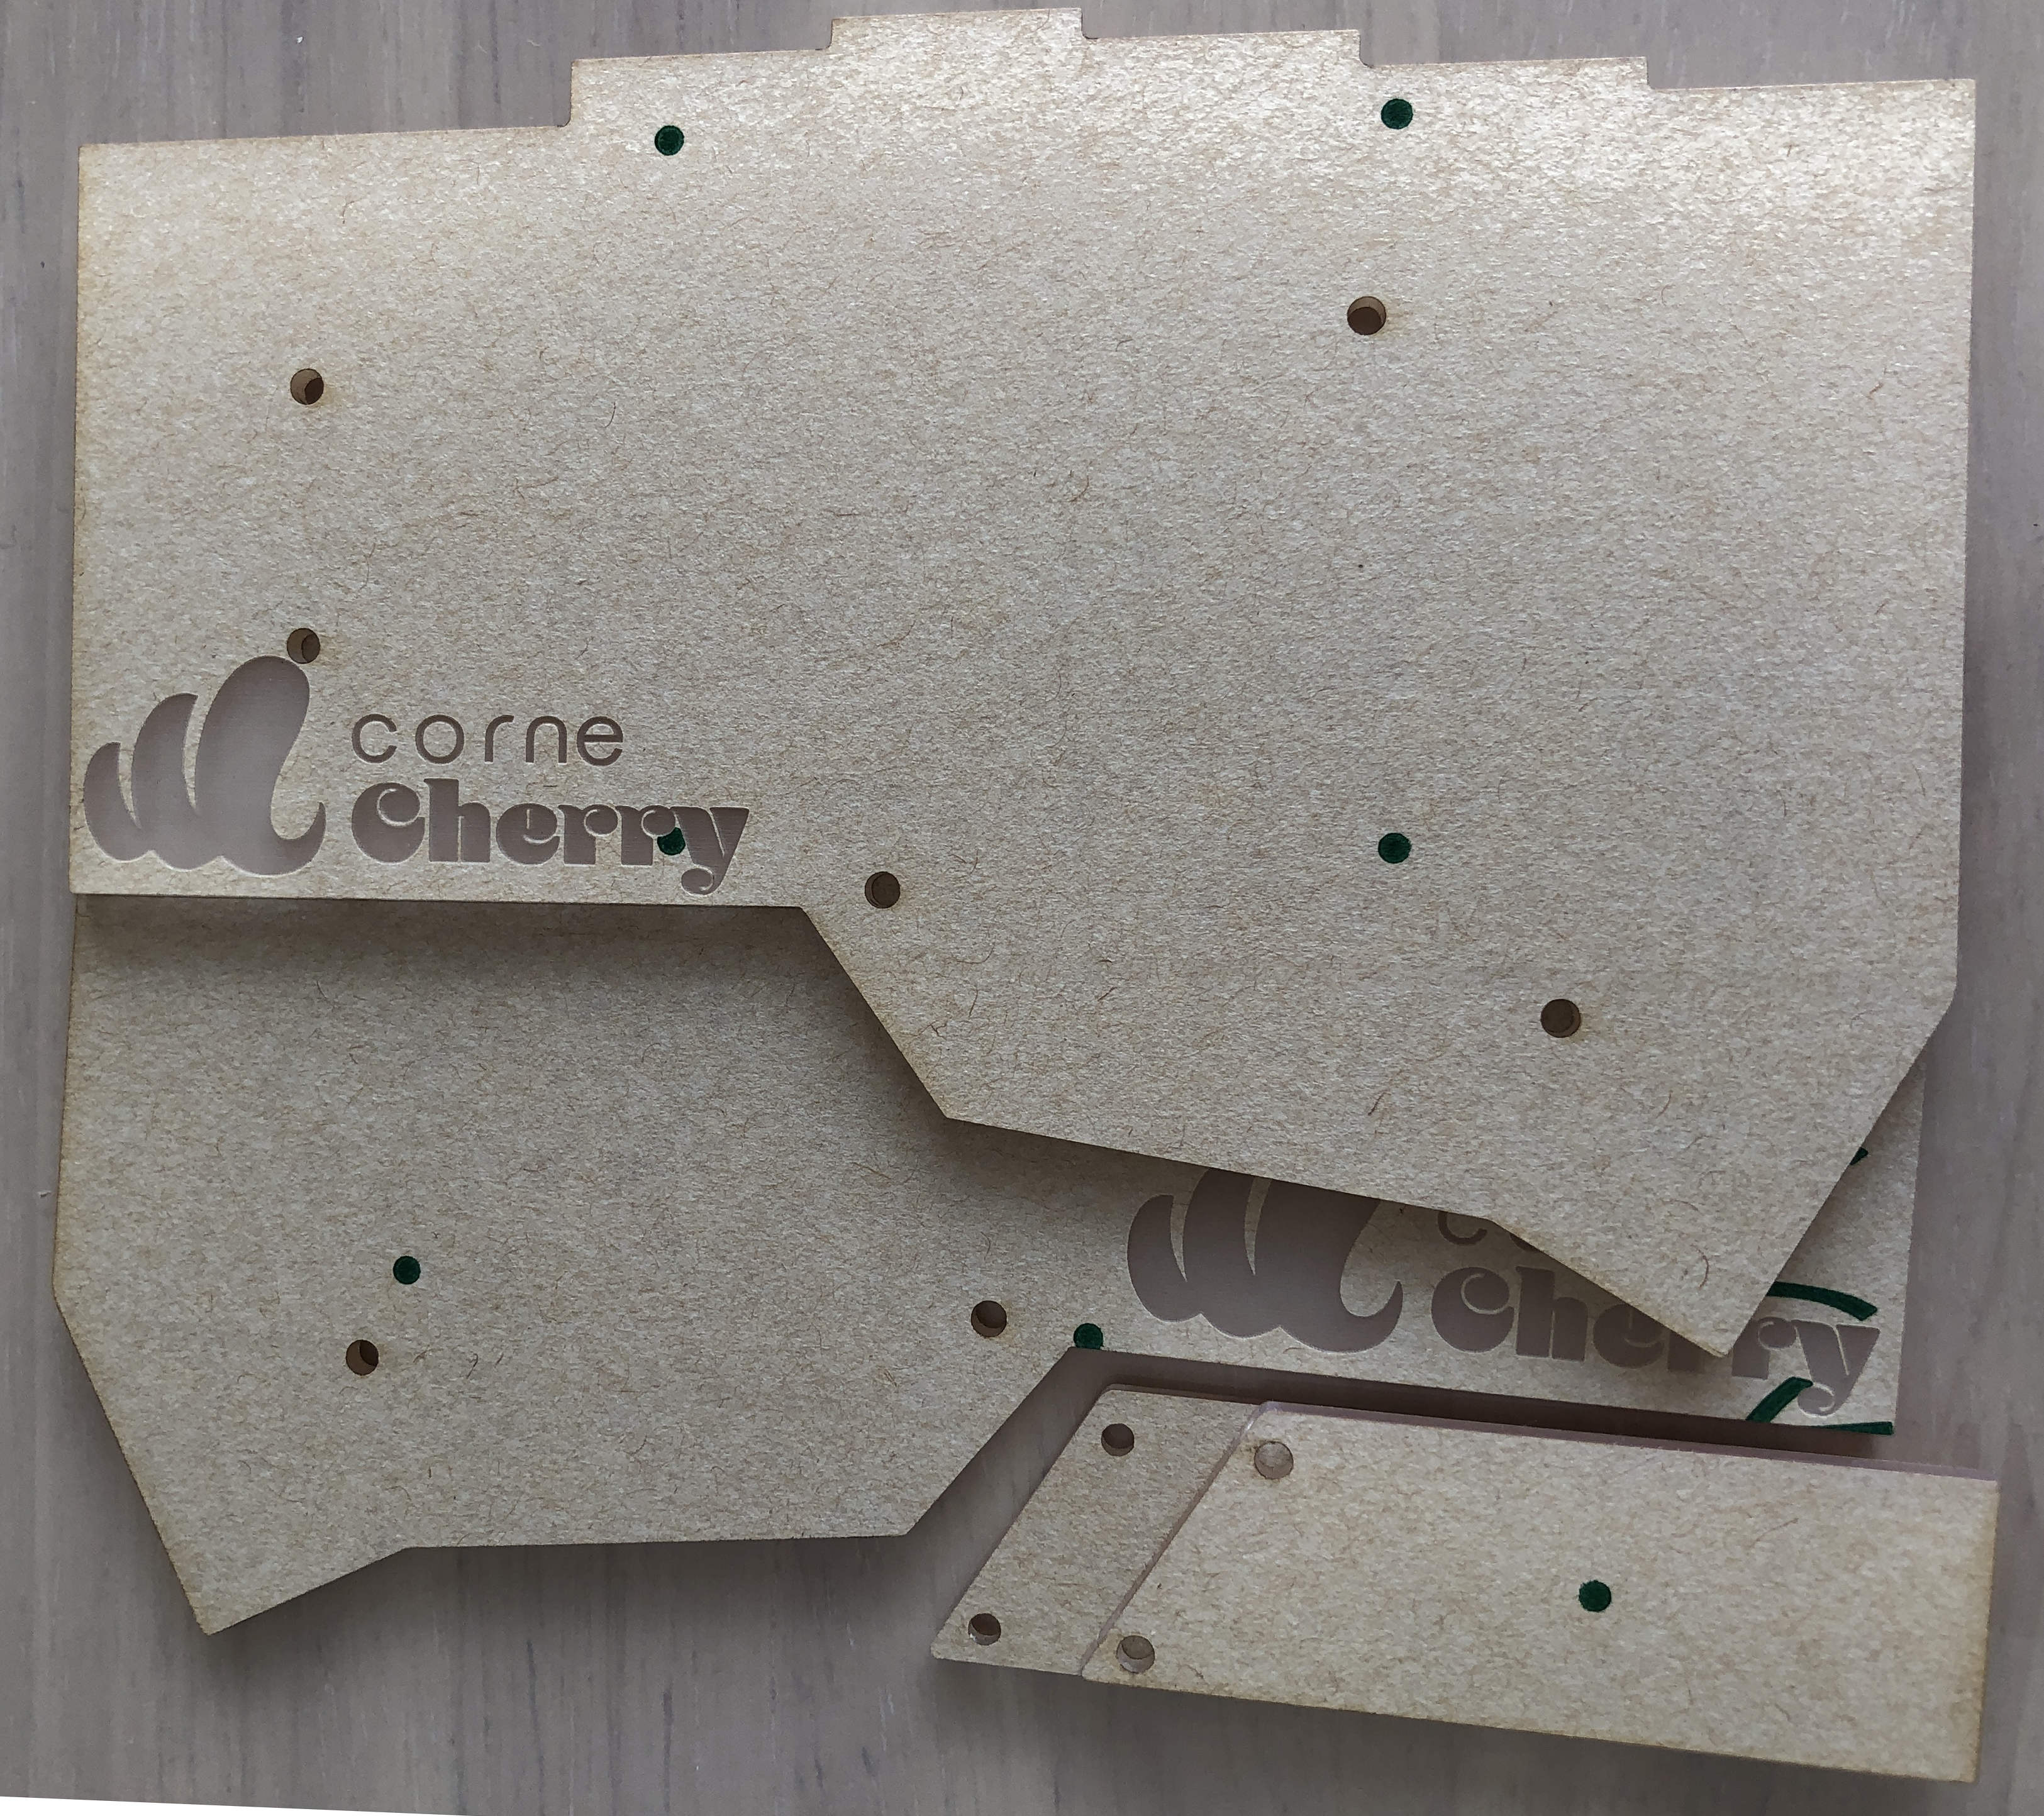 |
| ProMicro protective plate | 2 sheets | |
| diode | 42 | 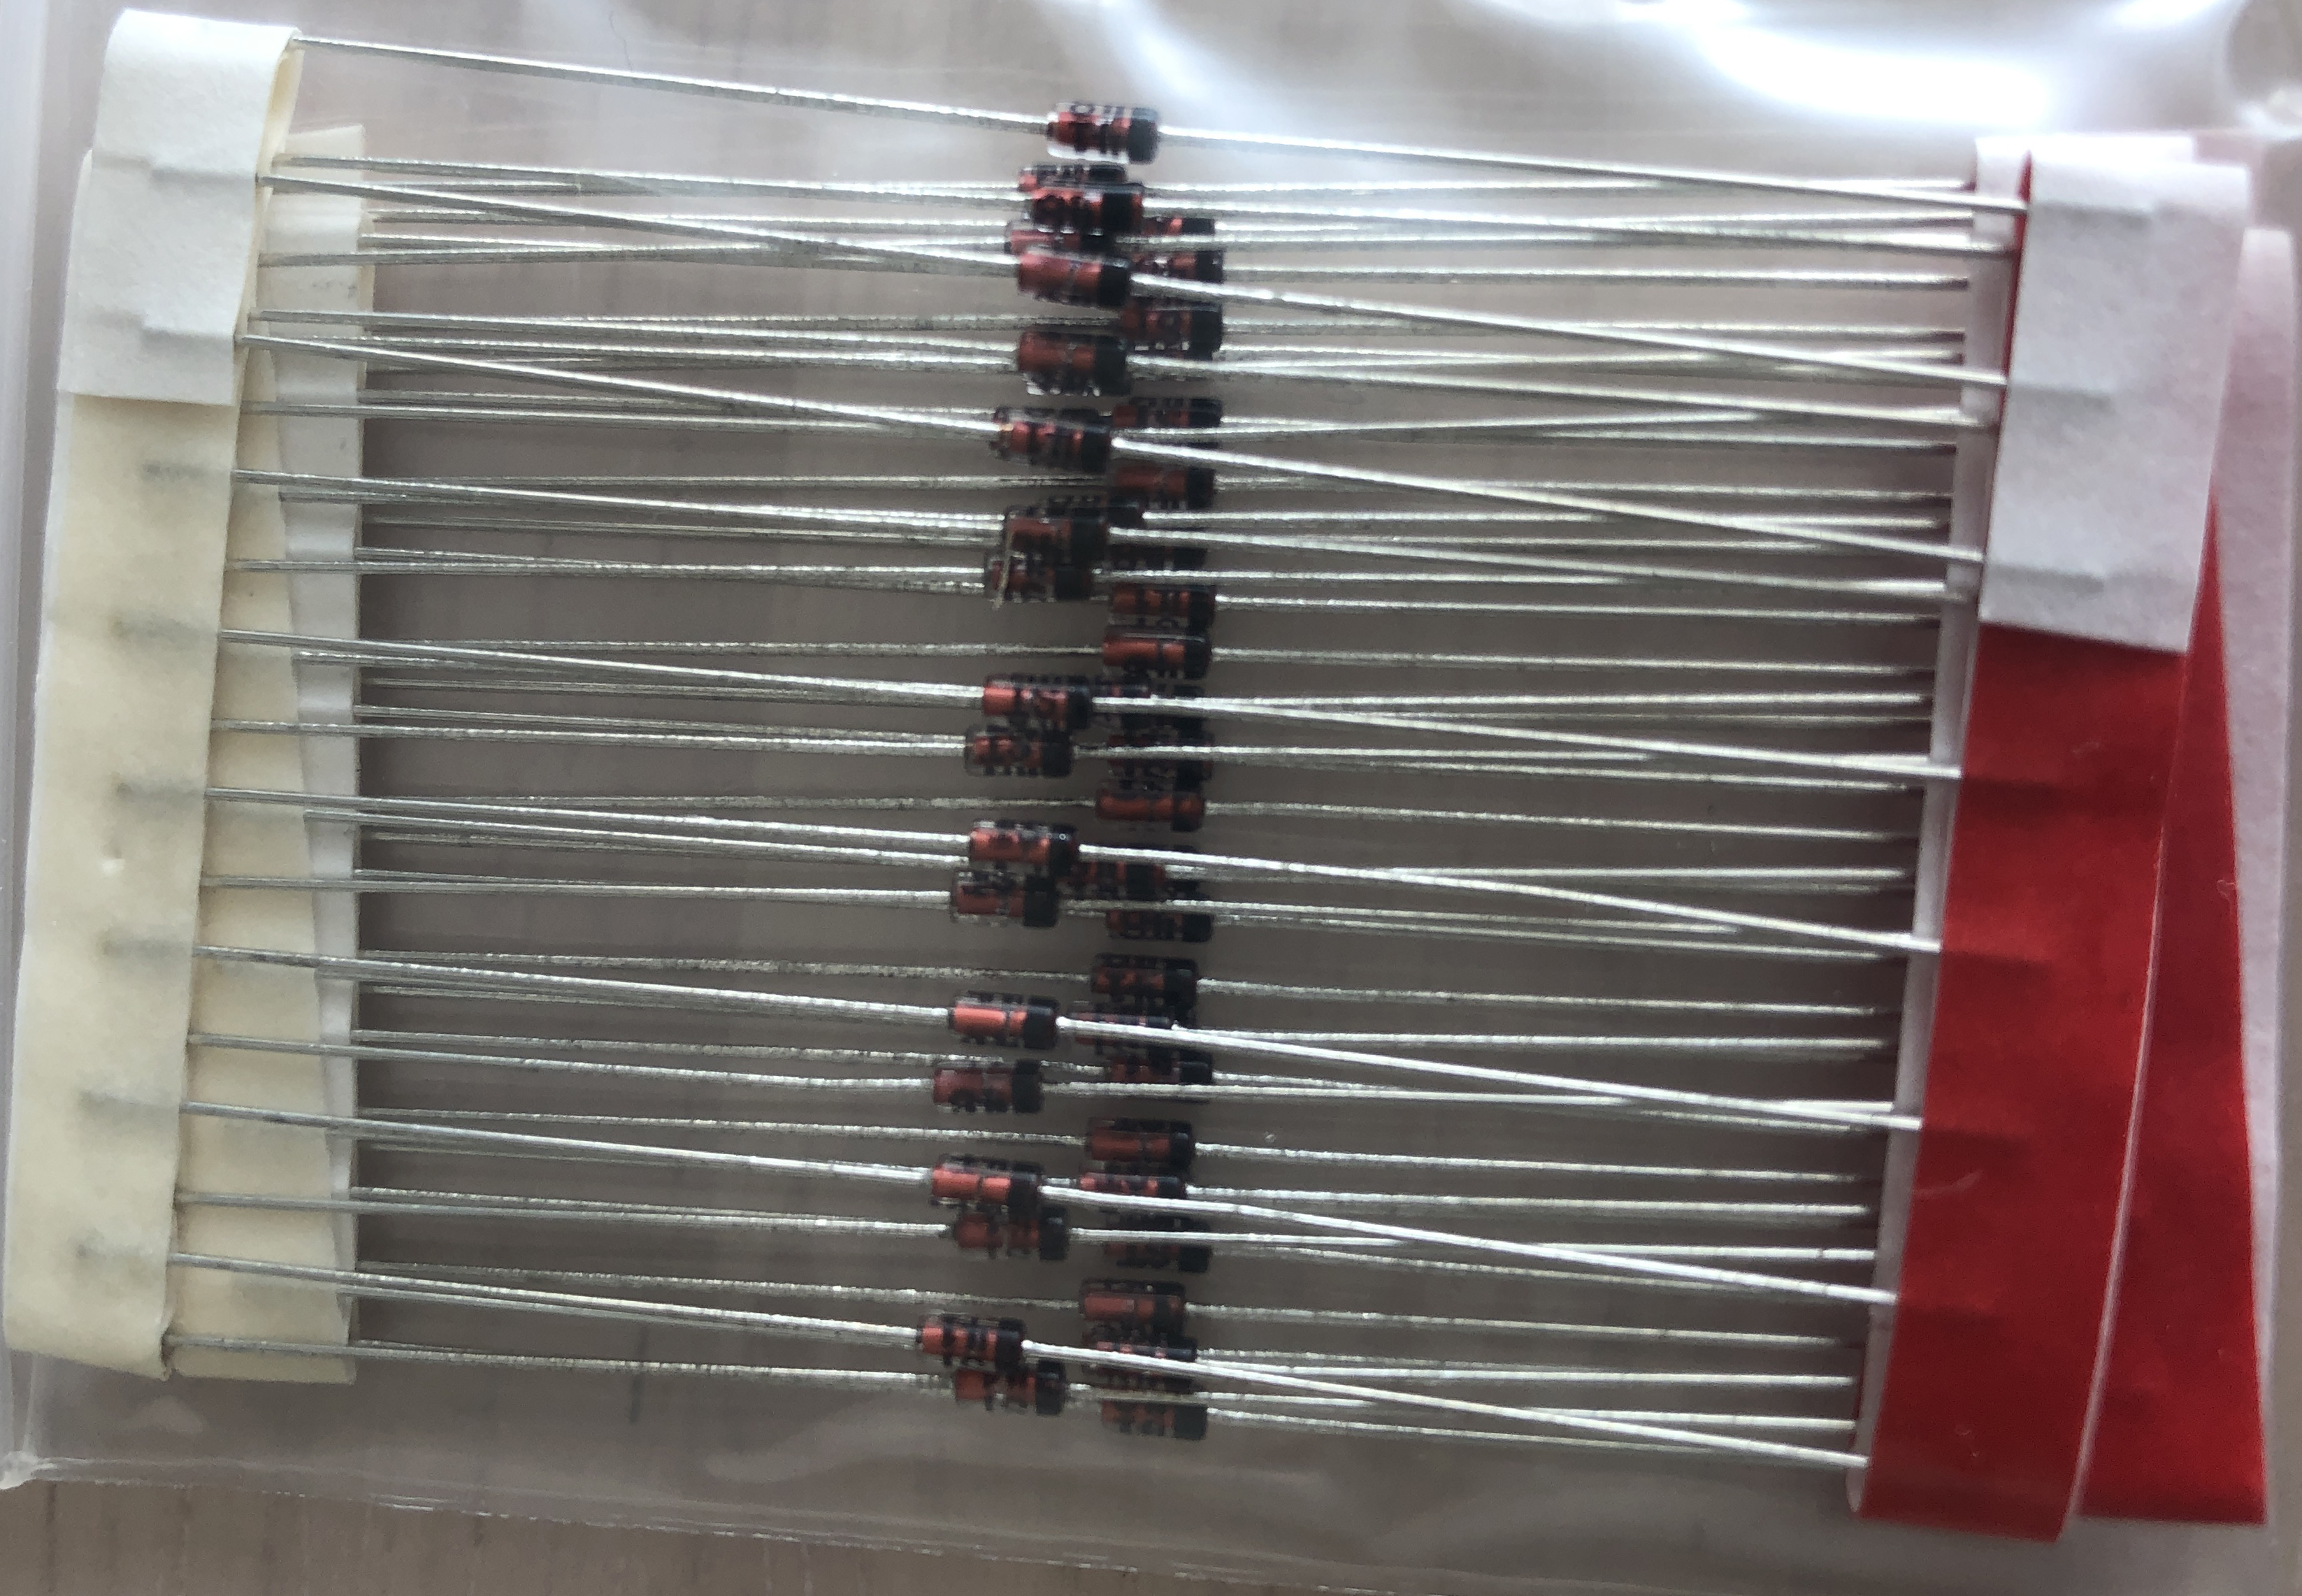 |
| Spacer M2 7.5mm | 10 | 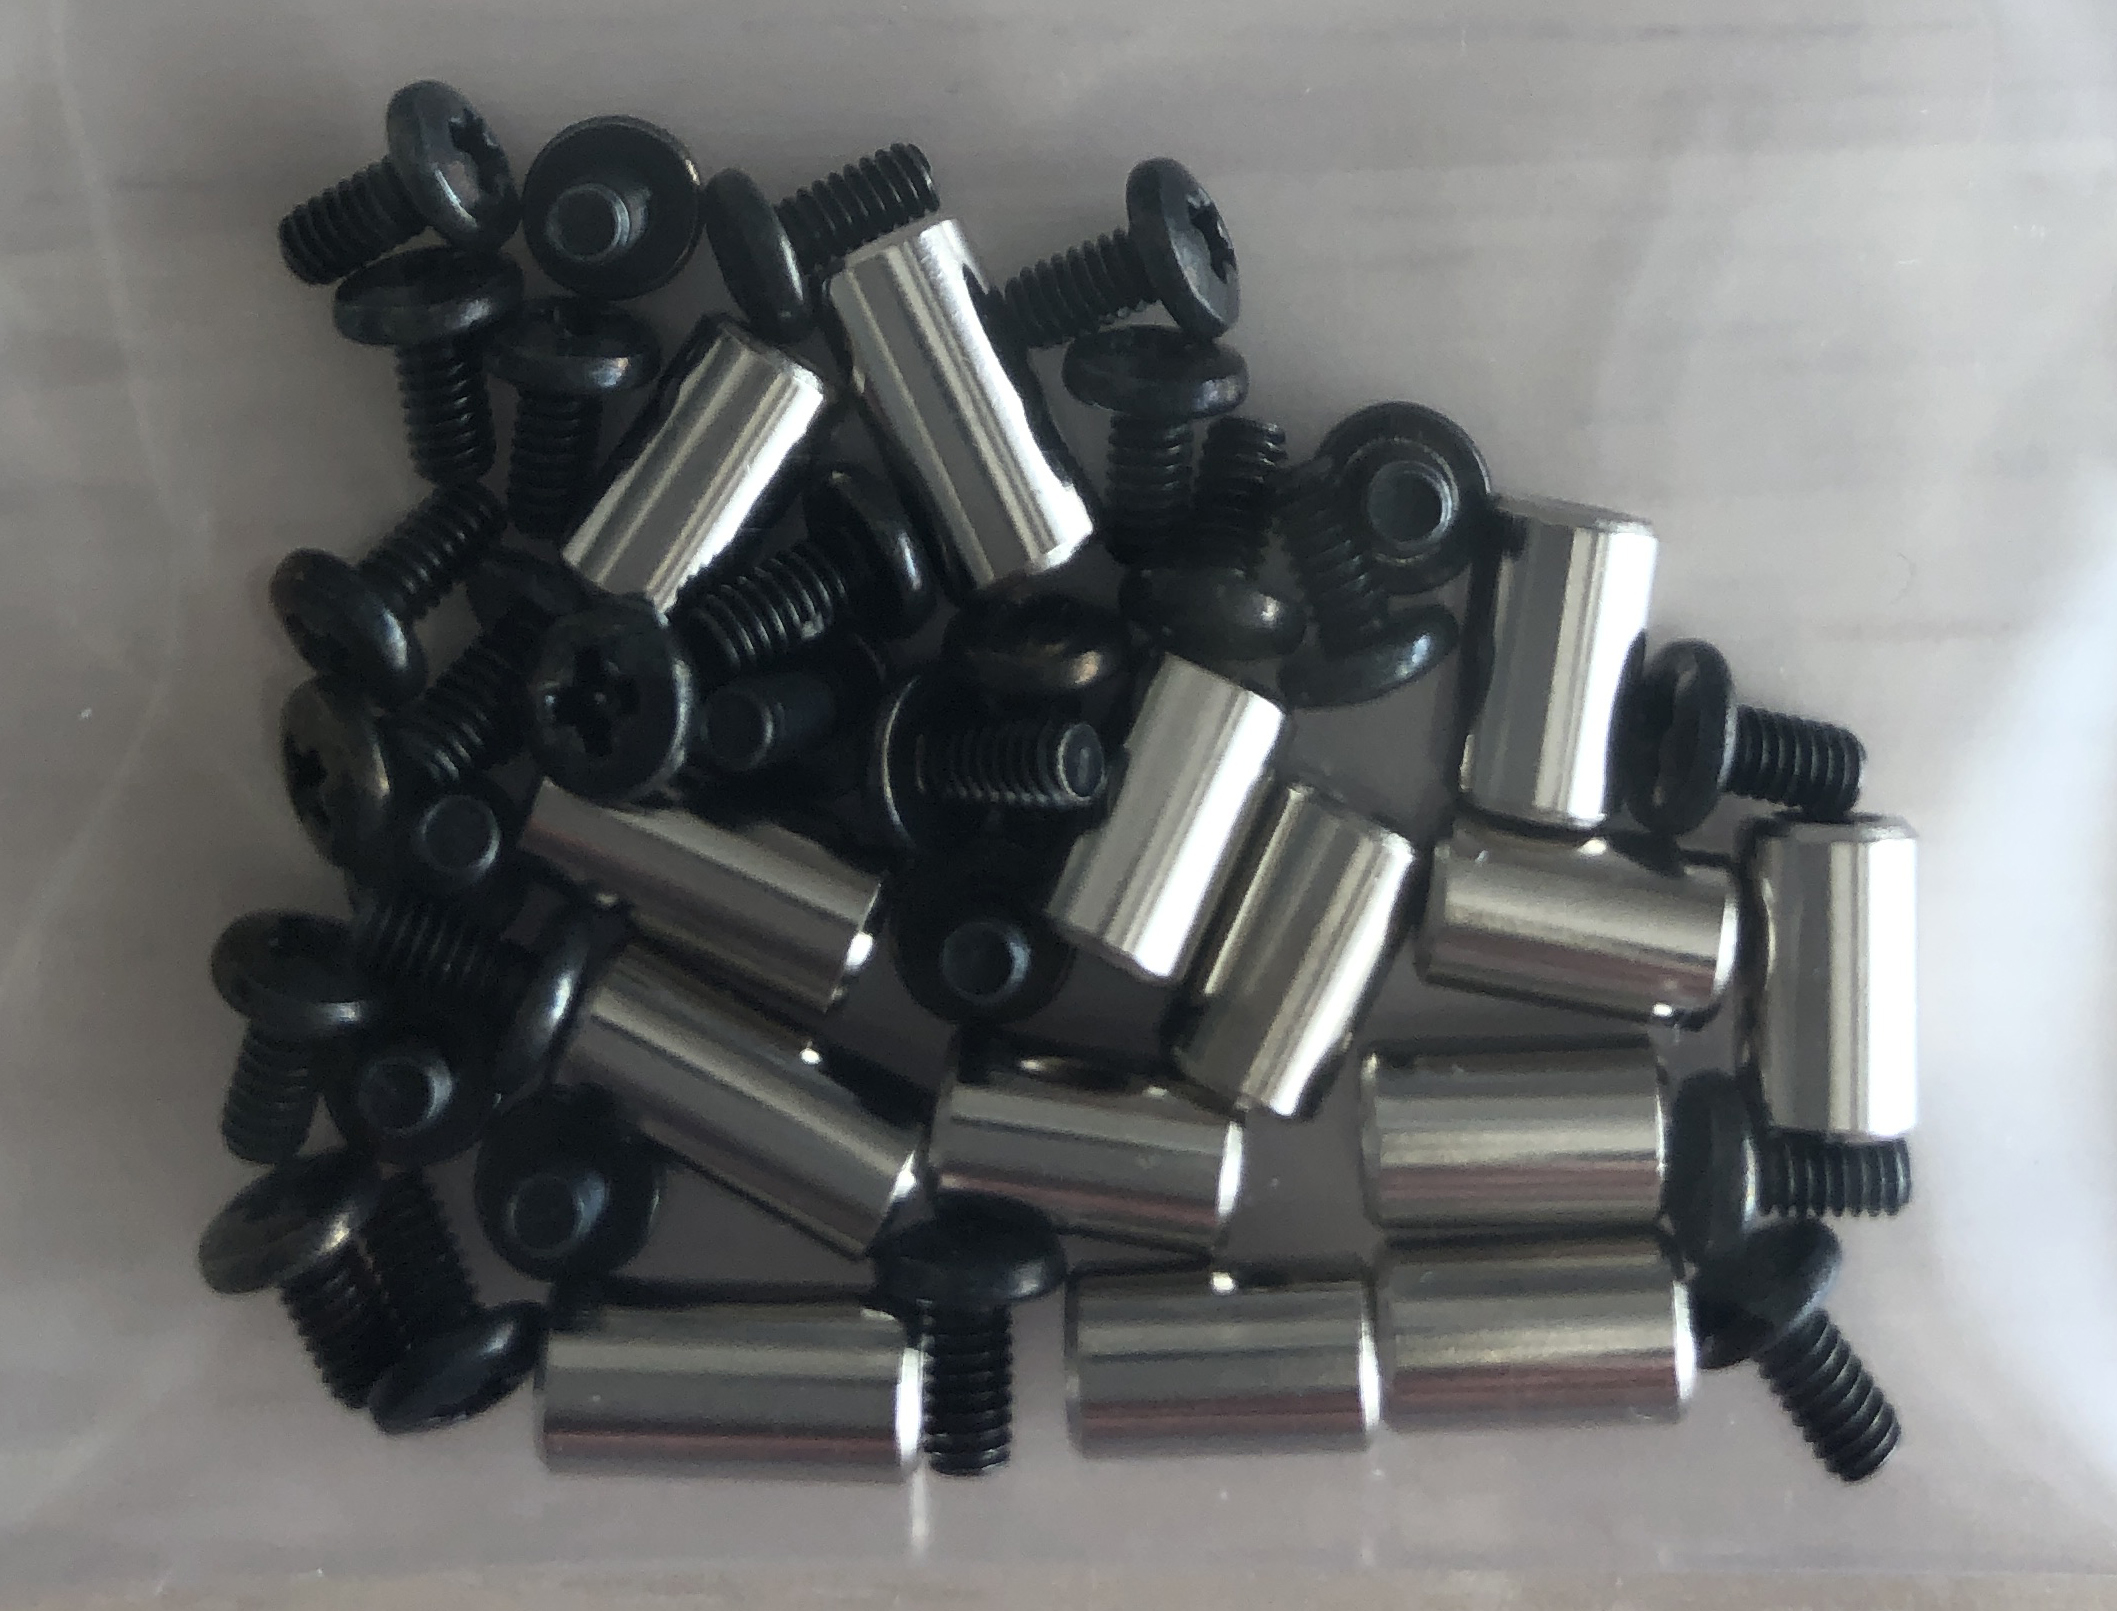 |
| Spacer M2 9mm | 4 | |
| Screw M2 4mm | 28 | |
| TRRS jack | 2 | 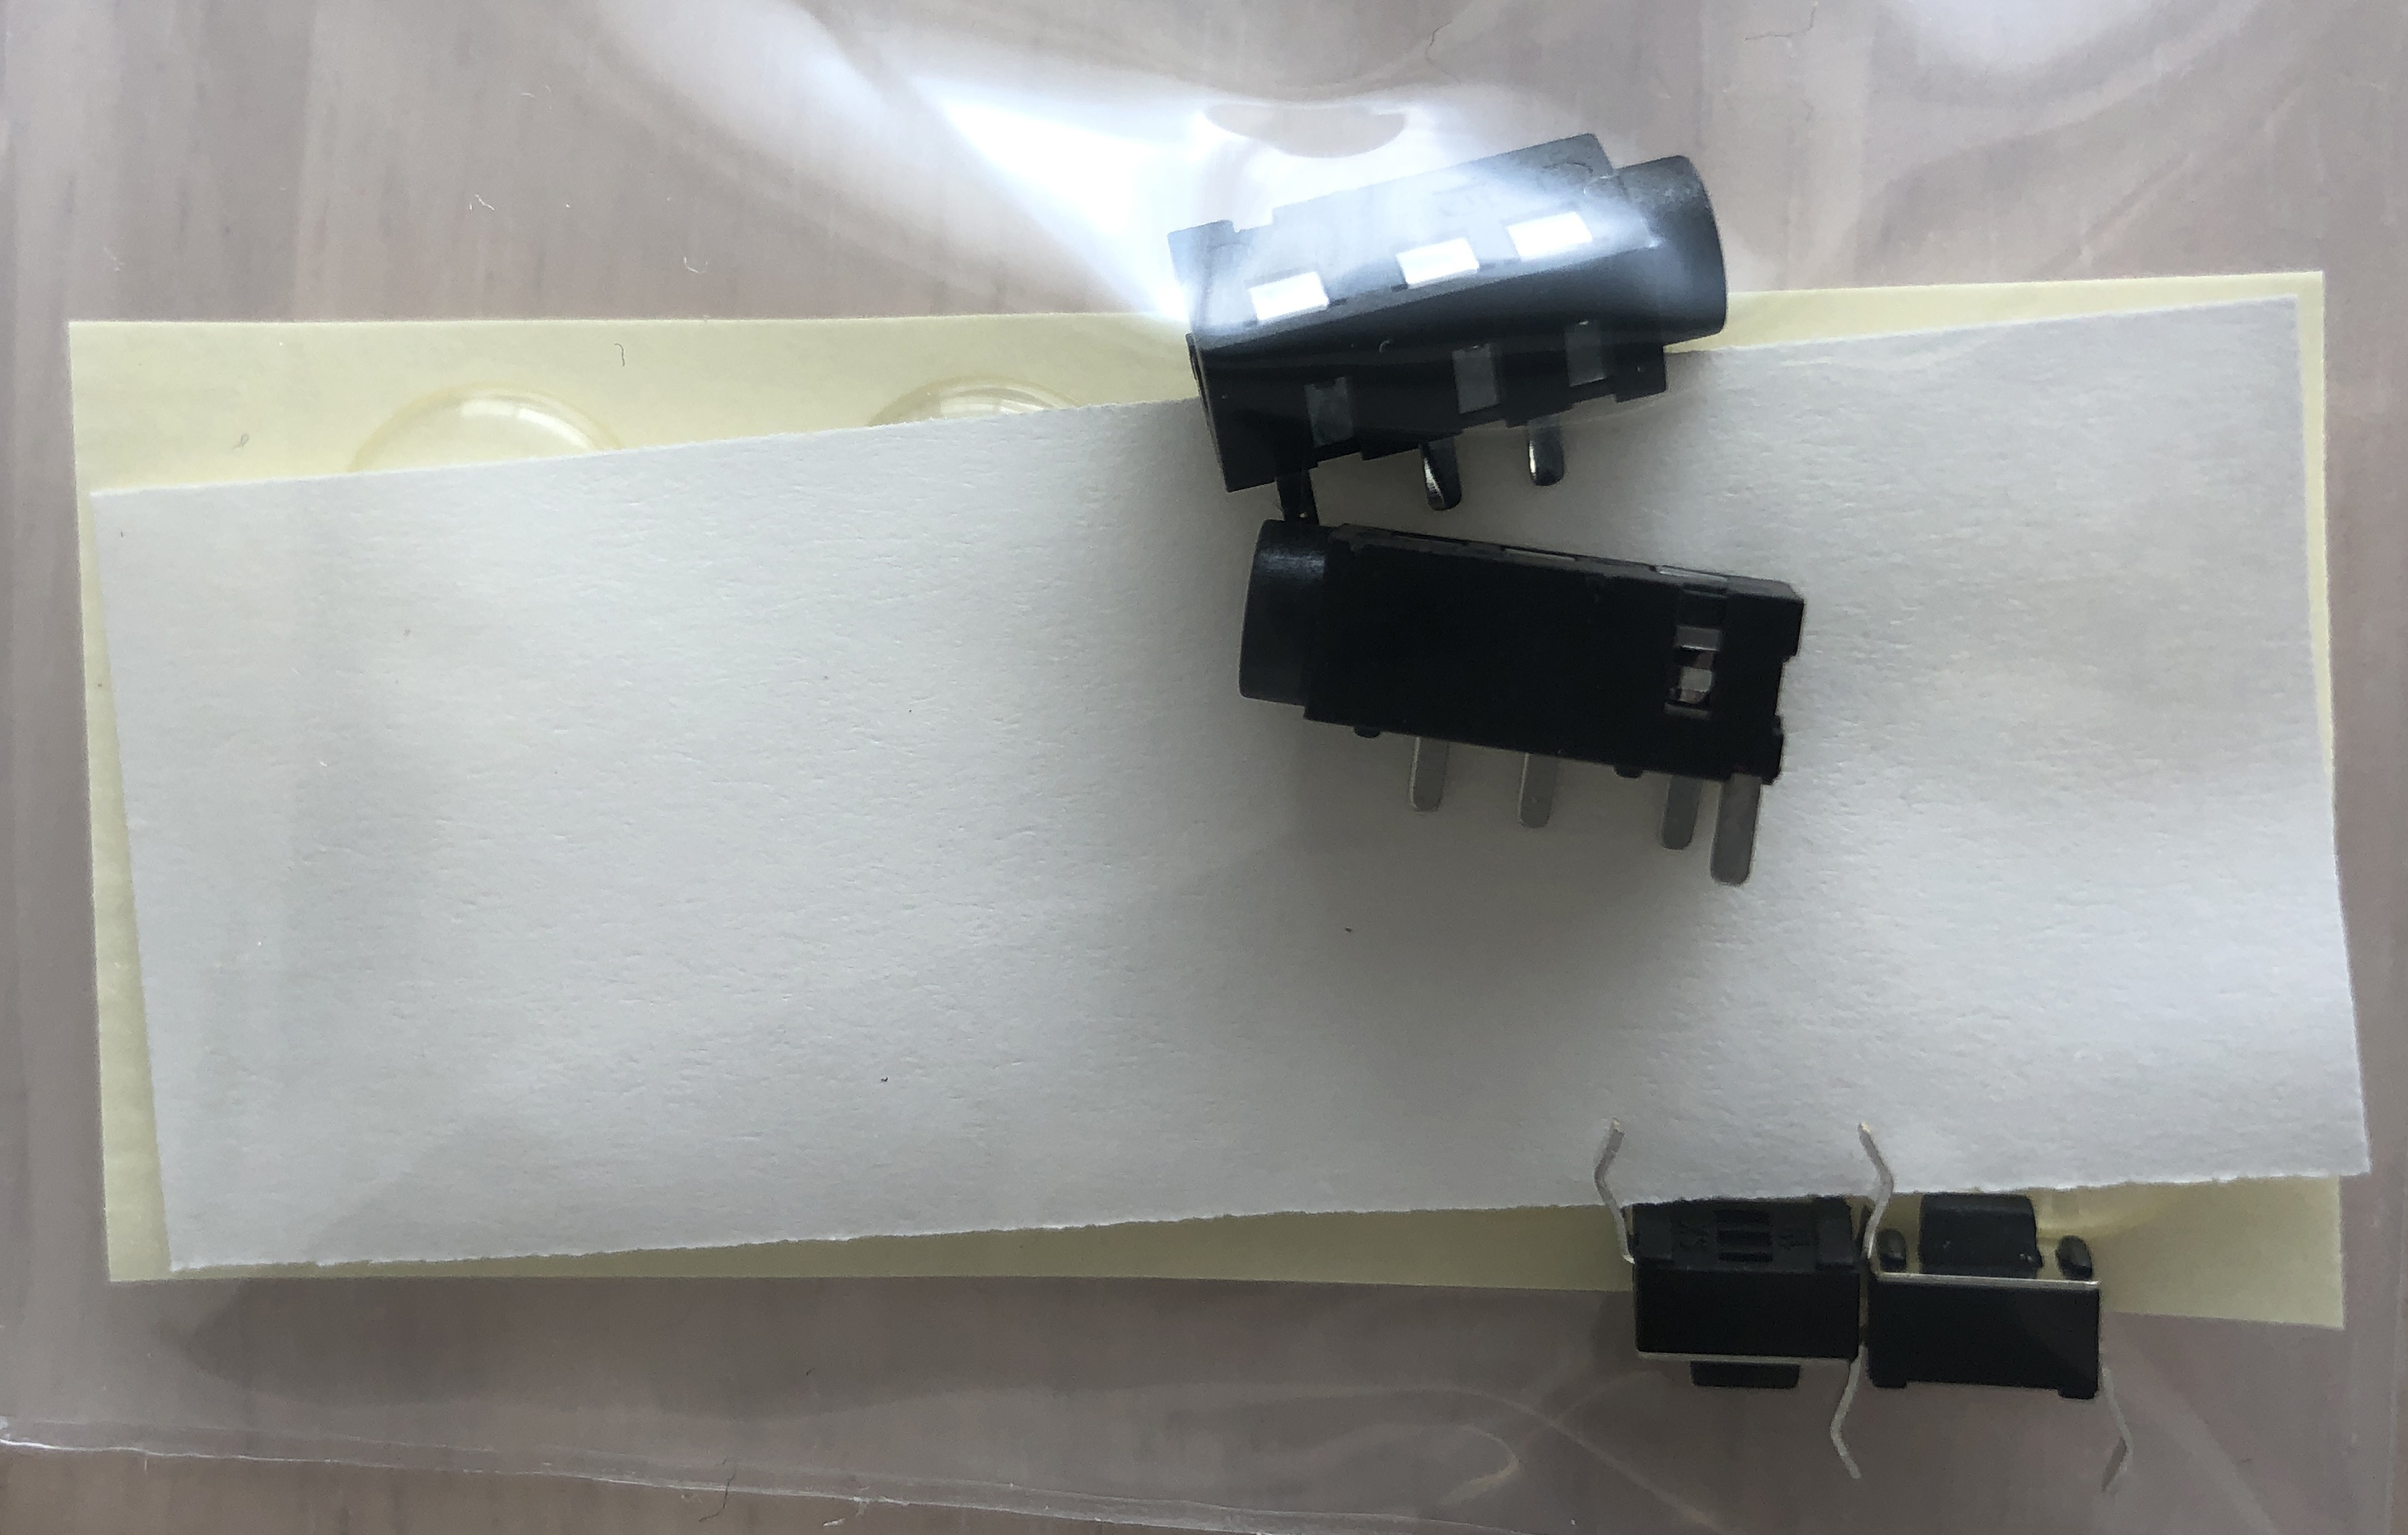 |
| Reset switch | 2 | |
| Rubber feet | 8 | |
| ProMicro (with conthrough) | 2 | https://yushakobo.jp/shop/promicro-spring-pinheader/ |
| OLED module (with pin socket) | 2 | https://yushakobo.jp/shop/oled/ |
| key switch | 42 | |
| keycap | 42 | |
| TRRS cable | 1 | TRS cable is also acceptable |
| USB cable | 1 |
| 名前 | 数 | 備考 |
| PCB | 1セット |

|
| トッププレート | 2枚 |

|
| ボトムプレート | 2枚 |

|
| ProMicro保護プレート | 2枚 | |
| ダイオード | 42本 |

|
| スペーサー M2 7.5mm | 10本 |

|
| スペーサー M2 9mm | 4本 | |
| ネジ M2 4mm | 28本 | |
| TRRSジャック | 2つ |

|
| リセットスイッチ | 2つ | |
| ゴム足 | 8つ | |
| ProMicro(コンスルー付き) | 2つ | https://yushakobo.jp/shop/promicro-spring-pinheader/ |
| OLEDモジュール(ピンソケット付き) | 2つ | https://yushakobo.jp/shop/oled/ |
| キースイッチ | 42個 | |
| キーキャップ | 42個 | |
| TRRSケーブル | 1本 | TRSケーブルでも可 |
| USBケーブル | 1本 |
 こちらはダイオードの足を曲げるための治具です。
必要に応じて切り離しておきます。
こちらはダイオードの足を曲げるための治具です。
必要に応じて切り離しておきます。
 ※ バージョンによって治具が付いていないものもあります。
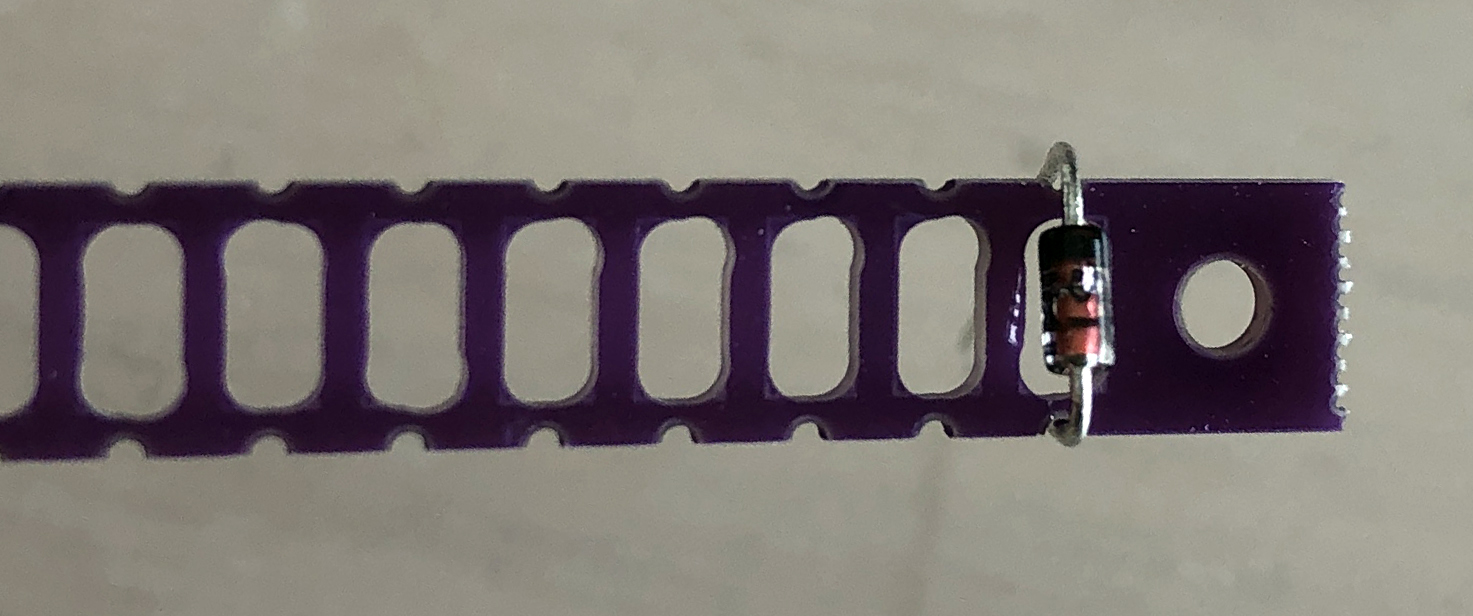
### ダイオード
まずはリードタイプのダイオードの足を曲げていきます。
※ 写真のように一本ずつ曲げるときれいにできますが、テープに繋がれたまま複数本を同時に曲げたほうが効率的です。
※ バージョンによって治具が付いていないものもあります。
### ダイオード
まずはリードタイプのダイオードの足を曲げていきます。
※ 写真のように一本ずつ曲げるときれいにできますが、テープに繋がれたまま複数本を同時に曲げたほうが効率的です。
 足を曲げたダイオードを指定の位置に付けていきます。
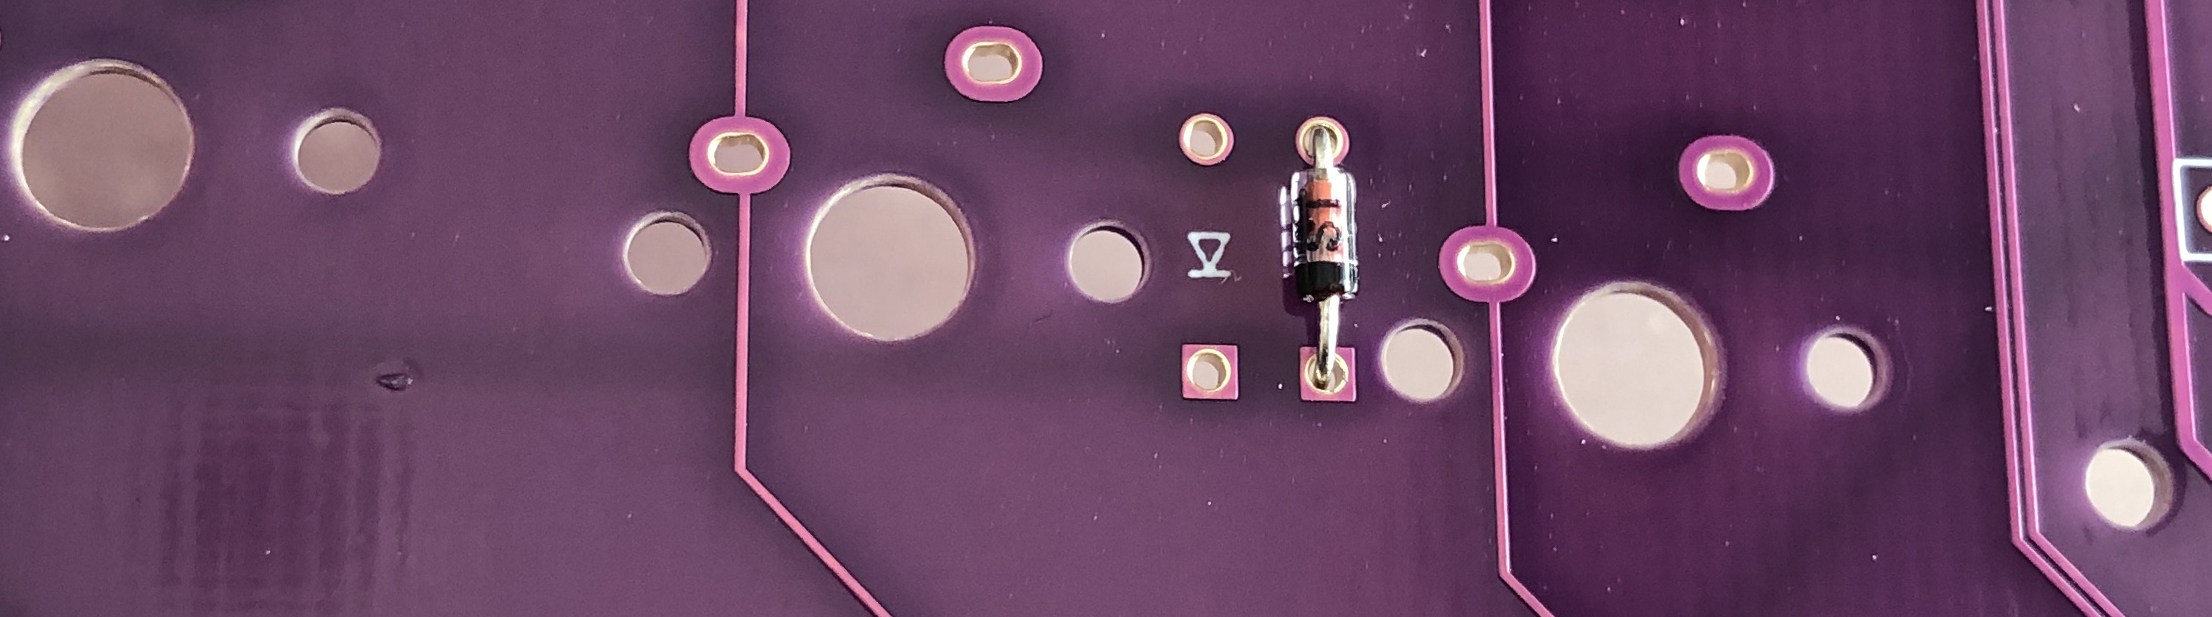
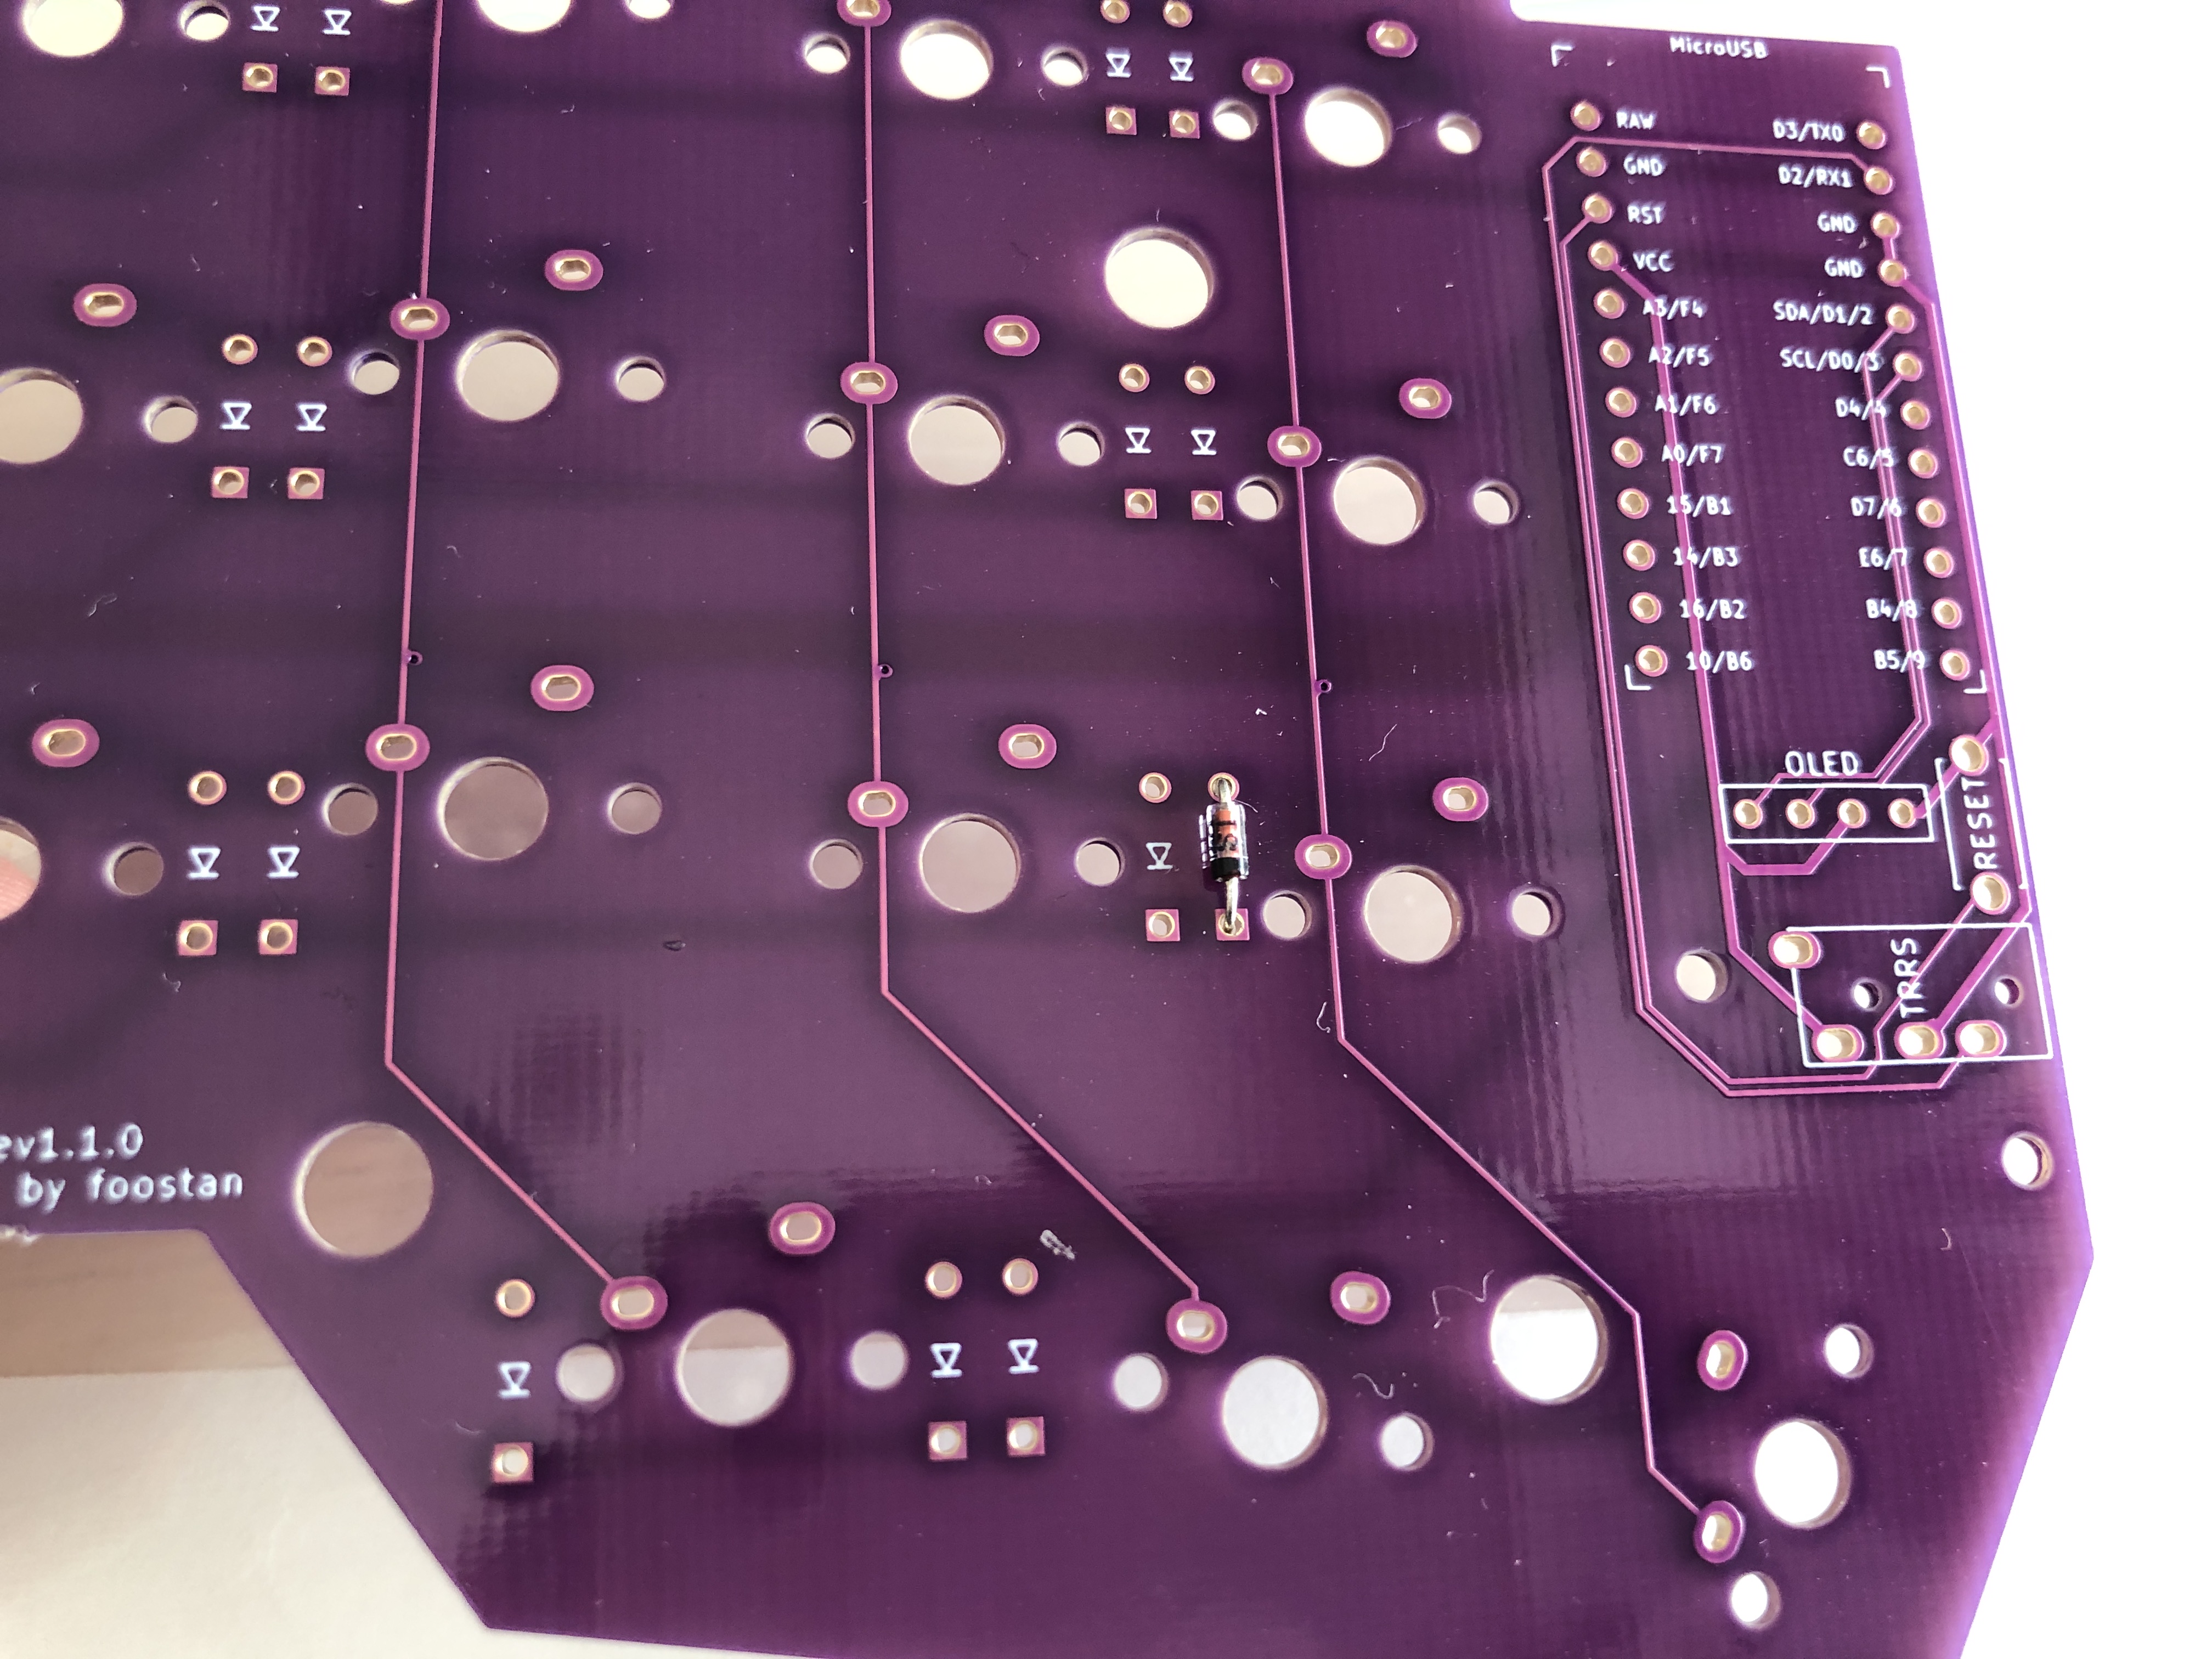 ダイオードには向きがあり、写真のように取り付けます。
※ 取り付けるダイオードはすべて同じ向きです。
ダイオードには向きがあり、写真のように取り付けます。
※ 取り付けるダイオードはすべて同じ向きです。
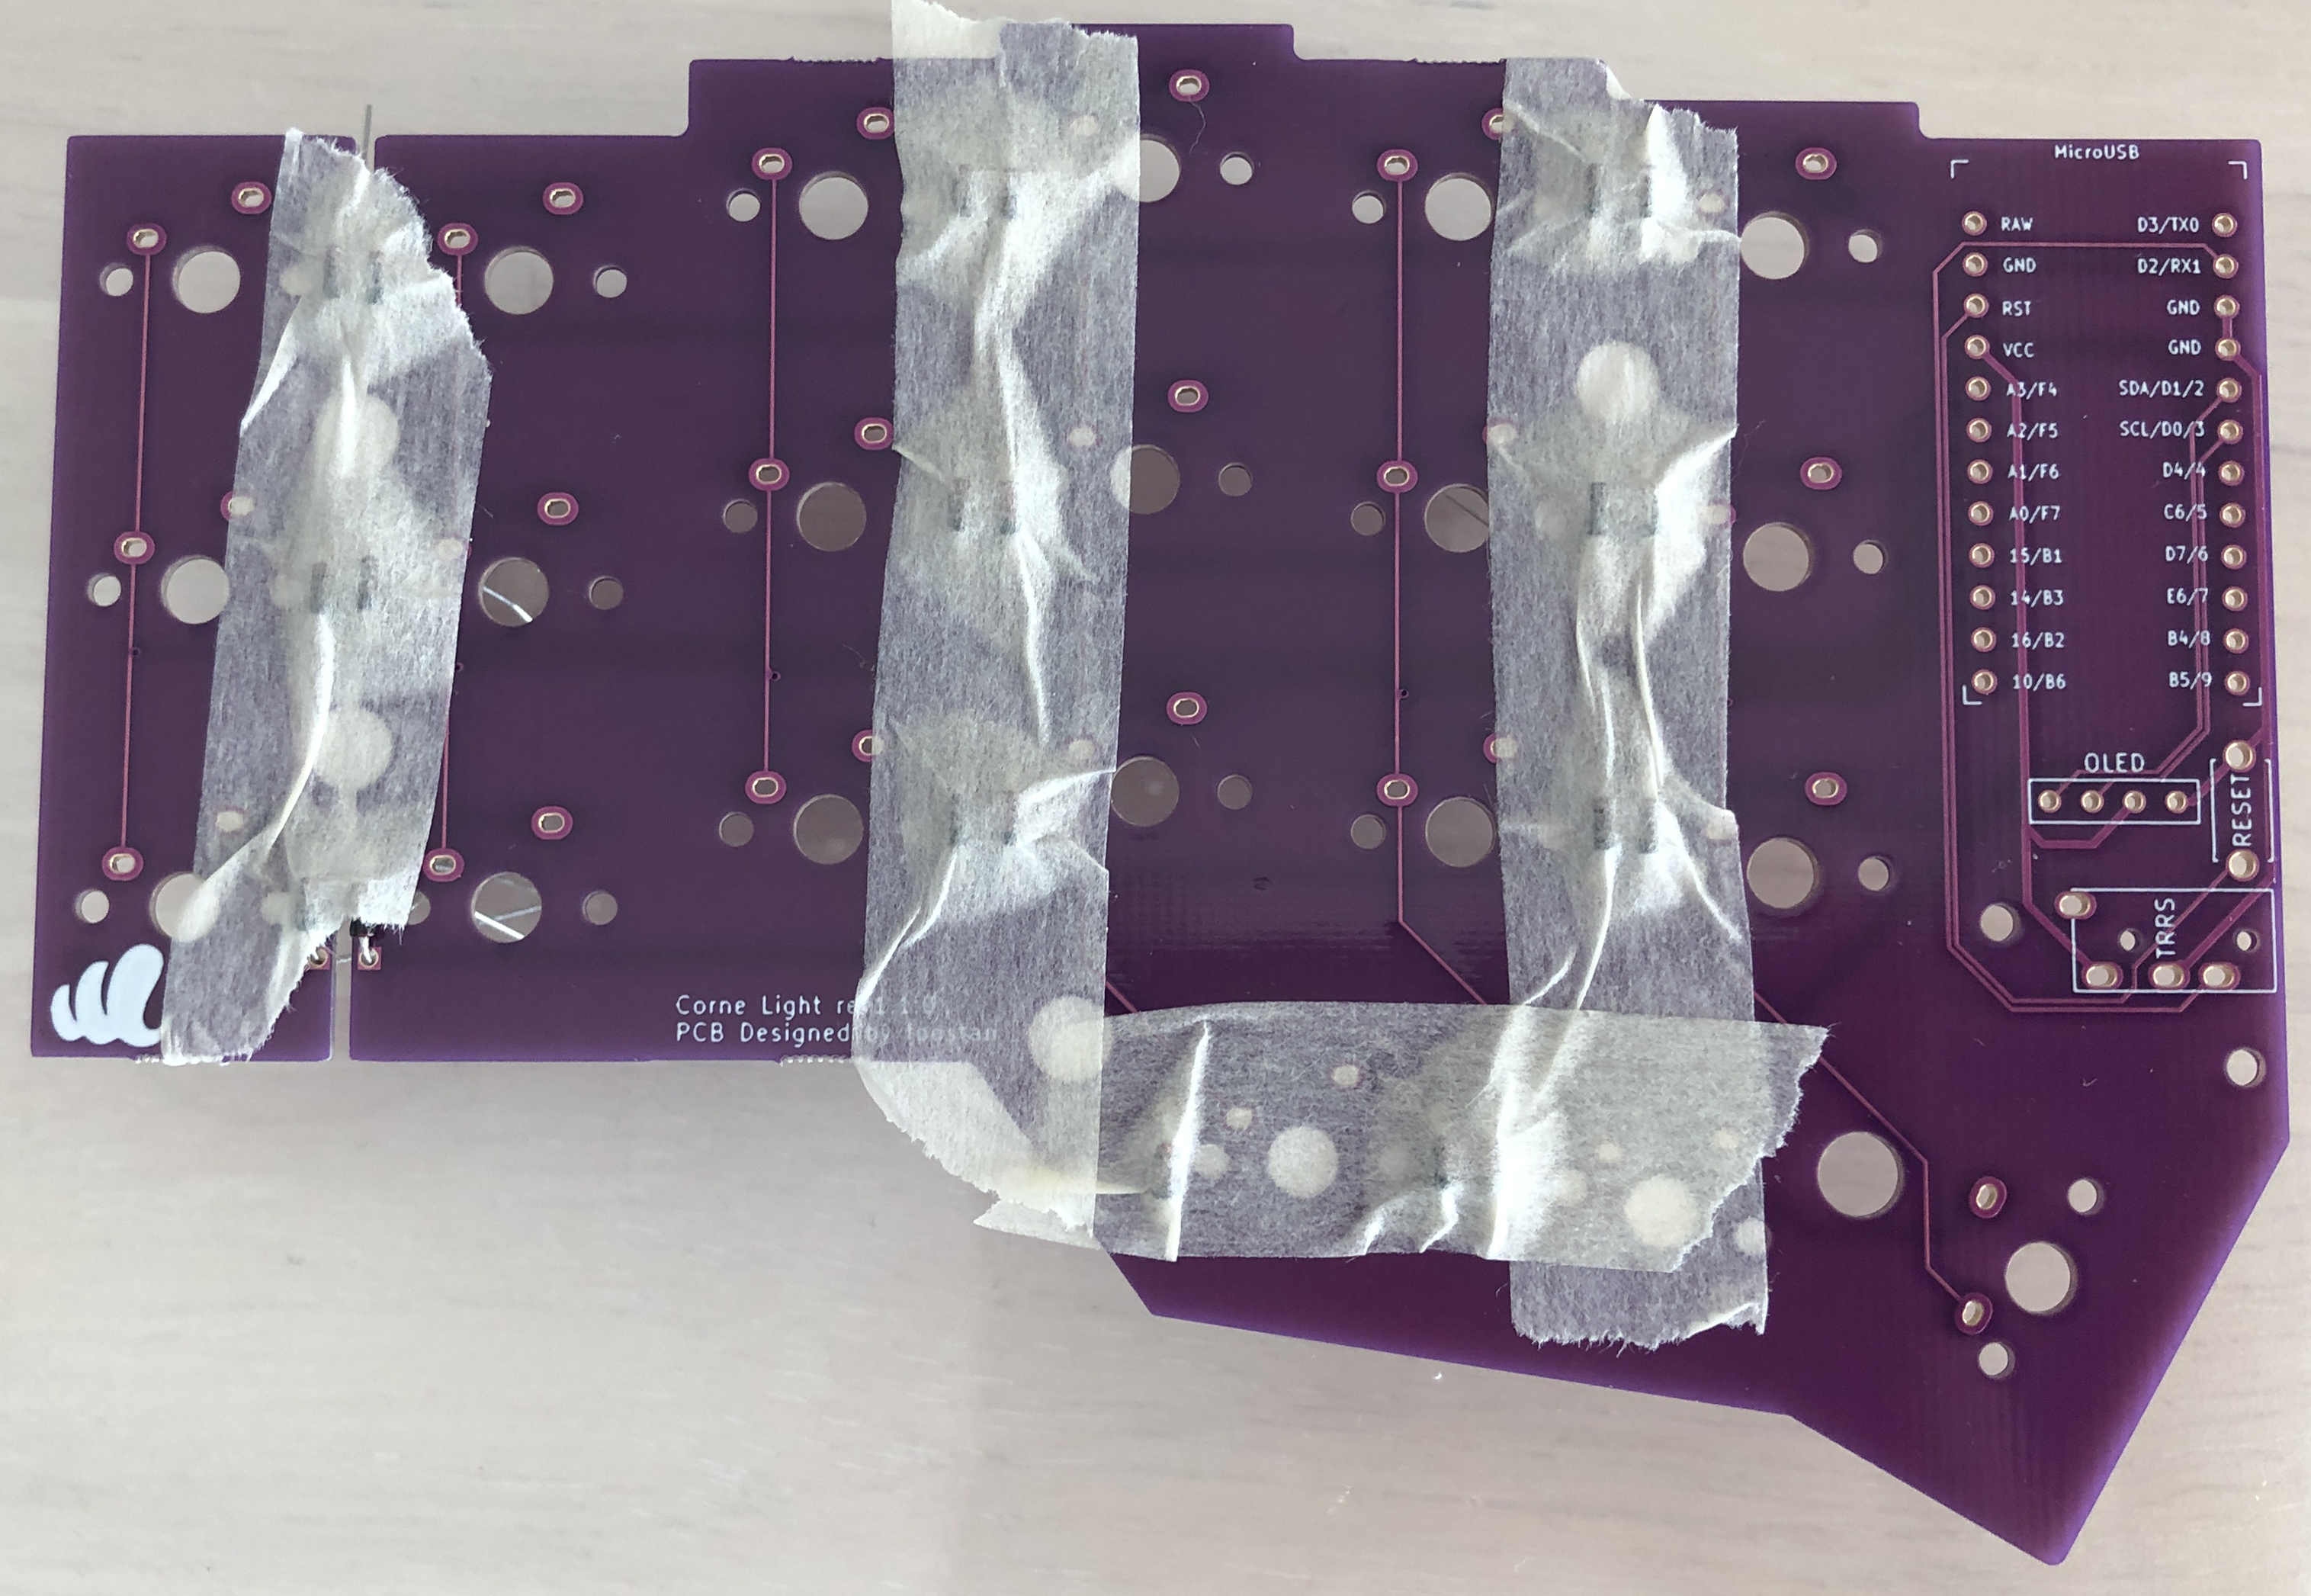
 マスキングテープで固定するときれいに付けることができます。
 裏面からはんだ付けを行います。
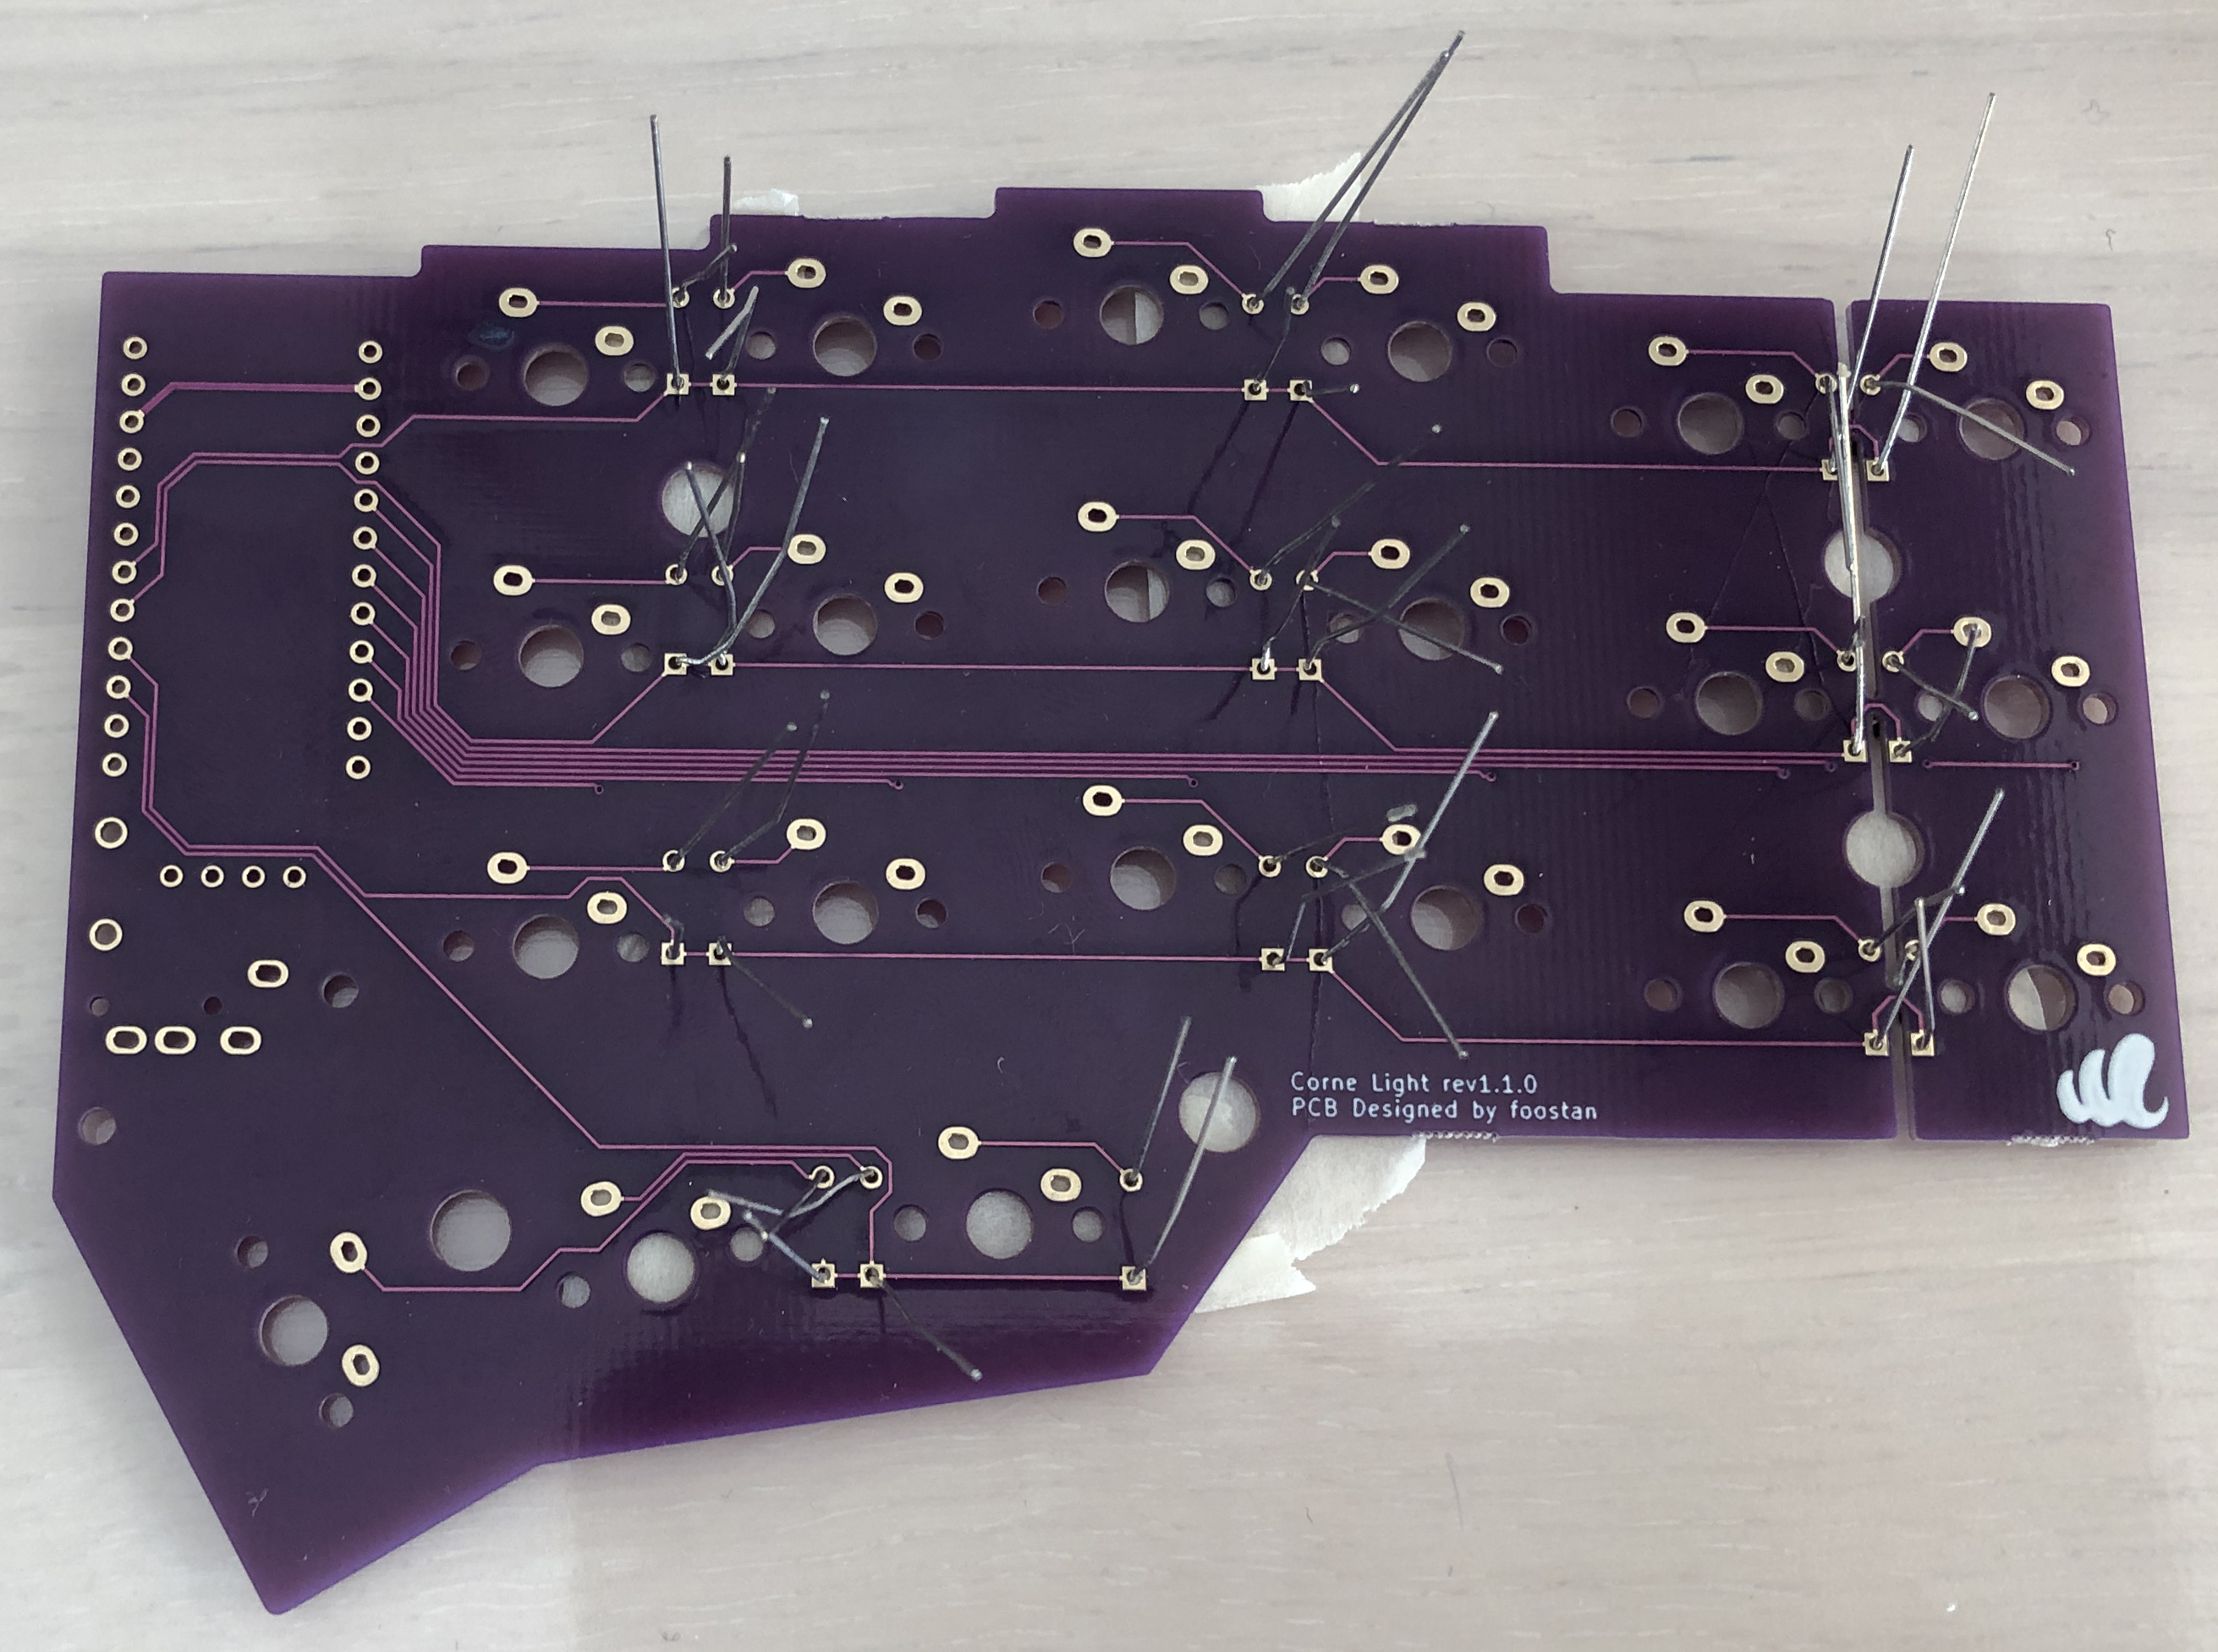 マスキングテープで固定している場合はこのようにギリギリまで足を切るとはんだ付けがやりやすくなります。
 片手21個、両手分で 42 個のダイオードを取り付けます。
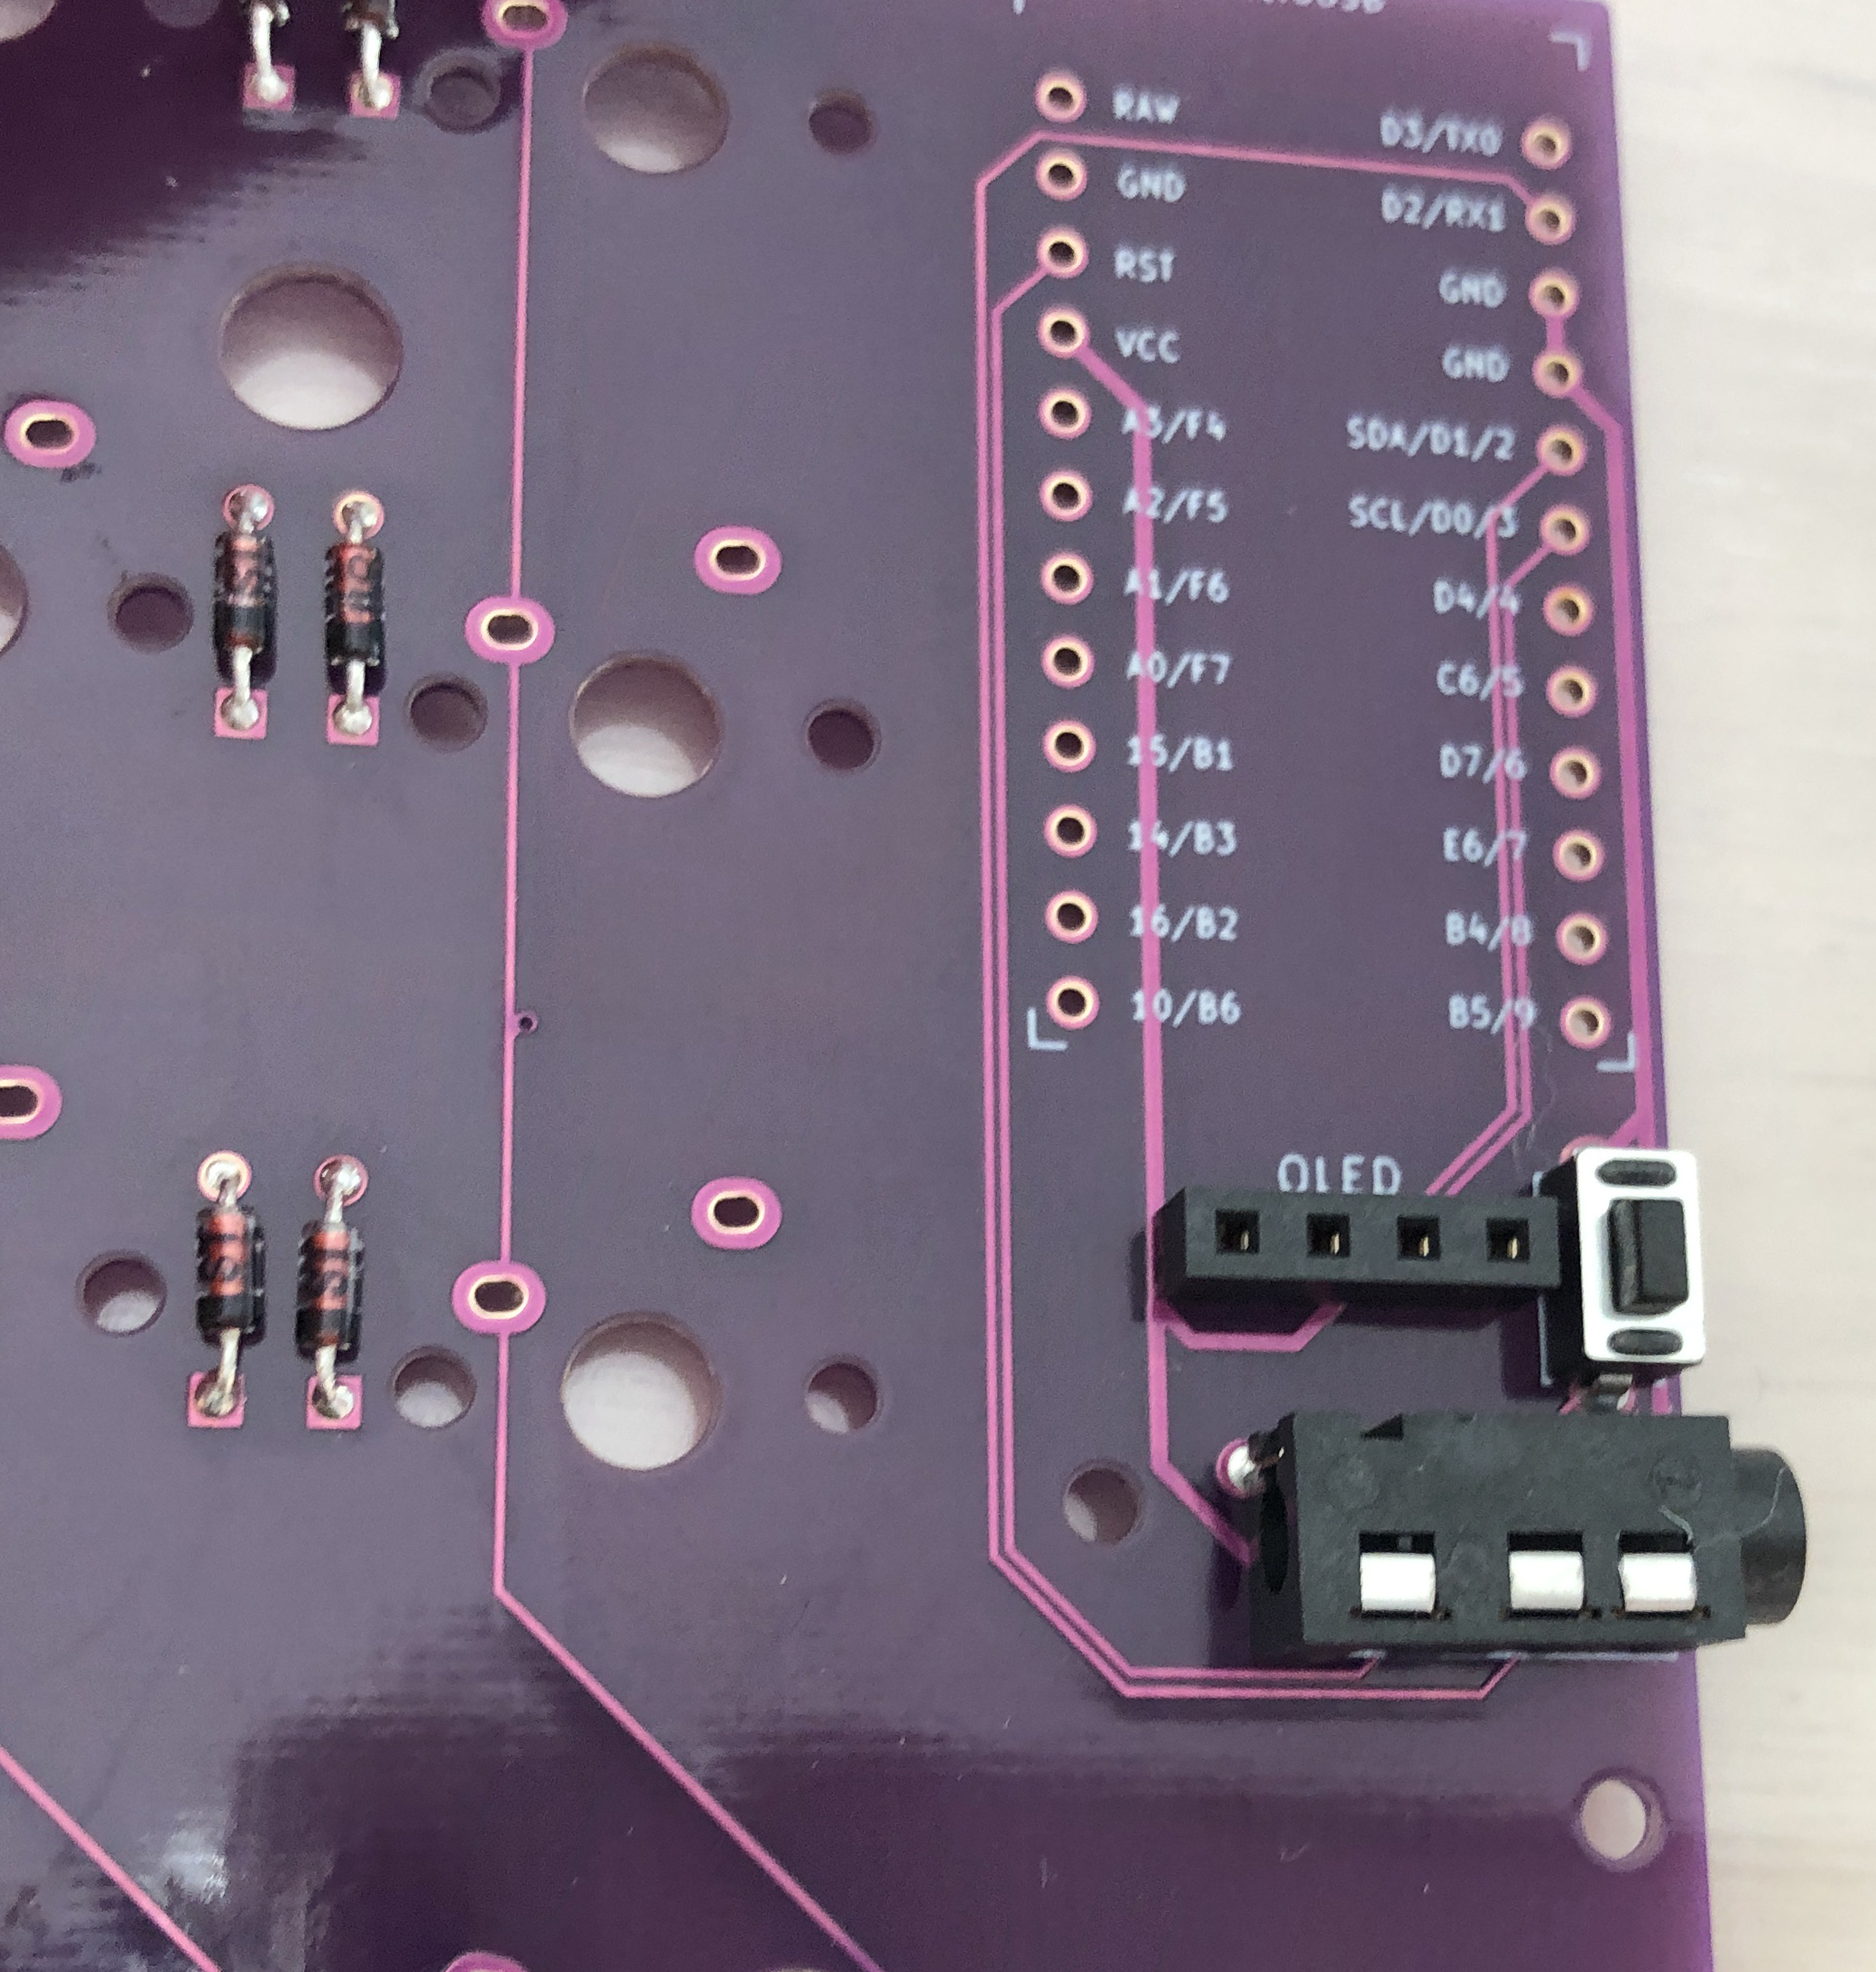
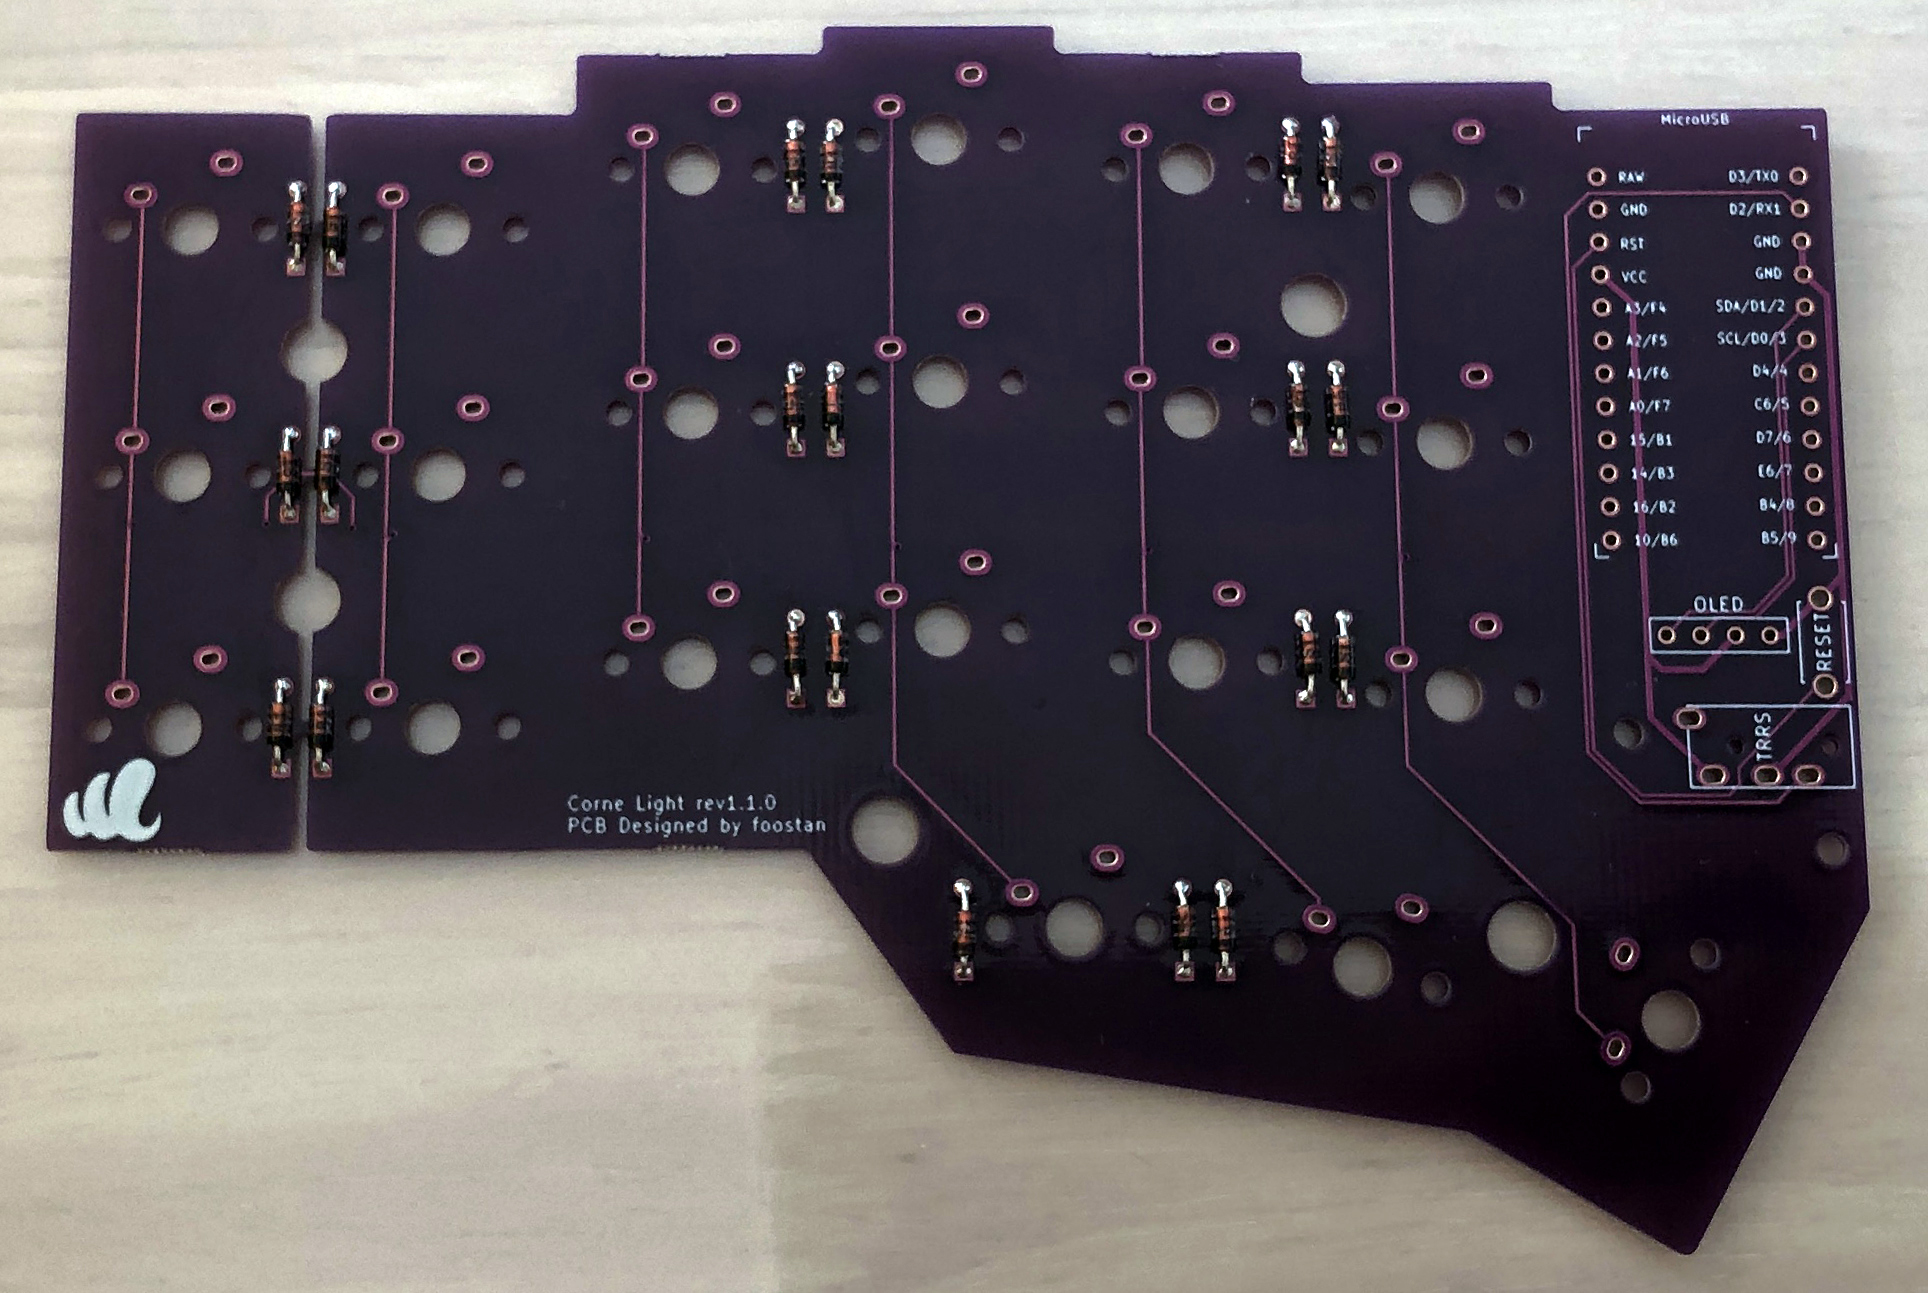 ### TRRSジャック、リセットスイッチ、ピンソケット
指定の位置に取り付けます。
※ 右手側も同じ位置に取り付けます(表裏の間違いに気を付けてください)。
### TRRSジャック、リセットスイッチ、ピンソケット
指定の位置に取り付けます。
※ 右手側も同じ位置に取り付けます(表裏の間違いに気を付けてください)。
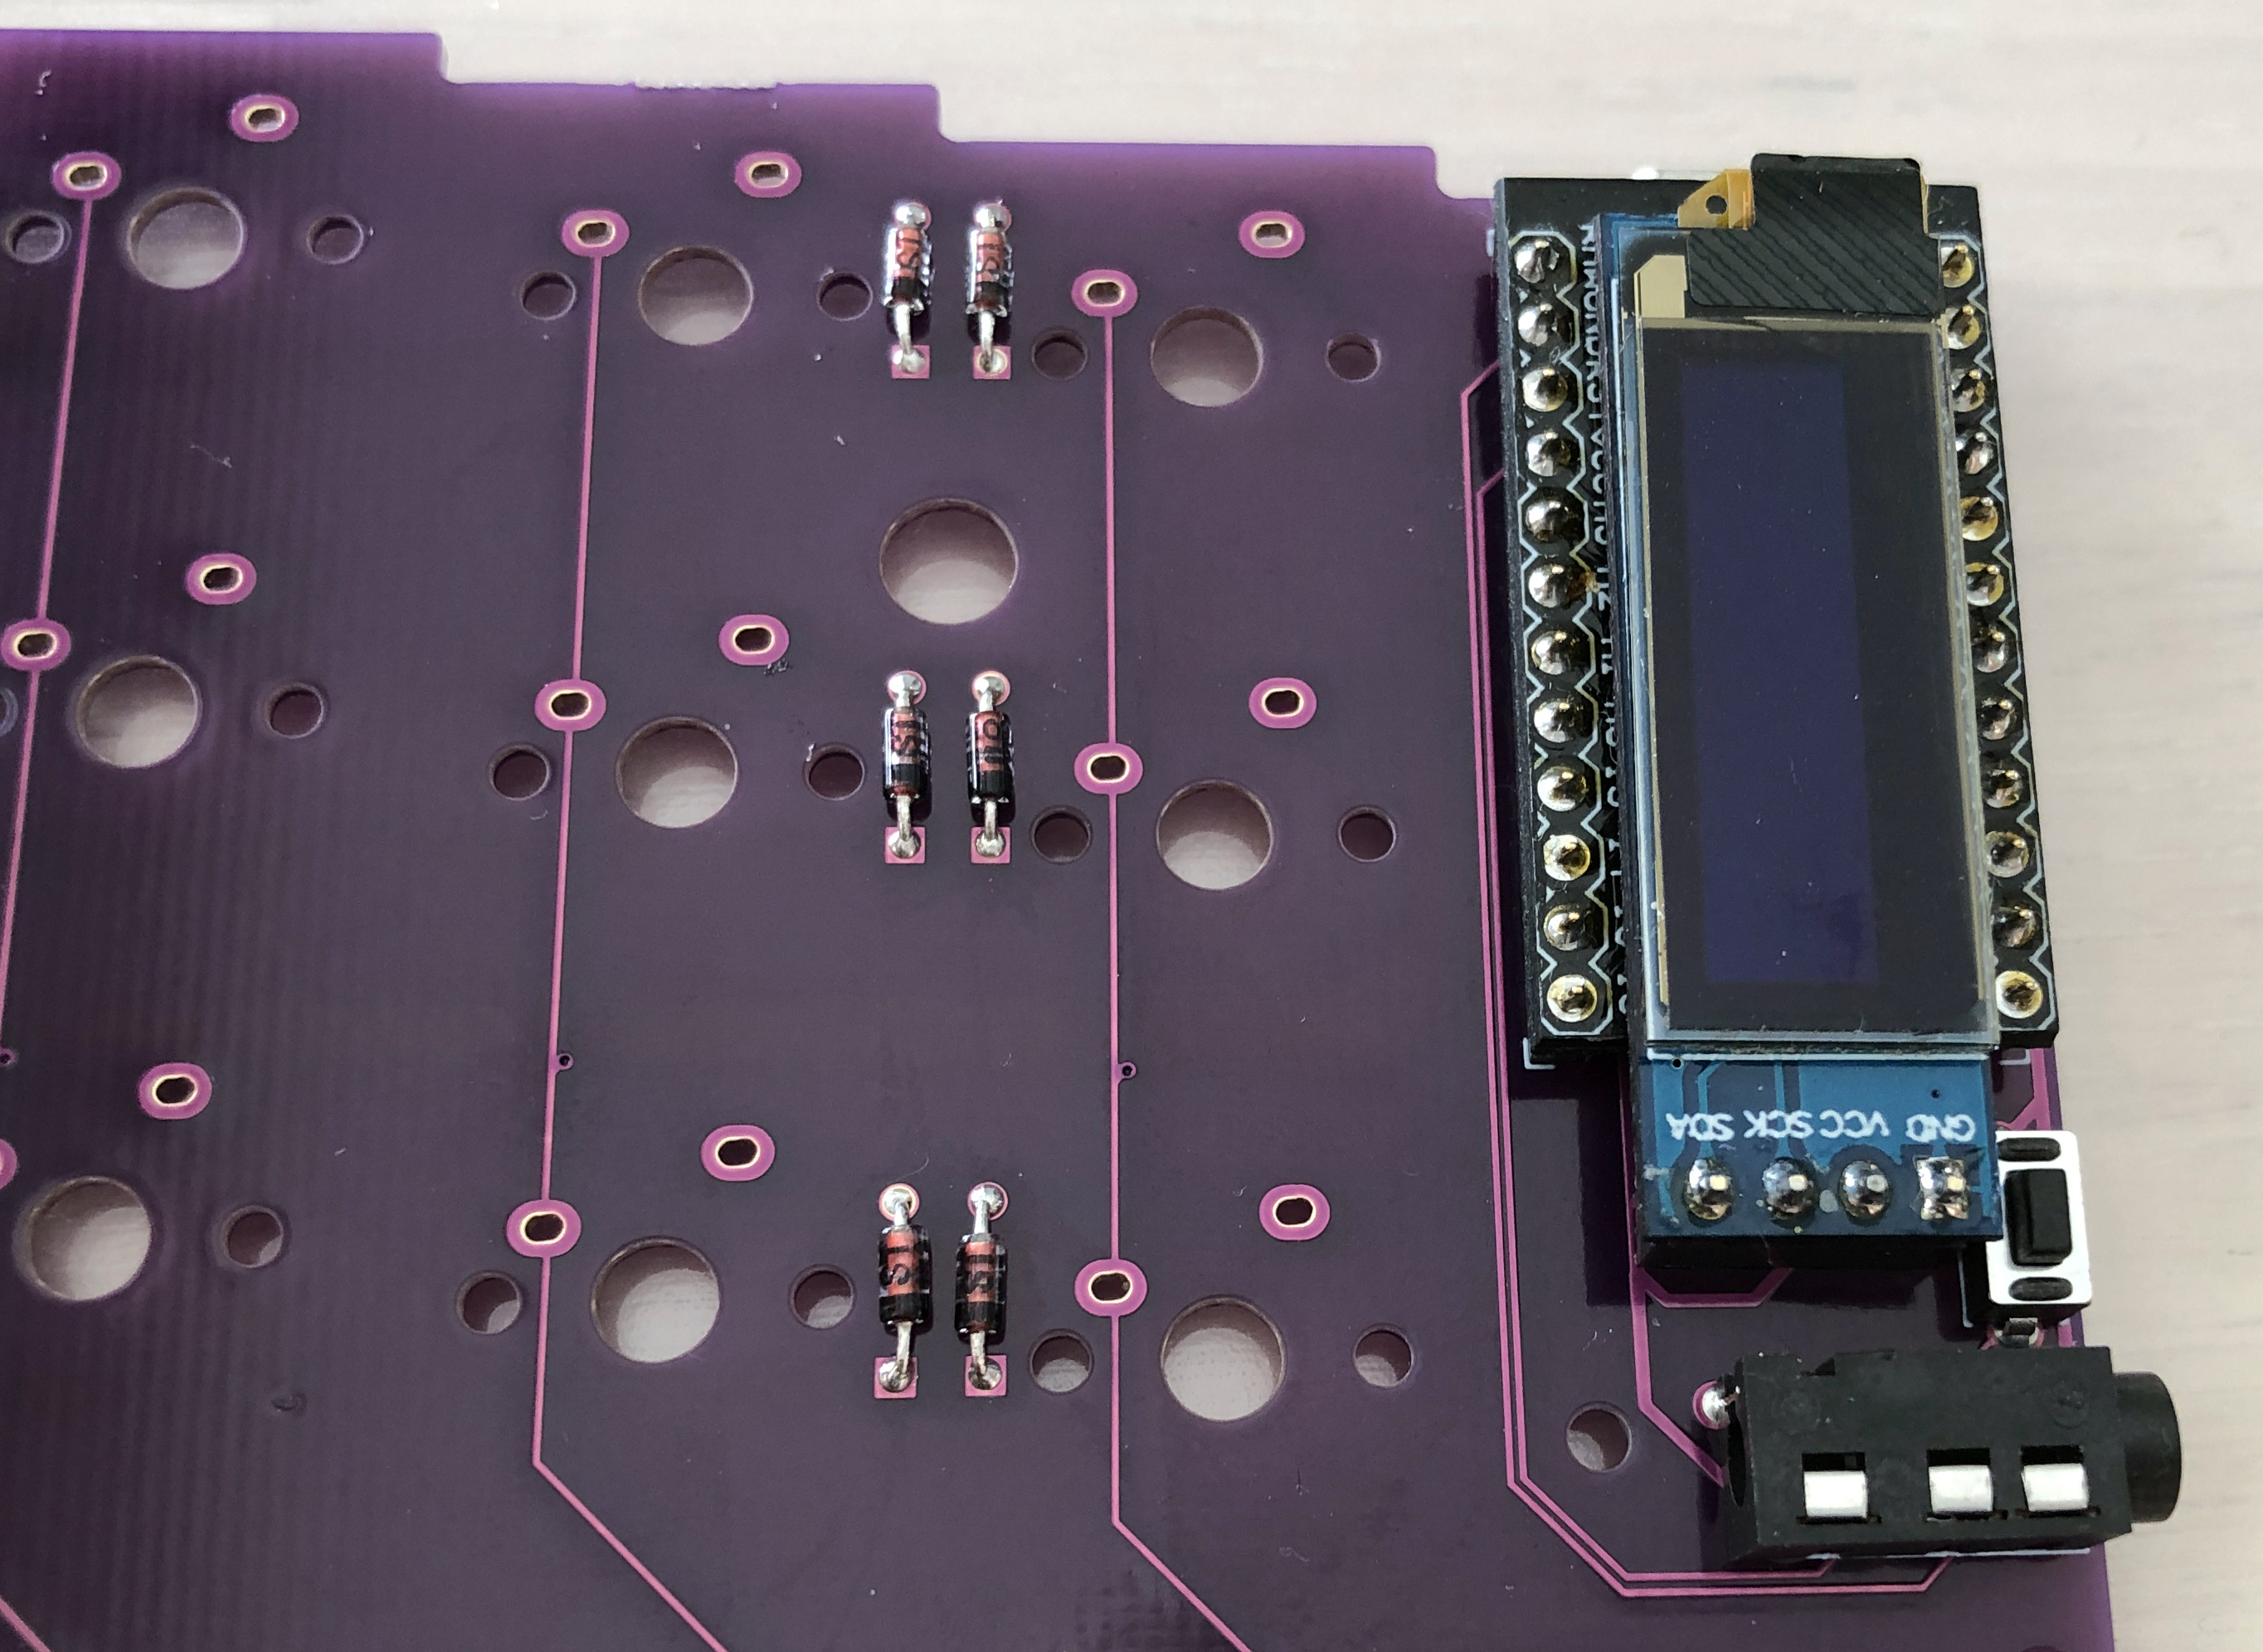
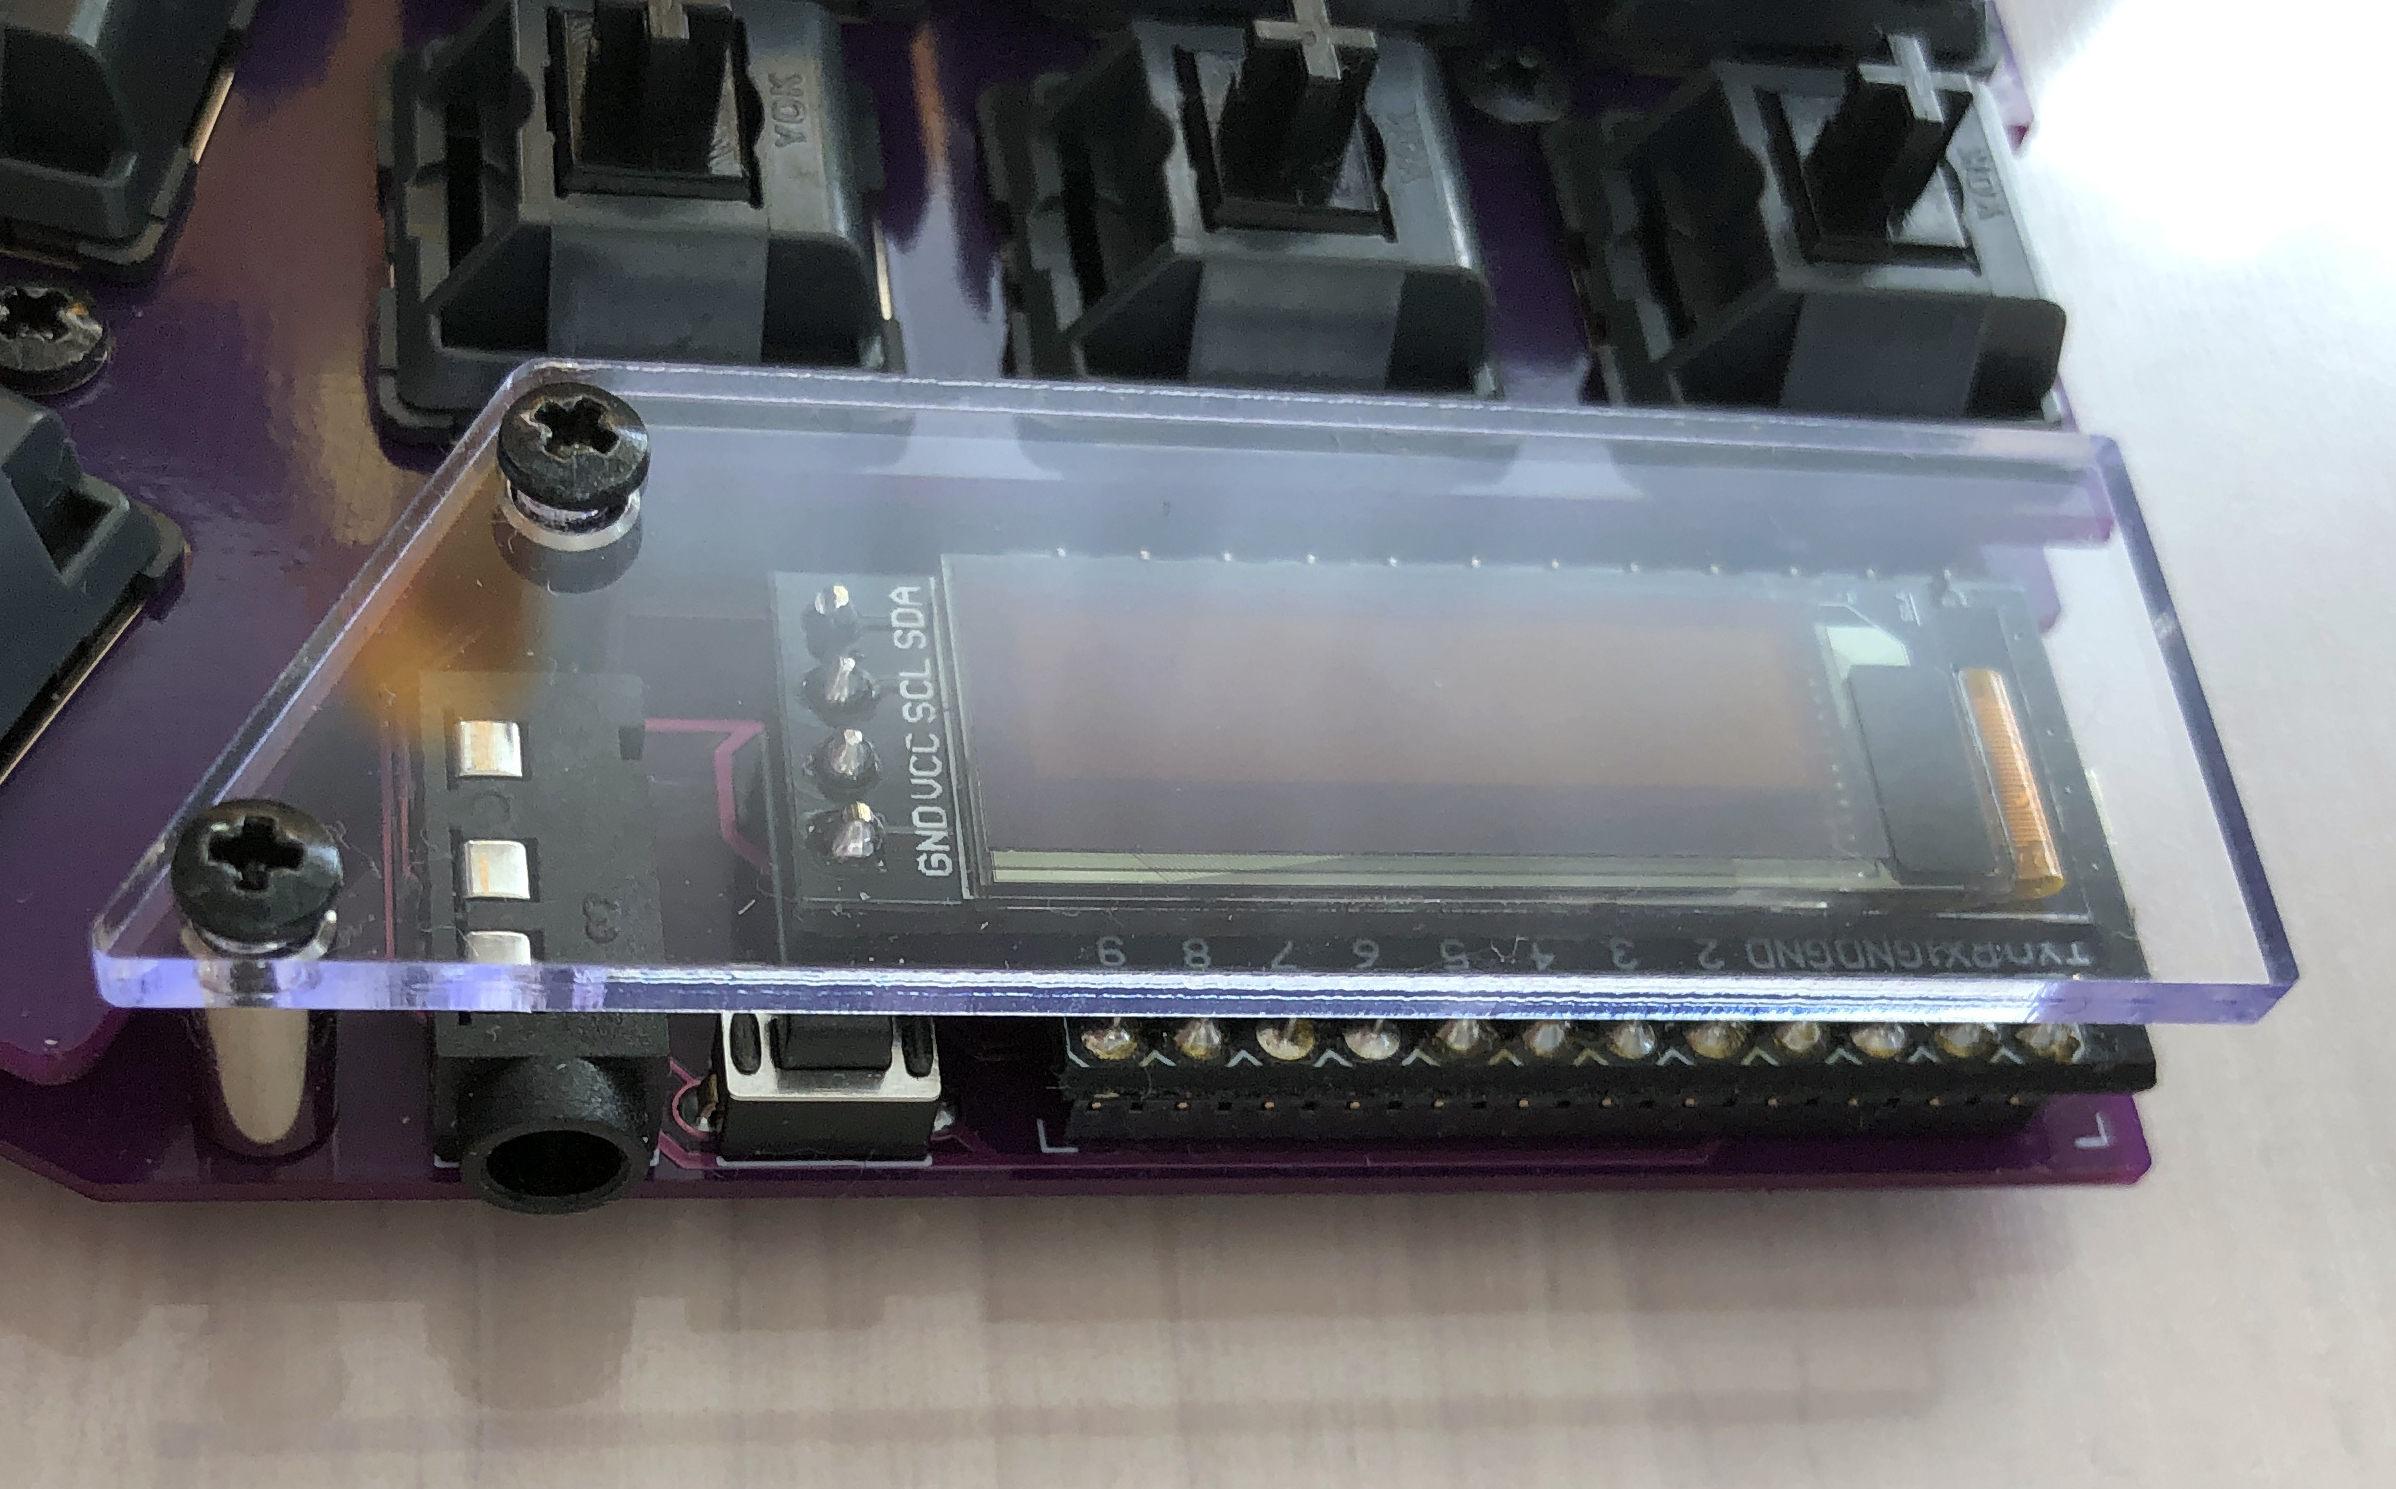
 ### ProMicro、OLEDモジュール
[Helix のビルドガイド](https://github.com/MakotoKurauchi/helix/blob/master/Doc/buildguide_jp.md#pro-micro)を参考にして ProMicro および OLED モジュールを取り付けます。
### ProMicro、OLEDモジュール
[Helix のビルドガイド](https://github.com/MakotoKurauchi/helix/blob/master/Doc/buildguide_jp.md#pro-micro)を参考にして ProMicro および OLED モジュールを取り付けます。
 ### ファームウェアの書き込み
下記を参照しファームウェアをProMicroに書き込みます。\
[docs/firmware/rev1](../../firmware/rev1/firmware_jp.md)
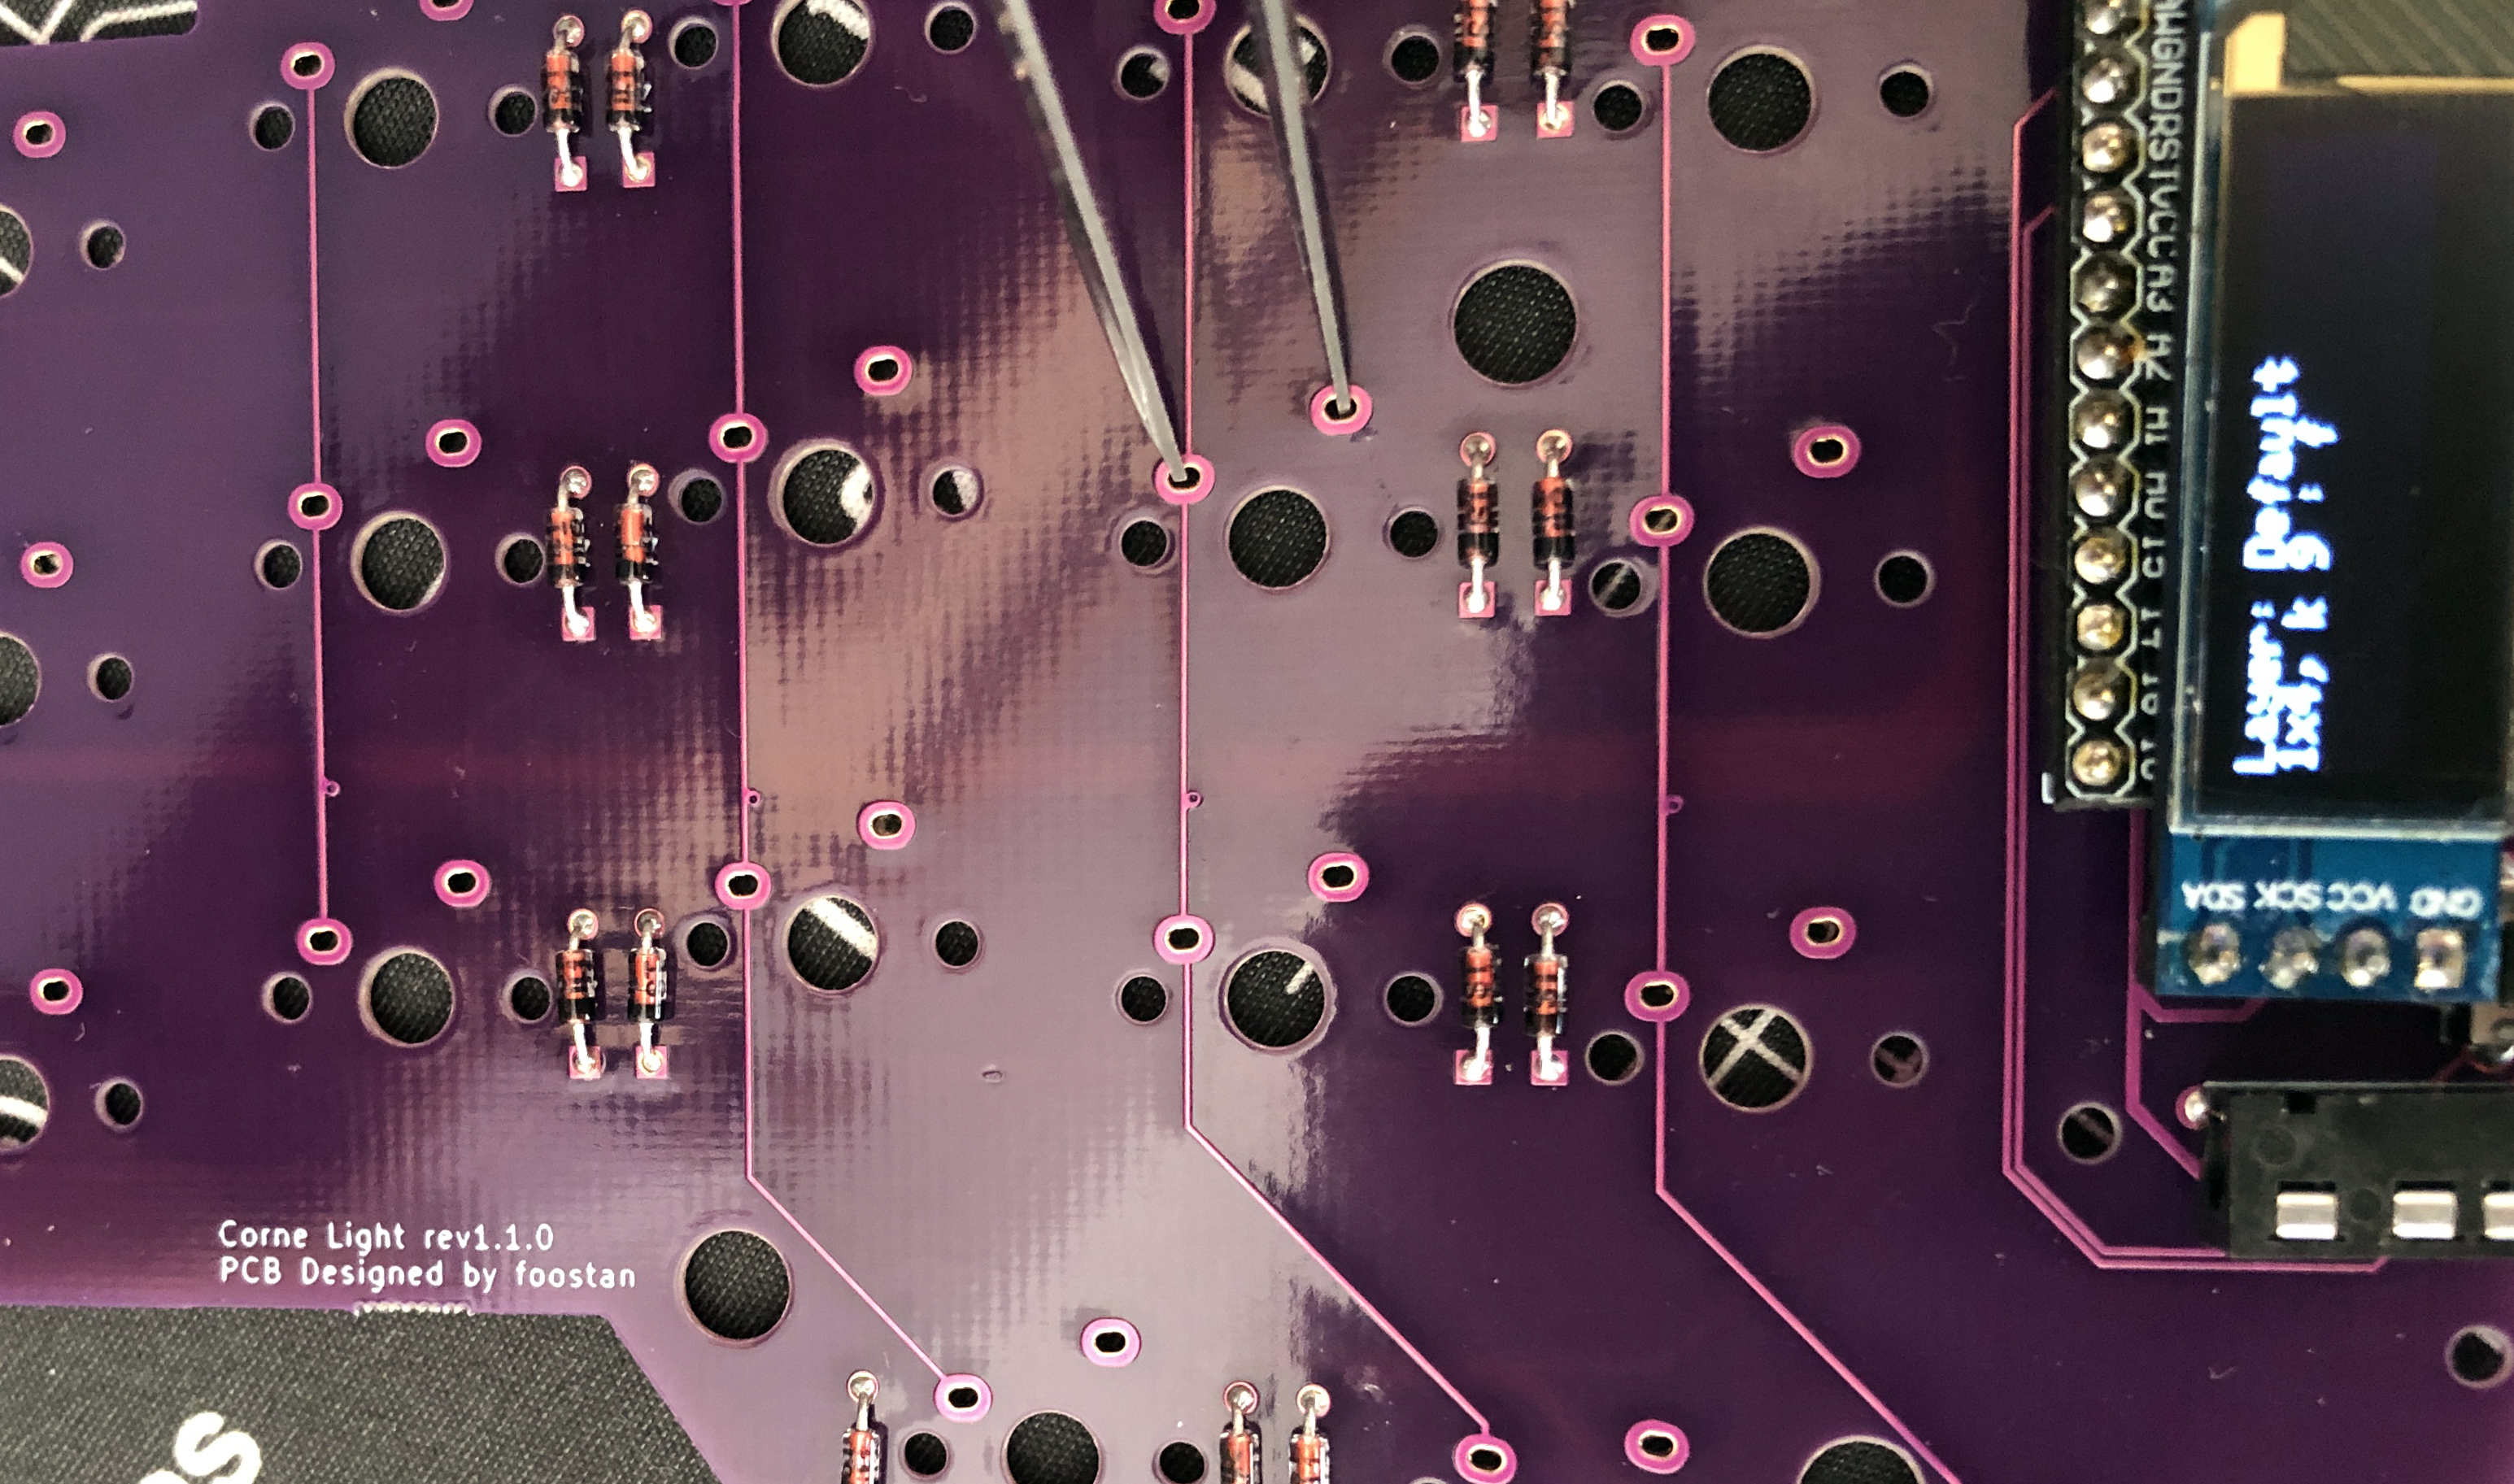
### 動作確認
動作確認は左手側を USB ケーブルで PC とつなぎ、左手側と右手側を TRRS ケーブルで接続して行います。ジャック等の不良もありえるので、片方ずつではなく必ず左右を接続させてから動作確認をしてください。
※ スイッチを付けてないので写真のようにピンセット等で動作確認を行います。
### ファームウェアの書き込み
下記を参照しファームウェアをProMicroに書き込みます。\
[docs/firmware/rev1](../../firmware/rev1/firmware_jp.md)
### 動作確認
動作確認は左手側を USB ケーブルで PC とつなぎ、左手側と右手側を TRRS ケーブルで接続して行います。ジャック等の不良もありえるので、片方ずつではなく必ず左右を接続させてから動作確認をしてください。
※ スイッチを付けてないので写真のようにピンセット等で動作確認を行います。
 ### トッププレート、キースイッチ
写真のようにトッププレートにキースイッチをはめます。
※ キースイッチの向きに気を付けてください。
### トッププレート、キースイッチ
写真のようにトッププレートにキースイッチをはめます。
※ キースイッチの向きに気を付けてください。
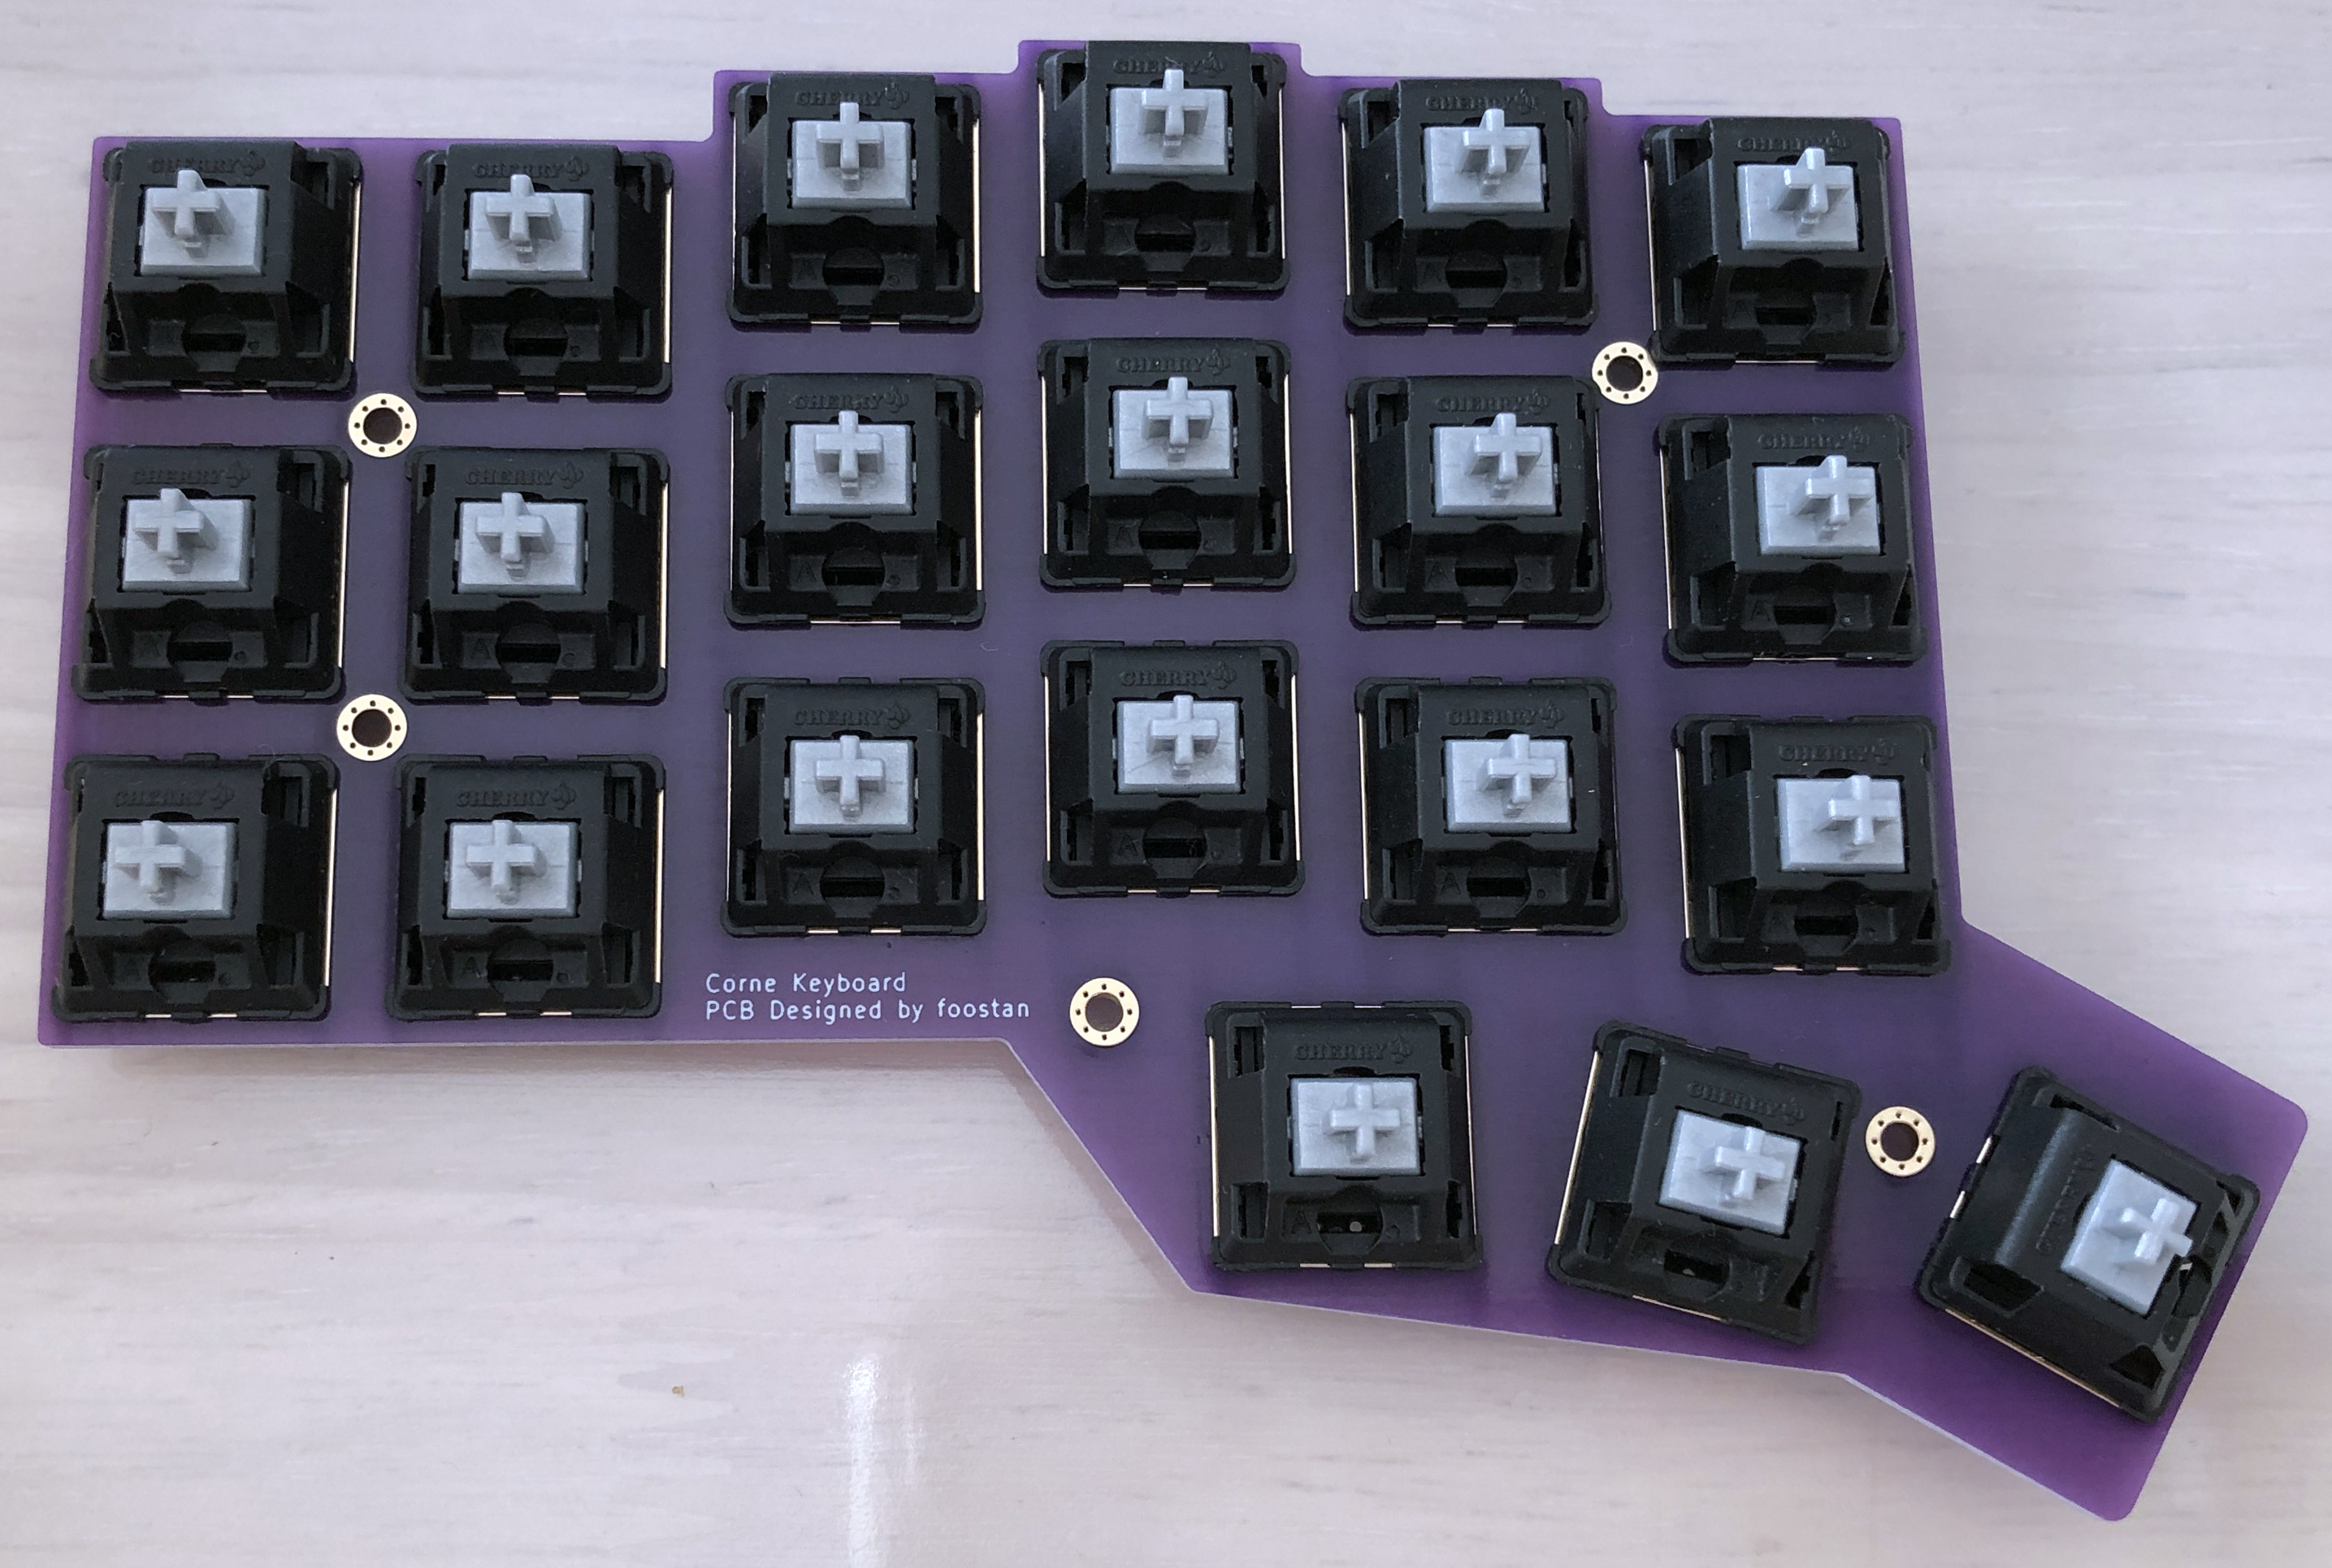 キースイッチは3ピンのものをおすすめします。
※ 5ピンを使用する場合でもプラスチックの足を切り離して3ピンにすることができます。
キースイッチは3ピンのものをおすすめします。
※ 5ピンを使用する場合でもプラスチックの足を切り離して3ピンにすることができます。
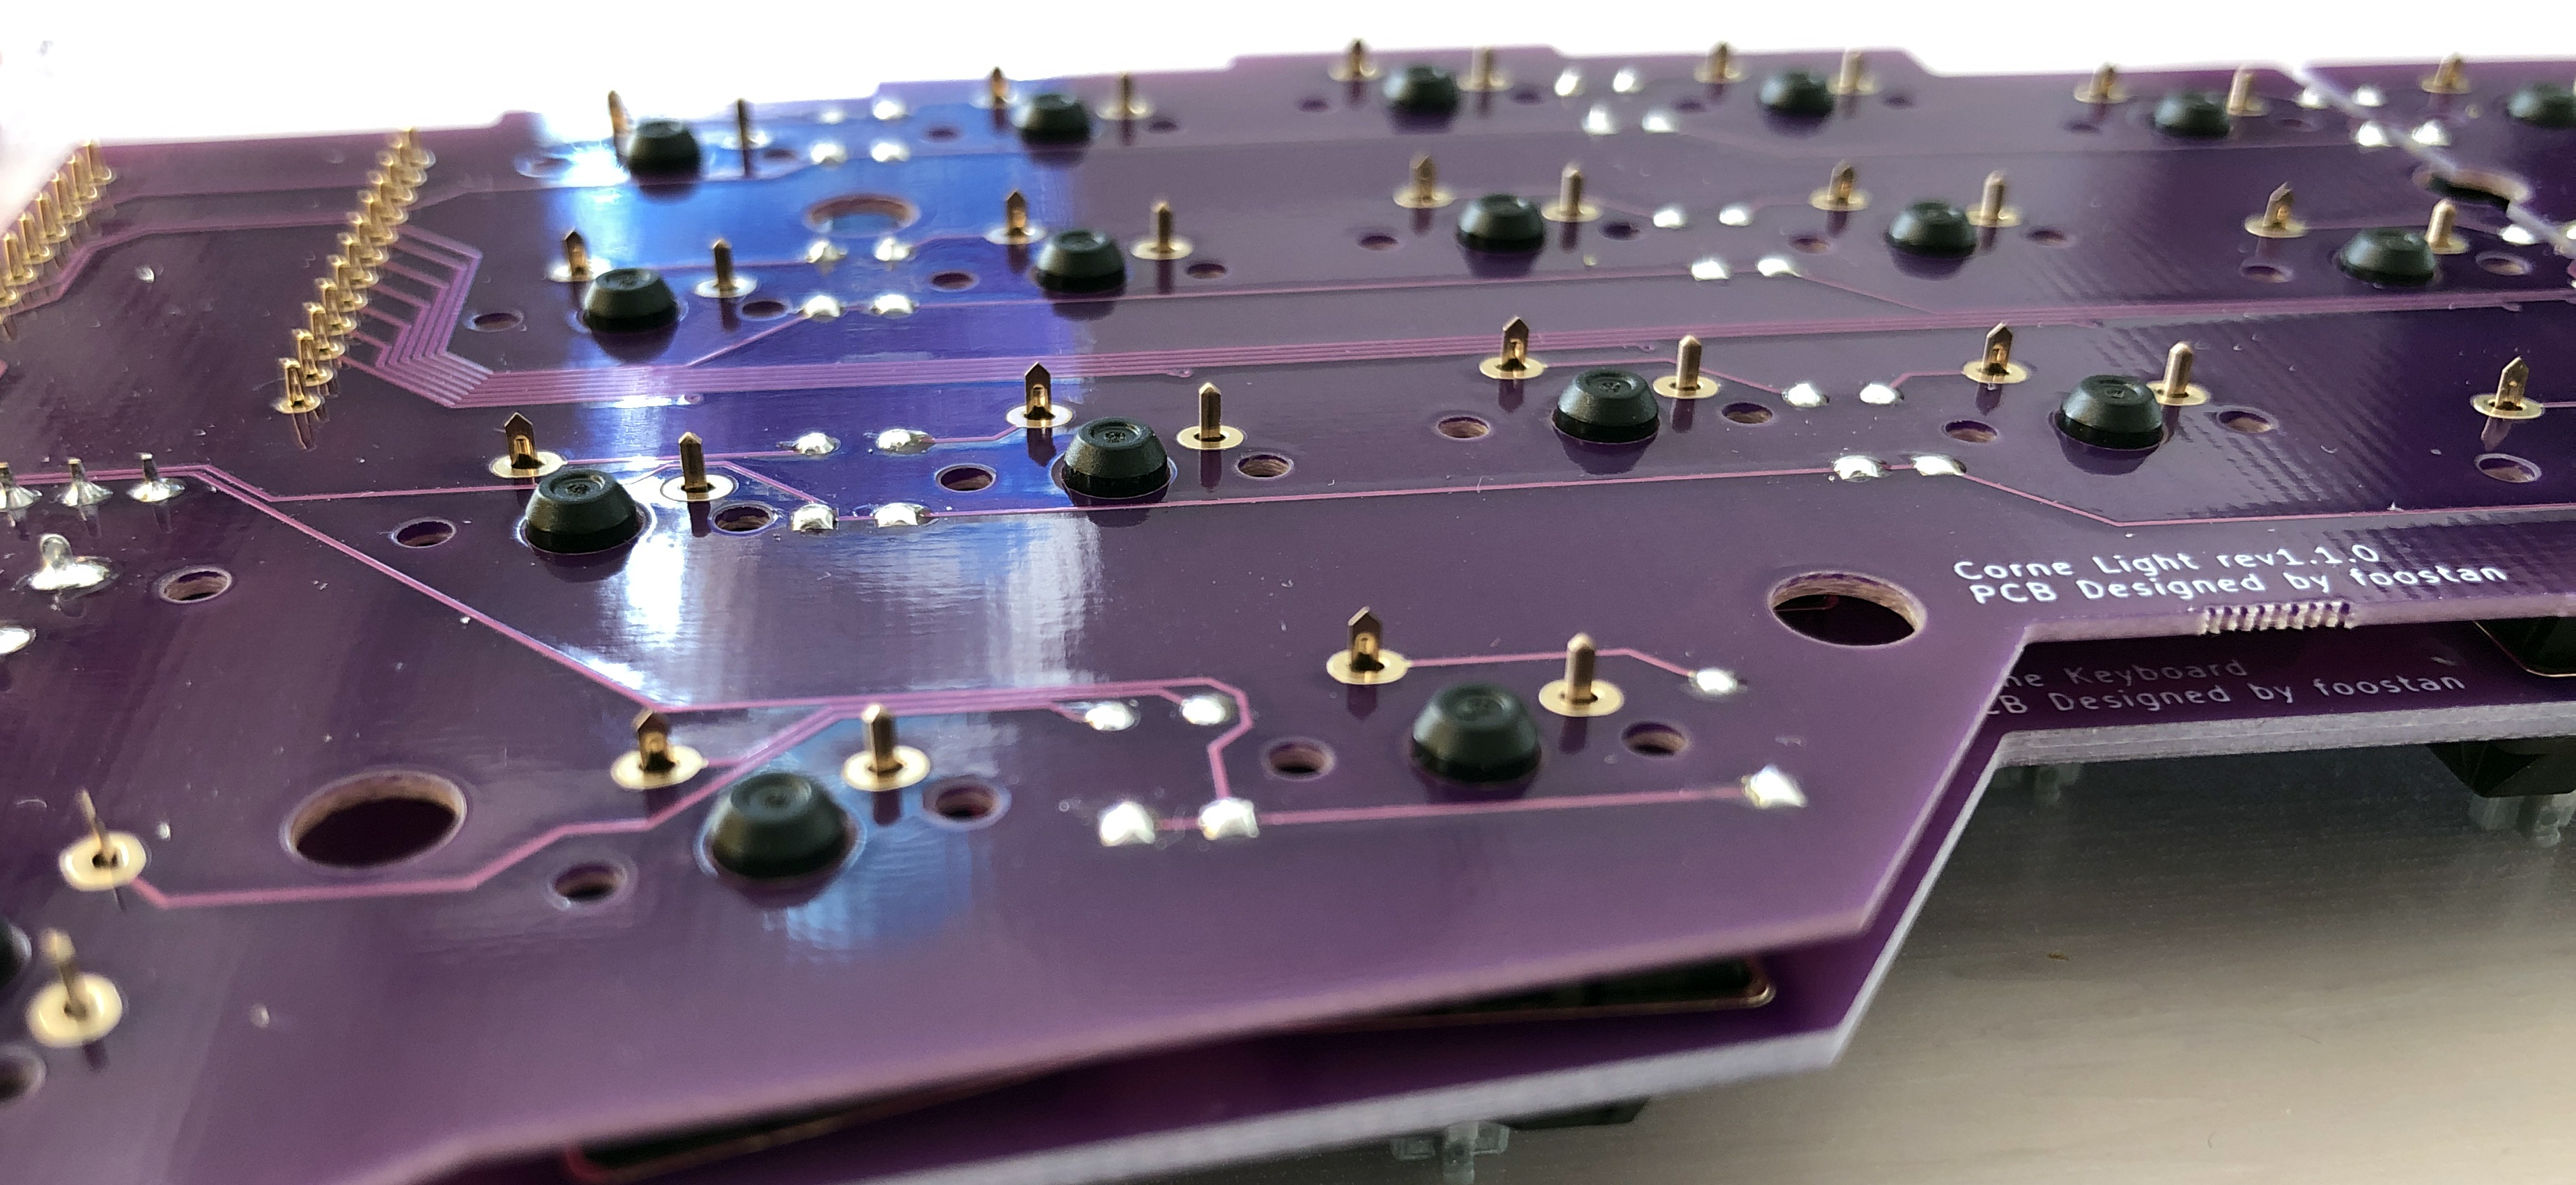
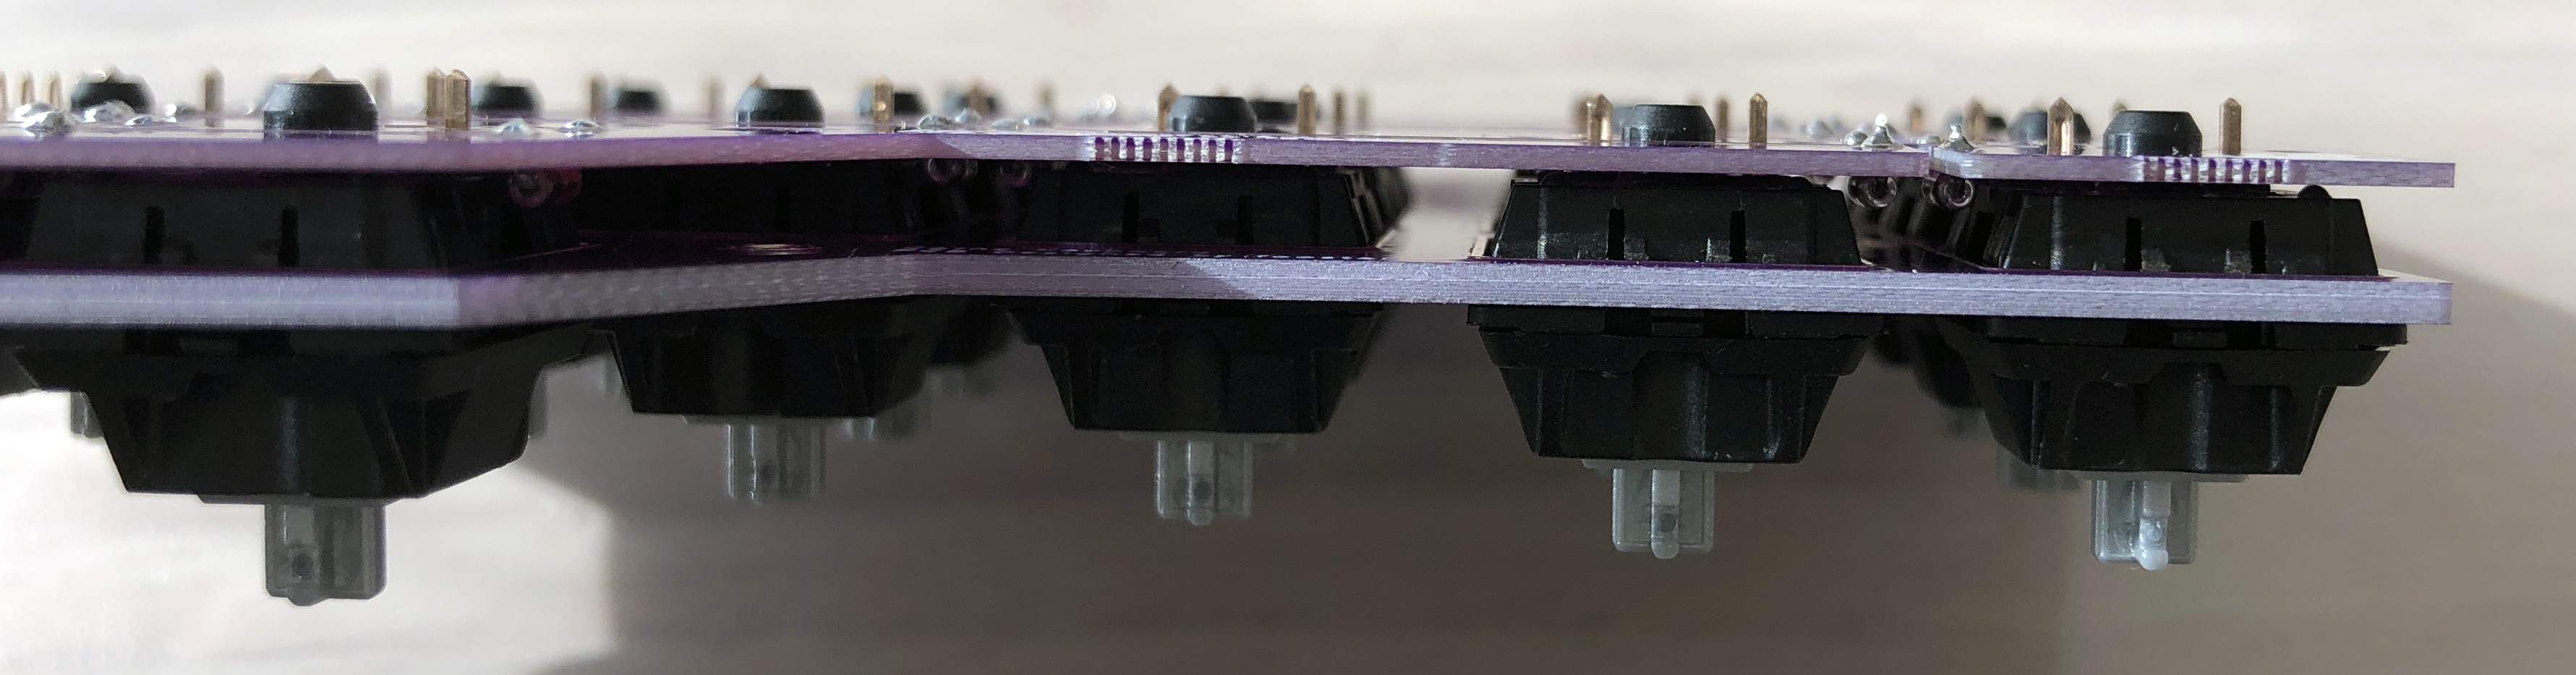
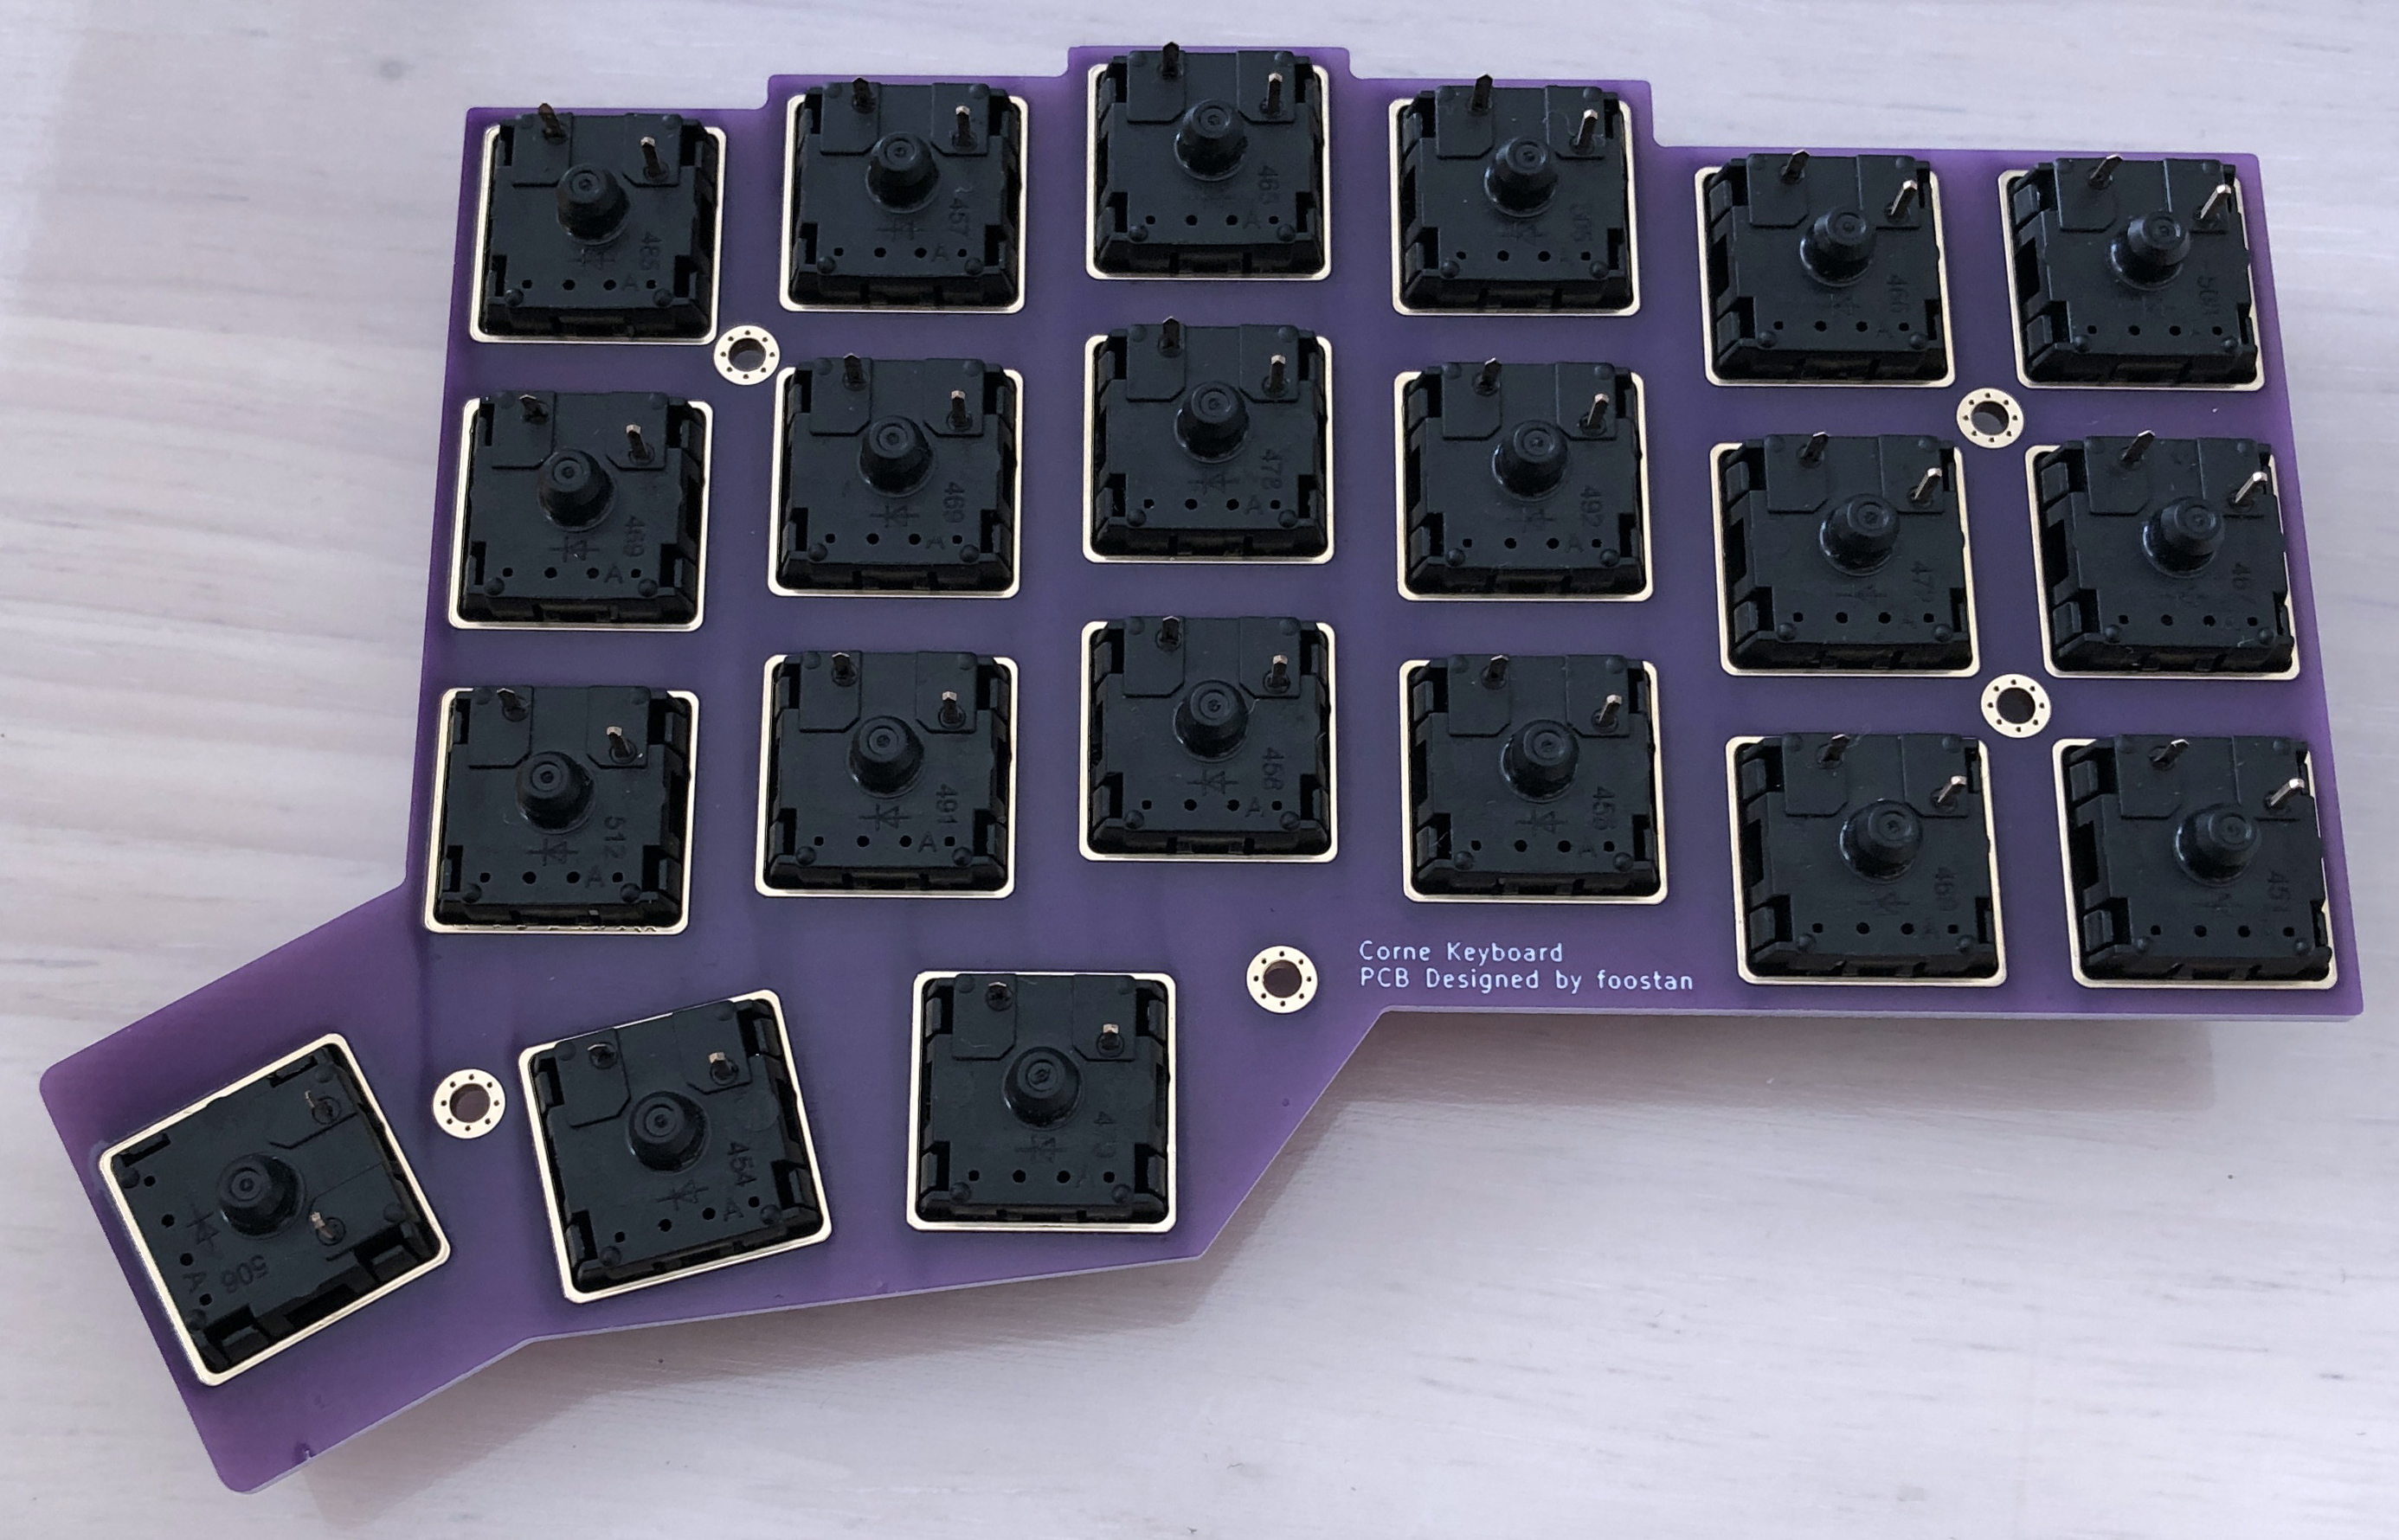 スイッチとPCBの間に隙間ができないようにしてはんだ付けを行います。
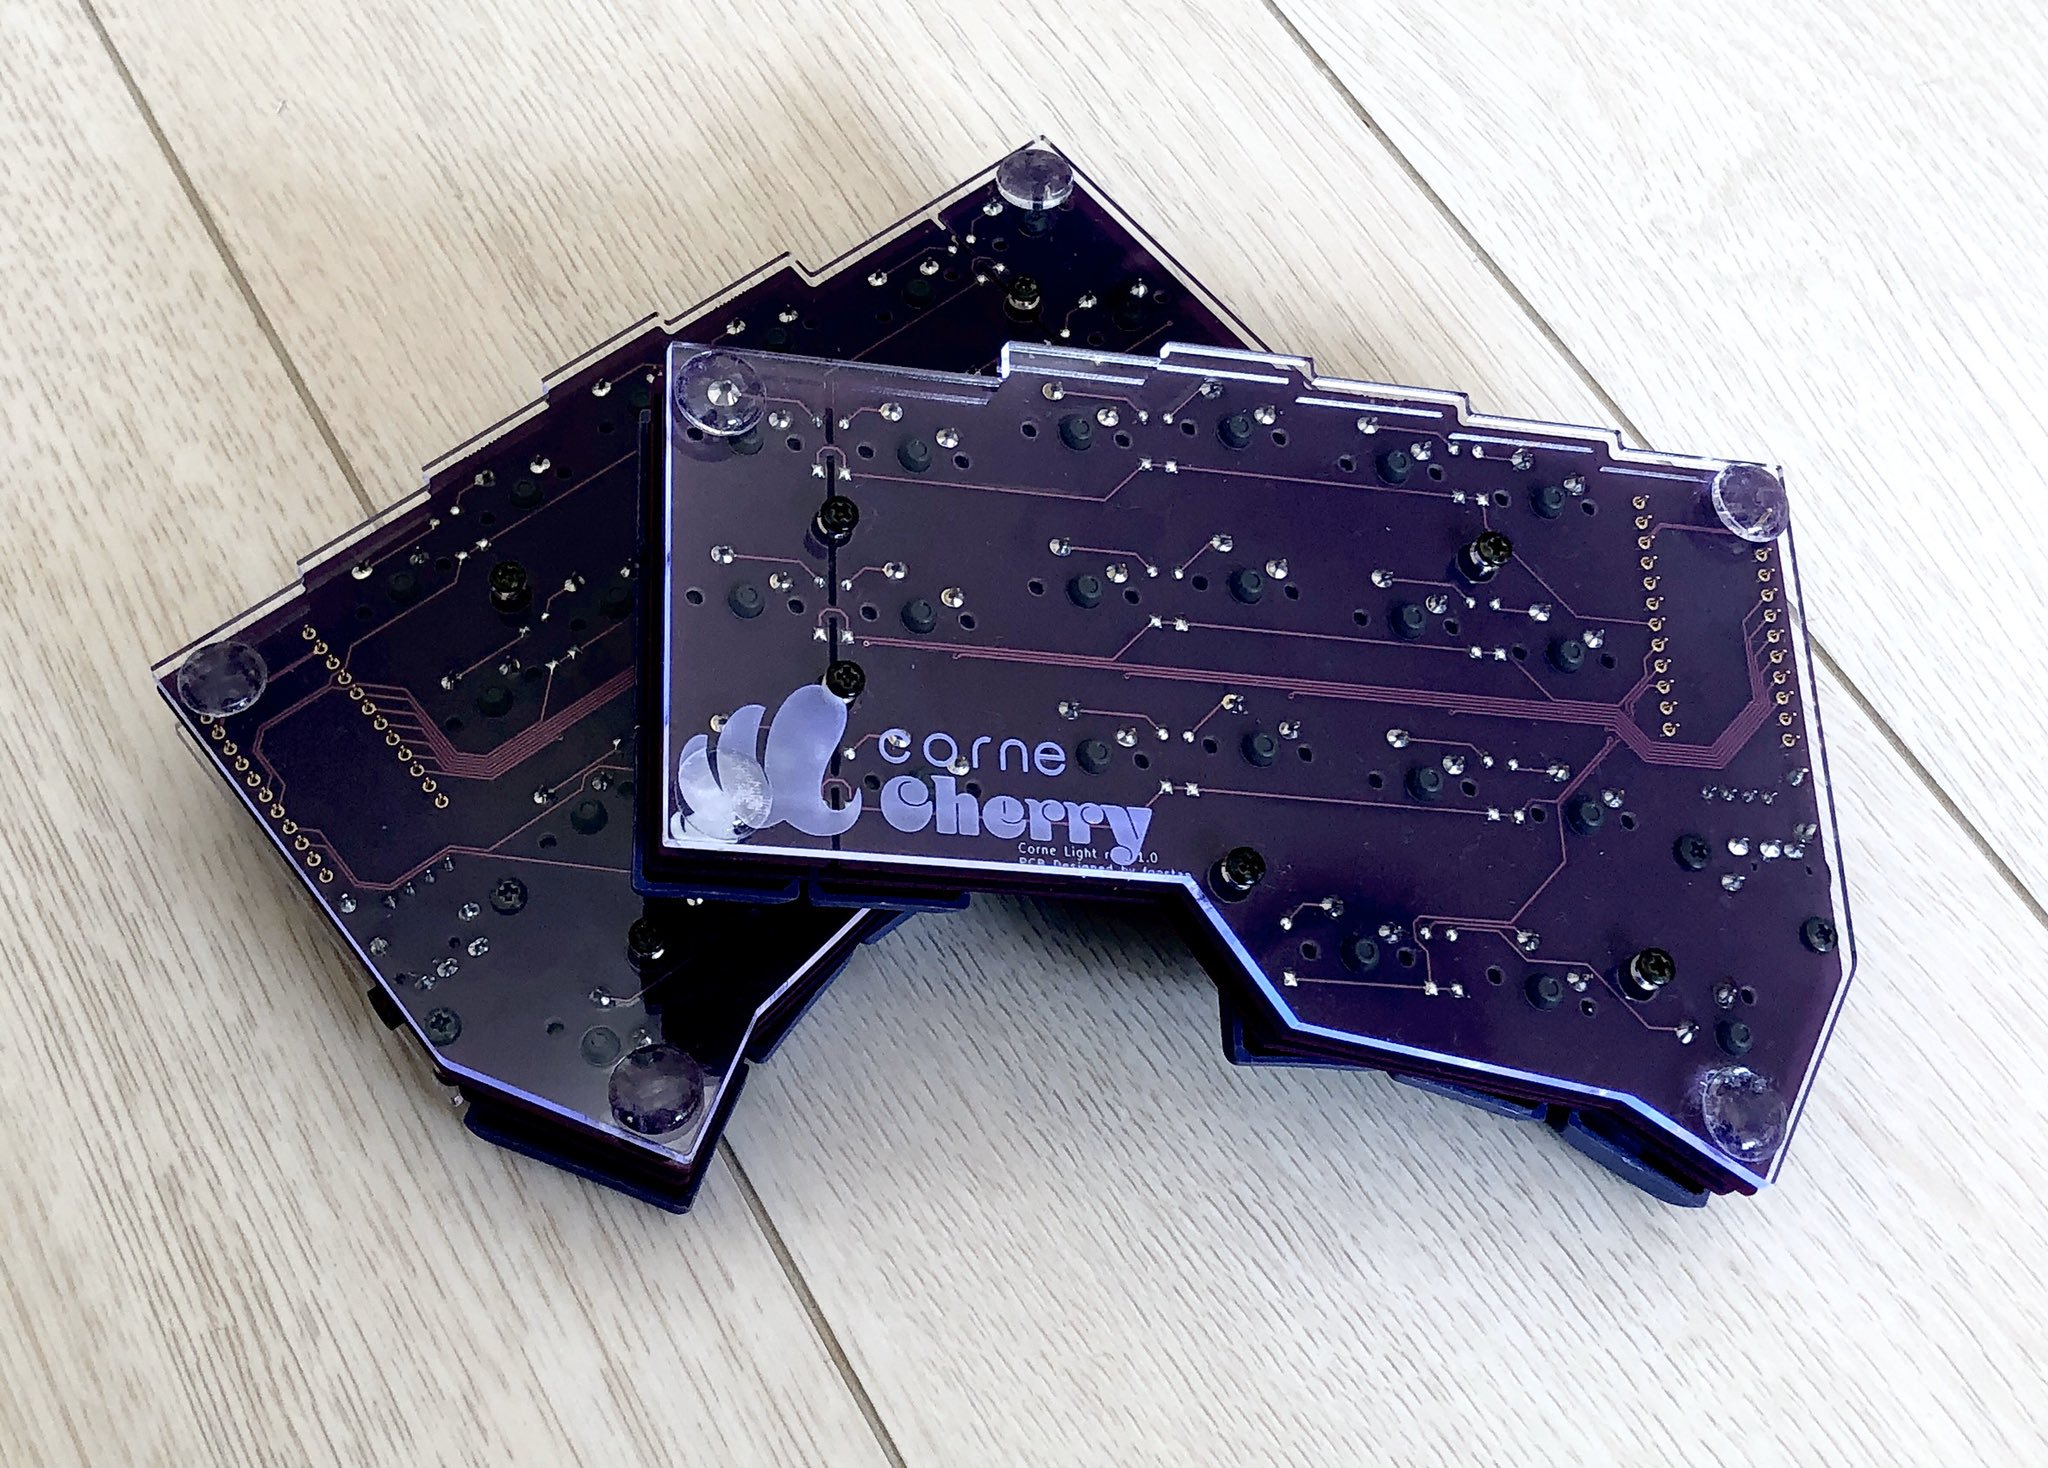
 ### ProMicro 保護プレート、ボトムプレート
M2 9mm スペーサーを用いて ProMicro 保護プレートを取り付けます。
### ProMicro 保護プレート、ボトムプレート
M2 9mm スペーサーを用いて ProMicro 保護プレートを取り付けます。
 M2 7.5mm スペーサーを用いてボトムプレートを取り付けます。
 4つ角にゴム足を取り付けます。
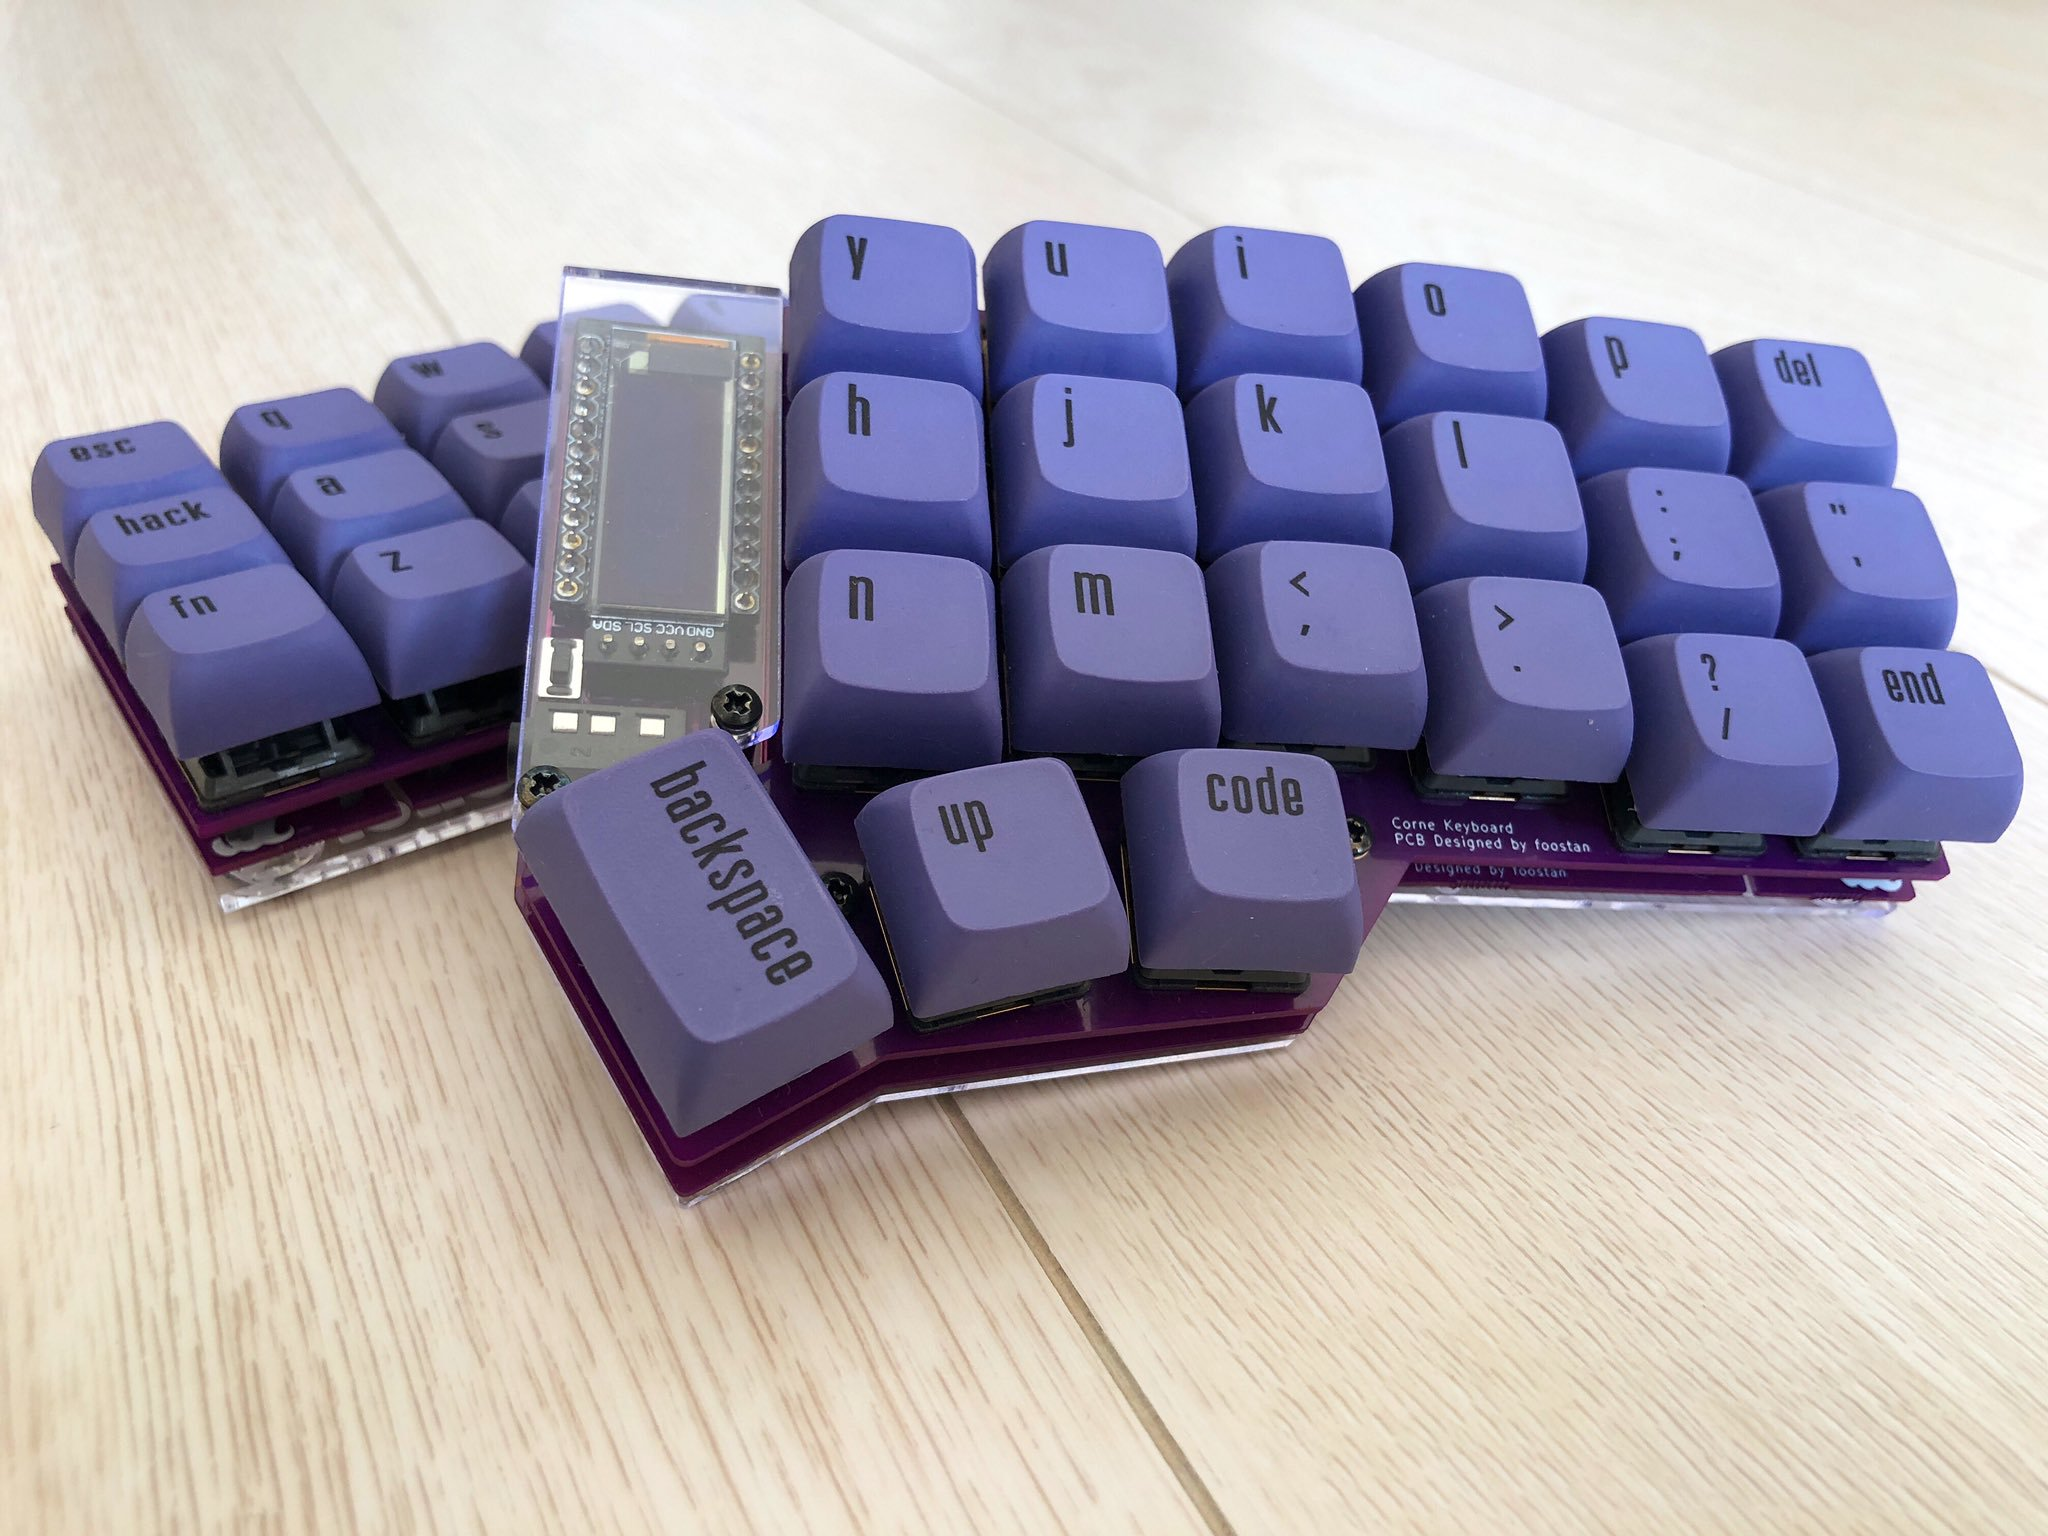
 ## 完成
キーキャップを取り付けて完成です。
## 完成
キーキャップを取り付けて完成です。
 ================================================
FILE: docs/corne-light/v2/buildguide_low_edition_en.md
================================================
# Build Guide
This is the build guide for Corne Light v2 Low edition.


## Parts
### Required
| Name | Count | Remarks |
|:-|:-|:-|
| PCB | 1 set | |
| Top plate (acrylic) 2mm | 2 sheets | |
| Bottom foam | 2 sheets | Special foam is cut out with a special mold |
| OLED protective plate | 2 sheets | |
| ProMicro | 2 sheets | |
| TRRS jack | 2 | |
| Tact switch | 2 | |
| Diodes | 42 | Recommended SMD Parts |
| Key switches | 42 | Kailh Choc v1 or v2 recommended |
| Keycaps | 42 pcs | 1u 40 pcs, 1.5u 2 pcs |
| Spacer M2 9mm | 4 pieces | |
| Screw M2 4mm | 8 screws | |
| TRRS (4 poles) cable | 1 | TRS (3 poles) cable is also acceptable |
| Micro USB cable | 1 | |
### Optional
| Name | Count | Remarks |
|:-|:-|:-|
| OLED module | 2 sheets | |
| Pin header for OLED module 4 series 1.5mm | 2 | |
| 4 pin sockets for OLED module 2.5mm | 2 | |
## Advance preparation
If you build the firmware yourself,
it takes time to prepare the environment,
so it is recommended to start first. \
See [docs/firmware/rev1](../../firmware/rev1/firmware_en.md)
for more information.
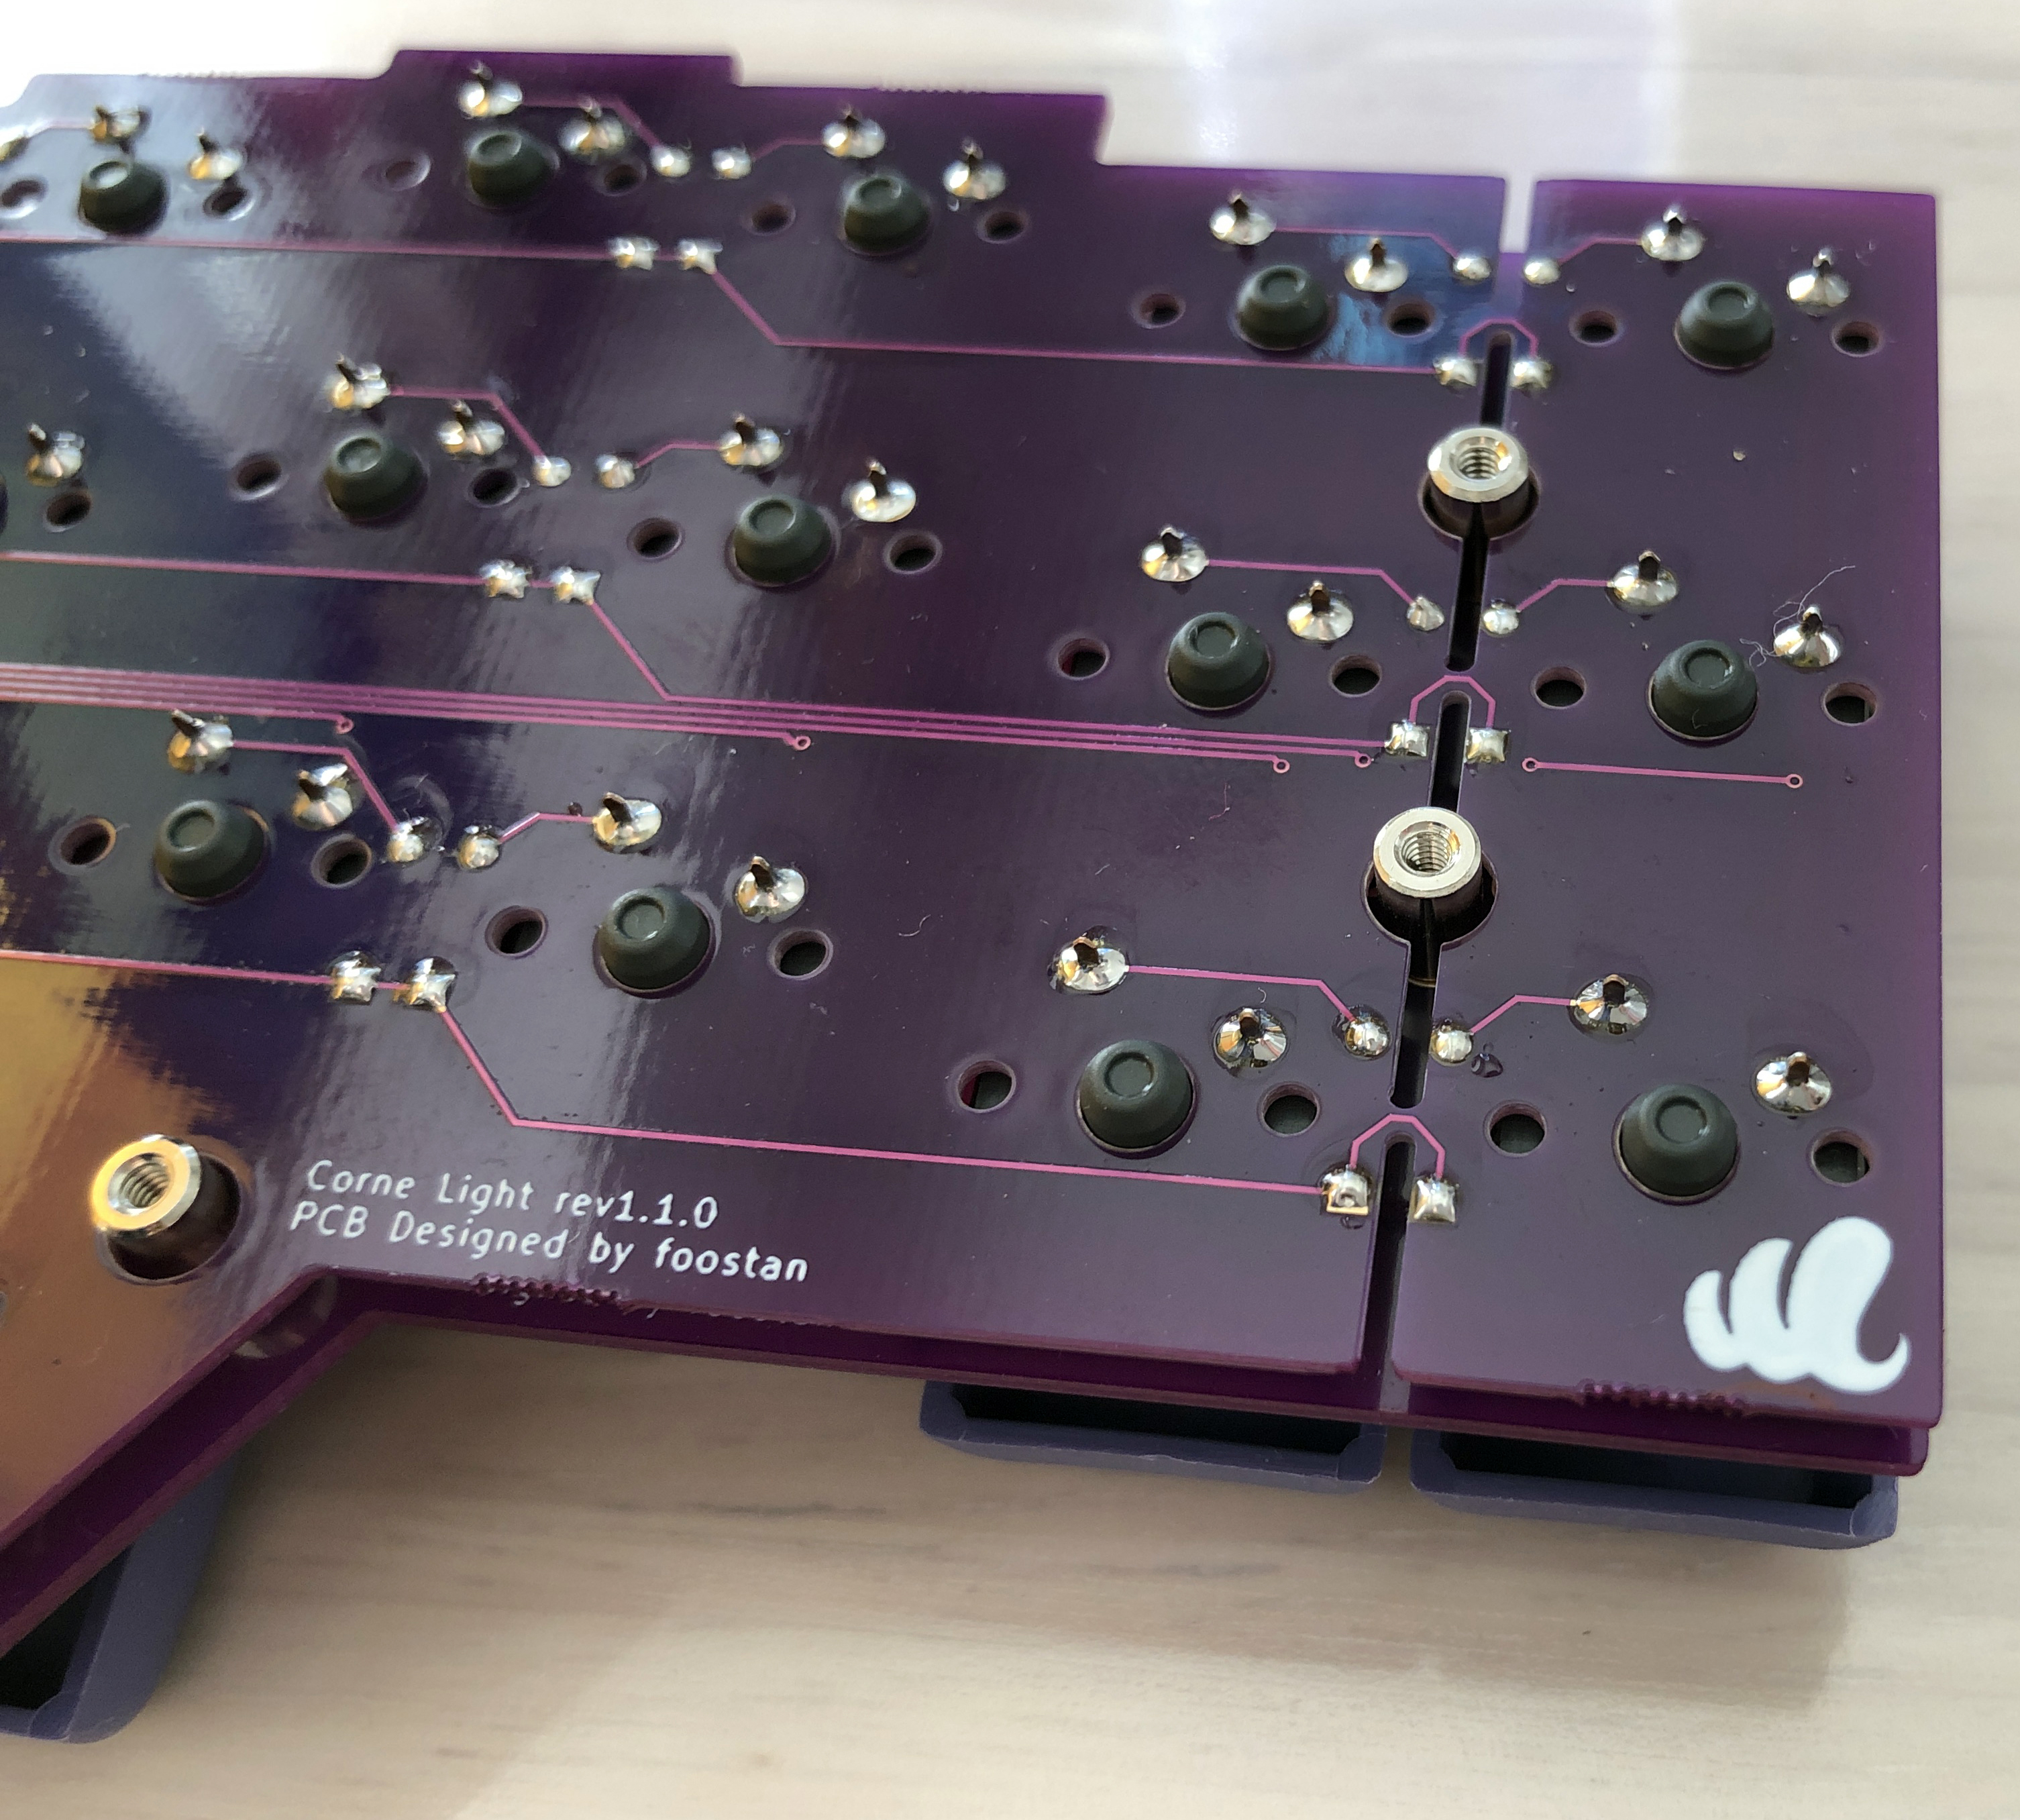
## Verification
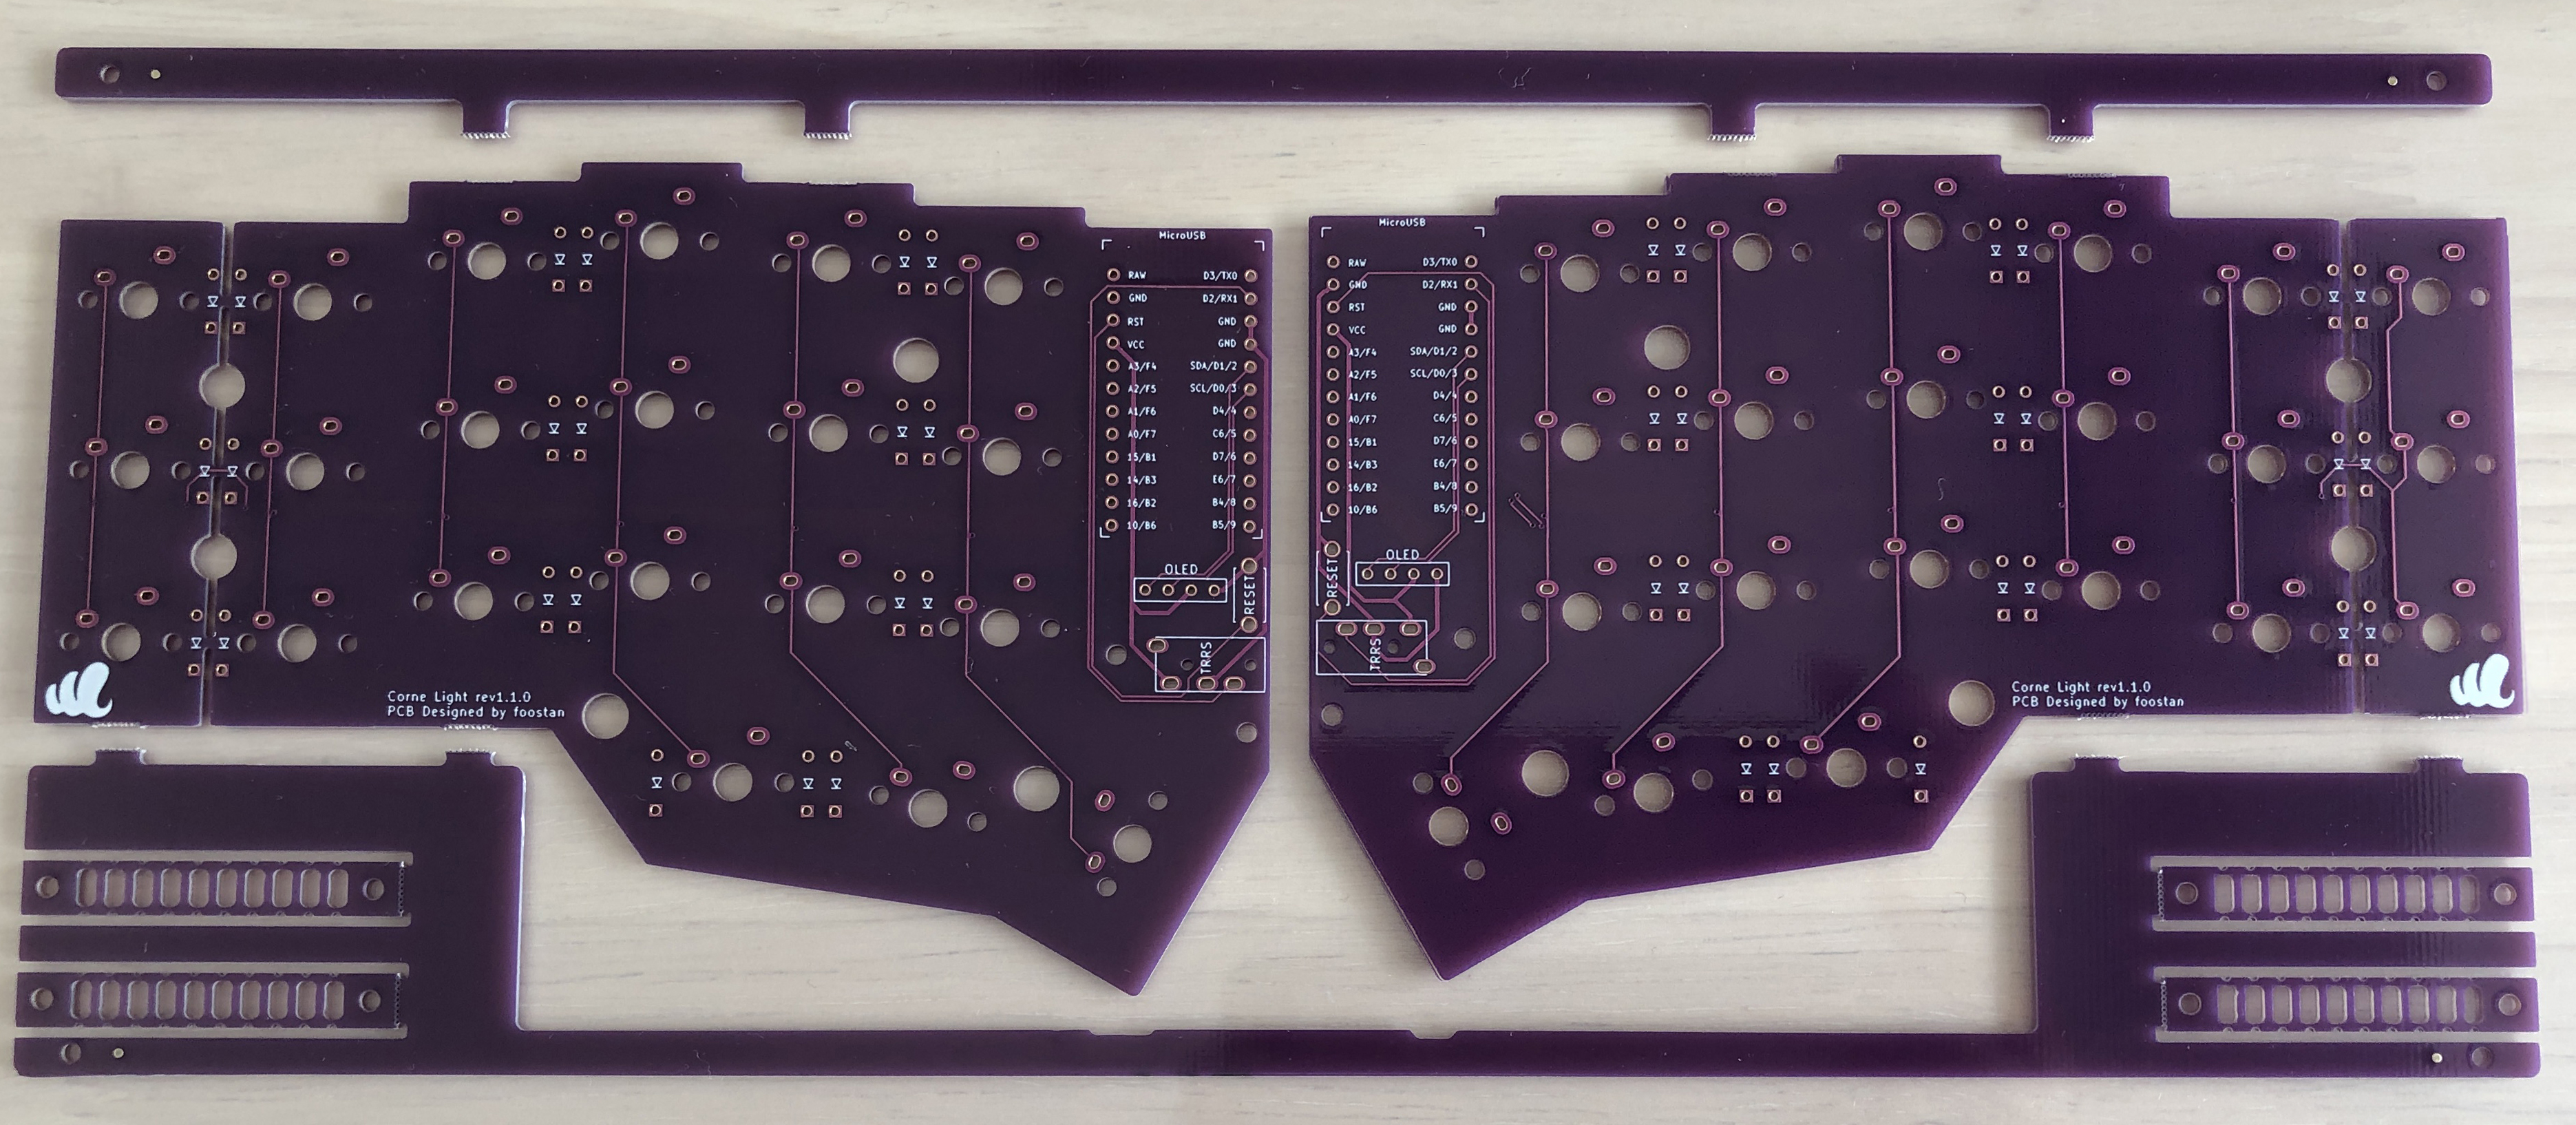
The PCB for Corne Light v2 is as follows.
Make sure it is the same as your PCB.


The PCB comes with a frame for manufacturing reasons.
You can fold it by hand to remove it, but if it is difficult,
make a cut in the joint \* with a cutter or similar,
to make it easier to remove.
In addition, the joint can be cleaned with a file.
\* *Joint part: There are a total of 8 parts,
which are marked in red in the image below.*

## Assembly
### Diodes
Solder diodes for SMD components.
Since SMD parts are very small,
it is convenient to have tweezers and counter-acting tweezers.
**The diode has a fixed mounting direction**,
so solder it so that the "|" mark on the part faces the "|" on the diode mark "|◁".
In addition, Corne's PCB has all the same diode mounting orientations.

================================================
FILE: docs/corne-light/v2/buildguide_low_edition_en.md
================================================
# Build Guide
This is the build guide for Corne Light v2 Low edition.


## Parts
### Required
| Name | Count | Remarks |
|:-|:-|:-|
| PCB | 1 set | |
| Top plate (acrylic) 2mm | 2 sheets | |
| Bottom foam | 2 sheets | Special foam is cut out with a special mold |
| OLED protective plate | 2 sheets | |
| ProMicro | 2 sheets | |
| TRRS jack | 2 | |
| Tact switch | 2 | |
| Diodes | 42 | Recommended SMD Parts |
| Key switches | 42 | Kailh Choc v1 or v2 recommended |
| Keycaps | 42 pcs | 1u 40 pcs, 1.5u 2 pcs |
| Spacer M2 9mm | 4 pieces | |
| Screw M2 4mm | 8 screws | |
| TRRS (4 poles) cable | 1 | TRS (3 poles) cable is also acceptable |
| Micro USB cable | 1 | |
### Optional
| Name | Count | Remarks |
|:-|:-|:-|
| OLED module | 2 sheets | |
| Pin header for OLED module 4 series 1.5mm | 2 | |
| 4 pin sockets for OLED module 2.5mm | 2 | |
## Advance preparation
If you build the firmware yourself,
it takes time to prepare the environment,
so it is recommended to start first. \
See [docs/firmware/rev1](../../firmware/rev1/firmware_en.md)
for more information.
## Verification
The PCB for Corne Light v2 is as follows.
Make sure it is the same as your PCB.


The PCB comes with a frame for manufacturing reasons.
You can fold it by hand to remove it, but if it is difficult,
make a cut in the joint \* with a cutter or similar,
to make it easier to remove.
In addition, the joint can be cleaned with a file.
\* *Joint part: There are a total of 8 parts,
which are marked in red in the image below.*

## Assembly
### Diodes
Solder diodes for SMD components.
Since SMD parts are very small,
it is convenient to have tweezers and counter-acting tweezers.
**The diode has a fixed mounting direction**,
so solder it so that the "|" mark on the part faces the "|" on the diode mark "|◁".
In addition, Corne's PCB has all the same diode mounting orientations.
