
Today is Nick's birthday 🎉

Developer | Teacher | Procrastinator
================================================ FILE: 1. Build and deploy your first website/10. Aside - Anchor Tags/work.html ================================================I built this one as a part of Scrimba's HTML&CSS course.
================================================ FILE: 1. Build and deploy your first website/11. Add an anchor tag to Google.com/blog.html ================================================Return back to Google.
================================================ FILE: 1. Build and deploy your first website/11. Add an anchor tag to Google.com/index.html ================================================
================================================
FILE: 1. Build and deploy your first website/11. Add an anchor tag to Google.com/styles.css
================================================
body, html {
margin: 0;
padding: 0;
}
img {
width: 30%;
display: block;
margin: 100px auto 20px;
min-width: 272px;
}
input {
box-sizing: border-box;
display: block;
border-radius: 24px;
border: 1px solid rgb(223, 225, 229);
height: 44px;
margin: 0 auto 29px;
max-width: 564px;
width: 90%;
padding-left: 30px;
font-size: 16px;
}
button {
box-sizing: border-box;
margin-top: 0;
padding: 0 16px;
font-size: 14px;
height: 36px;
background-color: #f8f9fa;
border: 1px solid #f8f9fa;
cursor: pointer;
}
button:first-of-type {
margin-right: 8px;
margin-left: calc(50% - 131.5px);
}
button::hover {
cursor: pointer;
}
p {
text-align: center;
margin-top:40px;
}
================================================
FILE: 1. Build and deploy your first website/12. Proper document structure/blog.html
================================================
Return back to Google.
================================================ FILE: 1. Build and deploy your first website/12. Proper document structure/index.html ================================================
We protect your privacy. Learn how.
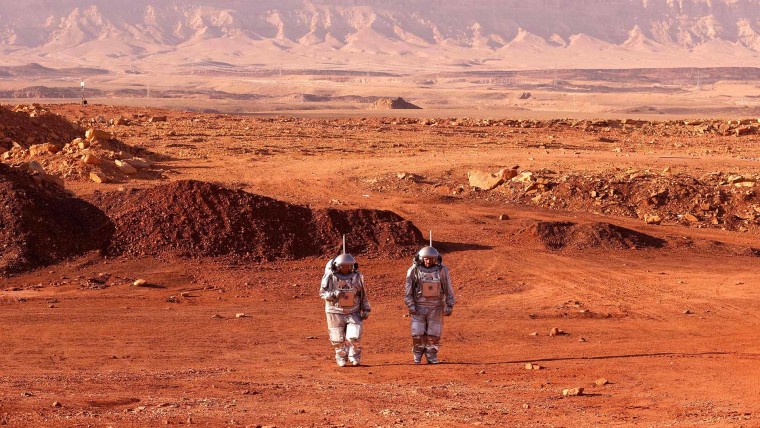
================================================ FILE: 1. Build and deploy your first website/12. Proper document structure/styles.css ================================================ body, html { margin: 0; padding: 0; } img { width: 30%; display: block; margin: 100px auto 20px; min-width: 272px; } input { box-sizing: border-box; display: block; border-radius: 24px; border: 1px solid rgb(223, 225, 229); height: 44px; margin: 0 auto 29px; max-width: 564px; width: 90%; padding-left: 30px; font-size: 16px; } button { box-sizing: border-box; margin-top: 0; padding: 0 16px; font-size: 14px; height: 36px; background-color: #f8f9fa; border: 1px solid #f8f9fa; cursor: pointer; } button:first-of-type { margin-right: 8px; margin-left: calc(50% - 131.5px); } button::hover { } p { margin-top: 40px; text-align: center; } a { } ================================================ FILE: 1. Build and deploy your first website/13. Aside - Lists/index.html ================================================ ================================================ FILE: 1. Build and deploy your first website/14. Build a Personal Website/index.html ================================================ ================================================ FILE: 1. Build and deploy your first website/14. Build a Personal Website/index.js ================================================ // Challenge 2: // Replace the parameters below according to your preference. // space, scary, military, romantic, cowboy, fantasy, superhero favouriteMovieGenre("regular") // watermelon, tomato, banana, orange, avocado, blueberry favouriteFruit("regular") // light, dark favouriteMode("light") // sharp, soft, round favouriteEdgeStyle("sharp") //////////////////////////////////// // IGONE THE CODE BELOW THIS LINE // //////////////////////////////////// function setProp(prop, value) { document.documentElement.style.setProperty(prop, value) } function favouriteEdgeStyle(style) { setProp("--image", "var(--" + style + ")"); } function favouriteMovieGenre(font) { if (font) { setProp("--font", "var(--" + font + ")"); } } function favouriteMode(mode) { if (mode === "light" || !mode) { setProp('--background', "var(--light)"); setProp('--text', "var(--dark)"); } else if (mode === "dark") { setProp('--background', "var(--dark)"); setProp('--text', "var(--light)"); } } function favouriteFruit(theme) { if (theme === "pastel") { setProp('--light', "#f2f6c3") setProp('--dark', "#68c4af") } else if (theme === "muted") { setProp('--light', "#4c5b64") setProp('--dark', "#45241c") } else if (theme === "love") { setProp('--light', "#f06836") setProp('--dark', "#ba0001") } else if (theme === "sky") { setProp('--light', "#99ccff") setProp('--dark', "#3366ff") } else if (theme === "forrest") { setProp('--light', "#91B247") setProp('--dark', "#597C2B") } else if (theme === "shiny") { setProp('--light', "#2e9afe") setProp('--dark', "#02197c") } else if (theme === "banana") { setProp('--light', "#fbec5d") setProp('--dark', "#6b3e26") } else if (theme === "watermelon") { setProp('--light', "#75b855") setProp('--dark', "#ad3838") } else if (theme === "tomato") { setProp('--light', "#d62e2e") setProp('--dark', "#600000") } else if (theme === "avocado") { setProp('--light', "#6b8c21") setProp('--dark', "#704012") } else if (theme === "orange") { setProp('--light', "#ffca16") setProp('--dark', "#f97300") } else if (theme === "blueberry") { setProp('--light', "#41a8f9") setProp('--dark', "#064490") } else { setProp('--light', "#f5f5f5") setProp('--dark', "#222222") } } ================================================ FILE: 1. Build and deploy your first website/14. Build a Personal Website/styles.css ================================================ :root { --superhero: 'Bangers', cursive; --fantasy: 'MedievalSharp', cursive; --space: 'Orbitron', sans-serif; --military: 'Black Ops One', cursive; --romantic: 'La Belle Aurore', cursive; --scary: 'Creepster', cursive; --cowboy: 'Rye', cursive; --regular: sans-serif; --fantasy: 'MedievalSharp', cursive; --font: var(--regular); --sharp: 0; --soft: 10px; --round: 100px; --image: var(--soft); --background: #f5f5f5; --text: #222222; --light: var(--background); --dark: var(--text); } body, html { margin: 0; padding: 10px; background: var(--background); color: var(--text); font-family: var(--font); } img { width: 30%; border-radius: calc(var(--image) * 2); border: 4px solid var(--text); } a { color: var(--text); } input { display: block; margin: 20px 0 0; width: 160px; box-sizing: border-box; padding: 4px 8px; border-width: 1px; border-style: solid; border-color: var(--text); color: var(--text); background: none; border-radius: var(--image); font-family: var(--font); } ::placeholder { color: var(--text); } button { border-radius: var(--image); padding: 5px 10px; border: none; background: var(--text); color: var(--background); font-weight: bold; box-sizing: border-box; display: block; margin: 8px 0; cursor: pointer; font-family: var(--font); width: 160px; } ================================================ FILE: 1. Build and deploy your first website/2. HTML tags/index.html ================================================After a 115 days long journey, the crew of 12 finally arrived at their destination. This is the first time humans have set foot on a planet other than Earth.
 ================================================
FILE: 1. Build and deploy your first website/5. Nesting/index.html
================================================
================================================
FILE: 1. Build and deploy your first website/5. Nesting/index.html
================================================
After a 115 days long journey, the crew of 12 finally arrived to their destination. This is the first time humans have set foot on a planet other than Earth.
 ================================================
FILE: 1. Build and deploy your first website/7. Interactive elements - button/index.html
================================================
================================================
FILE: 1. Build and deploy your first website/8. Interactive elements - input tags - input types/index.html
================================================
================================================
FILE: 1. Build and deploy your first website/7. Interactive elements - button/index.html
================================================
================================================
FILE: 1. Build and deploy your first website/8. Interactive elements - input tags - input types/index.html
================================================
You have been granted access to the platform. Please create an account.
================================================ FILE: 1. Build and deploy your first website/9. Lets build Google/index.html ================================================ ================================================ FILE: 1. Build and deploy your first website/9. Lets build Google/styles.css ================================================ body, html { margin: 0; padding: 0; } img { width: 30%; display: block; margin: 100px auto 20px; min-width: 272px; } input { box-sizing: border-box; display: block; border-radius: 24px; border: 1px solid rgb(223, 225, 229); height: 44px; margin: 0 auto 29px; max-width: 564px; width: 90%; padding-left: 30px; font-size: 16px; } button { box-sizing: border-box; margin-top: 0; padding: 0 16px; font-size: 14px; height: 36px; background-color: #f8f9fa; border: 1px solid #f8f9fa; cursor: pointer; } button:first-of-type { margin-right: 8px; margin-left: calc(50% - 131.5px); } button::hover { cursor: pointer; } ================================================ FILE: 2. Build a Google.com clone/1. Lets Learn CSS/index.html ================================================
 ================================================
FILE: 2. Build a Google.com clone/13. Aside - centering with margins/styles.css
================================================
img {
width: 200px;
}
================================================
FILE: 2. Build a Google.com clone/14. Centering our content/index.html
================================================
================================================
FILE: 2. Build a Google.com clone/5. Link to the CSS file/styles.css
================================================
body {
background: red;
}
================================================
FILE: 2. Build a Google.com clone/6. Set the width of the elements/index.html
================================================
================================================
FILE: 2. Build a Google.com clone/6. Set the width of the elements/styles.css
================================================
/*
Challenge:
Select the img tag and set the width
of the Google logo to be 300px.
*/
================================================
FILE: 2. Build a Google.com clone/7. Inline vs block elements/index.html
================================================
================================================
FILE: 2. Build a Google.com clone/7. Inline vs block elements/styles.css
================================================
/*
Challenge:
Turn the elements into blocks!
*/
img {
width: 300px;
}
input {
width: 400px;
}
================================================
FILE: 2. Build a Google.com clone/8. Margin top/index.html
================================================
================================================
FILE: 2. Build a Google.com clone/8. Margin top/styles.css
================================================
img {
/* Challenge:
Add some space (margin) above our image!
Do you remember how we added spacing in the
cookie widget example?
*/
display: block;
width: 300px;
}
input {
display: block;
width: 400px;
}
================================================
FILE: 2. Build a Google.com clone/9. Divs rule the world/index.html
================================================
================================================
FILE: 2. Build a Google.com clone/9. Divs rule the world/styles.css
================================================
img {
margin-top: 100px;
display: block;
width: 300px;
}
input {
display: block;
width: 400px;
}
================================================
FILE: 3. Build a digital Business Card/1. Building your digital Business Card/index.html
================================================
================================================
FILE: 2. Build a Google.com clone/13. Aside - centering with margins/styles.css
================================================
img {
width: 200px;
}
================================================
FILE: 2. Build a Google.com clone/14. Centering our content/index.html
================================================
================================================
FILE: 2. Build a Google.com clone/5. Link to the CSS file/styles.css
================================================
body {
background: red;
}
================================================
FILE: 2. Build a Google.com clone/6. Set the width of the elements/index.html
================================================
================================================
FILE: 2. Build a Google.com clone/6. Set the width of the elements/styles.css
================================================
/*
Challenge:
Select the img tag and set the width
of the Google logo to be 300px.
*/
================================================
FILE: 2. Build a Google.com clone/7. Inline vs block elements/index.html
================================================
================================================
FILE: 2. Build a Google.com clone/7. Inline vs block elements/styles.css
================================================
/*
Challenge:
Turn the elements into blocks!
*/
img {
width: 300px;
}
input {
width: 400px;
}
================================================
FILE: 2. Build a Google.com clone/8. Margin top/index.html
================================================
================================================
FILE: 2. Build a Google.com clone/8. Margin top/styles.css
================================================
img {
/* Challenge:
Add some space (margin) above our image!
Do you remember how we added spacing in the
cookie widget example?
*/
display: block;
width: 300px;
}
input {
display: block;
width: 400px;
}
================================================
FILE: 2. Build a Google.com clone/9. Divs rule the world/index.html
================================================
================================================
FILE: 2. Build a Google.com clone/9. Divs rule the world/styles.css
================================================
img {
margin-top: 100px;
display: block;
width: 300px;
}
input {
display: block;
width: 400px;
}
================================================
FILE: 3. Build a digital Business Card/1. Building your digital Business Card/index.html
================================================

Frontend Developer
Frontend Developer
The outbreak began in July 1518 when a woman began to dance fervently in a street in Strasbourg.[1] By early September, the outbreak began to subside.[2]
Historical documents, including "physician notes, cathedral sermons, local and regional chronicles, and even notes issued by the Strasbourg city council" are clear that the victims danced;[1] it is not known why. Historical sources agree that there was an outbreak of dancing after a single woman started dancing,[3] a group of mostly young women joined in, and the dancing did not seem to die down. It lasted for such a long time that it attracted the attention of the Strasbourg magistrate and bishop, and some number of doctors ultimately intervened, putting the afflicted in a hospital.[citation needed]
Events similar to this are said to have occurred throughout the medieval age including 11th century in Kölbigk Saxony, where it was believed to be the cause of demonic possession or divine judgment.[4] In 15th century Apulia Italy,[5] a woman was bitten by a tarantula, the venom making her dance convulsively. The only way to cure the bite was to "shimmy" and to have the right sort of music available, which was an accepted remedy by scholars like Athanasius Kircher.[6]

Some believe[2] the dancing could have been brought on by food poisoning caused by the toxic and psychoactive chemical products of ergot fungi (ergotism), which grows commonly on grains (such as rye) used for baking bread. Ergotamine is the main psychoactive product of ergot fungi; it is structurally related to the drug lysergic acid diethylamide (LSD-25) and is the substance from which LSD-25 was originally synthesized. The same fungus has also been implicated in other major historical anomalies, including the Salem witch trials.[10][11]
In The Lancet, John Waller argues that "this theory does not seem tenable, since it is unlikely that those poisoned by ergot could have danced for days at a time. Nor would so many people have reacted to its psychotropic chemicals in the same way. The ergotism theory also fails to explain why virtually every outbreak occurred somewhere along the Rhine and Moselle rivers, areas linked by water but with quite different climates and crops".[7]
This could have been a florid example of psychogenic movement disorder happening in mass hysteria or mass psychogenic illness, which involves many individuals suddenly exhibiting the same bizarre behavior. The behavior spreads rapidly and broadly in an epidemic pattern.[12] This kind of comportment could have been caused by elevated levels of psychological stress, caused by the ruthless years (even by the rough standards of the early modern period) the people of Alsace were suffering.[7]
Waller speculates that the dancing was "stress-induced psychosis" on a mass level, since the region where the people danced was riddled with starvation and disease, and the inhabitants tended to be superstitious. Seven other cases of dancing plague were reported in the same region during the medieval era.[13]
This psychogenic illness could have created a chorea (from the Greek khoreia meaning "to dance"), a situation comprising random and intricate unintentional movements that flit from body part to body part. Diverse choreas (St. Vitus' dance, St. John's dance, and tarantism) were labeled in the Middle Ages referring to the independent epidemics of "dancing mania" that happened in central Europe, particularly at the time of the plague.[14][15][16]
================================================ FILE: 3. Build a digital Business Card/11. Aside - inheritance/styles.css ================================================ body { margin: 10px; } ================================================ FILE: 3. Build a digital Business Card/12. Center the text via inheritance/index.html ================================================
Frontend Developer
and
Frontend Developer
Frontend Developer
Frontend Developer
Frontend Developer

Frontend Developer
Frontend Developer
Frontend Developer
Frontend Developer
Frontend Developer
Frontend Developer
Frontend Developer


"I have lived at Torshov for over 30 years, so I can show you all of its best parts and hidden secrets."
