Showing preview only (379K chars total). Download the full file or copy to clipboard to get everything.
Repository: roots/docs
Branch: docs
Commit: b9b2674e1a18
Files: 101
Total size: 352.4 KB
Directory structure:
gitextract_yjm39ipx/

├── .github/
│   └── workflows/
│       ├── lint-bash-blocks.yml
│       └── trigger-docs-sync.yml
├── .gitignore
├── CLAUDE.md
├── README.md
├── acorn/
│   ├── available-packages.md
│   ├── compatibility.md
│   ├── controllers-middleware-kernel.md
│   ├── creating-and-processing-laravel-queues.md
│   ├── creating-and-running-laravel-migrations.md
│   ├── creating-wp-cli-commands-with-artisan-console.md
│   ├── directory-structure.md
│   ├── eloquent-models.md
│   ├── error-handling.md
│   ├── installation.md
│   ├── laravel-cache-alternative-to-wordpress-transients.md
│   ├── laravel-redis-configuration.md
│   ├── logging.md
│   ├── package-development.md
│   ├── rendering-blade-views.md
│   ├── routing.md
│   ├── upgrading-acorn.md
│   ├── using-livewire-with-wordpress.md
│   └── wp-cli.md
├── bedrock/
│   ├── auditing-wordpress-vulnerabilities-with-composer.md
│   ├── bedrock-with-ddev.md
│   ├── bedrock-with-devkinsta.md
│   ├── bedrock-with-lando.md
│   ├── bedrock-with-local.md
│   ├── bedrock-with-valet.md
│   ├── compatibility.md
│   ├── composer.md
│   ├── configuration.md
│   ├── converting-wordpress-sites-to-bedrock.md
│   ├── deployment.md
│   ├── disable-plugins-based-on-environment.md
│   ├── environment-variables.md
│   ├── folder-structure.md
│   ├── installation.md
│   ├── local-development.md
│   ├── mu-plugin-autoloader.md
│   ├── patching-wordpress-plugins-with-composer.md
│   ├── patching-wordpress-with-composer.md
│   ├── private-or-commercial-wordpress-plugins-as-composer-dependencies.md
│   ├── server-configuration.md
│   ├── testing.md
│   └── wp-cron.md
├── netlify.toml
├── sage/
│   ├── adding-linting.md
│   ├── blade-templates.md
│   ├── bootstrap.md
│   ├── compatibility.md
│   ├── compiling-assets.md
│   ├── components.md
│   ├── composers.md
│   ├── configuration.md
│   ├── deployment.md
│   ├── fonts-setup.md
│   ├── functionality.md
│   ├── gutenberg.md
│   ├── installation.md
│   ├── localization.md
│   ├── sass.md
│   ├── structure.md
│   ├── tailwind-css.md
│   ├── theme-templates.md
│   ├── use-blade-icons.md
│   └── woocommerce.md
└── trellis/
    ├── ansible.md
    ├── cli.md
    ├── composer-authentication.md
    ├── configuring-php.md
    ├── cron-jobs.md
    ├── database-access.md
    ├── debugging-php.md
    ├── deploy-to-digitalocean.md
    ├── deploy-to-hetzner-cloud.md
    ├── deploy-with-github-actions.md
    ├── deployments.md
    ├── existing-projects.md
    ├── fastcgi-caching.md
    ├── install-wordpress-language-files.md
    ├── installation.md
    ├── local-development.md
    ├── mail.md
    ├── multiple-sites.md
    ├── multisite.md
    ├── nginx-includes.md
    ├── passwords.md
    ├── python.md
    ├── redis.md
    ├── remote-server-setup.md
    ├── sage-integration.md
    ├── security.md
    ├── server-logs.md
    ├── ssh-keys.md
    ├── ssl.md
    ├── troubleshooting.md
    ├── user-contributed-extensions.md
    ├── vault.md
    └── wordpress-sites.md
================================================
FILE CONTENTS
================================================
================================================
FILE: .github/workflows/lint-bash-blocks.yml
================================================
name: Lint bash code blocks
on:
pull_request:
paths:
- '**/*.md'
jobs:
check-bash-blocks:
runs-on: ubuntu-latest
steps:
- uses: actions/checkout@v4
- name: Check for multi-line bash code blocks
run: |
fail=0
while IFS= read -r file; do
# Strip leading ./ so GitHub annotations link to the correct file
clean="${file#./}"
awk -v file="$clean" '
/^```bash/ { in_block=1; lines=0; start=NR; next }
/^```/ && in_block {
if (lines > 1) {
printf "::error file=%s,line=%d::Bash code block has multiple commands. Each block must contain exactly one command.\n", file, start
found=1
}
in_block=0; next
}
in_block && /^[^#]/ && !/^[[:space:]]*$/ { lines++ }
END { if (found) exit 1 }
' "$file" || fail=1
done < <(find . -name '*.md' -not -path './.git/*' -not -name 'CLAUDE.md')
if [ "$fail" -eq 1 ]; then
echo ""
echo "Error: Found bash code blocks with multiple commands."
echo "Each bash code block must contain exactly one command."
exit 1
fi
echo "All bash code blocks contain a single command."
================================================
FILE: .github/workflows/trigger-docs-sync.yml
================================================
name: Trigger docs sync
on:
push:
branches: [docs]
paths:
- 'acorn/**'
- 'bedrock/**'
- 'sage/**'
- 'trellis/**'
jobs:
trigger:
runs-on: ubuntu-latest
steps:
- name: Trigger docs sync on roots.dev
run: gh workflow run docs-sync.yml --repo roots/roots.dev
env:
GH_TOKEN: ${{ secrets.ROOTS_DEV_TOKEN }}
================================================
FILE: .gitignore
================================================
================================================
FILE: CLAUDE.md
================================================
# Docs Conventions
## Markdown bash code blocks
Each bash code block must contain exactly one command. Never combine multiple commands in a single block. On the roots.io front-end, bash code blocks have a clipboard copy button that only supports single lines.
Good:
````markdown
```bash
composer require example/package
```
```bash
wp plugin activate example
```
````
Bad:
````markdown
```bash
composer require example/package
wp plugin activate example
```
````
================================================
FILE: README.md
================================================
# Roots Documentation
This repository is synced with the Roots docs for our primary projects:
- [Acorn Docs](https://roots.io/acorn/docs/)
- [Bedrock Docs](https://roots.io/bedrock/docs/)
- [Sage Docs](https://roots.io/sage/docs/)
- [Trellis Docs](https://roots.io/trellis/docs/)
## Contributing
Please use [Roots Discourse](https://discourse.roots.io/) to open a discussion about bigger changes before sending a pull request.
If you have an account on Roots Discourse, add your username in the authors list (in alphabetical order) at the top of any docs that you contribute to.
================================================
FILE: acorn/available-packages.md
================================================
---
date_modified: 2026-03-03 12:00
date_published: 2021-11-19 11:58
description: Explore community-developed packages for Acorn and Sage. WooCommerce integration, additional Laravel features, and third-party extensions.
title: Community Packages for Acorn
authors:
- alwaysblank
- ben
- QWp6t
---
# Community Packages for Acorn
| Package | Description |
| ----------- | ----------- |
| [`roots/acorn-ai`](https://github.com/roots/acorn-ai) | WordPress Abilities API integration and AI support for Acorn |
| [`roots/acorn-fse-helper`](https://github.com/roots/acorn-fse-helper) | Bootstrap FSE support in Acorn-based WordPress themes |
| [`roots/acorn-mail`](https://github.com/roots/acorn-mail) | A simple package handling WordPress SMTP using Acorn's mail configuration |
| [`roots/acorn-post-types`](https://github.com/roots/acorn-post-types) | Simple post types and taxonomies using Extended CPTs |
| [`roots/acorn-prettify`](https://github.com/roots/acorn-prettify) | A collection of modules to apply theme-agnostic front-end modifications to your Acorn-powered WordPress sites |
| [`roots/acorn-user-roles`](https://github.com/roots/acorn-user-roles) | Simple user role management for Acorn |
## Community packages
| Package | Description |
| ----------- | ----------- |
| [`40q/40q-seo-assistant`](https://github.com/40Q/40q-seo-assistant) | Editor-side SEO metadata suggestions for WordPress powered by Acorn |
| [`blavetstudio/sage-woocommerce-subscriptions`](https://github.com/blavetstudio/sage-woocommerce-subscriptions) | Add WooCommerce Subscriptions support to Sage 10 |
| [`digitalnodecom/substrate`](https://github.com/digitalnodecom/substrate) | AI MCP for Development with Bedrock, Acorn, Sage |
| [`generoi/sage-cachetags`](https://github.com/generoi/sage-cachetags) | A sage package for tracking what data rendered pages rely on using Cache Tags |
| [`generoi/sage-woocommerce`](https://github.com/generoi/sage-woocommerce) | Add WooCommerce support to Sage 10 |
| [`istogram/wp-api-content-migration`](https://github.com/istogram/wp-api-content-migration) | Migrate WordPress content using the WP REST API |
| [`leocolomb/wp-acorn-cache`](https://github.com/LeoColomb/wp-acorn-cache) | A WordPress cache manager powered by Laravel through Acorn |
| [`millipress/acorn-millicache`](https://github.com/MilliPress/Acorn-MilliCache) | MilliCache integration for Roots Acorn and Bedrock projects |
| [`log1x/acf-composer`](https://github.com/log1x/acf-composer) | ACF Composer is the ultimate tool for creating fields, blocks, widgets, and option pages using ACF Builder alongside Sage 10 |
| [`log1x/acorn-disable-media-pages`](https://github.com/log1x/acorn-disable-media-pages) | Disable media attachment pages on WordPress sites using Acorn |
| [`log1x/pagi`](https://github.com/log1x/pagi) | A better WordPress pagination utilizing Laravel's Pagination |
| [`log1x/poet`](https://github.com/log1x/poet) | Poet provides simple configuration-based post type, taxonomy, editor color palette, block category, block pattern and block registration/modification |
| [`log1x/sage-directives`](https://github.com/log1x/sage-directives) | A variety of useful Blade directives for use with Sage 10 including directives for WordPress, ACF, and various miscellaneous helpers |
| [`log1x/sage-html-forms`](https://github.com/log1x/sage-html-forms) | This is a simple package for the HTML Forms plugin that allows you to easily render forms using a corresponding Blade view (if one is present) with Sage 10 |
| [`log1x/sage-svg`](https://github.com/log1x/sage-svg) | Sage SVG is a simple package for using inline SVGs in your Sage 10 projects |
| [`pixelcollective/acorn-db`](https://github.com/pixelcollective/acorn-db) | Provides Sage 10 and other Acorn projects with an eloquent Model layer straight from the heart of the Laravel framework |
| [`supermundano/sage-the-events-calendar`](https://github.com/supermundano/sage-the-events-calendar) | Add The Events Calendar support to Sage 10 |
| [`tombroucke/sage-html-forms-export-submissions`](https://github.com/tombroucke/sage-html-forms-export-submissions) | Export HTML Forms submissions to Excel and CSV |
================================================
FILE: acorn/compatibility.md
================================================
---
date_modified: 2026-05-05 16:35
date_published: 2024-04-26 10:35
description: Known compatibility issues between WordPress plugins and Acorn, including solutions and workarounds for common integration conflicts.
title: WordPress Plugin Compatibility with Acorn
authors:
- ben
- dalepgrant
- joshf
---
# WordPress Plugin Compatibility with Acorn
Acorn is installed via Composer and includes many dependencies, that also include their own dependencies. WordPress plugin authors often include their own dependencies in a way that can conflict with Acorn.
Compatibility issues that arise in Acorn with other WordPress plugins are most often related to a WordPress plugin that is including an older version of a dependency that exists in the Acorn dependency tree.
**Plugin developers need to wrap their dependencies with their own namespace** in order to prevent conflicts with other plugins and with Acorn. The following tools can be used to handle this:
* [PHP-Scoper](https://github.com/humbug/php-scoper)
* [Imposter Plugin](https://github.com/TypistTech/imposter-plugin)
* [Mozart](https://github.com/coenjacobs/mozart)
**Acorn has no responsibility to fix compatibility issues that are the result of plugins that don't wrap their dependencies with their own namespace.**
## Known issues with plugins
Composer patches can sometimes be used to work around issues with plugins.
* **Google for WooCommerce** includes older versions of `psr/log` and `monolog/monolog`. [Patch available](https://gist.github.com/retlehs/3dfd033e196c25e376acbeb89fa41dbd).
* **Gravity Forms** merge tags JS causes an error on the admin notifications page. [@tombroucke provided a workaround in roots/acorn#198](https://github.com/roots/acorn/issues/198#issuecomment-1365942893).
* **Gravity Forms: Entry Automation FTP Extension** includes `league/flysystem` v1.1.4 which is incompatible with Acorn.
* **WooCommerce PayPal Payments** includes an older version of `psr/log`.
* **WooCommerce UPS Shipping** includes an older version of `psr/log`. [Patch available](https://gist.github.com/retlehs/4e76aee9a30cc0d3228cf6146eec64e0).
* **WooCommerce USPS Shipping** includes an older version of `psr/log`. [Patch available](https://gist.github.com/retlehs/4e76aee9a30cc0d3228cf6146eec64e0).
For more information on how to use Composer patches to resolve plugin conflicts, see [Patching WordPress Plugins with Composer](/bedrock/docs/patching-wordpress-plugins-with-composer/).
================================================
FILE: acorn/controllers-middleware-kernel.md
================================================
---
date_modified: 2026-03-22 12:00
date_published: 2025-10-01 00:00
description: Build robust APIs and handle requests with Laravel controllers, middleware, and custom HTTP kernels in WordPress using Acorn. Clean separation of concerns with validation, authentication, and response formatting.
title: Controllers, Middleware, and HTTP Kernel in WordPress
authors:
- ben
---
# Controllers, Middleware, and HTTP Kernel in WordPress
Acorn brings Laravel's controller and middleware system to WordPress, enabling you to build robust APIs, handle complex request logic, and implement clean separation of concerns. Controllers organize your route logic, while middleware provides a convenient mechanism for filtering HTTP requests.
We recommend referencing the [Laravel docs on Controllers](https://laravel.com/docs/13.x/controllers) and [Middleware](https://laravel.com/docs/13.x/middleware) for a complete understanding.
## Creating controllers
### Generate a controller
To create a new controller, use the `make:controller` Artisan command:
#### Create a basic controller
```bash
$ wp acorn make:controller PostController
```
#### Create an API resource controller
```bash
$ wp acorn make:controller PostController --api
```
#### Create a controller with all CRUD methods
```bash
$ wp acorn make:controller PostController --resource
```
This creates a new controller file in `app/Http/Controllers/`.
### Basic controller example
```php
<?php
namespace App\Http\Controllers;
use Illuminate\Http\Request;
use Illuminate\Http\JsonResponse;
use App\Models\Post;
class PostController extends Controller
{
public function index(): JsonResponse
{
$posts = Post::published()
->latest('ID')
->take(10)
->get();
return response()->json($posts);
}
public function show(int $id): JsonResponse
{
$post = Post::findOrFail($id);
return response()->json($post);
}
public function store(Request $request): JsonResponse
{
$validated = $request->validate([
'title' => 'required|max:255',
'content' => 'required',
'status' => 'in:draft,publish'
]);
$post = Post::create([
'post_title' => $validated['title'],
'post_content' => $validated['content'],
'post_status' => $validated['status'] ?? 'draft',
'post_type' => 'post',
'post_author' => get_current_user_id() ?: 1,
]);
return response()->json($post, 201);
}
}
```
### Using controllers in routes
Define your routes in `routes/web.php`:
```php
<?php
use Illuminate\Support\Facades\Route;
use App\Http\Controllers\PostController;
// Individual routes
Route::get('/api/posts', [PostController::class, 'index']);
Route::get('/api/posts/{id}', [PostController::class, 'show']);
Route::post('/api/posts', [PostController::class, 'store']);
// Resource routes (generates all CRUD routes)
Route::resource('/api/posts', PostController::class);
// API resource routes (excludes create/edit forms)
Route::apiResource('/api/posts', PostController::class);
```
## Working with WordPress data
```php
<?php
namespace App\Http\Controllers;
use Illuminate\Http\Request;
class WordPressController extends Controller
{
public function createPost(Request $request)
{
$validated = $request->validate([
'title' => 'required|max:255',
'content' => 'required',
]);
$post_id = wp_insert_post([
'post_title' => $validated['title'],
'post_content' => $validated['content'],
'post_status' => 'publish',
'post_type' => 'post',
]);
return response()->json(['id' => $post_id], 201);
}
}
```
## Creating middleware
### Generate middleware
To create new middleware, use the `make:middleware` Artisan command:
```bash
$ wp acorn make:middleware AuthenticateAdmin
```
This creates a new middleware file in `app/Http/Middleware/`.
### Authentication middleware example
```php
<?php
namespace App\Http\Middleware;
use Closure;
use Illuminate\Http\Request;
use Symfony\Component\HttpFoundation\Response;
class AuthenticateAdmin
{
public function handle(Request $request, Closure $next): Response
{
if (!is_user_logged_in()) {
return response()->json([
'message' => 'Authentication required'
], 401);
}
if (!current_user_can('manage_options')) {
return response()->json([
'message' => 'Admin access required'
], 403);
}
return $next($request);
}
}
```
## Applying middleware
Apply middleware to routes:
```php
<?php
use Illuminate\Support\Facades\Route;
use App\Http\Controllers\PostController;
use App\Http\Middleware\AuthenticateAdmin;
Route::post('/api/posts', [PostController::class, 'store'])
->middleware(AuthenticateAdmin::class);
```
## Customizing the HTTP kernel
For most middleware needs, use the `withMiddleware()` method when [booting Acorn](/acorn/docs/installation/#advanced-booting). If you need more control, you can override the HTTP kernel entirely.
### Creating a custom kernel
Create a custom kernel class that extends Acorn's HTTP kernel. When overriding properties like `$middleware`, make sure to include any defaults you still need — setting the property replaces the parent's values entirely:
```php
<?php
namespace App\Http;
use Roots\Acorn\Http\Kernel as AcornHttpKernel;
class Kernel extends AcornHttpKernel
{
public function __construct(\Illuminate\Contracts\Foundation\Application $app, \Illuminate\Routing\Router $router)
{
$this->middleware[] = \Illuminate\Foundation\Http\Middleware\TrimStrings::class;
parent::__construct($app, $router);
}
}
```
### Registering the custom kernel
Override the kernel singleton by rebinding it before `boot()`. The kernel is resolved during boot, so the binding must be in place before that happens:
```php
use Roots\Acorn\Application;
add_action('after_setup_theme', function () {
$builder = Application::configure()
->withProviders()
->withRouting(
web: base_path('routes/web.php'),
wordpress: true,
);
app()->singleton(
\Illuminate\Contracts\Http\Kernel::class,
\App\Http\Kernel::class
);
$builder->boot();
}, 0);
```
================================================
FILE: acorn/creating-and-processing-laravel-queues.md
================================================
---
date_modified: 2026-03-22 12:00
date_published: 2025-09-29 00:00
description: Use Laravel's queue system in WordPress through Acorn. Process background jobs, handle async tasks, and schedule recurring operations efficiently.
title: Creating and Processing Laravel Queues
authors:
- ben
---
# Creating and Processing Laravel Queues
Acorn brings Laravel's robust queue system to WordPress, enabling you to defer time-consuming tasks like image processing, email sending, or API calls to background jobs. This improves your application's response time and user experience by handling heavy operations asynchronously.
We recommend referencing the [Laravel docs on Queues](https://laravel.com/docs/13.x/queues) for a complete understanding of the queue system.
## Setting up the queue system
Before you can start using queues, you need to create the necessary database tables to store jobs and track their status.
### 1. Generate queue tables
Create the migration files for queue functionality:
#### Generate the jobs table migration
```bash
$ wp acorn queue:table
```
#### Generate the job batches table (optional, for batch processing)
```bash
$ wp acorn queue:batches-table
```
### 2. Run migrations
Apply the migrations to create the required tables:
```bash
$ wp acorn migrate
```
This will create:
- A `jobs` table to store queued jobs
- A `job_batches` table for batch job processing (if generated)
- A `failed_jobs` table to track failed job attempts
## Creating your first job
To create a new job class, use the `make:job` command:
```bash
$ wp acorn make:job ProcessImageOptimization
```
This creates a new job file in `app/Jobs/` with the basic structure needed for a queue job.
### Job file structure
A typical job class contains several key components:
```php
<?php
namespace App\Jobs;
use Illuminate\Bus\Queueable;
use Illuminate\Contracts\Queue\ShouldQueue;
use Illuminate\Foundation\Bus\Dispatchable;
use Illuminate\Queue\InteractsWithQueue;
use Illuminate\Queue\SerializesModels;
use Illuminate\Support\Facades\Log;
class ProcessImageOptimization implements ShouldQueue
{
use Dispatchable, InteractsWithQueue, Queueable, SerializesModels;
/**
* Number of times the job may be attempted
*/
public $tries = 3;
/**
* Number of seconds to wait before retrying
*/
public $backoff = [30, 60, 120];
/**
* Number of seconds the job can run before timing out
*/
public $timeout = 180;
/**
* The attachment ID to process
*/
protected int $attachmentId;
/**
* Create a new job instance
*/
public function __construct(int $attachmentId)
{
$this->attachmentId = $attachmentId;
}
/**
* Execute the job
*/
public function handle(): void
{
Log::info("Processing image optimization for attachment: {$this->attachmentId}");
$attachment = get_post($this->attachmentId);
if (!$attachment || $attachment->post_type !== 'attachment') {
Log::error("Invalid attachment ID: {$this->attachmentId}");
return;
}
$file_path = get_attached_file($this->attachmentId);
// Your image optimization logic here
// For example, using an image optimization library
// Mark as processed using post meta
update_post_meta($this->attachmentId, '_processed', true);
update_post_meta($this->attachmentId, '_processed_at', current_time('timestamp'));
Log::info("Successfully optimized image: {$this->attachmentId}");
}
/**
* Handle a job failure
*/
public function failed(\Throwable $exception): void
{
Log::error("Failed to optimize image {$this->attachmentId}: {$exception->getMessage()}");
// Notify administrators or take other actions
}
}
```
## Dispatching jobs
Once you've created a job, you can dispatch it from anywhere in your application:
### Basic dispatching
```php
use App\Jobs\ProcessImageOptimization;
// Dispatch a job to the default queue
ProcessImageOptimization::dispatch($attachmentId);
// Dispatch with a delay
ProcessImageOptimization::dispatch($attachmentId)
->delay(now()->addMinutes(5));
// Dispatch to a specific queue
ProcessImageOptimization::dispatch($attachmentId)
->onQueue('images');
```
### WordPress hook integration
Integrate queue jobs with WordPress hooks for automatic processing:
```php
// In your theme's functions.php or a service provider
add_action('add_attachment', function ($attachmentId) {
\App\Jobs\ProcessImageOptimization::dispatch($attachmentId);
});
// Process form submissions asynchronously
add_action('gform_after_submission', function ($entry, $form) {
\App\Jobs\ProcessFormSubmission::dispatch($entry['id']);
}, 10, 2);
```
## Processing queued jobs
To process jobs in the queue, you need to run a queue worker.
### Running a queue worker
#### Process jobs continuously
```bash
$ wp acorn queue:work
```
#### Process jobs from a specific queue
```bash
$ wp acorn queue:work --queue=high,default
```
#### Process a single job and exit
```bash
$ wp acorn queue:work --once
```
#### Process jobs for a specific duration
```bash
$ wp acorn queue:work --stop-when-empty
```
## Managing failed jobs
When jobs fail after all retry attempts, they're moved to the `failed_jobs` table.
### View failed jobs
```bash
$ wp acorn queue:failed
```
### Retry all failed jobs
```bash
$ wp acorn queue:retry all
```
### Retry specific job
```bash
$ wp acorn queue:retry 5
```
### Retry multiple jobs
```bash
$ wp acorn queue:retry 5 6 7
```
### Remove all failed jobs
```bash
$ wp acorn queue:flush
```
### Remove a specific failed job
```bash
$ wp acorn queue:forget 5
```
## Dispatching jobs
```php
// In a controller or WordPress hook
use App\Jobs\ProcessImageOptimization;
// Dispatch immediately
ProcessImageOptimization::dispatch($attachmentId);
// Dispatch with delay
ProcessImageOptimization::dispatch($attachmentId)->delay(now()->addMinutes(5));
```
================================================
FILE: acorn/creating-and-running-laravel-migrations.md
================================================
---
date_modified: 2026-03-22 12:00
date_published: 2025-08-06 14:00
description: Use Laravel's migration system in WordPress through Acorn. Create, modify, and manage custom database tables with Artisan migration commands.
title: Creating and Running Laravel Migrations
authors:
- ben
---
# Creating and Running Laravel Migrations
Acorn brings Laravel's powerful migration system to WordPress, allowing you to version control your database schema and manage custom tables with ease. Each migration contains instructions for creating or modifying database tables.
We recommend referencing the [Laravel docs on Database Migrations](https://laravel.com/docs/13.x/migrations) for a complete understanding of the migration system.
## Creating your first migration
To create a new migration, use the `make:migration` command:
```bash
$ wp acorn make:migration create_app_settings_table
```
This will create a new migration file in `database/migrations/` with a timestamp prefix, like `2025_08_06_140000_create_app_settings_table.php`.
### Migration file structure
A typical migration contains two methods:
- `up()` - Defines changes to apply
- `down()` - Defines how to reverse those changes
Here's an example migration for an app settings table:
```php
<?php
use Illuminate\Database\Migrations\Migration;
use Illuminate\Database\Schema\Blueprint;
use Illuminate\Support\Facades\Schema;
return new class extends Migration
{
/**
* Run the migrations.
*/
public function up(): void
{
Schema::create('app_settings', function (Blueprint $table) {
$table->id();
$table->string('key')->unique();
$table->json('value')->nullable();
$table->string('group')->default('general');
$table->boolean('is_public')->default(false);
$table->text('description')->nullable();
$table->timestamps();
$table->index('group');
$table->index('is_public');
});
}
/**
* Reverse the migrations.
*/
public function down(): void
{
Schema::dropIfExists('app_settings');
}
};
```
## Running migrations
To run all pending migrations:
```bash
$ wp acorn migrate
```
To see the status of your migrations:
```bash
$ wp acorn migrate:status
```
To rollback the last batch of migrations:
```bash
$ wp acorn migrate:rollback
```
## Adding columns to existing tables
To add columns to an existing table, create a new migration:
```bash
$ wp acorn make:migration add_encrypted_to_app_settings_table
```
```php
public function up(): void
{
Schema::table('app_settings', function (Blueprint $table) {
$table->boolean('is_encrypted')->default(false)->after('is_public');
});
}
public function down(): void
{
Schema::table('app_settings', function (Blueprint $table) {
$table->dropColumn('is_encrypted');
});
}
```
## Deployment
You should run migrations as part of your deployment process. Add this to your deployment script after `wp acorn optimize`:
```bash
$ wp acorn optimize
```
```bash
$ wp acorn migrate --force
```
The `--force` flag runs migrations without confirmation prompts in production environments.
## Troubleshooting
If you get an error about the migrations table not existing, run:
```bash
$ wp acorn migrate:install
```
================================================
FILE: acorn/creating-wp-cli-commands-with-artisan-console.md
================================================
---
date_modified: 2026-03-22 12:00
date_published: 2025-09-28 00:00
description: Create custom WP-CLI commands using Laravel's Artisan Console system with Acorn. Extend WordPress CLI with powerful Laravel functionality.
title: Creating WP-CLI Commands with Artisan Console
authors:
- ben
---
# Creating WP-CLI Commands with Artisan Console
Acorn brings Laravel's powerful Artisan Console system to WordPress, allowing you to create custom WP-CLI commands with the same elegance and functionality you'd expect from Laravel. This enables you to build sophisticated command-line tools that integrate seamlessly with both WordPress and Laravel features.
We recommend referencing the [Laravel docs on Artisan Console](https://laravel.com/docs/13.x/artisan) for a complete understanding of the console system.
## Creating your first command
To create a new WP-CLI command, use the `make:command` Artisan command:
```bash
$ wp acorn make:command SeoAuditCommand
```
This will create a new command file in `app/Console/Commands/` with the basic structure needed for a custom command.
### Command file structure
A typical Artisan command contains several key properties and methods:
- `$signature` - Defines the command name, arguments, and options
- `$description` - Provides a description for the command
- `handle()` - Contains the command logic
Here's a basic example for auditing SEO:
```php
<?php
namespace App\Console\Commands;
use Illuminate\Console\Command;
class SeoAuditCommand extends Command
{
/**
* The name and signature of the console command.
*
* @var string
*/
protected $signature = 'seo:audit
{--post-type=post : Post type to audit}
{--limit=20 : Number of posts to audit}';
/**
* The console command description.
*
* @var string
*/
protected $description = 'Audit SEO issues across posts';
/**
* Execute the console command.
*/
public function handle()
{
$postType = $this->option('post-type');
$limit = (int) $this->option('limit');
$this->components->info("Auditing {$postType} posts for SEO issues...");
$posts = get_posts([
'post_type' => $postType,
'post_status' => 'publish',
'numberposts' => $limit,
]);
if (empty($posts)) {
$this->components->warn('No posts found to audit.');
return 0;
}
$issues = [];
foreach ($posts as $post) {
$postIssues = $this->auditPost($post);
if (!empty($postIssues)) {
$issues[$post->ID] = [
'title' => $post->post_title,
'issues' => $postIssues,
];
}
}
if (empty($issues)) {
$this->components->info('No SEO issues found! 🎉');
return 0;
}
$this->displayIssues($issues);
return 0;
}
protected function auditPost($post)
{
$issues = [];
$seoTitle = get_post_meta($post->ID, '_genesis_title', true) ?: $post->post_title;
if (strlen($seoTitle) < 30) {
$issues[] = 'SEO title too short (< 30 chars)';
}
if (strlen($seoTitle) > 60) {
$issues[] = 'SEO title too long (> 60 chars)';
}
$description = get_post_meta($post->ID, '_genesis_description', true);
if (empty($description)) {
$issues[] = 'Missing SEO meta description';
} elseif (strlen($description) < 120) {
$issues[] = 'Meta description too short (< 120 chars)';
} elseif (strlen($description) > 160) {
$issues[] = 'Meta description too long (> 160 chars)';
}
return $issues;
}
protected function displayIssues($issues)
{
$this->components->error('Found ' . count($issues) . ' posts with SEO issues:');
$this->newLine();
foreach ($issues as $postId => $data) {
$this->components->twoColumnDetail(
"Post #{$postId}",
$data['title']
);
foreach ($data['issues'] as $issue) {
$this->line(" → {$issue}");
}
$this->newLine();
}
}
}
```
## Command signature syntax
```php
// Basic command
protected $signature = 'newsletter:send';
// With arguments
protected $signature = 'user:create {name} {email}';
// With options
protected $signature = 'seo:audit {--post-type=post}';
```
## Running your commands
Once created, your commands are automatically available through WP-CLI:
#### Run your SEO audit command
```bash
$ wp acorn seo:audit
```
#### Run with options
```bash
$ wp acorn seo:audit --post-type=page --limit=50
```
#### Get help for a command
```bash
$ wp acorn help seo:audit
```
## Console output
```php
public function handle()
{
$this->info('Success message');
$this->error('Error message');
// Ask for input
$name = $this->components->ask('What is your name?');
// Use WordPress functions
$posts = get_posts(['numberposts' => 10]);
return 0; // Success
}
```
================================================
FILE: acorn/directory-structure.md
================================================
---
date_modified: 2025-07-22 13:34
date_published: 2021-11-19 11:58
description: Acorn works with zero configuration by default. Optionally publish config files to use Laravel's familiar directory structure in WordPress.
title: Acorn Application Directory Structure
authors:
- alwaysblank
- ben
- rafaucau
- QWp6t
---
# Acorn Application Directory Structure
## Zero-config setup
Out of the box, Acorn will [use its own configs](https://github.com/roots/acorn/tree/main/config), and it will keep the application cache and logs in the standard WordPress cache directory:
```plaintext
[wp-content]/ # wp-content directory ("app" if you're using Bedrock)
├── cache/
│ └── /acorn/ # Private application storage ("storage" directory)
│ ├── app/ # Files generated or used by the application
│ ├── framework/ # Files generated or used by Acorn (never edit)
│ └── logs/ # Application logs
└── themes/
└── [theme]/ # Theme directory (e.g., "sage")
├── app/ # Core application code
├── public/ # Built application assets (never edit)
├── resources/ # Uncompiled source assets and views
│ └── views/ # Application views to be compiled by Blade
└── vendor/ # Composer packages (never edit)
```
## Traditional setup
Acorn also supports a more traditional Laravel-esque structure. We recommend this approach if you are adding Acorn/Laravel packages and want to have more control over your app.
::: tip
If you've installed Acorn from your Bedrock project root, Acorn's `config/` directory will conflict with Bedrock's. We recommend using [Radicle](/radicle/) to avoid this.
<br><br>
There are no conflicts with the `config/` directory if you've installed Acorn from your theme.
:::
```plaintext
root/ # Base directory for your Acorn application (e.g., "sage")
├── app/ # Core application code
├── config/ # Application configuration
├── public/ # Built application assets (never edit)
├── resources/ # Uncompiled source assets and views
│ └── views/ # Application views to be compiled by Blade
├── storage/ # Private application storage
│ ├── app/ # Files generated or used by the application
│ ├── framework/ # Files generated or used by Acorn (never edit)
│ └── logs/ # Application logs
└── vendor/ # Composer packages (never edit)
```
You can manually create a `config/` directory, or you can automatically set up the traditional structure with WP-CLI (see below).
If you have a `config/` directory, you can drop your desired config files in there. any that are missing (such as `app.php`) will just be pulled from [Acorn's config directory](https://github.com/roots/acorn/tree/main/config).
### WP-CLI commands for setting up the traditional structure
You can automatically set up the traditional structure via WP-CLI:
```shell
$ wp acorn acorn:init storage && wp acorn vendor:publish --tag=acorn
```
Alternatively, you can choose to only copy the config files.
```shell
$ wp acorn vendor:publish --tag=acorn
```
## Advanced directory modifications
You can modify the path for any Acorn directory by defining the following constants:
- `ACORN_BASEPATH`
- `ACORN_APP_PATH`
- `ACORN_CONFIG_PATH`
- `ACORN_STORAGE_PATH`
- `ACORN_RESOURCES_PATH`
- `ACORN_PUBLIC_PATH`
================================================
FILE: acorn/eloquent-models.md
================================================
---
date_modified: 2026-03-22 12:00
date_published: 2025-10-01 00:00
description: Use Laravel's Eloquent ORM in WordPress with Acorn. Create models for WordPress posts, users, and custom tables with relationships, scopes, and clean query syntax.
title: Using Eloquent Models in WordPress
authors:
- ben
---
# Using Eloquent Models in WordPress
Acorn brings Laravel's powerful Eloquent ORM to WordPress, allowing you to interact with WordPress data using clean, expressive syntax. Create models for posts, users, custom tables, and more with relationships, scopes, and all the Eloquent features you love.
We recommend referencing the [Laravel docs on Eloquent](https://laravel.com/docs/13.x/eloquent) for a complete understanding of the ORM.
## Creating your first model
Since Acorn doesn't include the `make:model` command, you'll need to create model files manually. Create a new PHP file in the `app/Models/` directory with the following structure.
## WordPress post model
Here's an example of an Eloquent model for WordPress posts:
```php
<?php
namespace App\Models;
use Illuminate\Database\Eloquent\Model;
class Post extends Model
{
protected $table = 'posts';
protected $primaryKey = 'ID';
public $timestamps = false;
protected $fillable = [
'post_title',
'post_content',
'post_status',
'post_type',
'post_author',
];
public function author()
{
return $this->belongsTo(User::class, 'post_author');
}
public function meta()
{
return $this->hasMany(PostMeta::class, 'post_id');
}
public function scopePublished($query)
{
return $query->where('post_status', 'publish');
}
public function scopeOfType($query, $type)
{
return $query->where('post_type', $type);
}
}
```
### Key considerations for WordPress models
When creating models for WordPress tables, keep these points in mind:
- **Table names**: WordPress tables don't follow Laravel naming conventions, so explicitly set the `$table` property
- **Primary keys**: WordPress uses `ID` (uppercase) instead of `id`, so set `$primaryKey = 'ID'`
- **Timestamps**: WordPress handles timestamps differently, so set `$timestamps = false` and handle dates manually
- **Table prefixes**: WordPress table prefixes are handled automatically by WordPress's database configuration
## WordPress user model
```php
<?php
namespace App\Models;
use Illuminate\Database\Eloquent\Model;
class User extends Model
{
protected $table = 'users';
protected $primaryKey = 'ID';
public $timestamps = false;
protected $fillable = [
'user_login',
'user_email',
'user_nicename',
'display_name',
];
public function posts()
{
return $this->hasMany(Post::class, 'post_author');
}
public function meta()
{
return $this->hasMany(UserMeta::class, 'user_id');
}
}
```
## Post meta model
```php
<?php
namespace App\Models;
use Illuminate\Database\Eloquent\Model;
class PostMeta extends Model
{
protected $table = 'postmeta';
protected $primaryKey = 'meta_id';
public $timestamps = false;
protected $fillable = [
'post_id',
'meta_key',
'meta_value',
];
public function post()
{
return $this->belongsTo(Post::class, 'post_id');
}
}
```
## Using models in your application
### Basic queries
```php
// Get all published posts
$posts = Post::published()->get();
// Get posts of a specific type
$pages = Post::ofType('page')->published()->get();
// Get a post with its author
$post = Post::with('author')->find(123);
// Create a new post
$post = Post::create([
'post_title' => 'Hello World',
'post_content' => 'This is my first post using Eloquent!',
'post_status' => 'publish',
'post_type' => 'post',
'post_author' => get_current_user_id(),
]);
```
### Working with relationships
```php
// Get a post's author
$post = Post::find(123);
$author = $post->author;
// Get an author's posts
$user = User::find(1);
$posts = $user->posts()->published()->get();
// Get post meta
$post = Post::with('meta')->find(123);
foreach ($post->meta as $meta) {
echo $meta->meta_key . ': ' . $meta->meta_value;
}
```
## Custom tables
You can also create models for custom database tables:
```php
<?php
namespace App\Models;
use Illuminate\Database\Eloquent\Model;
class CustomTable extends Model
{
protected $table = 'wp_custom_table';
protected $fillable = [
'name',
'value',
'status',
];
}
```
================================================
FILE: acorn/error-handling.md
================================================
---
date_modified: 2026-03-07 12:00
date_published: 2021-10-21 13:21
description: Acorn handles exceptions automatically in development mode, logging errors to `storage/logs` and rendering detailed stack traces.
title: Error Handling in Acorn Applications
authors:
- ben
- jure
- Log1x
---
# Error Handling in Acorn Applications
## Introduction
When working in a development environment, Acorn automatically registers an exception handler configured to handle logging as well as the rendering of thrown exceptions. This can be especially useful when diagnosing errors thrown by Blade views.
## Configuration
The `debug` option in your `config/app.php` is solely responsible for whether or not an exception is handled by Acorn. [By default](https://github.com/roots/acorn/blob/ad4f632dca909e09ef2783b8a2b8e3ce40334bcd/config/app.php#L46), this option is set to be enabled when `WP_DEBUG && WP_DEBUG_DISPLAY` are enabled in your WordPress config.
During local development, it is highly advised to ensure that `WP_DEBUG` is enabled to properly render exceptions thrown by Blade views and other errors further down the stack.
## The exception handler
Laravel includes a built-in debug/exception page that provides a detailed and easy to read stack trace on errors thrown in your application.
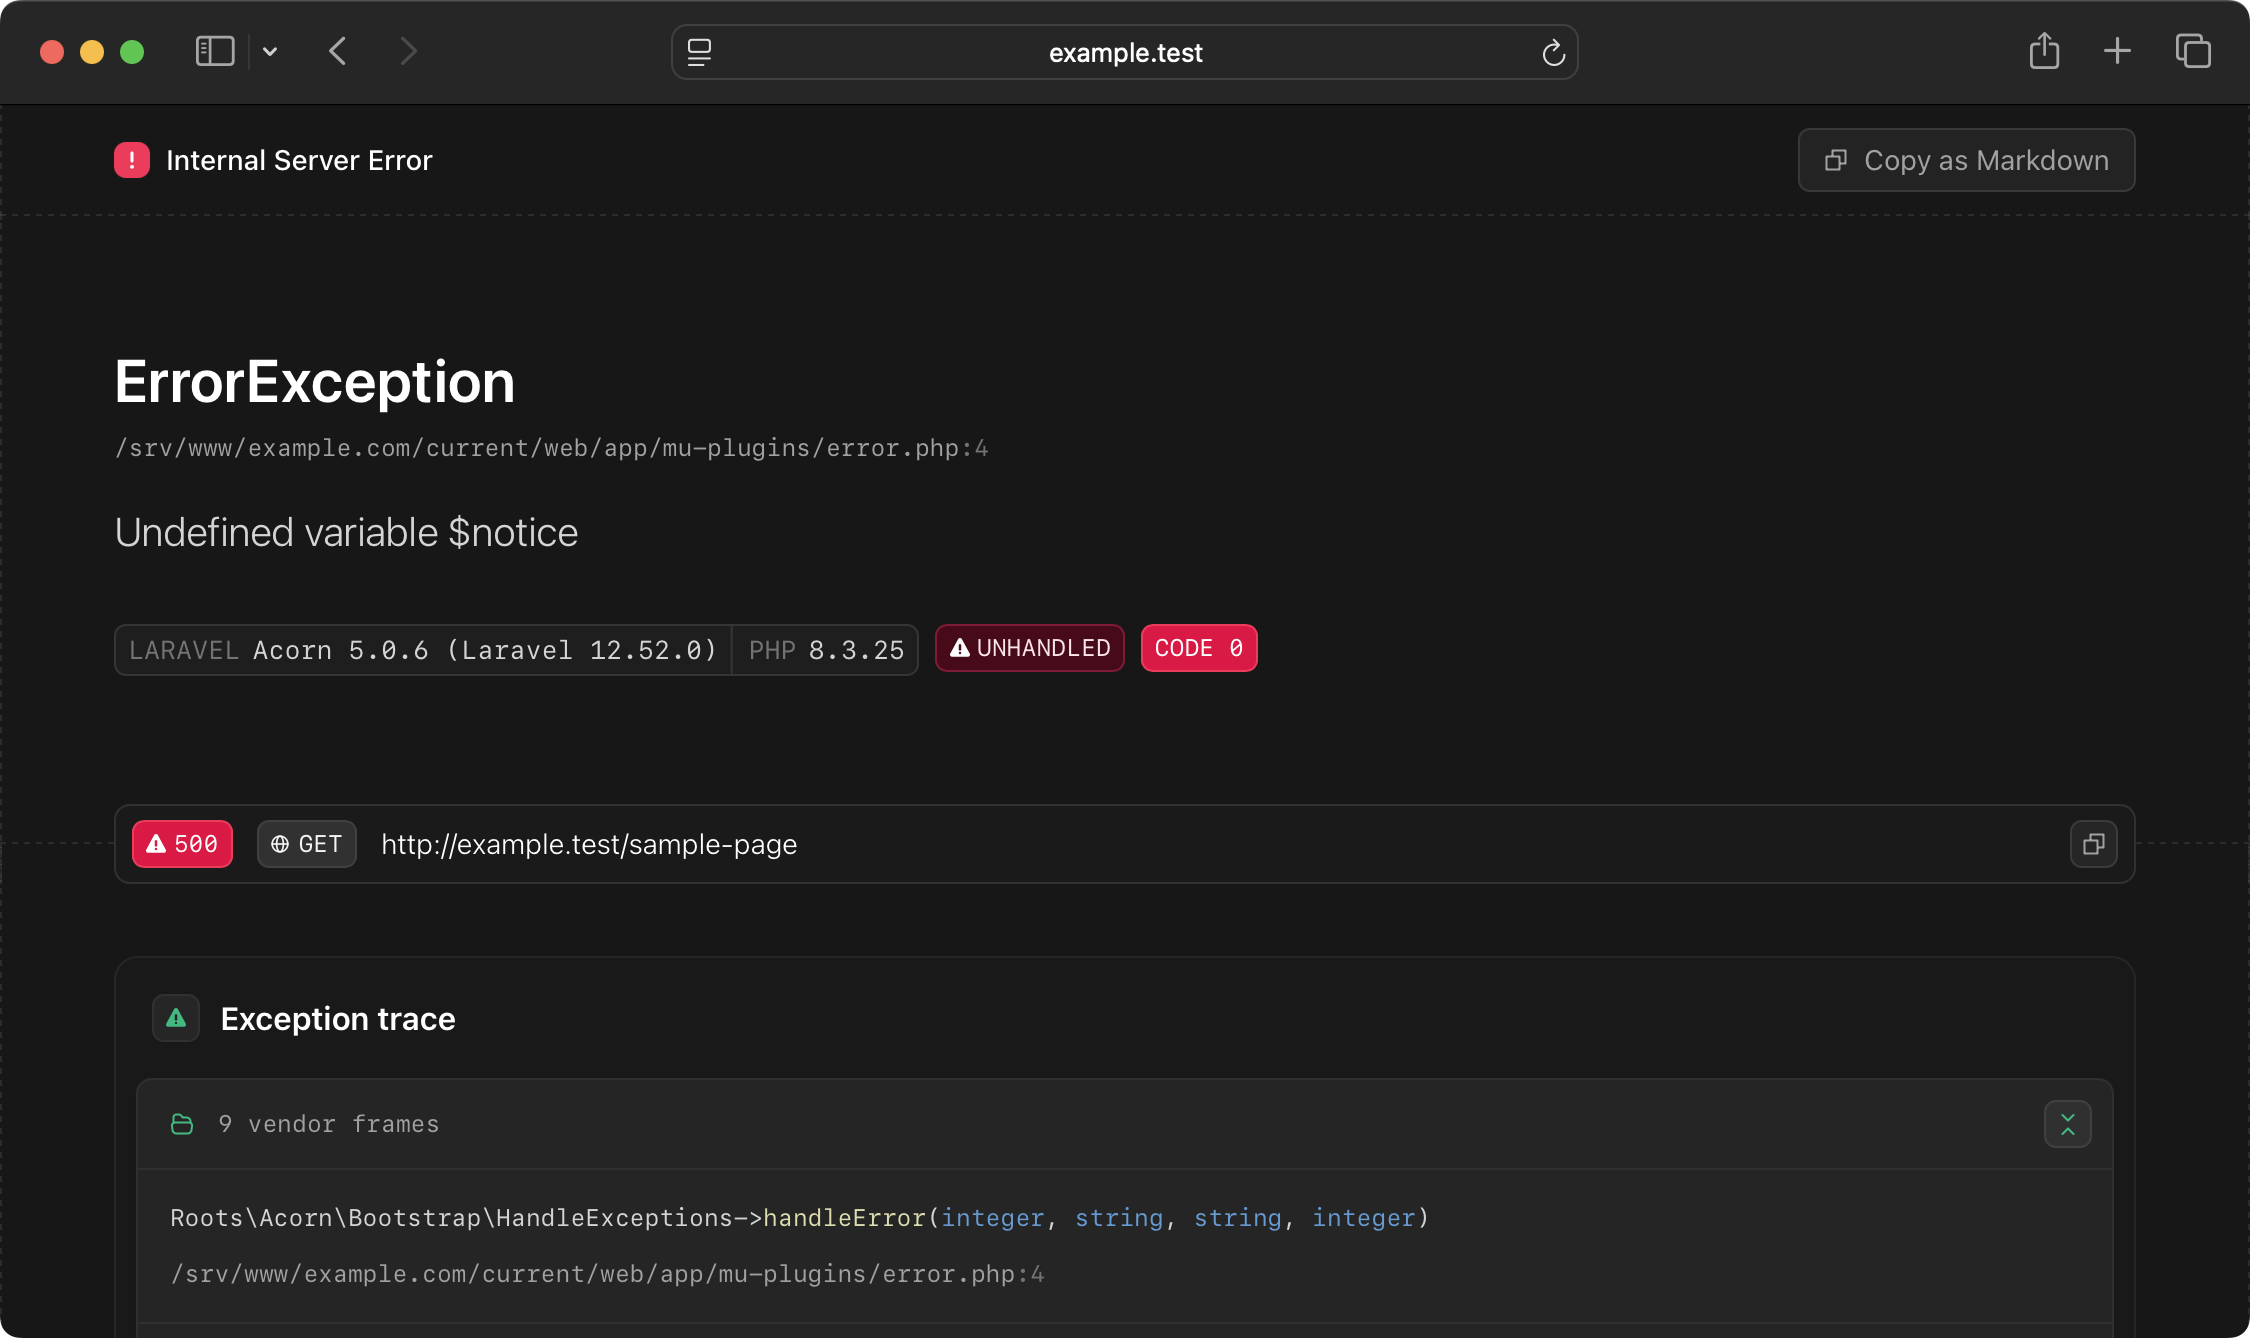
### Reporting exceptions
Exception reporting can be used to log exceptions to storage or send them to an external service such as Sentry. By default, exceptions will be logged to disk located in the `storage/logs` folder.
Check out the documentation on [logging](/acorn/docs/logging/) to learn more about log implementation.
### Disabling the exception handler
Acorn's `acorn/throw_error_exception` filter can be used to disable the exception handler:
```php
add_filter('acorn/throw_error_exception', '__return_false');
```
================================================
FILE: acorn/installation.md
================================================
---
date_modified: 2026-03-22 12:00
date_published: 2021-11-19 11:58
description: Install Acorn by running `composer require roots/acorn` in your WordPress project root. Requires Composer-based WordPress like Bedrock.
title: Installing Acorn in WordPress
authors:
- alwaysblank
- ben
- csorrentino
- QWp6t
- joshf
---
# Installing Acorn in WordPress
## What is Acorn?
Acorn is a way to use [Laravel components inside of WordPress](https://roots.io/acorn/).
### Why use Acorn?
Acorn brings elements of the Laravel ecosystem to any WordPress plugin or theme.
To put it simply, Acorn provides a way to gracefully load a Laravel application container inside of WordPress while respecting the WordPress lifecycle and template hierarchy.
This means you get access to Laravel's artisan commands through the use of [`wp acorn`](wp-cli.md). You can utilize [Blade templates](blade.md). You gain access to [third-party packages](available-packages.md#user-contributed) built specifically for Acorn. And we provide some first-party components as well, such as [view composers](/acorn/docs/blade#composers) and [assets management](/sage/docs/compiling-assets/).
## Installing Acorn with Composer
Install Acorn with Composer:
```shell
$ composer require roots/acorn
```
## Booting Acorn
Acorn must be booted in order to use it. [Sage](https://roots.io/sage/) and [Radicle](https://roots.io/radicle/) already handle booting Acorn.
<details>
<summary>Boot Acorn in your own theme or plugin</summary>
Add the following in your theme's `functions.php` file, or in your main plugin file:
```php
<?php
use Roots\Acorn\Application;
if (! class_exists(\Roots\Acorn\Application::class)) {
wp_die(
__('You need to install Acorn to use this site.', 'domain'),
'',
[
'link_url' => 'https://roots.io/acorn/docs/installation/',
'link_text' => __('Acorn Docs: Installation', 'domain'),
]
);
}
add_action('after_setup_theme', function () {
Application::configure()
->withProviders([
App\Providers\ThemeServiceProvider::class,
])
->boot();
}, 0);
```
</details>
### Advanced booting
Acorn provides several additional configuration methods that can be chained before booting. Here's a comprehensive example with explanations:
```php
add_action('after_setup_theme', function () {
Application::configure()
->withProviders([
// Register your service providers
App\Providers\ThemeServiceProvider::class,
])
->withMiddleware(function (Middleware $middleware) {
// Configure HTTP middleware for WordPress requests
$middleware->wordpress([
Illuminate\Cookie\Middleware\EncryptCookies::class,
Illuminate\Cookie\Middleware\AddQueuedCookiesToResponse::class,
Illuminate\Session\Middleware\StartSession::class,
Illuminate\View\Middleware\ShareErrorsFromSession::class,
Illuminate\Foundation\Http\Middleware\ValidateCsrfToken::class,
Illuminate\Routing\Middleware\SubstituteBindings::class,
]);
// You can also configure middleware for web and API routes
// $middleware->web([...]);
// $middleware->api([...]);
})
->withExceptions(function (Exceptions $exceptions) {
// Configure exception handling
// $exceptions->reportable(function (\Throwable $e) {
// Log::error($e->getMessage());
// });
})
->withRouting(
// Configure routing with named parameters
web: base_path('routes/web.php'), // Laravel-style web routes
api: base_path('routes/api.php'), // API routes
wordpress: true, // Enable WordPress request handling
)
->boot();
}, 0);
```
## Add the autoload dump script
Acorn has a function that should be added to the `scripts` section of your `composer.json` file for the `post-autoload-dump` event. To automatically configure this script, run the following command:
```shell
$ wp acorn acorn:install
```
Select **Yes** when prompted to install the Acorn autoload dump script.
::: warning
`wp acorn` commands won't work if your theme/plugin that boots Acorn hasn't been activated and will result in the following message:
**Error: 'acorn' is not a registered wp command.**
:::
<details>
<summary>Manually adding Acorn's post autoload dump function</summary>
Open `composer.json` and add Acorn's `postAutoloadDump` function to Composer's `post-autoload-dump` event in the `scripts`:
```json
"scripts": {
//...
"post-autoload-dump": [
"Roots\\Acorn\\ComposerScripts::postAutoloadDump"
]
}
```
</details>
## Server requirements
Acorn's server requirements are minimal, and mostly come from WordPress and [Laravel 13's requirements](https://laravel.com/docs/13.x/deployment#server-requirements).
- PHP >=8.3 with extensions: Ctype, cURL, DOM, Fileinfo, Filter, Hash, Mbstring, OpenSSL, PCRE, PDO, Session, Tokenizer, XML
- WordPress >= 5.4
- [WP-CLI](https://wordpress.org/cli/)
================================================
FILE: acorn/laravel-cache-alternative-to-wordpress-transients.md
================================================
---
date_modified: 2026-03-22 12:00
date_published: 2023-01-30 17:32
description: Use Laravel's caching system instead of WordPress Transients. Acorn supports multiple cache drivers including Redis, Memcached, and files.
title: Laravel Cache as an Alternative to WordPress Transients
authors:
- ben
---
# Laravel Cache as an Alternative to WordPress Transients
Acorn provides [Laravel integration with WordPress](/acorn/), which means that certain Laravel components are able to be used within your WordPress site.
Compared to WordPress transients API, [Laravel Cache](https://laravel.com/docs/13.x/cache) provides a more standardized and developer-friendly approach to caching data. It also has a wider range of cache storage options, compared to the WordPress Transients API, which only supports storing data in the WordPress database.
::: tip
Review the [Laravel Cache docs](https://laravel.com/docs/13.x/cache) to get a more detailed understanding about how it works, along with the various ways that the cache can be configured
:::
## Storing data in the cache
```php
use Illuminate\Support\Facades\Cache;
Cache::put('key', 'value', $minutes);
```
## Retrieving data from the cache
```php
use Illuminate\Support\Facades\Cache;
$value = Cache::get('key');
```
## Removing items from the cache
```php
use Illuminate\Support\Facades\Cache;
Cache::forget('key');
```
You can also use Acorn's WP-CLI integration to interact with the cache:
```shell
$ wp acorn cache:clear
```
================================================
FILE: acorn/laravel-redis-configuration.md
================================================
---
date_modified: 2026-03-22 12:00
date_published: 2025-10-27 10:00
title: Laravel Redis Configuration for Acorn
description: Configure Redis with Laravel and Acorn in WordPress. Enable high-performance caching using PhpRedis or Predis with your WordPress sites.
authors:
- ben
- Log1x
---
# Laravel Redis Configuration for Acorn
Acorn provides [Laravel integration with WordPress](/acorn/), which means that Laravel's Redis setup can be configured to work on your WordPress sites.
We recommend referencing the [Laravel docs on Redis](https://laravel.com/docs/13.x/redis) for a complete understanding of the integration.
## Requirements
The [PhpRedis PECL extension](https://github.com/phpredis/phpredis), or the [`predis/predis`](https://github.com/predis/predis) package are required in order to use Redis.
## Configuration
Add the Laravel Redis package as a dependency:
```shell
$ composer require illuminate/redis
```
Update `config/app.php` to add the Redis Service Provider:
```diff
Roots\Acorn\Providers\AcornServiceProvider::class,
Roots\Acorn\Providers\RouteServiceProvider::class,
Roots\Acorn\View\ViewServiceProvider::class,
+ Illuminate\Redis\RedisServiceProvider::class,
```
Update `config/app.php` to add the Redis facade:
```diff
'aliases' => Facade::defaultAliases()->merge([
// 'ExampleClass' => App\Example\ExampleClass::class,
+ 'Redis' => Illuminate\Support\Facades\Redis::class
])->toArray(),
```
================================================
FILE: acorn/logging.md
================================================
---
date_modified: 2026-03-22 12:00
date_published: 2021-10-21 13:21
description: Acorn provides Laravel's logging services for WordPress. Configure multiple channels and send logs to files, syslog, Slack, and custom handlers.
title: Laravel Logging in WordPress
authors:
- ben
---
# Laravel Logging in WordPress
::: tip
We recommend referencing the [Laravel docs on Logging](https://laravel.com/docs/13.x/logging)
:::
The location of your application logs depends on your [directory structure](/acorn/docs/directory-structure/).
For zero-config setups, logs live at `[wp-content]/cache/acorn/logs/`.
For traditional setups, logs live at `storage/logs/`.
## Basic PHP logging example
```php
use Illuminate\Support\Facades\Log;
Log::debug('👋 Howdy');
```
## Basic Blade logging example
```blade
{{ logger('👋 Howdy') }}
```
================================================
FILE: acorn/package-development.md
================================================
---
date_modified: 2026-03-22 12:00
date_published: 2021-10-21 13:21
title: Developing Packages for Acorn
description: Use the Acorn Example Package as a template for creating custom packages and reusable functionality for WordPress with Laravel architecture.
authors:
- ben
- Log1x
---
# Developing Packages for Acorn
We have an [Acorn Example Package](https://github.com/roots/acorn-example-package) repo that can be used as a template for creating your own Acorn packages. It's similar to some of the other Laravel package templates out there, but more specific to Acorn.
Creating Acorn packages is useful for when you want to reuse specific functionality on your Acorn-powered WordPress sites, or open-sourcing functionality that's not tied directly to your site. You can think of Acorn packages similiar to WordPress plugins, or any other dependency.
Packages are installed by Composer, just like Acorn is.
::: tip
We recommend referencing the [Laravel docs on Packages](https://laravel.com/docs/13.x/packages)
:::
## Creating an Acorn package
From the [roots/acorn-example-package](https://github.com/roots/acorn-example-package) repo, click the **Use this template** button to create a new repo with the template.
After cloning your new repo, run the configure script to replace the placeholder names with your own:
```shell
$ php configure.php
```
The script will prompt you for your vendor name, package name, namespace, and other details. You can also run it non-interactively:
```shell
$ php configure.php --no-interaction --author-name="Your Name" --author-email="you@example.com" --vendor-slug="your-vendor" --vendor-namespace="YourVendor" --package-slug="your-package" --class-name="YourPackage" --package-description="Your package description"
```
To preview changes without modifying any files, use `--dry-run`:
```shell
$ php configure.php --dry-run
```
## Developing an Acorn package
Once your package is created, clone your new git repo somewhere on your machine that's accessible from a WordPress site with Acorn installed. To work on a package locally, you can require it by defining a new local repository from the `composer.json` file used for your site/theme:
```json
"repositories": [
{
"type": "path",
"url": "./packages/vendor-name/example-package"
}
],
```
Replace `./packages/vendor-name/example-package` above with the path to your local package, along with the correct names.
Then require the package in your project:
```shell
$ composer require vendor-name/example-package
```
Then run the Acorn WP-CLI command to discover your package:
```shell
$ wp acorn package:discover
```
```plaintext
INFO Discovering packages.
vendor-name/example-package ...... DONE
roots/sage ....................... DONE
```
::: tip
If you haven't already, run `php configure.php` from the root of your package to replace the placeholder names
:::
================================================
FILE: acorn/rendering-blade-views.md
================================================
---
date_modified: 2026-02-02 12:00
date_published: 2023-02-21 11:30
description: Render Blade templates anywhere in WordPress using the `view()` helper function. Examples for Gutenberg blocks, ACF blocks, and email notifications.
title: Rendering Blade Views in WordPress
authors:
- ben
- chuckienorton
- rafaucau
- strarsis
- talss89
---
# Rendering Blade Views in WordPress
You can use the `view()` helper function from Acorn to render Blade templates anywhere in your WordPress site.
## Rendering blocks with Blade templates
### First-party blocks
In the following example we'll render a `vendor/example` block with `resources/views/blocks/example.blade.php`:
```php
register_block_type('vendor/example', [
'render_callback' => function ($attributes, $content) {
return view('blocks/example', compact('attributes', 'content'));
},
]);
```
In the following example register an ACF block named `example` and render it with `resources/views/blocks/example.blade.php`:
### ACF blocks with Blade templates
```php
acf_register_block_type([
'example',
'render_callback' => function ($block) {
echo view('blocks/example', ['block' => $block]);
},
]);
```
### Existing blocks with Blade templates
In the following example we'll render the `core/buttons` block with `resources/views/blocks/button.blade.php`:
```php
add_filter('register_block_type_args', function ($args, $name) {
if ($name === 'core/buttons') {
$args['render_callback'] = function ($attributes, $content) {
return view('blocks/buttons', compact('attributes', 'content'));
};
}
return $args;
}, 10, 2);
```
### block.json `render` field with Blade templates
If you're registering blocks using `block.json` with a `render` field pointing to a Blade template (e.g. `"render": "file:./render.blade.php"`), you can automatically handle the rendering with a single filter:
```php
add_filter('register_block_type_args', function (array $args, string $name): array {
if (empty($args['render_callback']) || ! ($args['render_callback'] instanceof \Closure)) {
return $args;
}
$reflector = new \ReflectionFunction($args['render_callback']);
$renderCallbackVariables = $reflector->getStaticVariables();
if (array_key_exists('template_path', $renderCallbackVariables) && str_ends_with($renderCallbackVariables['template_path'], '.blade.php')) {
$args['render_callback'] = function ($attributes, $content, $block) use ($renderCallbackVariables) {
return view()
->file($renderCallbackVariables['template_path'], compact('attributes', 'content', 'block'))
->render();
};
}
return $args;
}, 1, 2);
```
## Rendering emails with Blade templates
The following example uses the `resources/views/emails/welcome.blade.php` template file customizing the new WordPress user notification emails:
```php
add_filter('wp_new_user_notification_email', function ($wp_new_user_notification_email, $user, $blogname) {
$key = get_password_reset_key($user);
$encoded_user_login = rawurlencode($user->user_login);
$password_reset_link = network_site_url('wp-login.php?action=rp&key='.$key.'&login='.$encoded_user_login, 'login');
$message = view('emails/welcome', compact('user', 'blogname', 'password_reset_link'))->render();
$wp_new_user_notification_email['message'] = $message;
$wp_new_user_notification_email['headers'] = ['Content-Type: text/html; charset=UTF-8'];
return $wp_new_user_notification_email;
}, 10, 3);
```
================================================
FILE: acorn/routing.md
================================================
---
date_modified: 2025-03-07 09:00
date_published: 2024-06-03 15:00
description: Add Laravel's routing system to WordPress with Acorn. Create custom routes with parameters, controllers, and middleware for advanced applications.
title: Laravel Routing in WordPress
authors:
- ben
---
# Laravel Routing in WordPress
::: tip
See [Laravel's routing documentation](https://laravel.com/docs/10.x/routing) to better understand how routing works in Acorn
:::
Acorn allows you to use Laravel's routing functionality on your WordPress sites, and will automatically handle Laravel routes defined in the `routes/web.php` file if it exists.
Routes are an easier way to implement virtual pages in WordPress.
## Basic routing example
### Create the route file
Create `routes/web.php` with the following:
```php
<?php
use Illuminate\Support\Facades\Route;
/*
|--------------------------------------------------------------------------
| Web Routes
|--------------------------------------------------------------------------
|
| Here is where you can register web routes for your application.
|
*/
Route::view('/welcome/', 'welcome')->name('welcome');
```
### Create the view file
Create `resources/views/welcome.blade.php` with the following:
```blade
@extends('layouts.app')
@section('content')
<h1>Welcome</h1>
@endsection
```
## Update Acorn's configuration
Find where `Application::configure` is used in your setup. On a Sage theme, this would be `functions.php`.
Add `->withRouting(web: base_path('routes/web.php'))`:
```diff
Application::configure()
->withProviders([
App\Providers\ThemeServiceProvider::class,
])
+ ->withRouting(web: base_path('routes/web.php'))
->boot();
```
See [Advanced booting](/acorn/docs/installation/#advanced-booting) for more examples.
## Configuring SEO elements
Since registered routes are dynamic, WordPress is not aware of how to handle some SEO elements and functionality:
* Setting the canonical URL
* Setting the `<title>`
* Adding SEO-related meta data
* Adding pages to the sitemap
[Laravel's `Route` facade allows you to access information about the route](https://laravel.com/docs/11.x/routing#accessing-the-current-route), which can be used with hooks to populate this data:
```php
/**
* Set the page <title> for the welcome route
*/
add_filter('pre_get_document_title', function ($title) {
$name = Route::currentRouteName();
if ($name === 'welcome') {
return 'Welcome Page';
}
return $name;
});
```
## Advanced routing features
For more complex applications, you can use:
- **[Controllers, Middleware, and HTTP Kernel](controllers-middleware-kernel.md)** - Organize route logic with controllers, filter requests with middleware, and customize the HTTP kernel
- **[Eloquent Models](eloquent-models.md)** - Work with WordPress data using Laravel's ORM in your controllers
### Using controllers
Instead of defining route logic directly in your routes file, you can organize it into controller classes:
```php
<?php
use Illuminate\Support\Facades\Route;
use App\Http\Controllers\PostController;
Route::get('/api/posts', [PostController::class, 'index']);
Route::get('/api/posts/{id}', [PostController::class, 'show']);
```
### Applying middleware
Protect routes with middleware for authentication, rate limiting, and more:
```php
Route::middleware('auth')->group(function () {
Route::post('/api/posts', [PostController::class, 'store']);
Route::put('/api/posts/{id}', [PostController::class, 'update']);
});
```
## Route caching
If you're using routes then you should enable [Laravel's route cache](https://laravel.com/docs/10.x/routing#route-caching) during your deployment process:
```shell
$ wp acorn route:cache
```
================================================
FILE: acorn/upgrading-acorn.md
================================================
---
date_modified: 2026-03-22 12:00
date_published: 2023-01-13 13:12
description: Learn how to upgrade Acorn to the latest version with guidance on breaking changes, dependency requirements, and configuration updates.
title: Upgrading Acorn to the Latest Version
authors:
- ben
- chrillep
- joshf
---
# Upgrading Acorn to the Latest Version
## Upgrading to v6.x from v5.x
Acorn v6 includes Laravel v13 components, whereas Acorn v5 includes Laravel v12 components.
### Upgrading dependencies
Acorn v6 requires PHP >= 8.3.
Update the `roots/acorn` dependency in your `composer.json` file to `^6.0`:
```shell
$ composer require roots/acorn ^6.0 -W
```
The `-W` flag is required to upgrade the included Laravel dependencies.
::: warning
If any packages/dependencies have conflicts while updating, try removing and then re-requiring them after Acorn is bumped to 6.x.
:::
### Breaking changes
#### Cache, session, and Redis prefix separators
The default prefix/cookie separators have changed from underscores to hyphens to match Laravel 13 defaults. This means:
- **Cache prefix**: `laravel_cache_` → `laravel-cache-`
- **Session cookie**: `laravel_session` → `laravel-session`
- **Redis prefix**: `laravel_database_` → `laravel-database-`
This will **invalidate existing caches and log out all sessions** unless you have explicitly set these values via environment variables (`CACHE_PREFIX`, `SESSION_COOKIE`, `REDIS_PREFIX`).
To preserve existing behavior, add these to your `.env`:
```plaintext
CACHE_PREFIX=your_app_name_cache_
SESSION_COOKIE=your_app_name_session
REDIS_PREFIX=your_app_name_database_
```
#### Mail configuration
The SMTP `encryption` key has been replaced with `scheme`:
```diff
'smtp' => [
'transport' => 'smtp',
- 'encryption' => env('MAIL_ENCRYPTION', 'tls'),
+ 'scheme' => env('MAIL_SCHEME'),
],
```
If you are using the `MAIL_ENCRYPTION` environment variable, rename it to `MAIL_SCHEME`.
If you use [`roots/acorn-mail`](https://github.com/roots/acorn-mail), bump it to `^2.0` — earlier versions read the removed `encryption` key and will silently ignore `MAIL_SCHEME`:
```shell
$ composer require roots/acorn-mail ^2.0
```
#### Logging configuration
The stderr channel's `with` key has been renamed to `handler_with`:
```diff
'stderr' => [
'driver' => 'monolog',
'handler' => StreamHandler::class,
- 'with' => [
+ 'handler_with' => [
'stream' => 'php://stderr',
],
],
```
### Config changes
If you have published Acorn's configs, you should review and update them based on the latest versions in the [Acorn repo](https://github.com/roots/acorn/tree/main/config). Notable changes include:
- **cache.php**: New `serializable_classes` option
- **session.php**: New `serialization` option
- **database.php**: New Redis retry/backoff keys, SQLite `transaction_mode`, SSL CA guard updated for PHP 8.5
- **mail.php**: New `resend` and `roundrobin` mailers, `retry_after` on failover, `markdown` section removed
- **services.php**: Postmark and Resend env variable names updated
- **All configs**: `(string)` casts added to `env()` calls per Laravel 13 conventions
## Upgrading to v5.x from v4.x
Acorn v5 includes Laravel v12 components, whereas Acorn v4 includes Laravel v10 components.
### Upgrading dependencies
Acorn v5 requires PHP >= 8.2.
Update the `roots/acorn` dependency in your `composer.json` file to `^5.0`:
```shell
$ composer require roots/acorn ^5.0 -W
```
The `-W` flag is required to upgrade the included Laravel dependencies.
::: warning
If any packages/dependencies have conflicts while updating, try removing and then re-requiring them after Acorn is bumped to 5.x.
:::
### Breaking changes
The most significant change in v5 is how Acorn is booted. The `bootloader()` helper has been deprecated in favor of using `Application::configure()`. This change aligns Acorn with Laravel 11's new application configuration system, providing a more fluent and powerful way to configure your application.
You'll need to import the Application class at the top of your file:
```php
use Roots\Acorn\Application;
```
Then update your bootstrapping code:
```diff
- add_action('after_setup_theme', fn () => \Roots\bootloader()->boot(), 0);
+ add_action('after_setup_theme', function () {
+ Application::configure()
+ ->withProviders([
+ App\Providers\ThemeServiceProvider::class,
+ ])
+ ->boot();
+ }, 0);
```
If you have previously registered service providers through either `composer.json` (`extra.acorn.providers`) or `config/app.php`, you'll need to migrate these to the new configuration method. All providers should now be registered using `withProviders()` when configuring the application. Remove any provider configurations from your composer.json and config files, and instead register them directly in your bootstrapping code:
```php
Application::configure()
->withProviders([
App\Providers\ThemeServiceProvider::class,
App\Providers\ExampleServiceProvider::class,
])
->boot();
```
### Routing
Acorn v5 introduces support for Laravel’s routing features within WordPress. If you previously used Livewire, you may encounter an error such as `Route [livewire.update] not defined`, or experience other routing-related issues.
To resolve this, and to enable routing, ensure your application is properly configured by adding the `withRouting` method:
```diff
Application::configure()
->withProviders([
App\Providers\ThemeServiceProvider::class,
])
+ ->withRouting(wordpress: true)
->boot();
```
### Config changes
If you have published Acorn's configs, you should review and update them based on the latest versions in the [Acorn repo](https://github.com/roots/acorn/tree/main/config).
## Upgrading to v4.x from v3.x
Acorn v4 includes Laravel v10 components, whereas Acorn v3 includes Laravel v9 components.
### Upgrading dependencies
Acorn v4 requires PHP >= 8.1.
Update the `roots/acorn` dependency in your `composer.json` file to `^4.0`:
```shell
$ composer require roots/acorn ^4.0 -W
```
The `-W` flag is required to upgrade the included Laravel dependencies.
::: warning
If any packages/dependencies have conflicts while updating, try removing and then re-requiring them after Acorn is bumped to 4.x.
:::
### Config changes
If you previously published Acorn's config(s), you will need to update them based on the configs in the [Acorn repo](https://github.com/roots/acorn/tree/main/config) ([history](https://github.com/roots/acorn/commits/main/config?since=2023-11-01&until=2024-01-31)). You mainly need the [new provider changes](https://github.com/roots/acorn/blob/v4.0.0/config/app.php#L160-L169) if you published `config/app.php`.
```diff
+ use Roots\Acorn\ServiceProvider;
- 'timezone' => get_option('timezone_string', 'UTC'),
+ 'timezone' => get_option('timezone_string') ?: 'UTC',
- 'providers' => [
+ 'providers' => ServiceProvider::defaultProviders()->merge([
-
- /*
- * Framework Service Providers...
- */
- Illuminate\Auth\AuthServiceProvider::class,
- Illuminate\Broadcasting\BroadcastServiceProvider::class,
- Illuminate\Bus\BusServiceProvider::class,
- // ...
- Roots\Acorn\Providers\AcornServiceProvider::class,
- Roots\Acorn\Providers\RouteServiceProvider::class,
- Roots\Acorn\View\ViewServiceProvider::class,
/*
* Package Service Providers...
*/
/*
* Application Service Providers...
*/
// App\Providers\ThemeServiceProvider::class,
- ],
+ ])->toArray(),
```
### Breaking changes
The breaking changes this time are minimal and should not impact most users.
Service providers should now extend Illuminate:
```diff
- use Roots\Acorn\ServiceProvider;
+ use Illuminate\Support\ServiceProvider;
```
View Composer `Arrayable` trait uses property [`Composer::$except`](https://github.com/roots/acorn/blob/70d179955cddc61f0c6101717af2fdf88cf38831/src/Roots/Acorn/View/Composer.php#L35-L54) instead of `Arrayable::$ignore`.
```diff
class Alert extends Composer
{
use Arrayable;
- $ignore = ['token'];
+ $except = ['token'];
}
```
Asset Contract adds [`relativePath()` method](https://github.com/roots/acorn/blob/70d179955cddc61f0c6101717af2fdf88cf38831/src/Roots/Acorn/Assets/Contracts/Asset.php#L38). So if you're implementing this contract, you'll need to update it. (Most users will not be impacted by this.)
```diff
class MyAsset implements Asset
{
+ relativePath(string $base_path): string
+ {
+ // ...
+ }
}
```
## Upgrading to v3.x from v2.x
Acorn v3 includes Laravel v9 components, whereas Acorn v2 includes Laravel v8 components.
### Upgrading dependencies
Acorn v3 requires PHP >= 8.0.2.
Update the `roots/acorn` dependency in your `composer.json` file to `^3.0`:
```shell
$ composer require roots/acorn ^3.0 -W
```
The `-W` flag is required to upgrade the included Laravel dependencies.
### Theme/application
Acorn v2 is typically booted in your WordPress theme's `functions.php` file. Look for the line that includes `\Roots\bootloader()`, and replace it with `\Roots\bootloader()->boot()`.
```diff
-\Roots\bootloader();
+\Roots\bootloader()->boot();
```
We highly recommend removing the exception from bootloader to prevent service providers from silently skipping on local dev, a change that was introduced in Acorn v3.1.0 ([PR #266](https://github.com/roots/acorn/pull/266)) and Sage v10.5.1 ([PR #3121](https://github.com/roots/sage/pull/3121/files)). Replace the original bootloader method:
```php
try {
\Roots\bootloader()->boot();
} catch (Throwable $e) {
wp_die('You need to install Acorn to use this theme.'),
...
}
```
With the new one:
```php
if (! function_exists('\Roots\bootloader')) {
wp_die(
__('You need to install Acorn to use this theme.', 'sage'),
'',
[
'link_url' => 'https://roots.io/acorn/docs/installation/',
'link_text' => __('Acorn Docs: Installation', 'sage'),
]
);
}
add_action('after_setup_theme', fn () => \Roots\bootloader()->boot(), 0);
```
You can also remove the theme support added for Sage if you are working on a Sage-based WordPress theme:
```diff
-add_theme_support('sage');
```
#### Target class [sage.view] does not exist
Some setups may require changes if you run into the following error:
```plaintext
Target class [sage.view] does not exist
```
In this case, edit the `ThemeServiceProvider` and make sure it extends `SageServiceProvider` and has `parent::` calls to `register()` and `boot()` if they are present:
```diff
# app/Providers/ThemeServiceProvider.php
namespace App\Providers;
-use Roots\Acorn\ServiceProvider;
+use Roots\Acorn\Sage\SageServiceProvider;
-class ThemeServiceProvider extends ServiceProvider
+class ThemeServiceProvider extends SageServiceProvider
{
/**
* Register any application services.
*
* @return void
*/
public function register()
{
- //
+ parent::register();
}
/**
* Bootstrap any application services.
*
* @return void
*/
public function boot()
{
- //
+ parent::boot();
}
}
```
After doing so, you may need to delete [Acorn's application cache directory](https://roots.io/acorn/docs/directory-structure/). By default, this is located in `[wp-content|app]/cache/acorn/`.
Reference the [Acorn v3 upgrade pull request on the Sage repo](https://github.com/roots/sage/pull/3097) to see a full diff.
#### Target class [assets.manifest] does not exist
Some setups may require changes if you run into the following error:
```plaintext
Target class [assets.manifest] does not exist
```
This error can be fixed by copying over the latest changes to the [`config/app.php` file](https://github.com/roots/acorn/blob/67cce76e6ca13e28acaced3333d77e2f779b07a3/config/app.php) from Acorn.
================================================
FILE: acorn/using-livewire-with-wordpress.md
================================================
---
date_modified: 2025-03-06 07:00
date_published: 2024-03-05 16:41
description: Use Laravel Livewire with Acorn to create reactive, dynamic components in WordPress themes and plugins without complex JavaScript frameworks.
title: Using Livewire with WordPress
authors:
- ben
- Log1x
---
# Using Livewire with WordPress
With the release of Acorn v4 came the final implementations needed for [Livewire](https://livewire.laravel.com/) support alongside your Acorn-powered WordPress themes and plugins.
In this guide, we will walk through installing Livewire and using a component in a [Sage 11](https://roots.io/sage/) theme.
## Installing Livewire
Start by installing Livewire alongside where you installed Acorn:
```bash
$ composer require livewire/livewire
```
Once installed, Livewire requires you have an `APP_KEY` set in your environment. You can generate this using Acorn's CLI:
```bash
$ wp acorn key:generate
```
## Enqueueing Livewire
Adding the Livewire styles and scripts can be done using the `@livewireStyles` and `@livewireScripts` directives.
This can be done by [manually inserting](https://livewire.laravel.com/docs/installation#manually-including-livewires-frontend-assets) them inside of `resources/views/layouts/app.blade.php`:
```blade
<head>
...
@livewireStyles
</head>
<body>
...
@livewireScripts
</body>
```
## Update Acorn's configuration
Find where `Application::configure` is used in your setup. On a Sage theme, this would be `functions.php`. On a Radicle setup, this would be in `mu-plugins/00-acorn-boot.php`.
Add `->withRouting(wordpress: true)`:
```diff
Application::configure()
->withProviders([
App\Providers\ThemeServiceProvider::class,
])
+ ->withRouting(wordpress: true)
->boot();
```
See [Advanced booting](/acorn/docs/installation/#advanced-booting) for more examples.
## Creating a Component
For this example, we will create a simple searchable **Post List** component. Start by generating the component using Acorn's CLI:
```sh
$ wp acorn make:livewire PostList
```
Inside of `app/Livewire/PostList.php`, we can create a `$query` property to hold our search term and perform a simple `get_posts()` with the query if it is not empty:
```php
<?php
namespace App\Livewire;
use Livewire\Attributes\Url;
use Livewire\Component;
class PostList extends Component
{
/**
* The search query.
*/
#[Url]
public string $query = '';
/**
* Render the component.
*
* @return \Illuminate\View\View
*/
public function render()
{
$posts = $this->query ? get_posts([
'post_type' => 'post',
'post_status' => 'publish',
's' => $this->query,
]) : [];
$posts = collect($posts);
return view('livewire.post-list', compact('posts'));
}
}
```
In `resources/views/livewire/post-list.blade.php`, we can add some simple markup consisting of an `<input>` for the search `$query` and a loop of any found posts:
```php
<div>
<input
wire:model.live="query"
type="text"
placeholder="Search posts..."
>
@if ($query)
@if ($posts)
<p>Found {{ $posts->count() }} result(s) for "{{ $query }}"</p>
<ul>
@foreach ($posts as $post)
<li>
<a href="{{ get_permalink($post->ID) }}">
{{ $post->post_title }}
</a>
</li>
@endforeach
</ul>
@else
<p>No results found for "{{ $query }}"</p>
@endif
@else
<p>Start typing to search...</p>
@endif
</div>
```
Once done, you can add the Livewire component into one of your existing Blade views/templates:
```php
<livewire:post-list />
```
To learn more about Livewire, head over to the official [Livewire Documentation](https://livewire.laravel.com/docs/quickstart).
================================================
FILE: acorn/wp-cli.md
================================================
---
date_modified: 2026-03-10 12:00
date_published: 2021-11-19 11:58
description: Acorn provides WP-CLI commands similar to Laravel's `artisan` for managing WordPress. Clear caches, compile views, and run administrative tasks.
title: WP-CLI Commands for Acorn
authors:
- alwaysblank
- ben
- QWp6t
---
# WP-CLI Commands for Acorn
Acorn comes with WP-CLI commands similar to Laravel's `artisan` CLI.
## Available commands
| Command | Description |
| --- | --- |
| `wp acorn about` | Display basic information about your application |
| `wp acorn clear-compiled` | Remove the compiled class file |
| `wp acorn completion` | Dump the shell completion script |
| `wp acorn db` | Start a new database CLI session |
| `wp acorn env` | Display the current framework environment |
| `wp acorn help` | Display help for a command |
| `wp acorn list` | List commands |
| `wp acorn migrate` | Run the database migrations |
| `wp acorn optimize` | Cache framework bootstrap, configuration, and metadata to increase performance |
| `wp acorn test` | Run the application tests |
| `wp acorn acorn:init` | Initializes required paths in the base directory |
| `wp acorn acorn:install` | Install Acorn into the application |
| `wp acorn cache:clear` | Flush the application cache |
| `wp acorn cache:forget` | Remove an item from the cache |
| `wp acorn config:cache` | Create a cache file for faster configuration loading |
| `wp acorn config:clear` | Remove the configuration cache file |
| `wp acorn db:seed` | Seed the database with records |
| `wp acorn db:table` | Display information about the given database table |
| `wp acorn db:wipe` | Drop all tables, views, and types |
| `wp acorn key:generate` | Set the application key |
| `wp acorn make:command` | Create a new Artisan command |
| `wp acorn make:component` | Create a new view component class |
| `wp acorn make:composer` | Create a new view composer class |
| `wp acorn make:controller` | Create a new controller class |
| `wp acorn make:job` | Create a new job class |
| `wp acorn make:middleware` | Create a new HTTP middleware class |
| `wp acorn make:migration` | Create a new migration file |
| `wp acorn make:model` | Create a new Eloquent model class |
| `wp acorn make:provider` | Create a new service provider class |
| `wp acorn make:queue-batches-table` | Create a migration for the batches database table |
| `wp acorn make:queue-failed-table` | Create a migration for the failed queue jobs database table |
| `wp acorn make:queue-table` | Create a migration for the queue jobs database table |
| `wp acorn make:seeder` | Create a new seeder class |
| `wp acorn migrate:fresh` | Drop all tables and re-run all migrations |
| `wp acorn migrate:install` | Create the migration repository |
| `wp acorn migrate:refresh` | Reset and re-run all migrations |
| `wp acorn migrate:reset` | Rollback all database migrations |
| `wp acorn migrate:rollback` | Rollback the last database migration |
| `wp acorn migrate:status` | Show the status of each migration |
| `wp acorn optimize:clear` | Remove the cached bootstrap files |
| `wp acorn package:discover` | Rebuild the cached package manifest |
| `wp acorn queue:clear` | Delete all of the jobs from the specified queue |
| `wp acorn queue:failed` | List all of the failed queue jobs |
| `wp acorn queue:flush` | Flush all of the failed queue jobs |
| `wp acorn queue:forget` | Delete a failed queue job |
| `wp acorn queue:listen` | Listen to a given queue |
| `wp acorn queue:monitor` | Monitor the size of the specified queues |
| `wp acorn queue:pause` | Pause job processing for a specific queue |
| `wp acorn queue:prune-batches` | Prune stale entries from the batches database |
| `wp acorn queue:prune-failed` | Prune stale entries from the failed jobs table |
| `wp acorn queue:restart` | Restart queue worker daemons after their current job |
| `wp acorn queue:resume` | Resume job processing for a paused queue |
| `wp acorn queue:retry` | Retry a failed queue job |
| `wp acorn queue:retry-batch` | Retry the failed jobs for a batch |
| `wp acorn queue:work` | Start processing jobs on the queue as a daemon |
| `wp acorn route:cache` | Create a route cache file for faster route registration |
| `wp acorn route:clear` | Remove the route cache file |
| `wp acorn route:list` | List all registered routes |
| `wp acorn schedule:clear-cache` | Delete the cached mutex files created by scheduler |
| `wp acorn schedule:interrupt` | Interrupt the current schedule run |
| `wp acorn schedule:list` | List all scheduled tasks |
| `wp acorn schedule:run` | Run the scheduled commands |
| `wp acorn schedule:test` | Run a scheduled command |
| `wp acorn schedule:work` | Start the schedule worker |
| `wp acorn vendor:publish` | Publish any publishable assets from vendor packages |
| `wp acorn view:cache` | Compile all of the application's Blade templates |
| `wp acorn view:clear` | Clear all compiled view files |
================================================
FILE: bedrock/auditing-wordpress-vulnerabilities-with-composer.md
================================================
---
date_modified: 2026-05-03 12:00
date_published: 2026-05-03 12:00
description: Audit WordPress plugins and themes for known vulnerabilities with Composer using WP Sec Adv, a security advisory repository sourced from Wordfence Intelligence.
title: Auditing WordPress Vulnerabilities with Composer
authors:
- ben
---
# Auditing WordPress Vulnerabilities with Composer
`composer audit` reports known vulnerabilities for PHP packages on Packagist, but it has no awareness of WordPress plugin and theme advisories. [WP Sec Adv](https://github.com/typisttech/wpsecadv) closes that gap by exposing WordPress security data — sourced from the [Wordfence Intelligence](https://www.wordfence.com/help/wordfence-intelligence/v3-accessing-and-consuming-the-vulnerability-data-feed/) feed — as a Composer repository.
Once added, Composer treats WordPress advisories the same as any other:
- `composer audit` reports known vulnerabilities in installed WordPress packages
- `composer require` and `composer update` block installation of vulnerable packages
- Advisories include CVEs, severity ratings, and links to vulnerability reports
The advisory data refreshes twice daily.
## Adding the repository
From your Bedrock project root:
```shell
$ composer repo --append add wpsecadv composer https://repo-wpsecadv.typist.tech
```
Composer will now check for WordPress vulnerabilities during `install`, `require`, `update`, and `audit`.
## Package support
WP Sec Adv matches advisories to Composer packages by slug, with built-in support for:
- [WordPress plugin and theme packages](https://wp-packages.org/)
- [WordPress core packages](https://wp-packages.org/wordpress-core)
Unrecognized vendors still attempt to match against known plugin and theme slugs, so custom mirrors and private registries work too.
## Ignoring advisories
Not every advisory requires immediate action. Composer lets you acknowledge specific advisories with a documented reason:
```json
{
"config": {
"audit": {
"ignore": {
"CVE-2026-3589": {
"apply": "block",
"reason": "Waiting for upstream fix in v1.2.3. Allow during updates but still report in audits"
}
}
}
}
}
```
Every exception is tracked in `composer.json`, keeping your security posture intentional rather than reactive.
## Auditing in CI
Pair WP Sec Adv with a CI step to audit your lockfile on every push. For GitHub Actions:
```yaml
- name: Audit
run: composer audit --locked
```
This gives you continuous vulnerability monitoring for both PHP and WordPress dependencies with no additional tooling.
::: tip
WP Sec Adv is maintained by [Tang Rufus](https://github.com/tangrufus). If it's useful to your projects, consider [sponsoring his work](https://github.com/sponsors/tangrufus).
:::
================================================
FILE: bedrock/bedrock-with-ddev.md
================================================
---
date_modified: 2024-07-09 18:30
date_published: 2023-02-19 12:16
description: Set up DDEV for Bedrock WordPress development using Docker. Configure docroot to `web/` directory and adjust DDEV services for Bedrock's structure.
title: Bedrock Local Development with DDEV
authors:
- ben
---
# Bedrock Local Development with DDEV
[DDEV](https://ddev.readthedocs.io/en/stable/) is a local PHP development environment. In this guide you will learn how to setup a Bedrock-based WordPress site with DDEV.
## Setting up a Bedrock site
```shell
$ ddev config --project-type=wordpress --docroot=web --create-docroot
```
```shell
$ ddev composer create roots/bedrock
```
## Configure environment variables
Bedrock requires [environment variables to be configured](https://roots.io/bedrock/docs/installation/#getting-started) in order to get started.
The `.env` file must be configured with DDEV's database settings along with your home URL. Update the following values in your `.env` file:
```dotenv
DB_NAME='db'
DB_USER='db'
DB_PASSWORD='db'
DB_HOST='db'
WP_HOME="${DDEV_PRIMARY_URL}"
WP_SITEURL="${DDEV_PRIMARY_URL}/wp"
```
After configuring the environment variables, run `ddev start`. Your site will be accessible at `https://ddevtest.ddev.site/`.
================================================
FILE: bedrock/bedrock-with-devkinsta.md
================================================
---
date_modified: 2023-02-19 12:16
date_published: 2023-02-19 12:16
description: Set up DevKinsta for Bedrock WordPress development. Configure site settings and document root to work with Bedrock's unique `wp/` and `app/` directories.
title: Bedrock Development with DevKinsta
authors:
- ben
---
# Bedrock Development with DevKinsta
[DevKinsta](https://kinsta.com/devkinsta/?kaid=OFDHAJIXUDIV) is a local WordPress development environment. In this guide you will learn how to setup a Bedrock-based WordPress site with DevKinsta.
## Create a new site
1. Create a new site from the DevKinsta interface using the **Custom site** option
2. Select the **Empty site** option
In this guide, we'll use `example` as the site name.
## Installing Bedrock from the terminal
Navigate to the site path for your DevKinsta site:
```shell
$ cd ~/DevKinsta/public/example
```
Once you are in the `example/` folder for your DevKinsta site, either install Bedrock with Composer or clone your existing git repository into this directory:
```shell
$ composer create-project roots/bedrock
```
Your folder structure should now look like this:
```plaintext
# @ ~/DevKinsta/
.
├── kinsta
├── logs
├── nginx_sites
├── private
├── public
│ └── example
│ ├── bedrock
│ └── index.html
├── ssl
└── wp
```
## Configure environment variables
Bedrock requires [environment variables to be configured](https://roots.io/bedrock/docs/installation/#getting-started) in order to get started.
The `.env` file in the `app/bedrock/` directory must be configured with Local's database settings along with your home URL. Update the following values in your `.env` file:
```dotenv
DB_NAME='example'
DB_USER='root'
DB_PASSWORD='password'
DB_HOST='devkinsta_db'
WP_HOME='http://example.local'
```
Make sure to populate the `DB_PASSWORD` based on the provided password in the DevKinsta interface for your site.
## Set the webroot in DevKinsta's site config
DevKinsta's site config is located at `~/DevKinsta/nginx_sites/example.conf`. Open this file and modify the`root` path:
```diff
-root /www/kinsta/public/example;
+root /www/kinsta/public/example/bedrock/web;
```
You will need to restart your site after making these changes, and then your site will be accessible at `http://example.local`.
================================================
FILE: bedrock/bedrock-with-lando.md
================================================
---
date_modified: 2026-03-08 10:00
date_published: 2023-02-19 12:16
description: Set up Lando for Bedrock WordPress development. Configure webroot to `web/` directory and adjust Lando settings for Bedrock's unique folder structure.
title: Bedrock Local Development with Lando
authors:
- ben
- james0r
---
# Bedrock Local Development with Lando
[Lando](https://lando.dev/) is a local development environment. In this guide you will learn how to setup a Bedrock-based WordPress site with Lando.
## Configuring a Lando recipe for Bedrock
After [installing Bedrock](/bedrock/docs/installation/), you can either use `lando init` to create the recipe, or you can just drop in the contents of the recipe file that you will find below within a file called `.lando.yml`.
To use the CLI, run `lando init --recipe wordpress` and answer the following prompts:
* From where should we get your app's codebase? **current working directory**
* Where is your webroot relative to the init destination? **web**
* What do you want to call this app? **bedrock**
Or, just drop in the following `.lando.yml` file in the root of your Bedrock directory:
```yaml
# .lando.yml
name: bedrock
recipe: wordpress
config:
webroot: web
services:
appserver:
type: php:8.3 # Bedrock requires PHP >= 8.3
```
## Configure environment variables
Bedrock requires [environment variables to be configured](https://roots.io/bedrock/docs/installation/#getting-started) in order to get started.
The `.env` file must be configured with Lando's database settings along with your home URL. Update the following values in your `.env` file:
```dotenv
DB_NAME='wordpress'
DB_USER='wordpress'
DB_PASSWORD='wordpress'
DB_HOST='database'
WP_HOME='https://bedrock.lndo.site'
```
## Setup trusted certificates
Make sure to follow the instructions in the Lando docs for [Trusting the CA](https://docs.lando.dev/config/security.html#trusting-the-ca) to avoid warnings on your browser when visiting your site.
## Start your Lando site
Run `lando start`, and then your site will be accessible from `https://bedrock.lndo.site/`.
================================================
FILE: bedrock/bedrock-with-local.md
================================================
---
date_modified: 2026-03-10 17:00
date_published: 2023-02-19 12:16
description: Configure Local for Bedrock WordPress development. Adjust document root to `web/` directory and configure Local for Bedrock's structure.
title: Using Bedrock with Local
authors:
- ben
- ethanclevenger91
---
# Using Bedrock with Local
[Local](https://localwp.com/), previously known as Local by Flywheel, is one of the many local development tools available for WordPress developers. In this guide you will learn how to configure Local for a Bedrock-based WordPress site.
Bedrock sites are structured in a way that your [entire WordPress site is managed from a git repository](https://roots.io/bedrock/docs/folder-structure/). Local's workflow isn't friendly towards this approach, but it's still possible to configure Local to work with Bedrock sites.
## Create a new site
Create a new site from the Local interface. In this guide, we'll use `bedrock` as the site name.
## Installing Bedrock from the terminal
From your new Local site, click **Open site shell**. When the terminal opens, you should be under `/Local Sites/bedrock/app/public`.
First, remove the default WordPress installation that is in the public folder:
```shell
rm -rf *
rm .htaccess
```
This will remove all content of the public folder.
Now install Bedrock with Composer into the public directory or clone your existing git repository into this directory:
```shell
composer create-project roots/bedrock .
```
## Configure environment variables
Bedrock requires environment variables to be configured in order to get started.
First, copy the example environment file:
```shell
cp .env.example .env
```
The `.env` file must be configured with Local's database settings along with your home URL. Update the following values in your `.env` file:
```plaintext
DB_NAME='local'
DB_USER='root'
DB_PASSWORD='root'
WP_HOME='https://bedrock.local'
```
For Local WP these are the default DB credentials. If you changed them manually, then you need to change them here accordingly. The `WP_HOME` should be the website URL we configured in Local - in our case here it's `bedrock.local`.
## Set the webroot in Local's site config
Local's site config is located at `~/Local Sites/bedrock/conf/nginx/site.conf.hbs`. Open this file and append `/web` to the server root:
```diff
server {
listen {{port}};
- root "{{root}}";
+ root "{{root}}/web";
```
You will need to restart your site after making these changes, and then your site will be accessible at `https://bedrock.local`.
================================================
FILE: bedrock/bedrock-with-valet.md
================================================
---
date_modified: 2023-03-08 8:55
date_published: 2023-02-19 12:16
description: Set up Laravel Valet for Bedrock WordPress development on macOS. Configure Valet drivers and local domains for seamless development workflow.
title: Using Bedrock with Laravel Valet
authors:
- ben
---
# Using Bedrock with Laravel Valet
[Laravel Valet](https://laravel.com/docs/10.x/valet) is a local development environment. In this guide you will learn how to setup a Bedrock-based WordPress site with Valet.
Valet supports Bedrock out of the box, along with traditional WordPress installations, Laravel apps, Drupal sites, and more. Since Valet is very lightweight, it is a great local development setup for folks that are working on several WordPress sites at any given time.
See the [Valet installation docs](https://laravel.com/docs/10.x/valet#installation) for information on how to install Valet. You will also want to install the Valet WP-CLI command:
```shell
$ wp package install aaemnnosttv/wp-cli-valet-command:@stable
```
## Setting up a Bedrock site
To create a new Bedrock site for Valet, navigate to Valet sites directory and use the `wp valet` command:
```shell
$ cd ~/Sites/valet
```
```shell
$ wp valet new bedrock --project=bedrock
```
You should now be able to access your new site at `https://bedrock.test`.
If you hit a 404, make sure that you have ran `valet park` from your Valet sites directory first.
### Bedrock multisite
#### Subdomain installs
* `wp valet new bedrock-multisite --project=bedrock`
* Add to `config/application.php` in Bedrock:
```php
Config::define('WP_ALLOW_MULTISITE', true);
```
* Visit `https://bedrock-multisite.test/wp/wp-admin/network.php` to install the network and select subdomain install
* Add to `.env`: `DOMAIN_CURRENT_SITE=bedrock-multisite.test`
* Update `config/application.php` again with full multisite constants:
```php
/**
* Multisite
*/
Config::define('WP_ALLOW_MULTISITE', true);
Config::define('MULTISITE', true);
Config::define('SUBDOMAIN_INSTALL', true);
Config::define('DOMAIN_CURRENT_SITE', env('DOMAIN_CURRENT_SITE'));
Config::define('PATH_CURRENT_SITE', env('PATH_CURRENT_SITE') ?: '/');
Config::define('SITE_ID_CURRENT_SITE', env('SITE_ID_CURRENT_SITE') ?: 1);
Config::define('BLOG_ID_CURRENT_SITE', env('BLOG_ID_CURRENT_SITE') ?: 1);
```
* Add the Bedrock multisite URL fixer plugin: `composer require roots/multisite-url-fixer`
* Link any subdomains to current site with Valet:
```shell
$ valet link test.bedrock-multisite
```
```shell
$ valet link site2.bedrock-multisite
```
#### Subfolder / subdirectory installs
* Copy the [Bedrock multisite subdirectory driver](https://gist.github.com/QWp6t/1e055482d722e2b02dfff1bb21698194) into `~/.valet/Drivers/`
* `wp valet new bedrock-multisite --project=bedrock`
* Add to `config/application.php` in Bedrock:
```php
Config::define('WP_ALLOW_MULTISITE', true);
```
* Visit `https://bedrock-multisite.test/wp/wp-admin/network.php` to install the network and select subfolder install
* Add to `.env`: `DOMAIN_CURRENT_SITE=bedrock-multisite.test`
* Update `config/application.php` again with full multisite constants:
```php
/**
* Multisite
*/
Config::define('WP_ALLOW_MULTISITE', true);
Config::define('MULTISITE', true);
Config::define('SUBDOMAIN_INSTALL', false);
Config::define('DOMAIN_CURRENT_SITE', env('DOMAIN_CURRENT_SITE'));
Config::define('PATH_CURRENT_SITE', env('PATH_CURRENT_SITE') ?: '/');
Config::define('SITE_ID_CURRENT_SITE', env('SITE_ID_CURRENT_SITE') ?: 1);
Config::define('BLOG_ID_CURRENT_SITE', env('BLOG_ID_CURRENT_SITE') ?: 1);
```
* Add the Bedrock multisite URL fixer plugin: `composer require roots/multisite-url-fixer` (Optional)
* * *
Thank you to [Evan Mattson](https://discourse.roots.io/u/aaemnnosttv) for contributing Bedrock's driver to Valet, and for creating the [Valet WP-CLI command](https://github.com/aaemnnosttv/wp-cli-valet-command).
Thank you to [Craig](https://discourse.roots.io/u/QWp6t) for the multisite subdirectory driver.
================================================
FILE: bedrock/compatibility.md
================================================
---
date_modified: 2023-01-27 13:17
date_published: 2020-02-20 09:25
description: If plugins or themes work with regular WordPress but not Bedrock, it's usually due to hardcoded paths, not Bedrock itself. Solutions included.
title: WordPress Plugin Compatibility with Bedrock
authors:
- alwaysblank
- ben
- QWp6t
---
# WordPress Plugin Compatibility with Bedrock
Bedrock does certain things a bit differently than the default WordPress installation, but it does so by leveraging functionality that WordPress Core provides.
If a plugin or theme works with a vanilla WordPress install and not with Bedrock, the plugin or theme is likely at fault:
In most cases, it is hard-coding assumptions about directory structure or file location and ignoring the systems WordPress has in place to determine those things dynamically.
This type of issue will often arise not only on Bedrock, but also on sites that have [installed WordPress in its own directory](https://wordpress.org/support/article/giving-wordpress-its-own-directory/) or [moved the wp-content folder](https://developer.wordpress.org/apis/wp-config-php/#moving-wp-content-folder).
Common issues include:
- Assuming the content directory is `wp-content`.
- Assuming WordPress is not in a subdirectory.
- [Trying to include wp-load.php](https://ottopress.com/2010/dont-include-wp-load-please/).
If you reach a WordPress error page on a non-development environment that says `"Sorry, you are not allowed to access this page."`, then the plugin or theme could be conflicting with Bedrock's use of `DISALLOW_FILE_MODS`.
If you run into an issue with a specific theme or plugin, please contact their authors first and link them to this page.
================================================
FILE: bedrock/composer.md
================================================
---
date_modified: 2023-08-16 12:45
date_published: 2015-09-06 07:42
description: Bedrock treats WordPress core, plugins, and themes as Composer dependencies. Use WP Packages to require plugins and automate updates efficiently.
title: WordPress Dependencies with Composer
authors:
- ben
- Log1x
- swalkinshaw
- TangRufus
- EHLOVader
---
# WordPress Dependencies with Composer
Bedrock uses [Composer](https://getcomposer.org/) to manage dependencies. Any 3rd party library is considered a dependency, including WordPress itself and any plugins.
## Adding WordPress plugins with Composer
[WP Packages](https://wp-packages.org/) is already registered in the `composer.json` file so any plugins from the [WordPress Plugin Directory](https://wordpress.org/plugins/) can easily be required.
To add a plugin, add it under the `require` directive or use `composer require <namespace>/<packagename>` from the command line. If the plugin is from WordPress.org, then the namespace is always `wp-plugin`:
```shell
$ composer require wp-plugin/akismet
```
`plugins` and `mu-plugins` are ignored in Git by default since Composer manages them. If you want to add something to those folders that *isn't* managed by Composer, you need to update `.gitignore` to allow them to be added to your repository:
`!web/app/plugins/plugin-name`
### Force a plugin to be a mu-plugin
To force a regular `wordpress-plugin` to be treated as a `wordpress-muplugin`, you can update the `installer-paths` config to tell Bedrock to install it in the `mu-plugins` directory.
In the following example, Akismet will be installed in the `mu-plugins` directory:
```yaml
...
"extra": {
"installer-paths": {
"web/app/mu-plugins/{$name}/": ["type:wordpress-muplugin", "wp-plugin/akismet"],
"web/app/plugins/{$name}/": ["type:wordpress-plugin"],
"web/app/themes/{$name}/": ["type:wordpress-theme"]
},
"wordpress-install-dir": "web/wp"
},
...
```
#### Configuring multiple mu-plugins
To configure more than one regular plugin to be installed to `mu-plugins`, add additional strings to the same array value for the `web/app/mu-plugins/{$name}/` JSON key, for example:
```yaml
...
"web/app/mu-plugins/{$name}/": [
"type:wordpress-muplugin",
"wp-plugin/akismet",
"wp-plugin/turn-comments-off"
],
...
```
## Updating WordPress and WordPress plugin versions with Composer
Updating your WordPress version, or the version of any plugin, is best achieved by re-requiring the dependencies to install the latest versions or specific versions:
```shell
$ composer require roots/wordpress -W
```
```shell
$ composer require wp-plugin/akismet
```
```shell
$ composer require roots/wordpress:6.8.3 -W
```
### Automating WordPress updates
Tools like [Dependabot](https://dependabot.com/) and [Renovate](https://www.mend.io/free-developer-tools/renovate/) can be used to automate updates of your Composer dependencies in Bedrock, including WordPress itself.
The Bedrock repo [uses Renovate to bump WordPress versions](https://github.com/roots/bedrock/blob/e14658bbae2c64df9605168a9c7932e5e10a9dd8/.github/renovate.json) when new versions become available.
## Adding WordPress themes with Composer
Themes can also be managed by Composer but should only be done so under two conditions:
1. You're using a parent theme that won't be modified at all
2. You want to separate out your main theme and use that as a standalone package
Under most circumstances, we recommend keeping your main theme as part of your repository.
Just like plugins, WP Packages maintains a Composer mirror of the WP theme directory. To require a theme, just use the `wp-theme` namespace:
```shell
$ composer require wp-theme/twentytwentythree
```
## Recommended resources
[WordPress with Composer resources](https://roots.io/composer-wordpress-resources/) for more extensive documentation and background information:
- [📝 Composer in WordPress from Rarst](https://composer.rarst.net/)
- [📝 `roots/wordpress` Composer Package](https://roots.io/announcing-the-roots-wordpress-composer-package/)
- [📝 Using Composer with WordPress](https://roots.io/using-composer-with-wordpress/)
- [📝 WordPress Plugins with Composer](https://roots.io/wordpress-plugins-with-composer/)
- [🎥 Using Composer With WordPress screencast](https://www.youtube.com/watch?v=2cFRQA1_GY0) (2013)
- [📝 Private or Commercial WordPress Plugins as Composer Dependencies](https://roots.io/bedrock/docs/private-or-commercial-wordpress-plugins-as-composer-dependencies/)
================================================
FILE: bedrock/configuration.md
================================================
---
date_modified: 2023-01-27 13:17
date_published: 2015-09-06 07:42
description: Bedrock replaces `wp-config.php` with modern configuration files. Set global config in `application.php` and override per environment as needed.
title: Configuring Bedrock for WordPress
authors:
- ben
- Log1x
- mZoo
- swalkinshaw
---
# Configuring Bedrock for WordPress
The file to modify for configuration options is `config/application.php`. This is the file that contains what `wp-config.php` usually would.
The root `web/wp-config.php` is required by WordPress and is only used to load the other main configs. Nothing else should be added to it.
Bedrock's base configuration options are production-standard safe settings and used in all environments except where specifically overridden. To override configuration settings based on environments:
- Use an existing environment config in `config/environments` or create a new one. Bedrock will `require` any file in the `config/environments` directory with a filename matching the `WP_ENV` environment variable. This environment variable can be set in a few ways:
- in the `.env` file as described in our [installation docs](installation.md)
- via [Trellis config](/trellis/docs/wordpress-sites/) if you're using Trellis
- or as a last resort, hardcoding it in `config/application.php`
- Bedrock comes with `development.php` and `staging.php` configs included. If you create an additional environment, configure it with a matching PHP file in `config/environments`.
- The [`development.php` file](https://github.com/roots/bedrock/blob/master/config/environments/development.php) sets `WP_DEBUG_DISPLAY` to `true`, so WordPress will display PHP errors in the browser when your `WP_ENV` is `development`.
Bedrock 1.9.0 (2018-09-17) introduced [`roots/wp-config`](https://github.com/roots/wp-config/blob/master/docs/why.md) ([discussion](https://github.com/roots/bedrock/pull/380)).
`Config::define` is a static method that overrides the application options (WP) with environment specific options where they are defined, defaulting to the application options set in `config/application.php`.
================================================
FILE: bedrock/converting-wordpress-sites-to-bedrock.md
================================================
---
date_modified: 2025-10-24 12:00
date_published: 2025-10-24 12:00
description: Convert traditional WordPress sites to Bedrock using Lithify. Automatically updates database references and file paths for Bedrock's directory structure.
title: Converting WordPress Sites to Bedrock
authors:
- ben
- MWDelaney
---
# Converting WordPress Sites to Bedrock
[Lithify](https://github.com/MWDelaney/lithify) is a WordPress plugin that adds a WP-CLI command to convert traditional WordPress sites into Bedrock-style installations. Created by [MWDelaney](https://github.com/MWDelaney), Lithify automates the database changes needed to make your existing WordPress site work with Bedrock's improved folder structure.
Converting an existing WordPress site to Bedrock typically involves manual database updates and file path changes. Lithify handles this conversion process automatically, updating your database to work seamlessly with Bedrock's modern architecture.
## Prerequisites
Before starting the conversion, you'll need:
- A fresh Bedrock installation
- A database backup of your existing WordPress site
- Your existing site's plugins, themes, and uploads directories
## Create a new Bedrock site
Create a new Bedrock installation:
```bash
$ composer create-project roots/bedrock example.com
```
```bash
$ cd example.com
```
## Update WordPress version
Update Bedrock's WordPress version to match your current installation. For example, if your site runs WordPress 6.8.2, update `composer.json`:
```json
"roots/wordpress": "6.8.2"
```
## Copy your content files
Copy your WordPress `plugins`, `themes`, `mu-plugins`, and `uploads` directories into the Bedrock `web/app` directory.
## Add Lithify as a dependency
Install Lithify using Composer:
```bash
$ composer require mwdelaney/lithify
```
## Import your database
Navigate to your Bedrock directory and import your WordPress database:
```bash
$ wp db import example.sql
```
## Run the conversion
Activate Lithify and run the conversion command:
```bash
$ wp plugin activate lithify
```
```bash
$ wp lithify
```
### What Lithify does
When you run `wp lithify`, the plugin:
- Updates file path references from `wp-content` to `app`
- Adjusts plugin and theme paths to match Bedrock's structure
- Ensures upload paths work correctly with the new organization
- Verifies that WordPress core references point to the correct locations
The conversion is non-destructive—your existing content and configuration remain intact while gaining all the benefits of Bedrock's modern development workflow.
================================================
FILE: bedrock/deployment.md
================================================
---
date_modified: 2023-01-27 13:17
date_published: 2015-10-15 16:17
description: Bedrock deployments require running `composer install` to fetch dependencies. Learn deployment workflows for various hosting platforms and CI/CD tools.
title: Deploying WordPress with Bedrock
authors:
- alwaysblank
- ben
- knowler
- Log1x
- noplanman
- swalkinshaw
---
# Deploying WordPress with Bedrock
Running `composer install` from the Bedrock folder must be part of your deployment process.
## Supported deployment tools
These tools include supporting deploying Bedrock out of the box:
- [Trellis](https://roots.io/trellis/) – Recommended if self-hosting WordPress or [hosting with Kinsta](https://kinsta.com/?kaid=OFDHAJIXUDIV).
Other methods need to account for setting the `WP_ENV` [environment variable](environment-variables.md) to `production` when your site is in a production environment.
::: warning Note
Bedrock's [Disallow Indexing mu-plugin](https://github.com/roots/bedrock-disallow-indexing) will prevent indexing of a site when `WP_ENV` is not set to `production`.
:::
================================================
FILE: bedrock/disable-plugins-based-on-environment.md
================================================
---
date_modified: 2023-04-04 11:30
date_published: 2018-05-15 12:00
description: Use Bedrock Plugin Disabler to prevent specific plugins from loading in certain environments. Disable debug tools in production or heavy plugins locally.
title: Disable Plugins Based on Environment
authors:
- ben
- luke
- owi
---
# Disable Plugins Based on Environment
Bedrock supports defining an environment with the `WP_ENV` environment variable. A typical setup for a project could contain several different environments:
* `development` for local development
* `staging` for a staging environment
* `production` for the live/production environment
In some cases, you may want to enforce certain plugins to be deactivated on one or more of your environments.
The [Bedrock Plugin Disabler](https://github.com/lukasbesch/bedrock-plugin-disabler) mu-plugin package by [@luke](https://discourse.roots.io/u/luke) can be used to configure a list of disabled plugins in your Bedrock environment configs located in `config/environments/`.
Install the mu-plugin with Composer:
```shell
$ composer require lukasbesch/bedrock-plugin-disabler
```
This package requires defining a `DISABLED_PLUGINS` constant with an array of plugin filenames to be disabled.
## Disabling plugins on local development
The most common use-case is disabling caching plugins on local development. We'll cover disabling WP Rocket and WP Super Cache in the following example.
Open `config/environments/development.php` and add the `DISABLED_PLUGINS` constant:
```php
Config::define('DISABLED_PLUGINS', [
'wp-rocket/wp-rocket.php',
'wp-super-cache/wp-cache.php',
]);
```
================================================
FILE: bedrock/environment-variables.md
================================================
---
date_modified: 2023-02-16 20:55
date_published: 2015-09-06 07:42
description: Bedrock uses `.env` files for environment-specific settings like database credentials. Keep sensitive data out of Git with environment variables.
title: WordPress Environment Variables in Bedrock
authors:
- alwaysblank
- ben
- Log1x
- swalkinshaw
- tristanbes
---
# WordPress Environment Variables in Bedrock
Bedrock tries to separate config from code as much as possible and environment variables are used to achieve this. The benefit is there's a single place (`.env`) to keep settings like database or other 3rd party credentials that aren't committed to your repository.
[PHP dotenv](https://github.com/vlucas/phpdotenv) is used to load the `.env` file. All variables are then available in your app by the built-in `getenv`, `$_SERVER`, or `$_ENV` methods.
However, we use the [env](https://github.com/oscarotero/env) library and its `env` function which handles simple type coercion (such as converting the string `'True'` to the boolean `true`). We recommend you use `env` as well for reading environment variables.
Currently, the following env vars are required:
- `WP_HOME`
- `WP_SITEURL`
The following vars are required if `DATABASE_URL` is not set:
- `DB_USER`
- `DB_NAME`
- `DB_PASSWORD`
::: tip Note
There is also the `DATABASE_URL` which is optional.
:::
## WP_ENV
Although it isn't required (if not defined elsewhere, Bedrock will default to `production`), `WP_ENV` is used by several pieces of the Roots stack, as well as software outside of it, to modify behavior based on environment. There are three values you can set for `WP_ENV` that Bedrock will understand:
- `production`
- `staging`
- `development`
Make sure that these are set correctly in your different environments.
### WP_ENVIRONMENT_TYPE
Bedrock also infers [`WP_ENVIRONMENT_TYPE`](https://developer.wordpress.org/reference/functions/wp_get_environment_type/) based on `WP_ENV`. `WP_ENVIRONMENT_TYPE` was introduced in WordPress 5.5.0.
================================================
FILE: bedrock/folder-structure.md
================================================
---
date_modified: 2023-01-27 13:17
date_published: 2015-09-06 07:42
description: Bedrock organizes WordPress differently. `wp-content` renamed to `app/`, WordPress core isolated in `wp/` directory for improved project structure.
title: Bedrock WordPress Folder Structure
authors:
- ben
- Log1x
- mZoo
- swalkinshaw
---
# Bedrock WordPress Folder Structure
```plaintext
├── composer.json # → Manage versions of WordPress, plugins & dependencies
├── config # → WordPress configuration files
│ ├── application.php # → Primary WP config file (wp-config.php equivalent)
│ └── environments # → Environment specific configs
│ ├── development.php # → Development config
│ └── staging.php # → Staging config
├── vendor # → Composer packages (never edit)
└── web # → Web root (document root on your webserver)
├── app # → wp-content equivalent
│ ├── mu-plugins # → Must use plugins
│ ├── plugins # → Plugins
│ ├── themes # → Themes
│ └── uploads # → Uploads
├── wp-config.php # → Required by WP (never edit)
├── index.php # → WordPress view bootstrapper
└── wp # → WordPress core (never edit)
```
The organization of Bedrock is similar to putting WordPress in its own subdirectory but with some improvements:
- In order not to expose sensitive files in the web root, Bedrock moves what's required into a `web/` directory including the `wp/` source, and the `wp-content` source.
- `wp-content` has been named `app` to better reflect its contents. It contains application code and not just "static content". It also matches up with other frameworks such as Symfony and Rails.
- `wp-config.php` remains in the `web/` because it's required by WP, but it only acts as a loader. The actual configuration files have been moved to `config/` for better separation.
- `vendor/` is where the Composer managed dependencies are installed to.
- `wp/` is where WordPress core lives. It's also managed by Composer but can't be put under `vendor` due to WP limitations.
================================================
FILE: bedrock/installation.md
================================================
---
date_modified: 2026-03-08 16:09
date_published: 2015-10-15 12:29
description: Install Bedrock with PHP 8.3+ and Composer. Configure environment variables in `.env` file and set document root to `web/` directory to access WordPress.
title: Installing the Bedrock WordPress Boilerplate
authors:
- ben
- Log1x
- swalkinshaw
---
# Installing the Bedrock WordPress Boilerplate
## What is Bedrock?
Bedrock is a [WordPress boilerplate](https://roots.io/bedrock/).
### Why use Bedrock?
- Better folder structure
- Dependency management with [Composer](https://getcomposer.org)
- Easy WordPress configuration with environment specific files
- Environment variables with [Dotenv](https://github.com/vlucas/phpdotenv)
- Autoloader for mu-plugins (use regular plugins as mu-plugins)
## Requirements
- PHP >= 8.3
- [Composer](https://getcomposer.org/doc/00-intro.md#installation-linux-unix-macos)
## Installing Bedrock with Composer
Create a new Bedrock project:
```shell
$ composer create-project roots/bedrock
```
## Getting Started
- Create a `.env` file with the following environment variables (see `.env.example` as an example):
- Database variables
- `DB_NAME` - Database name
- `DB_USER` - Database user
- `DB_PASSWORD` - Database password
- `DB_HOST` - Database host
- Optionally, you can define `DATABASE_URL` for using a DSN instead of using the variables above (e.g. `mysql://user:password@127.0.0.1:3306/db_name`)
- `WP_ENV` - Set to environment (`development`, `staging`, `production`)
- `WP_HOME` - Full URL to WordPress home (https://example.com)
- `WP_SITEURL` - Full URL to WordPress including subdirectory (https://example.com/wp)
- `AUTH_KEY`, `SECURE_AUTH_KEY`, `LOGGED_IN_KEY`, `NONCE_KEY`, `AUTH_SALT`, `SECURE_AUTH_SALT`, `LOGGED_IN_SALT`, `NONCE_SALT`
- Generate with [wp-cli-dotenv-command](https://github.com/aaemnnosttv/wp-cli-dotenv-command)
- Generate with [our WordPress salts generator](https://roots.io/salts.html)
- Add theme(s) in `web/app/themes/` as you would for a normal WordPress site
- Run the test suite with `composer test` (see [Testing Bedrock with Pest](/bedrock/docs/testing/))
- Set the document root on your webserver to Bedrock's `web` folder: `/path/to/site/web/`
- Access WordPress admin at `https://example.com/wp/wp-admin/`
### Multisite
Bedrock is multisite network compatible, but needs the [roots/multisite-url-fixer](https://github.com/roots/multisite-url-fixer) mu-plugin on subdomain installs to make sure admin URLs function properly. This plugin is not _needed_ on subdirectory installs but will work well with them. From your Bedrock directory:
```shell
$ composer require roots/multisite-url-fixer
```
================================================
FILE: bedrock/local-development.md
================================================
---
date_modified: 2026-03-08 16:07
date_published: 2018-12-28 13:54
description: Bedrock supports various local development tools including Trellis, Laravel Valet, Local, DDEV, Lando, and DevKinsta for flexible WordPress development.
title: Local WordPress Development with Bedrock
authors:
- ben
- Log1x
- swalkinshaw
---
# Local WordPress Development with Bedrock
Bedrock can be used with most local development setups. [Trellis](https://roots.io/trellis/) is our WordPress LEMP stack that supports Bedrock out of the box. We also have guides for using Bedrock with some popular setups:
- [Bedrock with DDEV](/bedrock/docs/bedrock-with-ddev/)
- [Bedrock with DevKinsta](/bedrock/docs/bedrock-with-devkinsta/)
- [Bedrock with Lando](/bedrock/docs/bedrock-with-lando/)
- [Bedrock with Local](/bedrock/docs/bedrock-with-local/)
- [Bedrock with Valet](/bedrock/docs/bedrock-with-valet/)
For test setup and commands, see [Testing Bedrock with Pest](/bedrock/docs/testing/).
Additionally, [WP-CLI's server command](https://developer.wordpress.org/cli/commands/server/) can be used with Bedrock (the `docroot` for the server is set in Bedrock's [`wp-cli.yml`](https://github.com/roots/bedrock/blob/master/wp-cli.yml))
MAMP, XAMPP, and others setups work with Bedrock once the [virtual host is configured](configuration.md).
================================================
FILE: bedrock/mu-plugin-autoloader.md
================================================
---
date_modified: 2023-01-27 13:17
date_published: 2015-09-06 07:42
description: Bedrock's autoloader lets you install regular plugins as must-use plugins via Composer, ensuring critical plugins always load without user control.
title: WordPress Must-use Plugin Autoloader
authors:
- ben
- Log1x
- swalkinshaw
---
# WordPress Must-use Plugin Autoloader
Bedrock includes an autoloader that enables standard plugins to be required just like must-use plugins.
The autoloaded plugins are included after all mu-plugins and standard plugins have been loaded. An asterisk (*) next to the name of the plugin designates the plugins that have been autoloaded. To remove this functionality, just delete `web/app/mu-plugins/bedrock-autoloader.php`.
This enables the use of mu-plugins through Composer if their package type is `wordpress-muplugin`. You can also override a plugin's type like the following example:
```json
"installer-paths": {
"web/app/mu-plugins/{$name}/": ["type:wordpress-muplugin", "roots/wp-stage-switcher"],
"web/app/plugins/{$name}/": ["type:wordpress-plugin"],
"web/app/themes/{$name}/": ["type:wordpress-theme"]
},
```
[wp-stage-switcher](https://github.com/roots/wp-stage-switcher) is a package with its type set to `wordpress-plugin`. Since it implements `composer/installers` we can override its type.
================================================
FILE: bedrock/patching-wordpress-plugins-with-composer.md
================================================
---
date_modified: 2025-10-13 12:00
date_published: 2025-10-13 12:00
description: Use Composer patches to modify WordPress plugins without forking. Resolve dependency conflicts and apply fixes to third-party plugins in Bedrock projects.
title: Patching WordPress Plugins with Composer
authors:
- ben
---
# Patching WordPress Plugins with Composer
When managing WordPress plugins through Composer in Bedrock, you may encounter situations where you need to modify third-party plugin code. Common scenarios include resolving dependency conflicts, fixing bugs before official updates are released, or adapting plugins for your specific environment.
Rather than forking plugins or manually editing vendor code, Composer patches provide a maintainable solution that persists across updates.
## Installing the patches plugin
Add the [cweagans/composer-patches](https://github.com/cweagans/composer-patches) package to your project:
```shell
$ composer require cweagans/composer-patches
```
Enable the plugin in your `composer.json`:
```json
"config": {
"allow-plugins": {
"cweagans/composer-patches": true
}
}
```
## Creating a patch file
Patches are standard unified diff files. You can create them using Git or the `diff` command.
### Using Git to create a patch
The easiest method is to make changes to the plugin and generate a diff. First initialize a temporary Git repo for the plugin:
```shell
$ cd web/app/plugins/example-plugin
```
```shell
$ git init
```
```shell
$ git add . && git commit -m "Base plugin"
```
Make your changes to the plugin files, then generate the patch and clean up:
```shell
$ git diff > ../../../../patches/example-plugin-fix.patch
```
```shell
$ rm -rf .git
```
### Example: resolving PSR library conflicts
A common issue in WordPress is multiple plugins bundling the same PSR libraries with different versions, causing conflicts. Here's a real-world example of commenting out conflicting `psr/log` class registrations:
```diff
diff --git a/vendor/composer/jetpack_autoload_classmap.php b/vendor/composer/jetpack_autoload_classmap.php
index 1855b18..d52edf3 100644
--- a/vendor/composer/jetpack_autoload_classmap.php
+++ b/vendor/composer/jetpack_autoload_classmap.php
@@ -194,11 +194,11 @@ return array(
'version' => '3.1.3',
'path' => $vendorDir . '/automattic/jetpack-autoloader/src/class-plugins-handler.php'
),
- 'Psr\\Log\\LoggerInterface' => array(
- 'version' => '1.1.4.0',
- 'path' => $vendorDir . '/psr/log/Psr/Log/LoggerInterface.php'
- ),
+ // 'Psr\\Log\\LoggerInterface' => array(
+ // 'version' => '1.1.4.0',
+ // 'path' => $vendorDir . '/psr/log/Psr/Log/LoggerInterface.php'
+ // ),
```
Save this patch file to a `patches/` directory in your project root.
## Configuring patches in `composer.json`
Add your patches to the `extra.patches` section of `composer.json`:
```json
"extra": {
"patches": {
"vendor/package-name": [
{
"description": "Brief description of patch",
"url": "patches/example-plugin-fix.patch"
}
]
}
}
```
## Applying patches
Once configured, patches are automatically applied when you install or update dependencies:
```shell
$ composer install
```
You'll see output confirming patches are being applied:
```plaintext
- Applying patches for vendor/package-name
patches/example-plugin-fix.patch (Brief description of patch)
```
## When to use patches
Composer patches are ideal for:
* **Dependency conflicts** - Removing bundled libraries that conflict with your main dependencies
* **Bug fixes** - Applying fixes before official plugin updates are available
* **Environment adjustments** - Modifying plugins for specific hosting requirements
* **Temporary workarounds** - Addressing issues while waiting for upstream fixes
::: tip
Document your patches clearly. Include the reason for each patch in the description and maintain separate patch files for different issues to make future maintenance easier.
:::
## Maintaining patches across updates
When updating plugins, patches are reapplied automatically. If a patch fails to apply (usually because the plugin code changed), Composer will show an error. You'll need to:
1. Review the plugin changes
2. Update or remove the patch as needed
3. Test that your fix is still necessary
================================================
FILE: bedrock/patching-wordpress-with-composer.md
================================================
---
date_modified: 2026-03-10 12:00
date_published: 2026-03-10 12:00
description: Apply patches to WordPress core in Bedrock using Composer. Fix bugs or apply upstream changes before official releases without modifying core files directly.
title: Patching WordPress with Composer
authors:
- ben
---
# Patching WordPress with Composer
Sometimes you need to patch WordPress core — to fix a bug before an official release, suppress noisy deprecation notices, or backport a change from an open pull request. Composer patches let you apply these changes in a maintainable way that persists across installs and deploys.
## Installing the patches plugin
Add the [cweagans/composer-patches](https://github.com/cweagans/composer-patches) package to your project:
```shell
$ composer require cweagans/composer-patches
```
Enable the plugin in your `composer.json`:
```json
"config": {
"allow-plugins": {
"cweagans/composer-patches": true
}
}
```
## Which package to patch
Bedrock's `roots/wordpress` is a metapackage — it doesn't contain any files. The actual WordPress core files are in the `roots/wordpress-no-content` package, which is installed to your `wordpress-install-dir` (typically `web/wp`).
Patches must target `roots/wordpress-no-content`, and patch file paths should be relative to the package root (e.g., `wp-includes/load.php`, not `web/wp/wp-includes/load.php`).
## Creating a patch file
Create a `patches/` directory in your project root. Patches are standard unified diff files with paths relative to the WordPress root.
### Example: suppressing deprecated notices
```diff
--- a/wp-includes/load.php
+++ b/wp-includes/load.php
@@ -607,7 +607,7 @@ function wp_debug_mode() {
}
if ( WP_DEBUG ) {
- error_reporting( E_ALL );
+ error_reporting( E_ALL & ~E_DEPRECATED );
if ( WP_DEBUG_DISPLAY ) {
ini_set( 'display_errors', 1 );
```
Save this as `patches/wordpress.patch`.
## Configuring patches in `composer.json`
Add your patches to the `extra.patches` section of `composer.json`:
```json
"extra": {
"patches": {
"roots/wordpress-no-content": [
{
"description": "Suppress E_DEPRECATED notices",
"url": "patches/wordpress.patch"
}
]
}
}
```
## Applying patches
Patches are automatically applied when you install or update dependencies:
```shell
$ composer install
```
You'll see output confirming patches are being applied:
```plaintext
- Patching roots/wordpress-no-content
- Applying patch patches/wordpress.patch (Suppress E_DEPRECATED notices)
```
To force patches to reapply, reinstall the package:
```shell
$ composer reinstall roots/wordpress-no-content
```
## Maintaining patches across updates
When WordPress is updated, patches are reapplied automatically. If a patch fails to apply (usually because the patched code changed in the new version), Composer will show an error. You'll need to:
1. Review the WordPress changes
2. Update or remove the patch as needed
3. Test that your fix is still necessary — the issue may have been resolved upstream
::: warning
WordPress core patches are version-specific. After updating WordPress, always verify that your patches still apply cleanly and are still needed.
:::
================================================
FILE: bedrock/private-or-commercial-wordpress-plugins-as-composer-dependencies.md
================================================
---
date_modified: 2023-01-27 13:17
date_published: 2018-08-02 14:04
description: Add paid and private plugins to Bedrock through Composer using private Git repositories, custom Composer repos, or services like WP Packages.
title: Private or Commercial WordPress Plugins as Composer Dependencies
authors:
- MWDelaney
- strarsis
---
# Private or Commercial WordPress Plugins as Composer Dependencies
Bedrock (and by extension Trellis) uses Composer to manage its dependencies, which includes WordPress themes and plugins. This is great for version control as many WordPress plugins are easily available via [WP Packages](https://wp-packages.org/), but what happens when you need to add a private, commercial, or paid plugin to your site? This guide will explain a simple way to add private plugins to your site via Composer.
There are many ways to add private or paid plugins to your Bedrock-based project. Popular methods include:
* Private Git repositories
* [SatisPress](https://github.com/cedaro/satispress)
* [Private Packagist](https://packagist.com/)
* [Toran Proxy](https://toranproxy.com/)
For the purposes of this document we will focus only on the first option: **private Git repositories**. We welcome contributed guides covering these methods or others.
**Note:** We recommend hosting private and commercial plugins in private Git repositories. GitHub [offers private repositories](https://github.com/pricing) for free and BitBucket includes them in its [limited free plan](https://bitbucket.org/product/pricing). The following guide assumes you’re using a GitHub private repository.
## Create a private GitHub repository for your plugin
[Create the repository](https://docs.github.com/en/repositories/creating-and-managing-repositories/quickstart-for-repositories) as normal and clone the empty repository to your computer.
```shell
$ git clone git@github.com:YourGitHubUsername/example-plugin.git
```
## Create `composer.json`
In your empty repository, create a file named `composer.json` with the following content (edited to include your correct user, repository, and plugin information):
```json
{
"name": "YourGithubUsername/example-plugin",
"description": "",
"keywords": ["wordpress", "plugin"],
"homepage": "https://github.com/YourGitHubUsername/example-plugin",
"authors": [
{
"name": "Original Plugin Author's Name",
"homepage": "https://originalpluginurl.com"
}
],
"type": "wordpress-plugin",
"require": {
"php": ">=8.0"
}
}
```
::: tip
Composer can create a skeleton `composer.json` for you: Just run `composer init` in your empty directory.
:::
## Copy plugin files into your repository
Copy all the plugin’s files into your new repository.
## Commit your plugin to Git and push your changes to GitHub
Run each of the following commands from your repository directory:
Add all of your plugin’s files to Git.
```shell
$ git add .
```
Commit your changes
::: tip
Include the plugin’s version number in your commit message so that you can easily reference it later!
:::
```shell
$ git commit .
```
## Tag the release
Composer will need a way to know the version of a plugin. Fortunately, it understands [git tags](https://getcomposer.org/doc/articles/versions.md#tags) and can interpret them correctly if they use [semantic versioning](https://semver.org/), so we’ll be using those.
Let’s assume you’re pushing SearchWP version 2.9.14. That means we’ll be creating the 2.9.14 tag. Remember, tags are tied to commits, so be sure to commit all your changes _before_ creating the tag.
```shell
$ git tag 2.9.14
```
Push your changes, and your tags to GitHub:
```shell
$ git push --tags
```
::: tip
Tags pushed to GitHub will automatically be turned into “Releases,” a feature of GitHub. You can also [create releases](https://docs.github.com/en/repositories/releasing-projects-on-github/managing-releases-in-a-repository) manually on the GitHub website.
:::
## Edit your Bedrock `composer.json` file, add your repository and plugin
In your Bedrock site’s `composer.json`
* Add a new your GitHub repository to the `repositories` section referencing your GitHub repository:
```json
"repositories": [
...
{
"type": "vcs",
"url": "git@github.com:YourGitHubUsername/example-plugin.git"
}
...
],
```
* Add your plugin to the `require` section using the version number you named your `release` after:
```json
"require": {
...
"YourGitHubUsername/example-plugin": "2.9.14",
...
},
```
## Update your dependencies
Run `composer update` in your Bedrock directory to get your new plugin.
[**Join the discussion on Roots Discourse**](https://discourse.roots.io/t/private-or-commercial-wordpress-plugins-as-composer-dependencies/13247)
================================================
FILE: bedrock/server-configuration.md
================================================
---
date_modified: 2026-03-08 10:00
date_published: 2018-12-21 18:24
description: Configure Nginx or Apache for Bedrock by setting document root to `web/` directory. Includes complete server configuration examples and rewrite rules.
title: Server Configuration for Bedrock
authors:
- ben
- Lachlan_Arthur
- Log1x
- swalkinshaw
---
# Server Configuration for Bedrock
Bedrock can run on any webserver that supports Composer and PHP >= 8.3. The document root for your site must be pointed to Bedrock's `web` folder.
## Nginx configuration for Bedrock
If you aren't using a Nginx-based setup that already supports Bedrock, such as Valet or [Trellis](https://roots.io/trellis/), you'll need to configure Nginx with the following rules:
```nginx
server {
listen 80;
server_name example.com;
root /srv/www/example.com/web;
index index.php index.htm index.html;
# Prevent PHP scripts from being executed inside the uploads folder.
location ~* /app/uploads/.*.php$ {
deny all;
}
location / {
try_files $uri $uri/ /index.php?$args;
}
}
```
### Nginx multisite config
Multisite installations on Nginx need additional rewrites depending on the type of multisite install.
#### Subdomain multisite rewrites
```nginx
rewrite ^/(wp-.*.php)$ /wp/$1 last;
rewrite ^/(wp-(content|admin|includes).*) /wp/$1 last;
```
#### Subfolder multisite rewrites
```nginx
if (!-e $request_filename) {
rewrite /wp-admin$ $scheme://$host$uri/ permanent;
rewrite ^(/[^/]+)?(/wp-.*) /wp$2 last;
rewrite ^(/[^/]+)?(/.*.php) /wp$2 last;
}
```
## Apache configuration for Bedrock
Make sure the `DocumentRoot` is set to the `web` folder:
```apache
<VirtualHost *:80>
DocumentRoot /var/www/html/bedrock/web
DirectoryIndex index.php index.html index.htm
<Directory /var/www/html/bedrock/web>
Options -Indexes
# .htaccess isn't required if you include this
<IfModule mod_rewrite.c>
RewriteEngine On
RewriteBase /
RewriteRule ^index.php$ - [L]
RewriteCond %{REQUEST_FILENAME} !-f
RewriteCond %{REQUEST_FILENAME} !-d
RewriteRule . /index.php [L]
</IfModule>
</Directory>
</VirtualHost>
```
You can also add the suggested `.htaccess` file from WordPress at `web/.htaccess`:
```apache
# BEGIN WordPress
<IfModule mod_rewrite.c>
RewriteEngine On
RewriteBase /
RewriteRule ^index.php$ - [L]
RewriteCond %{REQUEST_FILENAME} !-f
RewriteCond %{REQUEST_FILENAME} !-d
RewriteRule . /index.php [L]
</IfModule>
# END WordPress
```
## Managed WordPress hosts and Bedrock
If you're using a [supported WordPress host](deployment.md#supported-wordpress-hosts) such as Kinsta, then contact support and ask them to set your document root to the `web` folder.
Sometimes you can't change the document root on hosted web server. In this case, you can create an `.htaccess` file at the root of your project with the following content:
```apache
RewriteEngine on
RewriteCond %{REQUEST_URI} !web/
RewriteRule ^(.*)$ /web/$1 [L]
```
================================================
FILE: bedrock/testing.md
================================================
---
date_modified: 2026-03-08 16:05
date_published: 2026-03-08 16:05
description: Learn how to run tests in Bedrock using Pest (powered by PHPUnit), create feature tests, and run the suite locally and in CI.
title: Testing Bedrock with Pest
authors:
- ben
---
# Testing Bedrock with Pest
Bedrock includes a minimal testing setup based on [Pest](https://pestphp.com/) (powered by PHPUnit).
## Running tests
Run the test suite from your Bedrock root:
```shell
$ composer test
```
## Default test structure
Bedrock ships with these testing files:
- `phpunit.xml.dist` - PHPUnit configuration used by Pest
- `tests/Pest.php` - Pest bootstrap and shared test configuration
- `tests/Feature/ExampleTest.php` - Example test
## Writing tests
Add tests anywhere under `tests/`:
```php
<?php
test('home URL is configured', function () {
expect(env('WP_HOME'))->not->toBeEmpty();
});
```
Then run:
```shell
$ composer test
```
## Scope of the default setup
The default setup is intentionally minimal and framework-agnostic:
- It gives you a ready-to-run PHP testing baseline
- It does **not** include WordPress core integration test bootstrap or database test provisioning
If you need deeper WordPress integration testing, you can extend this baseline with your preferred tooling.
================================================
FILE: bedrock/wp-cron.md
================================================
---
date_modified: 2023-01-27 13:17
date_published: 2015-09-06 07:42
description: Disable WordPress's unreliable internal cron with `DISABLE_WP_CRON` in Bedrock and set up proper system cron jobs for scheduled tasks.
title: Managing WP Cron in Bedrock
authors:
- ben
- Log1x
- swalkinshaw
---
# Managing WP Cron in Bedrock
Bedrock allows you to disable the internal WP Cron via the `DISABLE_WP_CRON` environment variable. If you enable this setting and disable WP Cron, you'll need to manually set a cron job like the following in your crontab file:
```plaintext
*/5 * * * * curl https://example.com/wp/wp-cron.php
```
================================================
FILE: netlify.toml
================================================
[[redirects]]
from = "/"
to = "https://roots.io/"
status = 301
force = true
[[redirects]]
from = "/docs/*"
to = "/:splat"
status = 301
force = true
[[redirects]]
from = "/acorn/"
to = "https://roots.io/acorn/docs/installation/"
status = 301
force = true
[[redirects]]
from = "/acorn/2.x/*"
to = "https://roots.io/acorn/docs/:splat"
status = 301
force = true
[[redirects]]
from = "/bedrock/"
to = "https://roots.io/bedrock/docs/installation/"
status = 301
force = true
[[redirects]]
from = "/bedrock/master/*"
to = "https://roots.io/bedrock/docs/:splat"
status = 301
force = true
[[redirects]]
from = "/examples/*"
to = "https://roots.io/"
status = 301
force = true
[[redirects]]
from = "/sage/"
to = "https://roots.io/sage/docs/installation/"
status = 301
force = true
[[redirects]]
from = "/sage/10.x/*"
to = "https://roots.io/sage/docs/:splat"
status = 301
force = true
[[redirects]]
from = "/trellis/"
to = "https://roots.io/trellis/docs/installation/"
status = 301
force = true
[[redirects]]
from = "/trellis/master/*"
to = "https://roots.io/trellis/docs/:splat"
status = 301
force = true
[[redirects]]
from = "/getting-started/"
to = "https://roots.io/"
status = 301
force = true
[[redirects]]
from = "/getting-started/macos/"
to = "https://roots.io/"
status = 301
force = true
[[redirects]]
from = "/getting-started/ubuntu-linux/"
to = "https://roots.io/"
status = 301
force = true
[[redirects]]
from = "/getting-started/windows/"
to = "https://roots.io/"
status = 301
force = true
[[redirects]]
from = "/sage/10.x/installing-packages/"
to = "https://roots.io/acorn/docs/available-packages/"
status = 301
force = true
[[redirects]]
from = "/acorn/2.x/installing-packages/"
to = "https://roots.io/acorn/docs/available-packages/"
status = 301
force = true
[[redirects]]
from = "/sage/10.x/available-packages/"
to = "https://roots.io/acorn/docs/available-packages/"
status = 301
force = true
[[redirects]]
from = "/sage/10.x/package-development/"
to = "https://roots.io/acorn/docs/package-development/"
status = 301
force = true
[[redirects]]
from = "/trellis/master/languages/"
to = "https://roots.io/trellis/docs/guides/install-wordpress-language-files/"
status = 301
force = true
[[redirects]]
from = "/trellis/master/deploys/"
to = "https://roots.io/trellis/docs/deployments/"
status = 301
force = true
================================================
FILE: sage/adding-linting.md
================================================
---
date_modified: 2023-03-12 19:25
date_published: 2023-01-23 19:40
description: Set up ESLint, Prettier, and Stylelint in Sage to enforce code quality standards, consistent formatting, and best practices for theme development.
title: Adding ESLint, Prettier, and Stylelint
authors:
- ben
- chrillep
---
# Adding ESLint, Prettier, and Stylelint
::: tip We recommend enabling linting
Sage 10 no longer includes linting styles or scripts out of the box. We highly recommend adding and configuring [ESLint](https://eslint.org/), [Prettier](https://prettier.io/), and [Stylelint](https://stylelint.io/) based on your needs.
:::
Bud has several extensions that can be added to your theme dependencies to help with linting. To add ESLint, Prettier, and Stylelint to your theme, run:
```
yarn add @roots/bud-eslint -D
yarn add @roots/bud-prettier -D
yarn add @roots/bud-stylelint -D
yarn add @roots/eslint-config -D
```
Add `scripts` to `package.json` for better access to linting your scripts and styles:
```json
...
"scripts": {
"lint": "yarn lint:js && yarn lint:css",
"lint:js": "eslint resources/scripts",
"lint:css": "stylelint \"resources/**/*.{css,scss,vue}\"",
"test": "yarn lint",
}
...
```
Then create new files for `.eslintrc.cjs`, `.prettierrc`, and `.stylelintrc`.
`.eslintrc.cjs`:
```javascript
module.exports = {
root: true,
extends: ['@roots/eslint-config/sage'],
};
```
`.prettierrc`:
```json
{
"bracketSpacing": false,
"jsxBracketSameLine": true,
"semi": true,
"singleQuote": true,
"tabWidth": 2,
"trailingComma": "all",
"useTabs": false
}
```
`.stylelintrc`:
```json
{
"extends": [
"@roots/sage/stylelint-config",
"@roots/bud-tailwindcss/stylelint-config"
]
}
```
================================================
FILE: sage/blade-templates.md
================================================
---
date_modified: 2023-01-27 13:17
date_published: 2018-02-07 09:46
description: Sage uses Laravel's Blade for powerful templating. Learn template inheritance with `@extends`, layouts with `@yield`, and passing data to WordPress views.
title: Using Blade Templates in Sage
authors:
- alwaysblank
- ben
- Log1x
---
# Using Blade Templates in Sage
Sage uses [Laravel's Blade](https://laravel.com/docs/10.x/blade) templating engine.
::: tip
The Blade templating language is described in much more depth in the [Laravel docs](https://laravel.com/docs/10.x/blade), which we recommend you read for a full understanding of how it works. Nearly everything described there should work in Sage.
:::
The following are some of the Blade features you're likely to find yourself using regularly.
## Including
One of the primary features of Blade is the `@include` directive (which also has a few useful variants). `@include` allows you to use a Blade file in any other Blade file, and creates a new scope for each included file.
Variables define in a given view will cascade down to views that it `@includes`, but you can also pass data directly to Blade templates by passing a keyed array as the second argument to the `@include()` directive.
The key names will become the variable names that their values are assigned to.
```blade
@include('partials.example-partial', ['variableName' => 'Variable Value']
<!-- /resources/views/partials/example-partial.blade.php -->
<h1>{{ $variableName }}</h1>
<!-- <h1>Variable Value</h1> -->
```
## Layouts
A layout is a special kind of template that can be extended. It's useful when you have a lot of HTML content surrounding something you want to be dynamic—for instance the header and footer of a site.
```blade
<!-- resources/views/layouts/app.blade.php -->
<html>
<body>
<header>
@section('header')
@include('partials.nav.primary')
@show
</header>
<main>
@yield('content')
</main>
</body>
</html>
<!-- resources/views/page.blade.php -->
@extends('layouts.app')
@section('header')
@parent
@include('partials.nav.page')
@endsection
@section('content')
<h1>{{ $title }}</h1>
<div>{!! $content !!}}</div>
@endsection
```
The extending view (`page.blade.php` in this case) can then "insert" its content into these sections to be rendered.
## Passing data to templates
The best way to handle passing data to templates is to use [Composers](composers.md), which allow you to separate data handling and manipulation from the view where that data is used.
With Composers, you can bind data to _any_ Blade template file.
You can also pass data directly to Blade templates when `@include`ing them by passing a keyed array as the second argument to the `@include()` directive.
The key names will become the variable names that their values are assigned to.
```blade
@include('partials.example-partial', ['variableName' => 'Variable Value'])
<!-- /resources/views/partials/example-partial.blade.php -->
<h1>{{ $variableName }}</h1>
<!-- <h1>Variable Value</h1> -->
```
## WP-CLI utility
If you need to clear or compile Blade templates, you can do so with WP-CLI:
### Compile all Blade templates
```shell
$ wp acorn view:cache
```
### Clear all Blade templates
```shell
$ wp acorn view:clear
```
## Additional resources
* [Rendering Blade views for blocks, emails, and more](/acorn/docs/rendering-blade-views/)
================================================
FILE: sage/bootstrap.md
================================================
---
date_modified: 2025-02-27 14:30
date_published: 2022-02-24 10:25
description: Add Bootstrap CSS framework to Sage themes. Install Bootstrap via npm and integrate Bootstrap styles, grid system, and components into WordPress theme development.
title: How to Use Bootstrap with Sage
authors:
- ben
- code23_isaac
- diomededavid
- MWDelaney
- kellymears
- talss89
- taylorgorman
---
# How to Use Bootstrap with Sage
::: warning Setup Sass first
See [how to use Sass](./sass.md) before you follow this guide
:::
## Install Bootstrap
Add Bootstrap as a dependency:
```shell
$ npm install --save bootstrap @popperjs/core
```
Add Bootstrap to `resources/css/app.scss`:
```scss
@import "bootstrap/scss/bootstrap";
```
::: tip Bootstrap's Vite docs
See [Bootstrap's Vite docs](https://getbootstrap.com/docs/5.2/getting-started/vite/) for more information.
:::
================================================
FILE: sage/compatibility.md
================================================
---
date_modified: 2023-04-26 10:35
date_published: 2018-04-25 13:52
description: Known compatibility issues between WordPress plugins and Sage starter theme, including solutions, workarounds, and alternative plugin recommendations.
title: WordPress Plugin Compatibility with Sage
authors:
- alwaysblank
- ben
- jure
- Log1x
---
# WordPress Plugin Compatibility with Sage
A list of currently known compatibility issues with any WordPress plugins and Sage. Also take a look at the [Acorn compatibility](/acorn/docs/compatibility/) docs.
## Adding support for plugins
### WooCommerce
WooCommerce support for Sage can be added by using the [generoi/sage-woocommerce](https://github.com/generoi/sage-woocommerce) package.
## Known issues with plugins
- Disqus Comment System is [not compatible with Sage](https://github.com/roots/sage/issues/2035#issuecomment-369673419). There is a [Laravel-based solution](https://github.com/yajra/laravel-disqus) which may work (untested).
================================================
FILE: sage/compiling-assets.md
================================================
---
date_modified: 2026-03-22 11:00
date_published: 2015-09-01 18:19
description: Sage uses Vite for fast asset compilation with HMR support. Includes custom plugin for hot module replacement in WordPress block editor during development.
title: Compiling Assets in Sage with Vite
authors:
- alwaysblank
- ben
- kero
- Log1x
- octoxan
- toddsantoro
---
# Compiling Assets in Sage with Vite
[Vite](https://vite.dev/) is front-end build tool used in Sage.
Sage also uses the Laravel Vite plugin, along with Laravel's Vite facade for referencing Vite assets in PHP and Blade template files. Because of this, [Laravel's Vite documentation](https://laravel.com/docs/13.x/vite) also applies to Sage.
## Available build commands
- `npm run build` — Build assets
- `npm run dev` — Start dev server (requires updating `vite.config.js` with your local dev URL)
## Theme assets
What files are built and how is controlled from the `vite.config.js` file in the root of the theme.
The configuration will generate the following files:
- `app.css` - The primary stylesheet for the theme.
- `app.js` - The primary JavaScript file for the theme.
- `editor.css` - Styles used by the editor when creating/editing posts.
- `editor.js` - JavaScript for the block editor, i.e. block styles and variants.
It will also copy any files in the `images` or `fonts` directories under `/resources/` into the `public` directory with the other compiled files, but does not optimize or compress them. This is handled by the `assets` option on `laravel-vite-plugin` in `vite.config.js`.
### Assets in Blade template files
Use the [`Vite::asset` method](https://laravel.com/docs/13.x/vite#blade-processing-static-assets) to call assets from Blade template files:
```blade
<img src="{{ Vite::asset('resources/images/example.svg') }}">
```
### Assets in CSS
You can reference images in CSS using the included Vite alias for images.
```css
.background {
background-image: url("@images/example.svg");
}
```
### Assets in PHP
#### Get the URL of the asset
```php
use Illuminate\Support\Facades\Vite;
$asset = Vite::asset('resources/images/example.svg');
```
#### Get the contents of the asset
```php
use Illuminate\Support\Facades\Vite;
$asset = Vite::content('resources/images/example.svg');
```
================================================
FILE: sage/components.md
================================================
---
date_modified: 2023-01-27 13:17
date_published: 2021-10-21 13:21
description: Components in Sage provide a structured approach for creating reusable view elements with scoped data, ideal for frequently reused theme components.
title: Creating Blade Components in Sage
authors:
- alwaysblank
- bbuilds
- ben
- code23_isaac
- Log1x
---
# Creating Blade Components in Sage
Fundamentally, Components don't do anything you couldn't also accomplish with [partials](blade-templates.md) and [Composers](composers.md), but they provide system of interaction and a mental model that can be more intuitive.
Like Composers and Blade templates, Components are an extension of the Laravel feature, so the [Laravel documentation](https://laravel.com/docs/7.x/blade#components) applies.
Generally a Component consists of:
1) A Blade template in `/resources/views/components/`.
2) A Composer-like class in `/app/View/Components/`.
The easiest way to create a component is with WP-CLI:
```shell
$ wp acorn make:component ExampleComponent
```
Sage also ships with some examples.
::: tip
You can also create [inline](https://laravel.com/docs/7.x/blade#inline-component-views) and [anonymous](https://laravel.com/docs/7.x/blade#anonymous-components) components, which forgo the template or class respectively.
These would need to be created manually
(the WP-CLI command only creates "traditional" components).
:::
## Usage
A Component in action in a Blade template will look something like this:
```blade
<x-example-component title="Example Component" :image-id="$image"/>
```
The template for that Component might look like this:
```blade
<div {{ $attributes }}>
<h3>{!! $title !!}</h3>
@if($imageElement)
<figure>{!! $imageElement !!}</figure>
@endif
</div>
```
In turn, the class might look like this:
```php
namespace App\View\Components;
use Roots\Acorn\View\Component;
class ExampleComponent extends Component
{
public $title;
public $imageElement;
protected $imageId;
public function __construct($title, $imageId = null) {
$this->title = $title;
$this->imageId = $imageId;
$this->imageElement = $this->getImage();
}
protected function getImage()
{
if (!is_numeric($this->imageId)) {
return false;
}
return wp_get_attachment_image($this->imageId, 'medium_large');
}
}
```
## Argument and attribute names
The names of the arguments in the definition of your Component's `__construct()` method must match the names of the attributes you use to pass data to your Component tag.
::: warning Note
Component constructor arguments should be specified using `camelCase`, while `kebab-case` should be used when referencing the argument names in your HTML attributes. [Laravel documentation](https://laravel.com/docs/10.x/blade#casing)
:::
In the above example
```blade
<x-example-component title="A Component"/>
```
will work, but
```blade
<x-example-component theTitle="A Component"/>
```
will throw an error.
The attributes used to pass data to your Component tag can be in any order, so long as the names are correct:
```blade
<x-example-component title="The Title" :image-id="$image"/>
<x-example-component :image-id="$image" title="The Title"/>
```
These are equivalent.
## Passing data
By default, anything passed to an attribute on a Component tag will be treated as a string.
So if you do this:
```blade
<x-example-component title="$variable"/>
```
Your component will treat that as a string containing `$variable`, _not_ whatever the contents of `$variable` is.
If you need to pass non-string data, just prefix your attribute with a colon, and its value will be evaluated as PHP:
```blade
<x-example-component :title="$variable"/>
<x-example-component :title="get_my_title()"/>
<x-example-component :title="TITLE_CONSTANT"/>
```
::: warning Note
Because your argument is now evaluated as PHP, you _don't_ want to pass a simple string, or PHP will try and evaluate it:
```blade
<x-example-component :title="Uh oh"/>
```
This will throw an error when it tries to evaluate `Uh oh` as PHP.
:::
## Data in views
The view for your Component
(in the above example, `/resources/views/components/example-component.blade.php`)
does _not_ receive the arguments you pass to the Component tag;
The data it has access to is limited to any `public` properties you've set on your class.
So remember to set those properties, or your view won't have the data you need!
## Other attributes
In the Component tag, you use attributes to pass data to your component, but you can also add other, arbitrary attributes as well.
These attributes will be put in an "attribute bag" which you can then access in your Component view with the special `$attributes` variable.
If you echo the variable it will print out each attribute and its value, which is very useful for things like passing CSS selectors to your Components:
```blade
<x-example-component title="Styled Component"
class="bg-color-red text-color-white"/>
<!-- yields... -->
<div class="bg-color-red text-color-white">
...
```
You can do many other things with attributes that are described in the [Laravel documentation](https://laravel.com/docs/7.x/blade#managing-attributes).
================================================
FILE: sage/composers.md
================================================
---
date_modified: 2023-01-27 13:17
date_published: 2021-10-21 13:21
description: Use composers to pass scoped data to any Blade view in Sage. Bind variables to templates, partials, and components for organized theme development.
title: View Composers in Sage WordPress Theme
authors:
- alwaysblank
- ben
- code23_isaac
- Log1x
---
# View Composers in Sage WordPress Theme
Composers, also sometimes called View Composers, are essentially identical to the [Laravel system of the same name](https://laravel.com/docs/7.x/views#view-composers).
They allow you to pass data to views (blade templates), scoping that data to that view (and any views it subsequently includes).
If you're familiar with [Sage 9's data filters](https://roots.io/sage/docs/blade-templates/#passing-data-to-templates), or the [Controller package](https://github.com/soberwp/controller) often used with Sage 9, then Composers are a similar concept, but much more powerful:
Instead of only allowing data binding to top-level WordPress templates, Composers allow you target _any_ view.
## Construction
::: warning Note
Composers are autoloaded, which means their naming needs to conform to the [PSR-4 standard](https://www.php-fig.org/psr/psr-4/).
:::
If you're using WP-CLI, you can create composers from the command line:
```shell
wp acorn make:composer ExampleComposer
```
This would create a Composer called `ExampleComposer` in `app/View/Composers/`.
If you're not using WP-CLI, the most basic Composer looks like this:
```php
// app/View/Composers/ExampleComposer.php
namespace App\View\Composers;
use Roots\Acorn\View\Composer;
class ExampleComposer extends Composer
{}
```
This composer doesn't do anything yet, though, so let's give it some functionality.
```php
class ExampleComposer extends Composer
{
/**
* This tells the Composer that it should bind data to the 'example'
* partial.
*/
protected static $views = [
'partials.example',
];
/**
* This will make the variable `$roots` available in the 'example' partial
* with the value described here.
*/
public function with()
{
return [
'roots' => "Tools for modern WordPress development",
];
}
}
```
Because that variable is scoped to `example.blade.php`, we'll also see the following behavior:
```blade
<!-- resources/views/content.blade.php -->
{{ $roots }}
<!-- Throws an error because the variable is not defined -->
@include('partials.example')
```
```blade
<!-- resources/views/partials/example.blade.php -->
<h1>{{ $roots }}</h1>
<!-- <h1>Tools for modern WordPress development</h1> -->
@include('partials.example2')
```
```blade
<!-- resources/views/partials/example2.blade.php -->
<div>{{ $roots }}</div>
<!-- <div>Tools for modern WordPress development</div> -->
<!-- Variable is defined in this context because it inherits
it from example.blade.php -->
```
## Data sources
We've seen how data can be bound to views, but we only returned a hard-coded string.
Usually you'll want something more involved than that.
### WordPress
Composers are executed in a context where WordPress functions like `get_the_ID()` and `the_post()` will return expected values, so you can retrieve data from WordPress much like you normally would.
### Inherited data
Inside of a Composer, you can easily access data that has been passed to or inherited by the view through the `data` property:
```php
class Example2 extends Composer
{
...
public function with()
{
return [
'better_roots' => str_replace(
'modern',
'*awesome*',
$this->data->get('roots')
),
];
}
}
```
```blade
<!-- resources/views/partials/example2.blade.php -->
<div>{{ $better_roots }}</div>
<!-- <div>Resources for *awesome* WordPress development</div> -->
```
### "Automatic" view selection
You can always define what view a Composer will be bound to using the `$views` property to list the name(s) of the views.
However, if your Composer will target only a single view, you can save yourself a few lines of code.
Sage will attempt to match Composers to views based on some simple file path logic:
If your view and Composer share the same path segments and name, they'll be automatically bound together.
For example, if your view is a partial at `/resources/views/partials/page-header.blade.php`, a Composer at `/app/View/Composers/PageHeader.php` will be automatically bound to it.
In other words:
- Match paths below `/resources/views` and `/app/View`.
- Convert the `kebab-case` of view file names to the `PascalCase` of Composers.
### `with()` vs `override()`
You've seen `with()` used above to pass data to views, but it has a more aggressive sibling calling `override()` which does the same thing--except that it will replace data inherited by, or passed to, the view while `with()` will not.
```blade
<!-- /resources/views/page.blade.php -->
@include('partials.example', ['roots' => "Resources for modern WordPress development"])
<!-- /resources/views/partials/example.blade.php -->
<h1>{{ $roots }}</h1>
<!-- <h1>Resources for modern WordPress development</h1> -->
```
Using `with()`:
```php
class Example extends Composer
{
public function with()
{
return [
'roots' => "An amazing stack!",
];
}
}
```
```blade
<!-- /resources/views/partials/example.blade.php -->
<h1>{{ $roots }}</h1>
<!-- <h1>Resources for modern WordPress development</h1> -->
<!-- The same output! -->
```
Using `override()`:
```php
class Example extends Composer
{
public function override()
{
return [
'roots' => "An amazing stack!",
];
}
}
```
```blade
<!-- /resources/views/partials/example.blade.php -->
<h1>{{ $roots }}</h1>
<!-- <h1>An amazing stack!</h1> -->
```
================================================
FILE: sage/configuration.md
================================================
---
date_modified: 2024-01-17 08:22
date_published: 2015-09-01 19:02
description: Configure Sage theme features in `setup.php`. Register menus, define sidebars, enable theme support for WordPress features, and set configuration values.
title: Configuring the Sage WordPress Theme
authors:
- alwaysblank
- ben
- Log1x
---
# Configuring the Sage WordPress Theme
## Introduction
All of the configuration for Sage lives inside of `app/setup.php`. Each option is documented allowing for you to easily familiarize yourself with the options configured out of the box.
## Theme Configuration
Configuration specific to WordPress resides in the `app/setup.php` file. In this file, you will find the default enqueued stylesheets and scripts, the supported theme features added with `add_theme_support`, and the registration hooks for navigation menus and sidebars.
By default, Sage is configured to:
- Enqueue `app.css` and `app.js` on the frontend.
- Enqueue `editor.css` and `editor.js` in the Gutenberg editor.
- Add theme support for common functionality.
- Register a default navigation menu called `primary_navigation`.
- Register a primary and footer Sidebar widget area.
### `theme.json`
Sage ships with a starter `theme.json` that is generated from the build based on your Tailwind config. See the [Gutenberg docs](/sage/docs/gutenberg/) for further information.
================================================
FILE: sage/deployment.md
================================================
---
date_modified: 2025-10-30 11:30
date_published: 2015-09-01 19:29
description: Deploy Sage themes by building assets for production, running `composer install` for dependencies, and ensuring PHP version consistency across environments.
title: Deploying the Sage WordPress Theme
authors:
- alwaysblank
- ben
- kero
- Log1x
- MWDelaney
---
# Deploying the Sage WordPress Theme
::: warning PHP versions must match
Make sure the PHP version of your development environment matches the PHP version of your production environment, or you may hit a fatal error due to your Composer dependencies requiring a different PHP version.
:::
## Deploying a Sage-based WordPress theme
1. Build theme assets (`npm run build`)
2. Install Composer dependencies (`composer install --no-dev --optimize-autoloader`)
3. Upload all files and folders in your theme except the `node_modules` directory to your host
## Optimization
Similar to deploying a Laravel app, Acorn supports an `optimize` command that will cache your configuration and views. This command should be run as part of your deployment process:
```shell
$ wp acorn optimize
```
## Server configuration
::: tip Using Trellis or Radicle?
If you are using [Trellis](/trellis/) to provision your production environment, or you are using [Radicle](/radicle/), you can **skip** this section.
:::
### Securing Blade templates
Due to the nature of WordPress, any file residing in the theme folder is publicly accessible. By default, webservers will return any requests made to a `*.blade.php` template as plain-text.
**This can create an opening for potential security risks as well as unwanted snooping.**
To prevent this from happening, we will need to add configuration to the web server to deny access to the file extension.
#### Nginx
If you are using Nginx, add the following to your site configuration before the final location directive:
```nginx
location ~* \.(blade\.php)$ {
deny all;
}
```
#### Apache
If you are using Apache, add the following to your virtual host configuration or the `.htaccess` file at the root of your web application:
```apache
<FilesMatch ".+\.(blade\.php)$">
# Apache 2.4
<IfModule mod_authz_core.c>
Require all denied
</IfModule>
# Apache 2.2
<IfModule !mod_authz_core.c>
Order deny,allow
Deny from all
</IfModule>
</FilesMatch>
```
## Deploying Sage with Trellis
If you use [Trellis](https://roots.io/trellis/), you can build your assets locally (or on a CI server), then copy them to the remote server during deployment.
[See the `build-before.yml` example hook](https://github.com/roots/trellis/blob/master/deploy-hooks/build-before.yml) in Trellis.
## Deploying Sage on Kinsta
[Kinsta supports Bedrock and Trellis](https://kinsta.com/blog/bedrock-trellis/?kaid=OFDHAJIXUDIV), so deploying Sage with Trellis on [Kinsta](https://kinsta.com/?kaid=OFDHAJIXUDIV) is possible by following a few extra steps.
================================================
FILE: sage/fonts-setup.md
================================================
---
date_modified: 2025-02-27 14:30
date_published: 2023-02-20 11:30
description: Set up custom fonts in Sage using `theme.json`. Define font families that work in both theme frontend and WordPress block editor for consistent typography.
title: Setting Up Custom Fonts in Sage
authors:
- ben
---
# Setting Up Custom Fonts in Sage
Sage includes an empty `resources/fonts/` directory for you to use for any fonts you want to use in your theme.
## Add your fonts
The first step to setting up a font in Sage is to add the `woff2` file to the `resources/fonts/` directory. Since [woff2 usage](https://caniuse.com/?search=woff2) is so high, you probably don't need to consider any other font file formats.
For this example, we're going to download [Public Sans from the google-webfonts-helper](https://gwfh.mranftl.com/fonts/public-sans?subsets=latin). The [google-webfonts-helper](https://gwfh.mranftl.com/) is a good resource for quickly grabbing font files and their CSS from Google Fonts.
```plaintext
resources
├── css
│ ├── app.css
│ ├── fonts.css # Create this file
│ └── editor.css
├── fonts
│ └── public-sans-v14-latin-regular.woff2
├── images
├── js
└── views
```
## Add the CSS
You can place the CSS for your web fonts wherever you'd like. We recommend creating a `css/fonts.css` file and then importing it from `app.css` and `editor.css`:
```css
@import './fonts.css';
```
Define your `@font-face` in `css/fonts.css`:
```css
@font-face {
font-display: swap;
font-family: 'Public Sans';
font-style: normal;
font-weight: 400;
src: url('@fonts/public-sans-v18-latin-regular.woff2') format('woff2'),
}
```
## Add the font to your Tailwind theme
Open `app.css` and add the new font family:
```css
@theme {
--font-sans: "Public Sans", sans-serif;
}
```
See the [Tailwind CSS docs on customizing fonts](https://tailwindcss.com/docs/font-family#customizing-your-theme) for more information.
================================================
FILE: sage/functionality.md
================================================
---
date_modified: 2023-01-27 13:17
date_published: 2015-09-01 19:05
description: The `app/` directory contains theme functionality. Sage is a starter theme, so modify files in `app/` to implement custom features for your WordPress site.
title: Adding Theme Functionality in Sage
authors:
- alwaysblank
- ben
- jure
- Log1x
---
# Adding Theme Functionality in Sage
The `app/` directory contains all the theme functionality. Since Sage is a starter theme, it’s okay for you to modify files within `app/` to meet the needs of the site you’re building.
Most of the PHP code in Sage is namespaced and autoloaded, so make sure to use namespaced functions and classes. If you aren't familiar with these methods, see our blog posts on:
* [Namespacing and Autoloading](/namespacing-and-autoloading/)
* [Upping PHP Requirements in Your WordPress Themes and Plugins](/upping-php-requirements-in-your-wordpress-themes-and-plugins/)
## The `app/` directory
- `app/setup.php` — Enqueue stylesheets and scripts, register support for theme features with `add_theme_support`, register navigation menus and sidebars.
See [Theme Configuration and Setup](configuration.md).
- `app/filters.php` — Add WordPress filters in this file.
Filters included by default:
- `excerpt_more` — add "… Continued" to excerpts.
- `app/Providers` — The place for any [Service Providers](https://laravel.com/docs/10.x/providers) you care to define for your theme.
Comes with `ThemeServiceProvider` that adds no functionality but provides a template for your own Service Providers.
- `app/View` — The place for view-related code, i.e. Composers and Components.
For more information, see the documentation on [Composers](composers.md) and [Components](components.md).
================================================
FILE: sage/gutenberg.md
================================================
---
date_modified: 2025-02-27 14:00
date_published: 2021-10-21 13:21
description: Sage includes full WordPress block editor support with HMR for editor styles, ensuring consistent styling between editor and frontend with `theme.json` integration.
title: Gutenberg Block Editor Support in Sage
authors:
- alwaysblank
- ben
- joshf
- Log1x
- strarsis
---
# Gutenberg Block Editor Support in Sage
Sage includes two assets that are enqueued when working with the WordPress block editor, also known as Gutenberg:
* `resources/js/editor.js`
* `resources/css/editor.css`
Any styles added to `editor.css` will only be applied to the block editor.
::: warning All blocks must have version 3 support
Sage's `editor.css` expects the block editor to be iframed. If you have any blocks that don't support version 3, then the block editor won't be iframed.
:::
<small>([Reference](https://developer.wordpress.org/block-editor/reference-guides/block-api/block-api-versions/#version-3-wordpress-6-3))</small>
## `theme.json` generator
Sage includes a `theme.json` file for configuring the WordPress editor. It's generated during [asset builds](compiling-assets.md) automatically and accounts for settings from your Tailwind setup.
::: tip theme.json spec
Reference [the `theme.json` documentation](https://developer.wordpress.org/block-editor/how-to-guides/themes/global-settings-and-styles/) for the full specification.
:::
Due to Sage including a `theme.json` file, this means [trying to use `add_theme_support()` to configure the editor](https://developer.wordpress.org/block-editor/how-to-guides/themes/theme-support/) will not work.
Tailwind CSS colors, font families, and sizes are generated on the theme build for `theme.json`. See the [Sage docs on Tailwind CSS](/sage/docs/tailwind-css/) for more information. This can be disabled in `vite.config.js`.
================================================
FILE: sage/installation.md
================================================
---
date_modified: 2025-02-27 13:45
date_published: 2015-08-29 18:09
description: Install Sage WordPress starter theme by running `composer create-project roots/sage`. Start modern WordPress theme development with Sage foundation.
title: Installing Sage WordPress Starter Theme
authors:
- alwaysblank
- ben
- Jacek
- Lachlan_Arthur
- Log1x
- QWp6t
- TangRufus
---
# Installing Sage WordPress Starter Theme
Install Sage using Composer from your WordPress themes directory:
```shell
$ composer create-project roots/sage your-theme-name
```
To install the latest development version of Sage, add `dev-main` to the end of the command:
```shell
$ composer create-project roots/sage your-theme-name dev-main
```
## Build assets
- Edit the `base` path in `vite.config.js`
- Run `npm install` from the theme directory to install dependencies
- Run `npm run build` to compile assets
You must build theme assets in order to access your site. Failing to build the assets will result in the error:
```plaintext
Vite manifest not found at [/path/to/sage/public/build/manifest.json] cannot be found.
```
================================================
FILE: sage/localization.md
================================================
---
date_modified: 2025-12-22 13:00
date_published: 2018-04-24 09:47
description: Generate translation files for Sage themes with custom build scripts. Create and load language files for multilingual WordPress sites with proper loading.
title: Localizing the Sage WordPress Theme
authors:
- alwaysblank
- ben
- bonakor
- jure
- Log1x
- strarsis
---
# Localizing the Sage WordPress Theme
## Generating language files
Run `yarn translate:pot` from your theme directory to generate the language files. Then open the generated `.pot` file with [Poedit](https://poedit.com/), select "Create new translation", save `.mo` & `.po` files in the `resources/lang` folder with the correct name syntax (eg. `fr_FR`, `en_US`).
When adding/removing translations in templates, run `yarn translate:update`, then select "Catalog > Update from a POT file" in Poedit.
## Loading language files
Add the following to `app/setup.php`:
```php
add_action('after_setup_theme', function () {
load_textdomain( 'sage', get_template_directory() . '/resources/lang/' . determine_locale() . '.mo' );
});
```
Make sure language files exist in the `resources/lang` directory.
## Polylang and Sage
- Install [BenjaminMedia/wp-polylang-theme-strings](https://github.com/BenjaminMedia/wp-polylang-theme-strings)
- Replace `__()` with `pll__()` in your templates
Need to also translate strings from the `app/` folder? See [`Sage_Polylang_Theme_Translation`](https://github.com/roots/sage/issues/1875#issuecomment-380076482).
================================================
FILE: sage/sass.md
================================================
---
date_modified: 2026-03-22 11:15
date_published: 2023-06-06 17:30
description: Enable Sass in Sage by renaming `app.css` to `app.scss` for advanced CSS preprocessing with variables and mixins.
title: Using Sass with Sage WordPress Theme
authors:
- ben
- carlosfaria
- code23_isaac
- diomededavid
- MWDelaney
- kellymears
- talss89
---
# Using Sass with Sage WordPress Theme
Remove Tailwind CSS dependencies: `npm uninstall -D @tailwindcss/vite tailwindcss`
Delete the contents of `resources/css/app.css` and `resources/css/editor.css`.
Add the `sass` extension:
```shell
$ npm install -D sass
```
In the `resources/css` directory, rename `app.css` to `app.scss` and rename `editor.css` to `editor.scss`.
```plaintext
app.css -> app.scss
editor.css -> editor.scss
```
Modify `vite.config.js` to remove the Tailwind plugin, reference the new file extensions, and disable the Tailwind CSS `theme.json` generation:
```diff
import { defineConfig } from 'vite'
-import tailwindcss from '@tailwindcss/vite';
import laravel from 'laravel-vite-plugin'
import { wordpressPlugin, wordpressThemeJson } from '@roots/vite-plugin';
export default defineConfig({
base: '/app/themes/sage/public/build/',
plugins: [
- tailwindcss(),
laravel({
input: [
- 'resources/css/app.css',
+ 'resources/css/app.scss',
'resources/js/app.js',
- 'resources/css/editor.css',
+ 'resources/css/editor.scss',
'resources/js/editor.js',
],
assets: ['resources/images/**', 'resources/fonts/**'],
wordpressThemeJson({
- disableTailwindColors: false,
- disableTailwindFonts: false,
- disableTailwindFontSizes: false,
+ disableTailwindColors: true,
+ disableTailwindFonts: true,
+ disableTailwindFontSizes: true,
}),
],
```
Modify the `@vite()` directive in `resourves/views/layouts/app.blade.php` to use `app.scss` instead of `app.css`:
```diff
- @vite(['resources/css/app.css', 'resources/js/app.js'])
+ @vite(['resources/css/app.scss', 'resources/js/app.js'])
```
Modify the `block_editor_settings_all` filter in `app/setup.php` to use `editor.scss` instead of `editor.css`;
```diff
add_filter('block_editor_settings_all', function ($settings) {
- $style = Vite::asset('resources/css/editor.css');
+ $style = Vite::asset('resources/css/editor.scss');
$settings['styles'][] = [
'css' => "@import url('{$style}')",
];
return $settings;
});
```
================================================
FILE: sage/structure.md
================================================
---
date_modified: 2025-02-27 13:50
date_published: 2021-10-21 13:21
description: Sage's directory structure provides organized folders for scalable development. `resources/` for views, `app/` for functionality, `config/` for settings.
title: Sage WordPress Theme Structure
authors:
- alwaysblank
- ben
- jure
- Log1x
- MWDelaney
---
# Sage WordPress Theme Structure
## Introduction
The default Sage structure is intended to provide a sane starting point for both small and large WordPress sites alike.
Where a file or class is located is ultimately decided by you. As long as Composer can autoload the class or you have modified the necessary paths in your [configuration](configuration.md), things should work as expected.
```plaintext
themes/your-theme-name/ # → Root of your Sage based theme
├── app/ # → Theme PHP
│ ├── Providers/ # → Service providers
│ ├── View/ # → View models
│ ├── filters.php # → Theme filters
│ └── setup.php # → Theme setup
├── public/ # → Built theme assets (never edit)
├── resources/ # → Theme assets and templates
│ ├── css/ # → Theme stylesheets
│ ├── fonts/ # → Theme fonts
│ ├── images/ # → Theme images
│ ├── js/ # → Theme JavaScript
│ └── views/ # → Theme templates
│ ├── components/ # → Component templates
│ ├── forms/ # → Form templates
│ ├── layouts/ # → Base templates
│ └── partials/ # → Partial templates
├── vendor/ # → Composer packages (never edit)
├── composer.json # → Autoloading for `app/` files
├── functions.php # → Theme bootloader
├── index.php # → Theme template wrapper
├── node_modules/ # → Node packages (never edit)
├── package.json # → Node dependencies and scripts
├── screenshot.png # → Theme screenshot for WP admin
├── style.css # → Theme meta information
└── vite.config.js # → Vite configuration
```
## The root directory
### The `app/` directory
The majority of your theme functionality lives in the `app` directory. By default, this directory is namespaced under `App` and is automatically loaded by Composer using the [PSR-4 autoloading standard](https://www.php-fig.org/psr/psr-4/). See our blog post on [Namespacing and Autoloading](/namespacing-and-autoloading/) if you aren't familiar with these methods.
This directory is covered more in [Functionality](/sage/docs/functionality/).
### The `public/` directory
The `public` directory contains the compiled assets for your theme. This directory will never be manually modified.
### The `node_modules/` directory
The `node_modules` directory contains your [Node](https://nodejs.org/) dependencies used to build your assets during development or for production. This folder is automatically generated and should not be modified.
::: danger Don’t upload node_modules
Under no circumstances should there ever be a need to upload this folder or any of its contents to a live production server. It is a security risk.
:::
### The `resources/` directory
The `resources` directory contains your Blade views as well as the un-compiled assets of your theme such as CSS, JavaScript, images, and fonts.
### The `vendor/` directory
The `vendor` directory contains your [Composer](https://getcomposer.org/) dependencies and autoloader. This directory is automatically generated and should not be modified.
================================================
FILE: sage/tailwind-css.md
================================================
---
date_modified: 2025-02-27 14:00
date_published: 2023-03-13 11:00
description: Sage generates `theme.json` from Tailwind configuration automatically, making Tailwind color palette, font families, and sizes available in WordPress block editor.
title: Using Tailwind CSS with Sage Theme
authors:
- ben
- MWDelaney
---
# Using Tailwind CSS with Sage Theme
Sage includes support for Tailwind CSS out of the box, along with some helpful functionality for integrating your Tailwind config into the WordPress block editor.
## Generating `theme.json` from your Tailwind setup
Sage includes a `theme.json` file for configuring the WordPress editor. It's generated during [asset builds](compiling-assets.md) automatically and accounts for settings from your `app.css` file.
This functionality is handled by the [`@roots/vite-plugin`](https://github.com/roots/vite-plugin) included in Sage.
To modify this behavior, open `vite.config.js` and edit the `wordpressThemeJson` plugin's configuration.
### Default color palette
Rather than [manually defining the editor colors](https://developer.wordpress.org/themes/global-settings-and-styles/settings/color/) by adding them to `theme.json`, your Tailwind config will be used to generate colors for the WordPress editor.
Tailwind’s [default color palette](https://tailwindcss.com/docs/colors) is a good starting point for sites that don’t already have color/branding guidelines to follow.
### Sizes and font families
In addition to including Tailwind’s color palette for the WordPress editor, Sage will also configure the editor with Tailwind’s font families and font sizes.
================================================
FILE: sage/theme-templates.md
================================================
---
date_modified: 2023-01-27 13:17
date_published: 2015-09-01 19:12
description: Sage's `resources/views/` directory contains Blade templates following WordPress template hierarchy. Extend templates using standard WordPress conventions.
title: WordPress Theme Templates in Sage
authors:
- alwaysblank
- ben
- Log1x
---
# WordPress Theme Templates in Sage
The `resources/views/` directory contains files that you can further extend with the normal [WordPress Template Hierarchy](https://developer.wordpress.org/themes/classic-themes/basics/template-hierarchy/):
- `404.blade.php` – Error 404 page
- `index.blade.php` – Archive page (used by blog page, category archives, author archives and more)
- `page.blade.php` – Single page
- `search.blade.php` – Search results page
- `single.blade.php` – Single post page
- `template-custom.blade.php` – An example single page template
All templates are wrapped by a base file in the `layouts/` directory:
- `app.blade.php` – The base template which wraps the base markup around all template files
::: warning Note
The `app` layout contains all the content generated by Blade templates, but is itself wrapped by the `index.php` in the root of the theme.
:::
These files include templates from the `resources/views/partials/` directory which is where you'll be making most of your customizations:
- `comments.blade.php` – Markup for comments
- `content-page.blade.php` – Markup included from `resources/views/page.blade.php`
- `content-search.blade.php` – Markup included from `resources/views/search.blade.php`
- `content-single.blade.php` – Markup included from `resources/views/single.blade.php`
- `content.blade.php` – Markup included from `resources/views/index.blade.php`
- `entry-meta.blade.php` – Post entry meta information included from `resources/views/content-single.blade.php`
- `footer.blade.php` – Footer markup included from `resources/views/app.blade.php`
- `header.blade.php` – Header markup included from `resources/views/app.blade.php`
- `page-header.blade.php` – Page title markup included from most of the files in the `resources/views/` directory
- `sidebar.blade.php` – Sidebar markup included from `resources/views/app.blade.php`
## Extending templates
The normal [WordPress Template Hierarchy](https://developer.wordpress.org/themes/classic-themes/basics/template-hierarchy/) is still intact. Here’s some examples:
- Copy `index.blade.php` to `author.blade.php` for customizing author archives
- Copy `index.blade.php` to `home.blade.php` for customizing the Home page if you’re showing the latest posts (under Reading Settings) instead of a static front page
- Copy `index.blade.php` to `archive-gallery.blade.php` for customizing the archive page for a custom post type registered as `gallery`
- Copy `page.blade.php` to `front-page.blade.php` for customizing the static front page
- Copy `page.blade.php` to `page-about.blade.php` for customizing a page called About
================================================
FILE: sage/use-blade-icons.md
================================================
---
date_modified: 2024-04-24 13:00
date_published: 2022-03-18 20:49
description: Install and use blade-icons in Sage for SVG icon components in Blade templates. Simplifies icon management with clean component syntax.
title: How to Use blade-icons with Sage
authors:
- altan
- ben
---
# How to Use blade-icons with Sage
The [blade-icons](https://github.com/driesvints/blade-icons) package allows you to easily use SVG's in your Blade views.
Besides being able to use your own SVG's, you can also add one of the many third party icon sets, such as:
* [Blade Bootstrap Icons](https://github.com/davidhsianturi/blade-bootstrap-icons)
* [Blade Font Awesome](https://github.com/owenvoke/blade-fontawesome)
* [Blade Heroicons](https://github.com/driesvints/blade-heroicons)
* [Blade Simple Icons](https://github.com/ublabs/blade-simple-icons)
[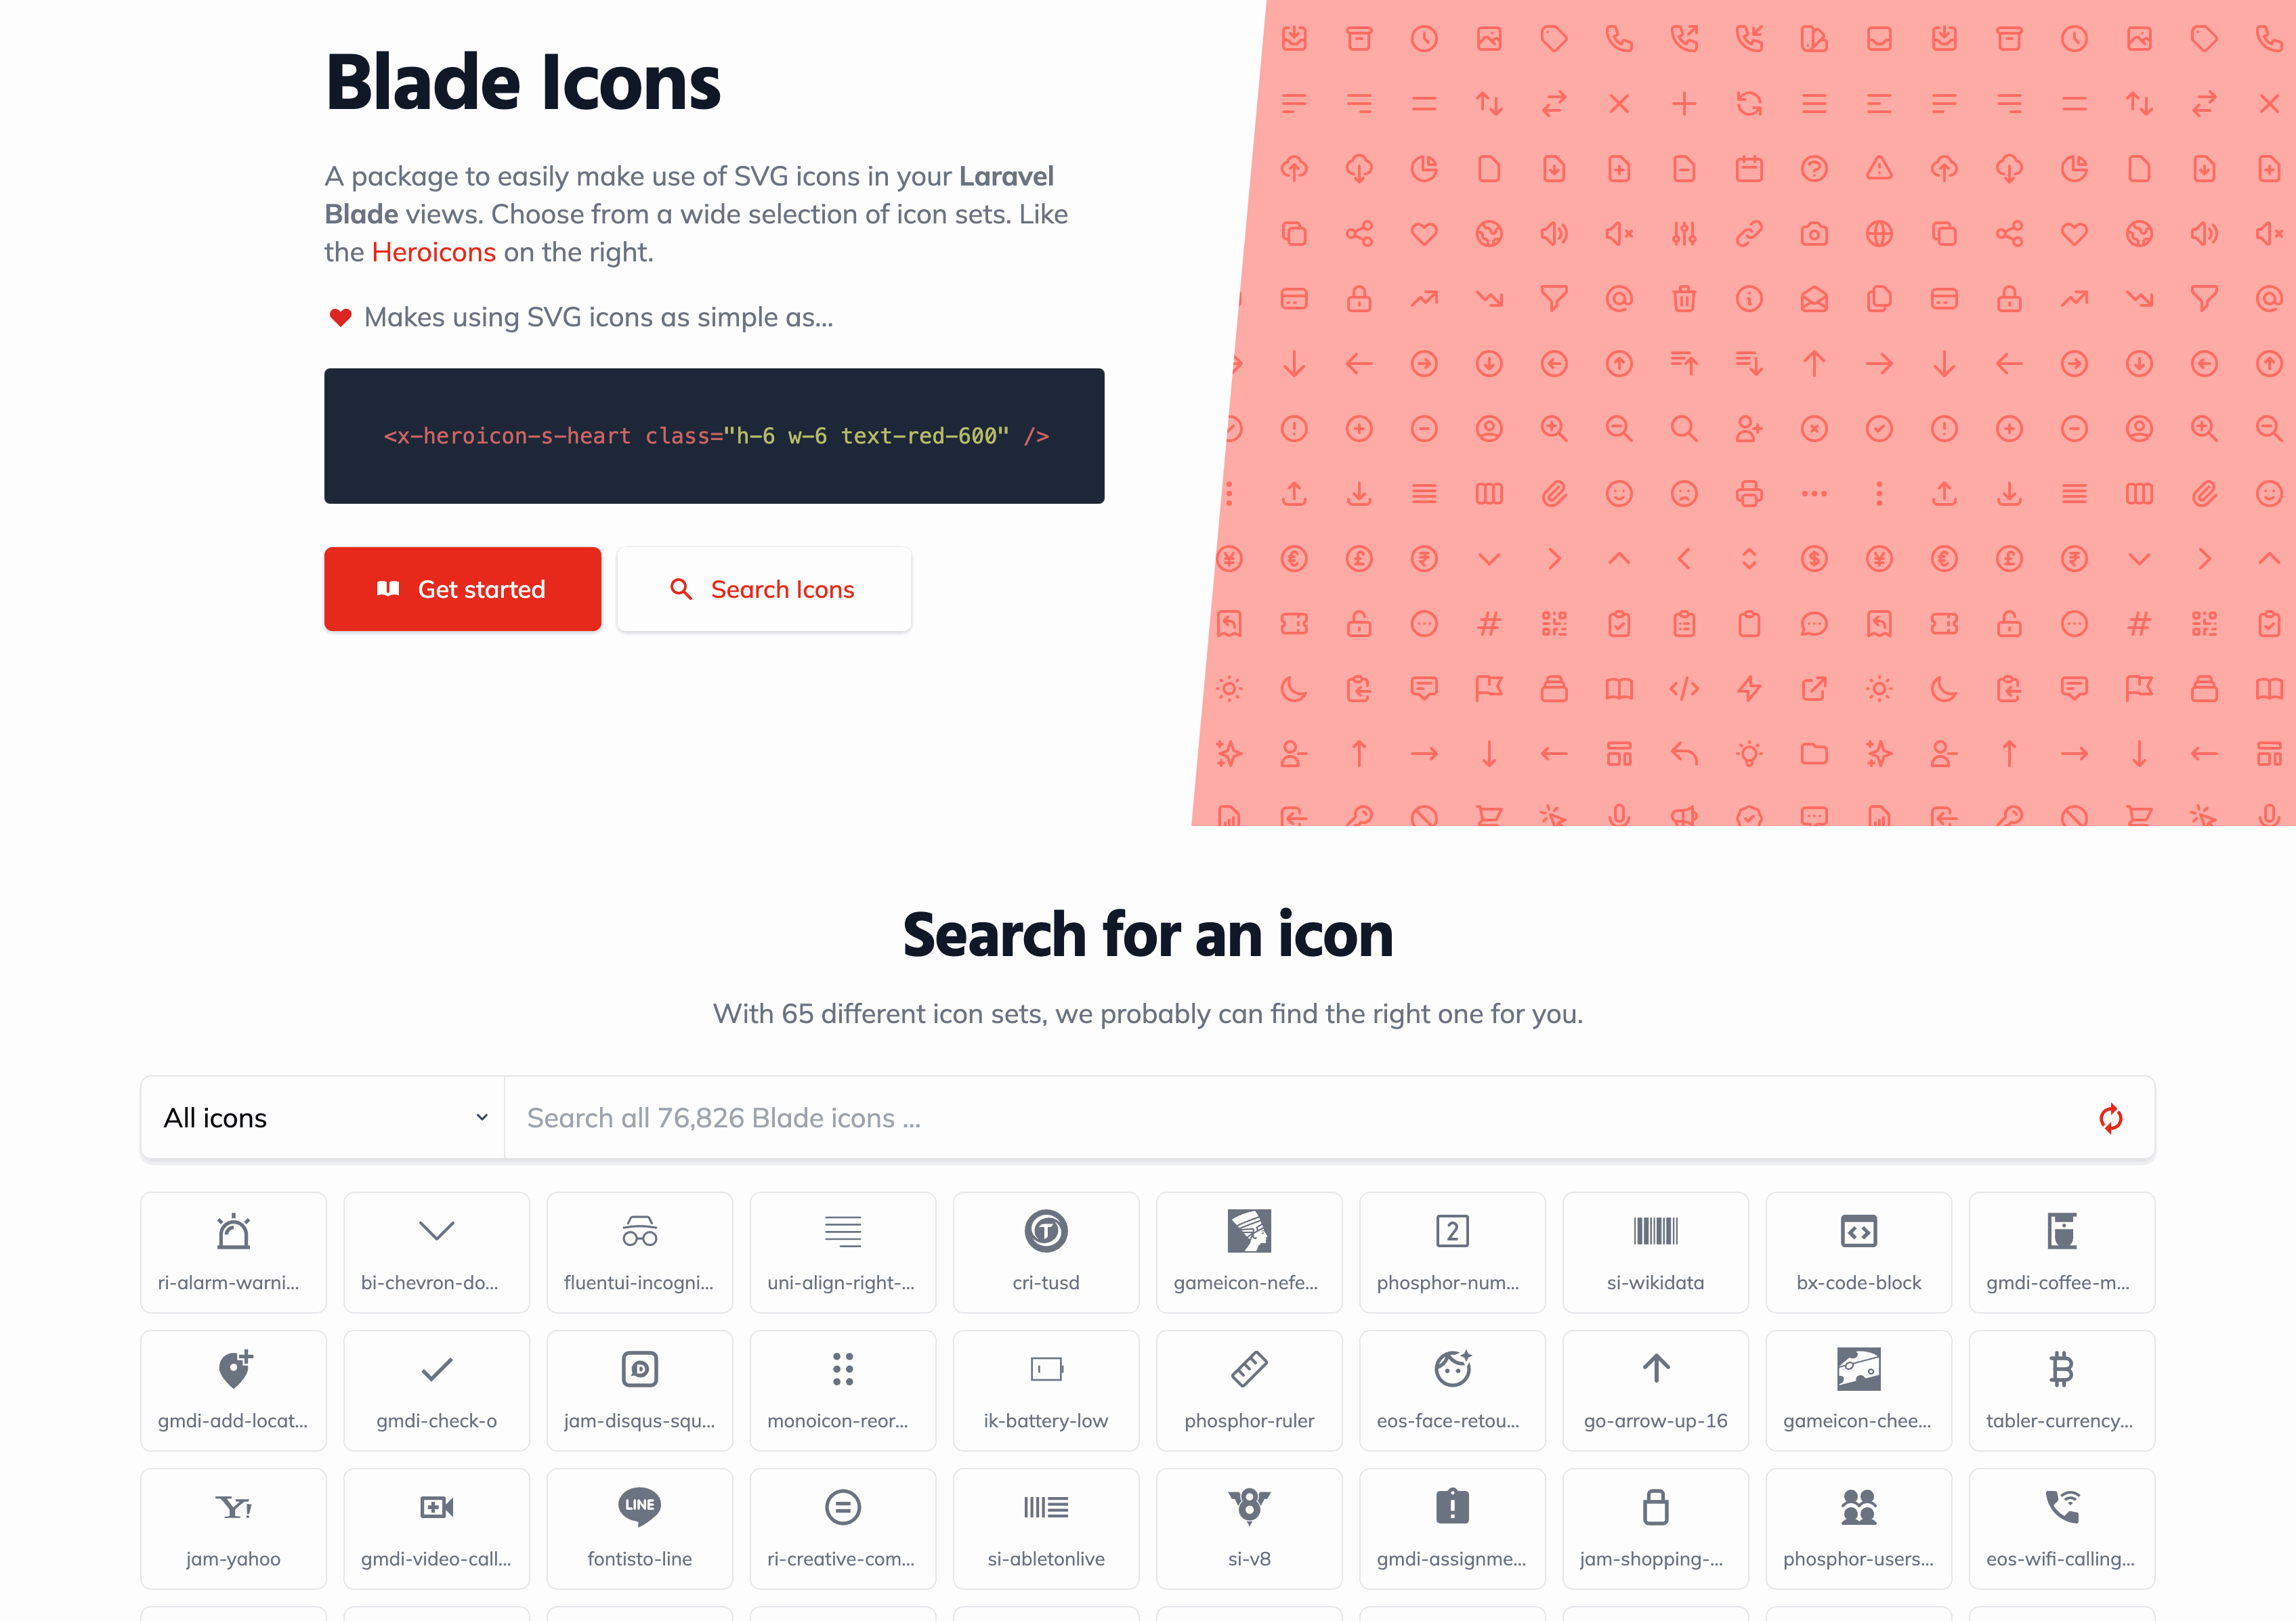](https://blade-ui-kit.com/blade-icons)
## Installation
From the same directory where you've installed Acorn (typically your site root or your Sage theme folder), add `blade-icons` as a Composer dependency:
```shell
$ composer require blade-ui-kit/blade-icons
```
Then publish the configuration file:
```shell
$ wp acorn vendor:publish --tag=blade-icons
```
## Configuration
From the published `config/blade-icons.php` file, we recommend setting the default set to point to your theme directory:
```php
<?php
return [
'sets' => [
'default' => [
'path' => 'web/app/themes/sage/resources/images/icons', # Relative path to the new directory
'prefix' => 'icon',
],
],
];
```
## Adding icons
Add a new directory inside `resources/images/` named `icons/` and place your SVG icons in this directory.
## Using icons in Blade views
From your Blade views you can now use the provided Blade component, or the `@svg` directive:
```blade
<x-icon-example-icon />
@svg('example-icon')
```
## Adding icon sets
`blade-icons` supports a **lot** of different icon sets through packages made through the community. The [Blade icons search](https://blade-ui-kit.com/blade-icons#search) allows you to quickly find a new icon to use in your project.
To add aditional icon sets, require them as Composer dependencies the same as you did for the `blade-icons` package. In this example, we'll add the `blade-heroicons` package:
```shell
$ composer require blade-ui-kit/blade-heroicons
```
Now Heroicons can be referenced in any of the supported methods from inside your Blade views:
```blade
<x-heroicon-s-menu />
@svg('heroicon-s-menu')
{{ svg('heroicon-s-menu) }}
```
## Caching icons in production
It's recommended to enable icon caching to optimize performance by running `wp acorn icons:cache` during deployment.
If you are using Trellis, modify the `deploy_build_after` hook within your `deploy-hooks/build-after.yml` file:
```yml
- name: Cache Blade UI Icons
command: wp acorn icons:cache
args:
chdir: "{{ deploy_helper.new_release_path }}"
```
## Additional information
The [blade-icons README](https://github.com/driesvints/blade-icons) covers how to pass attributes, set default classes, and more.
================================================
FILE: sage/woocommerce.md
================================================
---
date_modified: 2025-06-26 11:00
date_published: 2025-06-26 11:00
description: Set up WooCommerce in Sage themes for eCommerce functionality. Configure templates, declare theme support, and integrate WooCommerce styling with Sage.
title: Setting Up WooCommerce with Sage Theme
authors:
- aitor
- csorrentino
- ben
- strarsis
- YourRightWebsite
---
# Setting Up WooCommerce with Sage Theme
[WooCommerce](https://woocommerce.com/) is compatible with Sage's Blade templates with the correct setup.
## Add the sage-woocommerce package
The [`generoi/sage-woocommerce`](https://github.com/generoi/sage-woocommerce) package adds functionality to allow Blade templates to work on Acorn and Sage powered WordPress sites:
```shell
$ composer require generoi/sage-woocommerce
```
### Publish the templates to your theme
Add the required `single-product.blade.php` and `archive-product.blade.php` views to your theme:
```shell
$ wp acorn vendor:publish --tag="woocommerce-template-views"
```
You can now edit these templates from `resources/views/woocommerce/`.
## Update WooCommerce default pages
In WooCommerce 9.x+, the default pages (Shop, Cart, Checkout) are created with block-based content by default. These do not use classic templates.
Remove the default blocks from these pages and replace them with the relevant shortcodes:
* `[woocommerce_cart]`
* `[woocommerce_checkout]`
## Disable "Coming soon mode"
In WooCommerce 9.x+, Coming soon mode is enabled by default for all stores from **Settings > Site visibility**.
Until it’s done, WooCommerce keeps the Shop page in a special unpublished state that behaves differently depending on whether you’re logged in or not:
* Logged-in users see the correct template
* Logged-out users are shown a block-based fallback, ignoring the theme's templates entirely
================================================
FILE: trellis/ansible.md
================================================
---
date_modified: 2023-01-27 13:17
date_published: 2022-02-28 22:16
description: Understand how Trellis leverages Ansible for WordPress automation. Learn key concepts like playbooks, roles, tasks, and variables used for server management.
title: How Trellis Uses Ansible for WordPress
authors:
- swalkinshaw
---
# How Trellis Uses Ansible for WordPress
Since Trellis is powered by Ansible, the best way to understand Trellis is to understand Ansible itself.
Even knowing a few just key Ansible concepts will help you learn Trellis and how to
customize it to fit your needs.
Ansible's own [documentation](https://docs.ansible.com/projects/ansible/latest/user_guide/index.html) is very comprehensive and should be considered as an extension of Trellis' documentation.
However, since Ansible itself is unopinionated, this will explore some key
concepts and how they apply to Trellis.
## Playbooks
At the highest level, Trellis provides a few playbooks which execute _tasks_
organized into _roles_.
Trellis' playbooks are found in the root of Trellis itself:
* [`dev.yml`](https://github.com/roots/trellis/blob/master/dev.yml) - provisions a development server. This playbook assumes that your local Trellis project files have been synced to a virtual machine and automatically installs WordPress.
* [`server.yml`](https://github.com/roots/trellis/blob/master/dev.yml) -
provisions a remote (non-dev) server. This playbook assumes you will be
deploying sites separately and does not attempt to install WordPress.
* [`deploy.yml`](https://github.com/roots/trellis/blob/master/deploy.yml) - deploys a single site to an environment
* [`rollback.yml`](https://github.com/roots/trellis/blob/master/deploy.yml) - rolls back a previously deployed release
* [`xdebug-tunnel.yml`](https://github.com/roots/trellis/blob/master/xdebug-tunnel.yml) - opens or closes the PHP Xdebug tunnel
## Roles
Each playbook listed above contains a list of roles to run. A role's main
purpose is to group a collection of tasks to run within the `tasks` directory.
All of Trellis' roles are found under the top-level [`roles`](https://github.com/roots/trellis/tree/master/roles) directory. Additionally, there are some 3rd party community roles used from Ansible Galaxy which are specified in the [`galaxy.yml`](https://github.com/roots/trellis/blob/master/galaxy.yml) file.
Roles in Trellis usually contain one of more of these subfolders:
* `defaults` - variables defined with low precedence
* `tasks` - tasks to be executed - the main functional part of roles
* `templates` - templates in Jinja format which are used in tasks
## Inventory
In Ansible,
[inventory](https://docs.ansible.com/projects/ansible/latest/user_guide/intro_inventory.html#intro-inventory) is a list of defined hosts in your infrastructure.
For most Trellis projects, this list of hosts is usually one development
virtual machine, one staging server (optional), and one production server.
If you look at the default inventory files in [`hosts`](https://github.com/roots/trellis/tree/master/hosts) directory, you'll see three files named after the standard environments: `development`, `staging`, `production`.
Here's what an inventory file in Trellis looks like:
```ini
[production]
your_server_hostname
[web]
your_server_hostname
```
Each host is under two groups: the environment (`production` in this case) and `web`. These groups can be used
for any semantic grouping you want, b
gitextract_yjm39ipx/
├── .github/
│ └── workflows/
│ ├── lint-bash-blocks.yml
│ └── trigger-docs-sync.yml
├── .gitignore
├── CLAUDE.md
├── README.md
├── acorn/
│ ├── available-packages.md
│ ├── compatibility.md
│ ├── controllers-middleware-kernel.md
│ ├── creating-and-processing-laravel-queues.md
│ ├── creating-and-running-laravel-migrations.md
│ ├── creating-wp-cli-commands-with-artisan-console.md
│ ├── directory-structure.md
│ ├── eloquent-models.md
│ ├── error-handling.md
│ ├── installation.md
│ ├── laravel-cache-alternative-to-wordpress-transients.md
│ ├── laravel-redis-configuration.md
│ ├── logging.md
│ ├── package-development.md
│ ├── rendering-blade-views.md
│ ├── routing.md
│ ├── upgrading-acorn.md
│ ├── using-livewire-with-wordpress.md
│ └── wp-cli.md
├── bedrock/
│ ├── auditing-wordpress-vulnerabilities-with-composer.md
│ ├── bedrock-with-ddev.md
│ ├── bedrock-with-devkinsta.md
│ ├── bedrock-with-lando.md
│ ├── bedrock-with-local.md
│ ├── bedrock-with-valet.md
│ ├── compatibility.md
│ ├── composer.md
│ ├── configuration.md
│ ├── converting-wordpress-sites-to-bedrock.md
│ ├── deployment.md
│ ├── disable-plugins-based-on-environment.md
│ ├── environment-variables.md
│ ├── folder-structure.md
│ ├── installation.md
│ ├── local-development.md
│ ├── mu-plugin-autoloader.md
│ ├── patching-wordpress-plugins-with-composer.md
│ ├── patching-wordpress-with-composer.md
│ ├── private-or-commercial-wordpress-plugins-as-composer-dependencies.md
│ ├── server-configuration.md
│ ├── testing.md
│ └── wp-cron.md
├── netlify.toml
├── sage/
│ ├── adding-linting.md
│ ├── blade-templates.md
│ ├── bootstrap.md
│ ├── compatibility.md
│ ├── compiling-assets.md
│ ├── components.md
│ ├── composers.md
│ ├── configuration.md
│ ├── deployment.md
│ ├── fonts-setup.md
│ ├── functionality.md
│ ├── gutenberg.md
│ ├── installation.md
│ ├── localization.md
│ ├── sass.md
│ ├── structure.md
│ ├── tailwind-css.md
│ ├── theme-templates.md
│ ├── use-blade-icons.md
│ └── woocommerce.md
└── trellis/
├── ansible.md
├── cli.md
├── composer-authentication.md
├── configuring-php.md
├── cron-jobs.md
├── database-access.md
├── debugging-php.md
├── deploy-to-digitalocean.md
├── deploy-to-hetzner-cloud.md
├── deploy-with-github-actions.md
├── deployments.md
├── existing-projects.md
├── fastcgi-caching.md
├── install-wordpress-language-files.md
├── installation.md
├── local-development.md
├── mail.md
├── multiple-sites.md
├── multisite.md
├── nginx-includes.md
├── passwords.md
├── python.md
├── redis.md
├── remote-server-setup.md
├── sage-integration.md
├── security.md
├── server-logs.md
├── ssh-keys.md
├── ssl.md
├── troubleshooting.md
├── user-contributed-extensions.md
├── vault.md
└── wordpress-sites.md
Condensed preview — 101 files, each showing path, character count, and a content snippet. Download the .json file or copy for the full structured content (378K chars).
[
  {
    "path": ".github/workflows/lint-bash-blocks.yml",
    "chars": 1348,
    "preview": "name: Lint bash code blocks\n\non:\n  pull_request:\n    paths:\n      - '**/*.md'\n\njobs:\n  check-bash-blocks:\n    runs-on: u"
  },
  {
    "path": ".github/workflows/trigger-docs-sync.yml",
    "chars": 379,
    "preview": "name: Trigger docs sync\n\non:\n  push:\n    branches: [docs]\n    paths:\n      - 'acorn/**'\n      - 'bedrock/**'\n      - 'sa"
  },
  {
    "path": ".gitignore",
    "chars": 0,
    "preview": ""
  },
  {
    "path": "CLAUDE.md",
    "chars": 470,
    "preview": "# Docs Conventions\n\n## Markdown bash code blocks\n\nEach bash code block must contain exactly one command. Never combine m"
  },
  {
    "path": "README.md",
    "chars": 584,
    "preview": "# Roots Documentation\n\nThis repository is synced with the Roots docs for our primary projects:\n\n- [Acorn Docs](https://r"
  },
  {
    "path": "acorn/available-packages.md",
    "chars": 4180,
    "preview": "---\ndate_modified: 2026-03-03 12:00\ndate_published: 2021-11-19 11:58\ndescription: Explore community-developed packages f"
  },
  {
    "path": "acorn/compatibility.md",
    "chars": 2474,
    "preview": "---\ndate_modified: 2026-05-05 16:35\ndate_published: 2024-04-26 10:35\ndescription: Known compatibility issues between Wor"
  },
  {
    "path": "acorn/controllers-middleware-kernel.md",
    "chars": 6459,
    "preview": "---\ndate_modified: 2026-03-22 12:00\ndate_published: 2025-10-01 00:00\ndescription: Build robust APIs and handle requests "
  },
  {
    "path": "acorn/creating-and-processing-laravel-queues.md",
    "chars": 6059,
    "preview": "---\ndate_modified: 2026-03-22 12:00\ndate_published: 2025-09-29 00:00\ndescription: Use Laravel's queue system in WordPres"
  },
  {
    "path": "acorn/creating-and-running-laravel-migrations.md",
    "chars": 3355,
    "preview": "---\ndate_modified: 2026-03-22 12:00\ndate_published: 2025-08-06 14:00\ndescription: Use Laravel's migration system in Word"
  },
  {
    "path": "acorn/creating-wp-cli-commands-with-artisan-console.md",
    "chars": 5205,
    "preview": "---\ndate_modified: 2026-03-22 12:00\ndate_published: 2025-09-28 00:00\ndescription: Create custom WP-CLI commands using La"
  },
  {
    "path": "acorn/directory-structure.md",
    "chars": 3368,
    "preview": "---\ndate_modified: 2025-07-22 13:34\ndate_published: 2021-11-19 11:58\ndescription: Acorn works with zero configuration by"
  },
  {
    "path": "acorn/eloquent-models.md",
    "chars": 4596,
    "preview": "---\ndate_modified: 2026-03-22 12:00\ndate_published: 2025-10-01 00:00\ndescription: Use Laravel's Eloquent ORM in WordPres"
  },
  {
    "path": "acorn/error-handling.md",
    "chars": 1945,
    "preview": "---\ndate_modified: 2026-03-07 12:00\ndate_published: 2021-10-21 13:21\ndescription: Acorn handles exceptions automatically"
  },
  {
    "path": "acorn/installation.md",
    "chars": 5192,
    "preview": "---\ndate_modified: 2026-03-22 12:00\ndate_published: 2021-11-19 11:58\ndescription: Install Acorn by running `composer req"
  },
  {
    "path": "acorn/laravel-cache-alternative-to-wordpress-transients.md",
    "chars": 1493,
    "preview": "---\ndate_modified: 2026-03-22 12:00\ndate_published: 2023-01-30 17:32\ndescription: Use Laravel's caching system instead o"
  },
  {
    "path": "acorn/laravel-redis-configuration.md",
    "chars": 1447,
    "preview": "---\ndate_modified: 2026-03-22 12:00\ndate_published: 2025-10-27 10:00\ntitle: Laravel Redis Configuration for Acorn\ndescri"
  },
  {
    "path": "acorn/logging.md",
    "chars": 834,
    "preview": "---\ndate_modified: 2026-03-22 12:00\ndate_published: 2021-10-21 13:21\ndescription: Acorn provides Laravel's logging servi"
  },
  {
    "path": "acorn/package-development.md",
    "chars": 2917,
    "preview": "---\ndate_modified: 2026-03-22 12:00\ndate_published: 2021-10-21 13:21\ntitle: Developing Packages for Acorn\ndescription: U"
  },
  {
    "path": "acorn/rendering-blade-views.md",
    "chars": 3590,
    "preview": "---\ndate_modified: 2026-02-02 12:00\ndate_published: 2023-02-21 11:30\ndescription: Render Blade templates anywhere in Wor"
  },
  {
    "path": "acorn/routing.md",
    "chars": 3754,
    "preview": "---\ndate_modified: 2025-03-07 09:00\ndate_published: 2024-06-03 15:00\ndescription: Add Laravel's routing system to WordPr"
  },
  {
    "path": "acorn/upgrading-acorn.md",
    "chars": 12030,
    "preview": "---\ndate_modified: 2026-03-22 12:00\ndate_published: 2023-01-13 13:12\ndescription: Learn how to upgrade Acorn to the late"
  },
  {
    "path": "acorn/using-livewire-with-wordpress.md",
    "chars": 3843,
    "preview": "---\ndate_modified: 2025-03-06 07:00\ndate_published: 2024-03-05 16:41\ndescription: Use Laravel Livewire with Acorn to cre"
  },
  {
    "path": "acorn/wp-cli.md",
    "chars": 4939,
    "preview": "---\ndate_modified: 2026-03-10 12:00\ndate_published: 2021-11-19 11:58\ndescription: Acorn provides WP-CLI commands similar"
  },
  {
    "path": "bedrock/auditing-wordpress-vulnerabilities-with-composer.md",
    "chars": 2798,
    "preview": "---\ndate_modified: 2026-05-03 12:00\ndate_published: 2026-05-03 12:00\ndescription: Audit WordPress plugins and themes for"
  },
  {
    "path": "bedrock/bedrock-with-ddev.md",
    "chars": 1257,
    "preview": "---\ndate_modified: 2024-07-09 18:30\ndate_published: 2023-02-19 12:16\ndescription: Set up DDEV for Bedrock WordPress deve"
  },
  {
    "path": "bedrock/bedrock-with-devkinsta.md",
    "chars": 2288,
    "preview": "---\ndate_modified: 2023-02-19 12:16\ndate_published: 2023-02-19 12:16\ndescription: Set up DevKinsta for Bedrock WordPress"
  },
  {
    "path": "bedrock/bedrock-with-lando.md",
    "chars": 2099,
    "preview": "---\ndate_modified: 2026-03-08 10:00\ndate_published: 2023-02-19 12:16\ndescription: Set up Lando for Bedrock WordPress dev"
  },
  {
    "path": "bedrock/bedrock-with-local.md",
    "chars": 2554,
    "preview": "---\ndate_modified: 2026-03-10 17:00\ndate_published: 2023-02-19 12:16\ndescription: Configure Local for Bedrock WordPress "
  },
  {
    "path": "bedrock/bedrock-with-valet.md",
    "chars": 4008,
    "preview": "---\ndate_modified: 2023-03-08 8:55\ndate_published: 2023-02-19 12:16\ndescription: Set up Laravel Valet for Bedrock WordPr"
  },
  {
    "path": "bedrock/compatibility.md",
    "chars": 1703,
    "preview": "---\ndate_modified: 2023-01-27 13:17\ndate_published: 2020-02-20 09:25\ndescription: If plugins or themes work with regular"
  },
  {
    "path": "bedrock/composer.md",
    "chars": 4557,
    "preview": "---\ndate_modified: 2023-08-16 12:45\ndate_published: 2015-09-06 07:42\ndescription: Bedrock treats WordPress core, plugins"
  },
  {
    "path": "bedrock/configuration.md",
    "chars": 2146,
    "preview": "---\ndate_modified: 2023-01-27 13:17\ndate_published: 2015-09-06 07:42\ndescription: Bedrock replaces `wp-config.php` with "
  },
  {
    "path": "bedrock/converting-wordpress-sites-to-bedrock.md",
    "chars": 2575,
    "preview": "---\ndate_modified: 2025-10-24 12:00\ndate_published: 2025-10-24 12:00\ndescription: Convert traditional WordPress sites to"
  },
  {
    "path": "bedrock/deployment.md",
    "chars": 1090,
    "preview": "---\ndate_modified: 2023-01-27 13:17\ndate_published: 2015-10-15 16:17\ndescription: Bedrock deployments require running `c"
  },
  {
    "path": "bedrock/disable-plugins-based-on-environment.md",
    "chars": 1647,
    "preview": "---\ndate_modified: 2023-04-04 11:30\ndate_published: 2018-05-15 12:00\ndescription: Use Bedrock Plugin Disabler to prevent"
  },
  {
    "path": "bedrock/environment-variables.md",
    "chars": 2022,
    "preview": "---\ndate_modified: 2023-02-16 20:55\ndate_published: 2015-09-06 07:42\ndescription: Bedrock uses `.env` files for environm"
  },
  {
    "path": "bedrock/folder-structure.md",
    "chars": 2202,
    "preview": "---\ndate_modified: 2023-01-27 13:17\ndate_published: 2015-09-06 07:42\ndescription: Bedrock organizes WordPress differentl"
  },
  {
    "path": "bedrock/installation.md",
    "chars": 2716,
    "preview": "---\ndate_modified: 2026-03-08 16:09\ndate_published: 2015-10-15 12:29\ndescription: Install Bedrock with PHP 8.3+ and Comp"
  },
  {
    "path": "bedrock/local-development.md",
    "chars": 1332,
    "preview": "---\ndate_modified: 2026-03-08 16:07\ndate_published: 2018-12-28 13:54\ndescription: Bedrock supports various local develop"
  },
  {
    "path": "bedrock/mu-plugin-autoloader.md",
    "chars": 1337,
    "preview": "---\ndate_modified: 2023-01-27 13:17\ndate_published: 2015-09-06 07:42\ndescription: Bedrock's autoloader lets you install "
  },
  {
    "path": "bedrock/patching-wordpress-plugins-with-composer.md",
    "chars": 4306,
    "preview": "---\ndate_modified: 2025-10-13 12:00\ndate_published: 2025-10-13 12:00\ndescription: Use Composer patches to modify WordPre"
  },
  {
    "path": "bedrock/patching-wordpress-with-composer.md",
    "chars": 3226,
    "preview": "---\ndate_modified: 2026-03-10 12:00\ndate_published: 2026-03-10 12:00\ndescription: Apply patches to WordPress core in Bed"
  },
  {
    "path": "bedrock/private-or-commercial-wordpress-plugins-as-composer-dependencies.md",
    "chars": 4783,
    "preview": "---\ndate_modified: 2023-01-27 13:17\ndate_published: 2018-08-02 14:04\ndescription: Add paid and private plugins to Bedroc"
  },
  {
    "path": "bedrock/server-configuration.md",
    "chars": 3107,
    "preview": "---\ndate_modified: 2026-03-08 10:00\ndate_published: 2018-12-21 18:24\ndescription: Configure Nginx or Apache for Bedrock "
  },
  {
    "path": "bedrock/testing.md",
    "chars": 1293,
    "preview": "---\ndate_modified: 2026-03-08 16:05\ndate_published: 2026-03-08 16:05\ndescription: Learn how to run tests in Bedrock usin"
  },
  {
    "path": "bedrock/wp-cron.md",
    "chars": 628,
    "preview": "---\ndate_modified: 2023-01-27 13:17\ndate_published: 2015-09-06 07:42\ndescription: Disable WordPress's unreliable interna"
  },
  {
    "path": "netlify.toml",
    "chars": 2499,
    "preview": "[[redirects]]\n  from = \"/\"\n  to = \"https://roots.io/\"\n  status = 301\n  force = true\n\n[[redirects]]\n  from = \"/docs/*\"\n  "
  },
  {
    "path": "sage/adding-linting.md",
    "chars": 1734,
    "preview": "---\ndate_modified: 2023-03-12 19:25\ndate_published: 2023-01-23 19:40\ndescription: Set up ESLint, Prettier, and Stylelint"
  },
  {
    "path": "sage/blade-templates.md",
    "chars": 3412,
    "preview": "---\ndate_modified: 2023-01-27 13:17\ndate_published: 2018-02-07 09:46\ndescription: Sage uses Laravel's Blade for powerful"
  },
  {
    "path": "sage/bootstrap.md",
    "chars": 876,
    "preview": "---\ndate_modified: 2025-02-27 14:30\ndate_published: 2022-02-24 10:25\ndescription: Add Bootstrap CSS framework to Sage th"
  },
  {
    "path": "sage/compatibility.md",
    "chars": 988,
    "preview": "---\ndate_modified: 2023-04-26 10:35\ndate_published: 2018-04-25 13:52\ndescription: Known compatibility issues between Wor"
  },
  {
    "path": "sage/compiling-assets.md",
    "chars": 2292,
    "preview": "---\ndate_modified: 2026-03-22 11:00\ndate_published: 2015-09-01 18:19\ndescription: Sage uses Vite for fast asset compilat"
  },
  {
    "path": "sage/components.md",
    "chars": 5285,
    "preview": "---\ndate_modified: 2023-01-27 13:17\ndate_published: 2021-10-21 13:21\ndescription: Components in Sage provide a structure"
  },
  {
    "path": "sage/composers.md",
    "chars": 5880,
    "preview": "---\ndate_modified: 2023-01-27 13:17\ndate_published: 2021-10-21 13:21\ndescription: Use composers to pass scoped data to a"
  },
  {
    "path": "sage/configuration.md",
    "chars": 1376,
    "preview": "---\ndate_modified: 2024-01-17 08:22\ndate_published: 2015-09-01 19:02\ndescription: Configure Sage theme features in `setu"
  },
  {
    "path": "sage/deployment.md",
    "chars": 2968,
    "preview": "---\ndate_modified: 2025-10-30 11:30\ndate_published: 2015-09-01 19:29\ndescription: Deploy Sage themes by building assets "
  },
  {
    "path": "sage/fonts-setup.md",
    "chars": 1930,
    "preview": "---\ndate_modified: 2025-02-27 14:30\ndate_published: 2023-02-20 11:30\ndescription: Set up custom fonts in Sage using `the"
  },
  {
    "path": "sage/functionality.md",
    "chars": 1769,
    "preview": "---\ndate_modified: 2023-01-27 13:17\ndate_published: 2015-09-01 19:05\ndescription: The `app/` directory contains theme fu"
  },
  {
    "path": "sage/gutenberg.md",
    "chars": 1866,
    "preview": "---\ndate_modified: 2025-02-27 14:00\ndate_published: 2021-10-21 13:21\ndescription: Sage includes full WordPress block edi"
  },
  {
    "path": "sage/installation.md",
    "chars": 1113,
    "preview": "---\ndate_modified: 2025-02-27 13:45\ndate_published: 2015-08-29 18:09\ndescription: Install Sage WordPress starter theme b"
  },
  {
    "path": "sage/localization.md",
    "chars": 1514,
    "preview": "---\ndate_modified: 2025-12-22 13:00\ndate_published: 2018-04-24 09:47\ndescription: Generate translation files for Sage th"
  },
  {
    "path": "sage/sass.md",
    "chars": 2501,
    "preview": "---\ndate_modified: 2026-03-22 11:15\ndate_published: 2023-06-06 17:30\ndescription: Enable Sass in Sage by renaming `app.c"
  },
  {
    "path": "sage/structure.md",
    "chars": 3532,
    "preview": "---\ndate_modified: 2025-02-27 13:50\ndate_published: 2021-10-21 13:21\ndescription: Sage's directory structure provides or"
  },
  {
    "path": "sage/tailwind-css.md",
    "chars": 1627,
    "preview": "---\ndate_modified: 2025-02-27 14:00\ndate_published: 2023-03-13 11:00\ndescription: Sage generates `theme.json` from Tailw"
  },
  {
    "path": "sage/theme-templates.md",
    "chars": 2953,
    "preview": "---\ndate_modified: 2023-01-27 13:17\ndate_published: 2015-09-01 19:12\ndescription: Sage's `resources/views/` directory co"
  },
  {
    "path": "sage/use-blade-icons.md",
    "chars": 3206,
    "preview": "---\ndate_modified: 2024-04-24 13:00\ndate_published: 2022-03-18 20:49\ndescription: Install and use blade-icons in Sage fo"
  },
  {
    "path": "sage/woocommerce.md",
    "chars": 1832,
    "preview": "---\ndate_modified: 2025-06-26 11:00\ndate_published: 2025-06-26 11:00\ndescription: Set up WooCommerce in Sage themes for "
  },
  {
    "path": "trellis/ansible.md",
    "chars": 5090,
    "preview": "---\ndate_modified: 2023-01-27 13:17\ndate_published: 2022-02-28 22:16\ndescription: Understand how Trellis leverages Ansib"
  },
  {
    "path": "trellis/cli.md",
    "chars": 6397,
    "preview": "---\ndate_modified: 2024-09-11 10:00\ndate_published: 2023-04-05 07:42\ndescription: Use the Trellis CLI to manage WordPres"
  },
  {
    "path": "trellis/composer-authentication.md",
    "chars": 4586,
    "preview": "---\ndate_modified: 2026-03-11 12:00\ndate_published: 2021-09-06 16:48\ndescription: Set up Composer authentication in Trel"
  },
  {
    "path": "trellis/configuring-php.md",
    "chars": 2587,
    "preview": "---\ndate_modified: 2025-04-01 00:00\ndate_published: 2025-04-01 00:00\ndescription: Configure PHP settings in Trellis by o"
  },
  {
    "path": "trellis/cron-jobs.md",
    "chars": 5799,
    "preview": "---\ndate_modified: 2026-03-10 12:00\ndate_published: 2026-03-10 12:00\ndescription: How Trellis manages WordPress cron job"
  },
  {
    "path": "trellis/database-access.md",
    "chars": 1394,
    "preview": "---\ndate_modified: 2023-06-06 15:00\ndate_published: 2016-11-27 11:34\ndescription: Access Trellis WordPress databases usi"
  },
  {
    "path": "trellis/debugging-php.md",
    "chars": 6031,
    "preview": "---\ndate_modified: 2023-01-27 13:17\ndate_published: 2016-11-07 16:30\ndescription: Debug WordPress PHP code with Trellis'"
  },
  {
    "path": "trellis/deploy-to-digitalocean.md",
    "chars": 3905,
    "preview": "---\ndate_modified: 2026-04-03 10:00\ndate_published: 2019-01-07 10:05\ndescription: Deploy Trellis WordPress sites to Digi"
  },
  {
    "path": "trellis/deploy-to-hetzner-cloud.md",
    "chars": 2334,
    "preview": "---\ndate_modified: 2026-04-03 10:00\ndate_published: 2026-04-03 10:00\ndescription: Deploy Trellis WordPress sites to Hetz"
  },
  {
    "path": "trellis/deploy-with-github-actions.md",
    "chars": 2278,
    "preview": "---\ndate_modified: 2025-11-16 11:00\ndate_published: 2023-04-05 11:00\ndescription: Deploy Trellis WordPress sites with Gi"
  },
  {
    "path": "trellis/deployments.md",
    "chars": 6410,
    "preview": "---\ndate_modified: 2025-02-21 17:30\ndate_published: 2015-09-07 20:44\ndescription: Trellis provides zero-downtime WordPre"
  },
  {
    "path": "trellis/existing-projects.md",
    "chars": 3857,
    "preview": "---\ndate_modified: 2023-01-27 13:17\ndate_published: 2018-08-23 09:56\ntitle: Adding Trellis to Existing WordPress Project"
  },
  {
    "path": "trellis/fastcgi-caching.md",
    "chars": 3868,
    "preview": "---\ndate_modified: 2025-02-27 15:48\ndate_published: 2015-09-06 07:42\ndescription: Trellis offers built-in FastCGI cachin"
  },
  {
    "path": "trellis/install-wordpress-language-files.md",
    "chars": 7702,
    "preview": "---\ndate_modified: 2023-09-27 14:05\ndate_published: 2021-09-08 00:29\ndescription: Configure WordPress language file inst"
  },
  {
    "path": "trellis/installation.md",
    "chars": 7336,
    "preview": "---\ndate_modified: 2026-03-06 13:00\ndate_published: 2015-10-15 12:20\ndescription: Install Trellis for WordPress projects"
  },
  {
    "path": "trellis/local-development.md",
    "chars": 7325,
    "preview": "---\ndate_modified: 2023-01-27 13:17\ndate_published: 2015-10-15 12:24\ndescription: Trellis uses Lima VM's for local devel"
  },
  {
    "path": "trellis/mail.md",
    "chars": 3980,
    "preview": "---\ndate_modified: 2026-04-04 07:00\ndate_published: 2015-09-06 07:42\ndescription: Trellis uses Mailpit in development to"
  },
  {
    "path": "trellis/multiple-sites.md",
    "chars": 1870,
    "preview": "---\ndate_modified: 2026-03-10 12:00\ndate_published: 2026-03-10 12:00\ndescription: Learn how to structure your Trellis pr"
  },
  {
    "path": "trellis/multisite.md",
    "chars": 4014,
    "preview": "---\ndate_modified: 2023-01-27 13:17\ndate_published: 2015-09-06 07:42\ndescription: Set up WordPress multisite on Trellis "
  },
  {
    "path": "trellis/nginx-includes.md",
    "chars": 13099,
    "preview": "---\ndate_modified: 2023-01-27 13:17\ndate_published: 2020-02-05 16:24\ndescription: Customize Nginx configuration in Trell"
  },
  {
    "path": "trellis/passwords.md",
    "chars": 1371,
    "preview": "---\ndate_modified: 2023-01-27 13:17\ndate_published: 2015-09-06 07:42\ndescription: Manage passwords in Trellis for MySQL "
  },
  {
    "path": "trellis/python.md",
    "chars": 5177,
    "preview": "---\ndate_modified: 2023-01-27 13:17\ndate_published: 2022-02-28 22:16\ndescription: Install and configure Python for using"
  },
  {
    "path": "trellis/redis.md",
    "chars": 7678,
    "preview": "---\ndate_modified: 2026-03-02 12:00\ndate_published: 2025-10-24 12:00\ndescription: Enable Redis in Trellis for WordPress "
  },
  {
    "path": "trellis/remote-server-setup.md",
    "chars": 4747,
    "preview": "---\ndate_modified: 2024-09-11 10:00\ndate_published: 2015-10-15 12:27\ndescription: Set up remote servers for Trellis requ"
  },
  {
    "path": "trellis/sage-integration.md",
    "chars": 1714,
    "preview": "---\ndate_modified: 2023-01-27 13:17\ndate_published: 2020-04-07 23:23\ndescription: Use Trellis with Sage themes for compl"
  },
  {
    "path": "trellis/security.md",
    "chars": 3861,
    "preview": "---\ndate_modified: 2026-03-05 00:00\ndate_published: 2015-09-06 07:42\ndescription: Secure Trellis WordPress servers by di"
  },
  {
    "path": "trellis/server-logs.md",
    "chars": 1742,
    "preview": "---\ndate_modified: 2023-01-31 17:40\ndate_published: 2018-04-24 09:59\ndescription: Trellis site logs are located at `/srv"
  },
  {
    "path": "trellis/ssh-keys.md",
    "chars": 7539,
    "preview": "---\ndate_modified: 2025-10-16 10:00\ndate_published: 2015-09-06 07:42\ndescription: Configure SSH keys in Trellis for secu"
  },
  {
    "path": "trellis/ssl.md",
    "chars": 14759,
    "preview": "---\ndate_modified: 2026-05-03 12:00\ndate_published: 2015-09-06 07:42\ndescription: Enable HTTPS in Trellis with automatic"
  },
  {
    "path": "trellis/troubleshooting.md",
    "chars": 7120,
    "preview": "---\ndate_modified: 2023-01-27 13:17\ndate_published: 2015-09-06 07:42\ndescription: Troubleshoot Trellis installations wit"
  },
  {
    "path": "trellis/user-contributed-extensions.md",
    "chars": 3436,
    "preview": "---\ndate_modified: 2024-10-12 16:15\ndate_published: 2015-09-06 07:42\ndescription: Explore community-developed Ansible ro"
  },
  {
    "path": "trellis/vault.md",
    "chars": 6536,
    "preview": "---\ndate_modified: 2026-03-10 17:00\ndate_published: 2015-11-01 14:32\ndescription: Enable Ansible Vault in Trellis to enc"
  },
  {
    "path": "trellis/wordpress-sites.md",
    "chars": 7984,
    "preview": "---\ndate_modified: 2024-06-19 13:17\ndate_published: 2016-03-28 21:10\ndescription: Configure WordPress sites in Trellis t"
  }
]
About this extraction
This page contains the full source code of the roots/docs GitHub repository, extracted and formatted as plain text for AI agents and large language models (LLMs). The extraction includes 101 files (352.4 KB), approximately 89.7k tokens. Use this with OpenClaw, Claude, ChatGPT, Cursor, Windsurf, or any other AI tool that accepts text input. You can copy the full output to your clipboard or download it as a .txt file.
Extracted by GitExtract — free GitHub repo to text converter for AI. Built by Nikandr Surkov.